• Skip to primary navigation
  • Skip to main content
  • Skip to primary sidebar

Magical Treats at Home

  • About
  • Treats
  • Drinks
  • Savory
  • Favorite Tools
  • Etsy Shop

treat

Mandalorian Macarons

December 6, 2020 by Elana Lepkowski Leave a Comment

Mandalorian Macarons // magicaltreatsathome.com
  • These treats were inspired by Disney’s The Mandalorian show.

We love macarons around here. LOVE THEM. But most of the recipes we’ve done require some design work. Not today. Why? Because we’ve been inspired by a simple recipe we saw on t.v… and Baby Yoda.

Mandalorian Macarons // magicaltreatsathome.com

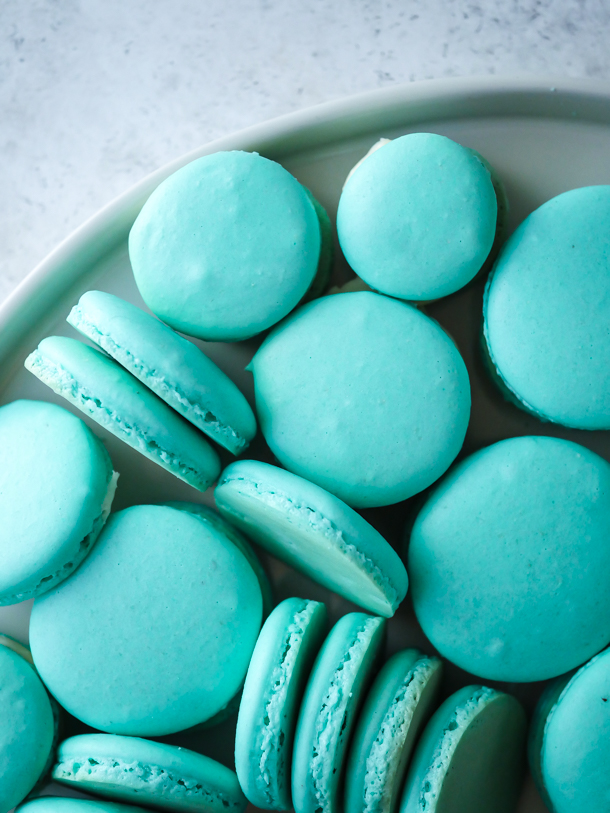
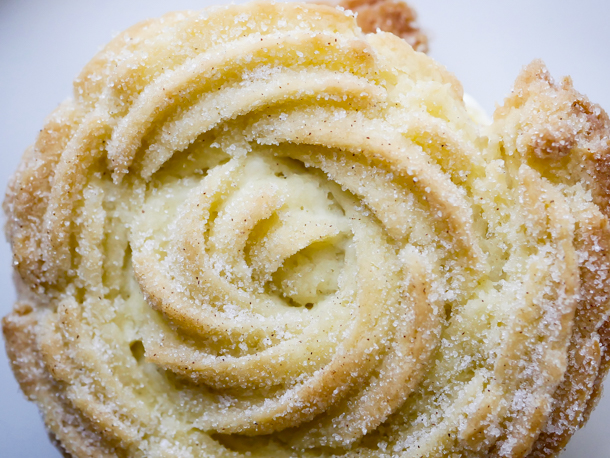
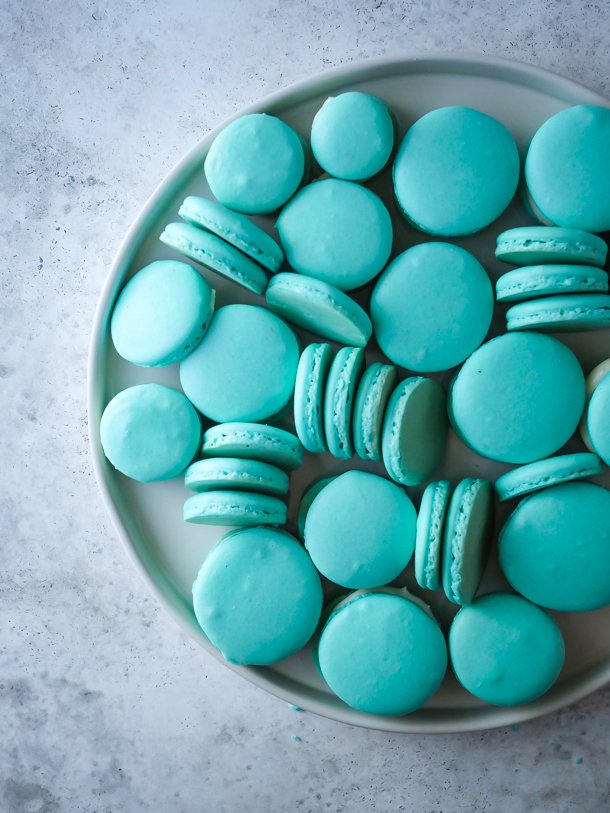
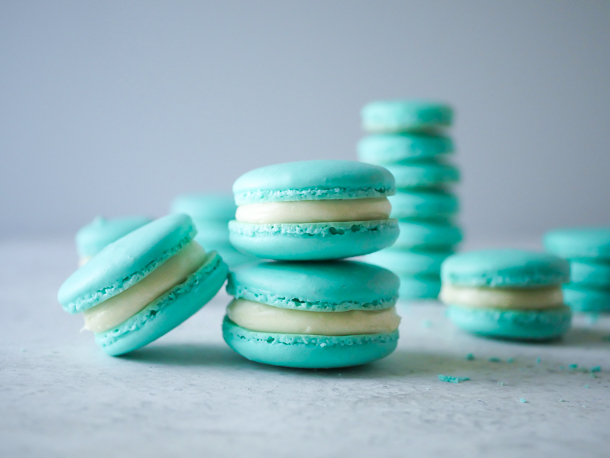
Yes, if you’ve been watching The Mandalorian these past few weeks (and if not, I don’t think this is a spoiler), then you spotted that cute little baby munching on.. macarons. They weren’t given a name in the show, so we’re calling them Manadalorian Macarons. Although, if you head to Williams Sonoma they’ve dubbed them Nevarro Nummies™️. And not to be a cantankerous fan, but I have a few issues with the ones they’re selling. But mostly, after the price point, the color is WRONG. They’re grey! Well, blue-grey, but still…

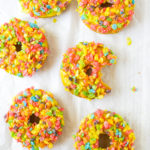
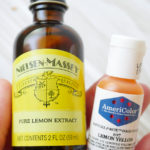
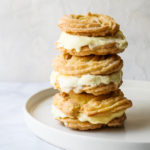
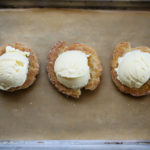
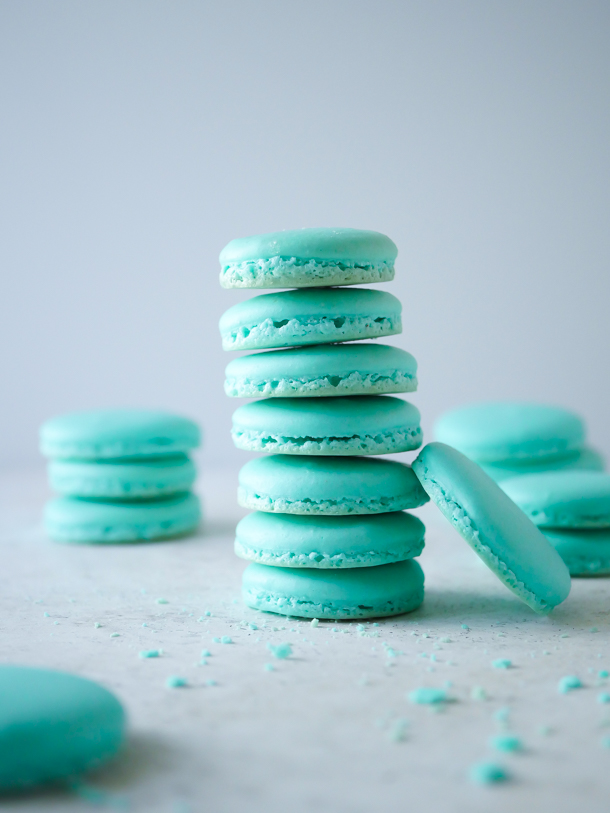
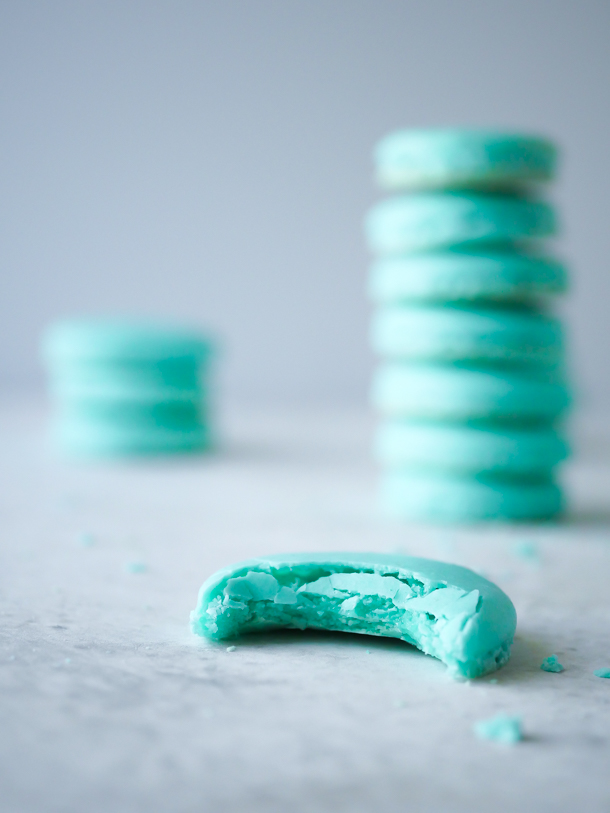
On the show they’re just the plain cookies, not filled. I’m showing both since everything is better with frosting. Also, Americolor makes a turquoise food gel color that is just perfect here and I’m linking to that because I’m so in love with it.

Mandalorian Macarons // magicaltreatsathome.com

If you’ve made some of my macaron recipes before, then you might notice I’ve included a new ingredient in the list: meringue powder. I got this tip from the Dessert for Two blog and I’ve noticed that it’s improved the stability of my egg whites when making french macarons. This ingredient is optional, but I’ve found the batter more forgiving with this addition.
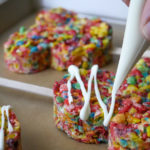
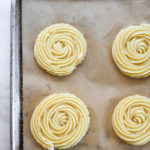
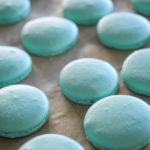
Mandalorian Macarons // magicaltreatsathome.com

If your kids are comfortable with a piping bag, they can help pipe the macarons. They can also help pipe frosting as well if you’re doing that (you should totally do that).

As always, please check out all the tips after the recipe. This is the way.

Print
clock clock iconcutlery cutlery iconflag flag iconfolder folder iconinstagram instagram iconpinterest pinterest iconfacebook facebook iconprint print iconsquares squares iconheart heart iconheart solid heart solid icon
Mandalorian Macarons // magicaltreatsathome.com

Mandalorian Macarons

5 Stars 4 Stars 3 Stars 2 Stars 1 Star No reviews
  • Author: Elana Lepkowski
  • Yield: Apx. 48 Mandalorian Macarons
Print Recipe
Pin Recipe

Description

Baby Yoda knew a good thing when he saw it, and now you can enjoy your own Mandalorian Macarons at home with this no fail recipe! Inspired by the Mandalorian television show.


Ingredients

Scale

For the macarons:

  • 1 cup (100 g) almond flour
  • 2 cups (200 g) powdered sugar
  • 3 large egg whites, room temperature
  • pinch salt
  • 3 tablespoon of meringue powder (optional)
  • 3 tablespoons granulated sugar
  • 1/2 teaspoon Americolor Turquoise Food Gel Color

For the buttercream (optional):

  • 1 stick (1/2 cup) butter
  • 2 cups powdered sugar
  • 1 teaspoon vanilla extract
  • 1 teaspoon heavy cream, milk, or nondairy milk

Specialty Items:

  • piping bags
  • open sided cookie sheet

Instructions

For the macarons:

  1. Line two open sided cookie sheets with parchment. Set aside.
  2. In a food processor, pulse together the almond flour and powdered sugar. If you do not have a food processor, sift well to combine. Set aside.
  3. In the bowl of a mixer, add egg whites and salt and whisk on low until foamy. Then slowly pour in the meringue powder and increase speed to medium.
  4. When soft peaks appear, add in granulated sugar. Now whip just until just about stiff peaks form.
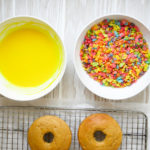
  5. Add in food coloring to the bowl and slowly mix to incorporate (I sometimes take the whisk attachment off and just stir by hand. Don’t worry about streaks at this point as you’ll mix more when you add dry ingredients in).
  6. Sift a third of the dry mixture into the egg whites and fold until barely incorporated, about 10 turns. Repeat twice with remaining dry mix. Mix gently until all of the almond mixture has been absorbed and there are no visible lumps in batter. Then continue to fold the mixture, pushing the batter against the sides of the bowl and scraping until it falls off your spoon in ribbons like cake batter. (This technique for mixing is called macaronage and I highly suggest looking up some videos on this if you’re serious about getting a great macaron.)
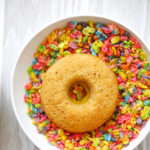
  7. Add batter into a piping bag and pipe circles onto the parchment lined baking sheet. Let the batter sit about 30 minutes to 1 hour. You want the macarons to form a skin, so that when you touch them, no batter comes off on your finger.
  8. Preheat your oven to 325°f about 15 minutes before your cookies are ready to bake.
  9. Bake the cookies about 10-11 minutes, turning the cookie sheet around about halfway through.
    Mandalorian Macarons // magicaltreatsathome.com
  10. Cool on the sheet and store in an airtight container.

For the buttercream (optional):

  1. If frosting, fully cool to room temperature before decorating.
  2. Cream the butter in a mixer until light and fluffy; about 1 – 2 minutes.
  3. Add in powdered sugar and mix until all the sugar is incorporated.
  4. Pour in vanilla and cream/milk and beat again for an additional 30 seconds.
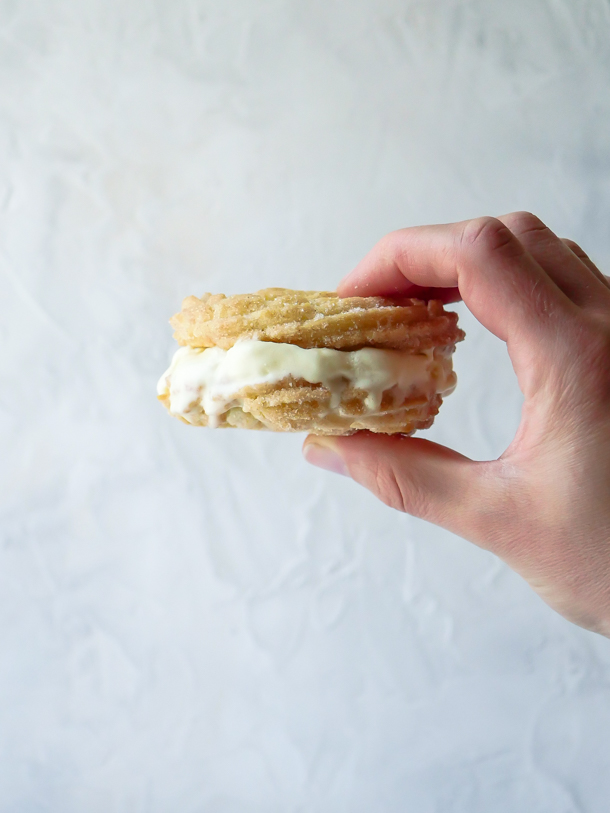
  5. Spread filling between two cookie halves and sandwich together. Enjoy!

Notes

  • Meringue powder helps to ensure stability with your egg whites. It helps them form better, and less likely to deflate when mixing in the dry ingredients. This ingredient is optional.
  • Sifting the almond flour and powdered sugar together is necessary for the absorption of oils and to prevent clumping of batter.
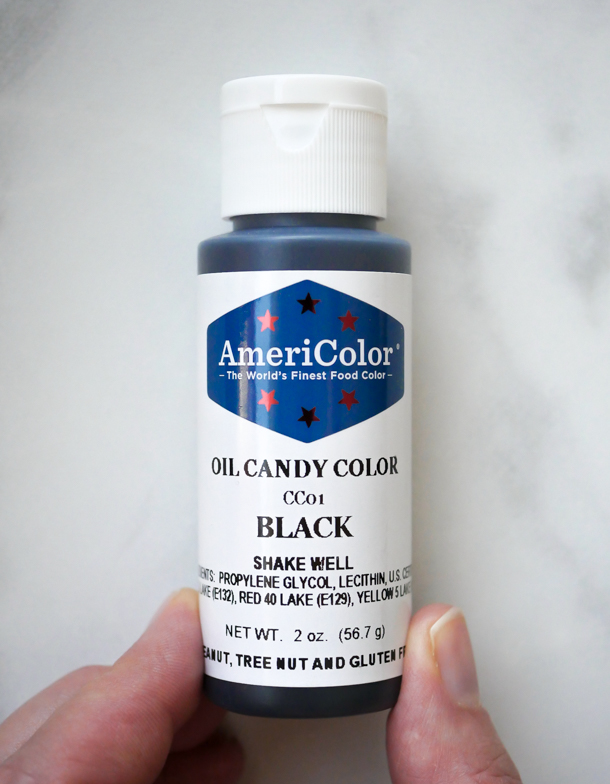
  • Using gel based food coloring will give a much deeper, and vibrant color, than standard food dye.
  • An open sided cookie sheet allows air to move freely and your macarons will cook more evenly.
  • Cookies can be stored in an airtight container up to one week.

Did you make this recipe?

Tag @magicaltreatsathome on Instagram and hashtag it #magicaltreatsathome

Mandalorian Macarons // magicaltreatsathome.com

Share this:

  • Click to share on Facebook (Opens in new window) Facebook
  • Click to share on X (Opens in new window) X

Like this:

Like Loading...

Filed Under: Gluten Free, Recipes, Treats Tagged With: Baby Yoda, blue, buttercream frosting, cookies, macarons, Mandalorian, Star Wars, treat, turquoise

Pecan Pie Crispy Treat

November 25, 2020 by Elana Lepkowski 1 Comment

Pecan Pie Crispy Treat // magicaltreatsathome.com

Where can I find the original treat?

  • This holiday treat can be found at Screen Door General Store at Disney’s BoardWalk Inn (Florida), and Marceline’s in Downtown Disney (California).

Thanksgiving is tomorrow here in the US; a Thanksgiving that will not run its usual course. And so today on the site we have a pie, but not really a pie, that you could serve at your nontraditional Thanksgiving feast. TLDR: it’s a pecan pie rice crispy treat. YES a whole 9” pie.

Pecan Pie Crispy Treat // magicaltreatsathome.com

Disney is known for whimsical treats, but sometimes they’re a bit on the silly side too. Like the crispy treat pies this year. I love the idea behind them, and I think the treat makers must have had a lot of fun making them. And I know we all loved eating them as the flavor combinations came through and it definitely was a unique, and 2020 way, to eating pie this year.

I’m presenting the recipe formed inside a 9” pie plate, but those that have seen the whole “pie” at the resorts (it was made available both in Florida and California), might have noticed its domed shape from the mold it was made in. I figure, if you’re going to serve this at your Thanksgiving dinner this year, it should arrive at the table in a proper pie plate. 

Pecan Pie Crispy Treat // magicaltreatsathome.com

Since we’re dealing with hot sugar here, I would not recommend the younger kids come help with the bases here. However, making and piping the frosting “cream” and decorating with sprinkles is a great way to get them involved in a holiday dessert. 

Now that we’ve thrown out all the conventional ideas of a traditional dinner this year, I do hope you make this pie. If you’re at home celebrating with just one or two of you, this also freezes really well. Just cut it into slices and freeze up to 3 months for best flavor.

Pecan Pie Crispy Treat // magicaltreatsathome.com

Happy Thanksgiving everyone!

Print
clock clock iconcutlery cutlery iconflag flag iconfolder folder iconinstagram instagram iconpinterest pinterest iconfacebook facebook iconprint print iconsquares squares iconheart heart iconheart solid heart solid icon
Pecan Pie Crispy Treat // magicaltreatsathome.com

Pecan Pie Crispy Treat

5 Stars 4 Stars 3 Stars 2 Stars 1 Star No reviews
  • Author: Elana Lepkowski
  • Yield: 1 9″ Pecan Pie Crispy Treat 1x
Print Recipe
Pin Recipe

Description

Pecan pie and crispy treat lovers unite with this full sized maple scented Pecan Pie Crispy Treat. A Disney-inspired holiday treat.


Ingredients

Scale

For the “crust”:

  • 2 cups crisped rice cereal
  • 20 full size marshmallows
  • 1–1/2 tbsp butter

For the “filling”

  • 3 cups crisped rice cereal
  • 30 full size marshmallows
  • 2 tablespoons butter
  • 1/4 cup maple syrup
  • 1/2 tsp cinnamon
  • 1 cup chopped pecans toasted, 3 tbsp reserved
  • Pinch salt

For the frosting:

  • 2 sticks unsalted butter
  • pinch of salt
  • 1/2 pound powdered sugar
  • 1 teaspoon milk
  • 2 teaspoons vanilla
  • Mickey Mouse sprinkles

Specialty Items:

  • 9″ glass pie pan
  • piping bag
  • closed star pastry tip (Ateco #844 used here)

Instructions

For the “crust”:

  1. Before beginning, butter/grease your pie pan. Set aside.
  2. Combine the butter and marshmallows in a medium sauce pan over medium-low heat. Stir constantly until marshmallows have melted and mixture is smooth.
  3. Immediately dump in the crisped rice cereal and quickly mix to combine.
  4. Pour into the prepared pan and gently press mixture into place with a rubber spatula (or damp fingers, which is my favorite method). Create a thin layer around the pan, pushing up the sides to make the “crust”. Set aside.
    Pecan Pie Crispy Treat // magicaltreatsathome.com

For the “filling”:

  1. Combine the butter, maple syrup, cinnamon, and marshmallows in a medium sauce pan over medium-low heat. Stir constantly until marshmallows have melted and mixture is smooth.
  2. Mix in the pecans at this stage, and then pour in the crisped rice cereal and quickly mix to combine.
  3. Pour on top of the “crust” layer, pushing firmly to fuse the layers.
  4. Spread the remained chopped pecans over the top, lightly pressing in. Cool to room temperature.
    Pecan Pie Crispy Treat // magicaltreatsathome.com

For the frosting and decoration:

  1. Whip the butter and salt until light and creamy in either a stand mixer, or with a handheld mixer.
  2. Pour in the powdered sugar (sift if yours is lumpy), and mix until incorporated.
  3. Add in the milk and vanilla extract and mix at high until creamy and smooth and desired texture is reached.
  4. Transfer to a piping bag fitted with an closed star tip and pipe 8 small swirls on top of the cooled pie. Refrigerated at least 4 hours to set or overnight.

To serve:

  1. Straight from the refrigerator, use a sharp knife to slice individual pieces.
  2. Let individual pieces come to room temp before serving.

Notes

  • Pecans can be toasted in a dry frying pan over medium-high heat for 5 minutes. Stir constantly to prevent browning and remove from the pan when done toasting.
  • Use a smaller pan than you think you’ll need for melting the marshmallows. As the marshmallows melt into the butter, if there’s too much space in the pan, they will start to dry out and form strings. Keeping the marshmallows closer together in the pan will ensure they melt more evenly, creating a better mixture to add the cereal into.
  • When mixing cereal into the melted marshmallows, keep the mixture on the flame so that marshmallows stay liquid. Removing to mix in can seize up the liquid before the cereal is fully mixed.
  • The addition the the maple syrup will make the “filling” softer and refrigeration is needed to cut out sliced cleanly.
  • Leftover frosting can be stored in an air tight container in the refrigerator up to one week, or frozen up to 3 months for best flavor. Defrost in the refrigerator overnight and re-whip to use again.

Did you make this recipe?

Tag @magicaltreatsathome on Instagram and hashtag it #magicaltreatsathome

Pecan Pie Crispy Treat // magicaltreatsathome.com

Share this:

  • Click to share on Facebook (Opens in new window) Facebook
  • Click to share on X (Opens in new window) X

Like this:

Like Loading...

Filed Under: Recipes, Treats Tagged With: buttercream frosting, cinnamon, crispy treat, disneyland, holiday, krispy treat, maple, marshmallow, Mickey Mouse, pecans, treat, WDW

Peanut Butter Blondie for peanut butter lovers

October 23, 2020 by Elana Lepkowski 1 Comment

Peanut Butter Blondie for peanut butter lovers // magicaltreatsathome.com

Where can I find the original treat?

  • These specialty treats were found at the Grand Californian Hotel.

One of the perks of the Disneyland resort being so contained and walkable, is that two parks and three hotels are all walking distance from each other. And while the parks boast some amazing treats, well, tucked away inside the Grand Californian Hotel is the small eatery GCH Craftsman Bar and Grill which I’ve found to have some delicious treats as well. Like today’s Peanut Butter Blondie.

Peanut Butter Blondie for peanut butter lovers // magicaltreatsathome.com

The name is very no nonsense, but this decadent peanut butter lover’s dream treat is anything but that. The treat consists of a hefty peanut butter blondie studded with Reeses Pieces, topped with peanut butter icing, and crowned with more Reeses Pieces and mini peanut butter cups. If you’re a fan of peanut butter desserts (and I can attest to peanut butter cups making up at least 50% of my diet as a child), YOU WILL WANT TO MAKE THIS STAT. And so it’s a good thing you’ve come to the site today because we’ve got that recipe for you below!

I used my one bowl blondie recipe for the base of this recipe, a recipe so simple that I consistently made this during my kids’ nap time so that I would have a snack to eat when they went to bed later that day (what? You think I was making it for them LOL?!). And I’ll note here that blondies with peanut butter in them have more of a dryer, cake-ier quality to them than the standard chocolate brownie. So expect that, and take a few minutes off baking time if you’d like them a little undercooked in the center. The icing can be whipped up while these cook too, making them ready for consumption pretty quickly.

Peanut Butter Blondie for peanut butter lovers // magicaltreatsathome.com

Other than melting the butter on the stove, most steps can be completed with the help of kids as young as 3. To help with icing the blondies, you can place the icing in a piping bag and let them dollop on top, and then place the candies. Just watch the level of candies you have. Every time I turned my back, candies went missing.

And if you’re thinking, wait, what happened to Whitewater Snacks at GCH? This is the same place at the hotel basically with a facelift.

Peanut Butter Blondie for peanut butter lovers // magicaltreatsathome.com

OK? Let’s bake!

Print
clock clock iconcutlery cutlery iconflag flag iconfolder folder iconinstagram instagram iconpinterest pinterest iconfacebook facebook iconprint print iconsquares squares iconheart heart iconheart solid heart solid icon
Peanut Butter Blondie for peanut butter lovers // magicaltreatsathome.com

Peanut Butter Blondies

5 Stars 4 Stars 3 Stars 2 Stars 1 Star No reviews
  • Author: Elana Lepkowski
  • Yield: 4 Oversized Peanut Butter Blondies 1x
Print Recipe
Pin Recipe

Description

Calling all peanut butter lovers! This oversized peanut butter blondie is chock full of creamy peanut butter and studded with a generous portion of peanut butter and chocolate candies. A Disneyland-inspired treat.


Ingredients

Scale

Blondie Base:

  • 1 stick butter (1/2 cup)
  • 1/2 cup creamy peanut butter
  • 3/4 cup brown sugar light or dark (1 cup if you like your brownies sweeter)
  • 1 egg
  • 1/2 teaspoon kosher salt
  • 1 teaspoon vanilla extract
  • 1/2 teaspoon baking powder
  • 1 cup flour
  • 1/2 cup Reese’s Pieces

Peanut Butter Frosting:

  • 1 cup creamy peanut butter
  • 3 tablespoons unsalted butter
  • ½ – ⅔ cup powdered sugar (depending on how runny your peanut butter is you may need more or less powdered sugar)
  • 1 teaspoon vanilla extract

Topping:

  • Reese’s Pieces candies
  • Mini Peanut Butter Cups

Specialty Tools

  • Oversized baking cups/molds

Instructions

For the blondie base:

  1. Preheat the oven to 350°f.
  2. Melt the butter in a small saucepan, or in the microwave.
  3. In a large mixing bowl, combine the melted butter, peanut butter, and brown sugar. Whisk until smooth.
  4. Mix in the egg, salt and vanilla extract until smooth.
  5. Sprinkle baking powder over the mixture, stir in, and then add in the flour and stir until just combined.
  6. Fold in the Reese’s Pieces candies.
  7. Pour the mixture into 4 of the baking cups (the mixture will be on the stiff side), and smooth the tops.
  8. Bake for 22-26 minutes
  9. When done, let fully cool before frosting.
    Peanut Butter Blondie for peanut butter lovers // magicaltreatsathome.com

For the peanut butter frosting:

  1. In a mixing bowl, beat together the peanut butter and butter until smooth.
  2. Mix in the powdered sugar and vanilla extract until fully combined and smooth.
  3. Spread on top of the blondie bases.
  4. Any leftover frosting can be kept refrigerated in an air-tight container for up to 4 days.

Topping:

  1. After spreading peanut butter frosting on blondies, top with Reese’s Pieces candies and mini peanut butter cups.
  2. Enjoy!

Notes

  • You can also bake this in an 8×8″ baking pan lined with parchment.
  • If your powdered sugar is lumpy, sift before mixing in to the frosting.
  • Extra frosting can be refrigerated up to 4 days in an air-tight container, or frozen up to 3 months. Re-whip once defrosted.

Did you make this recipe?

Tag @magicaltreatsathome on Instagram and hashtag it #magicaltreatsathome

Peanut Butter Blondie for peanut butter lovers // magicaltreatsathome.com

Share this:

  • Click to share on Facebook (Opens in new window) Facebook
  • Click to share on X (Opens in new window) X

Like this:

Like Loading...

Filed Under: Recipes, Treats Tagged With: disneyland, fall, fall-halloween, GCH, peanut butter, peanut butter cups, treat

Almond Mocha Shake

September 7, 2020 by Elana Lepkowski Leave a Comment

Almond Mocha Shake // magicaltreatsathome.com

Where can I find the original treat?

  • This treat was originally found at Shmoozies! in DCA as part of the Food and Wine Festival.

It’s been record-breaking hot in Southern California this weekend, and as today is the unofficial close to summer, I thought we’d end on a sweet, ice cold note. If there’s one thing you can rely on to cool you off and satisfy a sweet tooth at Disneyland, it’s their shakes. So today we’re making the Almond Mocha Shake, which happened to be the very last thing I ate when I was visiting California Adventure back in March for the Food and Wine Festival.

Almond Mocha Shake // magicaltreatsathome.com

So no, for this recipe I will not ask you to make your own ice cream. That’s because I recently discovered that Disneyland uses Dreyer’s brand ice cream in the park. So, if you want an almond mocha shake… you can grab mocha almond fudge ice cream from the supermarket. For those of you who live on the east coast, that would be Edy’s brand (not Breyer’s!).

Almond Mocha Shake // magicaltreatsathome.com

Now, one component here that you can either make yourself, or buy pre-made, is the English toffee. You’ve got a few options here. One, you can make it, and I have my favorite adaptation below. Second, if you’re able to get to Marceline’s in Downtown Disney, they are selling the English toffee BY THE BAG FULL!!!! It’s the exact kind you’d find on the shake and it’s a hefty bag and yes, I finished the whole package in less than two days… Your third option is to buy either an Almond Roca bar, a Skor bar, or Heath bar from the store. It won’t be the same as what you get on the shake, but it will be reminiscent of the original.

The third component of this shake is the whipped cream and here’s the thing about whipped cream on shakes in Disneyland: it’s thick. My guess is stabilizers in there, but it could also be something like Cool Whip (but not the actual brand). At home I make homemade whipped cream because I have a dispenser, but you could pick up a canister at the store. If you want your cream to be closer to what’s at the parks, I like the brand Truwhip. To create the swirl effect, spoon it semi frozen into a piping bag, attach a open star tip (or just cut the end off the bag), and pipe on top of the shake. 

Almond Mocha Shake // magicaltreatsathome.com

I love that this recipe can be quickly made by a few grocery store ingredients, but also can be adjusted to how much involvement you’d like in the kitchen. And since we’re making this on Labor Day, I say just buy the ingredients and give yourself a day off.

Kids can help assemble the ingredients and add them to the blender (I used my Magic Bullet for this and it was a perfect one serving container). They can also help decorate the glass and top with whipped cream. Older kids can help to make the English toffee due to the extremely high temperatures you need. I would not recommend it for the younger kids.

Almond Mocha Shake // magicaltreatsathome.com

Extra credit: the shakes at Disneyland, like this shake, will sometimes come with a delicious decoration on the outside of the cup. Totally not necessary to enjoy at home unless you want the true park treat experience. So, if you’d like that, we’ve included the instructions below in the recipe card. It’s pretty easy, but it’s one more step.

Now let’s relax and blend up some magic!

Almond Mocha Shake // magicaltreatsathome.com
Print
clock clock iconcutlery cutlery iconflag flag iconfolder folder iconinstagram instagram iconpinterest pinterest iconfacebook facebook iconprint print iconsquares squares iconheart heart iconheart solid heart solid icon
Almond Mocha Shake // magicaltreatsathome.com

Almond Mocha Shake

5 Stars 4 Stars 3 Stars 2 Stars 1 Star No reviews
  • Author: Elana Lepkowski
  • Yield: 1 Almond Mocha Shake 1x
Print Recipe
Pin Recipe

Description

The 2020 Food and Wine Festival at DCA gave us this chocolatey-almond shake with buttery, crunchy toffee topping that you can make at home! A Disneyland-inspired recipe.


Ingredients

Scale

Almond Mocha Shake:

  • 3, 2 ounce scoops of Dreyer’s Mocha Almond Fudge ice cream
  • 1/4 cup milk, more or less to taste

English Toffee (adapted from King Arthur):

  • 16 tablespoons (227g) unsalted butter, cold

  • 1/2 teaspoon salt

  • 1–1/2 cups (298g) sugar

  • 3 tablespoons (43g) water

  • 1 tablespoon (21g) light corn syrup

  • 2 cups (227g) chopped peanuts, toasted (see notes below)

  • 2–2/3 cups (454g) semisweet or bittersweet chocolate, finely chopped; or chocolate chips


Toppings and Decorations:

  • 1/2 cup light cocoa candy melts, optional if decorating cup (see tips about what chocolate to use below)
  • 1/3 cup chopped peanuts, toasted, optional if decorating cup
  • whipped cream (or 1 cup heavy cream, 1 teaspoon each vanilla extract and simple syrup or liquid sweetener of your choice with directions below for making from scratch)

Specialty Tools:

  • Soda fountain pint glasses
  • Whipped cream dispenser
  • N2O chargers
  • reusable straws

Instructions

For the English Toffee:

  1. In a large, deep (3 quart) saucepan, melt the butter. Stir in the salt, sugar, water, and corn syrup, and bring the mixture to a boil. Boil gently over medium heat, without stirring, until the mixture reaches hard-crack stage (300°F on an instant-read or candy thermometer; you’ll be taking it off the heat a few degrees sooner). The syrup will bubble without seeming to change much for awhile, but be patient; all of a sudden it will darken, and at that point you need to take its temperature and see if it’s ready. (If you don’t have a thermometer, test a dollop in ice water; it should immediately harden to a brittleness sufficient that you’ll be able to snap it in two, without any bending or softness). This whole process should take about 10 to 12 minutes. Pay attention; too long on the heat, and the syrup will burn.
  2. While the sugar is boiling, spread half of the nuts in an even, closely packed layer on a parchment-lined 9″ x 13″ pan. Top the nuts with half the chocolate.
  3. When the syrup has reached 295°F, remove from the heat. Pour the syrup quickly and evenly over the nuts and chocolate. Top with the remaining chocolate and let sit for 2 to 3 minutes, until it softens; spread the chocolate with an offset spatula in an even layer and immediately sprinkle the remaining nuts on top.
  4. While the candy is still slightly warm, pull it out of the pan and use a thin spatula to loosen it from the parchment. When completely cool, break into chunks.

For the shake:

  1. Blend the ice cream and milk together until smooth. Set aside.
    Almond Mocha Shake // magicaltreatsathome.com

For the glass decoration (optional):

  1. Pour the chopped, toasted peanuts into a wide, shallow dish. Set aside.
  2. Melt the cocoa candy melts in a microwave safe bowl, like glass. Microwave for 30 seconds. Stir and microwave again for an additional 30 seconds. Keep stirring and microwaving in short bursts of 15-20 seconds until melted and smooth. Use can alternatively use a double boiler for melting or melt directly in a heat-safe piping bag.
    Almond Mocha Shake // magicaltreatsathome.com
  3. Dip and coat the outer rim of a glass with the melted candy melts (or if melted in a pastry bag, clip the tip off and pipe the chocolate around the outer edge). Then dip into the chopped peanuts, turning to coat the entire outside rim. Place in the fridge for five minutes to harden.

Assembly:

  1. Pour the blended shake mixture into your prepared glass.
  2. Spoon or spray whipped cream on top of the shake mixture.
    Almond Mocha Shake // magicaltreatsathome.com
  3. Place a piece of English toffee in the whipped cream and enjoy!

Notes

  • To toast nuts, place in a frying pan over medium high heat. Stir peanuts around until they start to smell, well, toasty. This can take anywhere from 5-10 minutes depending on the heat of your stove. Keep watch though, as the oils from the nuts will cause they to scorch.
  • Cocoa melts are best to use for coating the glass because they will melt but not become too thin and liquid. Regular baking chocolate will be thinner and run more.
  • English toffee can be kept, wrapped, at room temperature for several weeks. Or frozen for longer storage.

Did you make this recipe?

Tag @magicaltreatsathome on Instagram and hashtag it #magicaltreatsathome

Almond Mocha Shake // magicaltreatsathome.com

Share this:

  • Click to share on Facebook (Opens in new window) Facebook
  • Click to share on X (Opens in new window) X

Like this:

Like Loading...

Filed Under: Recipes, Treats Tagged With: almond, DCA, disneyland, English toffee, Food and Wine Festival, fudge, ice cream, mocha, peanuts, Schmoozies, treat, whipped cream

Mickey Mouse Fruity Pebbles Crispy Treats

August 30, 2020 by Elana Lepkowski Leave a Comment

Mickey Mouse Fruity Pebble Crispy Treats // magicaltreatsathome.com
  • These were inspired by the Disney Parks Mickey Mouse shaped crispy treats.

If you’ve come to this site over the past year you’ll have noticed that I’m a BIG fan of Disneyland’s crispy treats. And who could blame me? They’re relatively easy to make and there is always a cute seasonal design. However, we don’t always keep the cereal on hand at home. So, after making the Baked Fruity Pebbles Doughnuts earlier this week, I thought, Hey! I could turn it into a crispy treat! And I’m so happy I did.

Mickey Mouse Fruity Pebble Crispy Treats // magicaltreatsathome.com

I kept it Mickey shaped because it’s my favorite shape, although you can always use whatever cutter you have on hand, or to make it super easy on yourself, just cut into squares (or rip off bits like my husband does). To compliment the flavor of the cereal, I drizzled some white chocolate over the whole thing and that really made this a complete recipe for me. 

Mickey Mouse Fruity Pebble Crispy Treats // magicaltreatsathome.com

As an adult, Fruity Pebbles just taste like bergamot to me (which is the citrus flavoring used in Earl Gray tea). So I needed to tone that down a bit seeing as this was going to be one gigantic treat chock full of that cereal’s flavor. Yes, the cereal is sweet, the marshmallows are sweet, so why choose white chocolate? It just worked. Using a semi sweet or milk chocolate would be heavy here and dull the flavor. White chocolate balances everything flavor wise.

Once you’ve gotten the treats into the pan and cooled, kids can help cut out shapes. Depending on their age, they can help melt the chocolate in the microwave, and can drizzle on their own designs. Just watch that they don’t try to eat all the melted chocolate.

So, if you’re a fan of Disney’s crispy treats and want to venture out into new and bold cereal flavors, give this recipe a try!

Mickey Mouse Fruity Pebble Crispy Treats // magicaltreatsathome.com
Print
clock clock iconcutlery cutlery iconflag flag iconfolder folder iconinstagram instagram iconpinterest pinterest iconfacebook facebook iconprint print iconsquares squares iconheart heart iconheart solid heart solid icon
Mickey Mouse Fruity Pebble Crispy Treats // magicaltreatsathome.com

Mickey Mouse Fruity Pebbles Crispy Treats

5 Stars 4 Stars 3 Stars 2 Stars 1 Star No reviews
  • Author: Elana Lepkowski
  • Yield: 3 Mickey Mouse Fruity Pebbles Crispy Treats 1x
Print Recipe
Pin Recipe

Description

Turn your breakfast cereal into an anytime snack with these Mickey Mouse shaped Fruity Pebbles crispy treats! A Disney inspired treat!


Ingredients

Scale

For the crispy treat:

  • 2 tablespoons butter or vegan butter substitute, unsalted
  • 3 cups mini marshmallows or ~30 regular sized marshmallows
  • 3 cups Fruity Pebbles cereal

For the chocolate:

  • 3 tablespoons to 1/4 cup white chocolate, coarsely chopped

Specialty Tools:

  • Mickey Mouse Cookie Cutter
  • loaf pan

Instructions

For the crispy treat:

  1. Before beginning, line a loaf pan with parchment.
  2. Combine the butter and marshmallows in a medium sauce pan over medium-low heat. Stir constantly until marshmallows have melted and mixture is smooth.
  3. Immediately dump in the Fruity Pebbles cereal and quickly mix to combine.
  4. Pour into the prepared pan and gently press mixture into place with a rubber spatula (or damp fingers, which is my favorite method). Set aside for at least an hour in the refrigerator (or 20 minutes in the freezer) so that the mixture can firm up enough to cut shapes.
  5. When the treats have firmed up, use a Mickey Mouse cutter to cut out your shapes. Set aside.
    Mickey Mouse Fruity Pebble Crispy Treats // magicaltreatsathome.com

For the white chocolate:

  1. Melt the white chocolate in the microwave inside a microwave safe bowl, like glass, for 20 seconds. Stir and microwave again for an additional 15-20 seconds. Keep stirring and microwaving in short bursts of 15-20 seconds until melted and smooth. You can alternatively use a double boiler for melting. OR you can directly melt in a heat safe pastry bag similar to how you’d melt in the bowl. (20 second bursts, kneading bag in-between)
  2. When melted, transfer to a pastry bag (if you did not melt directly in one), snip off the tip, and drizzle over the crispy treat shapes. You can also drizzle with a spoon from the bowl.
    Mickey Mouse Fruity Pebble Crispy Treats // magicaltreatsathome.com
  3. Repeat with all treats. Set aside in the refrigerator for 15 minutes and then enjoy.
    Mickey Mouse Fruity Pebble Crispy Treats // magicaltreatsathome.com

Notes

  • Use a smaller pan than you think you’ll need for this. As the marshmallows melt into the butter, if there’s too much space in the pan, they will start to dry out and form strings. Keeping the marshmallows closer together in the pan will ensure they melt more evenly, creating a better mixture to add the cereal into.
  • When mixing cereal into the melted marshmallows, keep the mixture on the flame so that marshmallows stay liquid. Removing to mix in can seize up the liquid before the cereal is fully mixed.
  • After you’ve cut out your treats, extra cereal/marshmallow mixture can be recombined by hand and cut again (or just combined and shaped into another treat by hand).
  • Treats can be kept in an air-tight container refrigerated for up to 3 days.

Did you make this recipe?

Tag @magicaltreatsathome on Instagram and hashtag it #magicaltreatsathome

Mickey Mouse Fruity Pebble Crispy Treats // magicaltreatsathome.com

Share this:

  • Click to share on Facebook (Opens in new window) Facebook
  • Click to share on X (Opens in new window) X

Like this:

Like Loading...

Filed Under: Recipes, Treats Tagged With: cereal, cripsy treat, disneyland, Fruity Pebbles, krispie treat, krispy treat, marshmallow, Mickey Mouse, rice krispie treats, treat, WDW, white chocolate

Baked Fruity Pebbles Doughnuts

August 27, 2020 by Elana Lepkowski Leave a Comment

Fruity Pebbles Doughnuts // magicaltreatsathome.com

Where can I find the original treat?

  • This treat was found at the Jolly Holiday Bakery Cafe inside Disneyland.

Somehow summer is already over and everyone is starting to head back to school, in whatever form that looks like. Over here at Magical Treats Headquarters, we will be doing the entirety of the next school year (kinder and pre-k) virtually. There will be many bowls of cereal for future breakfasts. Or maybe it will be doughnuts covered in cereal, like today’s recipe The Fruity Pebbles Doughnut. Hey, we all need to do what we got to do to make it through the day. 

Fruity Pebbles Doughnuts // magicaltreatsathome.com

I’ve seen two versions of this at Disneyland, the classic circle and the rectangular Long John type, so basically you can make these whatever shape you’d like at home. The doughnut is also yeasted at the parks, and here today we will tweak that as well. 

A yeasted doughnut is really the perfect base for the sweet and crunchy topping because it’s light and airy and pushes your focus more to the Fruity Pebbles cereal and the lightly flavored lemon glaze than to the actual doughnut. Now, that said, it’s been quite hot here in SoCal, and deep frying anything inside, with all the windows shut and the air conditioning going, is not how I’m spending my day. Because of this hiccup in my baking schedule, I decided that I’d try these on baked doughnuts instead.

Fruity Pebbles Doughnuts // magicaltreatsathome.com

The verdict? Well, it’s definitely quicker to make everything and get to eating them, but using baked doughnuts is a lot more… well, doughnut! Baked doughnuts are like little round cakes and as such, are heavier and can have a more pronounced flavor. Did it taste bad? No! Not at all. But just a warning that using a baked doughnut, or a cake doughnut too, just means you end up with more dessert to contend with. And maybe that’s not all bad.

A note on the glaze. Consistency changes at the parks and again, I’ve had this lemon flavored, and not lemon flavored. Personally the lemon balances out the “fruity pebbles” flavor (which I find now as an adult to taste strongly of bergamot which you find in Earl Gray tea), however if you don’t want to add it in, or are having trouble locating a decent lemon flavoring (check out our rec below!), then go ahead and leave it out.

My kids were SUPER into these at the parks and at home. Once the doughnuts are cooled, kids can help dip the doughnut into the glaze and decorate with cereal topping. 

Fruity Pebbles Doughnuts // magicaltreatsathome.com

Ok, who needs a doughnut? If that’s you, remember to check out our helpful tips and tricks at the bottom of the recipe! Let’s bake (or fry)!

Print
clock clock iconcutlery cutlery iconflag flag iconfolder folder iconinstagram instagram iconpinterest pinterest iconfacebook facebook iconprint print iconsquares squares iconheart heart iconheart solid heart solid icon
Fruity Pebbles Doughnuts // magicaltreatsathome.com

Fruity Pebbles Doughnuts

5 Stars 4 Stars 3 Stars 2 Stars 1 Star No reviews
  • Author: Elana Lepkowski
  • Yield: 6 doughnuts 1x
Print Recipe
Pin Recipe

Description

Lemony Fruity Pebbles topped doughnuts are a sweet and crunchy dessert for snack time or breakfast time. A Disneyland-inspired treat.


Ingredients

Scale

For yeasted doughnuts, please check out the recipe here!

For the baked doughnuts:

  • 2 tablespoons butter
  • 25g (1/8 cup) vegetable oil (or refined coconut oil)
  • 49g (1/3 cup) granulated sugar
  • 35g (1/4 cup) brown sugar
  • 1 large egg
  • 3/4 teaspoons baking powder
  • 1/4 teaspoon baking soda
  • 1/4 teaspoon salt
  • 1/2 teaspoon vanilla extract
  • 159g (1–1/3 cups) Unbleached All-Purpose Flour
  • 113g (1/2 cup) milk (or milk substitute like almond milk)

For the glaze and topping:

  • 1/2 cup powdered sugar
  • 1/4 – 1/2 teaspoon pure lemon extract, optional (I used Nielsen-Massey lemon extract, see notes below about extracts)
  • 1 tablespoon milk (or milk alternative)
  • 2 to 3 drops of yellow food coloring (I used Lemon Yellow from Americolor)
  • 1 cup Fruity Pebbles cereal
    Fruity Pebbles Doughnuts // magicaltreatsathome.com

Instructions

For the doughnuts:

  1. Preheat the oven to 425°F. Lightly grease one standard doughnut pan.
  2. In a medium-sized mixing bowl, beat together the butter, vegetable oil, and sugars until smooth.
  3. Add the eggs, beating to combine.
  4. Stir in the baking powder, baking soda, salt, and vanilla.
  5. Stir the flour into the butter mixture alternately with the milk, beginning and ending with the flour and making sure everything is thoroughly combined. 
  6. Spoon the batter into the lightly greased doughnut pans, filling the wells to about 1/4″ shy of the rim.
  7. Bake the doughnuts for 10 minutes. Remove them from the oven, and wait 5 to 7 minutes before turning them out of the pans onto a rack.
    Fruity Pebbles Doughnuts // magicaltreatsathome.com

For the glaze and topping:

  1. Once the doughnuts are cool, in a bowl wide enough to fit a doughnut, whisk together the powdered sugar, lemon extract (if using), milk, and food coloring until smooth. Pour the Fruity Pebbles into a shallow, wide bowl that can accommodate a doughnut.
    Fruity Pebbles Doughnuts // magicaltreatsathome.com
  2. Dip the top half of each doughnut into the glaze, letting any excess glaze drip back into the bowl.
  3. Immediately press the doughnut glaze side down into the Fruity Pebbles. Gently press the doughnut down into the cereal and then gently lift and place on a drying rack to set. Repeat with the remaining doughnuts.
    Fruity Pebbles Doughnuts // magicaltreatsathome.com
  4. The glaze will take about 30-45 minutes to harden, however, don’t let that stop you from eating right away.

Notes

  • Don’t want to make doughnuts at all? Plain store bought doughnuts can be decorated instead!
  • Check the strength of your lemon extract  before adding more than a 1/4 teaspoon to your glaze. I had plenty of lemon flavor with a quarter teaspoon of my brand, but your brand might be different, so taste and adjust as necessary.
  • These are best eaten the day they are made as the Fruity Pebbles tend to go soft the longer they sit.

Did you make this recipe?

Tag @magicaltreatsathome on Instagram and hashtag it #magicaltreatsathome

Fruity Pebbles Doughnuts // magicaltreatsathome.com

Share this:

  • Click to share on Facebook (Opens in new window) Facebook
  • Click to share on X (Opens in new window) X

Like this:

Like Loading...

Filed Under: Recipes, Treats Tagged With: breakfast, cereal, disneyland, donut, donuts, doughnuts, Fruity Pebbles, glaze, lemon, treat

Karamell-Küche Caramel Drizzled Mickey Mouse Crispy Treat

July 16, 2020 by Elana Lepkowski 2 Comments

Mickey Mouse Caramel Chocolate Crispy Treat // magicaltreatsathome.com

Where can I find the original treat?

  • This Walt Disney World treat was found in Epcot at Karamell–Küche.

I am in a Facebook group with a bunch of people who are fanatical about the caramel corn from Karamell-Küche inside the Germany pavillion at Epcot. But you will probably never see a recipe for that here for one little reason… I hate popcorn. From the smell to the tiny shells getting stuck in my gums, everything about popcorn is just a miss for me. I do, however, thoroughly enjoy the buttered popcorn flavor from Jelly Belly, and “butter” is my favorite flavor of KitKat. You WILL see some caramel treats from Karamell-Küche on here though, just not the popcorn. And today, we’ll be making the caramel drizzled Mickey Mouse shaped crispy treat.

Back in March I panicked about what might be hard to get once we were in quarantine and I ended up with a case of marshmallows. A case. Of marshmallows. You all might want to buckle up for more crispy treats and marshmallow wand ideas because I’ve got PLENTY.

Mickey Mouse Caramel Chocolate Crispy Treat // magicaltreatsathome.com

Over the past year of making these Disney-inspired treats I’ve come to realize that I’m a real fan of cripsy treats. Well, most any treat on a stick I guess. And the Disney team gets very creative and cute with these, and right now I’m especially into this version from Karamell-Küche at Epcot. At its base, a plain crispy treat is delicious. But this version, besides being a fun Mickey Mouse shape, is coated in chocolate and drizzled in caramel. The combination, although simple, hits so many right notes, in my mouth.

I’ve also learned a new technique for decoration from those candy masters that I’ll share with you today if you’re interested in getting nice clean lines for decorations on the odd angles you find with a Mickey Mouse crispy treat. Hint: grab a piping bag.

Mickey Mouse Caramel Chocolate Crispy Treat // magicaltreatsathome.com

For the caramel, you can optionally decorate a few ways. One is to just buy yourself some caramel sauce if you want the easiest method. Second, you can melt caramel squares with some milk or cream and a little water and then go from there. Or, if you’ve got the time, make caramel sauce from scratch. As always, I’ve got all the info you need in the recipe below.

Kids love to decorate, so for this recipe, once cooled, kids can help cut out the Mickey Mouse shapes. And then they can decorate with the warm melted chocolate. Depending on which route you take for the caramel they may be able to help decorate with the drizzle. Just remember, cooked caramel on the stove is SUPER HOT and little hands might want to get in there and taste it. Don’t let that happen.

Mickey Mouse Caramel Chocolate Crispy Treat // magicaltreatsathome.com

Epcot might be open to some people right now, but it’s slim pickings at Karamell-Küche, so stay home, make a batch of these caramel drizzled crispy treats, and maybe watch a YouTube video of last years Garden Festival. Enjoy!

Mickey Mouse Caramel Chocolate Crispy Treat // magicaltreatsathome.com
Print
clock clock iconcutlery cutlery iconflag flag iconfolder folder iconinstagram instagram iconpinterest pinterest iconfacebook facebook iconprint print iconsquares squares iconheart heart iconheart solid heart solid icon
Mickey Mouse Caramel Chocolate Crispy Treat // magicaltreatsathome.com

Karamell-Küche Caramel Drizzled Mickey Mouse Crispy Treat

5 Stars 4 Stars 3 Stars 2 Stars 1 Star No reviews
  • Author: Elana Lepkowski
  • Yield: 3 Caramel Drizzled Mickey Mouse Crispy Treats 1x
Print Recipe
Pin Recipe

Description

The classic Mickey Mouse crispy treat is made into a decadent goodie with a dip in semisweet chocolate and topped with buttery caramel. A Walt Disney World inspired treat!


Ingredients

Scale

For the crispy treat:

  • 2 tablespoons butter, unsalted
  • 3 cups mini marshmallows or ~30 regular sized marshmallows
  • 3 cups crisped rice cereal

For the chocolate:

  • 4 ounces semisweet chocolate, coarsely chopped

For the caramel:

  • 14 individually wrapped caramels/4 ounces/115 g/ 1/2 cup
  • (OR 1/4 cup store bought caramel sauce or homemade caramel sauce from scratch)
  • 1 tablespoon cream or milk
  • 1 teaspoon water

Specialty Tools:

  • Mickey Mouse Cookie Cutter
  • loaf pan

Instructions

For the crispy treat:

  1. Before beginning, line a loaf pan with parchment.
  2. Combine the butter and marshmallows in a medium sauce pan over medium-low heat. Stir constantly until marshmallows have melted and mixture is smooth.
  3. Immediately dump in the crisped rice cereal and quickly mix to combine.
  4. Pour into the prepared pan and gently press mixture into place with a rubber spatula (or damp fingers, which is my favorite method). Set aside for at least an hour in the refrigerator (or 20 minutes in the freezer) so that the mixture can firm up enough to cut shapes.
  5. When the treats have firmed up, use a Mickey Mouse cutter to cut out your shapes. Set aside.

For the chocolate layer:

  1. Melt the semisweet chocolate in the microwave inside a microwave safe bowl, like glass, for 30 seconds. Stir and microwave again for an additional 30 seconds. Keep stirring and microwaving in short bursts of 15-20 seconds until melted and smooth. You can alternatively use a double boiler for melting. OR you can directly melt in a heat safe pastry bag similar to how you’d melt in the bowl. (20 second bursts, kneading bag in-between)
  2. When melted, transfer to a pastry bag (if you did not melt directly in one), snip off the tip, and outline and fill the ears and top 1/3 of the head. Repeat with all treats. Set aside in the refrigerator for 15 minutes.

For the caramel layer:

  1. In a small sauce pan over low heat, combine the caramels, cream or milk, and water. Stir continuously until melted and smooth. Do not let the mixture sit or it could burn.
  2. Once the mixture is melted and pour-able, take one crispy treat and hold over the saucepan. Drizzle caramel horizontally across the whole treat, lightly tapping any excess off back into the pan. Set aside on parchment and repeat until all treats are done. If sauce starts to stiffen, keep over a very low flame, stirring until smooth and pour-able again.
  3. Enjoy!

Notes

  • Use a smaller pan than you think you’ll need for this. As the marshmallows melt into the butter, if there’s too much space in the pan, they will start to dry out and form strings. Keeping the marshmallows closer together in the pan will ensure they melt more evenly, creating a better mixture to add the cereal into.
  • When mixing crisped rice cereal into the melted marshmallows, keep the mixture on the flame so that marshmallows stay liquid. Removing to mix in can seize up the liquid before the cereal is fully mixed.
  • If crisped rice cereal is unavailable right now, use any kind of puffed grain, or cereal. Cocoa Pebbles would work here too!
  • After you’ve cut out your treats, extra cereal/marshmallow mixture can be recombined by hand and cut again (or just combined and shaped into another treat by hand).
  • If you do not have pastry bags, this can be dipped into the bowl you melted the chocolate in. Using a pastry bag ensures neater lines, nothing more.
  • Melted caramel is HOT! Use caution in the kitchen. Do not dip your fingers or hands into the caramel has it can adhere to skin and burn you. Keep away from children.
  • Use hot water to remove caramel from pans and utensils.
  • Leftover caramel can be kept in an airtight container in the refrigerator up to one month.
  • Treats can be kept in an air-tight container refrigerated for up to 3 days.

Did you make this recipe?

Tag @magicaltreatsathome on Instagram and hashtag it #magicaltreatsathome

Mickey Mouse Caramel Chocolate Crispy Treat // magicaltreatsathome.com

Share this:

  • Click to share on Facebook (Opens in new window) Facebook
  • Click to share on X (Opens in new window) X

Like this:

Like Loading...

Filed Under: Recipes, Treats Tagged With: caramel, chocolate, crispy treat, Epcot, Karamell-Küche, marshmallow, rice krispie treat, treat, WDW

Mickey Waffles Three Ways

June 17, 2020 by Elana Lepkowski Leave a Comment

Mickey Mouse Waffles Three Ways // magicaltreatsathome.com
  • These were inspired by the Disney Parks classic Mickey Mouse waffles.

Since Disneyland’s closure this past March, I’ve definitely been trying to keep the magic up here at home, especially when my three year old asks on the daily when they will open again. We’ve done a Mary Poppins themed tea party, and ate egg bites while watching a POV ride through of It’s a Small World (and my IG followers know what that’s referencing at this point), and I’ve made a few recipes that I’ve posted on here too. It’s been a real… treat to hear from readers and followers that they’ve tried out a recipe they saw here because they, too, were missing the parks something fierce.

Mickey Mouse Waffles Three Ways // magicaltreatsathome.com

So today over on IG I launched a giveaway to say THANK YOU to all those followers and I thought they best way to do that… was with food! The contest only runs until Friday afternoon so I apologize in advance for talking about a contest that will most likely be over with by the time you are reading this, but I hope the sentiment remains, and that just by you, reader, showing up and considering making a recipe, I want you to know that means a lot to me to take me into your kitchen with you. So, thank you.

Mickey Mouse Waffles Three Ways // magicaltreatsathome.com

The contest is giving away the waffle maker pictured above, and also a canister of Golden Malted waffle mix, which happens to be THE brand used by Disneyland Parks. The original flavor is iconic, BUT, I thought I’d change it up a little and give you some options for when you don’t want plain waffles. So check out the recipes below for: Vanilla Bean Mickey Waffles, Chocolate Mickey Waffles, and Citrus Sprinkles Mickey Waffles.

If you make a batch and close your eyes, you’d swear you were walking down Main Street…

Print
clock clock iconcutlery cutlery iconflag flag iconfolder folder iconinstagram instagram iconpinterest pinterest iconfacebook facebook iconprint print iconsquares squares iconheart heart iconheart solid heart solid icon
Mickey Mouse Waffles Three Ways // magicaltreatsathome.com

Mickey Waffles Three Ways

5 Stars 4 Stars 3 Stars 2 Stars 1 Star No reviews
  • Author: Elana Lepkowski
  • Yield: Each recipe yields about 15 Mickey Mouse Waffles
Print Recipe
Pin Recipe

Description

Nothing beats the iconic Mickey Waffle, but these Vanilla Bean Mickey Waffles, Chocolate Mickey Waffles, and Citrus Sprinkles Mickey Waffles sure are tasty too! A Disneyland inspired recipe.


Ingredients

Scale

For the Vanilla Bean Mickey Waffles:

  • 1 egg
  • 5 ounces water
  • 1 cup Golden Malted waffle mix
  • 1 teaspoon vanilla bean paste OR vanilla extract with seeds scraped from half a vanilla bean
  • 1 teaspoon sugar
  • 2 tablespoons butter, melted
  • cooking spray

Chocolate Mickey Waffles:

  • 1 egg
  • 5 ounces water
  • 1 cup Golden Malted waffle mix
  • 1 tablespoon unsweetened cocoa powder (if you use sweetened, omit tablespoon of sugar)
  • 1 teaspoon sugar
  • 2 tablespoon melted butter
  • cooking spray

Citrus Sprinkle Mickey Waffles:

  • 1 egg
  • 5 ounces water
  • 1 cup Golden Malted waffle mix
  • 1/4 teaspoon Fiori di Sicilia extract OR 1 teaspoon of finely grated lemon peel plus 1/2 teaspoon of finely grated orange peel
  • 1 teaspoon sugar
  • 2 tablespoon sprinkles
  • 2 tablespoon melted butter
  • cooking spray

Specialty Tools:

  • Mickey Flip Waffle Maker

Instructions

For the Vanilla Bean Mickey Waffles:

  1. Preheat your waffle maker according to the manufacturer’s instructions.
  2. Mix the egg and water together until frothy.
  3. Pour in the Golden Malted waffle mix, vanilla bean paste, and sugar. Stir until smooth.
  4. Pour in the melted butter and mix until just combined.
  5. Pour the desired amount of mix into your waffle maker (for this particular Mickey Mouse 90th anniversary edition waffle maker you’ll need a few tablespoon, and fill each compartment all the way).
  6. Bake according to the waffle maker’s instruction and enjoy!

For the Chocolate Mickey Waffles:

  1. Preheat your waffle maker according to the manufacturer’s instructions.
  2. Mix the egg and water together until frothy.
  3. Pour in the Golden Malted waffle mix, cocoa powder, and sugar. Stir until smooth.
  4. Pour in the melted butter and mix until just combined.
  5. Pour the desired amount of mix into your waffle maker (for this particular Mickey Mouse 90th anniversary edition waffle maker you’ll need a few tablespoon, and fill each compartment all the way).
  6. Bake according to the waffle maker’s instruction and enjoy!

For the Citrus Sprinkles Mickey Waffles:

  1. Preheat your waffle maker according to the manufacturer’s instructions.
  2. Mix the egg and water together until frothy.
  3. Pour in the Golden Malted waffle mix, fiori di sicilia extract, and sugar. Stir until smooth.
  4. Pour in the melted butter and sprinkles and mix until just combined.
  5. Pour the desired amount of mix into your waffle maker (for this particular Mickey Mouse 90th anniversary edition waffle maker you’ll need a few tablespoon, and fill each compartment all the way).
  6. Bake according to the waffle maker’s instruction and enjoy!

Notes

  • For extra chocolate waffles, melt 2 ounces of semisweet chocolate and pour into the batter.
  • Waffles can be individually frozen up to 6 months.
  • Waffles will get soft if kept in the refrigerator overnight but you can toast in your toaster to crisp up!

Did you make this recipe?

Tag @magicaltreatsathome on Instagram and hashtag it #magicaltreatsathome

Mickey Mouse Waffles Three Ways // magicaltreatsathome.com

Share this:

  • Click to share on Facebook (Opens in new window) Facebook
  • Click to share on X (Opens in new window) X

Like this:

Like Loading...

Filed Under: Recipes, Treats Tagged With: breakfast, chocolate, citrus, Disney Waffle Maker, disneyland, easy, Golden Malted Waffle Mix, sprinkles, treat, vanilla, waffles

Churro Ice Cream Sandwich

June 9, 2020 by Elana Lepkowski Leave a Comment

Churro Ice Cream Sandwich // magicaltreatsathome.com

Where can I find the original treat?

  • This treat was found at Sleepy Hollow inside the Magic Kingdom, Walt Disney World.

Hello! I took a break on here and muted myself last week in support of amplifying voices for Black Lives Matter. This space is not just inclusive, it is anti-racist. That support does not die down as the food posts start back up again. Yes, this is a very niche blog about making treats found at Disney, but there are people behind this account, and I will absolutely not shy away about being vocal when I need to use my voice, especially when there is a public platform like this.

If you have a knee-jerk reaction somewhere along the lines of “ugh, not another food blog talking about something other than food…”, I’d love for you to take a second and think why that makes you so uncomfortable.

Churro Ice Cream Sandwich // magicaltreatsathome.com

I cannot think of anyway to transition my above thoughts though into today’s post other than saying, hey, I made those Churro Ice Cream Sandwiches from Walt Disney World. So that’s what we’re making today.

You can bake these (like I did), or fry them or try them in your air fryer (I bet they’d be great there too). The original treat had vanilla ice cream, but I highly suggest you make a batch of cinnamon ice cream and sandwich that in-between here too.

Churro Ice Cream Sandwich // magicaltreatsathome.com

I took them a little lighter than the deep fried version as it gives the inside a custard-y, super soft center, but feel free to take it longer in the fryer if you’d like it crisper.

Churro Ice Cream Sandwich // magicaltreatsathome.com

These churro wheels should be eaten the day they’re made. They get soggy by the next day, although you can crisp them up again in the toaster oven (but I love them fresh).

Churro Ice Cream Sandwich // magicaltreatsathome.com
Print
clock clock iconcutlery cutlery iconflag flag iconfolder folder iconinstagram instagram iconpinterest pinterest iconfacebook facebook iconprint print iconsquares squares iconheart heart iconheart solid heart solid icon
Churro Ice Cream Sandwich // magicaltreatsathome.com

Churro Ice Cream Sandwich

5 Stars 4 Stars 3 Stars 2 Stars 1 Star No reviews
  • Author: Elana Lepkowski
  • Yield: 3 Churro Ice Cream Sandwiches 1x
Print Recipe
Pin Recipe

Description

Crispy, chewy, cinnamon swirled churros make the perfect sandwich base for vanilla ice cream with this Churro Ice Cream Sandwich. A Walt Disney World inspired treat.


Ingredients

Scale

For the churros:

  • 1/2 cup granulated sugar
  • 1 teaspoon cinnamon
  • 1/2 cup unsalted butter
  • 1 cup water
  • 1 tablespoon granulated sugar
  • big pinch of salt
  • 1 cup all purpose flour
  • 1 egg
  • vegetable oil for frying

For assembly:

  • Vanilla ice cream (or cinnamon!!)
  • Ground cinnamon

Special Tools:

  • spider for frying
  • Ateco 847 piping tip
  • pastry bag
  • candy thermometer

Instructions

For the churros:

  • Mix together 1/2 cup of granulated sugar and cinnamon in a shallow bowl, set aside.
  • In a medium sized saucepan over medium-high heat, combine water, butter, sugar and salt. Bring to a boil, or until butter has melted.
  • Turn burner to low and pour in all the flour at once. Stir until there are no visible flour lumps and dough has begun to stick together in a ball and pulled away from the sides of the pan.
  • Remove pan from heat and let sit 5 minutes. Stir in the egg until incorporated. Dough will appear to break or become lumpy. Continue to stir until it forms a smooth, sticky dough.
  • For baked churros:
    • Preheat oven to 425°f.
    • Line a half sized sheet pan with parchment. And then fill a pastry bag fitted with an Ateco 847 closed star tip half full with batter (see notes below on filling pastry bags).
    • Pipe out 2-1/2″ spirals spaced an inch apart (I was able to fit all 6 spirals on one sheet pan).
      Churro Ice Cream Sandwich // magicaltreatsathome.com
    • Bake in the oven 35-40 minutes.
    • Remove from the oven and let cool on the sheet pan until cool enough to touch, about 5 minutes. And then toss in the cinnamon sugar mix. Set aside.
  • For fried churros:
    • Line a half sized sheet pan with a sheet of parchment. And then fill a pastry bag fitted with an Ateco 847 closed star tip half full with batter (see notes below on filling pastry bags).Pipe out 2-1/2″ spirals spaced an inch apart (I was able to fit all 6 spirals on one sheet pan).
    • Refrigerate dough at least 30 minutes and up to two days. Batter will stiffen the more it sits, so let the dough come to room temperature before frying.
    • Place churros 2 at a time into the cooking oil for 6-7 minutes, turning after 3 minutes with a spatula or spider. Wait until oil comes back to temperature before adding next batch. Thicker churros may need an additional 30 seconds to one minute to fully cook through.
    • Using a spider or large spatula, remove churros from oil and drain on a cooling rack over parchment or on a paper towel. Wait at least a minute and then toss the churro in the cinnamon sugar, tapping off any excess. Set churro aside. Repeat with all the churros.

To assemble:

  • Scoop out about 2 ounces of ice cream and place on the bottom churro half. Sandwich with another churro.
    Churro Ice Cream Sandwich // magicaltreatsathome.com
  • Optionally sprinkle a little extra cinnamon over the whole sandwich and enjoy!

Notes

  • Do not overfill your pastry bag! Fill in two to three batches. If there is too much dough, it will seep out the top and will be hard to pipe.
  • Slowly pipe out dough all of a consistent size, smaller spots on the churro can cause them to become more fragile while handling and can break in the oil or while coating in sugar.
  • Churro dough can be piped out onto parchment and covered in the fridge up to 48 hours.
  • If you want to make you churros immediately after making dough without the chilling time, once oil has reached temp, starting about one inch above the oil, pipe a small line of dough down into oil and either snip end with scissors, or break the dough off the pastry tip on the side of your pan. Follow directions above for frying.
  • Thicker churros will require a longer cooking time to fully cook through the center. Test one churro first to adjust your cooking time.
  • Sugar not sticking to your baked churros? Melt 2-3 tablespoons of butter in a small saucepan, and then brush on the churro. Immediately toss in the sugar mixture and set aside on a grate to cool.
  • Cooking oil can be fine strained and stored again for another use. I strain back into the bottle it came from. Well strained oil can be stored in a cool, dry place and used up to several times.
  • These churros are best eaten the day of, however, they can be frozen between sheets of parchment without the sugar coating and crisped in the toaster oven for a few minutes.

Did you make this recipe?

Tag @magicaltreatsathome on Instagram and hashtag it #magicaltreatsathome

Churro Ice Cream Sandwich // magicaltreatsathome.com

Share this:

  • Click to share on Facebook (Opens in new window) Facebook
  • Click to share on X (Opens in new window) X

Like this:

Like Loading...

Filed Under: Recipes, Treats Tagged With: churro, cinnamon, ice cream, ice cream sandwich, Magic Kingdom, Sleepy Hollow, treat, WDW

Jack Skellington Cake Pops

May 16, 2020 by Elana Lepkowski Leave a Comment

Jack Skellington Cake Pops // magicaltreatsathome.com

Where can I find the original treat?

  • This seasonal treat was found throughout the Disneyland Resort.

First, yes, I know it is May, however when Disney announced they were going to hold a special “Halfway to Halloween” event yesterday (Friday May 15th), and I just happened to have a batch of undecorated white chocolate coated cake pops in the fridge, instead of my original idea (which I’ll withhold for now since I’m still going to do it at another date) I pivoted to a batch of Jack Skellington cake pops instead. They are super easy to decorate. So let’s talk about that and make some!

Jack Skellington Cake Pops // magicaltreatsathome.com

The original Disneyland treat last year was a vanilla cake pop, which makes sense, since if you make a darker colored cake, which I did with chocolate, you will more than likely have to double coat these depending on how opaque your melted chocolate is. So, I’ve linked to our standard Disneyland cake pop recipes in the recipe below and you can choose the flavor you’d like best.

Jack Skellington Cake Pops // magicaltreatsathome.com

For decorating, I colored semisweet chocolate with some chocolate, oil based, food coloring in black. If you can get your hands on black candy melts I’d suggest that for one less step. Also, remember, never use water based (like gel) food coloring with chocolate. Water and chocolate don’t mix! It will make your chocolate seize up when you melt it.

Jack Skellington Cake Pops // magicaltreatsathome.com

One tip when decorating Jack’s face is to cut the smallest tip off your piping bag that you can get away with. It will make the line work on his smile all the easier if you have a fine line to control. If you want to use a tip with your bag, I’d go with Wilton’s #1 or #2 tip.

Jack Skellington Cake Pops // magicaltreatsathome.com

And that’s it! These look great and are really very easy to decorate. Whip up a batch to celebrate #Halfway2Halloween right now, or pin this recipe to welcome the actual Halloween season the first week of September.

Jack Skellington Cake Pops // magicaltreatsathome.com
Print
clock clock iconcutlery cutlery iconflag flag iconfolder folder iconinstagram instagram iconpinterest pinterest iconfacebook facebook iconprint print iconsquares squares iconheart heart iconheart solid heart solid icon
Jack Skellington Cake Pops // magicaltreatsathome.com

Jack Skellington Cake Pops

5 Stars 4 Stars 3 Stars 2 Stars 1 Star No reviews
  • Author: Elana Lepkowski
  • Yield: 8–10 Jack Skellington Cake Pops 1x
Print Recipe
Pin Recipe

Description

Get spooky with these easy to decorate Jack Skellington white chocolate coated cake pops! A Disneyland-inspired treat.


Ingredients

Scale

For the cake pops:

  • 8–10 cake balls (find our recipe here for the Disneyland-inspired vanilla, chocolate, and red velvet cake pops)
  • 1 cup white chocolate discs (like Merckens) or white candy melts
  • 1/4 cup black candy melts OR 1/4 cup semisweet chocolate discs + 3-4 drops oil based food coloring for chocolate in black

Specialty Tools:

  • lollipop sticks
  • cake pop drying rack

Instructions

  1. First, make your cake balls for the cake pops. I chose the chocolate flavor for this recipe.
  2. Push a lollipop stick halfway into each cake ball. Set aside into a cake pop stand, or make holes in the bottom of a shoe box and stick the cake pops in there.
  3. Refrigerate at least one hour to firm up, or up to two days.
    Jack Skellington Cake Pops // magicaltreatsathome.com
  4. Next, melt the white chocolate. You can do this one of several ways:
    1. Melt in a candy pot until smooth (Wilton makes this one for their candy melts I use for dipping projects like this). This can take up to 20 minutes to get fully smooth candy melts. Follow the directions for your particular pot!
    2. Melt in the microwave in a microwave safe bowl, like glass, for 30 seconds. Stir and microwave again for an additional 30 seconds. Keep stirring and microwaving in short bursts of 15-20 seconds until melted and smooth.
    3. Melt in a double boiler on the stove. In a medium saucepan, bring about an inch of water to a simmer. Place a glass bowl on top and add candy melts. Stir until melted and smooth.
  5. Make sure the cake pops have come to room temperature. If they’re too cold, the chocolate will seize up and harden too soon.
  6. Next, dip each cake pop into the white chocolate, tapping each stick against the bowl to pop any air bubbles and to remove all the excess chocolate. If your white chocolate is not opaque enough, dip all the cake pops a second time after you have finished the first round. Stick them back into the stand or box holder.
    Jack Skellington Cake Pops // magicaltreatsathome.com
  7. Let the cake pops firm up slightly again and melt the black candy melts (or chocolate with 3-4 drops of the food coloring) to finish decorating the cake pops. To melt, microwave inside a microwave safe bowl, like glass, for 30 seconds. Stir and microwave again for an additional 30 seconds. Keep stirring and microwaving in short bursts of 15-20 seconds until melted and smooth. You can alternatively use a double boiler for melting or melt candy melts in a piping bag, kneading the candy melts between microwaving.
  8. If not melting directly in a piping bag, transfer melted candy melts into a piping bag and cut a small amount of the tip off to decorate. See notes below on tip sizing if using a piping tip.
  9. Draw on Jack’s face with the piping bag on each cake pop. Start with the eyes making a small circle and moving outward until the eyes are large. Then make to small lines for the nose at angles, and then draw on a thin line for the smile and perpendicular lines for his mouth. Set aside and let firm up at least a half hour, or refrigerate until ready to eat.

Notes

  • Cake balls should not be too wet or too dry to hold their shape properly. If too wet, add more cake crumbles. If too dry, add more frosting a small bit at a time.
  • I like to dry the cake crumbles out a bit before mixing with the frosting, and then letting that mixture sit overnight in the fridge to set up. This ensures a more solid cake pop when dipping.
  • Boxed cake and canned frosting will also work for the cake pops if you don’t want to make them from scratch. Just follow the amounts for the crumbled cake and amount of frosting on those recipe pages listed above.
  • Cake balls can be made in advance and frozen in a single layer on a sheet pan. Then move the frozen balls to a freezer safe container until ready to use. You can keep cake balls in the freezer up to 6 months.
  • If cake balls are slipping off the sticks, dip lollipop stick tip in the melted chocolate and insert into cake ball. Refrigerate a few minutes to set.
  • Pure white chocolate, as opposed to candy melts, will have a thinner texture and may show dark spots after one dip due to its translucent nature. The first dip will also ensure that your marshmallows will adhere and not slide off into the chocolate on the second dip. If your kitchen is particularly warm, stick in the fridge for 10 minutes to harden slightly before second dip.
  • White chocolate can get too hot very easily. If the white chocolate looks like it is seizing on your spoon when you have dipped in the chocolate and let it drip off, it is too hot. Keep stirring the white chocolate to cool it down. It will be the right consistency to dip the cake pops in when it drips smoothly off your spoon. This can take anywhere sometimes from 20 to 30 minutes to melt, and then cool down to the right consistency.
  • If your white chocolate or candy melts is still very clumpy and thick, add a 1/4 teaspoon of coconut oil into it and continue mixing. This should thin out your mixture and get a smoother consistency.
  • If you want to use a tip with your bag for decorating Jack’s face, use Wilton’s #1 or #2 tip.
  • Save any extra white chocolate to reuse for another treat within a week. Let chocolate harden and then seal in an airtight container.
  • Cake pops will last up to one week in the refrigerator in an airtight container.

Did you make this recipe?

Tag @magicaltreatsathome on Instagram and hashtag it #magicaltreatsathome

Jack Skellington Cake Pops // magicaltreatsathome.com

Share this:

  • Click to share on Facebook (Opens in new window) Facebook
  • Click to share on X (Opens in new window) X

Like this:

Like Loading...

Filed Under: Recipes, Treats Tagged With: cake, cake ball, cake pop, cake pops, candy melts, chocolate, disneyland, fall-halloween, Halfway to Halloween, Jack Skellington, Nightmare Before Christmas, This is Halloween, treat, white chocolate

  • « Go to Previous Page
  • Go to page 1
  • Go to page 2
  • Go to page 3
  • Go to page 4
  • Interim pages omitted …
  • Go to page 7
  • Go to Next Page »

Primary Sidebar

Follow Us

  • Instagram
  • Facebook
  • X
  • Pinterest
  • Email
  • YouTube

Hi! My name is Elana, and that’s me shoving a Mickey Mouse shaped treat in my face. I love the treats at Disneyland. A lot. So much so I’ve dedicated an entire website to making all my favorites, and hopefully yours too, out of my home kitchen. My aim is to create Disneyland-inspired treats, with easy to follow directions, and many recipes geared towards getting the kids in the kitchen to help too! Because putting sprinkles on things is F-U-N.

Top With Sprinkles

Get Recipes in Your Inbox!

* indicates required

Look for this icon in posts to find Kid Friendly recipes!

Recent Posts

  • Matterhorn Macaroon
  • Caramel Gingerbread Cookie Sandwiches
  • Colorful Fruit Hand Pies
  • Classic Mickey Shaped Beignets
  • Carrot Cake Cookies

Archives

  • February 2023
  • December 2022
  • August 2022
  • January 2022
  • December 2021
  • November 2021
  • December 2020
  • November 2020
  • October 2020
  • September 2020
  • August 2020
  • July 2020
  • June 2020
  • May 2020
  • April 2020
  • March 2020
  • February 2020
  • January 2020
  • December 2019
  • November 2019
  • October 2019
  • September 2019
  • August 2019
  • July 2019
  • June 2019
  • May 2019

Copyright © 2025 Magical Treats at Home on the Foodie Pro Theme

%d