• Skip to primary navigation
  • Skip to main content
  • Skip to primary sidebar

Magical Treats at Home

  • About
  • Treats
  • Drinks
  • Savory
  • Favorite Tools
  • Etsy Shop

Archives for December 2022

Caramel Gingerbread Cookie Sandwiches

December 18, 2022 by Elana Lepkowski Leave a Comment

Where can I find the original treat?

Whoopie pies, mini cakes, giant cookies, give me a handheld dessert to walk around and snack on at the parks and I’m a happy person. One favorite handheld dessert at EPCOT has a cult-like following, and for good reason, it’s DELICIOUS.
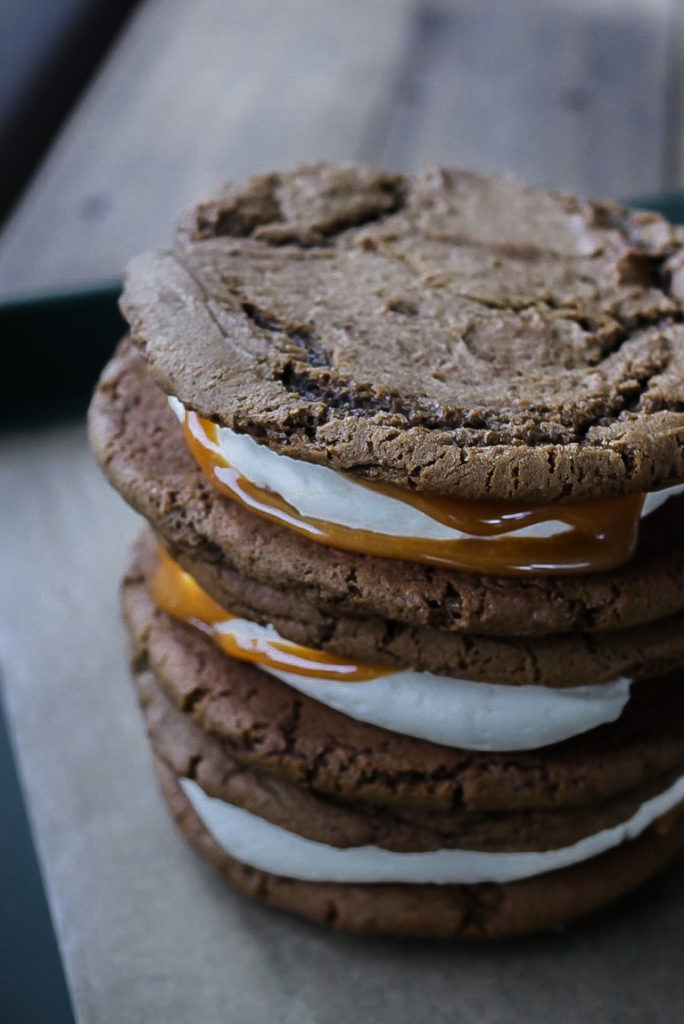
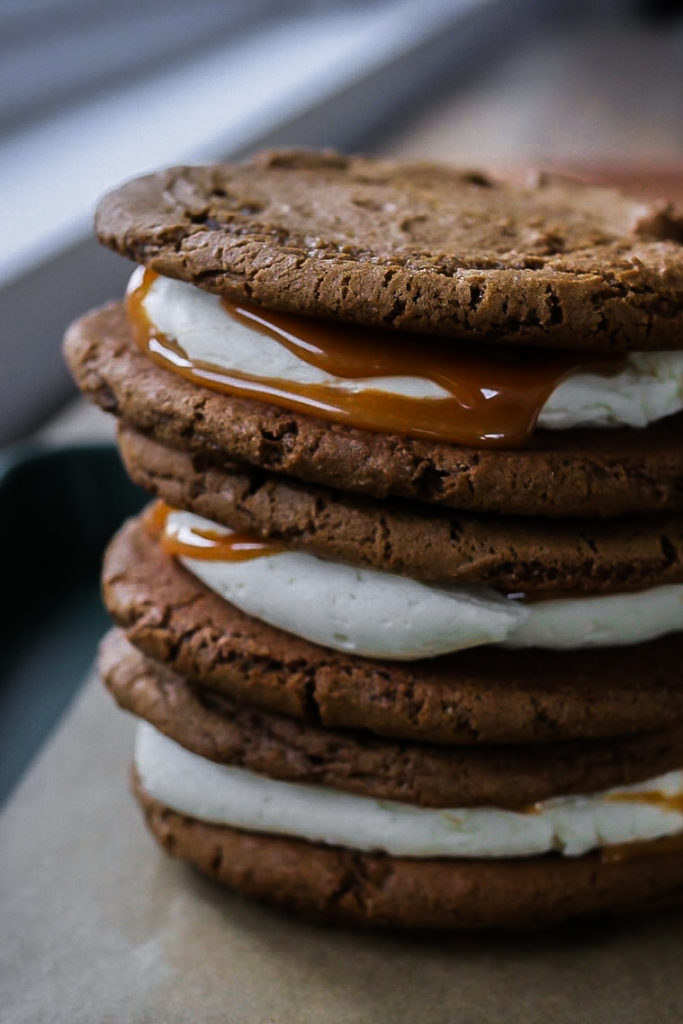
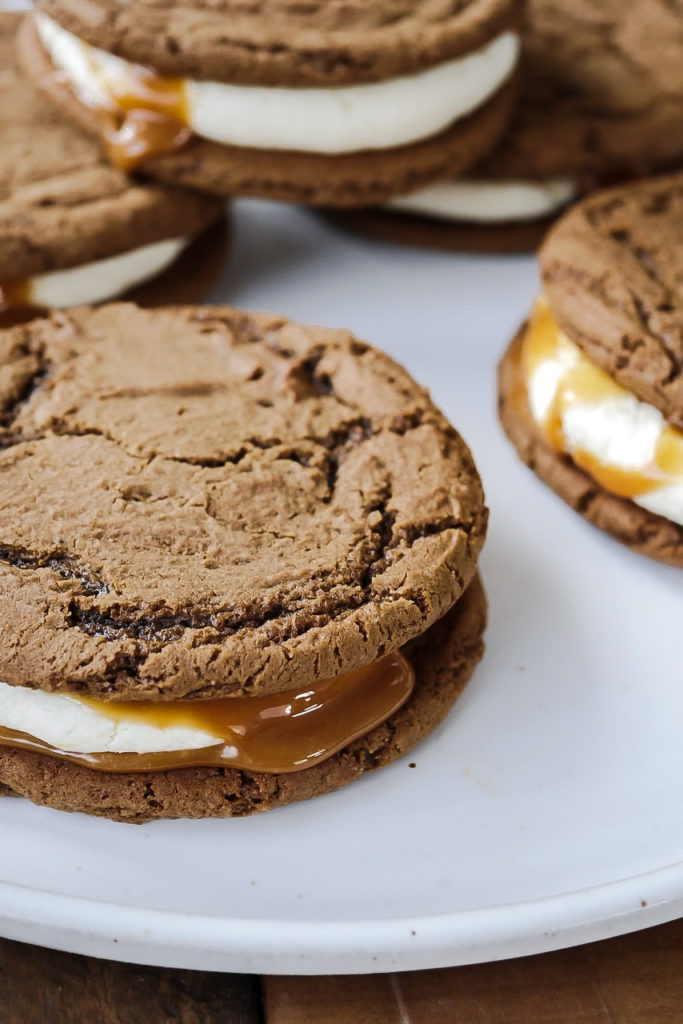
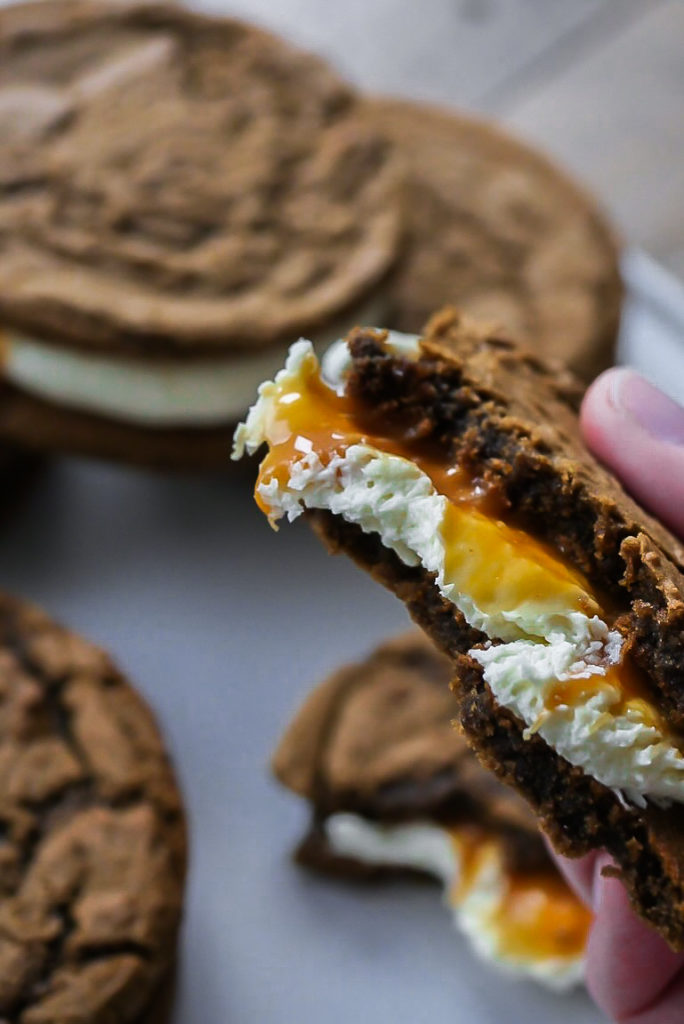
If you’re a caramel fan, then you’ve more than likely made your way over to Karamell-Küche (“caramel kitchen”) in EPCOT and tried one of the many, many amazing caramel-themed treats there. One absolute favorite on the menu is the seasonal Caramel Gingerbread cookie sandwiches. They are a sizeable handful of two oversized gingerbread cookies stuffed with American-style buttercream and oozing with Werther’s caramel. SO. GOOD.
So good in fact I had to make them at my home and share the recipe with you all, because after you’ve run out of your stash and your next trip is months away, this should hold you over.

Although there are three separate parts to this cookie, it comes together rather quickly. To keep it in-theme with the park version, I actually use Werther’s soft caramels and add some salt to them. It cuts down on making the caramel from scratch, although if that’s something you’d like to do, go for it!

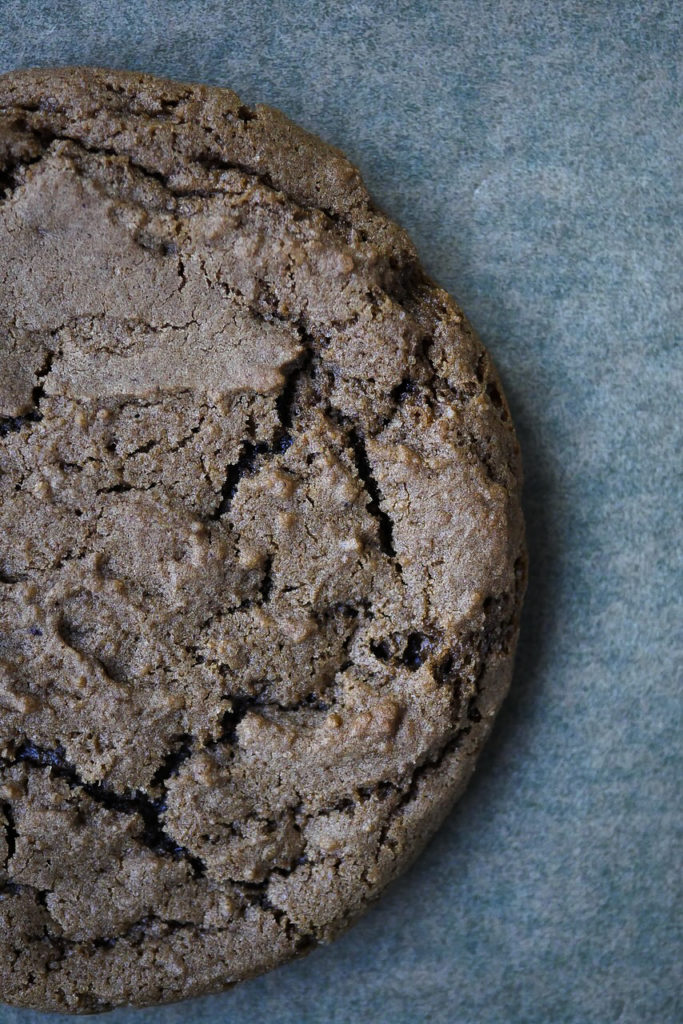
The dough recipe is easy to work with and requires minimal chilling. They do spread, which is why I recommend scooping into balls and baking them without flattening. If you want to make these cookies smaller, reduce the bake time by a few minutes or they’ll get too hard.

And the buttercream is straight-up American style, so nothing fancy here. Just whip up the butter, powdered sugar, vanilla, and cream and you’re done.
This is super kid-friendly recipe, and most components can be done by even the littlest hands. Older kids can definitely help with the caramel melting by themselves, and since you’re just warming those candies, even younger kids with supervision can do that part. Let’s just remind them not to stick their fingers into the hot pan. And even some of the adults might need that reminder too…

So let’s make our own caramel kitchen today and bake some cookies! And remember to check all the way through the recipe for helpful tips and tricks.
Print
clock clock iconcutlery cutlery iconflag flag iconfolder folder iconinstagram instagram iconpinterest pinterest iconfacebook facebook iconprint print iconsquares squares iconheart heart iconheart solid heart solid icon

Caramel Gingerbread Cookie Sandwiches

5 Stars 4 Stars 3 Stars 2 Stars 1 Star No reviews
  • Author: Elana Lepkowski
  • Yield: 5 cookies 1x
  • Category: Dessert
  • Cuisine: German
Print Recipe
Pin Recipe

Description

These oversized, beautifully spiced gingerbread cookies sandwich a generous amount of buttercream and salted caramel. Inspired by the Karamell-Küche cookies found at EPCOT in WDW.


Ingredients

Scale

For the cookies:

  • 1 stick (½ cup) unsalted butter, room temperature
  • 1 cup granulated sugar
  • 1 large egg
  • ¼ cup molasses
  • 1 tablespoon water
  • 2–¼ cups all-purpose flour
  • 2 teaspoons ground ginger
  • 1 teaspoon baking soda
  • 1 teaspoon ground cinnamon
  • ½ teaspoon ground cloves
  • pinch of kosher salt

For the buttercream:

  • 1 cup (2 sticks) unsalted butter, room temperature
  • 4 cups (454 grams) powdered sugar, sifted
  • pinch of kosher salt
  • 3 tablespoons heavy cream
  • 1 tablespoon pure vanilla extract

For the salted caramel sauce:

  • 6 ounces (about 25 candies) Werther’s soft caramel candies, unwrapped
  • 1 tablespoon water
  • ½ teaspoon kosher salt

Special Tools:

  • 2 ounce disher
  • #6 round piping tip
  • piping bag

Instructions

For the cookies:

  1. In a mixing bowl, cream together the butter and sugar until whipped and fluffy-about 2 minutes, scraping the sides of the bowl half-way through.
  2. Add in the egg and mix until fully incorporated. Then mix in the molasses and water.
  3. Next, dump in the flour, ground ginger, baking soda, cinnamon, cloves, and salt. Mix on low until no flour is visible, and then mix for an additional 30 seconds on medium-high until dough reaches the consistency of Play Doh.
  4. Chill the dough for 15-20 minutes (I keep it in the mixing bowl). While dough chills, preheat oven to 350°f.
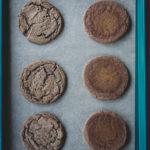
  5. Line two cookie sheets with parchment. When dough is done chilling, use a 2 ounce disher (blue handled, #16) or ¼ cup measuring cup to scoop out balls of dough placing 5 balls on each cookie sheet. Keep about 2-3” of space between cookies, as these spread out while they bake.
  6. Bake for 14-15 minutes. Cool on cookie sheets until room temperature. Cookies will still be soft but will firm up as they cool.
For the buttercream frosting:

  1. While the cookies are baking, make the frosting by first whipping the butter until creamy and lighter in color, about 1 minute. Next add in the powdered sugar, mixing on lowest setting until the powdered sugar has absorbed most of the butter. Stop, scrap down the sides, and then mix on medium high until it starts to whip up and resemble frosting.
  2. Next, add in vanilla and cream, mixing on low, and then gradually increasing to high. Whip for two minutes until light and fluffy. Set aside.
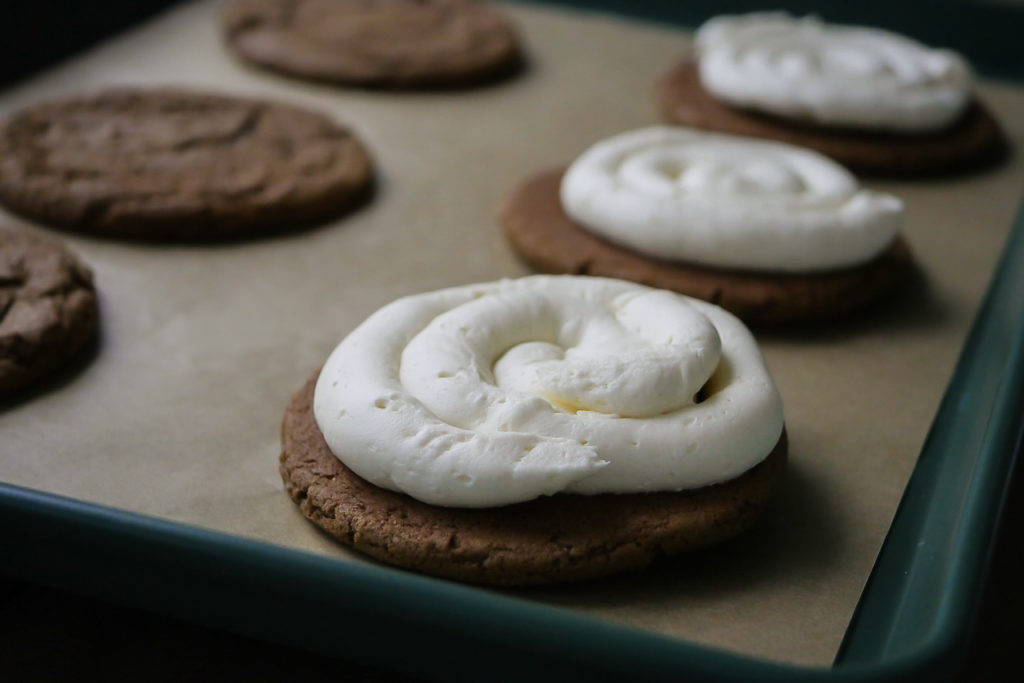
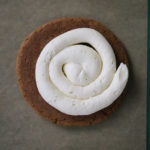
  3. When cookies are room temperature, move frosting to a piping bag fitting with a round piping tip. Pipe the frosting onto the bottom cookie half in a spiral starting from the center and moving outward. Set aside.
For the salted caramel sauce:

  1. To make the caramel sauce, combine the unwrapped caramels, water, and salt into a small saucepan over medium-low heat. When the caramels start to soften, mix continuously until smooth. Remove from the heat and let cool for 5 minutes, stirring frequently.

  2. When the caramel is still pourable, but not super liquidy, drizzle over the buttercream halves (if the caramel is too hot, it will melt the buttercream). Top with the other cookie half and enjoy!

Notes

  • Dough can be made in advance and stored in an airtight container in the refrigerator for up to 3 days.
  • If you want to make smaller cookies, reduce cooking time by about 5 minutes.
  • Cookies can be baked ahead of time and stored in an airtight container on the counter for up to 5 days. They can also be individually wrapped and frozen up to 4 months.
  • This frosting will make slightly more than you need. Extra frosting can be stored in an airtight container in the refrigerator for up to a week. Let come to room temp and re-whip if necessary before using.
  • Frosting can also be spread onto the cookies instead of piped if you prefer.
  • Any unused caramel sauce can be stored in an airtight container in the refrigerator for up to a month. If sauce sticks in the pan, re-warm slightly until soft and then transfer to the container.
  • Assembled cookies can be stored tightly wrapped in the refrigerator for up to 3 days.

Nutrition

  • Serving Size: 5 Cookies

Did you make this recipe?

Tag @magicaltreatsathome on Instagram and hashtag it #magicaltreatsathome

Share this:

  • Click to share on Facebook (Opens in new window) Facebook
  • Click to share on X (Opens in new window) X

Like this:

Like Loading...

Filed Under: Recipes, Treats Tagged With: buttercream frosting, caramel, cookies, Epcot, Germany, gingerbread, holiday, treat, WDW

Colorful Fruit Hand Pies

December 3, 2022 by Elana Lepkowski Leave a Comment

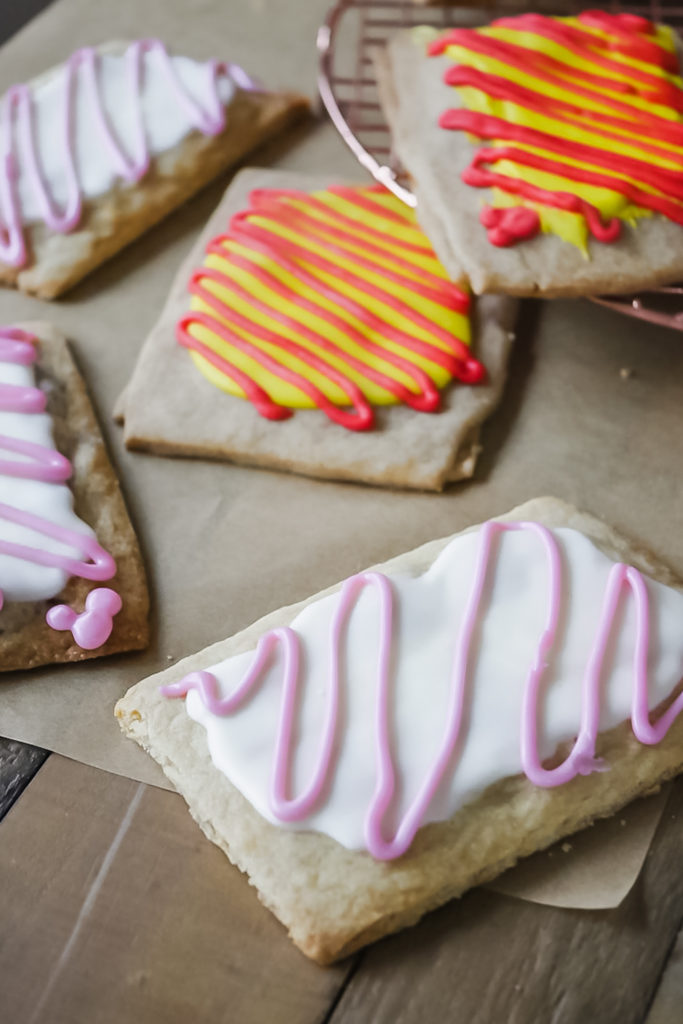
Fruity Hand Pies // magicaltreatsathome.com

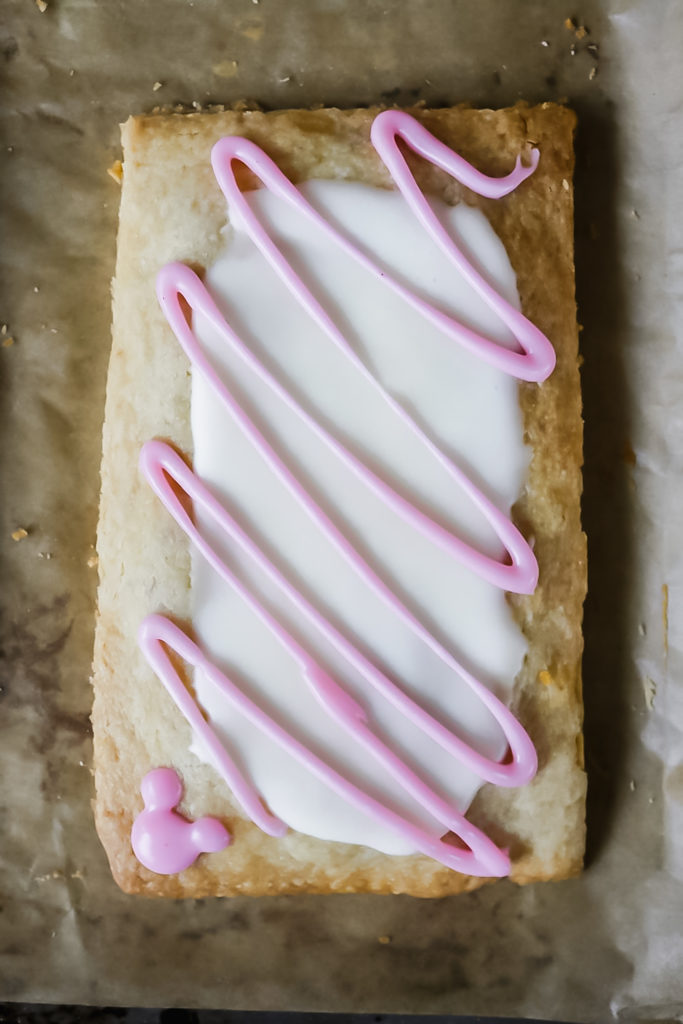
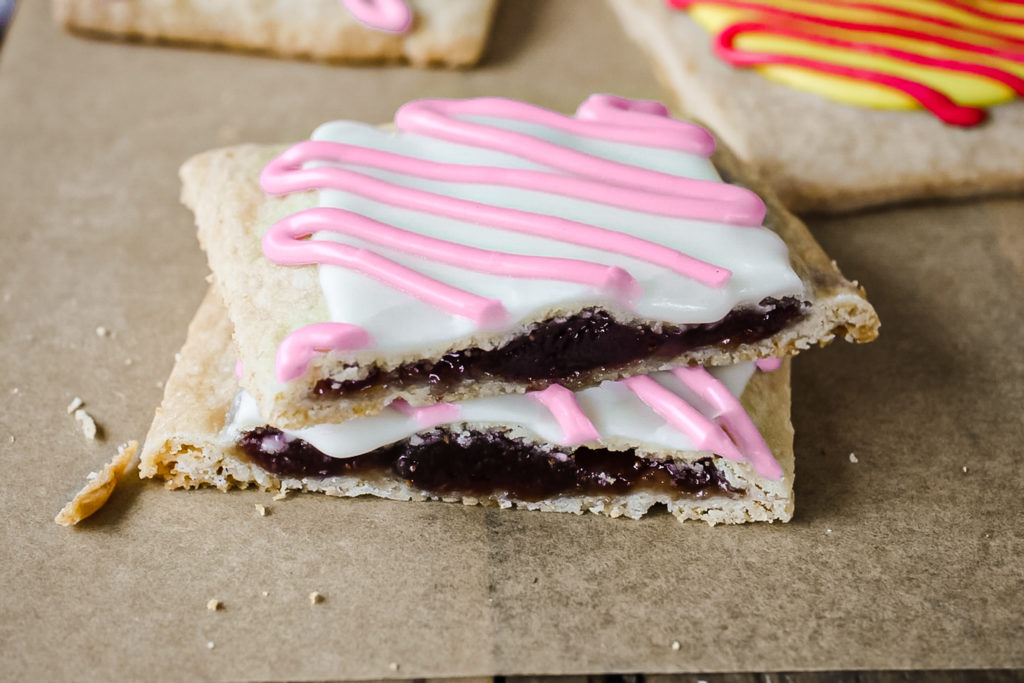
I get visibly excited anytime the Disney parks roll out a new form factor of treats. I may even exclaim an audible “ooooh” in public when I see them. So, suffice to say, I was on the verge of hopping up and down when Disneyland announced not just one, or two, or three, but five new hand pies earlier this year. 

Usually one could catch a seasonal hand pie at the Jolly Holiday Bakery Cafe, although many times, but not always, it was strawberry filled with different decorations, my favorite exception being the Coco hand pies with the guava filling from 2020 right before the park temporarily closed (and I was going to make these for the site and even sourced the sugar skulls! I might still one day…). I had, incorrectly, assumed that these were going to be a temporary summer treat, but lo! They’re with us 6 months later, and still popular with guests. Similarly to the year-round treats found at The Candy Palace, Pooh Corner, Trolley Treats, Bing Bong’s, and Marceline’s, the hand pies span both parks and Downtown Disney, the catch is, each store has a different flavor, so if you want a specific kind, you need to be in the right place. 

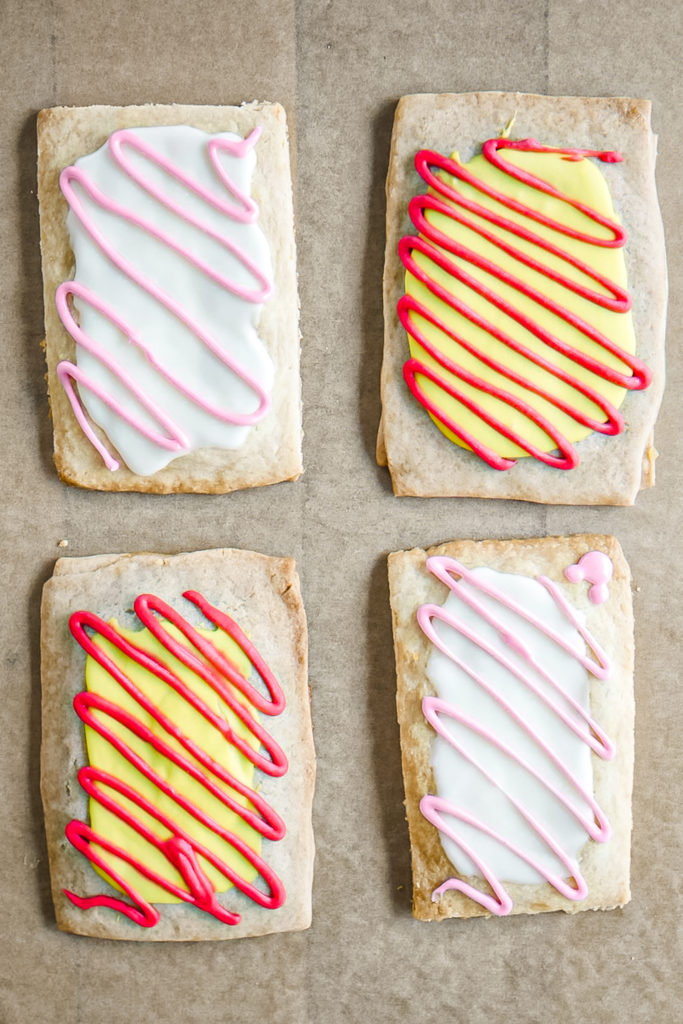
Or you can make them at home! Which is what I’ve got for you all today. In the recipe below, I’m giving you my tried and tested pop tart base recipe and icing ratios. Then you can choose your own adventure when it comes to the filling. I’m also including the Americolor food coloring names that correspond to each flavor decoration to take the guesswork out of that (unless you are using another brand of food coloring, in which case, you will be guessing, sorry!). 

I opted to not include filling recipes, as I’ve found that store bought jams, curds, and pastes work just as well as homemade (but if you want to make one of the fillings from scratch, let me know and I can amend below). I made a lemon curd and tested it against a store bought curd for the lemon filling, and my only complaint is that the store bought was not as vibrant, but still tasted fine.

For the base, go with an all purpose flour. I tested pastry flour and found it went too soft on me. And FYI, my lemon hand pies here look a little darker than the strawberry, as I went with a stone ground all purpose from Janie’s Mill which gives a darker color than the standard AP flour you find at the grocery store (like King Arthur or Gold Medal). Both AP flours though are great no matter which you go with. 

And finally, the icing takes, at a minimum, 30 minutes to set up. So, if you wanted to, say, put a bunch of sprinkles on top, that would be the time to do it. Also, remember to read all the tips and tricks in the recipe card below for your best bake!

Let me know which flavors you make! And happy baking!

Print
clock clock iconcutlery cutlery iconflag flag iconfolder folder iconinstagram instagram iconpinterest pinterest iconfacebook facebook iconprint print iconsquares squares iconheart heart iconheart solid heart solid icon

Colorful Fruit Hand Pies

5 Stars 4 Stars 3 Stars 2 Stars 1 Star No reviews
  • Author: Elana Lepkowski
  • Prep Time: 90 minutes
  • Chill time: 30 minutes
  • Cook Time: 15 minutes
  • Total Time: 2 hours 15 minutes
  • Yield: 4 Hand Pies 1x
  • Category: Dessert
  • Cuisine: American
Print Recipe
Pin Recipe

Description

Inspired by the summery hand pies found throughout the Disneyland Resort.


Ingredients

Scale

This base dough was adapted from the Bravetart Cookbook.

Dough:

  • 150 g (5.3 oz, 1–1/2 heaping cups) All Purpose Flour
  • 25 g (.8 oz, 1/8 cup) granulated sugar
  • 1/2 teaspoon baking powder
  • pinch of salt
  • 1 stick of butter, cut into cubes
  • 92 g (3.2 oz, 1/4 cup) light corn syrup

Icing:

  • 100 g (3.5 oz, 3/4 cup plus 2 tablespoons) powdered sugar
  • 2–3 tablespoons heavy cream, divided
  • 1/2 teaspoon vanilla extract
  • pinch salt

Fillings:

  • smooth strawberry jam
  • lemon curd
  • raspberry jam
  • blueberry jam
  • guava paste

Americolor Gel Paste Color Combos (Base/Drizzle):

  • Strawberry: White (no color on base)// Deep Pink
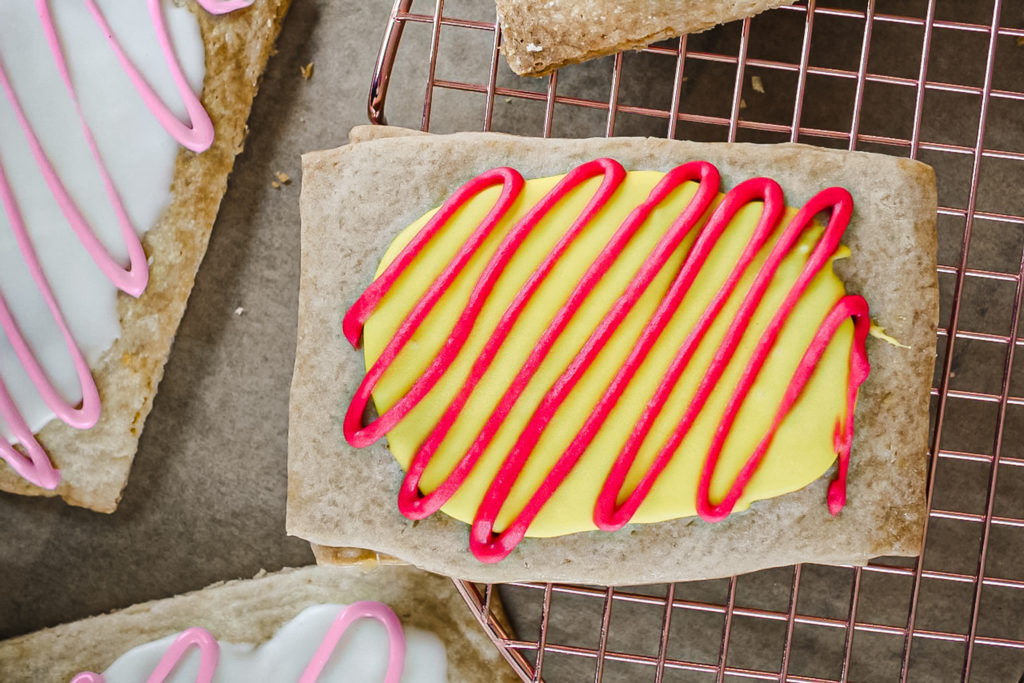
  • Lemon: Lemon Yellow // Red Red
  • Raspberry: Deep Pink // Violet
  • Guava: Orange // Leaf Green
  • Blueberry: Turquoise // White (no color on drizzle)

Instructions

For the dough:

  1. In a mixing bowl, whisk together the flour, sugar, baking powder, and salt.
  2. Add in the butter and combine until the mixture resembles wet sand (the butter should be fully incorporated with no chunks).
  3. Next, pour in the corn syrup and mix until it comes together and forms a thick dough.
  4. Form into a ball and then flatten into a disc. At this point you can either use the dough, or wrap tightly with plastic wrap or alternative wrap and refrigerate up to a week. (Chilled dough will need to sit out and reach room temperature, about 30 minutes, first.)
  5. On a floured work surface, roll dough out into a 13″ by 10″ rectangle. Divide dough in lengthwise to create to rectangles 5″ high. Next divide dough vertically into 4 long rectangles that measure 3-1/4″ wide. This will give you 8 total rectangles. (Note: I find drawing the entire dimensions listed on a piece of parchment first and then scoring the dough with a ruler or chopstick helpful for cutting later)
  6. Place 4 of the rectangles on a parchment lined sheet pan, and spread about 1 tablespoon of your filling evenly and thinly on each rectangle, leaving a 1/2″ border around all four edges.
  7. Cover these rectangles with the unused dough, placing them directly over the filling and bottom rectangles. Lightly pat the dough down over the filling and lightly press around all edges (no need to crimp the dough together).
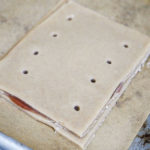
  8. Poke 8 holes in each hand pie, and then cover tightly with plastic wrap or alternative wrap. Refrigerated for 30 minutes.
  9. Preheat oven to 350°f during this time.
  10. Remove tray from the refrigerator after 30 minutes, remove plastic wrap, and place in oven for 14 to 16 minutes until still light blonde in color but dry.
  11. Cool on the sheet pan until room temperature.

For the icing:

  1. In a small mixing bowl, combine the powdered sugar, 1-1/2 tablespoons cream, vanilla extract, and salt until stiff and no powdered sugar remains visible.
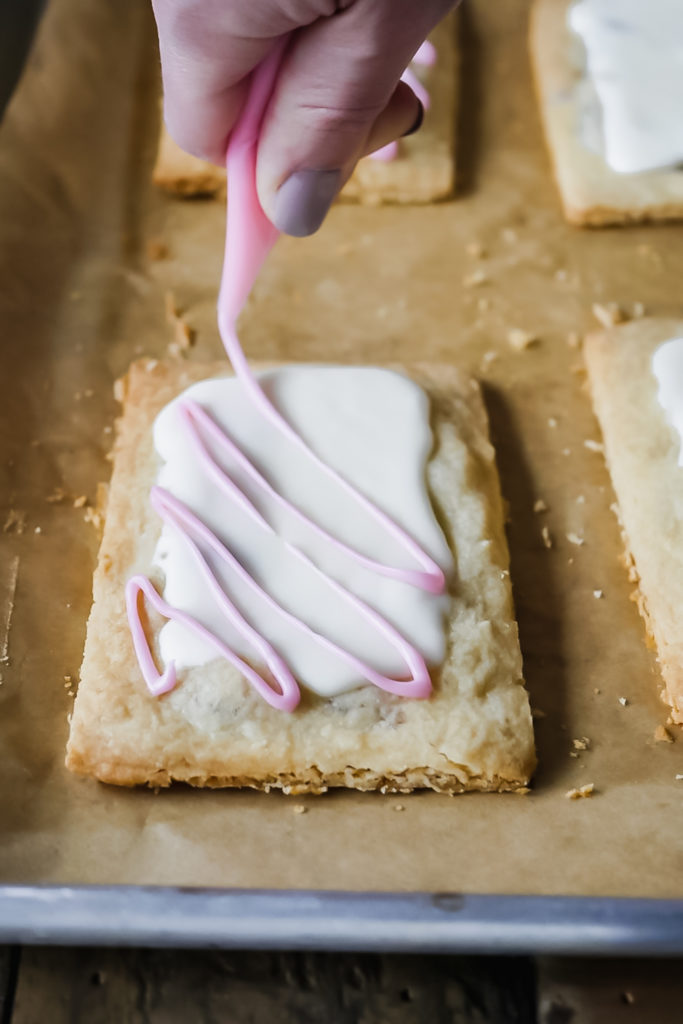
  2. Remove 1/4 of the mixture to a piping bag for the drizzle. You can add a drop of food coloring directly to the bag and knead until uniform in color. Set aside.
  3. Next, add another tablespoon of cream to the remaining mixture. If your icing is still too stiff, add another teaspoon or two until smooth and easily spreadable. If you go too far and it’s so runny it immediately drips off the hand pie, you can mix in a tablespoon or two of powdered sugar.
  4. At this point you can leave white for the strawberry hand pie, or mix in the desired color using the color combos above.
  5. Spread an even layer of the base icing on the hand pie, let the icing for a crust before adding the drizzle, otherwise the drizzle will sink into the base and the colors will bleed.
  6. Allow 30 minutes for the icing to harden up, however with the cream, it will be a ‘soft’ icing and not brittle.

Notes

  • Recipe can be doubled to make 8 hand pies.
  • Corn syrup may be “vanilla” flavored or plain.
  • If your dough is sticky when rolling out, place the dough between two sheets of parchment.
  • You can trim the edges with a knife or pizza cutter when they come out of the oven for sharper, defined lines.
  • Store at room temperature for up to 5 days, refrigerated for 1 week.
  • The longer the base and drizzle colors sit together, the greater chance they will begin to bleed together.

Did you make this recipe?

Tag @magicaltreatsathome on Instagram and hashtag it #magicaltreatsathome

Share this:

  • Click to share on Facebook (Opens in new window) Facebook
  • Click to share on X (Opens in new window) X

Like this:

Like Loading...

Filed Under: Recipes, Treats Tagged With: blueberry, disneyland, guava, hand pies, icing, lemon curd, pastry dough, raspberry, strawberry, treat

Primary Sidebar

Follow Us

  • Instagram
  • Facebook
  • X
  • Pinterest
  • Email
  • YouTube

Hi! My name is Elana, and that’s me shoving a Mickey Mouse shaped treat in my face. I love the treats at Disneyland. A lot. So much so I’ve dedicated an entire website to making all my favorites, and hopefully yours too, out of my home kitchen. My aim is to create Disneyland-inspired treats, with easy to follow directions, and many recipes geared towards getting the kids in the kitchen to help too! Because putting sprinkles on things is F-U-N.

Top With Sprinkles

Get Recipes in Your Inbox!

* indicates required

Look for this icon in posts to find Kid Friendly recipes!

Recent Posts

  • Matterhorn Macaroon
  • Caramel Gingerbread Cookie Sandwiches
  • Colorful Fruit Hand Pies
  • Classic Mickey Shaped Beignets
  • Carrot Cake Cookies

Archives

  • February 2023
  • December 2022
  • August 2022
  • January 2022
  • December 2021
  • November 2021
  • December 2020
  • November 2020
  • October 2020
  • September 2020
  • August 2020
  • July 2020
  • June 2020
  • May 2020
  • April 2020
  • March 2020
  • February 2020
  • January 2020
  • December 2019
  • November 2019
  • October 2019
  • September 2019
  • August 2019
  • July 2019
  • June 2019
  • May 2019

Copyright © 2025 Magical Treats at Home on the Foodie Pro Theme

%d