• Skip to primary navigation
  • Skip to main content
  • Skip to primary sidebar

Magical Treats at Home

  • About
  • Treats
  • Drinks
  • Savory
  • Favorite Tools
  • Etsy Shop

holiday

Caramel Gingerbread Cookie Sandwiches

December 18, 2022 by Elana Lepkowski Leave a Comment

Where can I find the original treat?

Whoopie pies, mini cakes, giant cookies, give me a handheld dessert to walk around and snack on at the parks and I’m a happy person. One favorite handheld dessert at EPCOT has a cult-like following, and for good reason, it’s DELICIOUS.
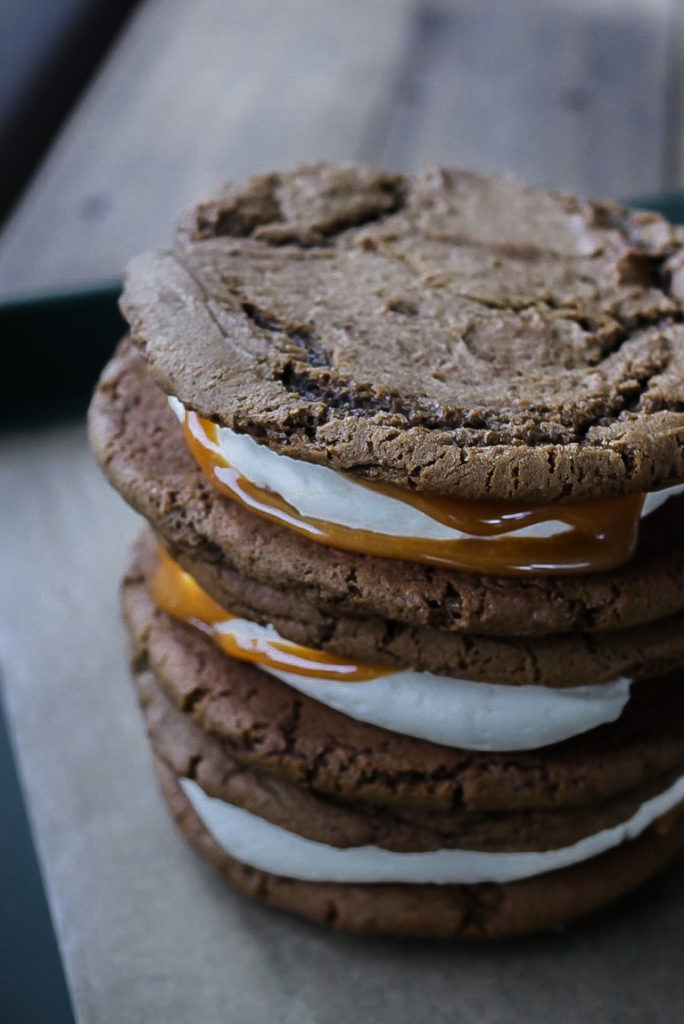
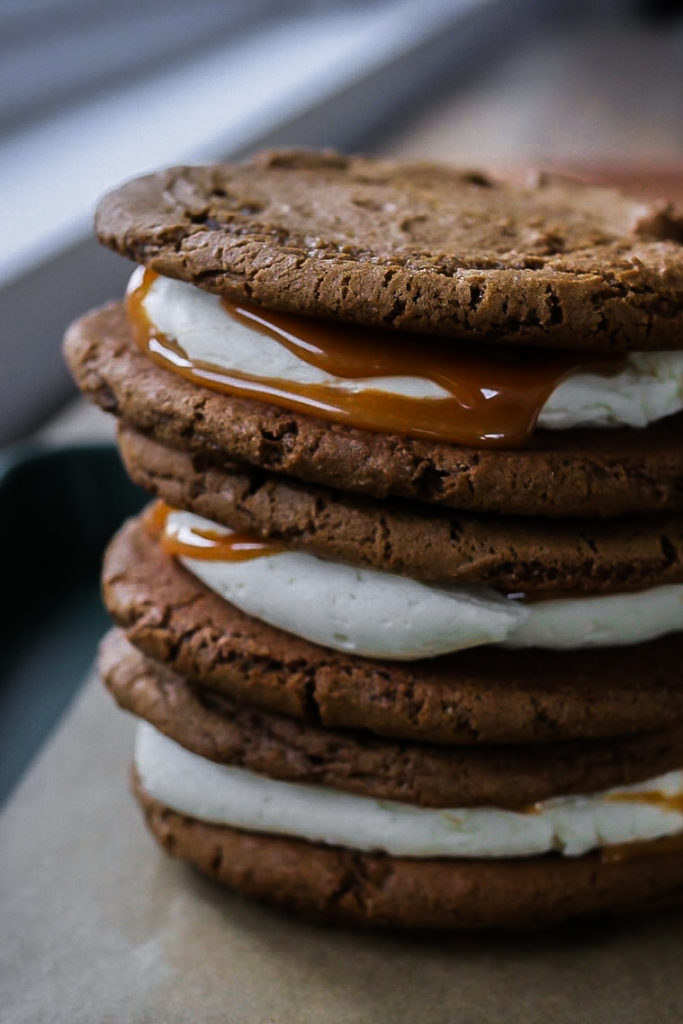
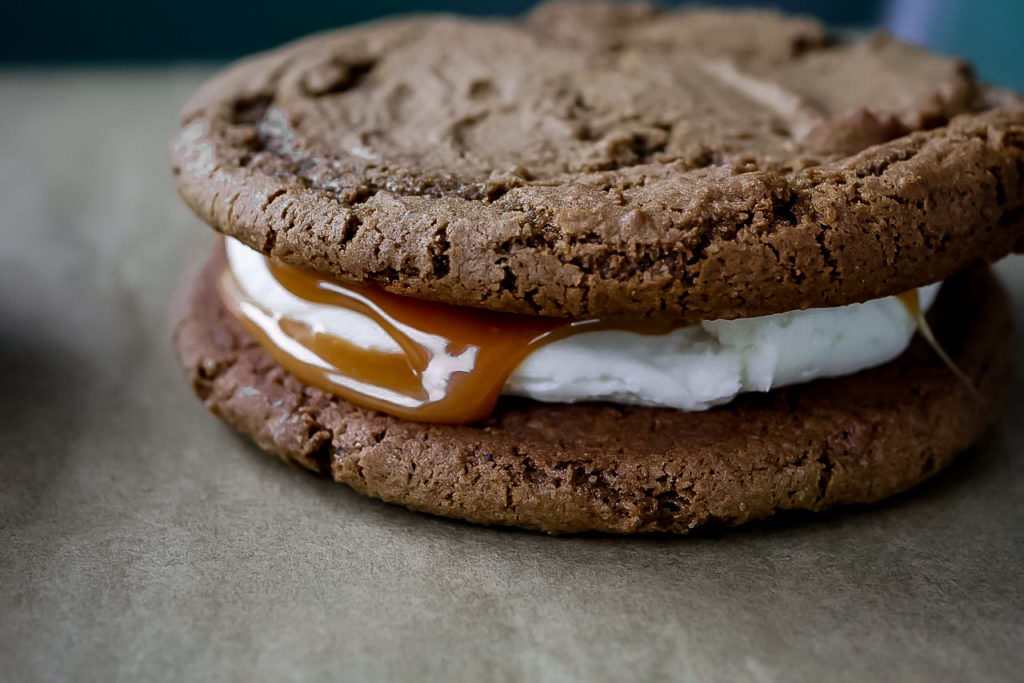
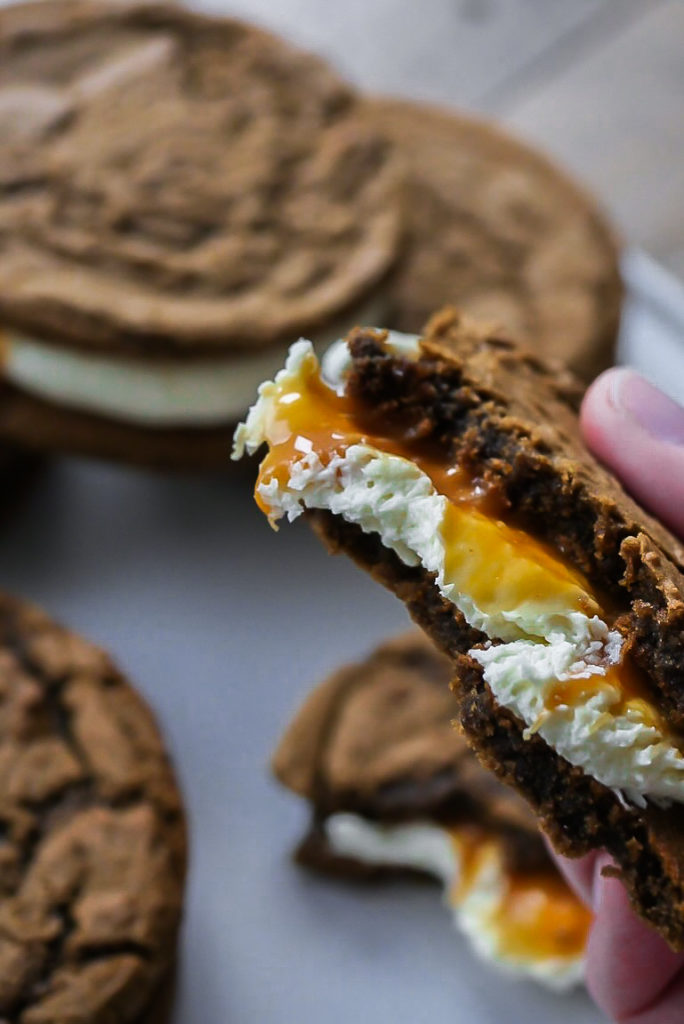
If you’re a caramel fan, then you’ve more than likely made your way over to Karamell-Küche (“caramel kitchen”) in EPCOT and tried one of the many, many amazing caramel-themed treats there. One absolute favorite on the menu is the seasonal Caramel Gingerbread cookie sandwiches. They are a sizeable handful of two oversized gingerbread cookies stuffed with American-style buttercream and oozing with Werther’s caramel. SO. GOOD.
So good in fact I had to make them at my home and share the recipe with you all, because after you’ve run out of your stash and your next trip is months away, this should hold you over.

Although there are three separate parts to this cookie, it comes together rather quickly. To keep it in-theme with the park version, I actually use Werther’s soft caramels and add some salt to them. It cuts down on making the caramel from scratch, although if that’s something you’d like to do, go for it!
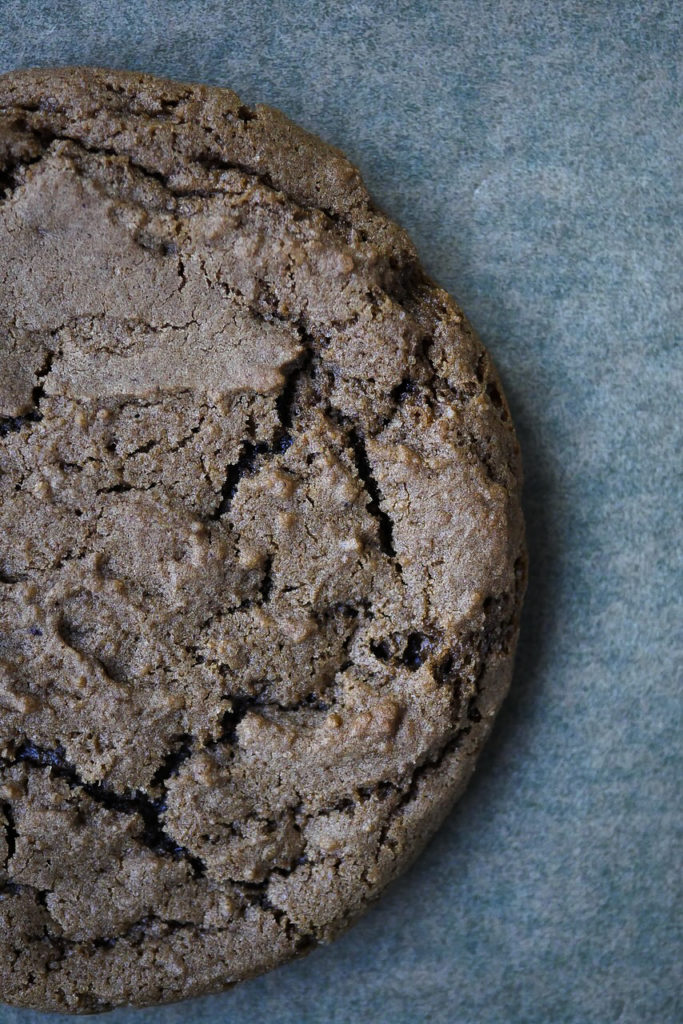
The dough recipe is easy to work with and requires minimal chilling. They do spread, which is why I recommend scooping into balls and baking them without flattening. If you want to make these cookies smaller, reduce the bake time by a few minutes or they’ll get too hard.

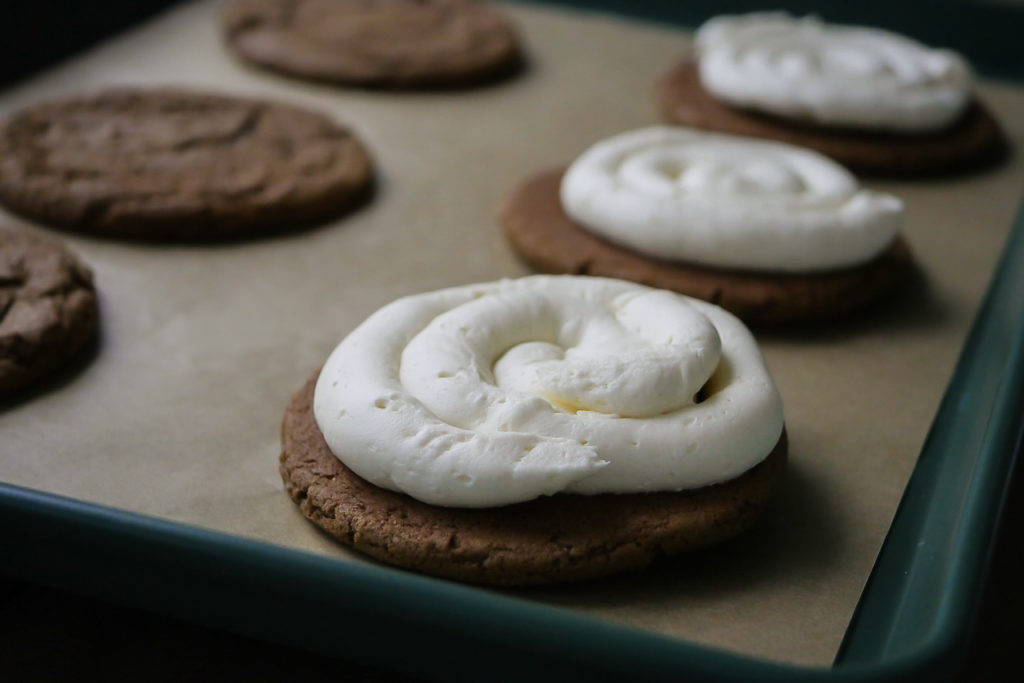
And the buttercream is straight-up American style, so nothing fancy here. Just whip up the butter, powdered sugar, vanilla, and cream and you’re done.
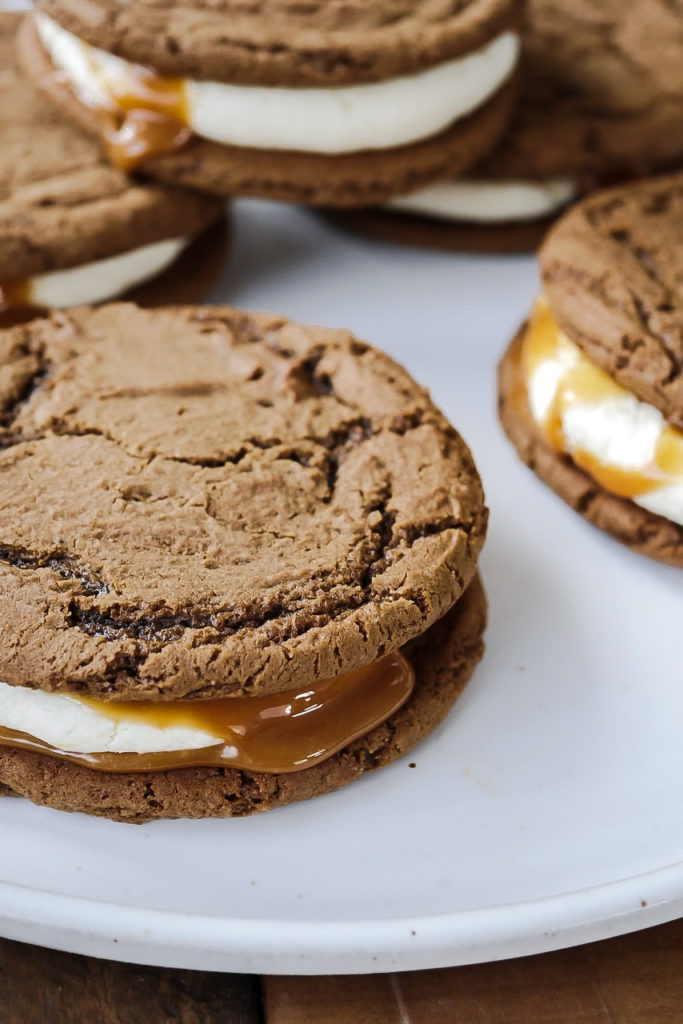
This is super kid-friendly recipe, and most components can be done by even the littlest hands. Older kids can definitely help with the caramel melting by themselves, and since you’re just warming those candies, even younger kids with supervision can do that part. Let’s just remind them not to stick their fingers into the hot pan. And even some of the adults might need that reminder too…

So let’s make our own caramel kitchen today and bake some cookies! And remember to check all the way through the recipe for helpful tips and tricks.
Print
clock clock iconcutlery cutlery iconflag flag iconfolder folder iconinstagram instagram iconpinterest pinterest iconfacebook facebook iconprint print iconsquares squares iconheart heart iconheart solid heart solid icon

Caramel Gingerbread Cookie Sandwiches

5 Stars 4 Stars 3 Stars 2 Stars 1 Star No reviews
  • Author: Elana Lepkowski
  • Yield: 5 cookies 1x
  • Category: Dessert
  • Cuisine: German
Print Recipe
Pin Recipe

Description

These oversized, beautifully spiced gingerbread cookies sandwich a generous amount of buttercream and salted caramel. Inspired by the Karamell-Küche cookies found at EPCOT in WDW.


Ingredients

Scale

For the cookies:

  • 1 stick (½ cup) unsalted butter, room temperature
  • 1 cup granulated sugar
  • 1 large egg
  • ¼ cup molasses
  • 1 tablespoon water
  • 2–¼ cups all-purpose flour
  • 2 teaspoons ground ginger
  • 1 teaspoon baking soda
  • 1 teaspoon ground cinnamon
  • ½ teaspoon ground cloves
  • pinch of kosher salt

For the buttercream:

  • 1 cup (2 sticks) unsalted butter, room temperature
  • 4 cups (454 grams) powdered sugar, sifted
  • pinch of kosher salt
  • 3 tablespoons heavy cream
  • 1 tablespoon pure vanilla extract

For the salted caramel sauce:

  • 6 ounces (about 25 candies) Werther’s soft caramel candies, unwrapped
  • 1 tablespoon water
  • ½ teaspoon kosher salt

Special Tools:

  • 2 ounce disher
  • #6 round piping tip
  • piping bag

Instructions

For the cookies:

  1. In a mixing bowl, cream together the butter and sugar until whipped and fluffy-about 2 minutes, scraping the sides of the bowl half-way through.
  2. Add in the egg and mix until fully incorporated. Then mix in the molasses and water.
  3. Next, dump in the flour, ground ginger, baking soda, cinnamon, cloves, and salt. Mix on low until no flour is visible, and then mix for an additional 30 seconds on medium-high until dough reaches the consistency of Play Doh.
  4. Chill the dough for 15-20 minutes (I keep it in the mixing bowl). While dough chills, preheat oven to 350°f.
  5. Line two cookie sheets with parchment. When dough is done chilling, use a 2 ounce disher (blue handled, #16) or ¼ cup measuring cup to scoop out balls of dough placing 5 balls on each cookie sheet. Keep about 2-3” of space between cookies, as these spread out while they bake.
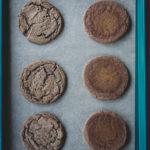
  6. Bake for 14-15 minutes. Cool on cookie sheets until room temperature. Cookies will still be soft but will firm up as they cool.
For the buttercream frosting:

  1. While the cookies are baking, make the frosting by first whipping the butter until creamy and lighter in color, about 1 minute. Next add in the powdered sugar, mixing on lowest setting until the powdered sugar has absorbed most of the butter. Stop, scrap down the sides, and then mix on medium high until it starts to whip up and resemble frosting.
  2. Next, add in vanilla and cream, mixing on low, and then gradually increasing to high. Whip for two minutes until light and fluffy. Set aside.
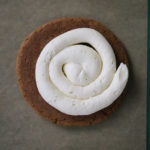
  3. When cookies are room temperature, move frosting to a piping bag fitting with a round piping tip. Pipe the frosting onto the bottom cookie half in a spiral starting from the center and moving outward. Set aside.
For the salted caramel sauce:

  1. To make the caramel sauce, combine the unwrapped caramels, water, and salt into a small saucepan over medium-low heat. When the caramels start to soften, mix continuously until smooth. Remove from the heat and let cool for 5 minutes, stirring frequently.

  2. When the caramel is still pourable, but not super liquidy, drizzle over the buttercream halves (if the caramel is too hot, it will melt the buttercream). Top with the other cookie half and enjoy!

Notes

  • Dough can be made in advance and stored in an airtight container in the refrigerator for up to 3 days.
  • If you want to make smaller cookies, reduce cooking time by about 5 minutes.
  • Cookies can be baked ahead of time and stored in an airtight container on the counter for up to 5 days. They can also be individually wrapped and frozen up to 4 months.
  • This frosting will make slightly more than you need. Extra frosting can be stored in an airtight container in the refrigerator for up to a week. Let come to room temp and re-whip if necessary before using.
  • Frosting can also be spread onto the cookies instead of piped if you prefer.
  • Any unused caramel sauce can be stored in an airtight container in the refrigerator for up to a month. If sauce sticks in the pan, re-warm slightly until soft and then transfer to the container.
  • Assembled cookies can be stored tightly wrapped in the refrigerator for up to 3 days.

Nutrition

  • Serving Size: 5 Cookies
Did you make this recipe?

Tag @magicaltreatsathome on Instagram and hashtag it #magicaltreatsathome

Share this:

  • Click to share on Facebook (Opens in new window) Facebook
  • Click to share on X (Opens in new window) X

Like this:

Like Loading...

Filed Under: Recipes, Treats Tagged With: buttercream frosting, caramel, cookies, Epcot, Germany, gingerbread, holiday, treat, WDW

Peanut Butter and Chocolate Cookie Pie

December 31, 2021 by Elana Lepkowski 2 Comments

Peaut Butter Chocolate Cookie Pie // magicaltreatsathome.com

Where can I find the original treat?

  • The original treat can be found at the Candy Palace in Disneyland.

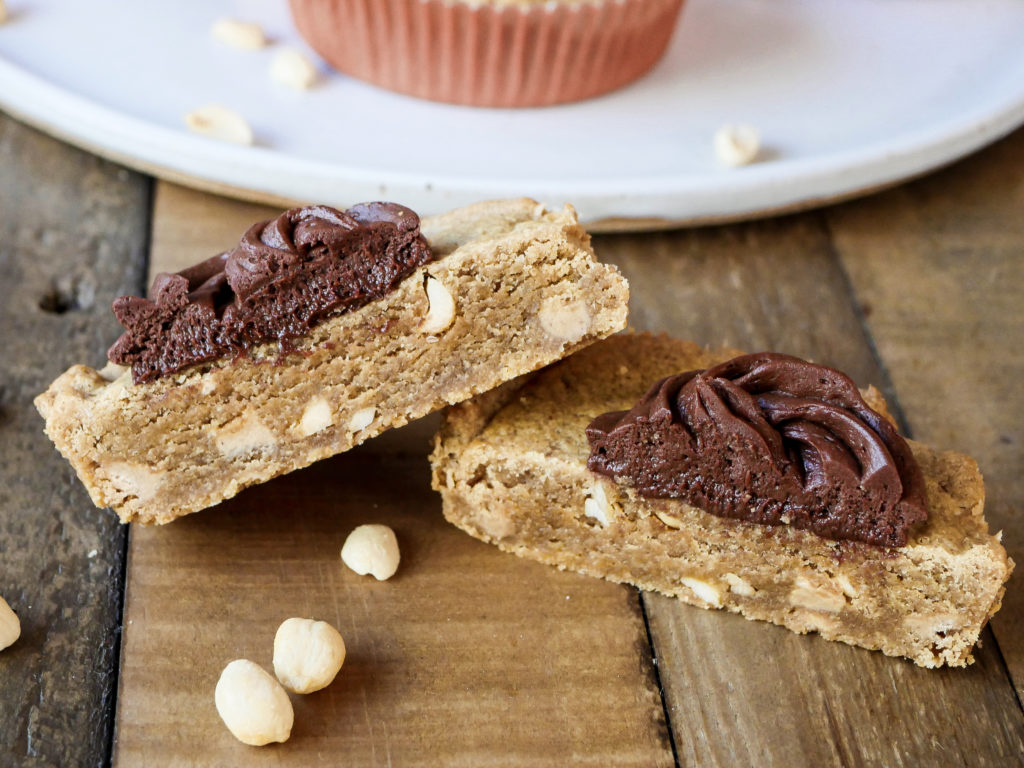
We’re closing out the year squeezing this recipe in just before the clock rings midnight. While I am a huge fan of chocolate and peppermint, I know there are some of you (my husband being the most vocal) who cannot take that delicious holiday combo. So I thought I’d add in my second favorite of the cookie/brownie “pies” over at Disneyland with this yummy treat. The Peanut Butter and Chocolate Cookie Pie is both salty and sweet, and just as richly decadent as the other new treats found over at the Candy Palace. It’s big enough to share… if you want.

Peaut Butter Chocolate Cookie Pie // magicaltreatsathome.com

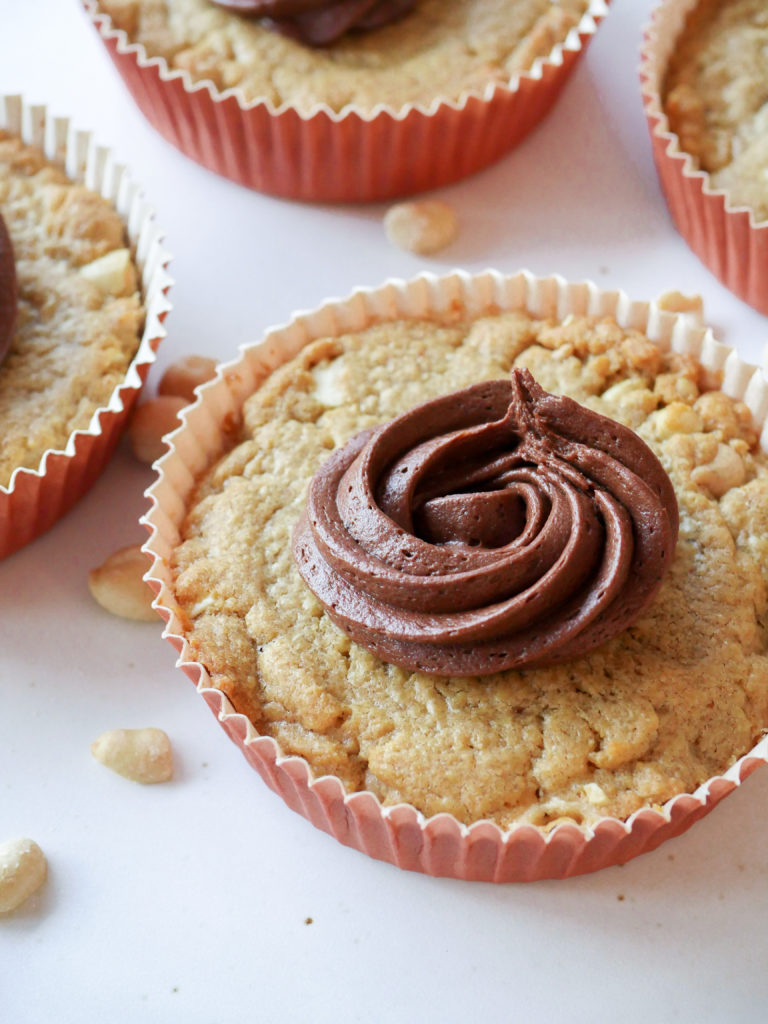
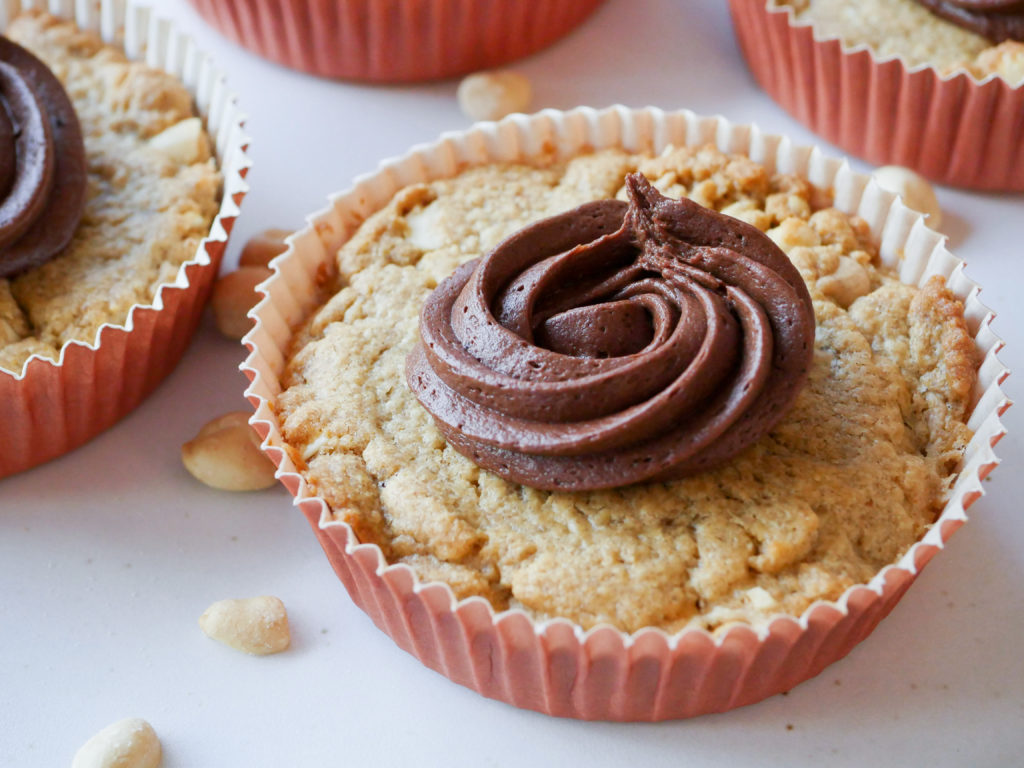
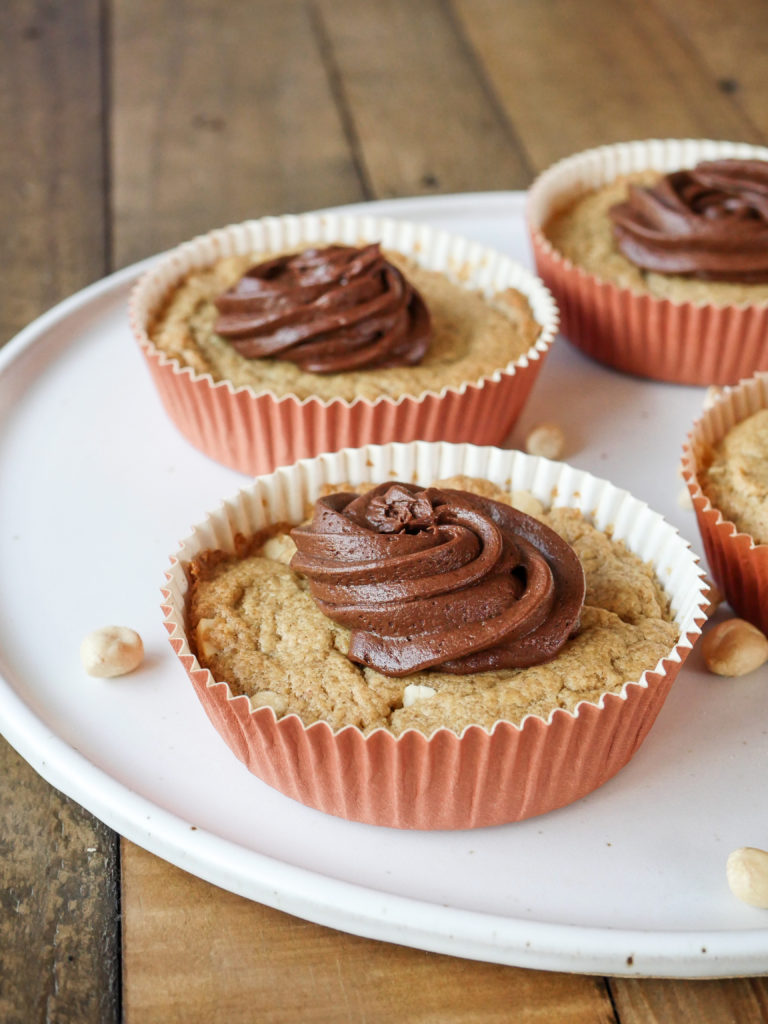
These have a similar base to the Peanut Butter Blondies, but the fillings and toppings are different. The cookie base here is chock full of peanut butter chips and chopped peanuts, topped with a swirl of fudgey chocolate frosting. I’ve pared down the recipe to make four, but if that still seems like a lot to have on hand, these will freeze well wrapped for several months.

If you’ve got kids in the kitchen, this is an all-levels recipe with opportunities for small hands to help chop, stir, and mix. We’ve been practicing piping techniques and I’ve recently been introduced to these great squeeze bulbs that are easy for kids to hold instead of the larger piping bags.

Peaut Butter Chocolate Cookie Pie // magicaltreatsathome.com

The time and temperature I’ve put in the recipe will result in the peanut butter cookie pies having a firm exterior and moist center, but not so moist as to fall apart. You can take the time down a few minutes if you prefer your cookie pies to have that very soft cookie center. How much chocolate you add to the top is also to you. Did I test one completely covered in chocolate on top? Yes, yes I did. The chocolate gives this a much needed sweet bite that complements the salty peanut butter (but don’t worry, it’s not too salty-savory). If you find that your frosting is too stiff, add a teaspoon of cream until it is soft enough for your liking.

I’ve really enjoyed these new “pies” at the parks, and I’d love to see some new treat formats in 2022. Maybe an actual pie? On a stick?

Peaut Butter Chocolate Cookie Pie // magicaltreatsathome.com

Happy New Year everyone! As always, leave us a comment here or on our socials if you’ve tried one of our recipes, or if you have one you’d like to see. Thanks for visiting and making magic in your kitchen with us!

Print
clock clock iconcutlery cutlery iconflag flag iconfolder folder iconinstagram instagram iconpinterest pinterest iconfacebook facebook iconprint print iconsquares squares iconheart heart iconheart solid heart solid icon
Peaut Butter Chocolate Cookie Pie // magicaltreatsathome.com

Peanut Butter and Chocolate Cookie Pie

5 Stars 4 Stars 3 Stars 2 Stars 1 Star No reviews
  • Author: Elana Lepkowski
  • Prep Time: 20
  • Cooling Time: 15
  • Cook Time: 26
  • Total Time: 1 hour 1 minutes
  • Yield: 4 Peanut Butter and Chocolate Cookie Pies 1x
  • Category: Dessert
  • Method: Baking
  • Cuisine: Holiday
Print Recipe
Pin Recipe

Description

The classic combination of peanut butter and chocolate create a shareable treat that satisfies both your sweet and savory tastes in this oversized cookie “pie”. A Disneyland-inspired recipes.


Ingredients

Scale

Peanut Butter Base:

  • 1 stick butter (1/2 cup)
  • 1/2 cup (120 g) creamy peanut butter
  • 3/4 cup (150 g) light brown sugar
  • 1 egg
  • 1/2 teaspoon kosher salt
  • 1 teaspoon vanilla extract
  • 1 cup (120 g) flour
  • 1/2 cup (127 g) peanut butter chips
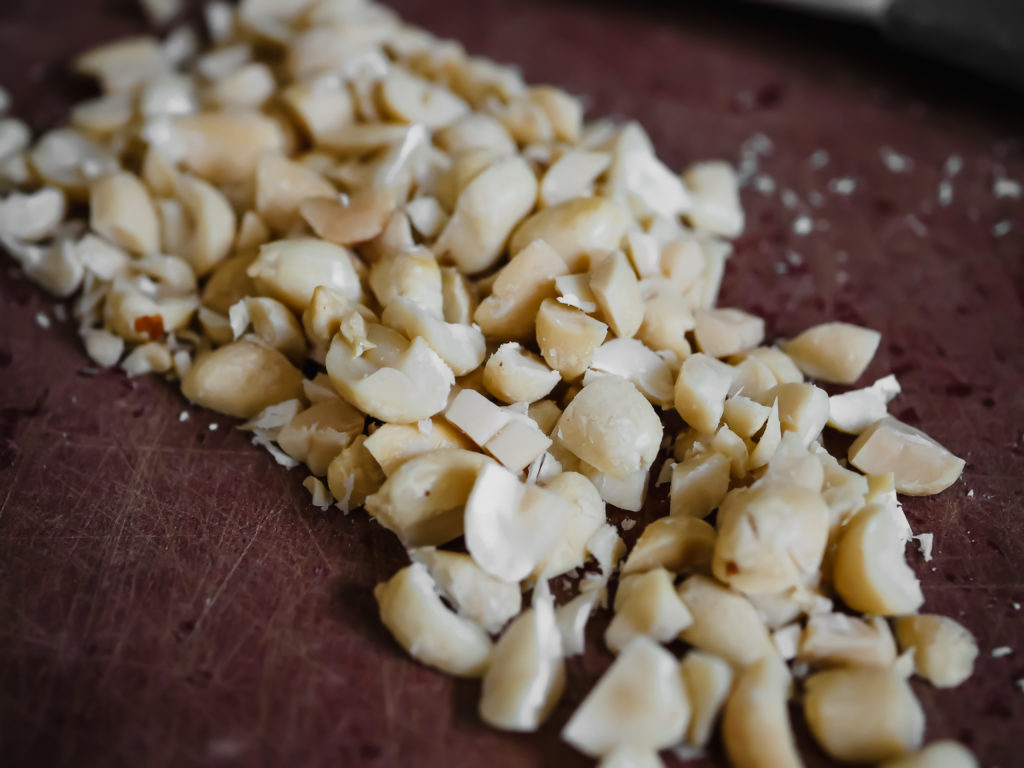
  • 1/4 cup (31 g) roasted peanuts, chopped

Fudge Frosting:

  • 1/4 cup (4 tablespoons) unsalted butter
  • 2 ounces (57 g) unsweetened baking chocolate, chopped
  • 1/2 pound (227 g) powdered sugar, sifted
  • 2 tablespoons unsweetened cocoa powder, sifted
  • 1/4 teaspoon pure vanilla extract
  • 4 tablespoons cream

Special Tools:

  • Oversized baking cups/molds
  • Wilton 1 M tip
  • Small 12″ pastry bags

Instructions

For the base:

  1. Preheat the oven to 350°f.
  2. Melt the butter in a small saucepan, or in the microwave.
  3. In a large mixing bowl, combine the melted butter, peanut butter, and brown sugar. Whisk until smooth.
  4. Mix in the egg, salt and vanilla extract until smooth.
  5. Stir in the flour until just combined.
    Peaut Butter Chocolate Cookie Pie // magicaltreatsathome.com
  6. Fold in the peanut butter chips and chopped peanuts.
    Peaut Butter Chocolate Cookie Pie // magicaltreatsathome.com
  7. Pour the mixture into 4 of the baking cups (the mixture will be on the stiff side), and smooth the tops.
    Peaut Butter Chocolate Cookie Pie // magicaltreatsathome.com
  8. Bake for 25-30 minutes.
    Peaut Butter Chocolate Cookie Pie // magicaltreatsathome.com
  9. When done, let fully cool before frosting. To help create a space for the frosting to sit, depress the center of the cookie pies with the back of a spoon.
    Peaut Butter Chocolate Cookie Pie // magicaltreatsathome.com

For the fudge frosting and finishing:

  1. Melt butter and chocolate in a double boiler, or microwave, in a heat proof bowl. For a double boiler, stir constantly over a low simmer until melted and smooth. If using a microwave, do short bursts of 15-20 second intervals, stirring in-between, until fully melted and smooth.
  2. Stir together the powdered sugar, cocoa powder, and melted chocolate and butter. Add in the vanilla extract and cream.
  3. Whip together on medium high speed (8), until well combined and smooth.
  4. Transfer frosting to a piping bag fitted with the Wilton 1M tip.
  5. Pipe rosettes in middle of the peanut butter cookie pies.
    Peaut Butter Chocolate Cookie Pie // magicaltreatsathome.com
  6. Enjoy!

Notes

  • You can also bake this in an 8×8″ baking pan lined with parchment.
  • If you’re using salted peanut butter, reduce salt in recipe to 1/4 teaspoon.
  • Extra frosting can be refrigerated up to 4 days in an air-tight container, or frozen up to 3 months. Re-whip once defrosted.
  • Bases can be wrapped with or without frosting and frozen for up to 3 months.

Did you make this recipe?

Tag @magicaltreatsathome on Instagram and hashtag it #magicaltreatsathome

Peaut Butter Chocolate Cookie Pie // magicaltreatsathome.com

Share this:

  • Click to share on Facebook (Opens in new window) Facebook
  • Click to share on X (Opens in new window) X

Like this:

Like Loading...

Filed Under: Recipes, Treats Tagged With: blondies, Candy Palace, chocolate, cookies, disneyland, holiday, peanut butter, peanuts, treat

Chocolate and Peppermint Brownie Pie

December 16, 2021 by Elana Lepkowski 2 Comments

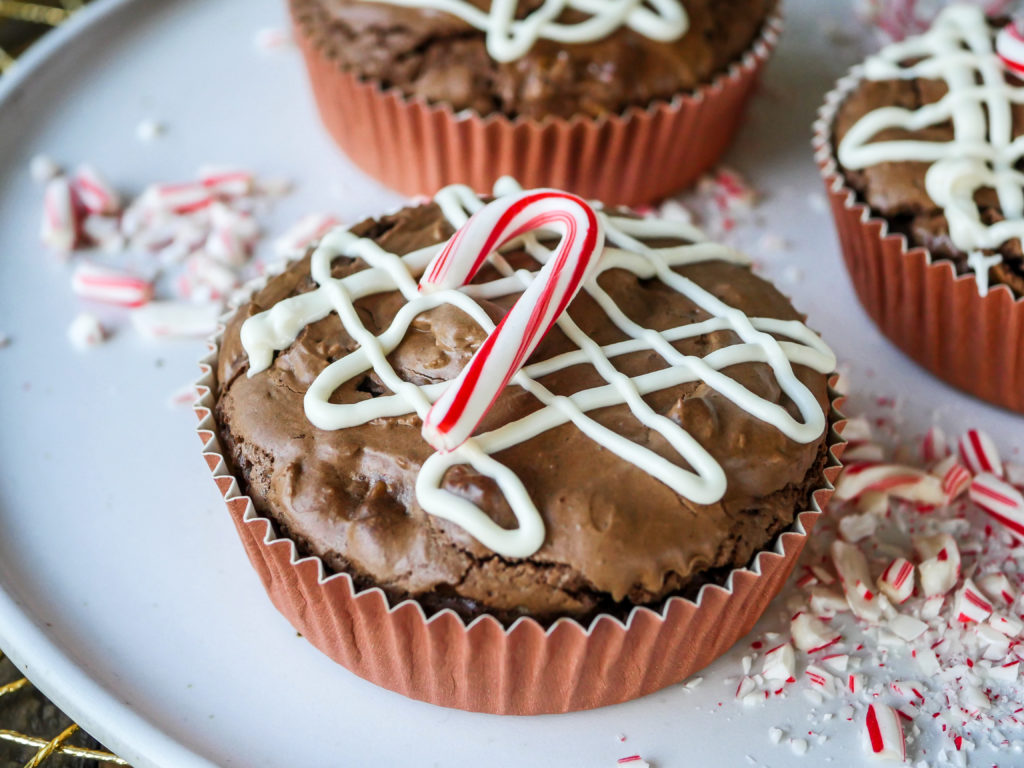
Chocolate Peppermint Brownie Pies // magicaltreatsathome.com

Where can I find the original treat?

  • The original treat can be found at the Candy Palace in Disneyland.

Hi everyone! It’s been a minute hasn’t it? Many, many minutes, but I couldn’t let a whole year go by without a new recipe, and now that they’ve opened up the gates at the parks, we’ve got all new treats to enjoy, and make!

While Disneyland and DCA tend to have the same formats for treats, and rotate or create new flavors for those, recently they’ve introduced these “pies” that are similar to giant saucer-like cookies and brownies. I’ve found that one is the perfect size for two people to share. Or eat one half in the car on the way back from the park, and the other half after the kids are asleep later that evening. Whatever works for you.

Chocolate Peppermint Brownie Pies // magicaltreatsathome.com

I’ve always been a big fan of chocolate and peppermint together in treats. I think perhaps it might have something to do with those Andes Mints we got on hotel pillows growing up (does anyone still do that?!). I get though that this combination is not for everyone, but don’t worry, I’ve got something for those that fall into that camp coming soon.

Anyways, these would make a pretty magical edible gift if you baked up a batch this holiday season. I’ve got a few going out the door this week for neighbors. 

Chocolate Peppermint Brownie Pies // magicaltreatsathome.com

If you’ve got kids in the kitchen there are a few more advanced techniques here with melting the chocolate. My 4 and 7 year old are pros at the decorating bits and especially adding the candy canes, although I suspect that they’re slipping a few of those into their pockets for later. 

It feels so good to be back in this space making treats again for all of you. I truly hope you get to make and enjoy this special recipe soon!

Print
clock clock iconcutlery cutlery iconflag flag iconfolder folder iconinstagram instagram iconpinterest pinterest iconfacebook facebook iconprint print iconsquares squares iconheart heart iconheart solid heart solid icon
Chocolate Peppermint Brownie Pies // magicaltreatsathome.com

Chocolate and Peppermint Brownie Pie

5 Stars 4 Stars 3 Stars 2 Stars 1 Star No reviews
  • Author: Elana Lepkowski
  • Prep Time: 10 minutes
  • Cook Time: 25 minutes
  • Total Time: 35 minutes
  • Yield: 6 Chocolate and Peppermint Brownie Pies 1x
  • Category: Dessert
  • Method: Baking
  • Cuisine: Holiday
Print Recipe
Pin Recipe

Description

Is it a brownie? Is it a pie? It’s both! And with the classic holiday combination of chocolate and peppermint, these shareable treats will be a hit this season. A Disneyland-inspired recipe.


Ingredients

Scale
  • 6 tablespoons unsalted butter
  • 8 ounces bittersweet chocolate (60% cacao)
  • 1/2 cup (60 g) flour
  • 1/3 cup (35 g) unsweetened cocoa powder, dutch processed (I used Valrhona)
  • 1/2 teaspoon salt
  • 3 large eggs
  • 1 cup (198 g) granulated sugar
  • 1 teaspoon vanilla extract
  • 1/2 teaspoon peppermint extract
  • 1 cup semi-sweet chocolate chunks
  • 1–1/3 cups white chocolate chunks, divided
  • 6 mini candy canes

Special Tools

  • Oversized baking cups/molds

Instructions

  1. Preheat the oven to 350°f. Set out 6 of the oversized bake cups on a half size sheet pan. Set aside.
    Chocolate Peppermint Brownie Pies // magicaltreatsathome.com
  2. In a double boiler, melt the butter and chopped bittersweet chocolate, stirring frequently until melted and smooth. Alternatively you can melt them together in the microwave inside a microwave safe bowl, like glass, for 20 seconds. Stir and microwave again for an additional 20 seconds. Keep stirring and microwaving in short bursts of 15-20 seconds until melted and smooth. Set aside to cool.
  3. Next, sift together the flour, unsweetened cocoa powder, and salt into a medium sized bowl. Set aside.
    Chocolate Peppermint Brownie Pies // magicaltreatsathome.com
  4. Whip together the eggs and sugar on high speed (10) for 5 minutes until light and frothy. This should be done with either a stand mixer or hand mixer. Then pour in the melted chocolate, vanilla extract, and peppermint extract. Stir to combine until there are no more white streaks.
  5. Next, dump in the sifted flour/cocoa/salt mix and, by hand, fold that in to combine until there are no longer any visible flour streaks.
  6. Then fold in semi-sweet chocolate and 1 cup of the white chocolate chunks, setting the additional third of a cup aside.
    Chocolate Peppermint Brownie Pies // magicaltreatsathome.com
  7. Scoop about a 1/2 cup of the mixture into each baking cup, smoothing out the top.
    Chocolate Peppermint Brownie Pies // magicaltreatsathome.com
  8. Bake for around 25-30 minutes until a toothpick comes out clean. Let cool to room temperature.
  9. While the brownie pies cool, melt the remaining 1/3 cup of white chocolate chunks. You can either melt them in the microwave in short bursts like the above direction, in a small double boiler, or using a candy melting pot (my favorite way of melting small amounts of chocolate and candy melts).
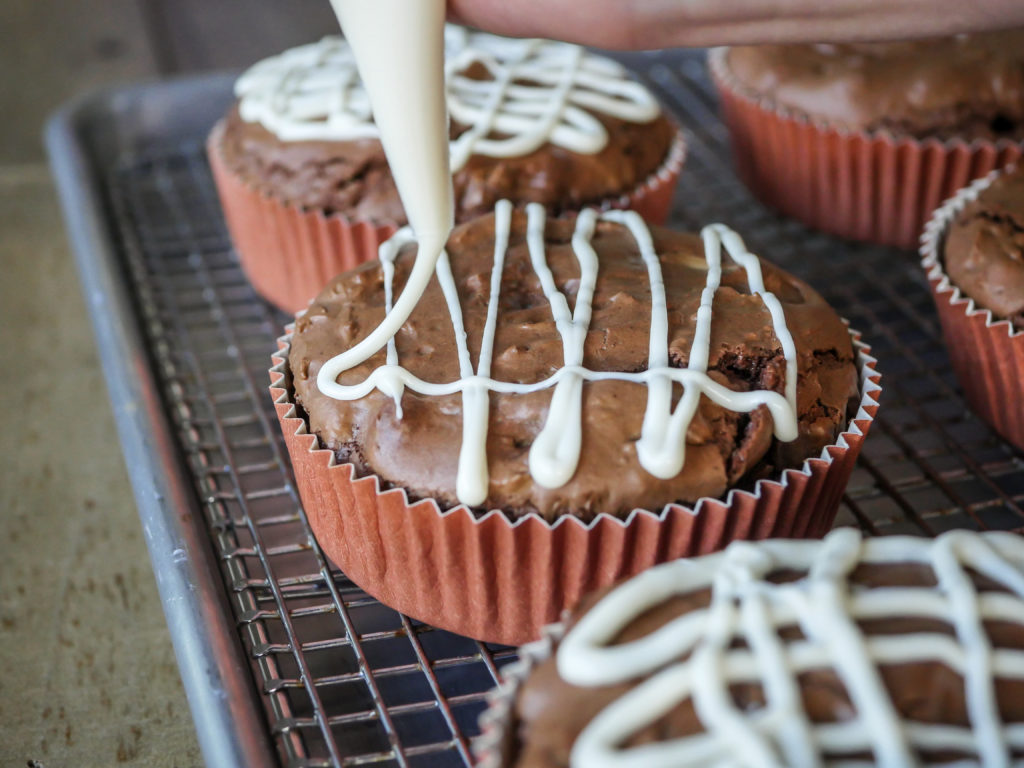
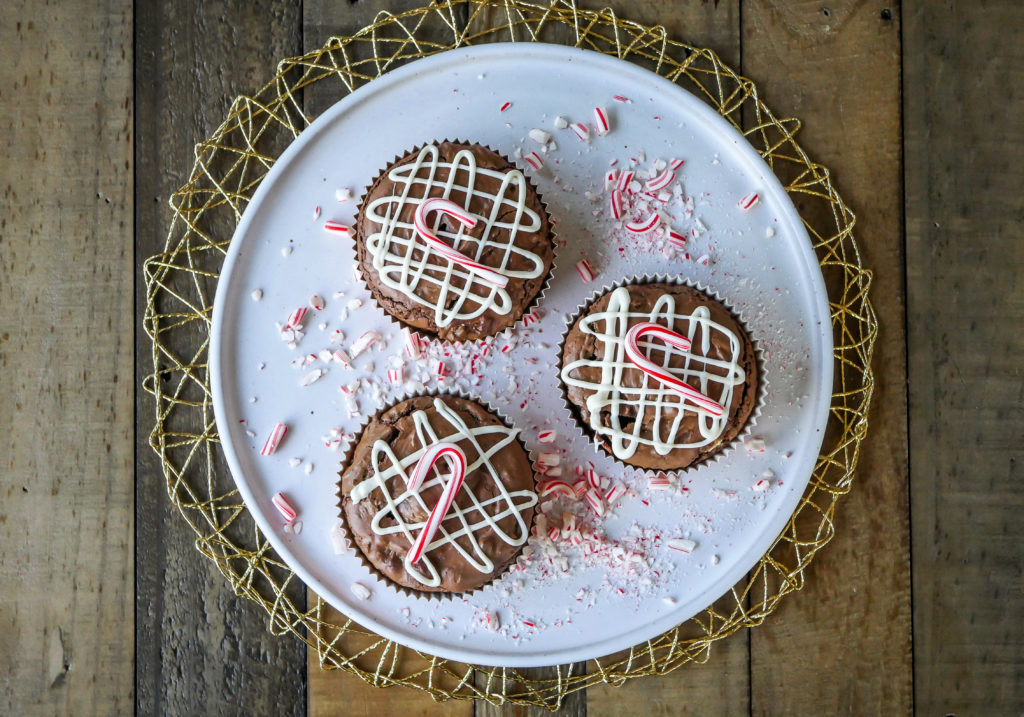
  10. Transfer the melted white chocolate to a heat-safe piping bag and make crisscrossing lines over the tops of the room-temp brownies. Immediately at the candy cane to each one after you finish decorating so that it will adhere to the top. Wait 30 minutes for the chocolate to set up (or more if your kitchen is warm), and enjoy!

Notes

  • I’m using a bittersweet chocolate for my brownie base, however, if you prefer yours sweeter, up that to 68 or 70% cacao.
  • Looking for that light, crackly brownie crust? Don’t skip on whipping the sugar and the eggs together for what seems like an awfully long time. That crust is actually a meringue that forms while baking. This does create a more delicate top that is prone to cracks, but if you love a shiny, crackly top, you want that!
  • Any remaining melted white chocolate can be kept in the piping bag and refrigerated. Seal off the ends with twist ties. Large chunks can be broken up and re-melted.

Did you make this recipe?

Tag @magicaltreatsathome on Instagram and hashtag it #magicaltreatsathome

Chocolate Peppermint Brownie Pies // magicaltreatsathome.com

Share this:

  • Click to share on Facebook (Opens in new window) Facebook
  • Click to share on X (Opens in new window) X

Like this:

Like Loading...

Filed Under: Recipes, Treats Tagged With: brownie, Candy Palace, chocolate, disneyland, holiday, peppermint, treat, white chocolate

Twice Upon a Cupcake

December 23, 2020 by Elana Lepkowski Leave a Comment

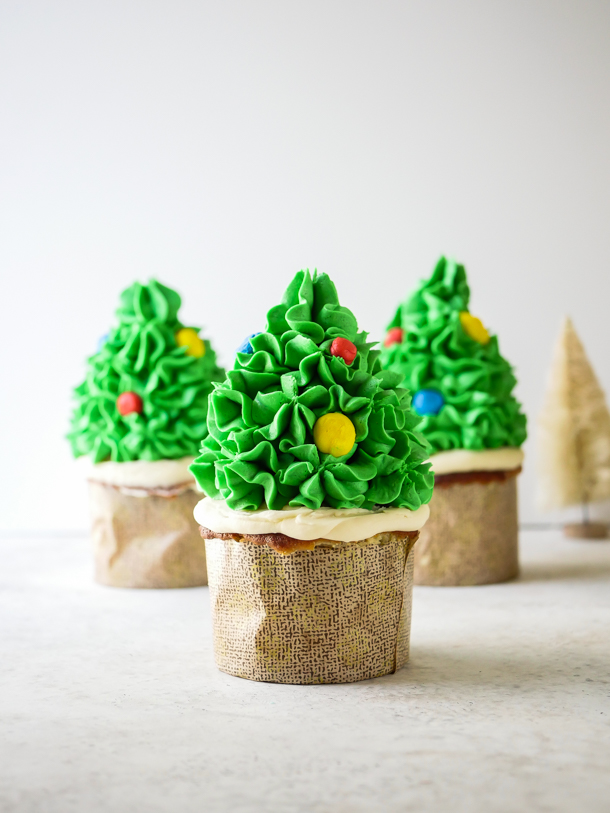
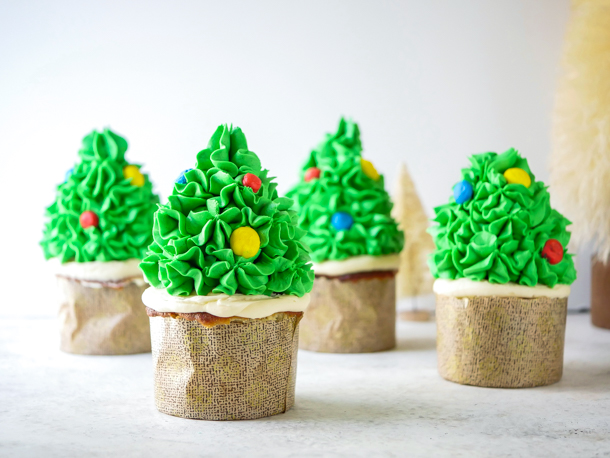
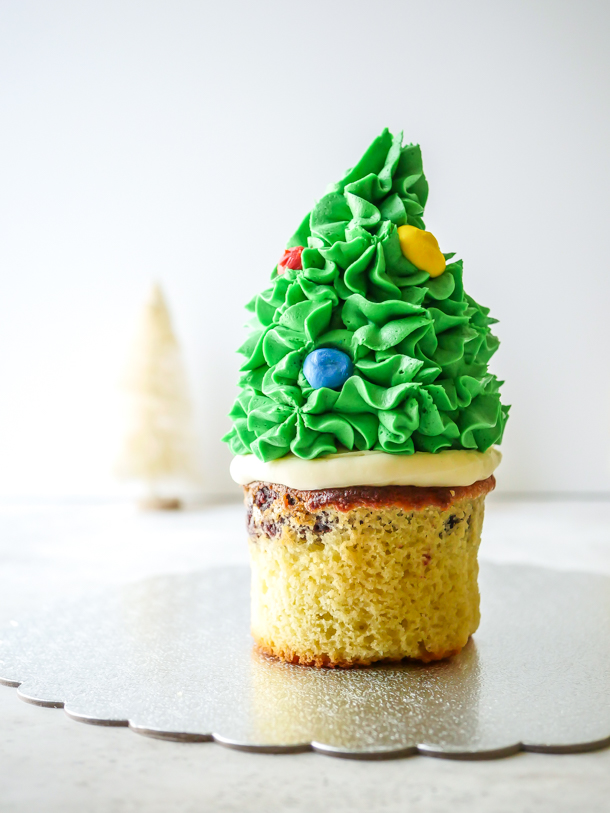
Christmas Tree Cupcakes // magicaltreatsathome.com

Where can I find the original treat?

  • This holiday treat was found at the Main Street Bakery inside the Magic Kingdom in Walt Disney World.

During the holidays your baking is allowed to be… extra. And today we’ve got an “extra” cupcake. As in, there is a cupcake sitting on top of another cupcake. See? Extra.

Christmas Tree Cupcakes // magicaltreatsathome.com

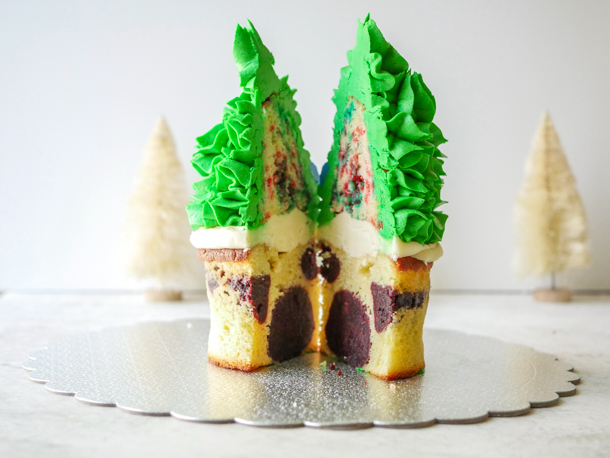
Actually, there is a cupcake sitting on top of a cupcake with a hidden Mickey cake ball inside. Sooooo extra. And let’s be real. This is fun to make, but there’s a lot of components. You can definitely make just some of these parts, but if you’re missing Disney treats on Main Street this holiday season, then this is a fun project.

Christmas Tree Cupcakes // magicaltreatsathome.com

The recipe below is broken down into three components: cake balls, confetti tree cupcakes, and the surrounding base for the cupcake. These can be done simultaneously, or broken up into steps over days depending on how much time you have. I’m also noting that usually, I make the red velvet cake balls with cream cheese icing, but I found that regular American buttercream works better here (it doesn’t “weep” like the cream cheese does when molding and freezing).

Christmas Tree Cupcakes // magicaltreatsathome.com

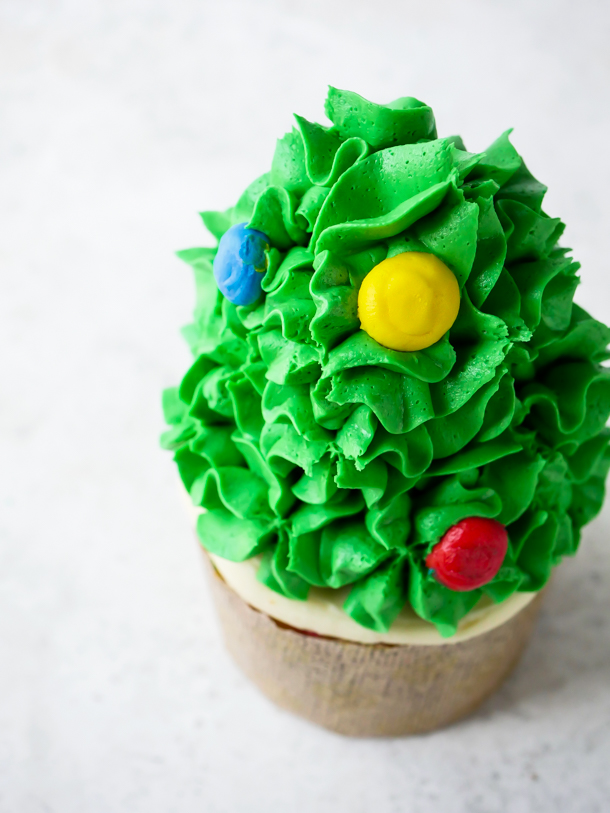
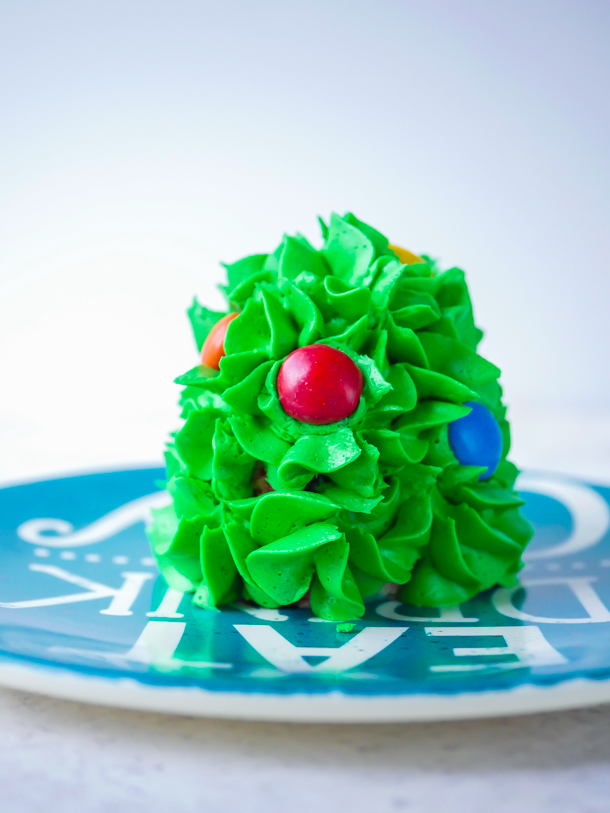
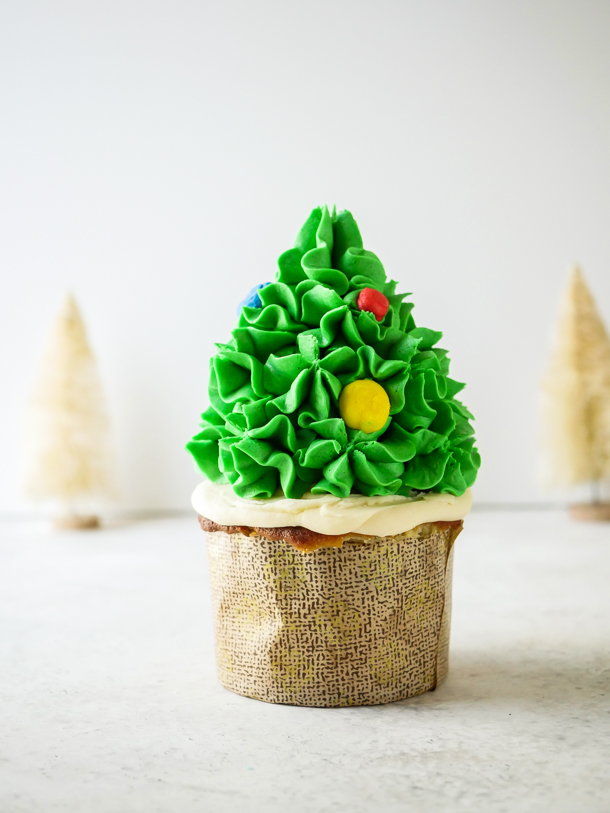
The only thing I deviated from in the original treat was the sugar light bulbs. For a home baker, I thought going through this step would feel like overkill. Instead I piped out buttercream lights, refrigerated them, and used for the lights. Then, my 6 year old looked at the trees and asked “why didn’t I just use M&Ms?”, and honestly, I would have just done that had I thought of it. So, I’m recommending that for convenience here as well.

Kids can help in all parts of the baking and decorating stages here. My kids mostly liked adding the M&Ms to their half trees (in the picture below I piped some frosting onto an extra confetti “tree” cupcake and let them decorate and eat that part).

Christmas Tree Cupcakes // magicaltreatsathome.com
You can also make a single tree cupcake too!

Now, the hidden Mickey part of these is probably the hardest of these cupcakes. And what is the secret to getting a hidden Mickey every time you make a cut? Simple! You actually create a ring, or halo, over the ball in the center. Then no matter where you make the cut to reveal the hidden Mickey, you’ll get one! They are tricky though, and as you can see, mine were prone to separate when baking. My suggestion is that you really seal the ball and the ring together. I had placed mine just on top, and the cake batter pushed the ring up a bit. You could also pin them together with toothpicks and take the toothpicks out when done baking (and PLEASE remember to do that as I do not want you to harm your mouth eating treats!).

Christmas Tree Cupcakes // magicaltreatsathome.com

Anyway you decided to make these, whether the full cupcakes, just the trees, or without the hidden Mickey centers, these are a delightful treat to have this holiday week.

Happy baking, happy holidays, and I’ll see you all in the New Year!

Print
clock clock iconcutlery cutlery iconflag flag iconfolder folder iconinstagram instagram iconpinterest pinterest iconfacebook facebook iconprint print iconsquares squares iconheart heart iconheart solid heart solid icon
Christmas Tree Cupcakes // magicaltreatsathome.com

Twice Upon a Cupcake

5 Stars 4 Stars 3 Stars 2 Stars 1 Star No reviews
  • Author: Elana Lepkowski
  • Yield: 4–6 Twice Upon a Cupcake cupcakes 1x
Print Recipe
Pin Recipe

Description

A decadent holiday cupcake has TWO hidden treats inside that are revealed when you cut through the cupcake. Did you find the hidden Mickey? A Walt Disney World inspired treat.


Ingredients

Scale

For the Buttercream and decorations:

  • 1 pound powdered sugar, sifted
  • 1 cup butter, room temperature
  • pinch of salt
  • 1 tablespoon vanilla
  • 1 tablespoon cream
  • green food coloring (I used Americolor Leaf green)
  • Optional food coloring if making buttercream light decorations: red, yellow, blue
  • Red, yellow, and blue M&Ms for lights

For the red velvet hidden Mickey center:

Adapted from Dessert for Two

  • 95 g (3/4 cup) flour
  • 4 teaspoons cocoa powder, unsweetened
  • 1/2 tsp baking soda
  • 1/4 teaspoon salt
  • 1/2 cup coconut oil or neutral oil
  • 2 tablespoons warm water
  • 1/2 cup (99 g) granulated sugar
  • scant 1/4 cup (57 g) Greek yogurt
  • 1 egg
  • Red food coloring (see notes below for type and amounts)
  • 1/4 tsp vanilla

For the Cupcakes (and Sprinkle Funfetti Tree Cupcakes):

  • 1/2 cup (1 stick) unsalted butter
  • 3/4 cup (150 g) granulated sugar
  • 2 large eggs
  • 1/2 cup milk
  • 2 teaspoons vanilla
  • 1–1/2 cups (180 g) all purpose flour
  • 1–1/2 teaspoons baking powder
  • 1/2 teaspoon salt
  • 1/2 cup green and red sprinkles

Specialty Tools:

  • Tall baking cups
  • popover pan
  • piping bags
  • closed star tip (Ateco #847 used here)

Instructions

For the buttercream:

  1. First, make sure your powdered sugar is lump free. Sift if needed.
  2. Then, beat the butter and salt together for a minute until light and fluffy.
  3. Pour in the powdered sugar and slowly mix until they start to combine about 30 seconds. Then turn up the speed to high and beat together until mixture starts to become fluffy in texture.
  4. Add in the vanilla and cream, and beat on high an additional minute or two until desired texture is reached. If dry, add in an additional teaspoon of cream. Set aside covered with a damp, not wet, towel.

For the red velvet hidden Mickey center:

  1. Preheat oven to 350°f and grease and flour a 6″ round cake pan.
  2. In a small bowl, whisk together the flour, cocoa powder, baking soda, and salt. Set aside.
  3. In the bowl of a stand mixer, combine the oil, warm water, granulated sugar, Greek yogurt, egg, red food coloring, and vanilla.
  4. Add in the dry ingredients and mix until combined.
  5. Pour into prepared baking pan and bake 20-25 minutes, or until a cake tester comes out clean.
  6. Let cool in the pan 5 minutes, turn out the cake onto a cooling rack, and let completely cool at least one hour.
  7. Then crumble the cake into pea sized crumbs and place in a mixing bowl.
  8. Add to the crumbs about 1/4 cup of the buttercream frosting. Mix well until combined.
  9. Next, roll out 4-6 small round balls, these will be the heads. Set aside on a parchment lined baking sheet.
  10. With the remaining cake pop dough, roll out thin snakes (you can use plastic wrap to help roll out the snakes). Form the snakes into rings and place on the balls. You can use toothpicks to hold in place. Press firmly to help seal the two together. Place in freezer until ready to use.

For the cupcakes:

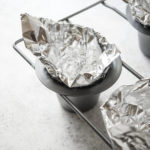
  1. Set the oven to 350°f. Set out tall cupcake holders (you will not need a cupcake tray for the freestanding molds). Then, using tin foil, shape out a conical mold for the tree tops. (You can use a popover pan to hold the molds in place, or place the tin foil mold in a tall baking cup). Make sure there are no gaps or holes or your batter will leak. Optionally, you can also cook off some funfetti cupcakes in regular molds, freeze, and then cut to shape.
    Christmas Tree Cupcakes // magicaltreatsathome.com
  2. In a mixing bowl, beat butter and sugar together until light and fluffy.
  3. Next, beat in eggs one at a time until incorporated. Then add in vanilla and 1/4 cup of the milk.
  4. Mix in flour, baking powder, and salt, and then the rest of the milk. Set aside.
  5. Remove red velvet cake pops from freezer and place into freestanding baking molds. Spoon batter over cake pops until about 2/3 of mold is filled. Place in oven for 25-28 minutes.
  6. Next, add sprinkles to remaining batter and mix to combine. Do not over mix.
  7. Pour sprinkle batter into conical molds, and place in oven for 22-26 minutes. Both cupcakes can bake in the oven at the same time, but keep separate timers.
  8. When finished baking, let cool to room temperature. Funfetti cupcakes can be kept in the freezer for 30 minutes to firm up if they need to be cut to shape.

Decorating:

  1. If piping lights, remove about a half cup of frosting. Divide into three bowls and color one bowl red, another yellow, and lastly blue. Then transfer to small piping bags with a round tip. Pipe out circles onto a parchment lined baking sheet and refrigerate at least an hour to firm up.
    Christmas Tree Cupcakes // magicaltreatsathome.com
  2. If not piping lights and using M&Ms instead, remove about 1/2 cup of frosting into a plain tipped piping bag and pipe a circle on top of the base cupcakes. Place the funfetti trees on top of that. Then proceed to coloring all the remaining frosting green by adding 2-3 drops of gel food coloring into the frosting bowl. Mix well to fully incorporate the color and then transfer all of the frosting to a piping bag fitted with an closed star tip (I used Ateco #847).
    Christmas Tree Cupcakes // magicaltreatsathome.com
  3. Pipe out closed stars for the trees all over the funfetti cakes.
    Christmas Tree Cupcakes // magicaltreatsathome.com
  4. Next, if using buttercream lights, remove those from the fridge and place immediately onto the green frosting. If you using M&Ms, place those on the frosting. Repeat until all cupcakes are decorated.
  5. Enjoy!

Notes

  • If cocoa powder is lumpy, sift before using.
  • If you are using grocery store food coloring, you will need about 1-1/2 teaspoons of red food coloring to get the cake a nice bright red. If you were using a gel paste from like Americolor, you will need about a quarter teaspoon or two big squirts from the bottle.
    Mickey Mouse Red Velvet Cake Pop // magicaltreatsathome.com
  • Cake crumbs should be small and no larger than a pea.
  • Cake balls should not be too wet or too dry to hold their shape properly. If too wet, add more cake crumbles. If too dry, add more frosting a small bit at a time.
  • M&Ms candies can be used instead of piping buttercream lights.
  • To prevent cake pop from moving inside the cupcake when baking, use toothpicks to hold together in place. REMEMBER TO REMOVE THE TOOTHPICKS BEFORE DECORATING.
  • Cupcakes will keep up to 4 days refrigerated in an airtight container. Let come to room temperature before eating.
  • Extra buttercream can be kept in an airtight container up to a week, or frozen up to 3 months.
  • Extra cake batter can be baked off for regular cupcakes. Reduce bake time by 2-3 minutes.

Did you make this recipe?

Tag @magicaltreatsathome on Instagram and hashtag it #magicaltreatsathome

Christmas Tree Cupcakes // magicaltreatsathome.com

Share this:

  • Click to share on Facebook (Opens in new window) Facebook
  • Click to share on X (Opens in new window) X

Like this:

Like Loading...

Filed Under: Recipes, Treats Tagged With: buttercream frosting, cake ball, cake pop, Christmas, christmastimetreats, cupcakes, hidden Mickey, holiday, Magic Kingdom, Main Street Bakery, red velvet, sprinkles, treat, vanilla, WDW

Mickey Mouse Holiday Gingerbread Cookie 2020

December 15, 2020 by Elana Lepkowski 3 Comments

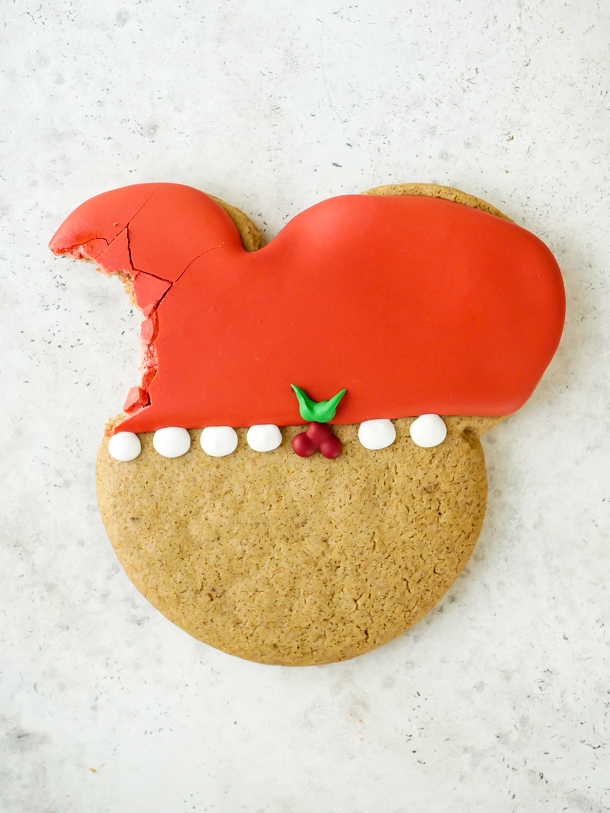
Mickey Holly Christmas Cookies 2020 // magicaltreatsathome.com

Where can I find the original treat?

  • This holiday treat was found a Marceline’s and Trolley Treats at the Disneyland resort.

It’s that wonderful time of year where it’s totally acceptable to bake dozens upon dozens of cookies in one weekend: holiday cookie season. And I’ve been doing just that but with one goal: to perfect the light colored gingerbread cookie found at Disneyland this year. And you know what? I think I did it!

Mickey Holly Christmas Cookies 2020 // magicaltreatsathome.com
The secret to light gingerbread? Brown rice syrup, or honey, instead of molasses. You still get some molasses in the brown sugar, but it doesn’t overwhelm the whole cookie like the more traditional darker versions. I found this technique on Leite’s Culinaria and it was such an “AH-HA” moment! This has also been a game changer for my husband who gets food related migraines as molasses is a trigger and now he can have the cookies too.
Mickey Holly Christmas Cookies 2020 // magicaltreatsathome.com
I’ve made a “half batch” of royal icing in the recipe below but to be honest, it still make a lot. The nice thing is with meringue powder instead of fresh egg whites, it’s shelf stable and you can just put extra in air tight containers and store until you’re ready to use again. The consistency turns out about halfway between a stiff piping icing and a flood so I found it great to use for most of the decorations on the cookie. I did pull some out and set aside for the holly decorations as I wanted them to hold their shape more. I’ve made notes in the recipe below about that.

Mickey Holly Christmas Cookies 2020 // magicaltreatsathome.com
Kids can really get involved in all aspects of this recipe. From making the dough, to rolling, shaping, and even decorating. This is a fun, family friendly recipe, and getting everyone involved in a holiday activity is a big win for me.

These cookies felt very special for me this year as they really felt like there was a part of Disneyland at home with us. Holiday time there is just so special and it’s been a real bummer not being able to go and experience that (and eat all the treats). Making SO many of these cookies (and gifting quite a few away to other friends who are missing Disneyland too) has felt like a gift and I hope you’ll be able to make a batch and bring home the magic too.

Mickey Holly Christmas Cookies 2020 // magicaltreatsathome.com

Ok, let’s get baking!

Print
clock clock iconcutlery cutlery iconflag flag iconfolder folder iconinstagram instagram iconpinterest pinterest iconfacebook facebook iconprint print iconsquares squares iconheart heart iconheart solid heart solid icon
Mickey Holly Christmas Cookies 2020 // magicaltreatsathome.com

Mickey Mouse Holiday Gingerbread Cookie 2020

5 Stars 4 Stars 3 Stars 2 Stars 1 Star No reviews
  • Author: Elana Lepkowski
  • Yield: 15–18 Mickey Gingerbread Cookies 1x
  • Category: Baking
  • Cuisine: Holiday
Print Recipe
Pin Recipe

Description

Make your holiday cookie platter even more magical with an oversized Mickey Mouse shaped gingerbread cookie in holiday themed royal icing. A Disneyland-inspired treat.


Ingredients

Scale

For the gingerbread cookie:

  • 8 tablespoons unsalted butter
  • 3/4 cup light brown sugar, packed
  • 1/2 cup brown rice syrup or honey
  • 1 egg, room temperature
  • 1 teaspoon vanilla extract
  • 3–1/2 cups all purpose flour
  • 1 teaspoon baking soda
  • 2 tablespoons arrowroot powder or cornstarch
  • 1 tablespoon ground ginger
  • 1 tablespoon ground cinnamon
  • 1/2 teaspoon ground nutmeg
  • 1/2 teaspoon ground cloves
  • 1/2 teaspoon kosher salt

For the half batch royal icing:

  • 255 g powdered sugar
  • 3 tablespoons water
  • 1 tablespoons + 3/4 teaspoon meringue powder
  • 1/2 teaspoon vanilla extract
  • red and green food coloring
    • Americolor Super Red for hat
    • Americolor Red Red for berries
    • Americolor Leaf Green for leaves

Specialty Tools:

  • Mickey Mouse cutter
  • piping bags

Instructions

For the cookies:

  1. Beat the butter at high speed (10) until light and creamy, about 1 minute. Scrape down the sides of the bowl then add in brown sugar and brown rice syrup (or honey). Beat together until combined and creamy. Scrape down sides again.
  2. Add in the egg and vanilla and continue to beat at high speed (10) until the mixture is light and fluffy, 1 to 2 minutes.
  3. Next, add in flour, baking soda, arrowroot powder (or cornstarch), ginger, cinnamon, nutmeg, cloves, and salt. Beat together on medium-low speed (4) until combined and dough becomes stiff.
  4. Divide the dough in half, and then transfer each half of the dough into two gallon size ziplock bags. Flatten out to fill the space of the bag with a rolling pin so that dough is evenly dispersed. Refrigerate at least 4 hours or overnight. Dough can also be frozen at this point to use later.
  5. When ready to bake, preheat oven to 350°f. and cover two cookie sheets with parchment. Set aside.
  6. Generously flour your counter and remove dough from the bag (I usually cut the sides to open the bag, flip the open side down towards the floured surface and peel the rest of the bag off the dough). Roll out to 1/4″ thickness (or leave as is if you’d like thicker cookies).
  7. Cut out Mickey shapes from dough and place on parchment lined cookie sheet. Recombine the dough, flour your rolling pin and continue to cut shapes and recombine dough until finished. One bag of dough should fill one and a half to two cookie sheets.
    Mickey Holly Christmas Cookies 2020 // magicaltreatsathome.com
  8. Bake for 5 minutes, rotate sheet pans and bake an additional 5 minutes. If you’d like crispier cookies (or cookies that will withstand transportation), bake an additional 1 to 2 minutes.
  9. Let cool in the pans and then transfer to a wire rack to fully cool before decorating.

For the royal icing and decorations:

  1. Sift your powdered sugar first so that there are no lumps.
  2. Combine the water, meringue powder, and vanilla extract in a large measuring cup and whisk until there are no longer any lumps or powder. Mixture will froth a bit.
  3. Whisk the powdered sugar with the liquid until smooth. At this point the royal icing should hold its shape when dropped on itself. Set some aside, about a 1/4 of the mix, for the holly decorations by placing in a bowl and putting a damp, not wet, tea towel over the bowl so mix will not dry out.
  4. Add a teaspoon more water to the mix and beat the icing again. The icing should smooth out after about 20 seconds. You do not want it too runny though or it will run off the cookie.
  5. Once the desired consistency is achieved, remove about 1/4 of the mixture for the white dot decoration straight into a piping bag.
  6. The rest of the royal icing will be for the red decoration. Add about a teaspoon of the red food coloring to the bowl and mix until desired color is achieved. Transfer to a large piping bag.
  7. Next divide the icing for the holly decorations into two separate bowls. Add red food coloring to one bowl, mix, and then transfer to a piping bag. In the second bowl mix in green food coloring, and then transfer to a piping bag.
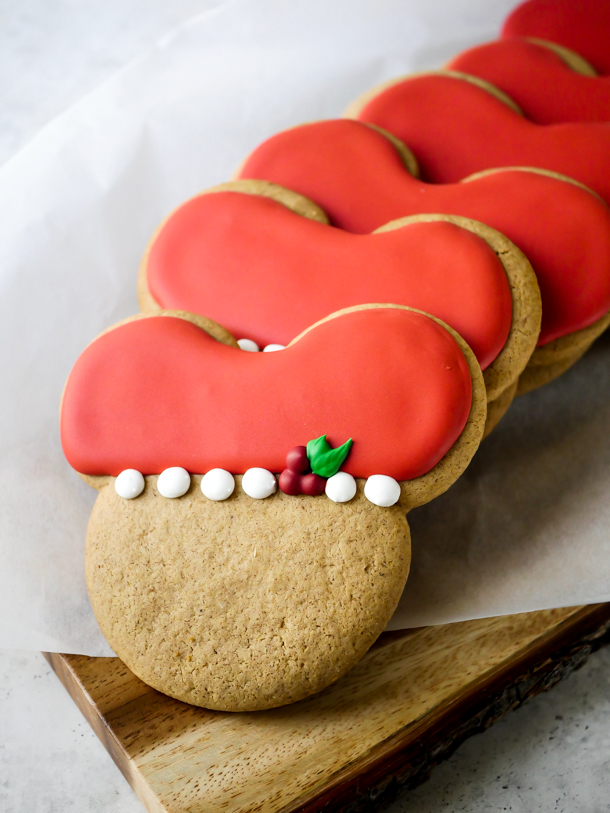
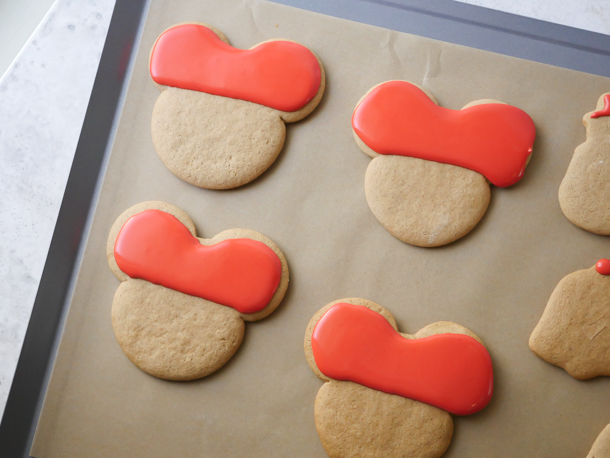
  8. To decorate the cookies, on the top half of the cookies, outline and then flood with large red royal icing. Let dry until no longer shiny, then then pipe 6 white dots (4 to the left and 2 to the right leaving space for the holly) along the bottom edge of the red outline. Let dry. Then finally pipe the smaller red royal icing as 3 combined dots for the holly, followed by the green for the leaves on the holly.
    Mickey Holly Christmas Cookies 2020 // magicaltreatsathome.com
  9. Let the icing dry at least 8 hours or overnight before packaging, or eating. Enjoy!

Notes

  • If you’d like even lighter colored cookies, replace all of the brown sugar with white granulated sugar.
  • Letting the dough chill ensures the cookies won’t spread and let’s the spices infuse throughout the dough.
  • Arrowroot powder also ensures cookies will not spread or puff up too much. This ingredient is optional.
  • For softer cookies, add in two tablespoons of butter.
  • For crispier cookies, cook 1 – 2 minutes longer.
  • For darker cookies, sub in molasses for the brown rice syrup.
  • If you freeze the cookie dough, let it defrost overnight in the refrigerator and proceed to rolling out step.
  • You will have extra royal icing left over from the recipe. This can be stored in the refrigerator in an air tight container for weeks.
  • Icing should fully dry between decorating so that the colors will not bleed.
  • Cookies can be stored at room temperature up to one week for best flavor.

Did you make this recipe?

Tag @magicaltreatsathome on Instagram and hashtag it #magicaltreatsathome

Mickey Holly Christmas Cookies 2020 // magicaltreatsathome.com

Share this:

  • Click to share on Facebook (Opens in new window) Facebook
  • Click to share on X (Opens in new window) X

Like this:

Like Loading...

Filed Under: Recipes, Treats Tagged With: Christmas, christmastimetreats, cookies, disneyland, gingerbread, holiday, Marceline's, Mickey Mouse, royal icing, treat, Trolley Treats

Pecan Pie Crispy Treat

November 25, 2020 by Elana Lepkowski 1 Comment

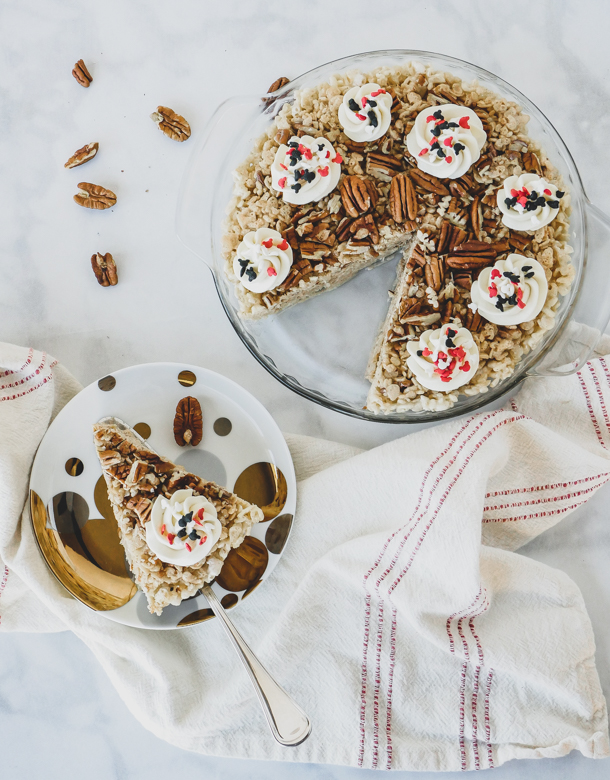
Pecan Pie Crispy Treat // magicaltreatsathome.com

Where can I find the original treat?

  • This holiday treat can be found at Screen Door General Store at Disney’s BoardWalk Inn (Florida), and Marceline’s in Downtown Disney (California).

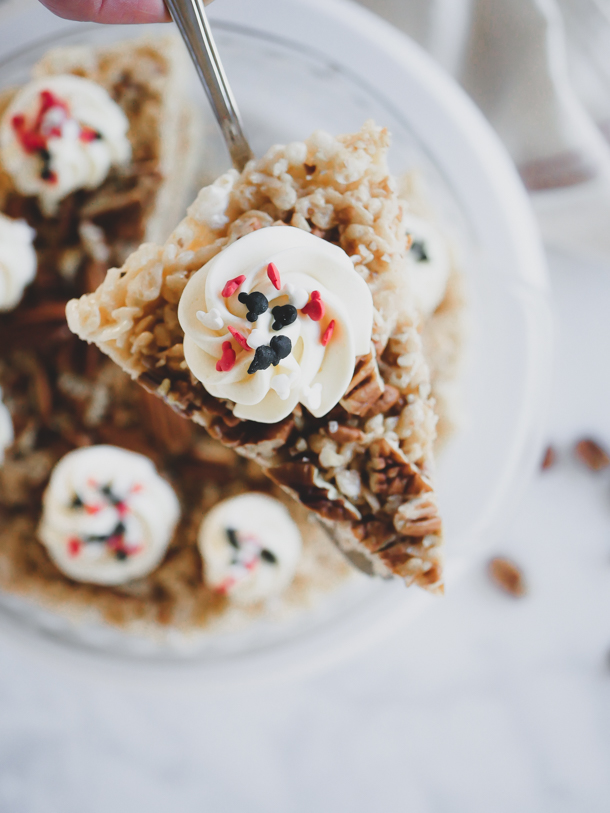
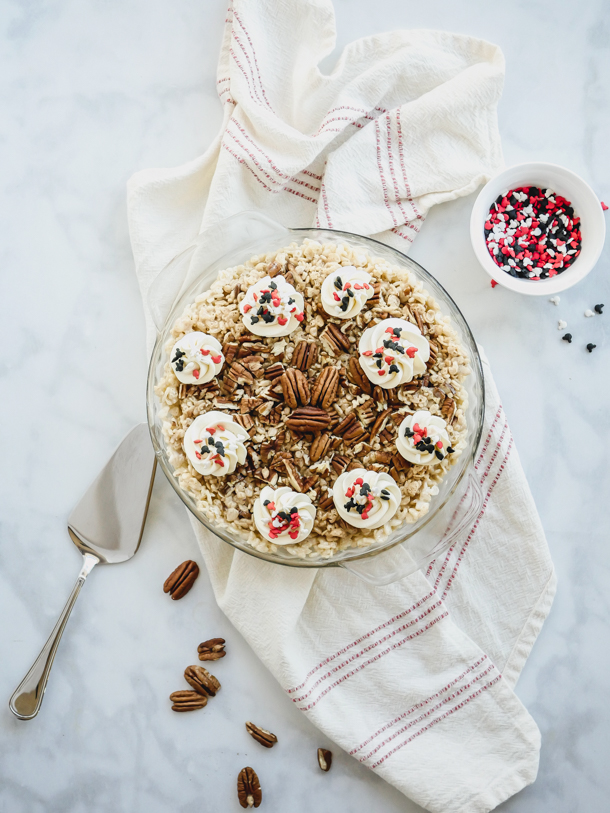
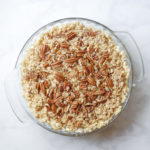
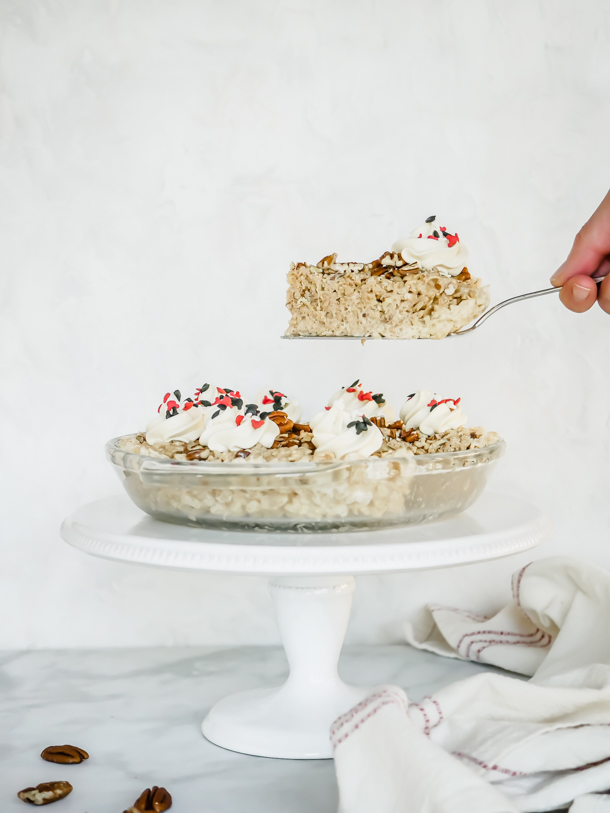
Thanksgiving is tomorrow here in the US; a Thanksgiving that will not run its usual course. And so today on the site we have a pie, but not really a pie, that you could serve at your nontraditional Thanksgiving feast. TLDR: it’s a pecan pie rice crispy treat. YES a whole 9” pie.

Pecan Pie Crispy Treat // magicaltreatsathome.com

Disney is known for whimsical treats, but sometimes they’re a bit on the silly side too. Like the crispy treat pies this year. I love the idea behind them, and I think the treat makers must have had a lot of fun making them. And I know we all loved eating them as the flavor combinations came through and it definitely was a unique, and 2020 way, to eating pie this year.

I’m presenting the recipe formed inside a 9” pie plate, but those that have seen the whole “pie” at the resorts (it was made available both in Florida and California), might have noticed its domed shape from the mold it was made in. I figure, if you’re going to serve this at your Thanksgiving dinner this year, it should arrive at the table in a proper pie plate. 

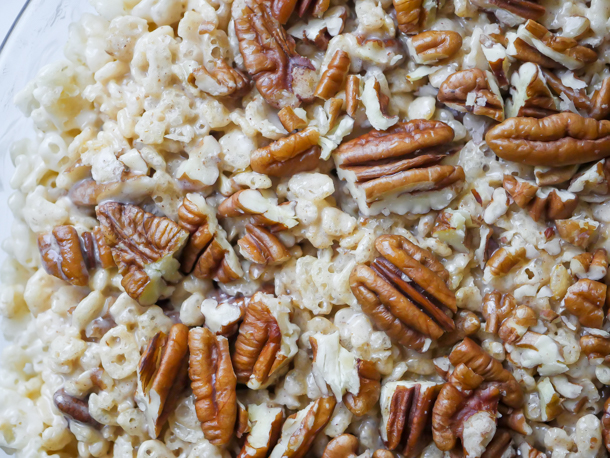
Pecan Pie Crispy Treat // magicaltreatsathome.com

Since we’re dealing with hot sugar here, I would not recommend the younger kids come help with the bases here. However, making and piping the frosting “cream” and decorating with sprinkles is a great way to get them involved in a holiday dessert. 

Now that we’ve thrown out all the conventional ideas of a traditional dinner this year, I do hope you make this pie. If you’re at home celebrating with just one or two of you, this also freezes really well. Just cut it into slices and freeze up to 3 months for best flavor.

Pecan Pie Crispy Treat // magicaltreatsathome.com

Happy Thanksgiving everyone!

Print
clock clock iconcutlery cutlery iconflag flag iconfolder folder iconinstagram instagram iconpinterest pinterest iconfacebook facebook iconprint print iconsquares squares iconheart heart iconheart solid heart solid icon
Pecan Pie Crispy Treat // magicaltreatsathome.com

Pecan Pie Crispy Treat

5 Stars 4 Stars 3 Stars 2 Stars 1 Star No reviews
  • Author: Elana Lepkowski
  • Yield: 1 9″ Pecan Pie Crispy Treat 1x
Print Recipe
Pin Recipe

Description

Pecan pie and crispy treat lovers unite with this full sized maple scented Pecan Pie Crispy Treat. A Disney-inspired holiday treat.


Ingredients

Scale

For the “crust”:

  • 2 cups crisped rice cereal
  • 20 full size marshmallows
  • 1–1/2 tbsp butter

For the “filling”

  • 3 cups crisped rice cereal
  • 30 full size marshmallows
  • 2 tablespoons butter
  • 1/4 cup maple syrup
  • 1/2 tsp cinnamon
  • 1 cup chopped pecans toasted, 3 tbsp reserved
  • Pinch salt

For the frosting:

  • 2 sticks unsalted butter
  • pinch of salt
  • 1/2 pound powdered sugar
  • 1 teaspoon milk
  • 2 teaspoons vanilla
  • Mickey Mouse sprinkles

Specialty Items:

  • 9″ glass pie pan
  • piping bag
  • closed star pastry tip (Ateco #844 used here)

Instructions

For the “crust”:

  1. Before beginning, butter/grease your pie pan. Set aside.
  2. Combine the butter and marshmallows in a medium sauce pan over medium-low heat. Stir constantly until marshmallows have melted and mixture is smooth.
  3. Immediately dump in the crisped rice cereal and quickly mix to combine.
  4. Pour into the prepared pan and gently press mixture into place with a rubber spatula (or damp fingers, which is my favorite method). Create a thin layer around the pan, pushing up the sides to make the “crust”. Set aside.
    Pecan Pie Crispy Treat // magicaltreatsathome.com

For the “filling”:

  1. Combine the butter, maple syrup, cinnamon, and marshmallows in a medium sauce pan over medium-low heat. Stir constantly until marshmallows have melted and mixture is smooth.
  2. Mix in the pecans at this stage, and then pour in the crisped rice cereal and quickly mix to combine.
  3. Pour on top of the “crust” layer, pushing firmly to fuse the layers.
  4. Spread the remained chopped pecans over the top, lightly pressing in. Cool to room temperature.
    Pecan Pie Crispy Treat // magicaltreatsathome.com

For the frosting and decoration:

  1. Whip the butter and salt until light and creamy in either a stand mixer, or with a handheld mixer.
  2. Pour in the powdered sugar (sift if yours is lumpy), and mix until incorporated.
  3. Add in the milk and vanilla extract and mix at high until creamy and smooth and desired texture is reached.
  4. Transfer to a piping bag fitted with an closed star tip and pipe 8 small swirls on top of the cooled pie. Refrigerated at least 4 hours to set or overnight.

To serve:

  1. Straight from the refrigerator, use a sharp knife to slice individual pieces.
  2. Let individual pieces come to room temp before serving.

Notes

  • Pecans can be toasted in a dry frying pan over medium-high heat for 5 minutes. Stir constantly to prevent browning and remove from the pan when done toasting.
  • Use a smaller pan than you think you’ll need for melting the marshmallows. As the marshmallows melt into the butter, if there’s too much space in the pan, they will start to dry out and form strings. Keeping the marshmallows closer together in the pan will ensure they melt more evenly, creating a better mixture to add the cereal into.
  • When mixing cereal into the melted marshmallows, keep the mixture on the flame so that marshmallows stay liquid. Removing to mix in can seize up the liquid before the cereal is fully mixed.
  • The addition the the maple syrup will make the “filling” softer and refrigeration is needed to cut out sliced cleanly.
  • Leftover frosting can be stored in an air tight container in the refrigerator up to one week, or frozen up to 3 months for best flavor. Defrost in the refrigerator overnight and re-whip to use again.

Did you make this recipe?

Tag @magicaltreatsathome on Instagram and hashtag it #magicaltreatsathome

Pecan Pie Crispy Treat // magicaltreatsathome.com

Share this:

  • Click to share on Facebook (Opens in new window) Facebook
  • Click to share on X (Opens in new window) X

Like this:

Like Loading...

Filed Under: Recipes, Treats Tagged With: buttercream frosting, cinnamon, crispy treat, disneyland, holiday, krispy treat, maple, marshmallow, Mickey Mouse, pecans, treat, WDW

Shop Favorites: Mickey Mouse Cookie Cutters & Molds

November 19, 2020 by Elana Lepkowski Leave a Comment

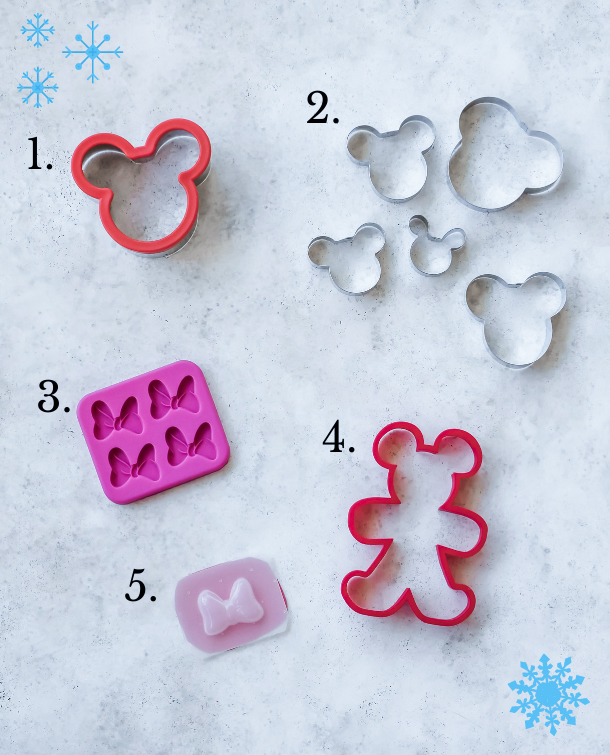
It’s not the holidays without cookies in my house. And a Mickey Mouse shaped cookie is always extra special. I’ve rounded up a few of my favorite cutters and molds I use at home today to help you find your favorite holiday baking cookie cutters, Mickey style. I’ve also thrown in a few Minnie Bow molds for when you need a 3D effect (or just want to make a bunch of chocolate bows to snack on. Perfectly normal.)

  1. 4″ Mickey Mouse Cutter: My favorite all purpose cutter! Sturdy enough for cutting out crispy treats, large enough for big cookies, and a classic shape.
  2. 5 Piece Mickey Mouse Cutter Set: This pack is great for smaller items. I like to make sandwich cookies with the medium ones and I’ve used the small ones for crackers.
  3. Minnie Mouse Bow Molds: These 4 Minnie Bow molds come in handy when I’m doing multiple treats that need bows. These are more shallow than my other mold, but still produce the right shape and I love how flexible the mold is.
  4. 5.5″ Mickey Mouse Gingerbread Cutter: This Mickey Gingerbread Man cutter is the perfect shape to make the gingerbread cookies from last year. And if you need a recipe you can check out ours here!
  5. Minnie Mouse Bow Mold: This single Minnie Bow mold is as close as I’ve gotten so far to the one at the parks. Use it to add a 3D effect for cookies, or top a Minnie Shake with this shape.

Share this:

  • Click to share on Facebook (Opens in new window) Facebook
  • Click to share on X (Opens in new window) X

Like this:

Like Loading...

Filed Under: Shop Favorites Tagged With: cookie cutters, cookies, gift guide, holiday, Mickey Mouse

Strawberry Shortcake Marshmallow Wands

May 15, 2020 by Elana Lepkowski Leave a Comment

Strawberry Shortcake Marshmallow Wands // magicaltreatsathome.com

Where can I find the original treat?

  • This seasonal treat can be found all over the Disneyland resort.

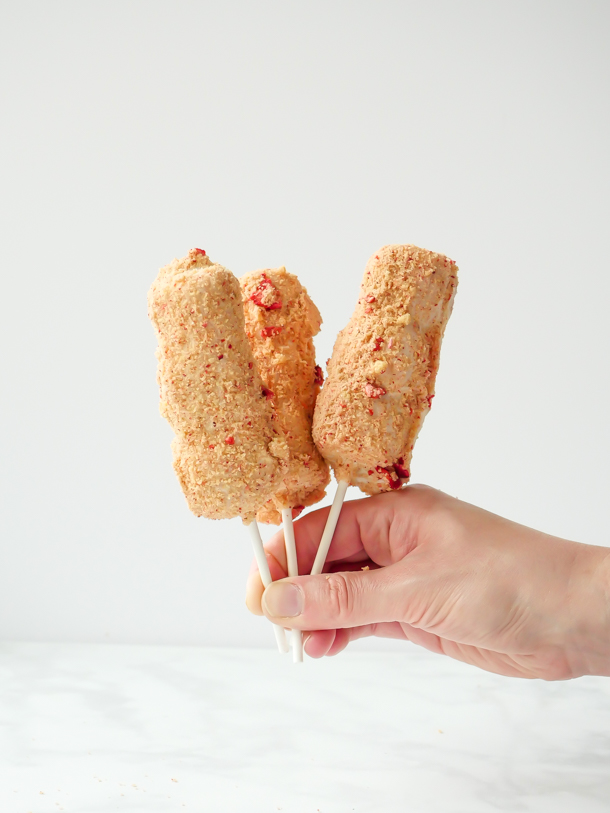
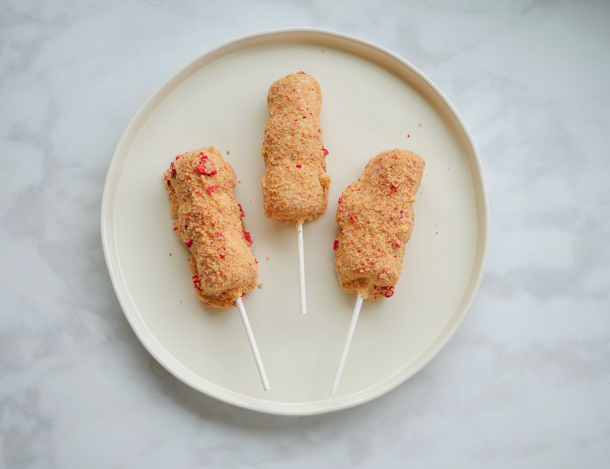
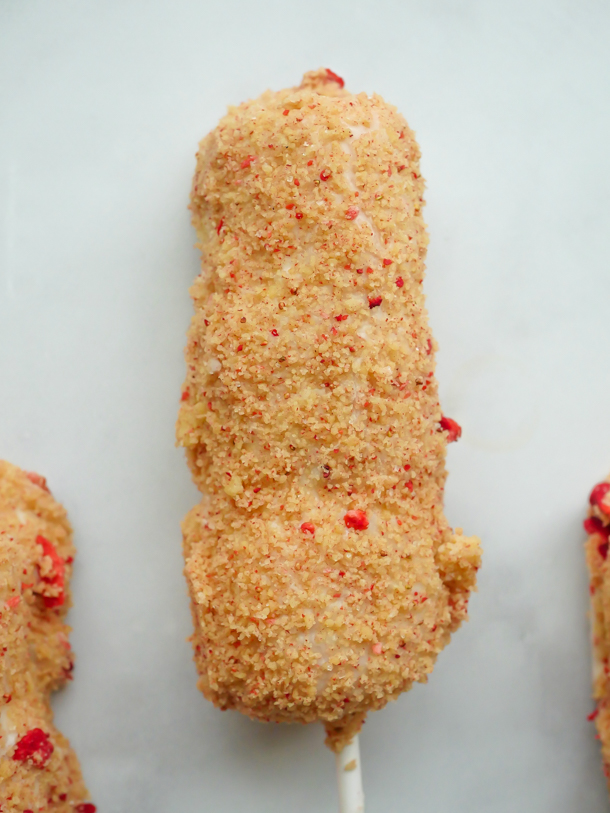
I had opened our mini freezer the other day, the freezer that I keep all my backup ingredients in for this site, and for my drinks site, Stir and Strain, and realized I had everything before me to make another round of marshmallow wands. If you take away one good tidbit from this post, I hope it’s that marshmallow wands, after they have been coated in caramel, freeze beautifully. And even after almost 6 months, once fully decorated, they still taste fresh. But so anyways, I also had a bag of crumbled shortbread in that freezer. And a bag of freeze dried strawberries. I had everything ready to go to make Strawberry Shortcake Marshmallow Wands. So that’s what we’re making today!

Strawberry Shortcake Marshmallow Wands // magicaltreatsathome.com

This treat appeared during Valentine’s Day among the many other delicious treats on sticks at Disneyland. It definitely was a contender for the site, but I had to narrow it down to just a few items since the treats were released right before the holiday, and soon after would be leaving the cases. Since we’re in the middle of a hiatus from new park treats, I’ll be making a few past ones here until I’m back once again, strolling the candy cases and shoving chocolate in my face. Fingers crossed I don’t have to wait until a year from now to do that.

Strawberry Shortcake Marshmallow Wands // magicaltreatsathome.com

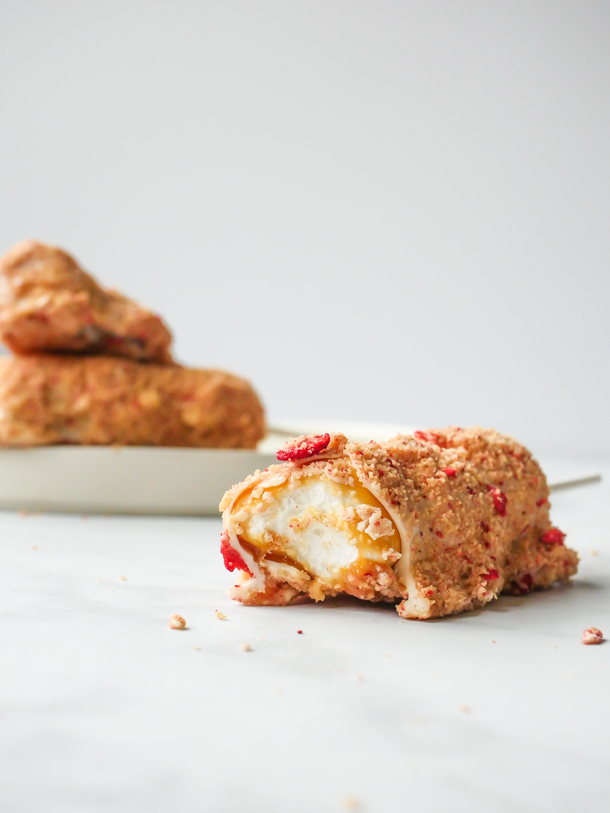
What I love about this treat is the buttery contrast of the cookie to the sweeeeeeeet white chocolate, caramel, and marshmallow. The strawberry bits add a nice zing to it as well. It’s definitely a sweet treat, but I wouldn’t write this off as just for kids.

But speaking of kids! Kids can help assemble these and dip in the chocolate and decorate. Older kids comfortable with a stove, and good common sense, can help dip in the caramel, but under supervision.

And if you’re wondering, the reason I had a container of marshmallow wands in the freezer is because I find melting the caramel in larger batches is easier to work with when making things like the wands. It stays liquid longer, and heats more evenly. The downside though is that there is a lot left over since I’m using more than I need. So now when I have extra caramel, I’ll just grab some lollipop sticks and some marshmallows (Another panic buy from March was a case of marshmallows. I’m thinking maybe I might start selling these as kits…), and I’ll coat a batch of marshmallows, place them on parchment and freeze. So far, after a 6 month hibernation, these were still great.

Strawberry Shortcake Marshmallow Wands // magicaltreatsathome.com

For the cookies, homemade or store bought is fine. But make sure you’re using a butter cookie, not a sugar cookie! And with that, I hope you enjoy these Strawberry Shortcake Marshmallow Wands!

Print
clock clock iconcutlery cutlery iconflag flag iconfolder folder iconinstagram instagram iconpinterest pinterest iconfacebook facebook iconprint print iconsquares squares iconheart heart iconheart solid heart solid icon
Strawberry Shortcake Marshmallow Wands // magicaltreatsathome.com

Strawberry Shortcake Marshmallow Wands

5 Stars 4 Stars 3 Stars 2 Stars 1 Star No reviews
  • Author: Elana Lepkowski
  • Yield: 6 Strawberry Shortcake Marshmallow Wands 1x
Print Recipe
Pin Recipe

Description

The classic caramel coated marshmallow wand gets a sweet upgrade with a layer of white chocolate and a buttery shortbread cookie crumble and tart strawberry coating! A Disneyland-inspired treat.


Ingredients

Scale
  • 18 marshmallows
  • 9 ounces (~32 candies) individually wrapped caramels (like Kraft)
  • 1–3/4 tablespoons water
  • 1/2 teaspoon of coconut oil
  • 10 ounces of white candy melts
  • 1 cup crushed shortbread cookies
  • 1/4 cup freeze dried strawberries, crushed
  • 6 lollipop sticks

Instructions

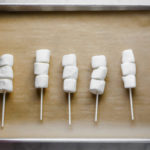
  1. Place 3 marshmallows on each lollipop stick and set aside on a parchment lined sheet pan.
    Churro Marshmallow Wand // magicaltreatsathome.com
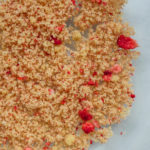
  2. Mix together the crushed shortbread and freeze dried strawberries in a large, shallow bowl that can accommodate the length of the marshmallow wand. If you cannot crush the strawberries by hand (some brands are chewier than others), a quick blitz in the food processor or coffee grinder should render them fine enough to mix with the cookies. Set aside.
    Strawberry Shortcake Marshmallow Wands // magicaltreatsathome.com
  3. Unwrap all the caramels and add to a small saucepan. Pour water in and heat over medium-low heat.
  4. Stir constantly until everything has melted and caramels are smooth (about 7-8 minutes).
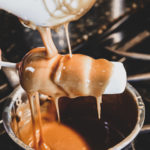
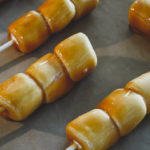
  5. Once melted (caramels should drip in a ribbon from a spoon back into the pan), dip each wand into the caramel, turning quickly to coat OR ladle the caramel over the wand, turning to coat. Let excess caramel drip off for at least 30 seconds, turning while it drips for even coating, tap the wand gently but firmly on the edge of the pan to remove any additional excess caramel, and then place back on the  parchment.
    Churro Marshmallow Wand // magicaltreatsathome.com
  6. When all the wands have been dipped, place the baking sheet in the refrigerator for 15-20 minutes so that the caramel will be set for dipping.
    Churro Marshmallow Wand // magicaltreatsathome.com
  7. While the caramels set, melt your white chocolate for coating. Combine the white candy melts and coconut oil in the microwave inside a microwave safe bowl, like glass, for 30 seconds. Stir and microwave again for an additional 30 seconds. Keep stirring and microwaving in short bursts of 15-20 seconds until melted and smooth. Use can alternatively use a double boiler for melting. Do not let the white chocolate get over 110°f as it can burn the chocolate (use a candy thermometer if you’re not sure about this).
  8. Remove the marshmallow wands from the refrigerator. You’ll know they are set when they lift easily off the parchment. If they still stick, keep them in 5 minutes longer.
  9. Set up the shortbread cookie and strawberry mix bowl next to your white chocolate.
  10. Dip the marshmallow wand in the white chocolate, or ladle chocolate over, turning to coat. Tap the stick firmly on the side of your pan to remove any excess chocolate. Then immediately roll in the cookie/strawberry mix, gently pressing the mix onto the white chocolate. Then place back on the parchment.
  11. Repeat with the remaining marshmallow wands.
  12. Let sit at least 30 minutes to firm up or in the refrigerator for quicker results. Enjoy!

Notes

  • Melted caramel is HOT! Use caution in the kitchen. Do not dip your fingers or hands into the caramel has it can adhere to skin and burn you. Keep away from children.
  • Use hot water to remove caramel from pans and utensils.
  • If the marshmallow wands start to stick to the parchment while you are dipping and coating, stick the pan with the un-coated wands back to chill in the refrigerator for a few minutes. If your kitchen is really hot, keep them in there the whole time, taking one at a time out to coat and decorate.
  • If you have extra melted caramel that has dried around your wand, use kitchen shears to remove it immediately after removing from the refrigerator.
  • Extra caramel coated marshmallow wands may be placed on a sheet of parchment in a single layer inside an airtight container and frozen for up to 6 months. No need to defrost them before use.
  • Did your chocolate coating break when you first dipped your wand in? Wait for the chocolate to cool down more. It should drip freely from a spoon without it seizing when the spoon is shaken slightly (will cause crevices in the chocolate on the spoon). If it breaks on the wand, your wand also might be too cool, so let them warm up more. And don’t worry, once that chocolate starts to firm up, you can dip it AGAIN into the chocolate to get a more even, although slightly thicker, coating.

Did you make this recipe?

Tag @magicaltreatsathome on Instagram and hashtag it #magicaltreatsathome

Strawberry Shortcake Marshmallow Wands // magicaltreatsathome.com

Share this:

  • Click to share on Facebook (Opens in new window) Facebook
  • Click to share on X (Opens in new window) X

Like this:

Like Loading...

Filed Under: Recipes, Treats Tagged With: caramel, disneyland, holiday, marshmallow, marshmallow-wand, shortbread, strawberry, treat, Valentine's Day, white chocolate

5 Minute Treats: Cinnamon-Brown Sugar Affogato (Churro Affogato)

April 21, 2020 by Elana Lepkowski Leave a Comment

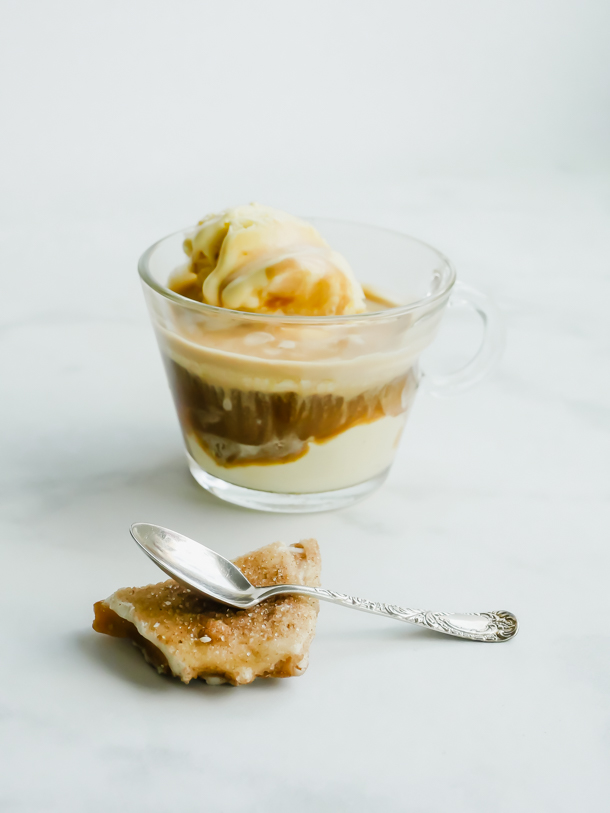
Churro Cinnamon-Brown Sugar Affogato // magicaltreatsathome.com

Where can I find the original treat?

  • This holiday time treat was available at Schmoozies! inside California Adventure.

We’re back again today with another quick treat in our 5 Minute Treats series! This holiday time Cinnamon-Brown Sugar Affogato was nicknamed the Churro Affogato because of its delicious ice cream base. And today you can either make, or buy, the ice cream depending on how quickly you’d like the treat!

Churro Cinnamon-Brown Sugar Affogato // magicaltreatsathome.com

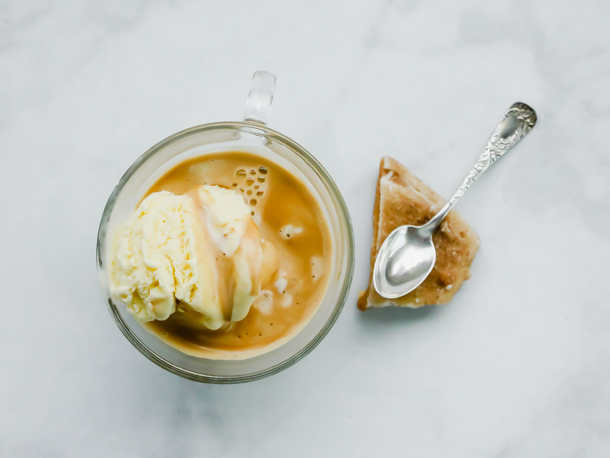
While we’ve been stuck inside, the kids and I have been doing some fun kitchen experiments. Making ice cream has definitely been a favorite! If you can score some cinnamon ice cream at the store, then this recipe really is a super quick treat. However, if you’ve got the time, and an ice cream maker, then I’ve also included a recipe for a super creamy, custard based cinnamon-brown sugar ice cream. I don’t want to make the store bought people jealous, but this stuff is SO GOOD and SO CREAMY. I also love that you can adjust the amount of cinnamon and/or sugar to suite your tastes as well.

Churro Cinnamon-Brown Sugar Affogato // magicaltreatsathome.com

Affogatos are usually espresso based, but if all you’ve got is coffee right now, try brewing a stronger batch for this. The combination of the bittersweet coffee and the spicy cinnamon make for an extraordinary pairing. It’s reminiscent of the Mexican coffee, or cafe de olla that we get at a local restaurant here in Los Angeles. It’s also, quite tasty with a hunk of Churro Toffee dipped in as well.

Churro Cinnamon-Brown Sugar Affogato // magicaltreatsathome.com

I hope you enjoy this super simple, and yet very elegant, treat today! (Or tomorrow if you make the ice cream!) It’s about to get REAL HOT here in LA, so I’m thinking about making a few batches of ice cream this week. Have a magical week everyone!

Print
clock clock iconcutlery cutlery iconflag flag iconfolder folder iconinstagram instagram iconpinterest pinterest iconfacebook facebook iconprint print iconsquares squares iconheart heart iconheart solid heart solid icon
Churro Cinnamon-Brown Sugar Affogato // magicaltreatsathome.com

5 Minute Treats: Cinnamon-Brown Sugar Affogato (Churro Affogato)

5 Stars 4 Stars 3 Stars 2 Stars 1 Star No reviews
  • Author: Elana Lepkowski
  • Yield: 1 Cinnamon-Brown Sugar Churro Affogato + 1 quart ice cream 1x
Print Recipe
Pin Recipe

Description

Creamy, spicy cinnamon and brown sugar ice cream is topped with a healthy pour of bittersweet espresso in this 5 Minute Treat. A Disneyland-inspired recipe.


Ingredients

Scale

For the ice cream:
adapted from David Lebovitz

  • 1 cup (250ml) whole milk
  • 3/4 cup (150g) brown sugar
  • pinch of salt
  • 8 cinnamon sticks broken up (see notes below)
  • 2 cups (500ml) heavy cream
  • 5 large egg yolks
  • 1/4 teaspoon ground cinnamon

For the affogato

  • 1 shot of freshly brewed espresso
  • churro toffee chunks, optional (find the recipe here on our site!)

Instructions

For the ice cream:

  1. Heat the milk, brown sugar, salt, cinnamon sticks, and 1 cup of the heavy cream together in a medium saucepan. Cover, remove from heat, and let steep 1 hour.
  2. Place the pan back on the stove and rewarm the mixture, removing the cinnamon sticks with a slotted spoon. Be careful not to let the mixture start to boil or get too hot, you are just warming the milk up to barely simmering at this point.
  3. Nest a medium-sized bowl in a larger bowl that’s partially filled with ice water, to create an ice bath. Set a mesh strainer over the medium bowl and pour the remaining cream into the medium bowl.
  4. Whisk together the egg yolks in a small bowl and gradually add some of the warm cinnamon-infused milk to the yolks, whisking constantly. Scrape the warmed yolks back into the saucepan and cook over medium heat, stirring constantly and scraping the bottom with a heatproof spatula, until the custard thickens and coats the spatula.
  5. Remove from heat and immediately pour the custard through the strainer into the cream. Remove the strainer and stir the custard until cool, then chill thoroughly in the refrigerator at least 8 hours or overnight.
  6. Before churning, add the ground cinnamon. Gently stir to combine.
  7. Then, freeze the custard in your ice cream maker according to the manufacturer’s instructions. Store in an airtight container in the freezer until ready to use.

For the affogato:

  1. Place the desired amount of ice cream in a small bowl or heat proof cup (I like two small scoops for this dessert).
    Churro Cinnamon-Brown Sugar Affogato // magicaltreatsathome.com
  2. Pour the espresso over the ice cream.
  3. Optionally top with crumbled churro toffee pieces. Enjoy!

Notes

  • To break up cinnamon sticks, you can either grind them in a mortar and pestle (which is what I did, and really, you’re just breaking them up, not grinding into a powder), or wrap them in a kitchen towel and break them up with a hammer or meat tenderizer. I would not suggest a ziplock as is said in the original recipe, as they tend to poke through and tear the bag, getting pieces everywhere.
  • We are Nespresso users at home, so I found that a regular shot was plenty. The lungo shot was a bit too much and melted the ice cream more than I desired creating a warm soup.
  • If you want to make a batch for a party, portion out ice cream into small cups and freeze ahead of time. When ready to serve, brew lungo shots in a large measuring glass with a spout. Then you can pour small amounts of espresso all at once into each cup.

Did you make this recipe?

Tag @magicaltreatsathome on Instagram and hashtag it #magicaltreatsathome

Churro Cinnamon-Brown Sugar Affogato // magicaltreatsathome.com

Share this:

  • Click to share on Facebook (Opens in new window) Facebook
  • Click to share on X (Opens in new window) X

Like this:

Like Loading...

Filed Under: 5 Minute Treats, Recipes, Treats Tagged With: 5 Minute Treat, brown sugar, churro toffee, cinnamon, DCA, disneyland, holiday, ice cream, Schmoozies, treat

Hot Cocoa Macaron

January 13, 2020 by Elana Lepkowski Leave a Comment

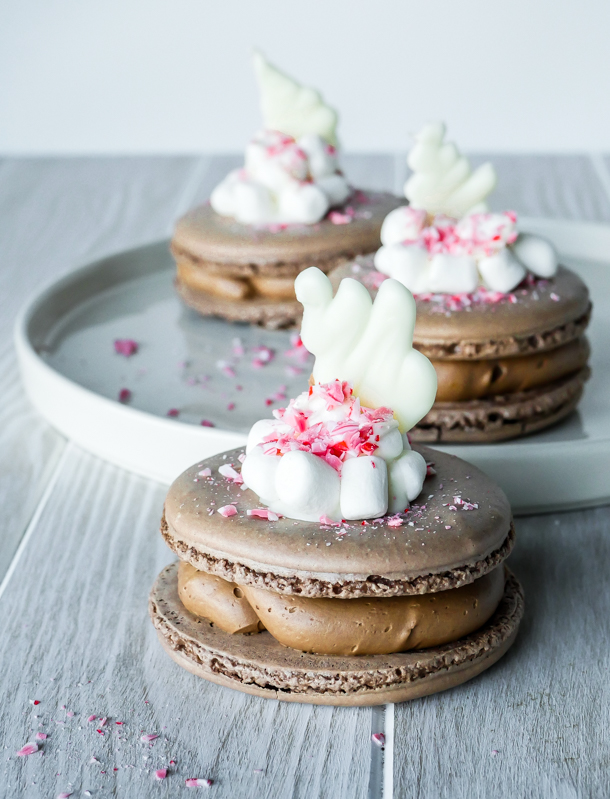
Hot Cocoa Macaron // magicaltreatsathome.com

Where can I find the original treat?

  • This holiday treat was part of the Festival of Holidays at Disney California Adventure Park.

Welcome back and Happy New Year! Are you in need of a comforting treat? Me too. Sometimes January can feel like someone let the air out of the balloon. There’s the big let down after all the holiday food and decorations have been put away for the year. And yeah, maybe there’s still a little of that, but now January marks the cozy season for me. Also, my youngest celebrates a birthday at the end of the month…. so I’m still party planning even after I put away the Christmas decorations.

Hot Cocoa Macaron // magicaltreatsathome.com

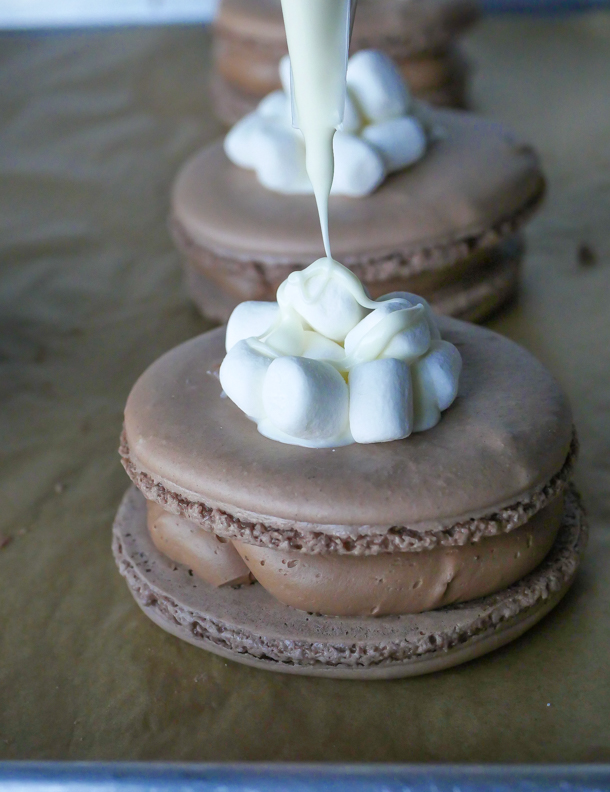
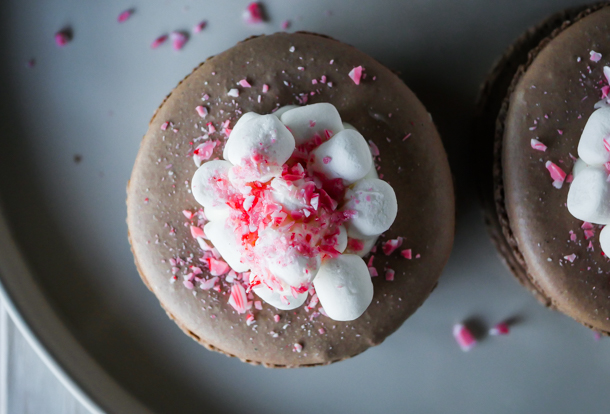
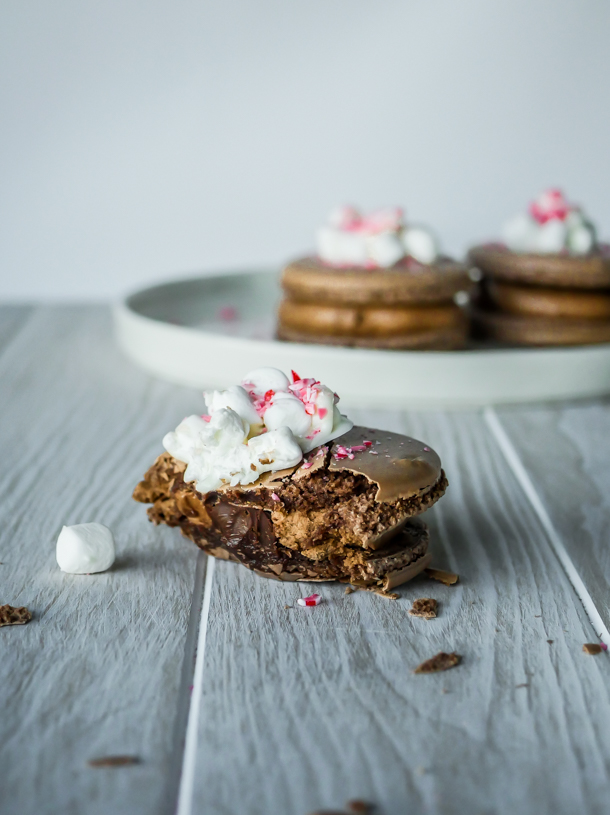
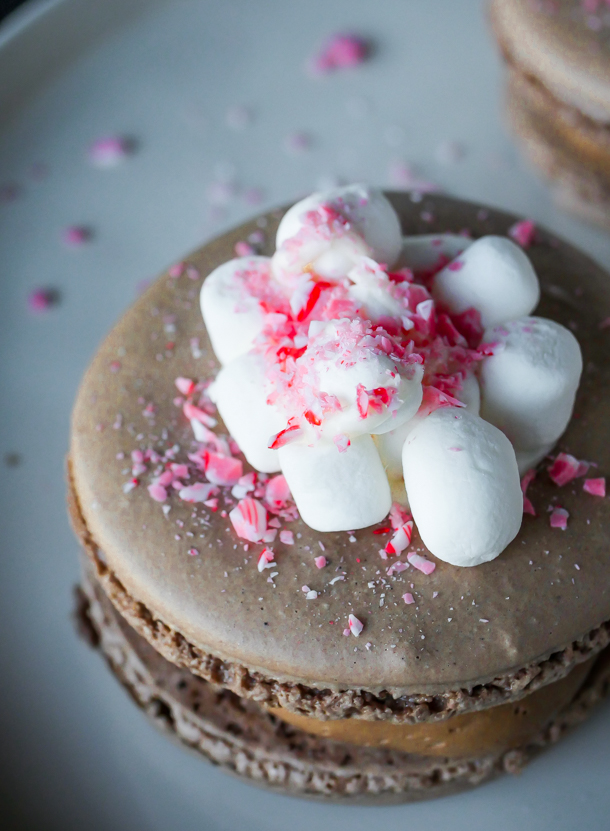
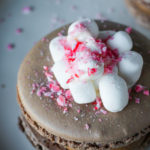
Our first treat of 2020 is like a warm sweater by the fire in cookie form: the Hot Cocoa Macaron! This oversized cookie was part of the Festival of Holidays celebration at DCA and you could have found this at the Making Spirits Bright kiosk.

It really did remind me of the flavors of a cup of hot cocoa, I think part of that was the combination of chocolates, especially the milk chocolate filling with semisweet ganache center. The mound of mini marshmallows on top didn’t hurt either.

Hot Cocoa Macaron // magicaltreatsathome.com

I love making macarons. (We have two other recipes on the site if you’re looking for more after this too!) They require a little patience and technique but honestly, they’re pretty quick to put together and they definitely wow people when you tell them you made them. If you’re looking ahead towards Valentine’s Day presents, these would be a pretty special gift (I might just gift myself another batch…).

I have a whole new set of tips and tricks with these, as the addition of cocoa powder to the macaron mix changes the consistency and texture a bit. So please read through all those before starting the recipe. They will ensure you will have a good batch (and not need to make them 4 times to be perfect… like some people I know *coughcough*).

Hot Cocoa Macaron // magicaltreatsathome.com

BONUS! As a special gift to all of you who want to try this recipe, first, thank you, and second, I’ve made a printable template for perfectly shaped macarons. You really need both halves to match up in order to sandwich the filling, and this template will help you make sure that happens.

Icon

3 inch circle template

1 file(s) 86.61 KB
Download

I’m so excited to kick off a whole new year of treats with all of you! If there’s anything at the parks you’d like to see made on here, drop us a line in the comments below or shoot us an email!

Hot Cocoa Macaron // magicaltreatsathome.com
Print
clock clock iconcutlery cutlery iconflag flag iconfolder folder iconinstagram instagram iconpinterest pinterest iconfacebook facebook iconprint print iconsquares squares iconheart heart iconheart solid heart solid icon
Hot Cocoa Macaron // magicaltreatsathome.com

Hot Cocoa Macaron

5 Stars 4 Stars 3 Stars 2 Stars 1 Star No reviews
  • Author: Elana Lepkowski
  • Yield: 3 Oversized Hot Cocoa Macarons 1x
Print Recipe
Pin Recipe

Description

Cozy up with this oversized hot cocoa inspired Macaron filled with two kinds of chocolate filling and topped with a mound of mini marshmallows and dusted with peppermint. A Disneyland-inspired recipe.


Ingredients

Scale

For the macarons:

  • 85g (1 cup minus one tablespoon) almond flour
  • 120g (1 cup) powdered sugar
  • 1 tablespoon (8g) unsweetened cocoa powder
  • pinch of salt
  • 70g egg whites, from about 2 large eggs
  • 1/4 teaspoon cream of tartar
  • 40g (3 tablespoons) granulated sugar

For the chocolate ganache:

  • 1/4 cup heavy cream
  • 2 ounces semisweet chocolate, chopped
  • 1 tablespoon unsalted butter

For the milk chocolate buttercream (adapted from Epicurious):

  • 1/3 cup whole milk, or milk substitute (this worked with almond milk)
  • 2 whole egg yolks
  • 2 teaspoons all purpose flour
  • 3/4 cup powdered sugar, divided
  • 1/2 teaspoon vanilla extract
  • 1–1/2 sticks (3/4 cup) unsalted butter
  • 4 ounces milk chocolate, melted and cooled
  • 1 ounce unsweetened baking chocolate, melted and cooled

For the topping:

  • 1 ounce white chocolate
  • 1 cup mini marshmallows
  • 1 candy cane, crushed

Special Tools:

  • 3″ circle cookie cutter

Instructions

For the macarons:

  1. First sift the almond flour, powdered sugar, cocoa powder, and salt back and forth four times between two bowls using a mesh strainer. Alternatively you can also pulse in a food processor 7-8 times. Set aside.
  2. Line a baking sheet with parchment. Using a pencil, trace six 3″ circles using the cutter as a guide leaving at least an 1″ between shapes. Flip parchment over so that you can still see outlines, but the graphite will not transfer to macarons. Alternatively,  place the free downloadable template (see notes above recipe for download) under the sheet of parchment. Set aside.
  3. In the bowl of a stand mixer fitted with the whisk attachment, add in the egg white and whisk on medium-low until slightly foamy, about 30 seconds. Add in the cream of tartar and whisk on medium until soft peaks appear. Then slowly pour in the sugar. Whisk on high until stiff peaks form, about 2-3 minutes.
  4. Remove the bowl from the mixer. Sift the entire dry mixture into the egg whites. Fold them until all the dry ingredients are incorporated and no egg whites remain. Egg whites will deflate and mixture should be the consistency of cake batter when they are ready. See notes below.
  5. Add batter into a piping bag. Cut the tip off about 1/2″, and pipe shapes onto the parchment lined baking sheet keeping the tip in the center and squeezing out until about 1/4″ before the outside of the circle. Then, pick up trays about 2″ from counter and let them fall down. Repeat. This helps to remove air bubbles from the batter. Let the batter sit about 45 minutes.
  6. Preheat your oven to 350°f about 15 minutes before the rest time is finished. Place cookies in oven to bake, and then lower the temperature to 300°f. Cook for 18-20 minutes.
  7. Let the macarons cool at least 20-30 minutes before decorating.

For the ganache:

  1. In a small sauce pan, heat the heavy cream until hot (about 181°f). Turn off the heat and add in the chocolate and stir to combine.
  2. Next, add in the butter and continue to stir until everything is incorporated and smooth.
  3. Transfer to a heat proof bowl and let cool to room temperature. Then cover and refrigerate until firm (about 30 minutes).

For the milk chocolate buttercream:

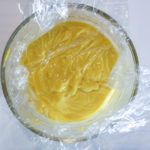
  1. Heat milk in a small saucepan over moderate heat until hot. Whisk together yolks, flour, 1/4 cup confectioners sugar, and a pinch of salt in a bowl, then add hot milk in a stream, whisking. Transfer custard to saucepan and bring to a boil over moderate heat while continually whisking (about 30 seconds to one minute). Reduce heat and simmer, whisking, until mixture becomes very thick, about 30 seconds more, then transfer to a medium sized bowl. Cover surface of custard with plastic wrap and cool completely, about 45 minutes.
    Hot Cocoa Macaron // magicaltreatsathome.com
  2. Add vanilla and remaining confectioners sugar to custard and beat at medium speed until combined well, then increase speed to medium-high and beat in butter, 2 tablespoons at a time, until smooth. Buttercream will look broken when mixing in butter but keep mixing and it will come together eventually!
  3. Scrape down bowl. Add chocolates and beat until combined well.

Assembly:

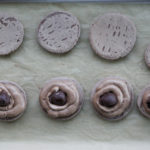
  1. Using a #100 disher or melon baller, scoop out small circle of ganache and place in the center of the macron bottom. Repeat with remaining macarons. See notes below for storing leftover ganache.
  2. Fill a piping bag 1/2 with frosting, cut about 1/2″ from the tip of the bag, and pipe circles of frosting around in a spiral until you hit the ganache center. Repeat with remaining macarons. See notes below for storing leftover frosting.
    Hot Cocoa Macaron // magicaltreatsathome.com
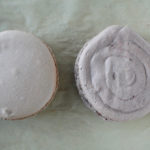
  3. Place macaron tops gently to form cookies sandwiches. Set aside.
  4. Melt the white chocolate in the microwave inside a microwave safe bowl, like glass, for 30 seconds. Stir and microwave again for an additional 30 seconds. Keep stirring and microwaving in short bursts of 15-20 seconds until melted and smooth. Spoon a small mound in the center top of each macaron. Place the mini marshmallows on top to set. Drizzle a small amount of the white chocolate on top and then sprinkle crushed peppermint on the tops of each macaron.
  5. Wait about 10 minutes for the chocolate to set and then enjoy!

Bonus! Making the white flames:

  1. Any left over melted white chocolate can be thinly spread on a sheet of parchment in the shape of a flame. Refrigerate 5 to 10 minutes to set. Remove from refrigerator and gently remove from the parchment. These can be placed on top of the macarons to resemble the decorations at DCA.
    Hot Cocoa Macaron // magicaltreatsathome.com

Notes

  • Sifting the almond flour and powdered sugar together is necessary for the absorption of oils and to prevent clumping of batter.
  • When mixing the macaron batter, you want to push the batter against the side of the bowl to help mix and deflate the egg whites. The cocoa powder will dry out the mixture and you will want to keep mixing more than a normal batch of macarons.
  • Do not pipe all the way to the edge of the circle as the batter will spread a bit while resting.
  • If you want a smooth top to the macaron, besides dropping the sheet pan to get out air bubbles, how you pipe is also important. Position your piping bag over the center of the circle and continually squeeze out batter until you fill 3/4 of the circle. If you pipe in a spiral, you will have noticeable lines on the top. You can use a damp, not wet, finger to push down any batter that sticks up. See below.
    Hot Cocoa Macaron // magicaltreatsathome.com
  • Any additional air bubbles that are not removed from the drop onto the counter can be poked with a scribe or toothpick before resting.
  • Any left over macaron batter can be piped into smaller cookies and baked off for 15 minutes.
  • If you are having any technical issues still with your macarons, I highly suggest looking up some tutorial videos on YouTube (that is until we have some of our own up!).
  • Leftover buttercream can be stored in the fridge up to one week, brought to room temperature, and whipped before using. It can also be stored in the freezer up to 3 months.
  • Leftover ganache can be stored in an airtight container in the refrigerator up to 3 weeks.
  • Macarons can be stored in the refrigerator up to one week. Let them sit 10-15 minutes to come to room temp before enjoying.

Did you make this recipe?

Tag @magicaltreatsathome on Instagram and hashtag it #magicaltreatsathome

Share this:

  • Click to share on Facebook (Opens in new window) Facebook
  • Click to share on X (Opens in new window) X

Like this:

Like Loading...

Filed Under: Gluten Free, Recipes, Treats Tagged With: buttercream frosting, chocolate, christmastimetreats, DCA, Festival of Holidays, ganache, gluten free, holiday, macarons, peppermint, treat, white chocolate

  • Go to page 1
  • Go to page 2
  • Go to Next Page »

Primary Sidebar

Follow Us

  • Instagram
  • Facebook
  • X
  • Pinterest
  • Email
  • YouTube

Hi! My name is Elana, and that’s me shoving a Mickey Mouse shaped treat in my face. I love the treats at Disneyland. A lot. So much so I’ve dedicated an entire website to making all my favorites, and hopefully yours too, out of my home kitchen. My aim is to create Disneyland-inspired treats, with easy to follow directions, and many recipes geared towards getting the kids in the kitchen to help too! Because putting sprinkles on things is F-U-N.

Top With Sprinkles

Get Recipes in Your Inbox!

* indicates required

Look for this icon in posts to find Kid Friendly recipes!

Recent Posts

  • Matterhorn Macaroon
  • Caramel Gingerbread Cookie Sandwiches
  • Colorful Fruit Hand Pies
  • Classic Mickey Shaped Beignets
  • Carrot Cake Cookies

Archives

  • February 2023
  • December 2022
  • August 2022
  • January 2022
  • December 2021
  • November 2021
  • December 2020
  • November 2020
  • October 2020
  • September 2020
  • August 2020
  • July 2020
  • June 2020
  • May 2020
  • April 2020
  • March 2020
  • February 2020
  • January 2020
  • December 2019
  • November 2019
  • October 2019
  • September 2019
  • August 2019
  • July 2019
  • June 2019
  • May 2019

Copyright © 2025 Magical Treats at Home on the Foodie Pro Theme

%d