• Skip to primary navigation
  • Skip to main content
  • Skip to primary sidebar

Magical Treats at Home

  • About
  • Treats
  • Drinks
  • Savory
  • Favorite Tools
  • Etsy Shop

Christmas

Twice Upon a Cupcake

December 23, 2020 by Elana Lepkowski Leave a Comment

Christmas Tree Cupcakes // magicaltreatsathome.com

Where can I find the original treat?

  • This holiday treat was found at the Main Street Bakery inside the Magic Kingdom in Walt Disney World.

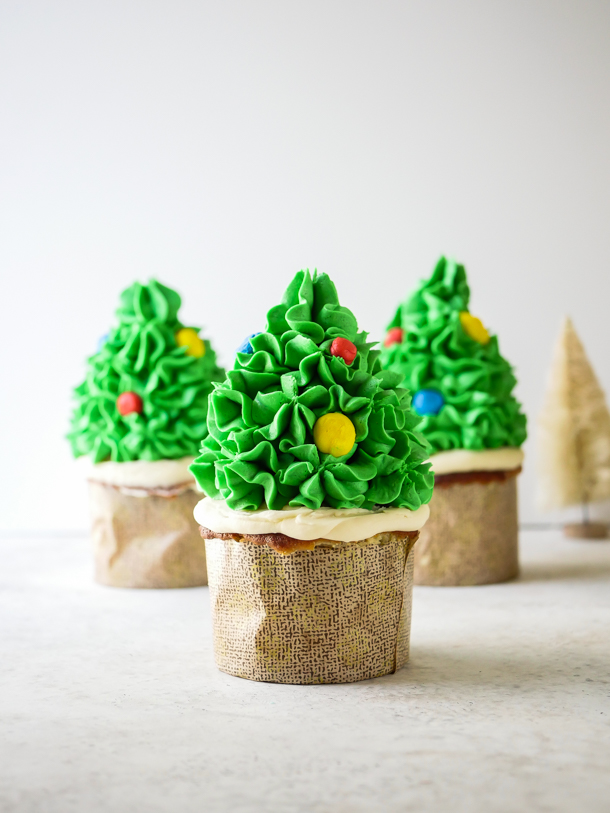
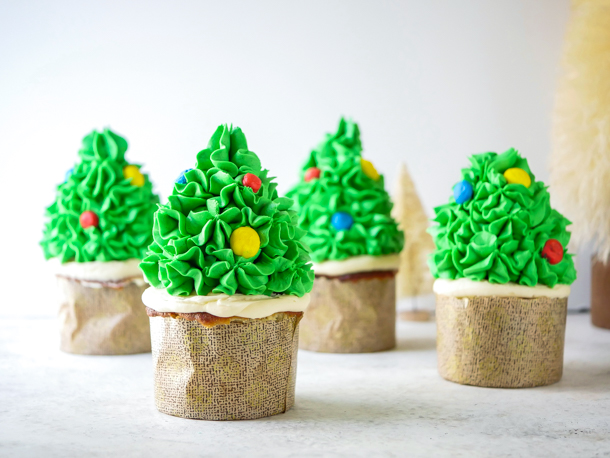
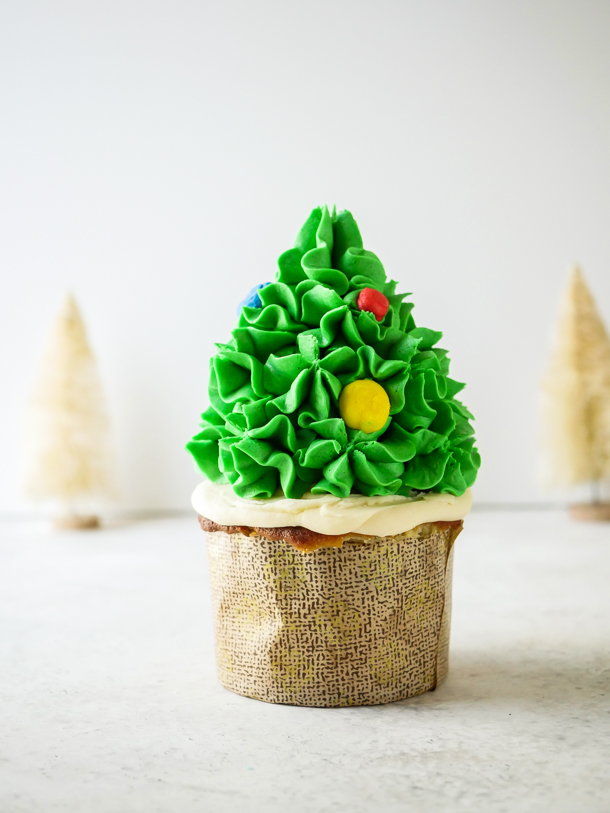
During the holidays your baking is allowed to be… extra. And today we’ve got an “extra” cupcake. As in, there is a cupcake sitting on top of another cupcake. See? Extra.
Christmas Tree Cupcakes // magicaltreatsathome.com

Actually, there is a cupcake sitting on top of a cupcake with a hidden Mickey cake ball inside. Sooooo extra. And let’s be real. This is fun to make, but there’s a lot of components. You can definitely make just some of these parts, but if you’re missing Disney treats on Main Street this holiday season, then this is a fun project.
Christmas Tree Cupcakes // magicaltreatsathome.com

The recipe below is broken down into three components: cake balls, confetti tree cupcakes, and the surrounding base for the cupcake. These can be done simultaneously, or broken up into steps over days depending on how much time you have. I’m also noting that usually, I make the red velvet cake balls with cream cheese icing, but I found that regular American buttercream works better here (it doesn’t “weep” like the cream cheese does when molding and freezing).
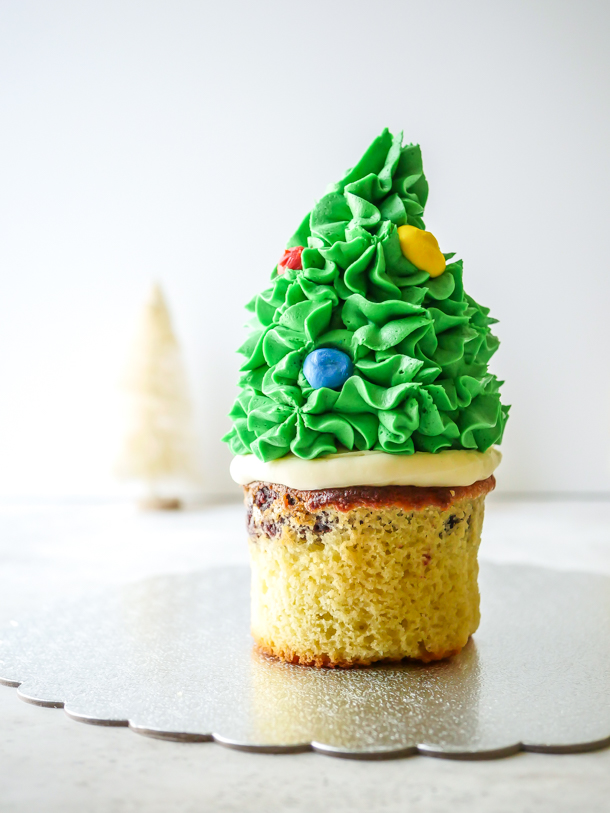
Christmas Tree Cupcakes // magicaltreatsathome.com

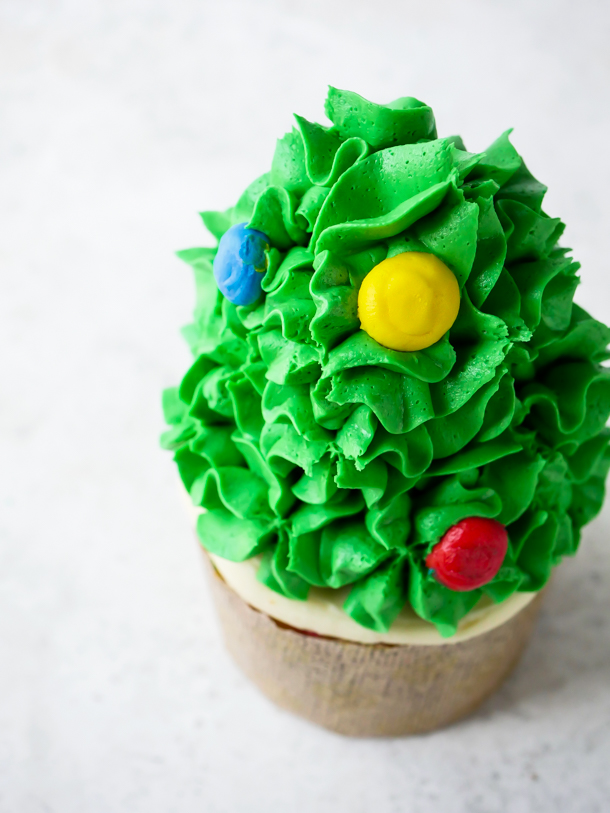
The only thing I deviated from in the original treat was the sugar light bulbs. For a home baker, I thought going through this step would feel like overkill. Instead I piped out buttercream lights, refrigerated them, and used for the lights. Then, my 6 year old looked at the trees and asked “why didn’t I just use M&Ms?”, and honestly, I would have just done that had I thought of it. So, I’m recommending that for convenience here as well.

Kids can help in all parts of the baking and decorating stages here. My kids mostly liked adding the M&Ms to their half trees (in the picture below I piped some frosting onto an extra confetti “tree” cupcake and let them decorate and eat that part).
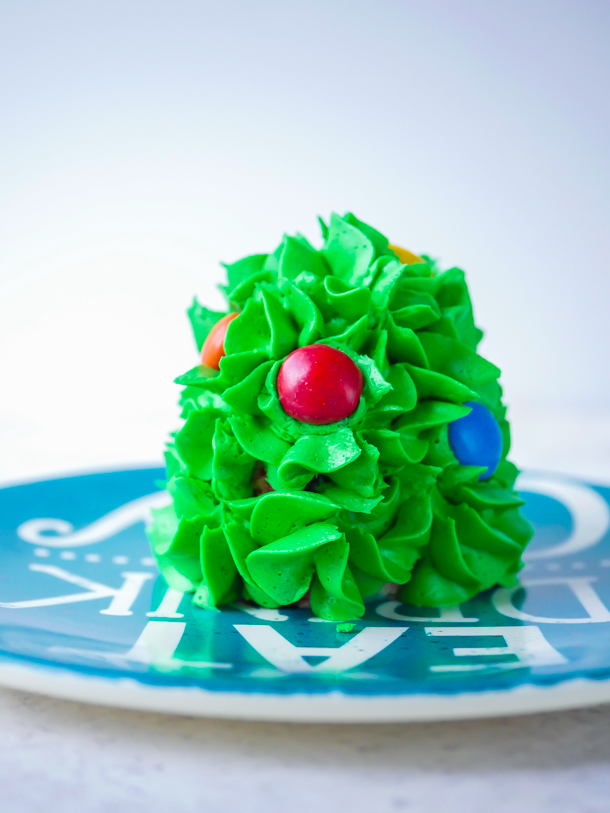
Christmas Tree Cupcakes // magicaltreatsathome.com
You can also make a single tree cupcake too!

Now, the hidden Mickey part of these is probably the hardest of these cupcakes. And what is the secret to getting a hidden Mickey every time you make a cut? Simple! You actually create a ring, or halo, over the ball in the center. Then no matter where you make the cut to reveal the hidden Mickey, you’ll get one! They are tricky though, and as you can see, mine were prone to separate when baking. My suggestion is that you really seal the ball and the ring together. I had placed mine just on top, and the cake batter pushed the ring up a bit. You could also pin them together with toothpicks and take the toothpicks out when done baking (and PLEASE remember to do that as I do not want you to harm your mouth eating treats!).
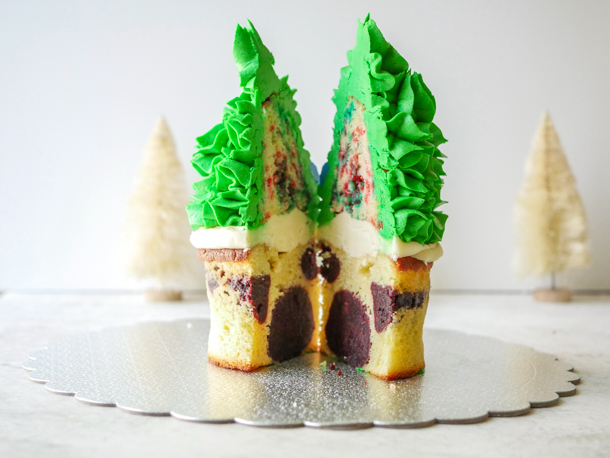
Christmas Tree Cupcakes // magicaltreatsathome.com

Anyway you decided to make these, whether the full cupcakes, just the trees, or without the hidden Mickey centers, these are a delightful treat to have this holiday week.

Happy baking, happy holidays, and I’ll see you all in the New Year!

Print
clock clock iconcutlery cutlery iconflag flag iconfolder folder iconinstagram instagram iconpinterest pinterest iconfacebook facebook iconprint print iconsquares squares iconheart heart iconheart solid heart solid icon
Christmas Tree Cupcakes // magicaltreatsathome.com

Twice Upon a Cupcake

5 Stars 4 Stars 3 Stars 2 Stars 1 Star No reviews
  • Author: Elana Lepkowski
  • Yield: 4–6 Twice Upon a Cupcake cupcakes 1x
Print Recipe
Pin Recipe

Description

A decadent holiday cupcake has TWO hidden treats inside that are revealed when you cut through the cupcake. Did you find the hidden Mickey? A Walt Disney World inspired treat.


Ingredients

Scale

For the Buttercream and decorations:

  • 1 pound powdered sugar, sifted
  • 1 cup butter, room temperature
  • pinch of salt
  • 1 tablespoon vanilla
  • 1 tablespoon cream
  • green food coloring (I used Americolor Leaf green)
  • Optional food coloring if making buttercream light decorations: red, yellow, blue
  • Red, yellow, and blue M&Ms for lights

For the red velvet hidden Mickey center:

Adapted from Dessert for Two

  • 95 g (3/4 cup) flour
  • 4 teaspoons cocoa powder, unsweetened
  • 1/2 tsp baking soda
  • 1/4 teaspoon salt
  • 1/2 cup coconut oil or neutral oil
  • 2 tablespoons warm water
  • 1/2 cup (99 g) granulated sugar
  • scant 1/4 cup (57 g) Greek yogurt
  • 1 egg
  • Red food coloring (see notes below for type and amounts)
  • 1/4 tsp vanilla

For the Cupcakes (and Sprinkle Funfetti Tree Cupcakes):

  • 1/2 cup (1 stick) unsalted butter
  • 3/4 cup (150 g) granulated sugar
  • 2 large eggs
  • 1/2 cup milk
  • 2 teaspoons vanilla
  • 1–1/2 cups (180 g) all purpose flour
  • 1–1/2 teaspoons baking powder
  • 1/2 teaspoon salt
  • 1/2 cup green and red sprinkles

Specialty Tools:

  • Tall baking cups
  • popover pan
  • piping bags
  • closed star tip (Ateco #847 used here)

Instructions

For the buttercream:

  1. First, make sure your powdered sugar is lump free. Sift if needed.
  2. Then, beat the butter and salt together for a minute until light and fluffy.
  3. Pour in the powdered sugar and slowly mix until they start to combine about 30 seconds. Then turn up the speed to high and beat together until mixture starts to become fluffy in texture.
  4. Add in the vanilla and cream, and beat on high an additional minute or two until desired texture is reached. If dry, add in an additional teaspoon of cream. Set aside covered with a damp, not wet, towel.

For the red velvet hidden Mickey center:

  1. Preheat oven to 350°f and grease and flour a 6″ round cake pan.
  2. In a small bowl, whisk together the flour, cocoa powder, baking soda, and salt. Set aside.
  3. In the bowl of a stand mixer, combine the oil, warm water, granulated sugar, Greek yogurt, egg, red food coloring, and vanilla.
  4. Add in the dry ingredients and mix until combined.
  5. Pour into prepared baking pan and bake 20-25 minutes, or until a cake tester comes out clean.
  6. Let cool in the pan 5 minutes, turn out the cake onto a cooling rack, and let completely cool at least one hour.
  7. Then crumble the cake into pea sized crumbs and place in a mixing bowl.
  8. Add to the crumbs about 1/4 cup of the buttercream frosting. Mix well until combined.
  9. Next, roll out 4-6 small round balls, these will be the heads. Set aside on a parchment lined baking sheet.
  10. With the remaining cake pop dough, roll out thin snakes (you can use plastic wrap to help roll out the snakes). Form the snakes into rings and place on the balls. You can use toothpicks to hold in place. Press firmly to help seal the two together. Place in freezer until ready to use.

For the cupcakes:

  1. Set the oven to 350°f. Set out tall cupcake holders (you will not need a cupcake tray for the freestanding molds). Then, using tin foil, shape out a conical mold for the tree tops. (You can use a popover pan to hold the molds in place, or place the tin foil mold in a tall baking cup). Make sure there are no gaps or holes or your batter will leak. Optionally, you can also cook off some funfetti cupcakes in regular molds, freeze, and then cut to shape.
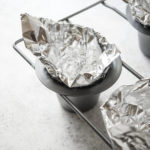
    Christmas Tree Cupcakes // magicaltreatsathome.com
  2. In a mixing bowl, beat butter and sugar together until light and fluffy.
  3. Next, beat in eggs one at a time until incorporated. Then add in vanilla and 1/4 cup of the milk.
  4. Mix in flour, baking powder, and salt, and then the rest of the milk. Set aside.
  5. Remove red velvet cake pops from freezer and place into freestanding baking molds. Spoon batter over cake pops until about 2/3 of mold is filled. Place in oven for 25-28 minutes.
  6. Next, add sprinkles to remaining batter and mix to combine. Do not over mix.
  7. Pour sprinkle batter into conical molds, and place in oven for 22-26 minutes. Both cupcakes can bake in the oven at the same time, but keep separate timers.
  8. When finished baking, let cool to room temperature. Funfetti cupcakes can be kept in the freezer for 30 minutes to firm up if they need to be cut to shape.

Decorating:

  1. If piping lights, remove about a half cup of frosting. Divide into three bowls and color one bowl red, another yellow, and lastly blue. Then transfer to small piping bags with a round tip. Pipe out circles onto a parchment lined baking sheet and refrigerate at least an hour to firm up.

    Christmas Tree Cupcakes // magicaltreatsathome.com
  2. If not piping lights and using M&Ms instead, remove about 1/2 cup of frosting into a plain tipped piping bag and pipe a circle on top of the base cupcakes. Place the funfetti trees on top of that. Then proceed to coloring all the remaining frosting green by adding 2-3 drops of gel food coloring into the frosting bowl. Mix well to fully incorporate the color and then transfer all of the frosting to a piping bag fitted with an closed star tip (I used Ateco #847).
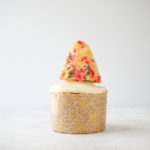
    Christmas Tree Cupcakes // magicaltreatsathome.com
  3. Pipe out closed stars for the trees all over the funfetti cakes.
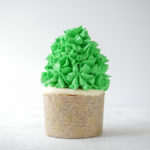
    Christmas Tree Cupcakes // magicaltreatsathome.com
  4. Next, if using buttercream lights, remove those from the fridge and place immediately onto the green frosting. If you using M&Ms, place those on the frosting. Repeat until all cupcakes are decorated.
  5. Enjoy!

Notes

  • If cocoa powder is lumpy, sift before using.
  • If you are using grocery store food coloring, you will need about 1-1/2 teaspoons of red food coloring to get the cake a nice bright red. If you were using a gel paste from like Americolor, you will need about a quarter teaspoon or two big squirts from the bottle.
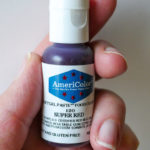
    Mickey Mouse Red Velvet Cake Pop // magicaltreatsathome.com
  • Cake crumbs should be small and no larger than a pea.
  • Cake balls should not be too wet or too dry to hold their shape properly. If too wet, add more cake crumbles. If too dry, add more frosting a small bit at a time.
  • M&Ms candies can be used instead of piping buttercream lights.
  • To prevent cake pop from moving inside the cupcake when baking, use toothpicks to hold together in place. REMEMBER TO REMOVE THE TOOTHPICKS BEFORE DECORATING.
  • Cupcakes will keep up to 4 days refrigerated in an airtight container. Let come to room temperature before eating.
  • Extra buttercream can be kept in an airtight container up to a week, or frozen up to 3 months.
  • Extra cake batter can be baked off for regular cupcakes. Reduce bake time by 2-3 minutes.
Did you make this recipe?

Tag @magicaltreatsathome on Instagram and hashtag it #magicaltreatsathome

Christmas Tree Cupcakes // magicaltreatsathome.com

Share this:

  • Click to share on Facebook (Opens in new window) Facebook
  • Click to share on X (Opens in new window) X

Like this:

Like Loading...

Filed Under: Recipes, Treats Tagged With: buttercream frosting, cake ball, cake pop, Christmas, christmastimetreats, cupcakes, hidden Mickey, holiday, Magic Kingdom, Main Street Bakery, red velvet, sprinkles, treat, vanilla, WDW

Mickey Mouse Holiday Gingerbread Cookie 2020

December 15, 2020 by Elana Lepkowski 3 Comments

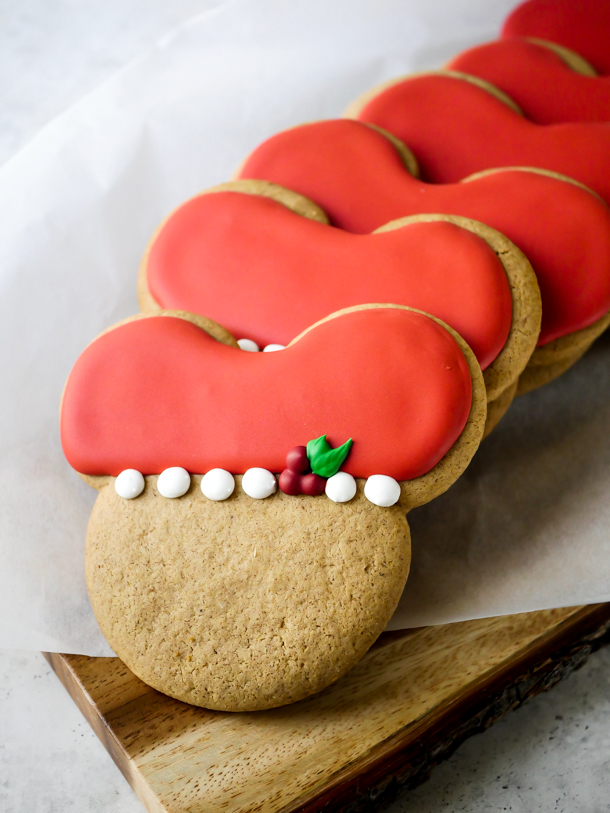
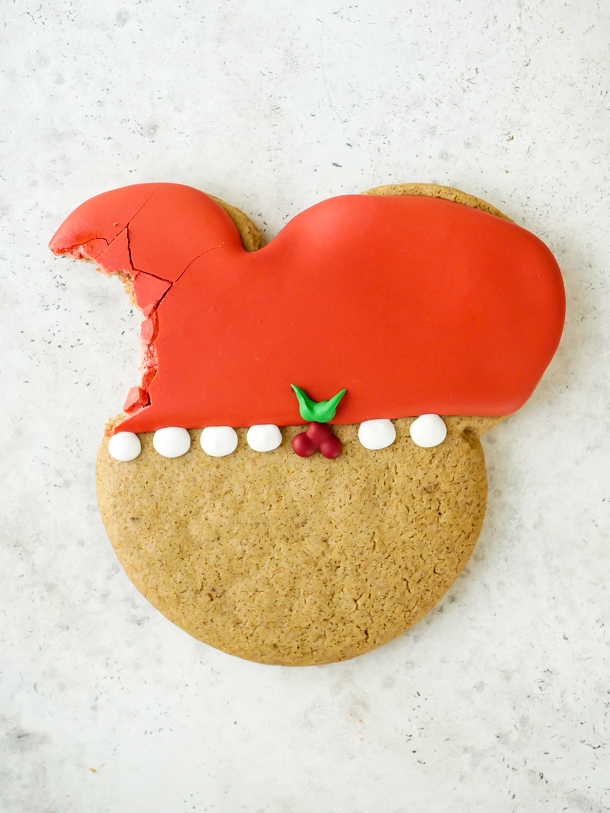
Mickey Holly Christmas Cookies 2020 // magicaltreatsathome.com

Where can I find the original treat?

  • This holiday treat was found a Marceline’s and Trolley Treats at the Disneyland resort.

It’s that wonderful time of year where it’s totally acceptable to bake dozens upon dozens of cookies in one weekend: holiday cookie season. And I’ve been doing just that but with one goal: to perfect the light colored gingerbread cookie found at Disneyland this year. And you know what? I think I did it!

Mickey Holly Christmas Cookies 2020 // magicaltreatsathome.com

The secret to light gingerbread? Brown rice syrup, or honey, instead of molasses. You still get some molasses in the brown sugar, but it doesn’t overwhelm the whole cookie like the more traditional darker versions. I found this technique on Leite’s Culinaria and it was such an “AH-HA” moment! This has also been a game changer for my husband who gets food related migraines as molasses is a trigger and now he can have the cookies too.

Mickey Holly Christmas Cookies 2020 // magicaltreatsathome.com

I’ve made a “half batch” of royal icing in the recipe below but to be honest, it still make a lot. The nice thing is with meringue powder instead of fresh egg whites, it’s shelf stable and you can just put extra in air tight containers and store until you’re ready to use again. The consistency turns out about halfway between a stiff piping icing and a flood so I found it great to use for most of the decorations on the cookie. I did pull some out and set aside for the holly decorations as I wanted them to hold their shape more. I’ve made notes in the recipe below about that.

Mickey Holly Christmas Cookies 2020 // magicaltreatsathome.com

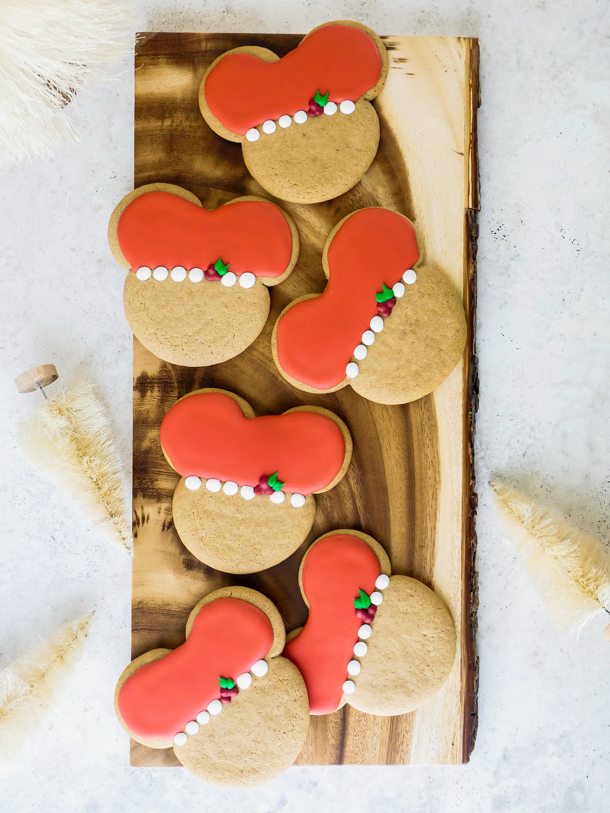
Kids can really get involved in all aspects of this recipe. From making the dough, to rolling, shaping, and even decorating. This is a fun, family friendly recipe, and getting everyone involved in a holiday activity is a big win for me.

These cookies felt very special for me this year as they really felt like there was a part of Disneyland at home with us. Holiday time there is just so special and it’s been a real bummer not being able to go and experience that (and eat all the treats). Making SO many of these cookies (and gifting quite a few away to other friends who are missing Disneyland too) has felt like a gift and I hope you’ll be able to make a batch and bring home the magic too.

Mickey Holly Christmas Cookies 2020 // magicaltreatsathome.com

Ok, let’s get baking!

Print
clock clock iconcutlery cutlery iconflag flag iconfolder folder iconinstagram instagram iconpinterest pinterest iconfacebook facebook iconprint print iconsquares squares iconheart heart iconheart solid heart solid icon
Mickey Holly Christmas Cookies 2020 // magicaltreatsathome.com

Mickey Mouse Holiday Gingerbread Cookie 2020

5 Stars 4 Stars 3 Stars 2 Stars 1 Star No reviews
  • Author: Elana Lepkowski
  • Yield: 15–18 Mickey Gingerbread Cookies 1x
  • Category: Baking
  • Cuisine: Holiday
Print Recipe
Pin Recipe

Description

Make your holiday cookie platter even more magical with an oversized Mickey Mouse shaped gingerbread cookie in holiday themed royal icing. A Disneyland-inspired treat.


Ingredients

Scale

For the gingerbread cookie:

  • 8 tablespoons unsalted butter
  • 3/4 cup light brown sugar, packed
  • 1/2 cup brown rice syrup or honey
  • 1 egg, room temperature
  • 1 teaspoon vanilla extract
  • 3–1/2 cups all purpose flour
  • 1 teaspoon baking soda
  • 2 tablespoons arrowroot powder or cornstarch
  • 1 tablespoon ground ginger
  • 1 tablespoon ground cinnamon
  • 1/2 teaspoon ground nutmeg
  • 1/2 teaspoon ground cloves
  • 1/2 teaspoon kosher salt

For the half batch royal icing:

  • 255 g powdered sugar
  • 3 tablespoons water
  • 1 tablespoons + 3/4 teaspoon meringue powder
  • 1/2 teaspoon vanilla extract
  • red and green food coloring
    • Americolor Super Red for hat
    • Americolor Red Red for berries
    • Americolor Leaf Green for leaves

Specialty Tools:

  • Mickey Mouse cutter
  • piping bags

Instructions

For the cookies:

  1. Beat the butter at high speed (10) until light and creamy, about 1 minute. Scrape down the sides of the bowl then add in brown sugar and brown rice syrup (or honey). Beat together until combined and creamy. Scrape down sides again.
  2. Add in the egg and vanilla and continue to beat at high speed (10) until the mixture is light and fluffy, 1 to 2 minutes.
  3. Next, add in flour, baking soda, arrowroot powder (or cornstarch), ginger, cinnamon, nutmeg, cloves, and salt. Beat together on medium-low speed (4) until combined and dough becomes stiff.
  4. Divide the dough in half, and then transfer each half of the dough into two gallon size ziplock bags. Flatten out to fill the space of the bag with a rolling pin so that dough is evenly dispersed. Refrigerate at least 4 hours or overnight. Dough can also be frozen at this point to use later.
  5. When ready to bake, preheat oven to 350°f. and cover two cookie sheets with parchment. Set aside.
  6. Generously flour your counter and remove dough from the bag (I usually cut the sides to open the bag, flip the open side down towards the floured surface and peel the rest of the bag off the dough). Roll out to 1/4″ thickness (or leave as is if you’d like thicker cookies).
  7. Cut out Mickey shapes from dough and place on parchment lined cookie sheet. Recombine the dough, flour your rolling pin and continue to cut shapes and recombine dough until finished. One bag of dough should fill one and a half to two cookie sheets.
    Mickey Holly Christmas Cookies 2020 // magicaltreatsathome.com
  8. Bake for 5 minutes, rotate sheet pans and bake an additional 5 minutes. If you’d like crispier cookies (or cookies that will withstand transportation), bake an additional 1 to 2 minutes.
  9. Let cool in the pans and then transfer to a wire rack to fully cool before decorating.

For the royal icing and decorations:

  1. Sift your powdered sugar first so that there are no lumps.
  2. Combine the water, meringue powder, and vanilla extract in a large measuring cup and whisk until there are no longer any lumps or powder. Mixture will froth a bit.
  3. Whisk the powdered sugar with the liquid until smooth. At this point the royal icing should hold its shape when dropped on itself. Set some aside, about a 1/4 of the mix, for the holly decorations by placing in a bowl and putting a damp, not wet, tea towel over the bowl so mix will not dry out.
  4. Add a teaspoon more water to the mix and beat the icing again. The icing should smooth out after about 20 seconds. You do not want it too runny though or it will run off the cookie.
  5. Once the desired consistency is achieved, remove about 1/4 of the mixture for the white dot decoration straight into a piping bag.
  6. The rest of the royal icing will be for the red decoration. Add about a teaspoon of the red food coloring to the bowl and mix until desired color is achieved. Transfer to a large piping bag.
  7. Next divide the icing for the holly decorations into two separate bowls. Add red food coloring to one bowl, mix, and then transfer to a piping bag. In the second bowl mix in green food coloring, and then transfer to a piping bag.
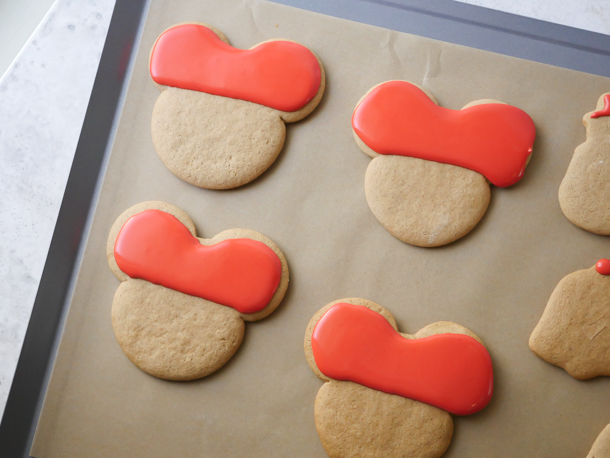
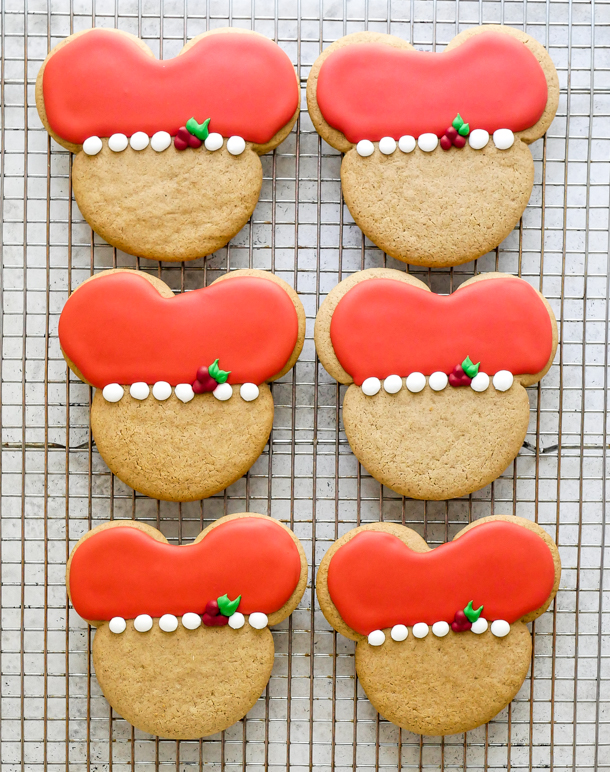
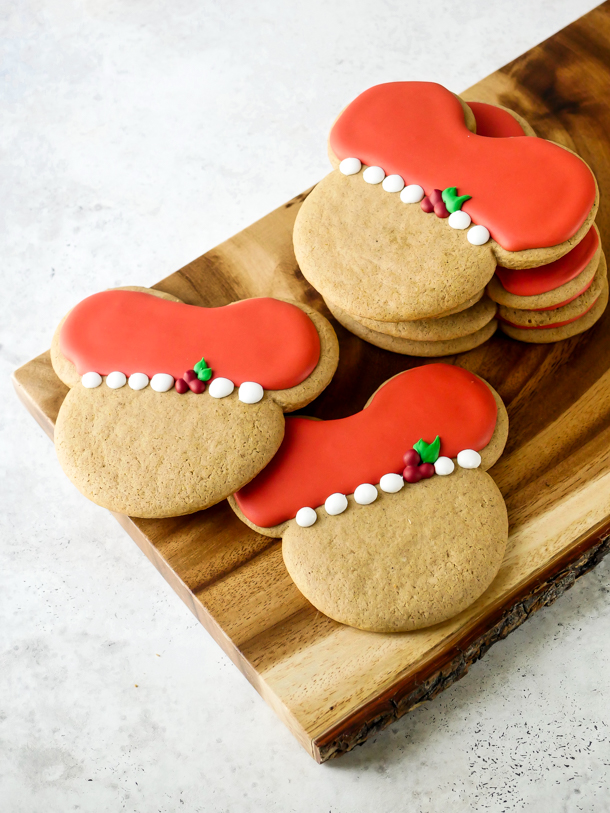
  8. To decorate the cookies, on the top half of the cookies, outline and then flood with large red royal icing. Let dry until no longer shiny, then then pipe 6 white dots (4 to the left and 2 to the right leaving space for the holly) along the bottom edge of the red outline. Let dry. Then finally pipe the smaller red royal icing as 3 combined dots for the holly, followed by the green for the leaves on the holly.
    Mickey Holly Christmas Cookies 2020 // magicaltreatsathome.com
  9. Let the icing dry at least 8 hours or overnight before packaging, or eating. Enjoy!

Notes

  • If you’d like even lighter colored cookies, replace all of the brown sugar with white granulated sugar.
  • Letting the dough chill ensures the cookies won’t spread and let’s the spices infuse throughout the dough.
  • Arrowroot powder also ensures cookies will not spread or puff up too much. This ingredient is optional.
  • For softer cookies, add in two tablespoons of butter.
  • For crispier cookies, cook 1 – 2 minutes longer.
  • For darker cookies, sub in molasses for the brown rice syrup.
  • If you freeze the cookie dough, let it defrost overnight in the refrigerator and proceed to rolling out step.
  • You will have extra royal icing left over from the recipe. This can be stored in the refrigerator in an air tight container for weeks.
  • Icing should fully dry between decorating so that the colors will not bleed.
  • Cookies can be stored at room temperature up to one week for best flavor.

Did you make this recipe?

Tag @magicaltreatsathome on Instagram and hashtag it #magicaltreatsathome

Mickey Holly Christmas Cookies 2020 // magicaltreatsathome.com

Share this:

  • Click to share on Facebook (Opens in new window) Facebook
  • Click to share on X (Opens in new window) X

Like this:

Like Loading...

Filed Under: Recipes, Treats Tagged With: Christmas, christmastimetreats, cookies, disneyland, gingerbread, holiday, Marceline's, Mickey Mouse, royal icing, treat, Trolley Treats

Christmas Tree Churro

December 9, 2019 by Elana Lepkowski Leave a Comment

Christmas Tree Churros // magicaltreatsathome.com

Where can I find the original treat?

  • This holiday treat is located in Critter Country.

I haven’t counted, but I would bet there are more holiday churros out there than candy apples or rice crispy treats this year. There are just SO many to choose from, and narrowing down which I was going to choose came down to two things: flavor and nostalgia. And that churro was the Christmas Tree Churro.

Christmas Tree Churros // magicaltreatsathome.com

Here’s the weird thing about this particular churro, it was made differently from the posted photo, and I’ve seen it look different even from other people’s photos of it. So, I have to approach this recipe with a caveat: it might be different from what you had, but one thing everyone had in common was that it came with the cherry dipping sauce.

Christmas Tree Churros // magicaltreatsathome.com

Now, it’s this cherry dipping sauce, with a very jelly-like consistency reminiscent of a doughnut or pie filling, that filled me with nostalgia. When I was younger, my Grandmother would make mini cheesecakes topped with jarred cherry jelly for every occasion. I’m talking birthdays, holidays, baby showers, pretty much any gathering we attended in the ’80’s and ’90’s always included a tray of these treats. And I loved them. Really, really loved them. I could probably eat 10 of these if no one was looking. I think I can pinpoint to these treats starting my obsession with cheesecake that still is going strong decades later.

Christmas Tree Churros // magicaltreatsathome.com

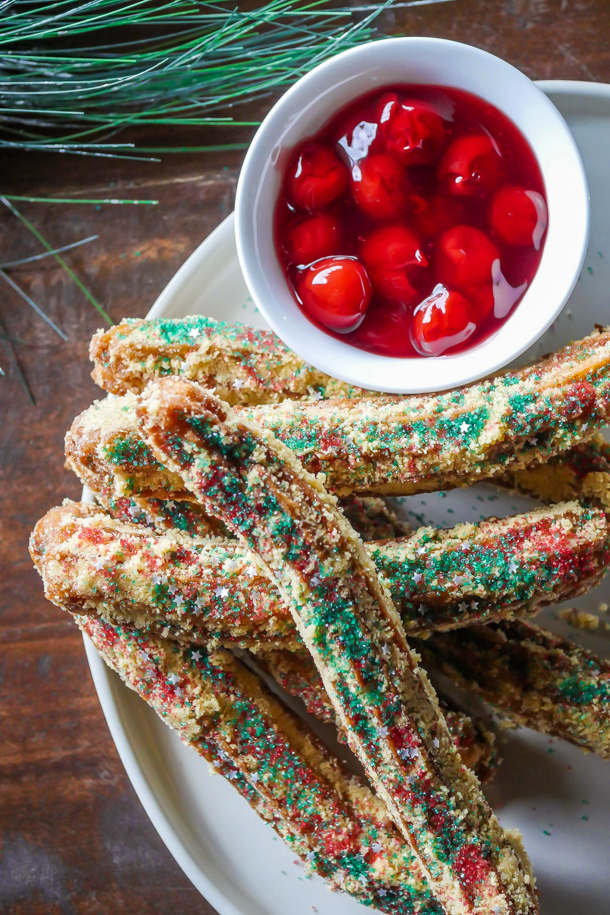
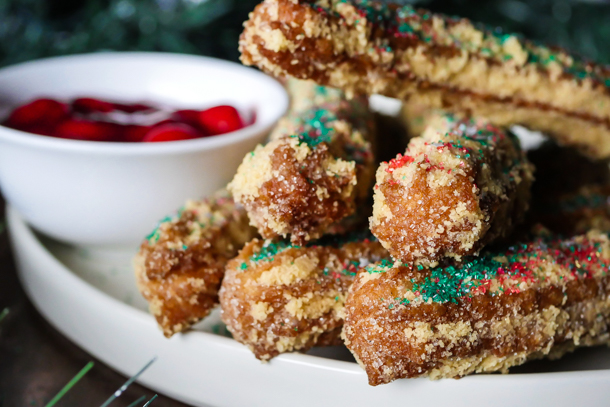
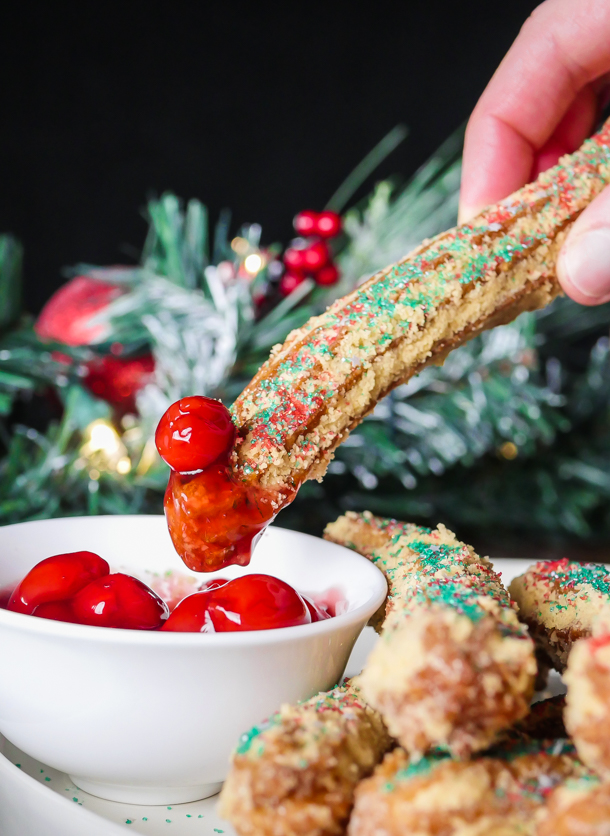
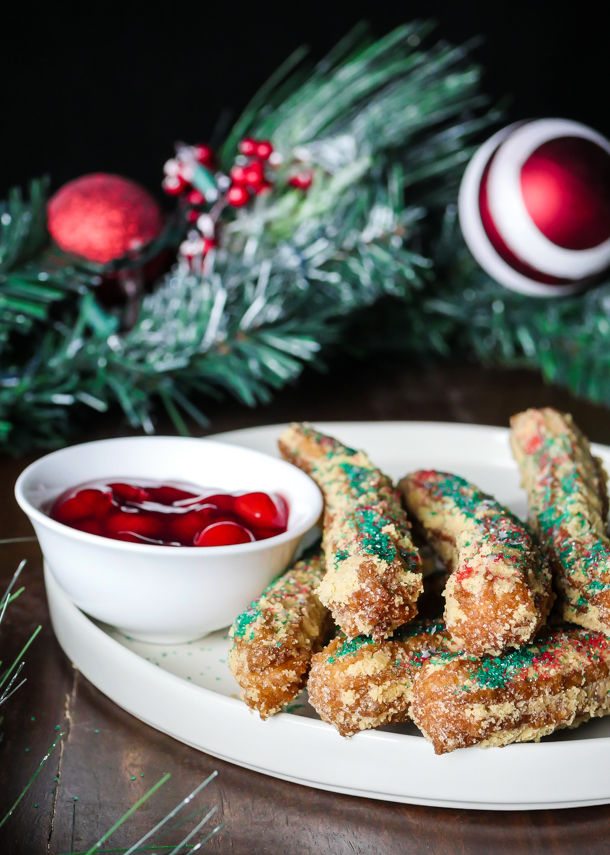
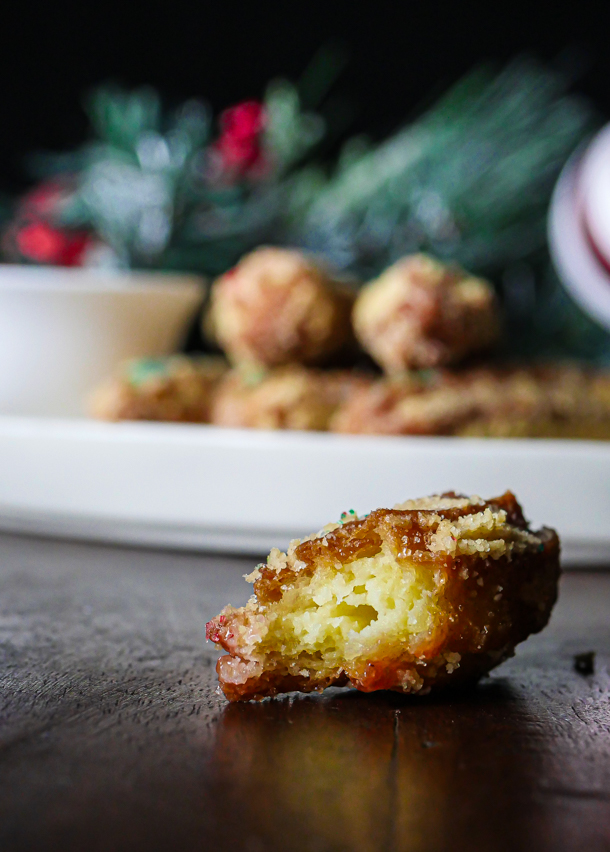
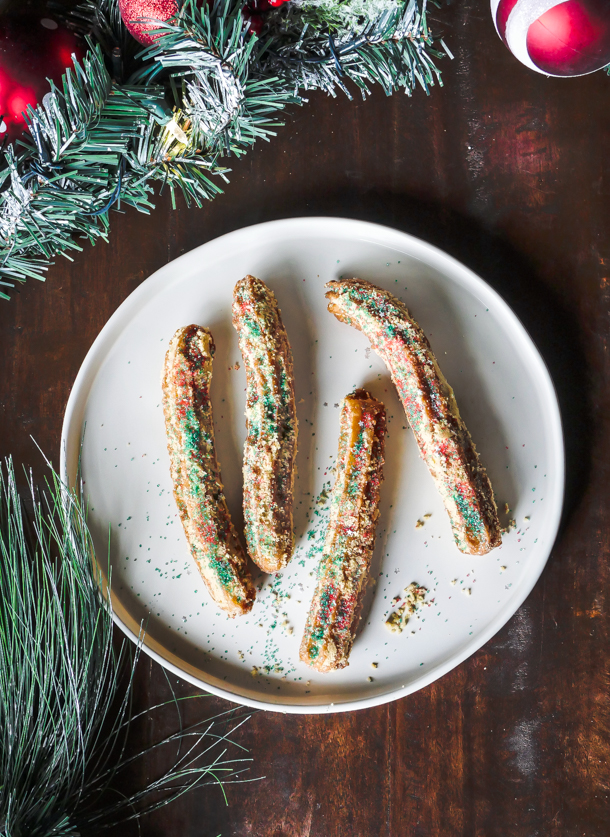
Anyways, these churros are the classic churro rolled in cookie crumbles and sprinkled with green (and apparently sometimes red) sanding sugar. The side comes with it (as opposed to costing extra), and altogether make for a classic looking holiday treat. I really love the buttery flavor the cookies impart here (similar to those Banana Pudding Churros from earlier in the year), and the tart cherry flavor cuts the sweetness back a bit, so combined it’s well balanced.

Christmas Tree Churros // magicaltreatsathome.com

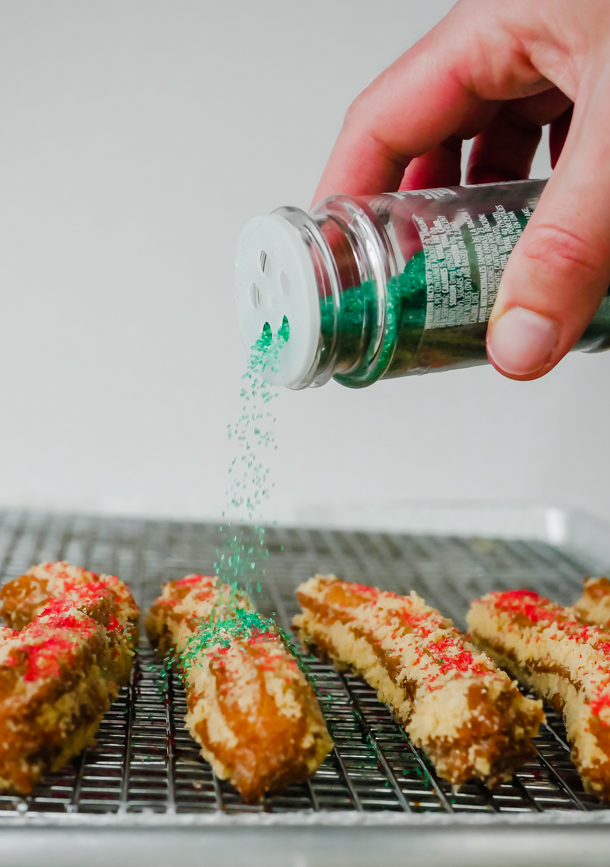
After these are fried up, kids can lend a hand to help decorate. Rolling in cookies (even crushing the cookies), and sprinkling toppings are all kid friendly here.

So, find some holiday music, heat up the oil, and start frying these tasty holiday treats! Enjoy!

Christmas Tree Churros // magicaltreatsathome.com
Print
clock clock iconcutlery cutlery iconflag flag iconfolder folder iconinstagram instagram iconpinterest pinterest iconfacebook facebook iconprint print iconsquares squares iconheart heart iconheart solid heart solid icon
Christmas Tree Churros // magicaltreatsathome.com

Christmas Tree Churro

5 Stars 4 Stars 3 Stars 2 Stars 1 Star No reviews
  • Author: Elana Lepkowski
  • Yield: 10–16 churros (depending on tip size) 1x
Print Recipe
Pin Recipe

Description

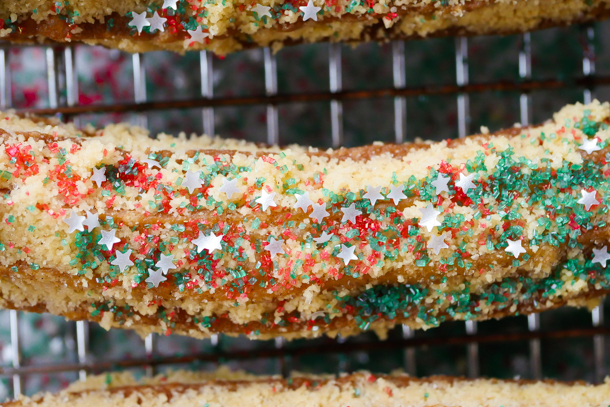
This Christmas tree inspired holiday churro is decked out in red and green sanding sugar, edible stars, and rolled in buttery cookie pieces. A Disneyland-inspired treat.


Ingredients

Scale
  • 1 cup water
  • 1/2 cup butter
  • 1 tablespoon granulated sugar
  • big pinch of salt
  • 1 cup all purpose flour
  • 2 eggs
  • vegetable oil for frying
  • 1/2 cup granulated sugar
  • 1 teaspoon cinnamon
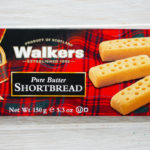
  • 1 package of Walker’s shortbread cookies (about 9 fingers), crushed
    Christmas Tree Churros // magicaltreatsathome.com
  • 2 tablespoons green sanding sugar
  • 2 tablespoons red sanding sugar
  • edible stars
  • cherry jam or pie filling

Specialty Tools

  • spider for frying
  • Wilton 1 M piping tip  or
  • Ateco 847 piping tip
  • pastry bag
  • candy thermometer

Instructions

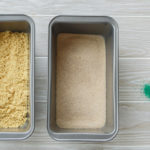
  1. First, line two half sized sheet pans with parchment, set aside. Mix together 1/2 cup of granulated sugar and cinnamon in a long shallow bowl or loaf pan, set aside.
  2. Next, crush cookies in a ziplock bag with a rolling pin until finely ground. Alternatively, you can pulse in a food processor until a sand-like consistency forms. Set aside in a large, shallow bowl.
    Christmas Tree Churros // magicaltreatsathome.com
  3. In a medium sized saucepan over medium-high heat, combine water, butter, sugar and salt. Bring to a boil, or until butter has melted.
  4. Turn burner to low and pour in all the flour at once. Stir until there are no visible flour lumps and dough has begun to stick together in a ball and pulled away from the sides of the pan.
  5. Remove pan from heat and let sit 5 minutes. Then stir in each egg until incorporated. Dough will appear to break or become lumpy. Continue to stir until it forms a smooth, sticky dough.
  6. Fill a pastry bag fitted with a Wilton 1 M open star tip (for thinner churros) or with a Ateco 847 closed star tip (for thicker churros, shown in this post) half full with batter (see notes below on filling pastry bags).
  7. If not frying immediately, pipe 6-8″ long dough onto the sheet pan. Refrigerate dough at least 30 minutes and up to two days. Batter will stiffen the more it sits, so let the dough come to room temperature before frying.
  8. If frying immediately, fill a dutch oven or deep frying pan with vegetable oil at least 2″ up the side of the pan (I found a 1/2 gallon of avocado oil worked for me in my large dutch oven. See note below about reusing oil.). Heat oil to 340-350°f, using a candy thermometer to keep the temperature constant. You may need to adjust heat up or down during cooking a few degrees.
  9. Place (if piped earlier) or pipe churros 2-3 at a time into the cooking oil for 6 minutes, turning after 3 minutes with a spatula or spider. Wait until oil comes back to temperature before adding next batch. Thicker churros may need an additional 30 seconds to one minute to fully cook through.
    Christmas Tree Churros // magicaltreatsathome.com
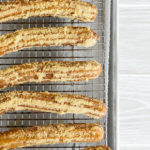
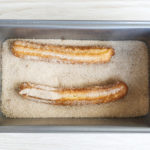
  10. Using a spider or large spatula, remove churros from oil and drain on a cooling rack over parchment or on a paper towel. Wait at least a minute and then toss the churro in the cinnamon sugar, tapping off any excess. Then roll churro in the cookie crumbs, lightly pressing to adhere. Set churro aside. Repeat with all the churros.
    Christmas Tree Churros // magicaltreatsathome.com
  11. Next, sprinkle churros with red and green sanding sugar, and edible stars.
  12. Finally, serve churros with a small dipping bowl of the cherry filling.

Notes

  • Do not overfill your pastry bag! Fill in two to three batches. If there is too much dough, it will seep out the top and will be hard to pipe.
  • Slowly pipe out dough all of a consistent size, smaller spots on the churro can cause them to become more fragile while handling and can break in the oil or while coating in sugar.
  • Churro dough can be piped out onto parchment and covered in the fridge up to 48 hours.
  • If you want to make you churros immediately after making dough without the chilling time, once oil has reached temp, starting about one inch above the oil, pipe a small line of dough down into oil and either snip end with scissors, or break the dough off the pastry tip on the side of your pan. Follow directions above for frying.
  • Thicker churros will require a longer cooking time to fully cook through the center. Test one churro first to adjust your cooking time.
  • Cooking oil can be fine strained and stored again for another use. I strain back into the bottle it came from. Well strained oil can be stored in a cool, dry place and used up to several times.
  • Churros curling? That could be one of a few reasons. One is that it will naturally shrink and change shape as the dough hits the oil and puffs up. I found that the stiffer dough from sitting in the fridge resulted in straighter churros while fresher dough tending to curl more. Also, if you’re using a circular pot like a dutch oven, churros may rest against the inside edge of the pan while cooking causing them to take on the curved shape of the pan. To prevent this, nudge your churro with the spider or spatula immediately after placing in oil when it pops back up to the surface. Continue to nudge gently back and forth for about 20-40 seconds or until the dough has gotten stiff in the oil.

Did you make this recipe?

Tag @magicaltreatsathome on Instagram and hashtag it #magicaltreatsathome

Christmas Tree Churros // magicaltreatsathome.com

Share this:

  • Click to share on Facebook (Opens in new window) Facebook
  • Click to share on X (Opens in new window) X

Like this:

Like Loading...

Filed Under: Recipes, Treats Tagged With: cherry, Christmas, christmastimetreats, churro, cookies, Critter Country, disneyland, holiday, treat

Primary Sidebar

Follow Us

  • Instagram
  • Facebook
  • X
  • Pinterest
  • Email
  • YouTube

Hi! My name is Elana, and that’s me shoving a Mickey Mouse shaped treat in my face. I love the treats at Disneyland. A lot. So much so I’ve dedicated an entire website to making all my favorites, and hopefully yours too, out of my home kitchen. My aim is to create Disneyland-inspired treats, with easy to follow directions, and many recipes geared towards getting the kids in the kitchen to help too! Because putting sprinkles on things is F-U-N.

Top With Sprinkles

Get Recipes in Your Inbox!

* indicates required

Look for this icon in posts to find Kid Friendly recipes!

Recent Posts

  • Matterhorn Macaroon
  • Caramel Gingerbread Cookie Sandwiches
  • Colorful Fruit Hand Pies
  • Classic Mickey Shaped Beignets
  • Carrot Cake Cookies

Archives

  • February 2023
  • December 2022
  • August 2022
  • January 2022
  • December 2021
  • November 2021
  • December 2020
  • November 2020
  • October 2020
  • September 2020
  • August 2020
  • July 2020
  • June 2020
  • May 2020
  • April 2020
  • March 2020
  • February 2020
  • January 2020
  • December 2019
  • November 2019
  • October 2019
  • September 2019
  • August 2019
  • July 2019
  • June 2019
  • May 2019

Copyright © 2025 Magical Treats at Home on the Foodie Pro Theme

%d