• Skip to primary navigation
  • Skip to main content
  • Skip to primary sidebar

Magical Treats at Home

  • About
  • Treats
  • Drinks
  • Savory
  • Favorite Tools
  • Etsy Shop

ice cream

Almond Mocha Shake

September 7, 2020 by Elana Lepkowski Leave a Comment

Almond Mocha Shake // magicaltreatsathome.com

Where can I find the original treat?

  • This treat was originally found at Shmoozies! in DCA as part of the Food and Wine Festival.

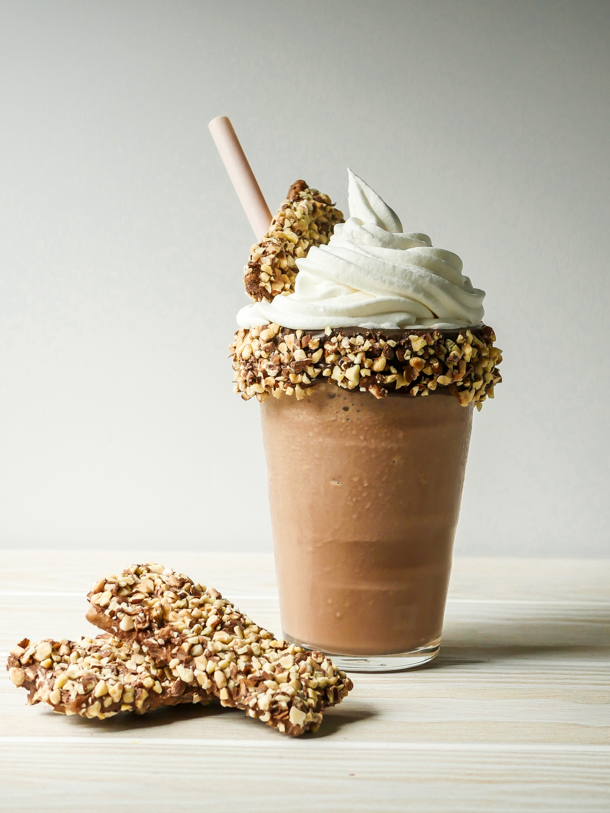
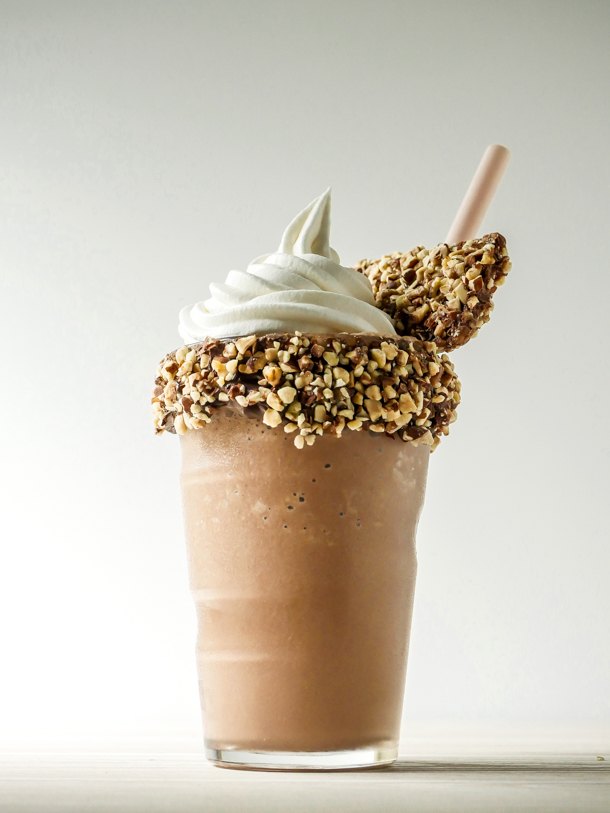
It’s been record-breaking hot in Southern California this weekend, and as today is the unofficial close to summer, I thought we’d end on a sweet, ice cold note. If there’s one thing you can rely on to cool you off and satisfy a sweet tooth at Disneyland, it’s their shakes. So today we’re making the Almond Mocha Shake, which happened to be the very last thing I ate when I was visiting California Adventure back in March for the Food and Wine Festival.
Almond Mocha Shake // magicaltreatsathome.com

So no, for this recipe I will not ask you to make your own ice cream. That’s because I recently discovered that Disneyland uses Dreyer’s brand ice cream in the park. So, if you want an almond mocha shake… you can grab mocha almond fudge ice cream from the supermarket. For those of you who live on the east coast, that would be Edy’s brand (not Breyer’s!).
Almond Mocha Shake // magicaltreatsathome.com

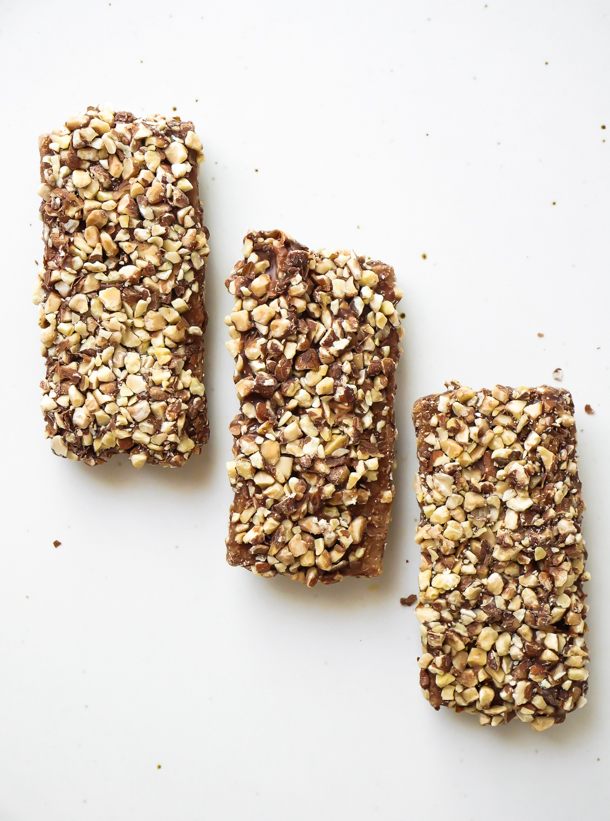
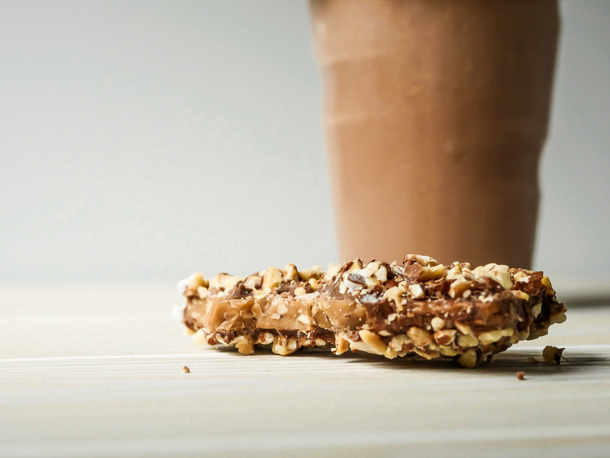
Now, one component here that you can either make yourself, or buy pre-made, is the English toffee. You’ve got a few options here. One, you can make it, and I have my favorite adaptation below. Second, if you’re able to get to Marceline’s in Downtown Disney, they are selling the English toffee BY THE BAG FULL!!!! It’s the exact kind you’d find on the shake and it’s a hefty bag and yes, I finished the whole package in less than two days… Your third option is to buy either an Almond Roca bar, a Skor bar, or Heath bar from the store. It won’t be the same as what you get on the shake, but it will be reminiscent of the original.

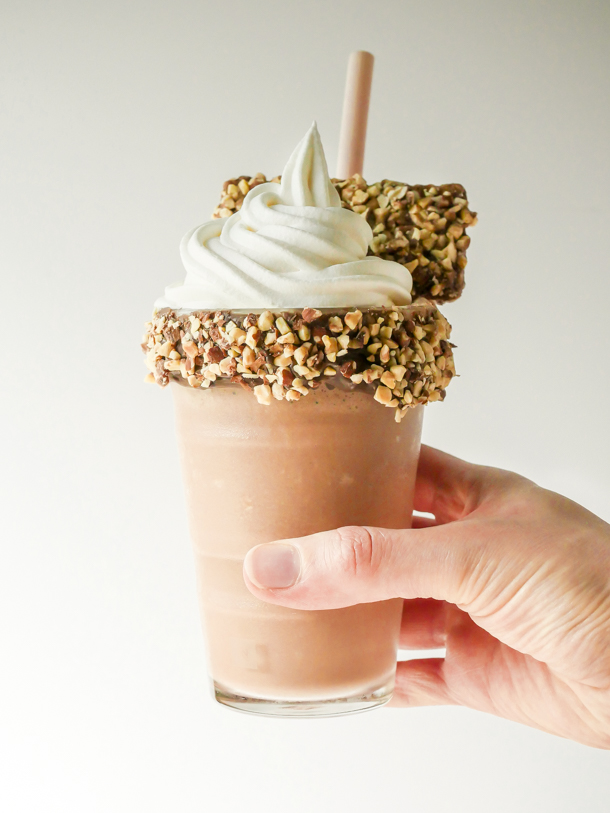
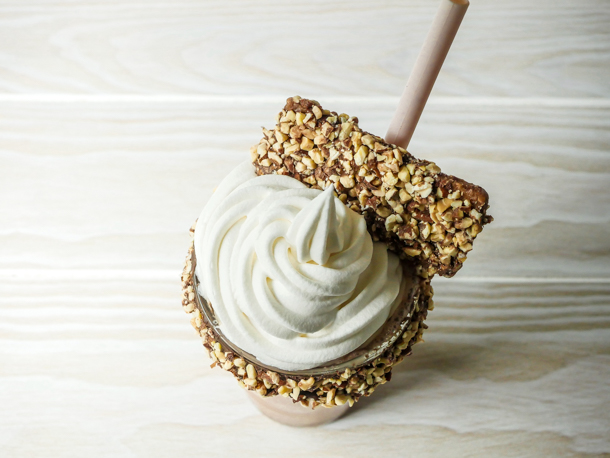
The third component of this shake is the whipped cream and here’s the thing about whipped cream on shakes in Disneyland: it’s thick. My guess is stabilizers in there, but it could also be something like Cool Whip (but not the actual brand). At home I make homemade whipped cream because I have a dispenser, but you could pick up a canister at the store. If you want your cream to be closer to what’s at the parks, I like the brand Truwhip. To create the swirl effect, spoon it semi frozen into a piping bag, attach a open star tip (or just cut the end off the bag), and pipe on top of the shake. 
Almond Mocha Shake // magicaltreatsathome.com

I love that this recipe can be quickly made by a few grocery store ingredients, but also can be adjusted to how much involvement you’d like in the kitchen. And since we’re making this on Labor Day, I say just buy the ingredients and give yourself a day off.

Kids can help assemble the ingredients and add them to the blender (I used my Magic Bullet for this and it was a perfect one serving container). They can also help decorate the glass and top with whipped cream. Older kids can help to make the English toffee due to the extremely high temperatures you need. I would not recommend it for the younger kids.
Almond Mocha Shake // magicaltreatsathome.com

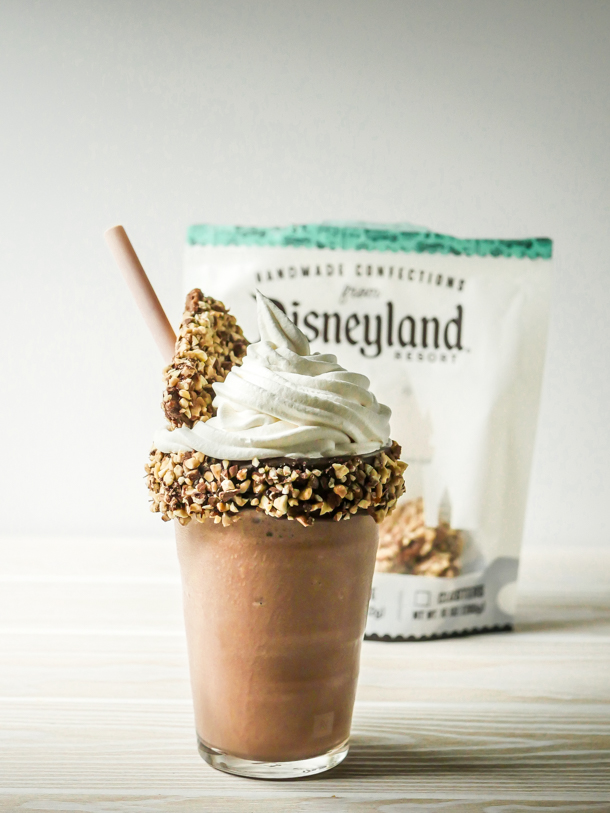
Extra credit: the shakes at Disneyland, like this shake, will sometimes come with a delicious decoration on the outside of the cup. Totally not necessary to enjoy at home unless you want the true park treat experience. So, if you’d like that, we’ve included the instructions below in the recipe card. It’s pretty easy, but it’s one more step.

Now let’s relax and blend up some magic!
Almond Mocha Shake // magicaltreatsathome.com
Print
clock clock iconcutlery cutlery iconflag flag iconfolder folder iconinstagram instagram iconpinterest pinterest iconfacebook facebook iconprint print iconsquares squares iconheart heart iconheart solid heart solid icon
Almond Mocha Shake // magicaltreatsathome.com

Almond Mocha Shake

5 Stars 4 Stars 3 Stars 2 Stars 1 Star No reviews
  • Author: Elana Lepkowski
  • Yield: 1 Almond Mocha Shake 1x
Print Recipe
Pin Recipe

Description

The 2020 Food and Wine Festival at DCA gave us this chocolatey-almond shake with buttery, crunchy toffee topping that you can make at home! A Disneyland-inspired recipe.


Ingredients

Scale

Almond Mocha Shake:

  • 3, 2 ounce scoops of Dreyer’s Mocha Almond Fudge ice cream
  • 1/4 cup milk, more or less to taste

English Toffee (adapted from King Arthur):

  • 16 tablespoons (227g) unsalted butter, cold

  • 1/2 teaspoon salt

  • 1–1/2 cups (298g) sugar

  • 3 tablespoons (43g) water

  • 1 tablespoon (21g) light corn syrup

  • 2 cups (227g) chopped peanuts, toasted (see notes below)

  • 2–2/3 cups (454g) semisweet or bittersweet chocolate, finely chopped; or chocolate chips


Toppings and Decorations:

  • 1/2 cup light cocoa candy melts, optional if decorating cup (see tips about what chocolate to use below)
  • 1/3 cup chopped peanuts, toasted, optional if decorating cup
  • whipped cream (or 1 cup heavy cream, 1 teaspoon each vanilla extract and simple syrup or liquid sweetener of your choice with directions below for making from scratch)

Specialty Tools:

  • Soda fountain pint glasses
  • Whipped cream dispenser
  • N2O chargers
  • reusable straws

Instructions

For the English Toffee:

  1. In a large, deep (3 quart) saucepan, melt the butter. Stir in the salt, sugar, water, and corn syrup, and bring the mixture to a boil. Boil gently over medium heat, without stirring, until the mixture reaches hard-crack stage (300°F on an instant-read or candy thermometer; you’ll be taking it off the heat a few degrees sooner). The syrup will bubble without seeming to change much for awhile, but be patient; all of a sudden it will darken, and at that point you need to take its temperature and see if it’s ready. (If you don’t have a thermometer, test a dollop in ice water; it should immediately harden to a brittleness sufficient that you’ll be able to snap it in two, without any bending or softness). This whole process should take about 10 to 12 minutes. Pay attention; too long on the heat, and the syrup will burn.
  2. While the sugar is boiling, spread half of the nuts in an even, closely packed layer on a parchment-lined 9″ x 13″ pan. Top the nuts with half the chocolate.
  3. When the syrup has reached 295°F, remove from the heat. Pour the syrup quickly and evenly over the nuts and chocolate. Top with the remaining chocolate and let sit for 2 to 3 minutes, until it softens; spread the chocolate with an offset spatula in an even layer and immediately sprinkle the remaining nuts on top.
  4. While the candy is still slightly warm, pull it out of the pan and use a thin spatula to loosen it from the parchment. When completely cool, break into chunks.

For the shake:

  1. Blend the ice cream and milk together until smooth. Set aside.

    Almond Mocha Shake // magicaltreatsathome.com

For the glass decoration (optional):

  1. Pour the chopped, toasted peanuts into a wide, shallow dish. Set aside.
  2. Melt the cocoa candy melts in a microwave safe bowl, like glass. Microwave for 30 seconds. Stir and microwave again for an additional 30 seconds. Keep stirring and microwaving in short bursts of 15-20 seconds until melted and smooth. Use can alternatively use a double boiler for melting or melt directly in a heat-safe piping bag.
    Almond Mocha Shake // magicaltreatsathome.com
  3. Dip and coat the outer rim of a glass with the melted candy melts (or if melted in a pastry bag, clip the tip off and pipe the chocolate around the outer edge). Then dip into the chopped peanuts, turning to coat the entire outside rim. Place in the fridge for five minutes to harden.

Assembly:

  1. Pour the blended shake mixture into your prepared glass.
  2. Spoon or spray whipped cream on top of the shake mixture.

    Almond Mocha Shake // magicaltreatsathome.com
  3. Place a piece of English toffee in the whipped cream and enjoy!

Notes

  • To toast nuts, place in a frying pan over medium high heat. Stir peanuts around until they start to smell, well, toasty. This can take anywhere from 5-10 minutes depending on the heat of your stove. Keep watch though, as the oils from the nuts will cause they to scorch.
  • Cocoa melts are best to use for coating the glass because they will melt but not become too thin and liquid. Regular baking chocolate will be thinner and run more.
  • English toffee can be kept, wrapped, at room temperature for several weeks. Or frozen for longer storage.
Did you make this recipe?

Tag @magicaltreatsathome on Instagram and hashtag it #magicaltreatsathome

Almond Mocha Shake // magicaltreatsathome.com

Share this:

  • Click to share on Facebook (Opens in new window) Facebook
  • Click to share on X (Opens in new window) X

Like this:

Like Loading...

Filed Under: Recipes, Treats Tagged With: almond, DCA, disneyland, English toffee, Food and Wine Festival, fudge, ice cream, mocha, peanuts, Schmoozies, treat, whipped cream

Churro Ice Cream Sandwich

June 9, 2020 by Elana Lepkowski Leave a Comment

Churro Ice Cream Sandwich // magicaltreatsathome.com

Where can I find the original treat?

  • This treat was found at Sleepy Hollow inside the Magic Kingdom, Walt Disney World.

Hello! I took a break on here and muted myself last week in support of amplifying voices for Black Lives Matter. This space is not just inclusive, it is anti-racist. That support does not die down as the food posts start back up again. Yes, this is a very niche blog about making treats found at Disney, but there are people behind this account, and I will absolutely not shy away about being vocal when I need to use my voice, especially when there is a public platform like this.

If you have a knee-jerk reaction somewhere along the lines of “ugh, not another food blog talking about something other than food…”, I’d love for you to take a second and think why that makes you so uncomfortable.

Churro Ice Cream Sandwich // magicaltreatsathome.com

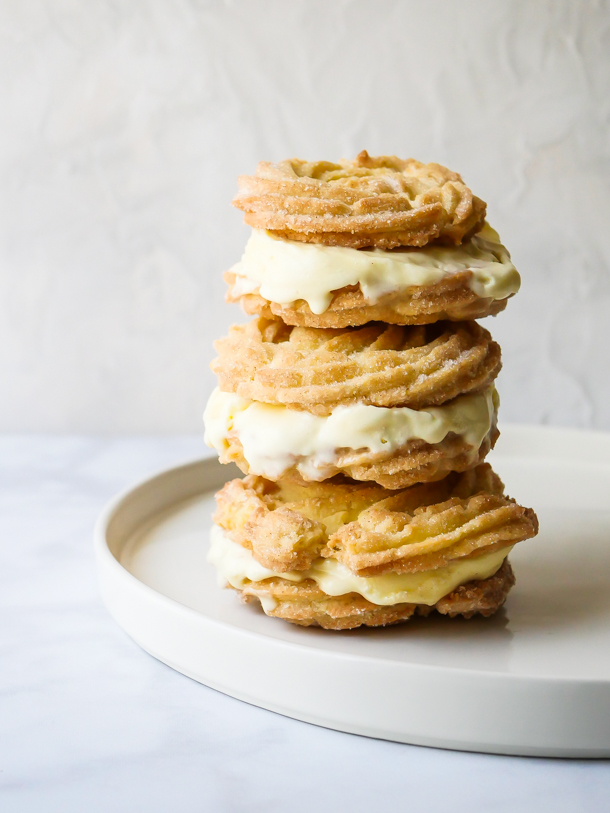
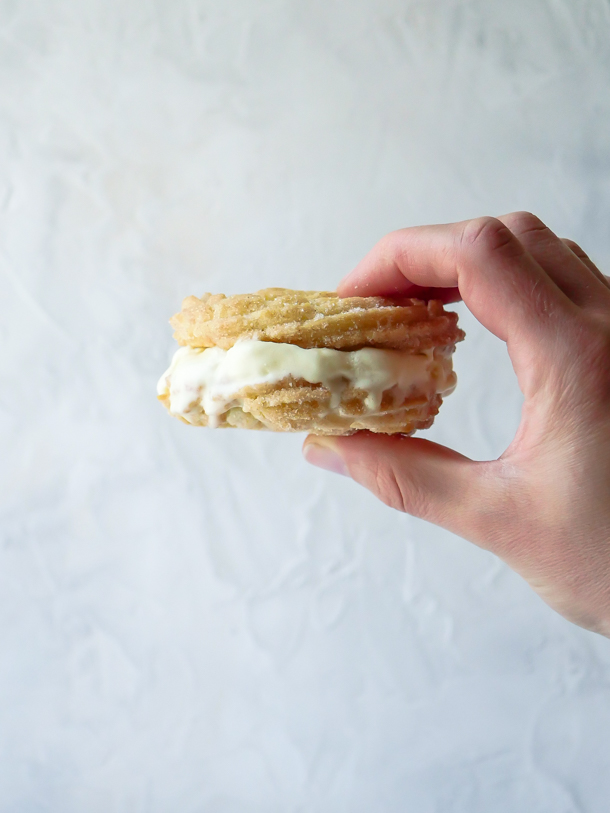
I cannot think of anyway to transition my above thoughts though into today’s post other than saying, hey, I made those Churro Ice Cream Sandwiches from Walt Disney World. So that’s what we’re making today.

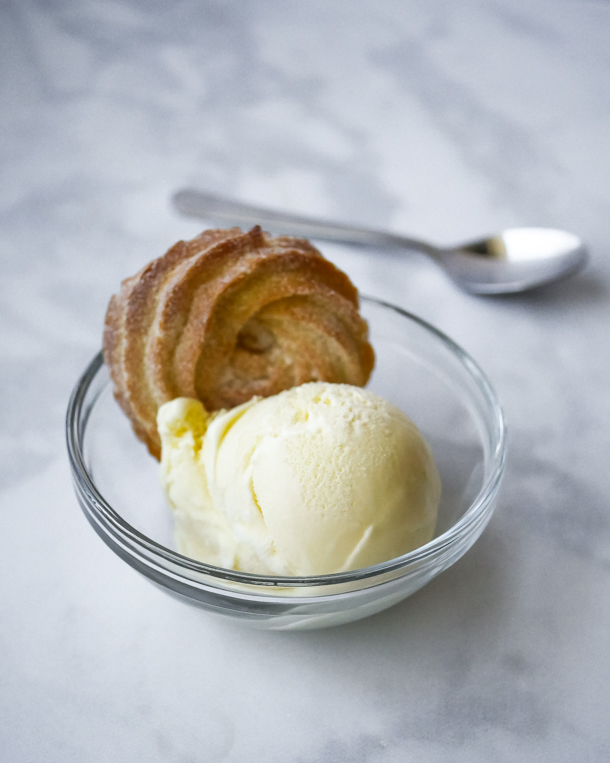
You can bake these (like I did), or fry them or try them in your air fryer (I bet they’d be great there too). The original treat had vanilla ice cream, but I highly suggest you make a batch of cinnamon ice cream and sandwich that in-between here too.

Churro Ice Cream Sandwich // magicaltreatsathome.com

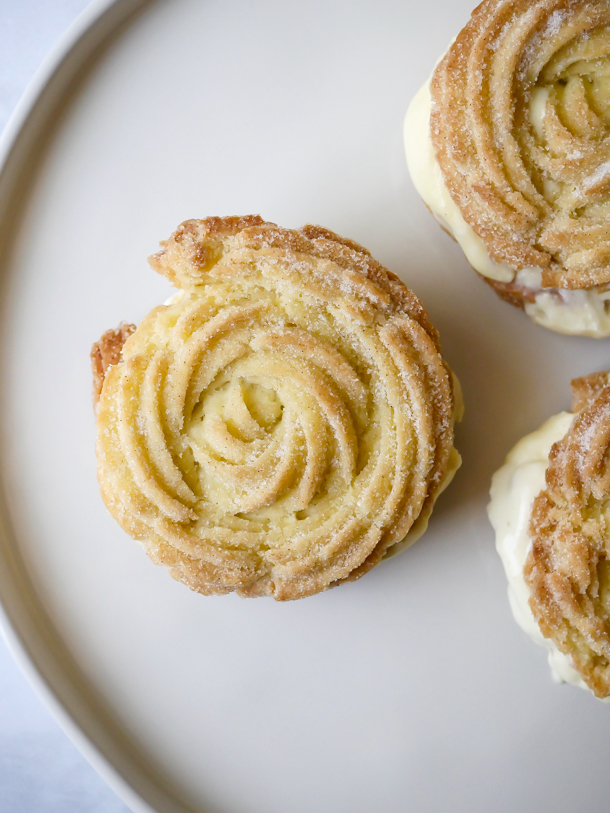
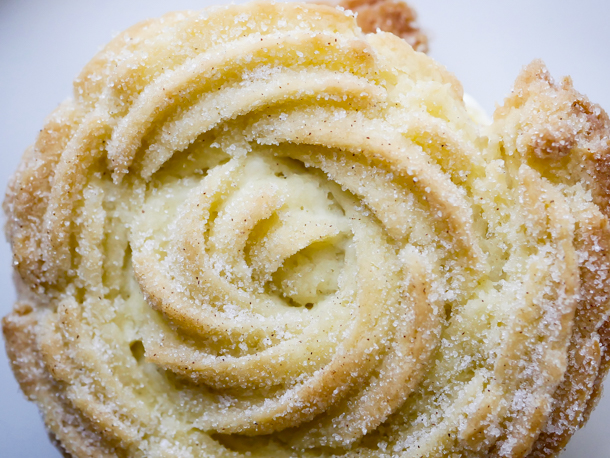
I took them a little lighter than the deep fried version as it gives the inside a custard-y, super soft center, but feel free to take it longer in the fryer if you’d like it crisper.

Churro Ice Cream Sandwich // magicaltreatsathome.com

These churro wheels should be eaten the day they’re made. They get soggy by the next day, although you can crisp them up again in the toaster oven (but I love them fresh).

Churro Ice Cream Sandwich // magicaltreatsathome.com
Print
clock clock iconcutlery cutlery iconflag flag iconfolder folder iconinstagram instagram iconpinterest pinterest iconfacebook facebook iconprint print iconsquares squares iconheart heart iconheart solid heart solid icon
Churro Ice Cream Sandwich // magicaltreatsathome.com

Churro Ice Cream Sandwich

5 Stars 4 Stars 3 Stars 2 Stars 1 Star No reviews
  • Author: Elana Lepkowski
  • Yield: 3 Churro Ice Cream Sandwiches 1x
Print Recipe
Pin Recipe

Description

Crispy, chewy, cinnamon swirled churros make the perfect sandwich base for vanilla ice cream with this Churro Ice Cream Sandwich. A Walt Disney World inspired treat.


Ingredients

Scale

For the churros:

  • 1/2 cup granulated sugar
  • 1 teaspoon cinnamon
  • 1/2 cup unsalted butter
  • 1 cup water
  • 1 tablespoon granulated sugar
  • big pinch of salt
  • 1 cup all purpose flour
  • 1 egg
  • vegetable oil for frying

For assembly:

  • Vanilla ice cream (or cinnamon!!)
  • Ground cinnamon

Special Tools:

  • spider for frying
  • Ateco 847 piping tip
  • pastry bag
  • candy thermometer

Instructions

For the churros:

  • Mix together 1/2 cup of granulated sugar and cinnamon in a shallow bowl, set aside.
  • In a medium sized saucepan over medium-high heat, combine water, butter, sugar and salt. Bring to a boil, or until butter has melted.
  • Turn burner to low and pour in all the flour at once. Stir until there are no visible flour lumps and dough has begun to stick together in a ball and pulled away from the sides of the pan.
  • Remove pan from heat and let sit 5 minutes. Stir in the egg until incorporated. Dough will appear to break or become lumpy. Continue to stir until it forms a smooth, sticky dough.
  • For baked churros:
    • Preheat oven to 425°f.
    • Line a half sized sheet pan with parchment. And then fill a pastry bag fitted with an Ateco 847 closed star tip half full with batter (see notes below on filling pastry bags).
    • Pipe out 2-1/2″ spirals spaced an inch apart (I was able to fit all 6 spirals on one sheet pan).
      Churro Ice Cream Sandwich // magicaltreatsathome.com
    • Bake in the oven 35-40 minutes.
    • Remove from the oven and let cool on the sheet pan until cool enough to touch, about 5 minutes. And then toss in the cinnamon sugar mix. Set aside.
  • For fried churros:
    • Line a half sized sheet pan with a sheet of parchment. And then fill a pastry bag fitted with an Ateco 847 closed star tip half full with batter (see notes below on filling pastry bags).Pipe out 2-1/2″ spirals spaced an inch apart (I was able to fit all 6 spirals on one sheet pan).
    • Refrigerate dough at least 30 minutes and up to two days. Batter will stiffen the more it sits, so let the dough come to room temperature before frying.
    • Place churros 2 at a time into the cooking oil for 6-7 minutes, turning after 3 minutes with a spatula or spider. Wait until oil comes back to temperature before adding next batch. Thicker churros may need an additional 30 seconds to one minute to fully cook through.
    • Using a spider or large spatula, remove churros from oil and drain on a cooling rack over parchment or on a paper towel. Wait at least a minute and then toss the churro in the cinnamon sugar, tapping off any excess. Set churro aside. Repeat with all the churros.

To assemble:

  • Scoop out about 2 ounces of ice cream and place on the bottom churro half. Sandwich with another churro.
    Churro Ice Cream Sandwich // magicaltreatsathome.com
  • Optionally sprinkle a little extra cinnamon over the whole sandwich and enjoy!

Notes

  • Do not overfill your pastry bag! Fill in two to three batches. If there is too much dough, it will seep out the top and will be hard to pipe.
  • Slowly pipe out dough all of a consistent size, smaller spots on the churro can cause them to become more fragile while handling and can break in the oil or while coating in sugar.
  • Churro dough can be piped out onto parchment and covered in the fridge up to 48 hours.
  • If you want to make you churros immediately after making dough without the chilling time, once oil has reached temp, starting about one inch above the oil, pipe a small line of dough down into oil and either snip end with scissors, or break the dough off the pastry tip on the side of your pan. Follow directions above for frying.
  • Thicker churros will require a longer cooking time to fully cook through the center. Test one churro first to adjust your cooking time.
  • Sugar not sticking to your baked churros? Melt 2-3 tablespoons of butter in a small saucepan, and then brush on the churro. Immediately toss in the sugar mixture and set aside on a grate to cool.
  • Cooking oil can be fine strained and stored again for another use. I strain back into the bottle it came from. Well strained oil can be stored in a cool, dry place and used up to several times.
  • These churros are best eaten the day of, however, they can be frozen between sheets of parchment without the sugar coating and crisped in the toaster oven for a few minutes.

Did you make this recipe?

Tag @magicaltreatsathome on Instagram and hashtag it #magicaltreatsathome

Churro Ice Cream Sandwich // magicaltreatsathome.com

Share this:

  • Click to share on Facebook (Opens in new window) Facebook
  • Click to share on X (Opens in new window) X

Like this:

Like Loading...

Filed Under: Recipes, Treats Tagged With: churro, cinnamon, ice cream, ice cream sandwich, Magic Kingdom, Sleepy Hollow, treat, WDW

5 Minute Treats: Cinnamon-Brown Sugar Affogato (Churro Affogato)

April 21, 2020 by Elana Lepkowski Leave a Comment

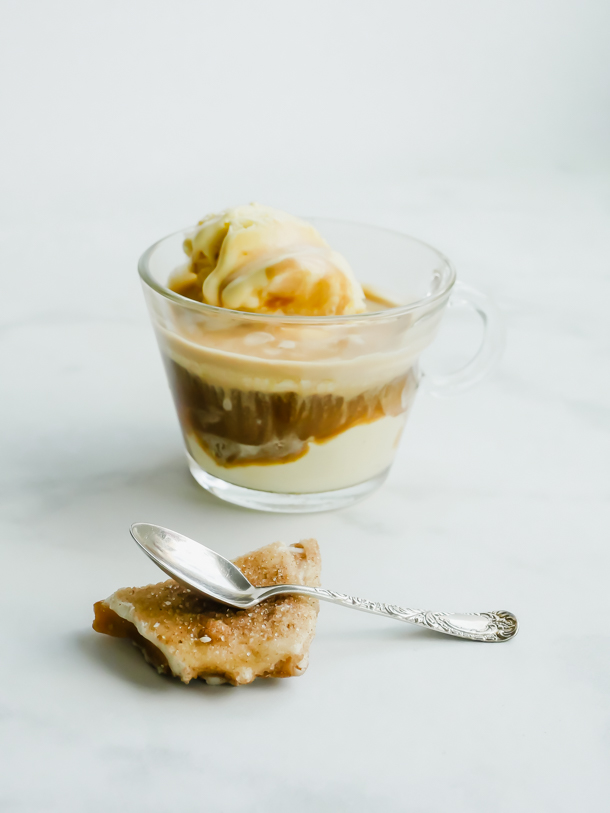
Churro Cinnamon-Brown Sugar Affogato // magicaltreatsathome.com

Where can I find the original treat?

  • This holiday time treat was available at Schmoozies! inside California Adventure.

We’re back again today with another quick treat in our 5 Minute Treats series! This holiday time Cinnamon-Brown Sugar Affogato was nicknamed the Churro Affogato because of its delicious ice cream base. And today you can either make, or buy, the ice cream depending on how quickly you’d like the treat!

Churro Cinnamon-Brown Sugar Affogato // magicaltreatsathome.com

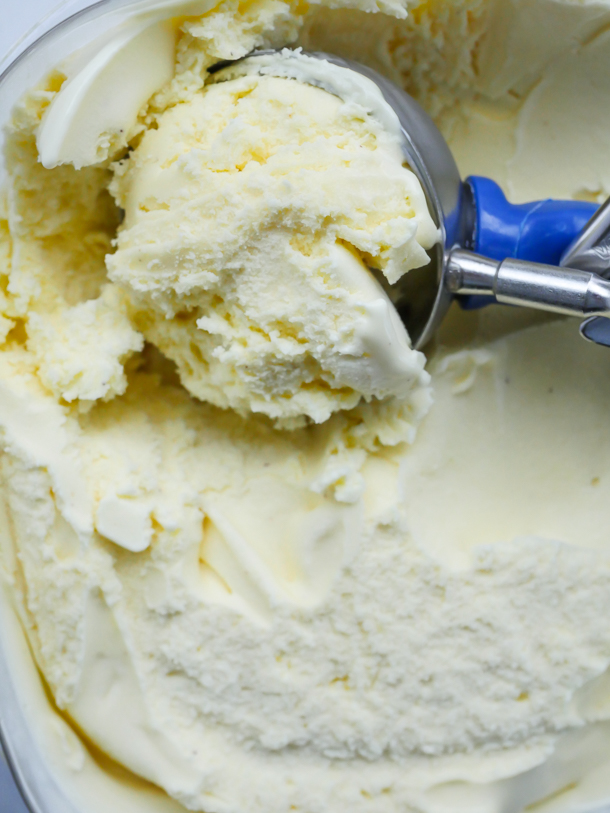
While we’ve been stuck inside, the kids and I have been doing some fun kitchen experiments. Making ice cream has definitely been a favorite! If you can score some cinnamon ice cream at the store, then this recipe really is a super quick treat. However, if you’ve got the time, and an ice cream maker, then I’ve also included a recipe for a super creamy, custard based cinnamon-brown sugar ice cream. I don’t want to make the store bought people jealous, but this stuff is SO GOOD and SO CREAMY. I also love that you can adjust the amount of cinnamon and/or sugar to suite your tastes as well.

Churro Cinnamon-Brown Sugar Affogato // magicaltreatsathome.com

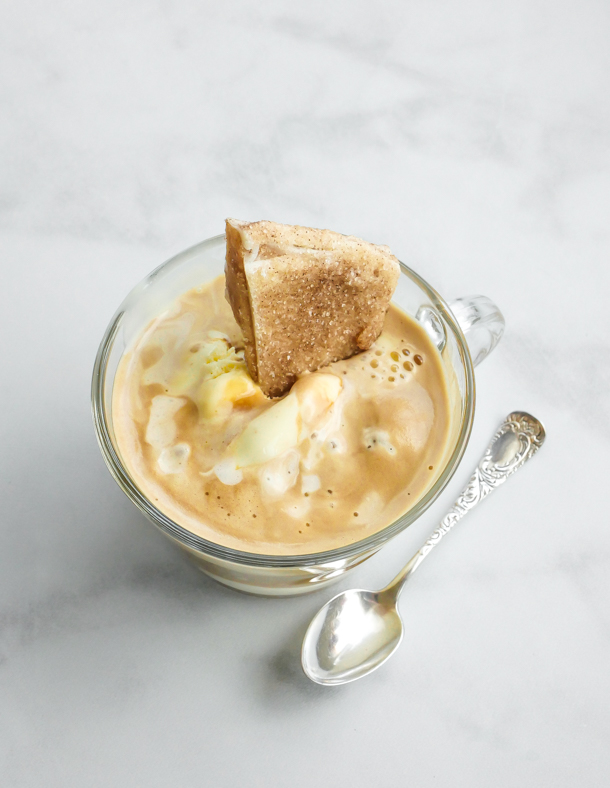
Affogatos are usually espresso based, but if all you’ve got is coffee right now, try brewing a stronger batch for this. The combination of the bittersweet coffee and the spicy cinnamon make for an extraordinary pairing. It’s reminiscent of the Mexican coffee, or cafe de olla that we get at a local restaurant here in Los Angeles. It’s also, quite tasty with a hunk of Churro Toffee dipped in as well.

Churro Cinnamon-Brown Sugar Affogato // magicaltreatsathome.com

I hope you enjoy this super simple, and yet very elegant, treat today! (Or tomorrow if you make the ice cream!) It’s about to get REAL HOT here in LA, so I’m thinking about making a few batches of ice cream this week. Have a magical week everyone!

Print
clock clock iconcutlery cutlery iconflag flag iconfolder folder iconinstagram instagram iconpinterest pinterest iconfacebook facebook iconprint print iconsquares squares iconheart heart iconheart solid heart solid icon
Churro Cinnamon-Brown Sugar Affogato // magicaltreatsathome.com

5 Minute Treats: Cinnamon-Brown Sugar Affogato (Churro Affogato)

5 Stars 4 Stars 3 Stars 2 Stars 1 Star No reviews
  • Author: Elana Lepkowski
  • Yield: 1 Cinnamon-Brown Sugar Churro Affogato + 1 quart ice cream 1x
Print Recipe
Pin Recipe

Description

Creamy, spicy cinnamon and brown sugar ice cream is topped with a healthy pour of bittersweet espresso in this 5 Minute Treat. A Disneyland-inspired recipe.


Ingredients

Scale

For the ice cream:
adapted from David Lebovitz

  • 1 cup (250ml) whole milk
  • 3/4 cup (150g) brown sugar
  • pinch of salt
  • 8 cinnamon sticks broken up (see notes below)
  • 2 cups (500ml) heavy cream
  • 5 large egg yolks
  • 1/4 teaspoon ground cinnamon

For the affogato

  • 1 shot of freshly brewed espresso
  • churro toffee chunks, optional (find the recipe here on our site!)

Instructions

For the ice cream:

  1. Heat the milk, brown sugar, salt, cinnamon sticks, and 1 cup of the heavy cream together in a medium saucepan. Cover, remove from heat, and let steep 1 hour.
  2. Place the pan back on the stove and rewarm the mixture, removing the cinnamon sticks with a slotted spoon. Be careful not to let the mixture start to boil or get too hot, you are just warming the milk up to barely simmering at this point.
  3. Nest a medium-sized bowl in a larger bowl that’s partially filled with ice water, to create an ice bath. Set a mesh strainer over the medium bowl and pour the remaining cream into the medium bowl.
  4. Whisk together the egg yolks in a small bowl and gradually add some of the warm cinnamon-infused milk to the yolks, whisking constantly. Scrape the warmed yolks back into the saucepan and cook over medium heat, stirring constantly and scraping the bottom with a heatproof spatula, until the custard thickens and coats the spatula.
  5. Remove from heat and immediately pour the custard through the strainer into the cream. Remove the strainer and stir the custard until cool, then chill thoroughly in the refrigerator at least 8 hours or overnight.
  6. Before churning, add the ground cinnamon. Gently stir to combine.
  7. Then, freeze the custard in your ice cream maker according to the manufacturer’s instructions. Store in an airtight container in the freezer until ready to use.

For the affogato:

  1. Place the desired amount of ice cream in a small bowl or heat proof cup (I like two small scoops for this dessert).
    Churro Cinnamon-Brown Sugar Affogato // magicaltreatsathome.com
  2. Pour the espresso over the ice cream.
  3. Optionally top with crumbled churro toffee pieces. Enjoy!

Notes

  • To break up cinnamon sticks, you can either grind them in a mortar and pestle (which is what I did, and really, you’re just breaking them up, not grinding into a powder), or wrap them in a kitchen towel and break them up with a hammer or meat tenderizer. I would not suggest a ziplock as is said in the original recipe, as they tend to poke through and tear the bag, getting pieces everywhere.
  • We are Nespresso users at home, so I found that a regular shot was plenty. The lungo shot was a bit too much and melted the ice cream more than I desired creating a warm soup.
  • If you want to make a batch for a party, portion out ice cream into small cups and freeze ahead of time. When ready to serve, brew lungo shots in a large measuring glass with a spout. Then you can pour small amounts of espresso all at once into each cup.

Did you make this recipe?

Tag @magicaltreatsathome on Instagram and hashtag it #magicaltreatsathome

Churro Cinnamon-Brown Sugar Affogato // magicaltreatsathome.com

Share this:

  • Click to share on Facebook (Opens in new window) Facebook
  • Click to share on X (Opens in new window) X

Like this:

Like Loading...

Filed Under: 5 Minute Treats, Recipes, Treats Tagged With: 5 Minute Treat, brown sugar, churro toffee, cinnamon, DCA, disneyland, holiday, ice cream, Schmoozies, treat

5 Minute Treats: Hand-dipped Ice Cream Bars

February 12, 2020 by Elana Lepkowski 3 Comments

5 Minute Treats: Hand Dipped Ice Cream Bars // magicaltreatsathome.com

Where can I find the original treat?

  • This treat is available at Clarabelle’s in Disney California Adventure Park.

Welcome to the next post in our new series, 5 Minute Treats! And today’s recipe is just TWO ingredients! Sound too good to be true? Well, now you have the magic power to make Hand-dipped Ice Cream Bars!

5 Minute Treats: Hand Dipped Ice Cream Bars // magicaltreatsathome.com

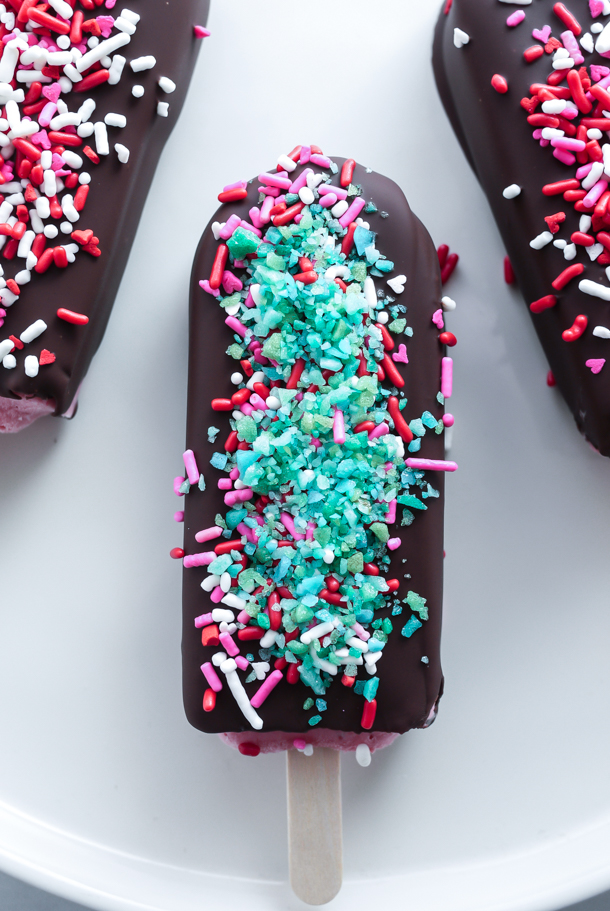
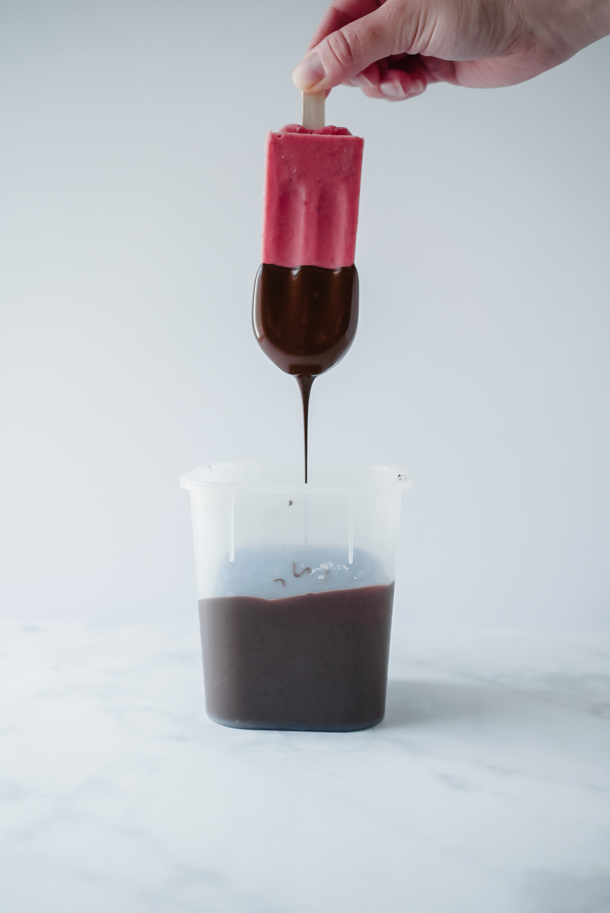
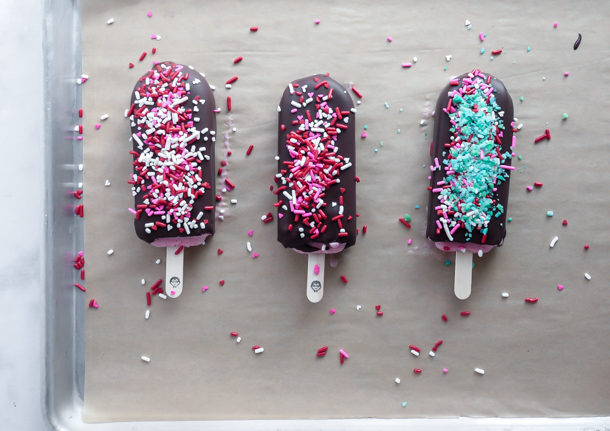
Otherwise known as magic shell, you just need chocolate (either milk or dark or somewhere in-between, or even white chocolate if you’d like) and coconut oil. That’s it! Melt them together, and when they hit the frozen ice cream… BAM! The chocolate is instantly hardened and ready to eat. You’ll need to time adding your ingredients so that they stick if you choose to do that. Clarabelle’s, where we originally tried this treat, has lots of options including sprinkles, chocolate chips, even POP ROCKS!! And if you get “The Whole Herd”, you get ALLLLLLLL the toppings. We usually go that route.

5 Minute Treats: Hand Dipped Ice Cream Bars // magicaltreatsathome.com

This is a really fun treat for kids to get involved in making. They can dip their ice cream and add all the toppings they want. And you can always drizzle on more chocolate sauce if you need a stronger “glue” for the items.

5 Minute Treats: Hand Dipped Ice Cream Bars // magicaltreatsathome.com

Now, the magic here happens because the frozen surface of the ice cream hardens the coconut oil (coconut oil reaches a solid state just below 76°f). If you dip non frozen items in this magic sauce, well, it won’t instantly harden. However, a quick trip to the freezer will take care of that!

5 Minute Treats: Hand Dipped Ice Cream Bars // magicaltreatsathome.com

Ok, grab some ice cream bars and get dipping!

Print
clock clock iconcutlery cutlery iconflag flag iconfolder folder iconinstagram instagram iconpinterest pinterest iconfacebook facebook iconprint print iconsquares squares iconheart heart iconheart solid heart solid icon
5 Minute Treats: Hand Dipped Ice Cream Bars // magicaltreatsathome.com

5 Minute Treats: Hand-dipped Ice Cream Bars

5 Stars 4 Stars 3 Stars 2 Stars 1 Star No reviews
  • Author: Elana Lepkowski
  • Yield: 2 cups Chocolate Magic Shell 1x
Print Recipe
Pin Recipe

Description

Magically turn chocolate sauce into a chocolate shell for your ice cream bars with our latest 5 Minute Treat for Hand-dipped Ice Cream Bars. And don’t forget to generously top with “The Whole Herd”. A Disneyland-inspired treat.


Ingredients

Scale

For the Magic Shell:

  • 2 cup chocolate chips (dark, milk, semisweet, white, or any combination)
  • 3 tablespoons refined coconut oil
  • pinch salt, optional

To serve:

  • ice cream bars
  • sprinkles
  • decorettes
  • chocolate chips
  • Pop Rocks

Instructions

For the Magic Shell:

  • In a microwave safe bowl, combine chocolate chips, coconut oil, and salt if using. Microwave on high 30 seconds, stir, and then repeat microwaving at 20 second intervals, stirring between, until melted and smooth. Let cool to room temp and use.
  • Can be stored in the refrigerator up to one month. Gently rewarm cold magic shell in the microwave in short bursts, stirring between.

To serve:

  1. Let magic shell cool at least 5 minutes.
  2. Quickly dip the ice cream in the sauce and then place on a piece of parchment.
  3. Immediately cover in toppings.
  4. If more “glue” is needed to hold toppings, drizzle on some additional sauce. Serve immediately! 

Notes

  • If using blocks of chocolate, finely chop before melting.
  • Store in a tall, narrow container (tupperware works!) to make dipping ice cream easier.
  • Magic Shell can be stored in the refrigerator up to one month. Gently rewarm cold magic shell in the microwave in short bursts (5-10 seconds), stirring in between.
  • If you want to dip with non-frozen items, like fruit, dip, place on parchment, and then freeze at least 5-10 minutes.

Did you make this recipe?

Tag @magicaltreatsathome on Instagram and hashtag it #magicaltreatsathome

5 Minute Treats: Hand Dipped Ice Cream Bars // magicaltreatsathome.com

Share this:

  • Click to share on Facebook (Opens in new window) Facebook
  • Click to share on X (Opens in new window) X

Like this:

Like Loading...

Filed Under: 5 Minute Treats, Recipes, Treats Tagged With: 5 Minute Treat, chocolate, Clarabelle's, coconut oil, DCA, ice cream, sprinkles

5 Minute Treats: Peppermint Affogato

December 13, 2019 by Elana Lepkowski Leave a Comment

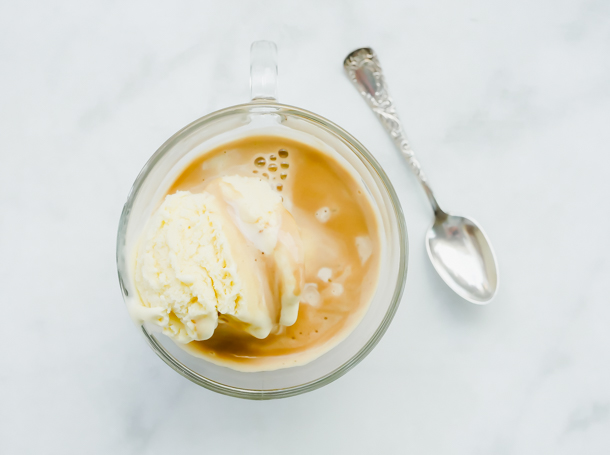
Peppermint Affogato // magicaltreatsathome.com

Where can I find the original treat?

  • This holiday time treat is available at Schmoozies! inside California Adventure.

What?! Another new series this week on the site?! YES! Today we’re launching what I hope will be a new series that will appear on here from time to time: 5 Minute Treats. And today we’re starting with this Peppermint Affogato.

Peppermint Affogato // magicaltreatsathome.com

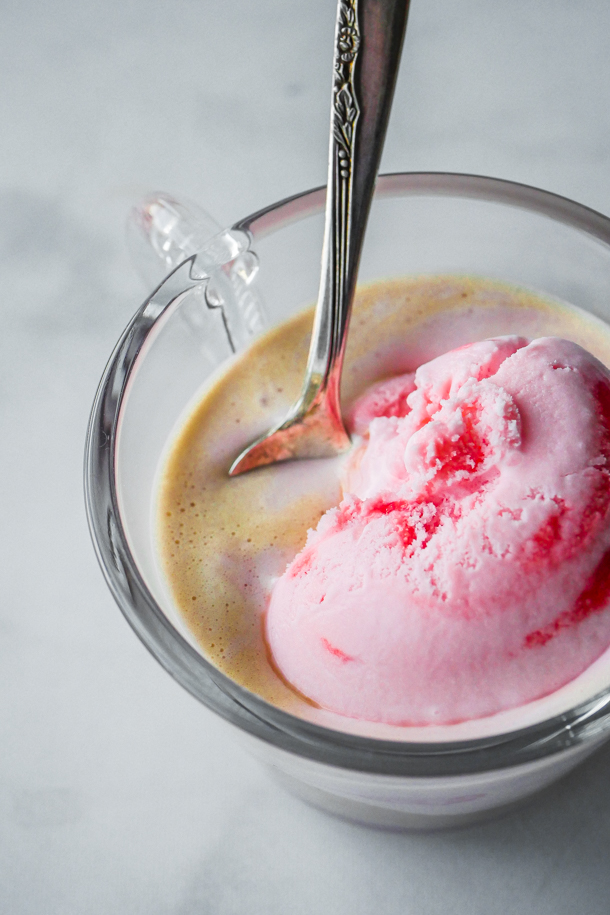
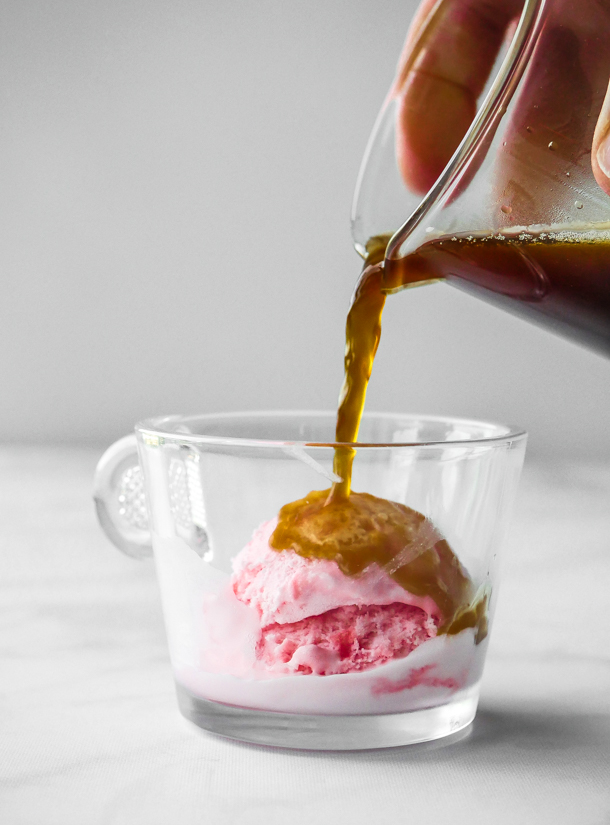
What is an affogato? An affogato is an Italian dessert that consists of two delicious things: ice cream (or gelato) and espresso. And while it may be a simple recipe, the end result is anything but simple. Over at Schmoozies! in DCA, they regularly have the classic vanilla topped with a large pour of espresso, but this holiday season, they had both a peppermint ice cream and a cinnamon-sugar (churro!) ice cream option.

Peppermint Affogato // magicaltreatsathome.com

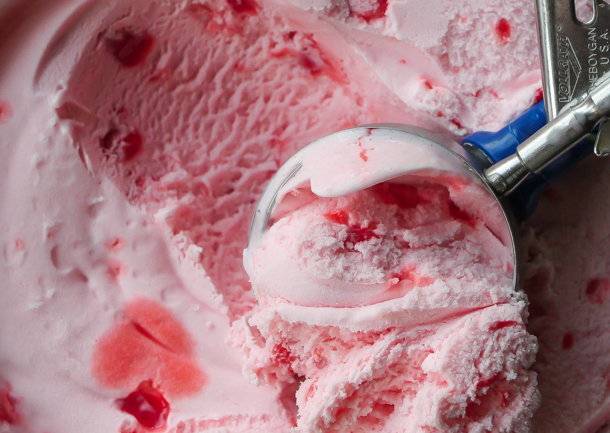
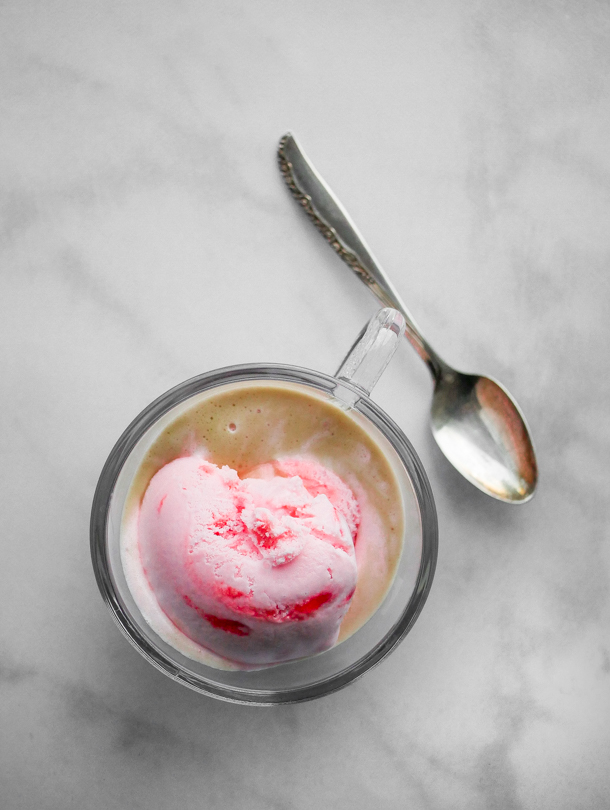
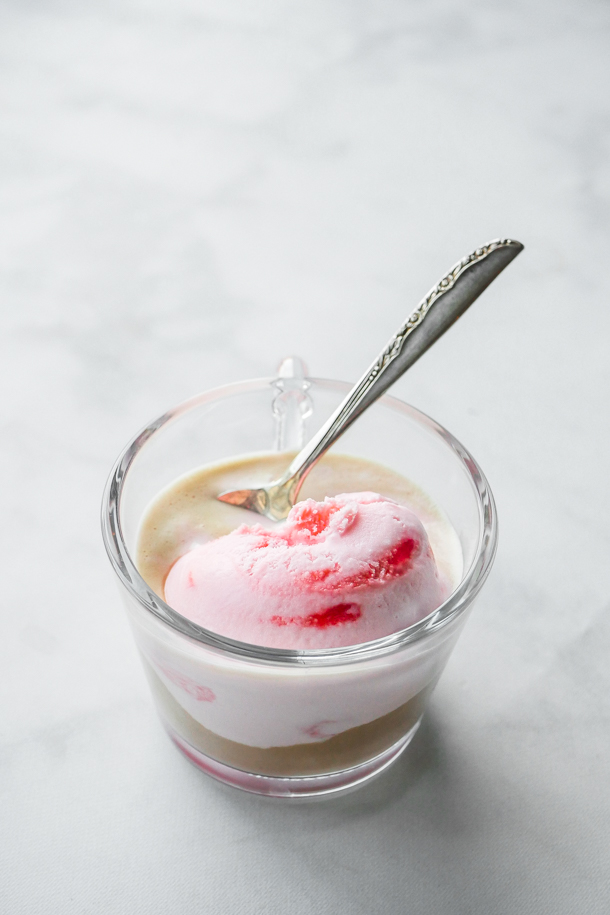
The peppermint ice cream affogato was just pure deliciousness, with the hot espresso slowly melting my peppermint candy specked pink ice cream, it came a whole other flavor once combined. The slightly bitter espresso was tamed by the sweetness of the ice cream and I found myself slurping up the whole thing unaware, or caring, who was watching me enjoy it.

Peppermint Affogato // magicaltreatsathome.com

But here’s why I’m giving you this “recipe” today. It’s holiday time, but that doesn’t mean you have to make complicated desserts. Especially when something simple like this tastes just so good. If you’re neck-deep in cookies and just want something easy to make, this is it. Bust this out after a meal and no one is going to ask you how long it took to make, or “is this it?”, because they’ll be too busy scarfing it down.

Peppermint Affogato // magicaltreatsathome.com

My hope with these “5 Minute Treats” is that you give yourself the space to not always feel like treats need to be complicated. They can be simple, but these recipes will always be good. I hope you enjoy one of these Peppermint Affogatos tonight or this weekend. Maybe treat yourself while you start wrapping presents and need an extra boost of caffeine (and that’s exactly what I did this week). Enjoy!

Print
clock clock iconcutlery cutlery iconflag flag iconfolder folder iconinstagram instagram iconpinterest pinterest iconfacebook facebook iconprint print iconsquares squares iconheart heart iconheart solid heart solid icon
Peppermint Affogato // magicaltreatsathome.com

5 Minute Treats: Peppermint Affogato

5 Stars 4 Stars 3 Stars 2 Stars 1 Star No reviews
  • Author: Elana Lepkowski
  • Total Time: 5 minutes
  • Yield: 1 Peppermint Affogato 1x
Print Recipe
Pin Recipe

Description

This two-ingredient creamy Peppermint Affogato comes together in just minutes! A Disneyland-inspired treat.


Ingredients

Scale
  • 1–2 scoops peppermint ice cream (with the candy pieces!)
  • 1 shot espresso, freshly made

Extra Tools

  • heat proof espresso glasses
  • demitasse spoons

Instructions

  1. Brew your espresso shot.
  2. Scoop out ice cream into a heat proof glass mug or small bowl.
  3. Pour espresso over the ice cream and enjoy!

Notes

  • We are Nespresso users at home, so I found that a regular shot was plenty. The lungo shot was a bit too much and melted the ice cream more than I desired creating a warm soup.
  • If you want to make a batch for a party, portion out ice cream into small cups and freeze ahead of time. When ready to serve, brew lungo shots in a large measuring glass with a spout. Then you can pour small amounts of espresso all at once into each cup.

Did you make this recipe?

Tag @magicaltreatsathome on Instagram and hashtag it #magicaltreatsathome

Peppermint Affogato // magicaltreatsathome.com

Share this:

  • Click to share on Facebook (Opens in new window) Facebook
  • Click to share on X (Opens in new window) X

Like this:

Like Loading...

Filed Under: 5 Minute Treats, Gluten Free, Recipes, Treats Tagged With: 5 Minute Treat, christmastimetreats, Disney's California Adventure, espresso, ice cream, peppermint, Schmoozies, treat

Primary Sidebar

Follow Us

  • Instagram
  • Facebook
  • X
  • Pinterest
  • Email
  • YouTube

Hi! My name is Elana, and that’s me shoving a Mickey Mouse shaped treat in my face. I love the treats at Disneyland. A lot. So much so I’ve dedicated an entire website to making all my favorites, and hopefully yours too, out of my home kitchen. My aim is to create Disneyland-inspired treats, with easy to follow directions, and many recipes geared towards getting the kids in the kitchen to help too! Because putting sprinkles on things is F-U-N.

Top With Sprinkles

Get Recipes in Your Inbox!

* indicates required

Look for this icon in posts to find Kid Friendly recipes!

Recent Posts

  • Matterhorn Macaroon
  • Caramel Gingerbread Cookie Sandwiches
  • Colorful Fruit Hand Pies
  • Classic Mickey Shaped Beignets
  • Carrot Cake Cookies

Archives

  • February 2023
  • December 2022
  • August 2022
  • January 2022
  • December 2021
  • November 2021
  • December 2020
  • November 2020
  • October 2020
  • September 2020
  • August 2020
  • July 2020
  • June 2020
  • May 2020
  • April 2020
  • March 2020
  • February 2020
  • January 2020
  • December 2019
  • November 2019
  • October 2019
  • September 2019
  • August 2019
  • July 2019
  • June 2019
  • May 2019

Copyright © 2025 Magical Treats at Home on the Foodie Pro Theme

%d