• Skip to primary navigation
  • Skip to main content
  • Skip to primary sidebar

Magical Treats at Home

  • About
  • Treats
  • Drinks
  • Savory
  • Favorite Tools
  • Etsy Shop

disneyland

Layered Pumpkin Cheesecake

November 11, 2019 by Elana Lepkowski Leave a Comment

Layered Pumpkin Cheesecake // magicaltreatsathome.com

Where can I find the original treat?

  • This treat can be found at the Jolly Holiday Bakery Cafe at the Disneyland resort.
Layered Pumpkin Cheesecake // magicaltreatsathome.com

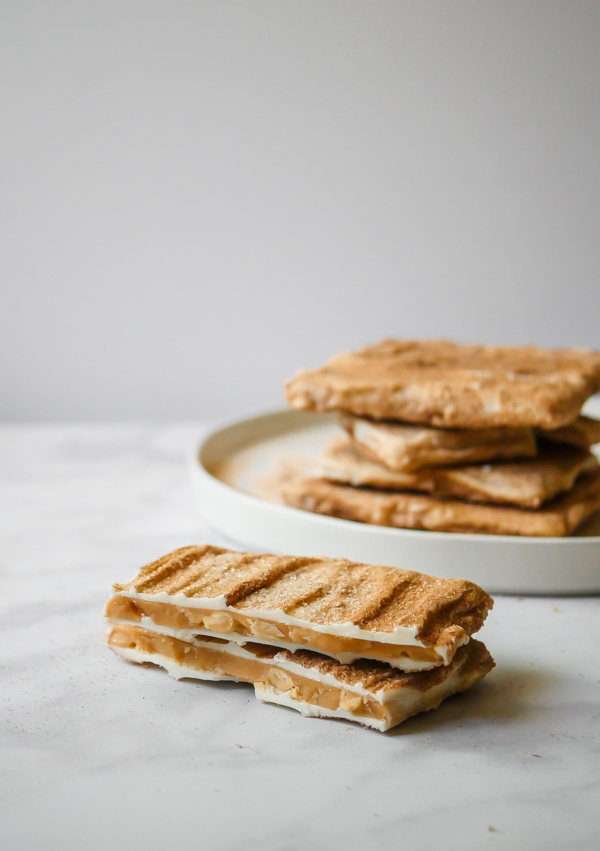
We’ve got our last of the pumpkin treats today as we say goodbye to all the fall decorations at Disneyland and head straight into Christmas. But wait! Yes, there is another holiday before then, and we’re not talking about National Peanut Butter Fudge Day (although that lands on November 20 this year). We’ve still got Thanksgiving coming this month, and that means PIE! Pumpkin pie! But if making a whole pie from scratch is just not doable, try these mini Layered Pumpkin Cheesecake jars instead!

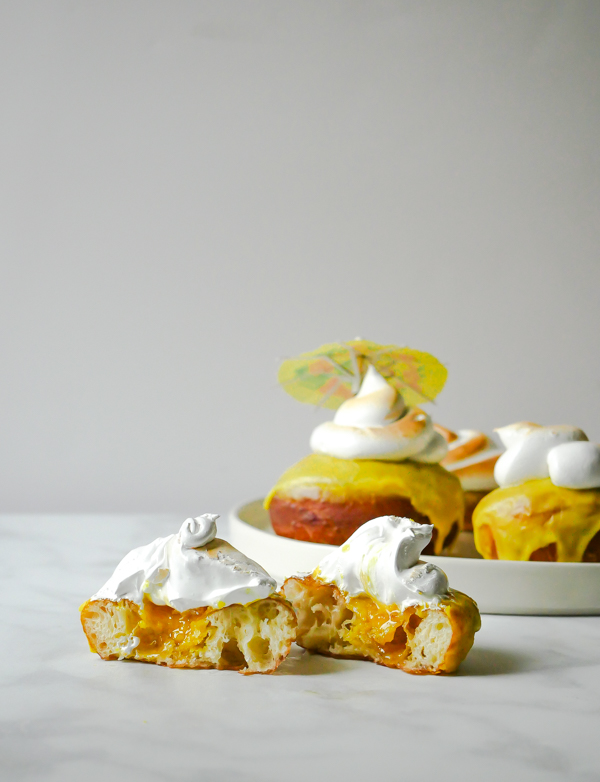
Last year at Disneyland I tried one of these and I inhaled it in seconds; it was just so good. Admittedly I am a lover of pumpkin flavored treats and I live for cheesecake, so this layered individual dessert cup was calling my name. I was so happy they brought it back this year, but on November 8th, *poof*, it’s gone, and who knows if it will come back next year. So let’s make our own now!

Layered Pumpkin Cheesecake // magicaltreatsathome.com

These are a really great option if you’re thinking about desserts for the holidays and want to do all the prep ahead of time, even a whole day or two ahead of time. These jars are quick to put together because there’s NO COOKING! Just dirty some bowls, store everything into little jars in the fridge, and then take them out when it’s time to serve to guests (or let’s be real, yourself, 4 times).

This recipe makes just 4 individual desserts, but this can be easily scaled up (the recipe box below has a handy tool to do that with too!). You may want to increase or decrease the sugar as you scale, so remember to do a taste test when adjusting!
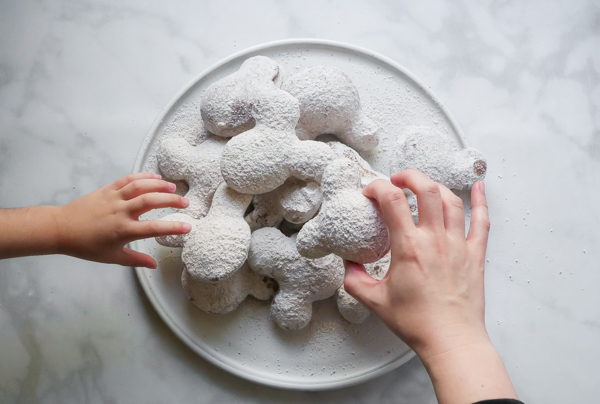
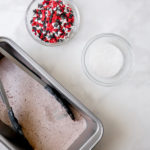
Layered Pumpkin Cheesecake // magicaltreatsathome.com

This might not be the most “fun” dessert for kids to make, but they can definitely help with assembly, and older kids can do the piping work. My kids always feel proud to eat anything they’ve helped make too, even if it doesn’t include sprinkles.

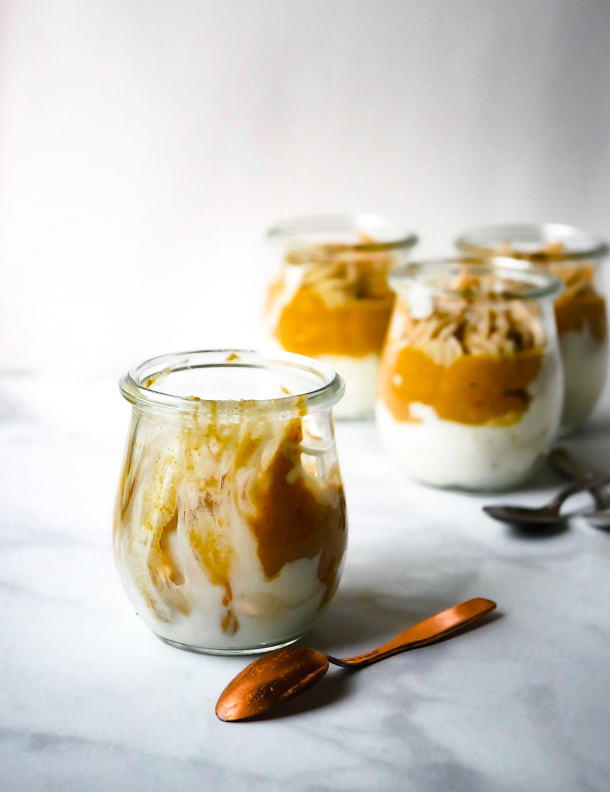
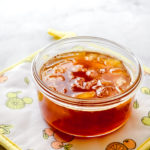
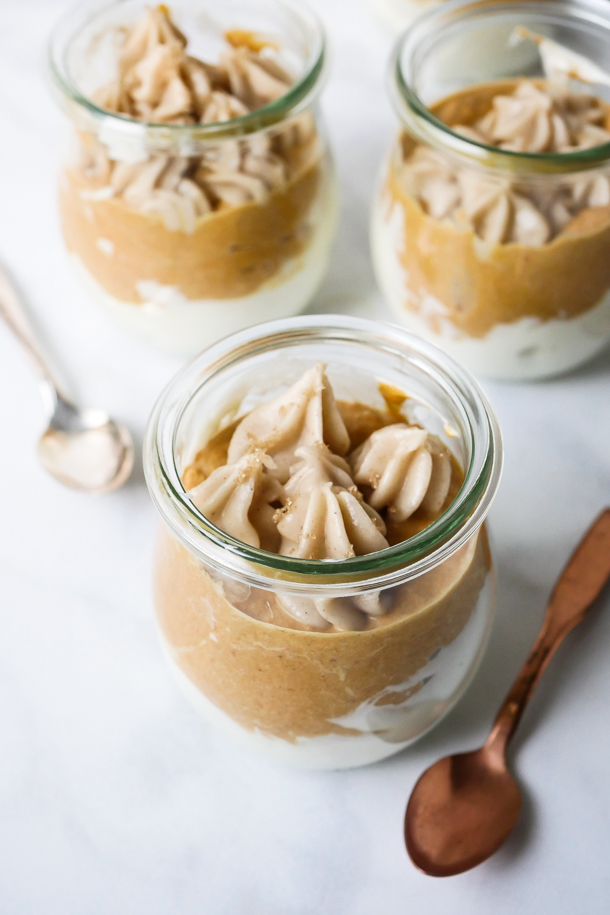
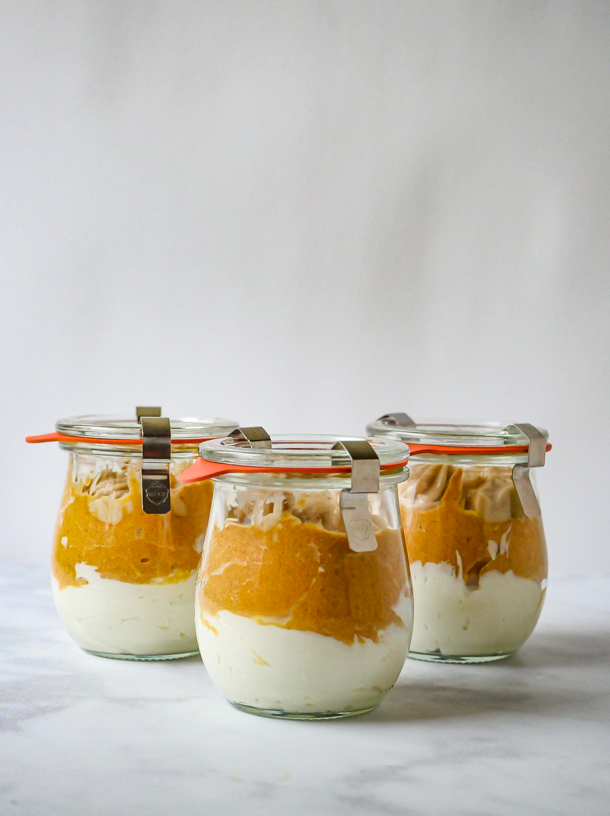
A note here on the jars used. In the photos I am using a Weck tulip jam jar that holds about 7.4 ounces. These are a great size for individual portions, and cute looking too. However, I find these very fragile and I do not suggest them for use with kids. Tempered glass jars, like Wean Green, or plastic lidded containers would work best if you are making these for younger guests, or hey, for those holiday guests that have a designated driver.

Layered Pumpkin Cheesecake // magicaltreatsathome.com
Print
clock clock iconcutlery cutlery iconflag flag iconfolder folder iconinstagram instagram iconpinterest pinterest iconfacebook facebook iconprint print iconsquares squares iconheart heart iconheart solid heart solid icon
Layered Pumpkin Cheesecake // magicaltreatsathome.com

Layered Pumpkin Cheesecake

5 Stars 4 Stars 3 Stars 2 Stars 1 Star No reviews
  • Author: Elana Lepkowski
  • Yield: 4 servings 1x
Print Recipe
Pin Recipe

Description

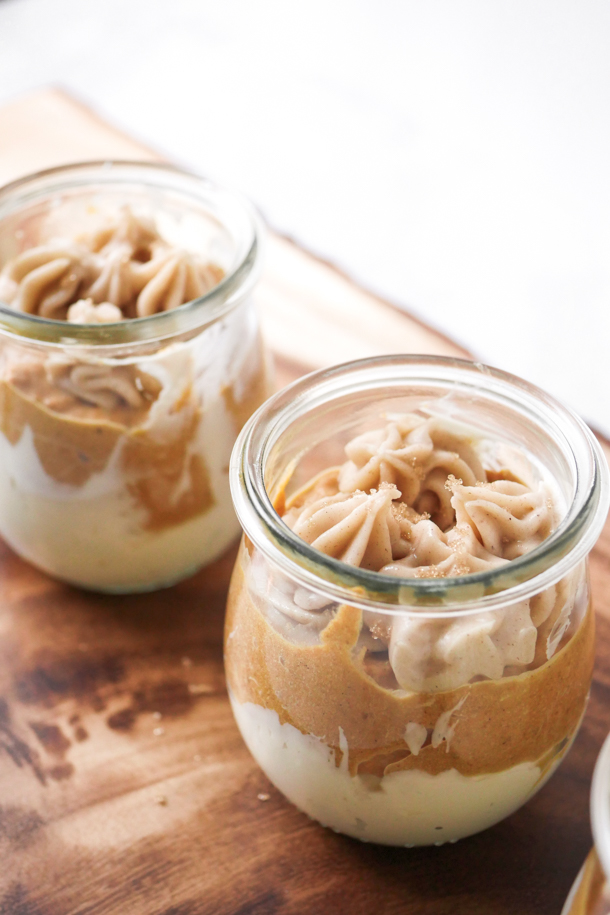
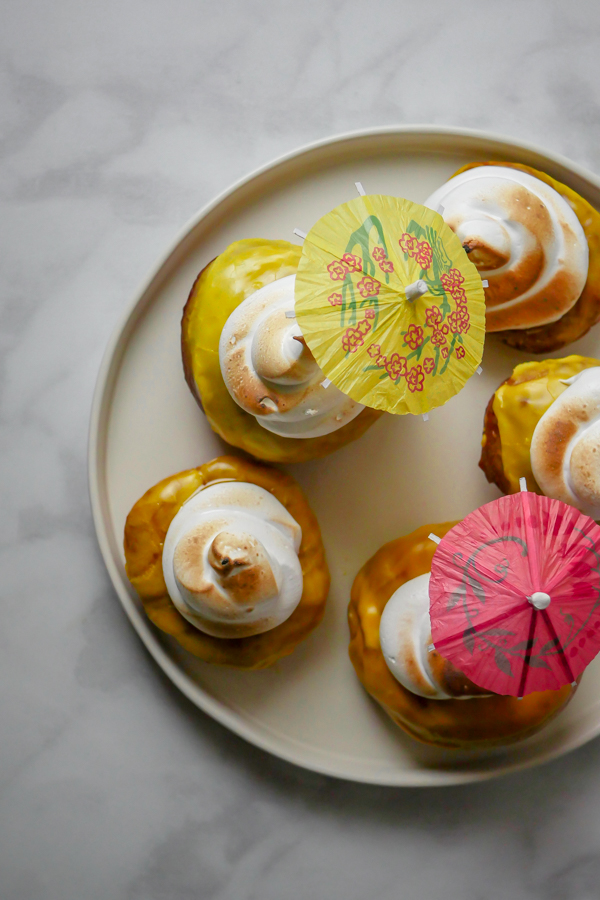
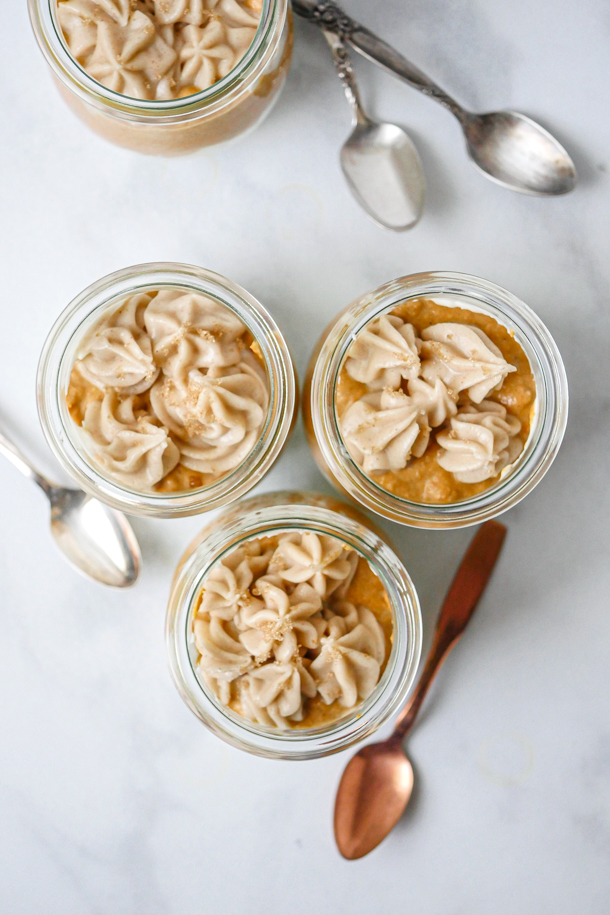
Layers of pumpkin pie filling and creamy, no bake cheesecake are topped with cinnamon spiced cream cheese swirls in individual portions. A Disneyland-inspired treat.


Ingredients

Scale

Whipped Cinnamon Cream Cheese Frosting:

  • 4 ounces (half a block) cream cheese
  • 1/4 cup (55 g) unsalted butter
  • 1–1/2 cups (188 g) powdered sugar
  • 1/2 teaspoon vanilla extract
  • 1/2 teaspoon ground cinnamon
  • pinch salt

Pumpkin Pie Filling:

  • 1/4 cup (65 g) heavy cream
  • 2/3 cup (180 g) pumpkin purée
  • 1/4 tsp cinnamon
  • 1/2 tsp pumpkin pie spice
  • 2–1/2 tbsp brown sugar (47 g)
  • pinch salt

Cheesecake Layer (adapted from Sally’s Baking Addiction):

  • 1/2 cup (4 oz) heavy cream
  • 4 ounces cream cheese (half a block)
  • 3 tablespoons (45 g) light brown sugar
  • 1 tablespoon (15 g) sour cream or Greek yogurt
  • 1 teaspoon lemon juice
  • 1/4 teaspoon pure vanilla extract

Topping:

  • crystallized ginger (see notes below)
  • brown sugar

Specialty Tools:

  • Ateco #843 closed star pastry tip
  • pastry bag
  • Weck tulip jam jars

Instructions

Whipped Cinnamon Cream Cheese Frosting:

  1. In a stand mixer fitted with the paddle attachment, on high speed for several minutes, cream together the cream cheese and the butter until light and fluffy, and fully combined.
  2. Next, add in the powdered sugar, vanilla extract, cinnamon, and salt. Slowly mix together until all the powdered sugar has been incorporated, and then bring the mixer to high speed until fully mixed, and frosting is light and fluffy.
  3. Add the frosting to a pastry bag fitted with a small closed star (like Ateco #843). Set aside.

Pumpkin Pie Filling Layer:

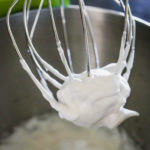
  1. In the bowl of a stand mixer fitted with the whisk attachment, pour in the heavy cream and whip until very soft peaks form. You want the cream to still slip off a spoon, but not be liquid-y.
  2. Then remove the whisk and add the paddle attachment.
  3. Add in pumpkin purée, cinnamon, pumpkin pie spice, brown sugar, and salt. Gently mix until combined.
  4. Set aside.

Cheesecake Layer:

  1. In a stand mixer fitted with a whisk attachment, whip the cold heavy cream into stiff peaks on medium-high speed, about 3-4 minutes. Gently remove into a separate bowl. Set aside.
  2. Next, switch to a paddle attachment and in the same empty bowl you whipped the cream in, add in the cream cheese, sour cream, lemon juice, and vanilla extract together on medium-high speed until smooth and no more lumps.
  3. Gently fold in the whipped cream into the cream cheese mixture by using a rubber spatula to cut down through the center of the mix, scooping through the bottom left, giving the bowl a quarter turn, and then repeating until the whipped cream is just barely incorporated. Set aside.
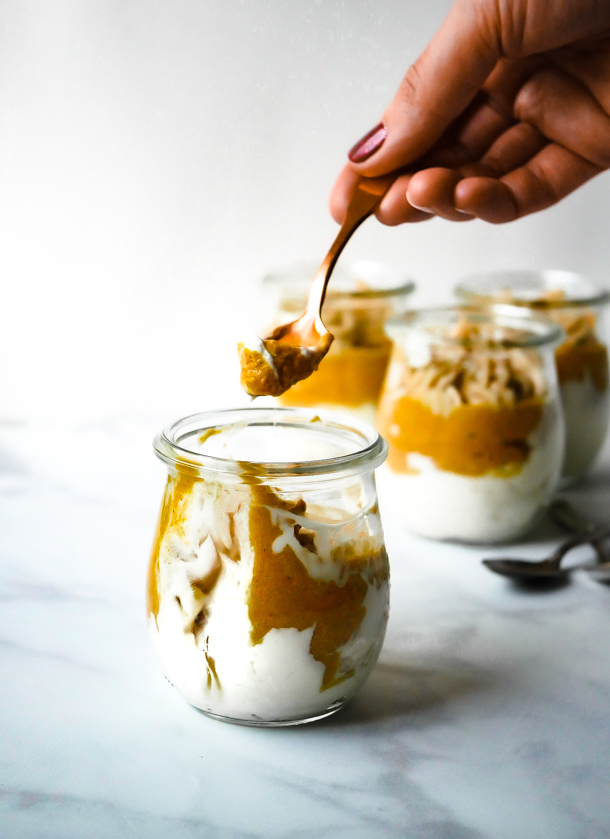
Assembly:

  1. In a clean jar, add about 1/4 cup (2 ounce #16 disher) of the cheesecake mixture to each jar.
  2. Next add in the same amount of the pumpkin filling.
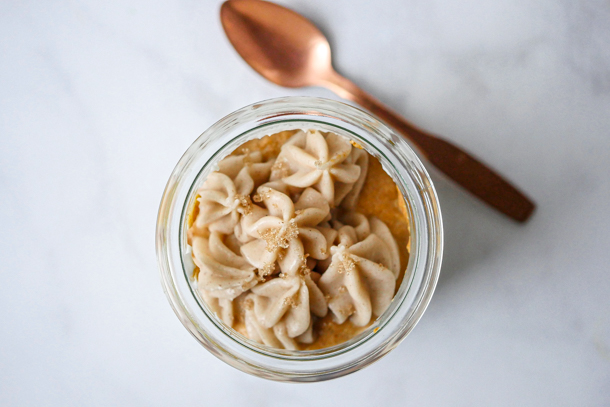
  3. Finally, dot the top of the pumpkin filling with small stars made of the cinnamon cream cheese frosting. Dust with finely chopped crystallized ginger or brown sugar. Enjoy!

Notes

  • Components can be refrigerated up to 5 days beforehand separately and then assembled to serve, or assembled into jars, sealed and kept refrigerated for 5 days.
  • Granulated ginger can also be used and mixed with brown sugar as a topping.
  • The dessert can also be assembled into a trifle dish for one larger serving.
  • Tempered glass jars, like Wean Green, or plastic lidded containers would work best if you are making these for younger guests as the Weck jars are fragile and can break easily.

Did you make this recipe?

Tag @magicaltreatsathome on Instagram and hashtag it #magicaltreatsathome

Layered Pumpkin Cheesecake // magicaltreatsathome.com

Share this:

  • Click to share on Facebook (Opens in new window) Facebook
  • Click to share on X (Opens in new window) X

Like this:

Like Loading...

Filed Under: Recipes, Treats Tagged With: cheesecake, cinnamon, cream cheese, disneyland, fall, fall-halloween, individual dessert, jolly holiday bakery cafe, Pumpkin, pumpkin spice, treat

Pumpkin Cake Pops

November 4, 2019 by Elana Lepkowski 1 Comment

Pumpkin Spice Cake Pops // magicaltreatsathome.com

Where can I find the original treat?

  • These treats can be found all over the Disneyland resort.

Santa was out riding around Disneyland on Halloween, which was kinda weird, what with jack-o-lanterns still hung up everywhere. It’s that narrow time frame of transition at the parks where everyone is itching for Christmas, but we still had to get through Halloween first. And now that trick or treating is behind us, I’m still here for the pumpkins. That’s why this week’s treat recipe is Pumpkin Cake Pops!

Pumpkin Spice Cake Pops // magicaltreatsathome.com

These pumpkin spice, pumpkin shaped cake pops have a wonderful punch of baking spices that will have you longing for a piece of pumpkin pie. They’re coated with orange and green chocolate, and a caramel stem, and the bakers did a great job of adding in a hint of molding so that these cake pops really do resemble little pumpkins. And now you get to have them at home too!

Pumpkin Spice Cake Pops // magicaltreatsathome.com

Cake pops are one of those treats that look easy to make, but actually require a little finesse to get it right, but don’t let that stop you! I’ve got some tips and tricks in the notes section below the recipe to help you out. These cake pops can be made all from scratch, a combo of pre-made items, or all store bought! The recipe I use from scratch makes for a moist cake that holds its shape well after forming a ball, and has a balanced amount of spices with real pumpkin in the mix. I use a cream cheese frosting that is super creamy and makes a great “glue” here. You can also choose to color white chocolate, or use pre-colored candy melts too.

Now, while all kids can definitely help roll the cake into balls and attach to the sticks, older kids might be better suited to coating the chocolate, as there is some technique involved there. However, you know your own kids, and if it comes down to it, you can just throw all the cake balls into the chocolate and have cake bon bons instead of pops. And then everyone can help decorate. That actually sounds pretty fun.

Pumpkin Spice Cake Pops // magicaltreatsathome.com

So let’s enjoy pumpkin season while it lasts, because we might not make it to Thanksgiving when all the peppermint treats that are about to drop at Disneyland. Have a magical day everyone!

Pumpkin Spice Cake Pops // magicaltreatsathome.com
Print
clock clock iconcutlery cutlery iconflag flag iconfolder folder iconinstagram instagram iconpinterest pinterest iconfacebook facebook iconprint print iconsquares squares iconheart heart iconheart solid heart solid icon
Pumpkin Spice Cake Pops // magicaltreatsathome.com

Pumpkin Cake Pops

5 Stars 4 Stars 3 Stars 2 Stars 1 Star No reviews
  • Author: Elana Lepkowski
  • Yield: 7 cake pops 1x
Print Recipe
Pin Recipe

Description

Moist, perfectly spiced pumpkin cake pops are coated in orange and green chocolate to resemble tiny pumpkins. A Disneyland-inspired treat.


Ingredients

Scale

For the cake balls:

  • 2 cups (~210 g) loosely packed crumbled pumpkin spice cake crumbs
  • 1/4 cup (32 g) cream cheese frosting
  • ***Both recipes can be found here if making from scratch (recipe makes more than you’ll need here. see notes below about freezing extra components)

For the decoration:

  • 6–1/2 ounces (3/4 cup) orange candy melts
  • 1–1/2 ounces red candy melts
  • 1/2 ounce (~1 tablespoon) green candy melts
  • 1/2 ounce (~1 tablespoon) dark cocoa candy melts OR 2 caramel squares

Special Tools:

  • 1 ounce disher
  • lollipop sticks
  • pastry bags
  • cake pop holder OR shoe box base for drying cake pops
  • scribe

Instructions

For the cake balls:

  • If baking from scratch, follow directions for cake, cool completely and crumble half for recipe. Eat or freeze the rest of the recipe for another time.
  • If making frosting from scratch, make and set 1/4 cup aside. Use or freeze the rest for another recipe.
  • Combine cake crumbles and frosting in the bowl of a stand mixer with paddle attachment until fully incorporated. You can also mix well in a bowl with a rubber spatula. If too wet, add more cake crumbles. If too dry, add more frosting a small bit at a time.
  • Using a 1 ounce disher, scoop out cake mixture and form a tight ball. Push a lollipop stick halfway into the ball. Set aside in the cake pop stand, or make holes in the bottom of a shoe box and stick the cake pops in there. Repeat until all the mixture is gone.
  • Refrigerate at least one hour to firm up, or up to two days.

For the decoration:

  • Take out the cake pops and let warm up slightly at least 10 minutes.
  • Melt the orange and red candy melts in the microwave inside a microwave safe bowl, like glass, for 30 seconds. Stir and microwave again for an additional 30 seconds. Keep stirring and microwaving in short bursts of 15-20 seconds until melted and smooth. Use can alternatively use a double boiler for melting.
  • Next, holding the cake ball over the melted chocolate, use a spoon to ladle the chocolate over it, turning and pouring to get an even coat. Tap gently so excess chocolate drips off and air bubbles get released. Use a scribe to pop any bubbles that do not break.
  • Set them back in the cake pop holder and continue until all of the cake pops are coated.
  • Next, melt green and dark cocoa chocolates using the same method from above.
  • Transfer the green and dark cocoa candy melts to separate piping bags and cut a small tip off each bag.
  • Use the green to decorate green vines on each cake pop.
  • Then use the dark cocoa to pipe small stems on each pop. If making the caramel stems (similar in style to the cake pops found at Disneyland), melt caramel squares in the microwave in short bursts at half power until soft but not melted. Cool slightly and take small chunks of the caramel out with a toothpick and attach to the top of the cake pops, using wet fingers to mold the caramel into a stem.
  • Refrigerate at least an hour to set. Then enjoy!

Notes

  • Cake balls should not be too wet or too dry to hold their shape properly. If too wet, add more cake crumbles. If too dry, add more frosting a small bit at a time.
  • If cake balls are slipping off the sticks, dip lollipop stick tip in the melted chocolate and insert into cake ball. Refrigerate a few minutes to set.
  • If you do not pop the air bubbles, then moisture from the cake will seep out as the chocolate dries. If this happens, gently wipe away anything that has seeped out, and coat a second time in the melted chocolate.
  • Don’t let the green or chocolate candy melts get too hot or they will run when trying to pipe out decorations. Allow to cool a bit after melting for more set lines.

Did you make this recipe?

Tag @magicaltreatsathome on Instagram and hashtag it #magicaltreatsathome

Pumpkin Spice Cake Pops // magicaltreatsathome.com

Share this:

  • Click to share on Facebook (Opens in new window) Facebook
  • Click to share on X (Opens in new window) X

Like this:

Like Loading...

Filed Under: Recipes, Treats Tagged With: cake, cake pop, chocolate, disneyland, fall, fall-halloween, Pumpkin, pumpkin spice, treat

Mickey Mouse Spider Web Rice Krispie Treats

September 30, 2019 by Elana Lepkowski Leave a Comment

Mickey Mouse Spider Web Rice Krispie Treat // magicaltreatsathome.com

Where can I find the original treat?

  • These treats can be found all over the Disneyland resort.

There are so many tasty Halloween treats at Disneyland right now that it was a bit hard to narrow down what I wanted my first spooky treat of the season to be. But I had to go with a rice crispy (crispie… krispie… krispy…) treat. A Mickey Mouse Spider Web Rice Krispie treat that is!

Mickey Mouse Spider Web Rice Krispie Treat // magicaltreatsathome.com

Sometimes simple is best and these treats are SO simple to make. They’re also great at sizing up, in case you want to give these out as Halloween treats at home, or to a class, or to friends. (Our recipe below has a handy button to increase the recipe yield, please use it for this if you want a large amount!)

After the initial rice crispy treat is made and cooled, kids can help cut and decorate. I also tried out a new-to-me product from Wilton which is pretty much a prepackaged squeeze bottle of black icing. So that’s an option if you don’t want to melt two batches of chocolate and color them. I found it convenient, however, I would have liked a smaller opening for the icing. All of these pictured I used the bottle icing but I think I’ll also try with my own chocolate next time just to compare.

Mickey Mouse Spider Web Rice Krispie Treat // magicaltreatsathome.com

As per usual, there are some notes following the recipe so please read all the way through. One big tip though is that when you’re working with marshmallows, you’ll never scrape everything out of the pan you make them in so make peace with that now. Also, damp fingers/hands are best since the marshmallow won’t stick to you!

I hope you get in the kitchen this week and make these sweet, classic treats, with this Halloween spin!

Print
clock clock iconcutlery cutlery iconflag flag iconfolder folder iconinstagram instagram iconpinterest pinterest iconfacebook facebook iconprint print iconsquares squares iconheart heart iconheart solid heart solid icon
Mickey Mouse Spider Web Rice Krispie Treat // magicaltreatsathome.com

Mickey Mouse Spider Web Rice Krispie Treats

5 Stars 4 Stars 3 Stars 2 Stars 1 Star No reviews
  • Author: Elana Lepkowski
  • Yield: 3 Mickey Mouse Spider Web Rice Krispie treats 1x
Print Recipe
Pin Recipe

Description

Chewy, crispy, Mickey Mouse-shaped rice krispie treats get the Halloween treatment with a bright orange and black spider web design on the iconic treat. A Disneyland-inspired recipe.


Ingredients

Scale

For the rice krispie treat:

  • 2 tablespoons butter, unsalted
  • 157 g ( 2 cups) mini marshmallows or 20 regular sized marshmallows
  • 2 cups crisped rice cereal

For the topping:

  • 3–1/2 ounces white chocolate
  • 6–8 drops orange, oil based food coloring for chocolate
  • 2 ounces (100 g) light cocoa candy melts
  • 3–4 drops black, oil based food coloring for chocolate
  • OR, Wilton Black Cookie Icing (instead of light cocoa melts and black food coloring)

Tools:

  • Mickey Mouse cutter
  • 3 Popsicle sticks

Instructions

For the rice krispie treat:

  1. Before beginning, line a 8×8″ baking pan with parchment.
  2. Combine the butter and marshmallows in a medium sauce pan over medium-low heat. Stir constantly until marshmallows have melted and mixture is smooth.
  3. Immediately dump in the crisped rice cereal and mix to combine.
  4. Pour into the prepared pan and gently press mixture into place with a rubber spatula (or damp fingers). Set aside for at least an hour in the refrigerator so that the mixture can firm up enough to cut shapes.
  5. Once firm, use parchment to lift out rice krispie treats. Use a Mickey Mouse shaped cutter to cut out shapes and set aside.
    Mickey Mouse Spider Web Rice Krispie Treat // magicaltreatsathome.com

For the decorating:

  1. First, melt the white chocolate and orange food coloring in the microwave inside a microwave safe bowl, like glass, for 30 seconds. Stir and microwave again for an additional 30 seconds. Keep stirring and microwaving in short bursts of 15-20 seconds until melted and smooth. Use can alternatively use a double boiler for melting.
  2. Insert a popsicle stick into each treat.
  3. Dip a treat into the melted chocolate, letting any excess drip off back into the bowl. Repeat for other treats.
  4. Next, melt the light cocoa candy melts and black food coloring in the microwave inside a microwave safe bowl, like glass, for 30 seconds. Stir and microwave again for an additional 30 seconds. Keep stirring and microwaving in short bursts of 15-20 seconds until melted and smooth. Use can alternatively use a double boiler for melting. Or you can skip and use the tube icing here.
  5. Transfer black melted chocolate to a squeeze bottle or a piping bag with a small portion of the tip cut off. Then decorate a spider web design over the orange chocolate. Repeat until all treats are decorated.
  6. Let the chocolate firm up, at least an hour in the refrigerator before serving. Enjoy!

Notes

  • Use a smaller pan than you think you’ll need for this. As the marshmallows melt into the butter, if there’s too much space in the pan they will start to dry out and form strings. Keeping the marshmallows closer together in the pan will ensure they melt more evenly, creating a better mixture to add the cereal into.
  • When mixing crisped rice cereal into the melted marshmallows, keep the mixture on the flame so that marshmallows stay liquid. Removing to mix in can seize up the liquid before the cereal is fully mixed.
  • You can combine some extra rice krispie treat scraps into the mold to shape additional Mickey Mouse treats.
  • You can also use orange candy melts instead of the white chocolate and orange food coloring.
  • Treats can be kept in an air-tight container for up to 3 days.

Did you make this recipe?

Tag @magicaltreatsathome on Instagram and hashtag it #magicaltreatsathome

Mickey Mouse Spider Web Rice Krispie Treat // magicaltreatsathome.com

Share this:

  • Click to share on Facebook (Opens in new window) Facebook
  • Click to share on X (Opens in new window) X

Like this:

Like Loading...

Filed Under: Recipes, Treats Tagged With: character treat, DCA, disneyland, Downtown Disneyland, fall-halloween, Halloween, rice krispie treat, treat

Mickey Mouse Pumpkin Spice Beignets

September 23, 2019 by Elana Lepkowski Leave a Comment

MIckey Mouse Pumpkin Spice Beignets // magicaltreatsathome.com

Where can I find the original treat?

  • These treats can be found at the Mint Julep Bar in New Orleans Square.

Today marks the first official day of fall. Which might seem odd because I think we’ve been celebrating all things pumpkin spice since about August 27th. But to mark the date, we’ve got our own pumpkin spiced treat on the site today: Mickey Mouse Pumpkin Spice Beignets!

MIckey Mouse Pumpkin Spice Beignets // magicaltreatsathome.com

If you want your kitchen, and maybe even your whole house, to smell like fall, this treat will do it. A hefty dose of pumpkin spice flavored powdered sugar covers every square inch of these melt-in-your-mouth beignets.

MIckey Mouse Pumpkin Spice Beignets // magicaltreatsathome.com

These Mickey Mouse beignets are the same base used in the traditional beignet recipe (and in our Butterscotch Beignets too!); it’s the coating here that makes them different. And, as with all our recipes, please read all the way through including the notes for helpful tips!

EXTRA EXTRA: since these traditional style beignets make for hollow pockets, you could go the extra mile here and fill them with pumpkin or apple butter if you want to turn the fall flavors up to 110%.

MIckey Mouse Pumpkin Spice Beignets // magicaltreatsathome.com

Ok, let’s go pumpkin spice-ify Mickey Mouse.

Print
clock clock iconcutlery cutlery iconflag flag iconfolder folder iconinstagram instagram iconpinterest pinterest iconfacebook facebook iconprint print iconsquares squares iconheart heart iconheart solid heart solid icon
MIckey Mouse Pumpkin Spice Beignets // magicaltreatsathome.com

Mickey Mouse Pumpkin Spice Beignets

5 Stars 4 Stars 3 Stars 2 Stars 1 Star No reviews
  • Author: Elana Lepkowski
  • Yield: 15–18 Mickey Mouse shaped beignets 1x
Print Recipe
Pin Recipe

Description

Melt-in-your-mouth Mickey Mouse Pumpkin Spice Beignets are ready for fall with a hefty dose of powdered sugar, cinnamon, and spice! A Disneyland-inspired treat.


Ingredients

Scale
  • 1/2 teaspoon dry yeast
  • 1/4 cup warm water (105º)
  • 1/4 cup sugar
  • 2 tablespoons vegetable shortening (I used refined coconut oil)
  • 1/2 teaspoon salt
  • 1/2 cup heavy cream
  • 1 egg
  • 4 cups all-purpose flour
  • 1/2 cup boiling water
  • Vegetable oil for frying, like avocado
  • 1 cup powdered sugar
  • 1 tablespoon pumpkin pie spice (or make your own blend, see notes below)

Specialty Tools:

  • heavy bottomed dutch oven
  • candy thermometer
  • Mickey Mouse cutter

Instructions

  1. Sprinkle yeast over warm water in a small bowl, gently stirring to dissolve. Let stand for 5 minutes.
  2. Combine sugar, shortening, salt, heavy cream, egg, flour and boiling water in a large bowl. Mix until everything is just combined and then stir in yeast mixture. With the dough hook attachment of an electric mixer on medium speed, mix the dough just until combined and smooth. About 3-4 minutes. Let dough rest for 30 minutes in the bowl.
  3. Flour your surface and roll to 1/4-inch thickness. Using the Mickey Mouse cutter, cut dough pieces, twisting slightly, and carefully removing dough from around cutter before releasing. You may have to combine dough and roll out again to cut more shapes out. Cover with a towel and let dough rise until doubled in size in a warm, draft-free area, about 1-1/2 to 2 hours.
  4. While dough is rising, mix together the powdered sugar and pumpkin pie spice in a large bowl. Set aside.
  5. Pour enough oil into a deep-sided, heavy bottomed pot until it reaches 2 inches up sides; heat oil over medium heat to 370°F.
    Mickey Mouse Butterscotch Beignets // magicaltreatsathome.com
  6. Add 2-3 beignets to oil; fry until golden brown on both sides, about a minute each, turning once.
  7. Remove from hot oil with a slotted spoon and place on a baking sheet lined with paper towels.
  8. Let rest at least five minutes, and then toss in the powdered sugar and spice mix. You can sift extra sugar over all the beignets before serving.
    MIckey Mouse Pumpkin Spice Beignets // magicaltreatsathome.com

Notes

  • Pumpkin pie spice blend: 3 tablespoons cinnamon, 2 teaspoons ground ginger, 1 teaspoon ground nutmeg, 3/4 teaspoon allspice, and 1/2 teaspoon cloves
  • Dough may have to be recombined and rolled a second time if you have a lot of scraps.
  • Wait for oil to come back to temperature before adding next batch of beignets to the pot.
  • No dough hook attachment? Knead dough until smooth and shiny, about 5-8 minutes and then proceed with the recipe.
  • Want to make these at night for the next morning? After cutting Mickey Mouse shapes out. Transfer to a baking sheet and let rest, covered with a towel, in the refrigerator overnight. Let come to room temperature before frying in the morning. Dough shapes can also be frozen and then left in refrigerator overnight and fried off.
  • If your dough gets a skin while rising, put the sticky side down first into the oil to avoid tearing while the beignet expands.
  • If your powdered sugar is lumpy, sift when combining with the pumpkin pie spice mix.
  • Strain your oil after it reaches room temperature. It can be used again!

Did you make this recipe?

Tag @magicaltreatsathome on Instagram and hashtag it #magicaltreatsathome

MIckey Mouse Pumpkin Spice Beignets // magicaltreatsathome.com

Share this:

  • Click to share on Facebook (Opens in new window) Facebook
  • Click to share on X (Opens in new window) X

Like this:

Like Loading...

Filed Under: Recipes, Treats Tagged With: beignet, character treat, disneyland, fall, fall-halloween, Mickey Mouse, Mint Julep Bar, New Orleans Square, pumpkin spice, treat

Pineapple Donut (aka Dole Whip Donut)

September 16, 2019 by Elana Lepkowski Leave a Comment

Pineapple Donut a.k.a. The Dole Whip Donut // magicaltreatsathome.com

Where can I find the original treat?

  • This treat can be found at the Jolly Holiday Bakery Cafe at Disneyland.

I just had to squeeze one last summertime dessert in before I flood your feeds with pumpkin spice, orange sanding sugar, and whatever spooky snacks Disneyland has planned for the next month and a half. And what dessert at Disneyland has the most summer fun packed into every bite? The Pineapple Donut, or as its cult following calls it: The Dole Whip Donut.

Pineapple Donut a.k.a. The Dole Whip Donut // magicaltreatsathome.com

First of all, let me make one quick aside here, and that is that Disneyland spells it “donut”, and I almost always spell mine D-O-U-G-H-N-U-T. And it’s driving me crazy to spell it their way. Ok. Moving on…

Pineapple Donut a.k.a. The Dole Whip Donut // magicaltreatsathome.com

This tropical doughnut (now I’m referring to the type of dessert so I can spell it this way again) is SO hot it needs its own umbrella. Packed with sweet-tart pineapple jam, this yeast style doughnut is topped with a bright yellow glaze and crowned with meringue reminiscent of that iconic Dole Whip swirl. While this might look like a sugar bomb, the pineapple jam has a nice acidity, that when eaten with the meringue and the not-too-sweet doughnut, it balances really well.

Pineapple Donut a.k.a. The Dole Whip Donut // magicaltreatsathome.com

The doughnut has three main parts: the doughnut, the pineapple filling, and the meringue topping (technically four if you count the glaze). And today, for the recipe, I’m going to let you decide how easy or involved you’d like to make this. So here it goes. You can:

  • buy the doughnuts, pineapple jam, marshmallow cream, and make the glaze
  • you can make everything from scratch (see recipes below)
  • you can do a combination of make/buy all the components except the glaze (you need to make the glaze)
Pineapple Donut a.k.a. The Dole Whip Donut // magicaltreatsathome.com

As per usual, notes are included below the recipe so please read through. If making the doughnuts, jam, and/or meringue, please keep children out of the kitchen as these all require HOT temperatures.

Pineapple Donut a.k.a. The Dole Whip Donut // magicaltreatsathome.com

However, once it is assembly time, kids can definitely help dip, fill, and decorate! Just leave the toasting to the adults.

Pineapple Donut a.k.a. The Dole Whip Donut // magicaltreatsathome.com

Now you’ve got an excuse to pick up some drink umbrellas! Let’s bake this!

Print
clock clock iconcutlery cutlery iconflag flag iconfolder folder iconinstagram instagram iconpinterest pinterest iconfacebook facebook iconprint print iconsquares squares iconheart heart iconheart solid heart solid icon
Pineapple Donut a.k.a. The Dole Whip Donut // magicaltreatsathome.com

Pineapple Donut (aka Dole Whip Donut)

5 Stars 4 Stars 3 Stars 2 Stars 1 Star No reviews
  • Author: Elana Lepkowski
  • Yield: 4 doughnuts 1x
Print Recipe
Pin Recipe

Description

Take a trip to the tropics with this pineapple jam filled yeast-style doughnut with creamy meringue topping reminiscent of the classic Dole Whip. A Disneyland-inspired treat!


Ingredients

Scale

For the doughnuts (adapted from Joy the Baker):

  • 3/4 teaspoon active dry yeast
  • 1 tablespoon warm water (110°f)
  • 1 cup (120 grams) all-purpose flour
  • 1/4 cup warmed whole milk, or milk alternative of your choice (see notes below)
  • 1 tablespoon unsalted butter, softened
  • 1 large egg yolk
  • 2 teaspoons granulated sugar
  • 1/2 teaspoon sea salt
  • 4 cups neutral oil like avocado or canola

For the pineapple jam:

  • 1 cup pineapple crushed with juice (or 1 cup frozen chunks plus 3/4 cup water)
  • 1 cup sugar
  • 1 ounce (2 tablespoons) freshly squeezed lime juice

For the meringue:

  • 5 tablespoons water
  • 1/4 cup plus 2 tablespoons sugar
  • 1/4 cup plus 2 tablespoons light corn syrup
  • 2 egg whites
  • 1/4 tsp cream of tartar
  • pinch of salt
  • 1/2 teaspoon vanilla

For the glaze:

  • 1 cup powdered sugar
  • 2–3 tablespoons water
  • yellow food coloring
  • pineapple extract, optional

Instructions

For the doughnuts:

  1. Mix together yeast and warm water in a small bowl. Let sit for five minutes until bubbles form on top.
  2. While yeast sits, in the bowl of a stand mixer, combine the flour, milk, butter, egg yolk, sugar and salt. Add in yeast mixture.
  3. Stir until just combined and then attach a dough hook and mix in the stand mixer on low until dough comes together. Then increase speed to high and mix for 3 more minutes.
  4. Remove dough from the dough hook and let sit in the bowl, covered, at room temperature, for one hour until dough has doubled in size.
  5. Next, sprinkle flour onto your counter and divide your dough into four equal pieces.
  6. Roll each segment into balls and let rise again for 30 minutes.
  7. About 20 minutes before the second rise is complete, heat oil in a dutch oven with a candy thermometer attached.
  8. When the oil reaches 350°f, take a dough ball, make an indentation in the middle with your thumb but do not go all the way through (you’ll need a ‘pocket’ to fill with jam), and lower carefully into the hot oil. You can fry two doughnuts at a time if in a wide dutch oven.
  9. Fry on each side about one minute. Then remove with a spider or slotted spoon onto a cooling rack with paper towels underneath. Let temperature in the pot come back to 350°f before frying next batch.
  10. Let doughnuts come to room temperature before glazing and filling.

For the pineapple jam:

  1. Combine pineapple and water/juice in a medium, heavy bottomed saucepan over medium heat. Cook, stirring occasionally, until pineapple becomes soft, about half an hour.
  2. Stir in sugar and lime juice to the pineapple and raise temperature to medium-high.
  3. Let the mixture reach a simmer, stirring to dissolve all the sugar.
  4. Then, lower heat to low and let cook about one hour, stirring occasionally, until thickened.
  5. Let cool to room temperature. If not using right away, store in an airtight container in the refrigerator up to one month.
    Pineapple Donut a.k.a. The Dole Whip Donut // magicaltreatsathome.com

For the meringue:

  1. Place the water, sugar, and corn syrup in a medium saucepan over medium-high heat until the mixture reaches 240°F on a candy thermometer.
  2. At the same time (you’ll want sugar syrup and egg whites to be done at the same time), whisk egg whites in a stand mixer until foamy, and then add in cream of tartar and salt. Increase speed to high until soft peaks form.
  3. Once the syrup reaches 240°f, slowly pour it into the egg whites while the stand mixer is on medium speed. Mix until the bowl is no longer hot but room temp, about 8-10 minutes. Then, mix in vanilla until incorporated.
  4. Place all the meringue into a large pastry bag or ziplock. Set aside.

For the glaze:

  1. In a small bowl, combine water and sugar. Stir until smooth and then add in desired amount of food coloring.
  2. Optionally, you can add in 1-2 drops of pineapple extract if you’d like more pineapple flavor.

Assembly:

  1. Start by dipping room temperature doughnuts in the glaze. Dip a second time for a more opaque glaze.
  2. Spoon pineapple jam into the center of the doughnuts, using the spoon to push the jam down into the center.
    Pineapple Donut a.k.a. The Dole Whip Donut // magicaltreatsathome.com
  3. Next, cut the tip off the pastry bag (if it’s disposable) or ziplock and pipe a swirl of meringue on top.
  4. Using a kitchen torch, lightly toast the outside of the meringue until golden. Enjoy!

Notes

  • Doughnuts, jam, and meringue can reach temperatures of over 300°F so please use caution in the kitchen! Wear gloves, an apron, closed toe shoes, and use a candy thermometer. Keep children away when handling hot dishes.
  • I made my batch of doughnuts with almond milk and they came out exactly the same as with cow milk, so feel free to use a milk alternative.
  • If you powdered sugar is clumpy, sift before adding water.
  • If glaze is too thin add more sugar. If too thick add more water a half a teaspoon at a time.
  • If you want your doughnuts extra pineapple-y, you can add a drop or two of pineapple extract to the glaze. But use sparingly!
  • Leftover meringue can be stored in the fridge for up to two weeks in an airtight container.
  • For this recipe I tested hand rolling doughnuts, cutting circles with a cutter, and rolling balls. To get a great puffy doughnut I found it best to roll into balls. However, if you’d like smaller doughnuts that still puff up, using a 2-3″ round cutter on flattened dough will produce smaller ones. Hand rolling will give you the classic shape, but you’d need to sandwich the pineapple jam between meringue in the hole.
    Pineapple Donut a.k.a. The Dole Whip Donut // magicaltreatsathome.com

Did you make this recipe?

Tag @magicaltreatsathome on Instagram and hashtag it #magicaltreatsathome

Pineapple Donut a.k.a. The Dole Whip Donut // magicaltreatsathome.com

Share this:

  • Click to share on Facebook (Opens in new window) Facebook
  • Click to share on X (Opens in new window) X

Like this:

Like Loading...

Filed Under: Recipes, Treats Tagged With: disneyland, dole whip, donut, doughnut, jolly holiday bakery cafe, pineapple

MSEP Ladybug Macarons

September 9, 2019 by Elana Lepkowski 1 Comment

Main Street Electrical Parade Ladybug Macarons // magicaltreatsathome.com

Where can I find the original treat?

  • This treat can be found at the Jolly Holiday Bakery Cafe in Disneyland.

This past summer, Disneyland brought back the beloved Main Street Electrical Parade (MSEP) for a short run, ending September 30th. Besides the thousands of glittering lights, they also brought out a slew of tasty treats to commemorate the event. Like the giant Ladybug Macaron.

Main Street Electrical Parade Ladybug Macarons // magicaltreatsathome.com

This treat is not new to the park, and was last seen in 2017 during a longer run of the MSEP, and I’m sure will be ending its run at the Jolly Holiday Bakery Cafe when the parade closes. But now that we’ve recreated the recipe, you can enjoy it again until the next (hopefully longer) run of the parade returns!

Main Street Electrical Parade Ladybug Macarons // magicaltreatsathome.com

This oversized ladybug-shaped macaron is filled with strawberry buttercream, strawberry jelly, and freeze dried strawberry pieces. These are also gluten free, as the cookies are made using ground almonds and no gluten containing flour if that’s an issue.

Main Street Electrical Parade Ladybug Macarons // magicaltreatsathome.com

I’ve included some additional notes below the recipe, so please read all the way through before making these. However, I will point out that sifting the almond flour and the powdered sugar together is a must. It might seem crazy to sift it four times, but you need that amount of sifting to make sure the sugar has absorbed the oils from the almonds otherwise it will be clumpy. Also, working with egg whites means you need to have a gentle hand when folding in the mix, or even pouring in the sugar. Patience and steadiness will result in great puffy macarons.

Main Street Electrical Parade Ladybug Macarons // magicaltreatsathome.com

BONUS: Download our printable template for these Main Street Electrical Parade Ladybug Macarons below! Perfectly shaped and spaced, with outlines for both colors. Never worry about mismatched macaron halves!

Icon

4 inch MSEP ladybug template

1 file(s) 89 KB
Download

Questions? Leave them in the comments below and you’ll probably be helping out another reader! Now let’s bake!

Print
clock clock iconcutlery cutlery iconflag flag iconfolder folder iconinstagram instagram iconpinterest pinterest iconfacebook facebook iconprint print iconsquares squares iconheart heart iconheart solid heart solid icon
Main Street Electrical Parade Ladybug Macarons // magicaltreatsathome.com

MSEP Ladybug Macarons

5 Stars 4 Stars 3 Stars 2 Stars 1 Star No reviews
  • Author: Elana Lepkowski
  • Yield: 3–4 large macarons 1x
Print Recipe
Pin Recipe

Description

Oversized ladybug shaped macarons with three kinds of strawberry filling to commemorate the Main Street Electrical Parade. A Disneyland-inspired treat.


Ingredients

Scale

For the black macarons:

  • 67g (apx. 3/4 cup) almond flour
  • 90g (apx. 3/4 cup) powdered sugar
  • 52g egg whites, from about 1–1/2 eggs
  • 1/8 teaspoon cream of tartar
  • 30g (1–1/2 heaping tablespoons) granulated sugar
  • gel based black food dye

For the red macarons:

  • 645g (apx. 1/2 cup) almond flour
  • 60g (apx. 1/2 cup) powdered sugar
  • 35g egg whites, from about 1 large egg
  • 1/8 teaspoon cream of tartar
  • 20g (1–1/4 heaping tablespoons) granulated sugar
  • gel based red food dye

For the filling:

  • 35g egg whites, from about 1 large egg
  • 1/4 cup (52 g) sugar
  • pinch salt
  • 1/2 teaspoon of vanilla extract
  • 1/2 teaspoon of strawberry extract (or bakery emulsion)
  • 4 ounces (1 stick) unsalted butter, cut into small pieces
  • 2 tablespoons strawberry jelly or jam
  • 1 teaspoon freeze dried strawberry pieces

Special Tools:

  • mesh strainer
  • pastry bags

Instructions

For the black macarons:

  1. First sift the almond flour, powdered sugar, and salt back and forth four times between two bowls using a mesh strainer. Set aside.
  2. Line a baking sheet with parchment. Set aside.
  3. In the bowl of a stand mixer fitted with the whisk attachment, add in the egg white and whisk until slightly foamy. Add in the cream of tartar and whisk until soft peaks appear. Then slowly pour in the sugar. Whisk on high until stiff peaks form.
    Main Street Electrical Parade Ladybug Macarons // magicaltreatsathome.com
  4. Add in four drops of the black food coloring to the egg whites and slowly whisk to combine. Remove the bowl from the mixer.
  5. Sift a third of the dry mixture into the colored egg whites and fold until barely incorporated, about 10 turns. Repeat twice with remaining dry mix. Fold until batter forms a ribbon when dropped into bowl.
  6. Add about 1/4 of the batter into a piping bag and set aside. Pour remaining batter into a new piping bag and cut the tip off the bag. You want it large enough to pipe out the large ladybugs.
  7. Pipe the bottom lady bug shape onto a parchment lined baking sheet. Let the batter sit about 1 hour.
  8. Preheat your oven to 350°f. Place cookies in oven to bake, and lower the temperature to 300°f. Cook for 17-18 minutes.
  9. Let the macarons cool at least 20-30 minutes before decorating.

For the red macarons:

  1. Follow steps 1-5 above, adding in RED food coloring instead of the black.
  2. Place all the batter into a piping bag, cut the tip of the bag, and pipe out the top ladybug halves as circles.
  3. Using the black macaron batter that was set aside, pipe heads and spots on the red batter to represent ladybugs.
  4. Again, let batter sit for one hour and follow cooking directions from above.
    Main Street Electrical Parade Ladybug Macarons // magicaltreatsathome.com

For the filling:

  1. First make the Swiss strawberry buttercream frosting by stirring the egg whites, sugar, and salt together over a double boiler (or bowl set over simmering water on the stove), until temperature reaches 160°f.
  2. Pour heated egg whites into the bowl of a stand mixer and beat until stiff peaks form.
  3. When the bowl is cool to the touch, add the butter, one piece at a time, whipping between pieces to incorporate butter, but not fully mixing it in.
  4. Next, add in vanilla and strawberry extracts. Whip everything on high until smooth.
  5. Place the frosting in a piping bag and pipe out along inside edges of the black macarons, leaving a center well to fill with the jam. *You may have leftover frosting. Storage instructions in notes below.
  6. Fill well with strawberry jelly/jam and sprinkle freeze-dried strawberry pieces on top.
  7. Attach top and enjoy!

Notes

  • Sifting the almond flour and powdered sugar together is necessary for the absorption of oils and to prevent clumping of batter.
  • Using gel based food coloring will give a much deeper, and vibrant color, than standard food dye.
  • Any left over macaron batter can be piped into smaller cookies and baked off for 15 minutes.
  • Swiss buttercream heats the egg whites to 160°f to kill off any bacteria.
  • Leftover buttercream can be stored in the fridge up to two weeks, brought to room temperature, and whipped before using. It can also be stored in the freezer up to 3 months.

Did you make this recipe?

Tag @magicaltreatsathome on Instagram and hashtag it #magicaltreatsathome

Main Street Electrical Parade Ladybug Macarons // magicaltreatsathome.com

Share this:

  • Click to share on Facebook (Opens in new window) Facebook
  • Click to share on X (Opens in new window) X

Like this:

Like Loading...

Filed Under: Gluten Free, Recipes, Treats Tagged With: buttercream frosting, disneyland, gluten free, ladybug, macarons, Main Street Electrical Parade, strawberry, treat

Churro Toffee

August 26, 2019 by Elana Lepkowski 3 Comments

Churro Toffee // magicaltreatsathome.com

Where can I find the original treat?

  • These treats can be found all over the Disneyland Resort.

I heard about Churro Toffee long before I ever tried it. Several Disney food accounts I follow on Instagram would frequently sing the praises of this spiced, sweet treat reminiscent of the classic Disneyland churro with lots of drooling emojis and exclamation points; I was intrigued. I had to make it.

Churro Toffee // magicaltreatsathome.com

But first I had to try it! The Disneyland resort has a few places you can pick this up from. I dropped in to Marceline’s in Downtown Disneyland to get mine. Sometimes, if you’re lucky, you can watch the candy makers make Churro Toffee in the window there (but mostly they’re making candy apples).

Churro Toffee // magicaltreatsathome.com

The trickiest part of this recipe is getting the toffee just right. You’d think with what is really just two, sometimes three, ingredients, this would be an easy recipe to make… but it can go very wrong if you’re not paying attention to temperature. Here, both the temperature of the stove, and the temperature of the mixture are very important. If the heat on your stove is too high, the mixture can “break” or separate and you’ll end up with an oily mess headed straight for the garbage. Also, if you let your mixture get too hot, it will burn, and nothing is going to save it. Nothing. So, if you’re new to toffee making, please go get yourself a candy thermometer. But if this isn’t your first time at the toffee rodeo, proceed as usual.

Churro Toffee // magicaltreatsathome.com

After you’ve got a solid toffee base, you’re in the clear and this treat comes together fairly easily. Once the toffee is set, it gets a quick dip in melted white chocolate and then takes a cinnamon sugar bath. Kids can help with this part! You’ll need to wait a little while before eating because the white chocolate needs to harden (but even when it’s still a little soft you can sneak a bite. I sure did!).

Churro Toffee // magicaltreatsathome.com

So now that we’ve talked up this sweet treat, let’s get to making some! Read through all the tips at the end of this recipe too and drop a comment below if you’ve got a question!

Print
clock clock iconcutlery cutlery iconflag flag iconfolder folder iconinstagram instagram iconpinterest pinterest iconfacebook facebook iconprint print iconsquares squares iconheart heart iconheart solid heart solid icon
Churro Toffee // magicaltreatsathome.com

Churro Toffee

5 Stars 4 Stars 3 Stars 2 Stars 1 Star No reviews
  • Author: Elana Lepkowski
  • Yield: 4 large squares 1x
Print Recipe
Pin Recipe

Description

Buttery english toffee is covered in white chocolate and dusted with a layer of cinnamon-sugar, reminiscent of the classic churro! A Disneyland-inspired treat.


Ingredients

Scale

For the Churro Toffee:

  • 1 cup salted butter (if using unsalted add 1/4 teaspoon)
  • 1 cup granulated sugar
  • 2 tablespoons water
  • 2 tablespoons chopped roasted peanuts (see notes on home roasting below)
  • white chocolate melting wafers
  • 1 cup granulated sugar
  • 1 tablespoon cinnamon

Special Tools:

  • candy thermometer
  • dough cutter/scraper

Instructions

For the toffee base:

  1. First, spray or grease an 8×8″ baking pan and then line with parchment.
  2. Sprinkle chopped peanuts over the parchment and set aside.
  3. In a medium saucepan over medium heat, melt the sugar, butter, and water together. Stir occasionally until butter is melted. Attach a candy thermometer to the side of the pan, careful not to let it touch the very bottom of the pan.
  4. Let the mixture come to a boil, stirring occasionally until it turns an amber brown (this could read 290-305 F on a candy thermometer). The mixture can burn very quickly at this point so as soon as it gets brown, remove from the stove and pour into the prepared pan.
  5. The mixture will start to set up pretty quickly, but move to the refrigerator for about 15 minutes to firm up more. After this point, use a dough scrapper to divide the toffee into 4 large squares (you can always do smaller too if you’d like). Then place back into the refrigerator to completely firm up, about one hour.

For the churro coating:

  1. About 15 minutes before the hour is up, set up your dipping station.
  2. In a medium sized work bowl large enough to fit a square of toffee, mix together 1 cup of sugar and the cinnamon. Set aside.
  3. In a microwave safe bowl, like glass, pour in the white chocolate melting wafers. Microwave for 30 seconds. Stir and microwave again for an additional 30 seconds. Keep stirring and microwaving in short bursts of 15-20 seconds until melted and smooth. Use can alternatively use a double boiler for melting. Set aside.
  4. Remove toffee from the refrigerator and let sit for 5 minutes to come to room temperature. Then dip one square into the white chocolate, letting excess drip off (you can also use a popsicle stick to remove any excess from the edge). Then immediately dip into the cinnamon sugar mixture, turning around the square so that it is evenly covered. Set aside on a baking sheet lined with parchment.
  5. Repeat above dipping steps for next three pieces.
  6. Let the squares sit about an hour at room temperature to fully harden and then enjoy!

Notes

  • Toffee can reach temperatures of over 300°F so please use caution in the kitchen! Wear gloves, an apron, closed toe shoes, and use a candy thermometer. Keep children away when handling hot sugar.
  • If the butter separates it could be for a few reasons. One could be that your stove heat is too hot. Keep it around medium for the whole time. Another could be that your butter has a high fat ratio (like European style butters). Also, don’t stir too much after it has reached a boil, just every few minutes should be ok.
  • I tried this with half the amount of the butter and sugar and found it kept burning easily so I’d keep this as the smallest amount to make and then you can double or triple your batch from there.
  • If chocolate starts to cool after it is melted, microwave for 5-10 seconds and give it a stir.
  • Use very hot water to remove stubborn toffee from pans and utensils.
  • If you cannot find roasted peanuts in the store, you can roast raw peanuts at home by laying them on a baking sheet and baking at 350°F for about 20-25 minutes. giving them a turn about halfway through.

Did you make this recipe?

Tag @magicaltreatsathome on Instagram and hashtag it #magicaltreatsathome

Churro Toffee // magicaltreatsathome.com

Share this:

  • Click to share on Facebook (Opens in new window) Facebook
  • Click to share on X (Opens in new window) X

Like this:

Like Loading...

Filed Under: Recipes, Treats Tagged With: churro toffee, cinnamon, Disney's California Adventure, disneyland, Downtown Disneyland, toffee, treat, Trolley Treats, white chocolate

Mickey S’more Square

August 12, 2019 by Elana Lepkowski Leave a Comment

Mickey S'more Square // magicaltreatsathome.com

Where can I find the original treat?

  • These treats can be found all over the Disneyland Resort.

Did you know that Saturday was National S’mores Day? Don’t worry, you won’t find it marked on the calendar, and there isn’t an elf that sneaks into your house at night and leaves s’mores in your shoes. It’s just an excuse to enjoy one of the BEST treats for summer. And Disneyland has you covered… with no fire required!

Mickey S'more Square // magicaltreatsathome.com

One of the year-round favorites at the resort, you can usually find this square at Candy Palace, Pooh Corner, Marceline’s in Downtown Disney, and Trolley Treats at DCA. And now you can have it at home too!

Mickey S'more Square // magicaltreatsathome.com

The Mickey S’more square is made up of a crisp graham cracker base, a layer of rich milk chocolate fudge, a layer of thick marshmallow, and it’s all covered in a semi-sweet chocolate topped with a yellow chocolate Mickey Mouse. Our recipe below has a few steps, but it all comes together fairly easily once you’re ready to assemble. There’s just the added wait time for the fudge to set up, and the chocolate to set. You WILL NOT need to make graham crackers for this recipe, however, if you do have a homemade recipe you love, by all means use it! We’re using store bought here for consistency and time. For your final square, the Mickey chocolate on top is definitely optional, but we do give an easy way to make one below too, just in case you want a few to snack on!

Mickey S'more Square // magicaltreatsathome.com

We won’t be making any campfires for this recipe, and the only fire you’ll see is on a gas stove, but you’ll definitely know you’re eating a S’more when you take a bite of this yummy treat.

Print
clock clock iconcutlery cutlery iconflag flag iconfolder folder iconinstagram instagram iconpinterest pinterest iconfacebook facebook iconprint print iconsquares squares iconheart heart iconheart solid heart solid icon
Mickey S'more Square // magicaltreatsathome.com

Mickey S’more Square

5 Stars 4 Stars 3 Stars 2 Stars 1 Star No reviews
  • Author: Elana Lepkowski
  • Yield: 6 S’mores Squares 1x
Print Recipe
Pin Recipe

Description

Layers of crisp graham crackers, rich milk chocolate fudge, and gooey marshmallow are covered in semi-sweet chocolate and topped with a yellow Mickey Mouse chocolate in this dessert reminiscent of the classic s’mores. A Disneyland-inspired treat!


Ingredients

Scale

For the Milk Chocolate Fudge:

  • 8 ounces (227 g) milk chocolate, finely chopped
  • 2 tablespoons unsalted butter
  • 7 ounces sweetened condensed milk
  • pinch teaspoon salt

For the Marshmallows:

  • 1–1/2 cups granulated sugar
  • 3/4 corn light corn syrup
  • pinch salt
  • 1 teaspoon vanilla extract
  • 2 packets of gelatine
  • 2/3 cups of water, divided

For assembly:

  • 6 graham cracker squares (3 large sheets broken in half)
  • 12 ounces (340 g) semi-sweet chocolate, finely chopped and divided
  • 2–1/2 ounces white chocolate (71 g), chopped, optional
  • yellow oil-based chocolate covering, optional

Special Tools:

  • Candy Thermometer
  • Mickey Mouse mold

Instructions

For the Milk Chocolate Fudge:

  1. Line a loaf pan with parchment paper or wax paper.
  2. In a double boiler, combine milk chocolate, butter, sweetened condensed milk, and salt. Stir occasionally, until smooth.
  3. Pour into loaf pan and chill, uncovered, until firm, about 4 hours. Set aside.

For the Marshmallows:

  1. Grease a loaf pan and line with parchment paper or wax paper. Grease top of paper as well. Set aside.
  2. In a medium saucepan over high heat, combine sugar, corn syrup, salt, and 1/3 cup of water. Stir to dissolve sugar. Once mixture reaches a boil, do not disturb. Let the mixture reach “soft ball” stage, approximately 238°F (use a candy thermometer or probe thermometer to get an accurate temperature).
  3. While syrup is boiling, in the bowl of a stand mixer, pour in the other 1/3 cup of water and sprinkle gelatine over it. Let sit for five minutes so water can absorb the gelatine. Not all of it will absorb and that’s ok.
  4. Then, attach the whisk attachment and turn mixer on slowest speed. Wearing oven mitts in case of splashing, slowly pour in the syrup mixture into the mixer. Whisk two minutes and then raise speed to medium. Whisk another two minutes and then gradually move speed to highest. Whisk another 3-5 minutes until mixture is stiff. Beat in vanilla extract for 30 seconds and then pour everything into the prepared pan. Mixture will be very sticky and you might not be able to get everything out of the bowl. See notes below. Mickey S'more Square // magicaltreatsathome.com
  5. Use wet fingers to smooth out the marshmallow top and let sit out, uncovered, until firm. About 3 hours.

Mickey Mouse chocolate toppers (optional)

  1. In a microwave safe bowl, combine chopped white chocolate and a few drops of the oil-based yellow food coloring.
  2. Heat in microwave for 30 seconds, stir, and continue to microwave in short 15 -20 second bursts, stirring between, until chocolate is melted and smooth.
  3. Pour into molds and let sit in the refrigerator about 30 minutes to harden. Remove from molds and set aside.

Assembly:

  1. First, temper the semi-sweet chocolate for coating: In a microwave safe bowl, add 2/3 of the chocolate. Microwave for 30 seconds, stir, microwave for another 30 seconds. Stir again and microwave in short bursts of 15-20 seconds until chocolate has uniformly melted and has reached between 114° – 118°F. Then add in some of the remaining chocolate, stir to completely melt and then add more (I did three batches). Continue to stir the chocolate until it has cooled to 88° – 89°F (this can take several minutes of stirring). The chocolate is now tempered and ready to use. Set aside.
  2. Un-mold the fudge from the pan and using a graham cracker as a guide, divide and cut the fudge to fit on the base of cracker. You may need to combine some pieces of fudge if your graham crackers are larger.
  3. Next, remove the marshmallow from the pan keeping it on the parchment. To square off ends of marshmallows, use a long, sharp knife to trim sides. Clean knife with hot water between cuts.
  4. Then, using a graham cracker as a guide, divide the pan into roughly 9 squares, using the same, long, sharp knife to make cuts. You will only need six of the marshmallows for this recipe. See notes below for storing extra marshmallows. Use damp fingers to remove marshmallows from each other if they get stuck together.
  5. Create each stack by starting with the graham cracker base, a piece of fudge, and then top with the marshmallow. Set aside on a sheet pan lined with parchment.
    Mickey S'more Square // magicaltreatsathome.com
  6. Dip each stack into the tempered chocolate, using a spoon to pour chocolate on top and let drip down sides. Use a chocolate fork or slotted spatula to remove the stack from the chocolate. Allow the chocolate to drip from the stack for a minute or two (or you’ll end up with lots of pooled chocolate) and then place on sheet pan. Repeat until all stacks have been dipped.
  7. If you are using the yellow chocolate Mickey Mouse topper, place one on each stack after you have dipped it.
  8. Allow everything to set at least 4 hours or overnight. Enjoy!

Notes

  • Making marshmallows is a sticky, hot mess. You will need to wear an apron, close toed shoes, and make sure you have a candy thermometer and the clear space to work.
  • Be OK with the fact that you were going to lose some of the marshmallow in the mixing bowl, on your spoon, and probably on your hands. It’s OK! You’ll have plenty left over.
  • Any leftover marshmallows in the pan can be cut and tossed in powdered sugar. Keep in an airtight container up to a week.
  • When tempering chocolate, keep all moisture and liquids away from the chocolate.
  • If chocolate starts to cool after it is tempered, microwave for 5-10 seconds.
  • A note on pan sizes. I mention that the fudge is made in a loaf pan and the marshmallows are made in an 8″ square pan. Both hold around 8 cups capacity so you would be able to make both in the 8″ square pan. I was able to get 6 squares of fudge from the loaf pan, I just had to smoosh a few pieces together as noted in the recipe above. Force of habit of making fudge in a loaf pan automatically had me write the recipe this way!

Did you make this recipe?

Tag @magicaltreatsathome on Instagram and hashtag it #magicaltreatsathome

Mickey S'more Square // magicaltreatsathome.com

Share this:

  • Click to share on Facebook (Opens in new window) Facebook
  • Click to share on X (Opens in new window) X

Like this:

Like Loading...

Filed Under: Recipes, Treats Tagged With: chocolate, DCA, disneyland, Downtown Disneyland, fudge, graham cracker, marshmallow, Mickey Mouse, treat

Cheshire Cat Tails

August 5, 2019 by Elana Lepkowski 2 Comments

Cheshire Cat Tail // magicaltreatsathome.com

Where can I find the original treat?

  • These treats can be found at the Candy Palace on Main Street in Disneyland.

These sweet treats, based on the iconic pink and purple coloring of Alice in Wonderland’s Cheshire Cat, are more than meets the eye. At its base, it’s a marshmallow wand, enrobed in a layer of caramel, and then dipped in pink colored white chocolate. The white chocolate is strawberry flavored, and the whole thing is finished with stripes of purple sanding sugar held on with white chocolate.

Cheshire Cat Tail // magicaltreatsathome.com
Wands on the left have have had excess caramel removed. Wands on the right were placed immediately onto sheet without excess caramel removed.

While these marshmallow wands might seem straightforward, there is actually a lot of temperature control needed, as well as precise ingredients. Why? Because we’re dealing with caramel and chocolate.

Now, admittedly I started this recipe off with the wrong caramel recipe. See, I have this super yummy salted caramel recipe that I love. So without thinking I started there and only when I tried to dip the marshmallows in it, and it just started falling off the marshmallows, did I realize that this yummy recipe was in fact the wrong type of caramel. A soft, liquid-y caramel is not what one wants here for two reasons. One, well, it falls off the marshmallows and does not become fully solid. And two, when the not fully solid caramel hits the very warm white chocolate… it all just melts off into a puddle. Yuck.

Cheshire Cat Tail // magicaltreatsathome.com

So, melting caramels are a good bet here. And on second try this was the perfect solution to getting a firm caramel that held up to being dipped in warm chocolate. Alternatively, there are homemade caramel recipes out there that will become solid, you’ll just need to use that type of recipe. Usually there is corn syrup in it.

With melting chocolate, there are a few factors you need to remember. First, the type of chocolate you’re using will determine how hot you can get your temperature. White chocolate, which isn’t technically chocolate, should not go above 110°f. If you temper your chocolate you will lose its temper and you also risk burning your chocolate if you get it too hot. Also, if you get your chocolate too hot, it will start to “break” when you try to coat items like these caramel covered marshmallow wands. Check out the notes below the recipe for tips dealing with this if it happens. The trick with coating is to get it warm enough to drip off your spoon and keep it warm, not hot, for even coating.

Cheshire Cat Tail // magicaltreatsathome.com

I did say this was a “kid friendly” recipe and you might think I have lost my mind. Molten caramel! Scalding hot chocolate! What the heck?! But really, the fun part for kids is the decorating. Older kids can dip wands into the pink white chocolate because really, at the dipping point the chocolate should not be hot enough to burn skin. And small kids will have lots of fun covering their marshmallow wands with purple sprinkles. And it’s OK if adults enjoy it just as much (I do!!).

So let’s get into the kitchen and whip up a batch of Cheshire Cat Tails! They’re sure to make you grin!

Cheshire Cat Tail // magicaltreatsathome.com
Print
clock clock iconcutlery cutlery iconflag flag iconfolder folder iconinstagram instagram iconpinterest pinterest iconfacebook facebook iconprint print iconsquares squares iconheart heart iconheart solid heart solid icon
Cheshire Cat Tail // magicaltreatsathome.com

Cheshire Cat Tails

5 Stars 4 Stars 3 Stars 2 Stars 1 Star No reviews
  • Author: Elana Lepkowski
  • Yield: 6 Cheshire Cat Tails 1x
Print Recipe
Pin Recipe

Description

These ooey-gooey marshmallow wands found at the Candy Palace at the Disneyland Resort are more than meets the eye! Sweet, buttery caramel covers a marshmallow wand while the whole treat get covered in strawberry flavored pink white chocolate and topped with purple sanding sugar stripes… just like the Cheshire Cat’s tail. A Disneyland-inspired treat.


Ingredients

Scale
  • 24 marshmallows
  • 1 eleven ounce package of individually wrapped caramels (like Kraft)
  • 2 tablespoons water
  • 11 ounces of pink candy melts
  • 1 tablespoon of coconut oil
  • 1/4 teaspoon of strawberry flavor oil (like Lorann – must be oil based not water based! See notes below)
  • 6 ounces of white candy melts
  • 1 cup purple sanding sugar
  • 6 lollipop sticks

Instructions

  1. Place four marshmallows, round side facing out, on each lollipop stick. Set aside.
  2. Place a sheet of parchment on a sheet pan. Butter it lightly and set aside.
  3. Unwrap all the caramels and add to a small saucepan. Pour water in and heat over medium-low heat.
  4. Stir constantly until everything has melted and caramels are smooth (about 7-8 minutes).
  5. Once melted (caramels should drip in a ribbon from a spoon back into the pan), dip each wand into the caramel, turning quickly to coat. Let excess caramel drip off for at least 30 seconds, turning while it drips for even coating, and then place on the buttered parchment.
  6. When all the wands have been dipped, refrigerate for thirty minutes.
  7. About 15 minutes to wands coming out of refrigerator, set up your sanding sugar station by setting out an empty wide, shallow bowl and another bowl with sanding sugar in it.
  8. Remove wands from the refrigerator. Then, in a double boiler, combine pink candy melts, strawberry flavoring, and coconut oil (this can alternatively be melted in the microwave as well. Please see notes below.). Melt over medium heat, stirring constantly until smooth. Do not let the temperature go above 110°f (you might want to use a candy thermometer if you’re unsure).
  9. Once smooth, dip caramel covered marshmallow wands in the chocolate, turning evenly to coat and fill in any gaps. Let the pink chocolate drip back into pan and lightly scrape one side on the edge of pan to remove any additional excess. Place back on buttered parchment. Repeat for all wands and let coating dry about 30 minutes.
  10. Next, melt the white chocolate (you can melt in a heavy duty piping bag as well), and create stripes on the first marshmallow wand, and immediately pour the purple sanding sugar over the stripes, letting excess catch in the empty bowl. You can press the wand lightly into sugar if you’d like a more thicker coating (I was fine with the lighter stripes). Set aside. Repeat with additional wands. If sanding sugar adheres to the pink coating, use a small brush to brush crystals away after fully dried. Then enjoy!

Notes

  • Melted caramel is HOT! Use caution in the kitchen. Do not dip your fingers or hands into the caramel has it can adhere to skin and burn you. Keep away from children.
  • Use hot water to remove caramel from pans and utensils.
  • If you wish to microwave your candy melts, combine them with strawberry flavoring, and coconut oil in a microwave safe bowl, and heat for 30 seconds on half power, stir, and continue to microwave in about 15-20 second increments until smooth.
  • If you have extra melted caramel that has dried around your wand, use kitchen shears to remove it immediately after removing from the refrigerator.
  • Did your chocolate coating break when you first dipped your wand in? Wait for the chocolate to cool down more. It should drip freely from a spoon without it seizing when the spoon is shaken slightly (will cause crevices in the chocolate on the spoon). If it breaks on the wand, your wand also might be too cool, so let them warm up more. And don’t worry, once that chocolate starts to firm up, you can dip it AGAIN into the chocolate to get a more even, although slightly thicker, coating.

Did you make this recipe?

Tag @magicaltreatsathome on Instagram and hashtag it #magicaltreatsathome

Cheshire Cat Tail // magicaltreatsathome.com

Share this:

  • Click to share on Facebook (Opens in new window) Facebook
  • Click to share on X (Opens in new window) X

Like this:

Like Loading...

Filed Under: Gluten Free, Recipes, Treats Tagged With: candy melts, Candy Palace, caramel, character treat, Cheshire Cat, disneyland, marshmallow, marshmallow-wand, strawberry, treat

Mickey’s Celebration Churro

July 29, 2019 by Elana Lepkowski Leave a Comment

Mickey's Celebration Churro // magicaltreatsathome.com

Where can I find the original treat?

  • This specialty churro was part of the “Get Your Ears On” celebration found near the Small World Promenade at the Disneyland resort.

Well, July is almost over and that means that Churro Month is coming to an end (for now). And to conclude this on a celebratory note, today we’ve got Mickey’s Celebration Churro for our final churro recipe.

Mickey's Celebration Churro // magicaltreatsathome.com

This fun chocolate churro was another favorite of mine, mostly because it was doused in warm cookie butter. And I heard from a number of followers that this too was a win, albeit a bit messy!

Mickey's Celebration Churro // magicaltreatsathome.com

Remember, check out all the notes following the recipe below for some tips and tricks to making churros at home. These are definitely easy to make once you get the hang of everything.

Mickey's Celebration Churro // magicaltreatsathome.com

Here we’ve got a chocolate churro that’s been covered in chocolate cinnamon sugar, drizzled with cookie butter, sprinkled with sparkling sugar crystals, and then it gets covered in black, white, and red Mickey Mouse decorettes. I opted to purchase cookie butter for ease of use with this recipe, but if you have a recipe for it you like, go ahead and use that! I’ve found that the cookie butter spread at Trader Joes was similar in taste to what was at the park. Also, if you enjoy making Disneyland-inspired treats at home, Amazon has a wealth of options currently for this Mickey Mouse decorettes.

Mickey's Celebration Churro // magicaltreatsathome.com

Ok, let’s start up that cooking oil one last time and make some churros!

Print
clock clock iconcutlery cutlery iconflag flag iconfolder folder iconinstagram instagram iconpinterest pinterest iconfacebook facebook iconprint print iconsquares squares iconheart heart iconheart solid heart solid icon
Mickey's Celebration Churro // magicaltreatsathome.com

Mickey’s Celebration Churro

5 Stars 4 Stars 3 Stars 2 Stars 1 Star No reviews
  • Author: Elana Lepkowski
  • Yield: 16 – 18 churros 1x
Print Recipe
Pin Recipe

Description

Celebrate Mickey with this chocolate churro covered with chocolate cinnamon-sugar, warm cookie butter, sugar crystals, and black, white, and red Mickey Mouse decorettes! A Disneyland-inspired treat.


Ingredients

Scale

Chocolate Churros

  • 1/2 cup granulated sugar
  • 1/2 teaspoon cinnamon
  • 1 teaspoon cocoa powder
  • 1/4 cup white sugar crystals
  • 1/2 cup cookie butter (I used Trader Joes brand here)
  • black, white, and red Mickey Mouse decorettes


  • vegetable oil for frying
  • 1 cup water
  • 1/2 cup unsalted butter
  • 1 tablespoon granulated sugar
  • 1/4 teaspoon salt
  • 1 cup all purpose flour
  • 1/4 cup cocoa powder
  • 2 eggs

Marshmallow Creme

  • 3/4 cup glucose or corn syrup
  • 1 ounce egg white
  • 1/4 teaspoon salt
  • 3/4 cup powdered sugar
  • 3 tablespoons vanilla extract
  • 1–2 tablespoons milk (start with one and increase if needed)
  • red food dye
  • yellow “buttons” (I used M&Ms)

Tools:

  • spider for frying
  • Wilton 1 M piping tip
  • pastry bag
  • candy thermometer

Instructions

Chocolate Churros:

  1. Line two half sized sheet pans with parchment, set aside. Mix together the 1/2 cup of granulated sugar, cinnamon and cocoa powder in a long shallow bowl or loaf pan, set aside.
    Mickey's Celebration Churro // magicaltreatsathome.com
  2. Warm the cookie butter in the microwave about 45 seconds. Stir and set aside. Optionally, you can pour the warmed cookie butter into squeeze bottle. Keep near the stove while cooking so it stays warm.
  3. In a medium sized saucepan over medium-high heat, combine water, butter, sugar and salt. Bring to a boil, or until butter has melted.
  4. Turn burner to low and sift in all the flour and cocoa powder. Stir until there are no visible flour lumps and dough has begun to stick together in a ball and pulled away from the sides of the pan. Remove pan from heat and let sit 5 minutes. Then stir in each egg until incorporated. Dough will appear to break or become lumpy. Continue to stir until it forms a smooth, sticky dough.
  5. Fill a pastry bag fitted with a Wilton 1 M open star tip half full with batter (see notes below on filling pastry bags) and pipe 8″ long dough onto the sheet pan. I was able to fill two sheet pans with all the batter.
  6. Refrigerate dough at least 30 minutes and up to two days. Batter will stiffen the more it sits, so let the dough come to room temperature before frying.
  7. Fill a dutch oven or deep frying pan with vegetable oil at least 2″ up the side of the pan (I found a 1/2 gallon of avocado oil worked for me in my large dutch oven. See note below about reusing oil.). Heat oil to 340-350°f, using a candy thermometer to keep the temperature constant. You may need to adjust heat up or down during cooking.
  8. Place churros 2-3 at a time in the cooking oil for 6 minutes, turning after 3 minutes with a spatula. Wait until oil comes back to temperature before adding next batch.
  9. Using a spider or large spatula, remove churros from oil and drain on a cooling rack over parchment or on a paper towel. Wait at least a minute and then toss the churro in the chocolate cinnamon-sugar, tapping off any excess. Then move them back to the cooling rack. Drizzle cookie butter on the churros, sprinkle the sugar crystals, and then the Mickey decorettes.
    Mickey's Celebration Churro // magicaltreatsathome.com
  10. While churros cool slightly, make the marshmallow creme dip.

Marshmallow Creme:

  1. Combine glucose or corn syrup, egg white, and salt in the bowl of a stand mixer. Beat on high for 5-10 minutes until doubled in size.
  2. Once doubled, move speed to low and pour in powdered sugar in a constant stream and mix until fully combined. You may have to stop and scrape down sides of bowl. Add in one tablespoon of milk. Add in additional milk if you’d like the creme runnier. Mix in vanilla extract.
  3. Remove 1/2 cup of mixture into a separate container and add in 3-4 drops of red food dye until desired color is reached. Top marshmallow creme with the yellow M&M “buttons”.
  4. The rest of the marshmallow creme can be sealed in an air-tight container and refrigerated up to a month.
  5. Dip churros in marshmallow creme. Enjoy!

Notes

  • Do not overfill your pastry bag! Fill in two to three batches. If there is too much dough, it will seep out the top and will be hard to pipe.
  • Slowly pipe out dough all of a consistent size, smaller spots on the churro can cause them to become more fragile while handling and can break in the oil or while coating in sugar.
  • Churro dough can be piped out onto parchment and covered in the fridge up to 48 hours.
  • If you want to make you churros immediately after making dough without the chilling time, once oil has reached temp, starting about one inch above the oil, pipe a small line of dough down into oil and either snip end with scissors, or break the dough off the pastry tip on the side of your pan. Follow directions above for frying.
  • Thicker churros will require a longer cooking time to fully cook through the center. Test one churro first to adjust your cooking time.
  • Cooking oil can be fine strained and stored again for another use. I strain back into the bottle it came from. Well strained oil can be stored in a cool, dry place and used up to several times.
  • Churros curling? That could be one of a few reasons. One is that it will naturally shrink and change shape as the dough hits the oil and puffs up. I found that the stiffer dough from sitting in the fridge resulted in straighter churros while fresher dough tending to curl more. Also, if you’re using a circular pot like a dutch oven, churros may rest against the inside edge of the pan while cooking causing them to take on the curved shape of the pan. To prevent this, nudge your churro with the spider or spatula immediately after placing in oil when it pops back up to the surface. Continue to nudge gently back and forth for about 20-40 seconds or until the dough has gotten stiff in the oil.

Did you make this recipe?

Tag @magicaltreatsathome on Instagram and hashtag it #magicaltreatsathome

Mickey's Celebration Churro // magicaltreatsathome.com

Share this:

  • Click to share on Facebook (Opens in new window) Facebook
  • Click to share on X (Opens in new window) X

Like this:

Like Loading...

Filed Under: Recipes, Treats Tagged With: chocolate, churro, cookie butter, disneyland, Get Your Ears On, marshmallow creme, Mickey Mouse, treat

  • « Go to Previous Page
  • Go to page 1
  • Go to page 2
  • Go to page 3
  • Go to page 4
  • Go to page 5
  • Go to Next Page »

Primary Sidebar

Follow Us

  • Instagram
  • Facebook
  • X
  • Pinterest
  • Email
  • YouTube

Hi! My name is Elana, and that’s me shoving a Mickey Mouse shaped treat in my face. I love the treats at Disneyland. A lot. So much so I’ve dedicated an entire website to making all my favorites, and hopefully yours too, out of my home kitchen. My aim is to create Disneyland-inspired treats, with easy to follow directions, and many recipes geared towards getting the kids in the kitchen to help too! Because putting sprinkles on things is F-U-N.

Top With Sprinkles

Get Recipes in Your Inbox!

* indicates required

Look for this icon in posts to find Kid Friendly recipes!

Recent Posts

  • Matterhorn Macaroon
  • Caramel Gingerbread Cookie Sandwiches
  • Colorful Fruit Hand Pies
  • Classic Mickey Shaped Beignets
  • Carrot Cake Cookies

Archives

  • February 2023
  • December 2022
  • August 2022
  • January 2022
  • December 2021
  • November 2021
  • December 2020
  • November 2020
  • October 2020
  • September 2020
  • August 2020
  • July 2020
  • June 2020
  • May 2020
  • April 2020
  • March 2020
  • February 2020
  • January 2020
  • December 2019
  • November 2019
  • October 2019
  • September 2019
  • August 2019
  • July 2019
  • June 2019
  • May 2019

Copyright © 2025 Magical Treats at Home on the Foodie Pro Theme

%d