• Skip to primary navigation
  • Skip to main content
  • Skip to primary sidebar

Magical Treats at Home

  • About
  • Treats
  • Drinks
  • Savory
  • Favorite Tools
  • Etsy Shop

disneyland

Mickey Mouse Fruity Pebbles Crispy Treats

August 30, 2020 by Elana Lepkowski Leave a Comment

Mickey Mouse Fruity Pebble Crispy Treats // magicaltreatsathome.com
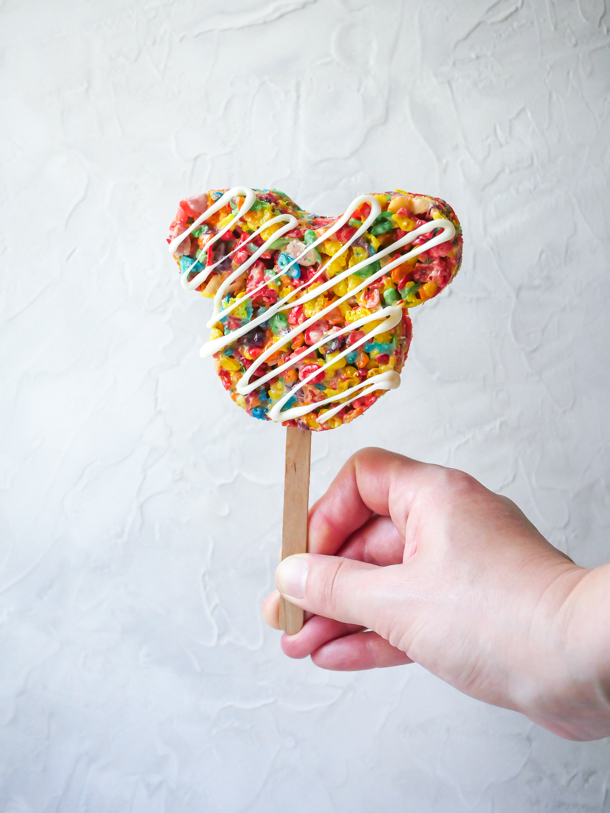
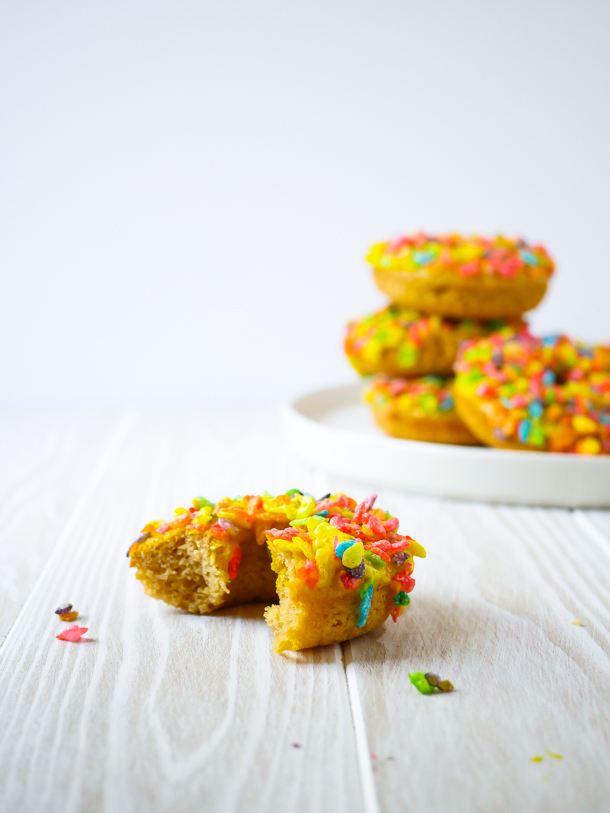
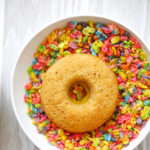
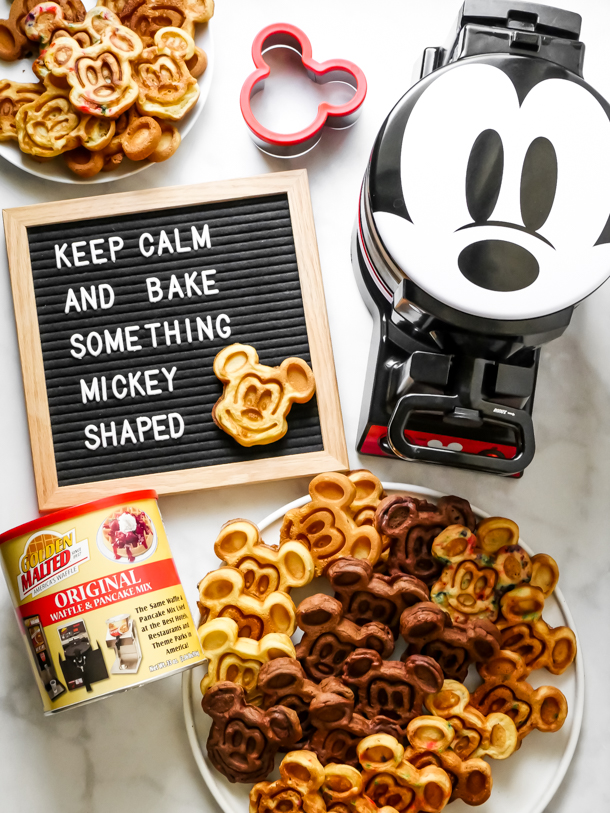
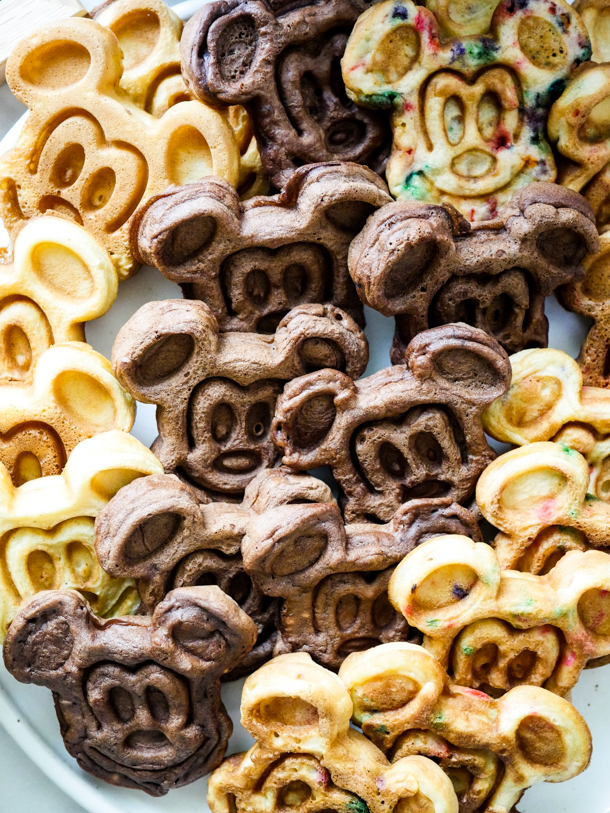
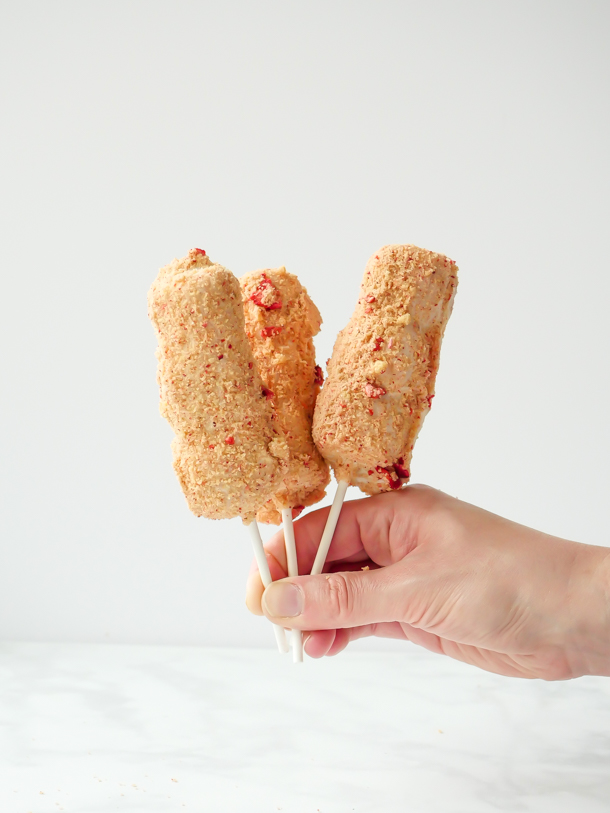
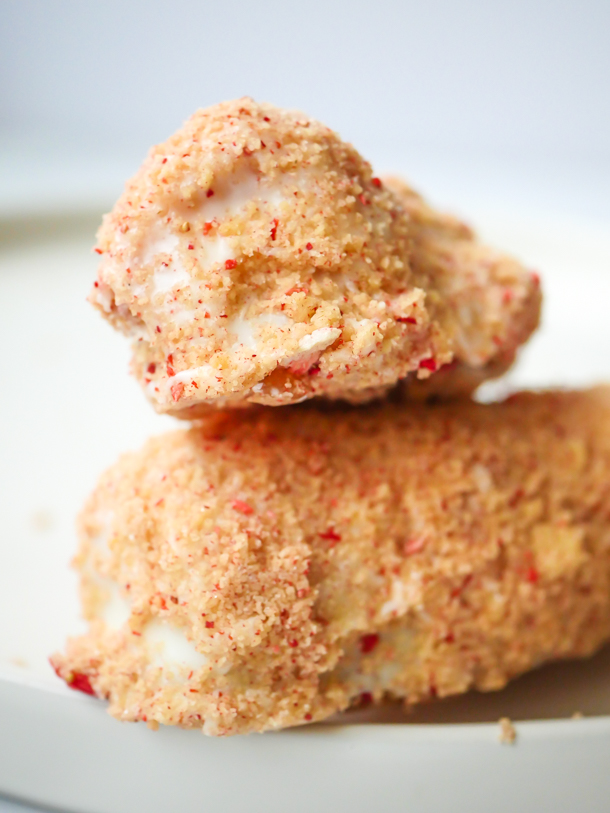
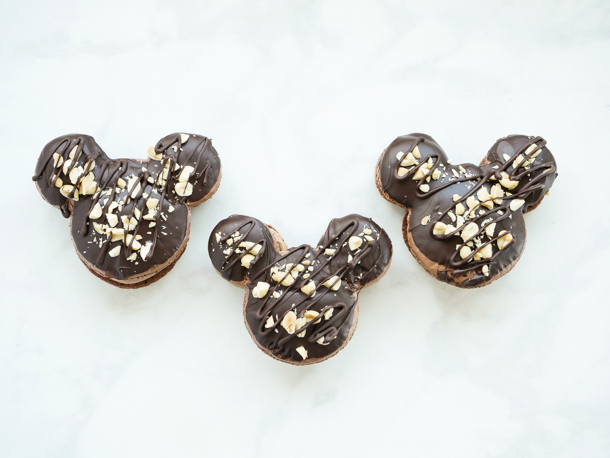
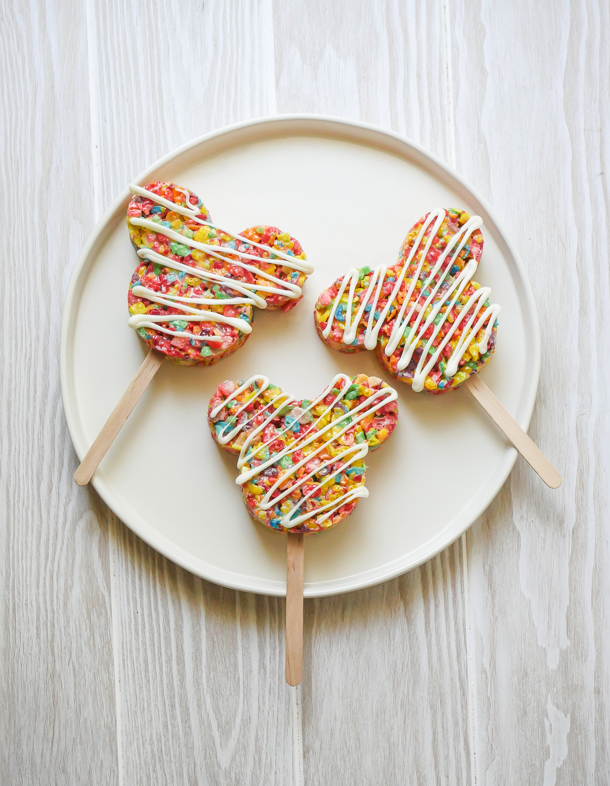
  • These were inspired by the Disney Parks Mickey Mouse shaped crispy treats.

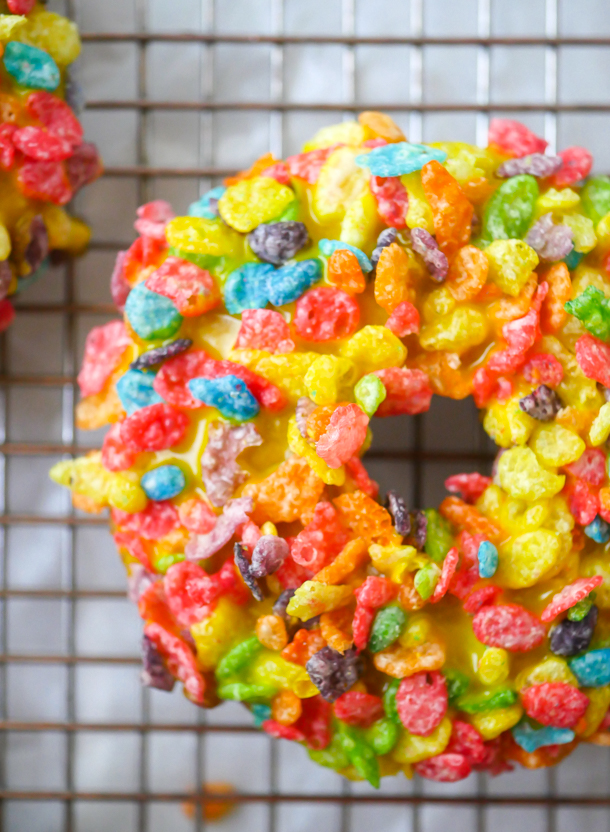
If you’ve come to this site over the past year you’ll have noticed that I’m a BIG fan of Disneyland’s crispy treats. And who could blame me? They’re relatively easy to make and there is always a cute seasonal design. However, we don’t always keep the cereal on hand at home. So, after making the Baked Fruity Pebbles Doughnuts earlier this week, I thought, Hey! I could turn it into a crispy treat! And I’m so happy I did.

Mickey Mouse Fruity Pebble Crispy Treats // magicaltreatsathome.com

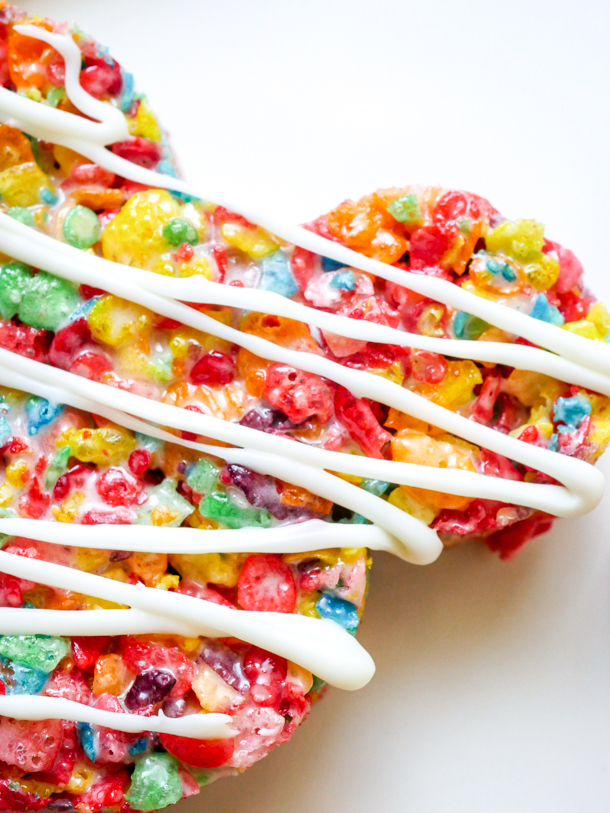
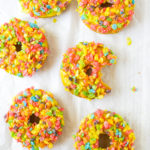
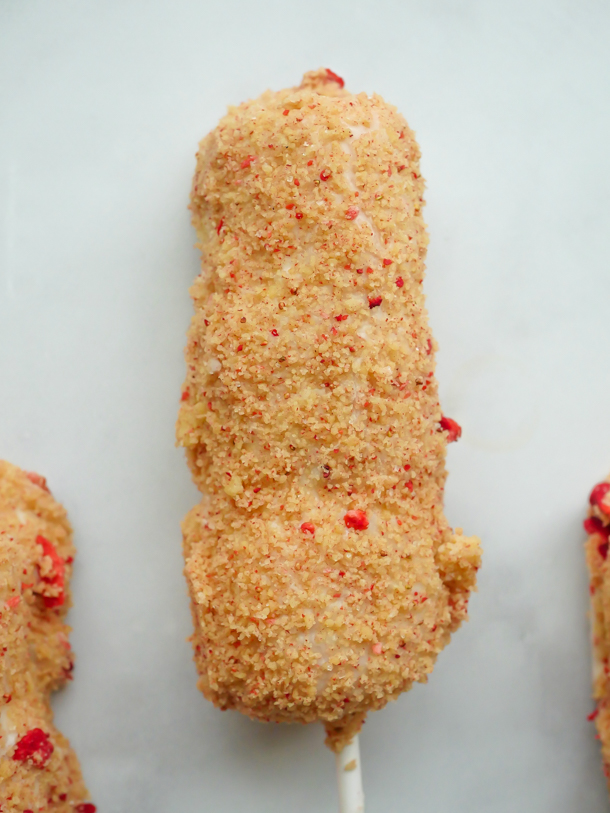
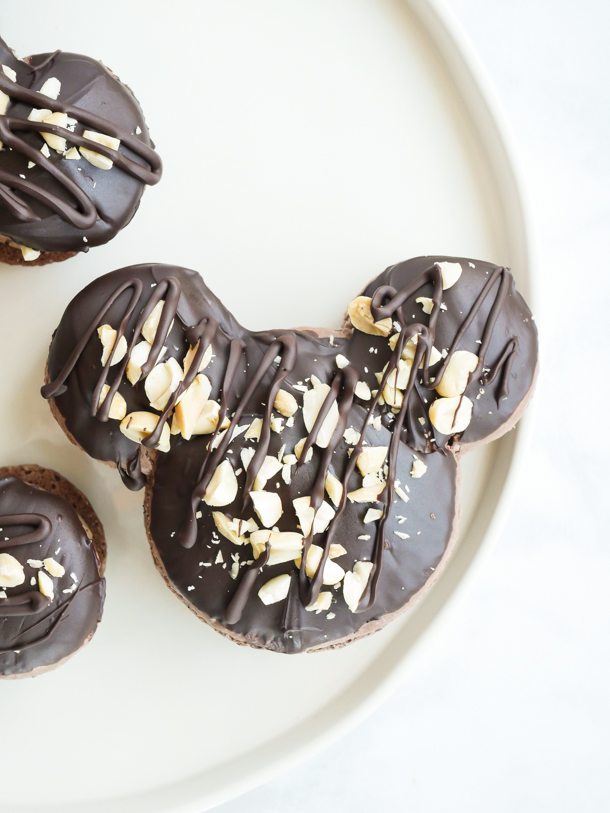
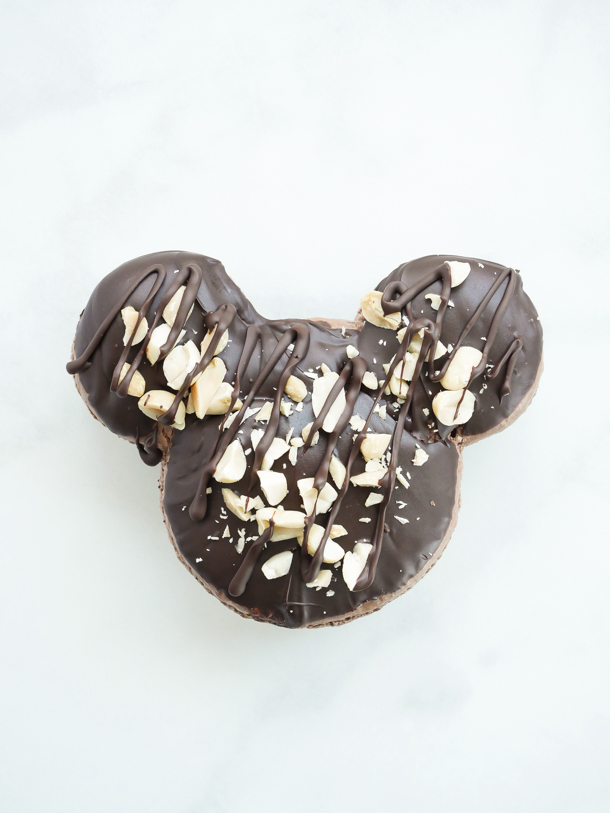
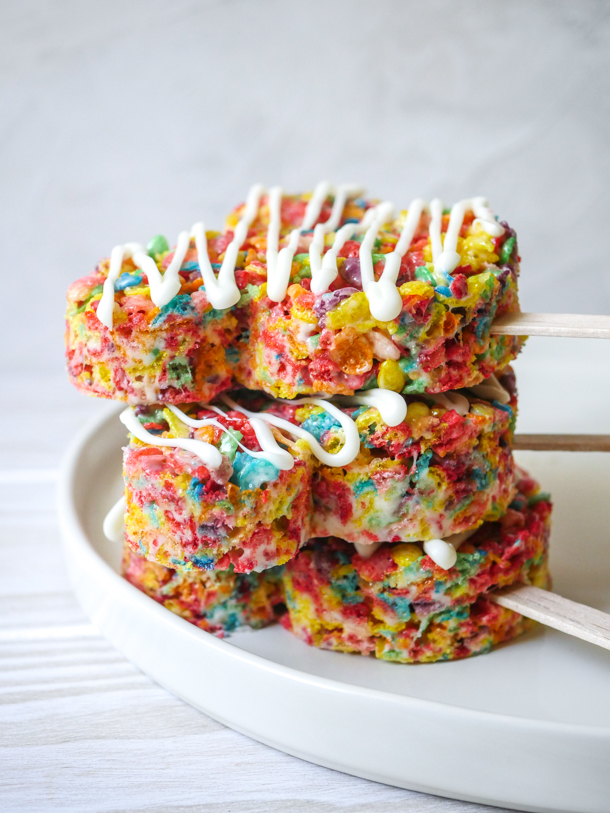
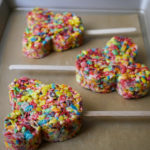
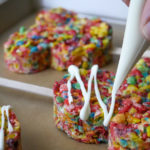
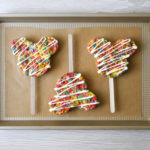
I kept it Mickey shaped because it’s my favorite shape, although you can always use whatever cutter you have on hand, or to make it super easy on yourself, just cut into squares (or rip off bits like my husband does). To compliment the flavor of the cereal, I drizzled some white chocolate over the whole thing and that really made this a complete recipe for me. 

Mickey Mouse Fruity Pebble Crispy Treats // magicaltreatsathome.com

As an adult, Fruity Pebbles just taste like bergamot to me (which is the citrus flavoring used in Earl Gray tea). So I needed to tone that down a bit seeing as this was going to be one gigantic treat chock full of that cereal’s flavor. Yes, the cereal is sweet, the marshmallows are sweet, so why choose white chocolate? It just worked. Using a semi sweet or milk chocolate would be heavy here and dull the flavor. White chocolate balances everything flavor wise.
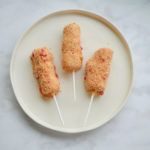
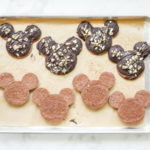
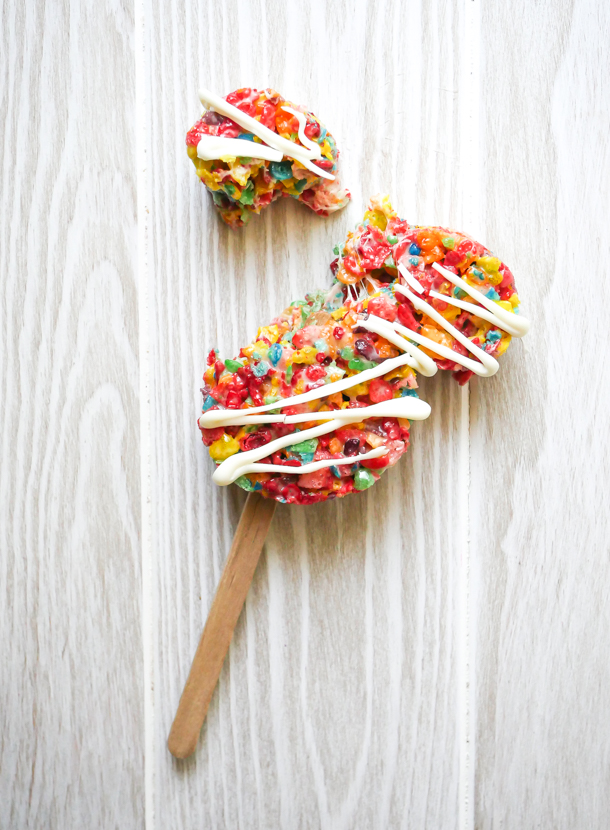
Once you’ve gotten the treats into the pan and cooled, kids can help cut out shapes. Depending on their age, they can help melt the chocolate in the microwave, and can drizzle on their own designs. Just watch that they don’t try to eat all the melted chocolate.

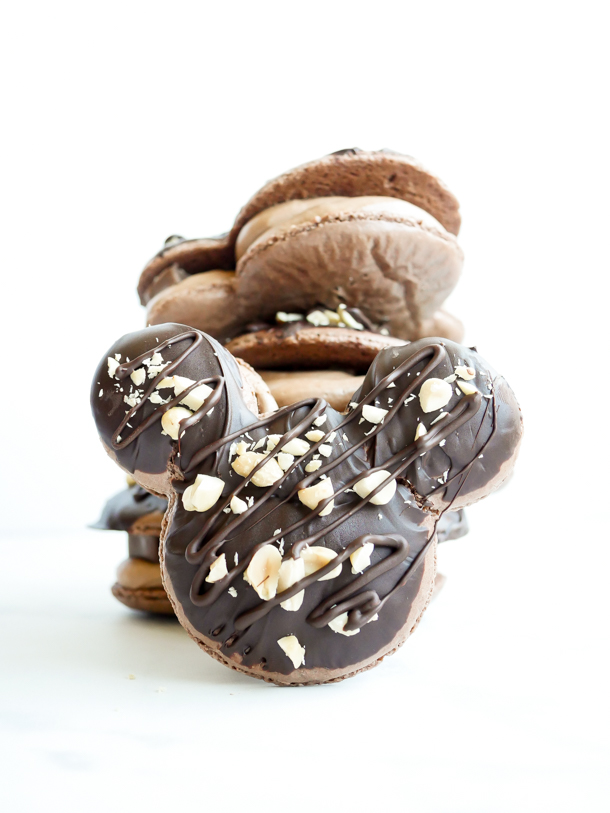
So, if you’re a fan of Disney’s crispy treats and want to venture out into new and bold cereal flavors, give this recipe a try!

Mickey Mouse Fruity Pebble Crispy Treats // magicaltreatsathome.com
Print
clock clock iconcutlery cutlery iconflag flag iconfolder folder iconinstagram instagram iconpinterest pinterest iconfacebook facebook iconprint print iconsquares squares iconheart heart iconheart solid heart solid icon
Mickey Mouse Fruity Pebble Crispy Treats // magicaltreatsathome.com

Mickey Mouse Fruity Pebbles Crispy Treats

5 Stars 4 Stars 3 Stars 2 Stars 1 Star No reviews
  • Author: Elana Lepkowski
  • Yield: 3 Mickey Mouse Fruity Pebbles Crispy Treats 1x
Print Recipe
Pin Recipe

Description

Turn your breakfast cereal into an anytime snack with these Mickey Mouse shaped Fruity Pebbles crispy treats! A Disney inspired treat!


Ingredients

Scale

For the crispy treat:

  • 2 tablespoons butter or vegan butter substitute, unsalted
  • 3 cups mini marshmallows or ~30 regular sized marshmallows
  • 3 cups Fruity Pebbles cereal
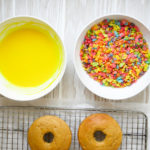
For the chocolate:

  • 3 tablespoons to 1/4 cup white chocolate, coarsely chopped

Specialty Tools:

  • Mickey Mouse Cookie Cutter
  • loaf pan

Instructions

For the crispy treat:

  1. Before beginning, line a loaf pan with parchment.
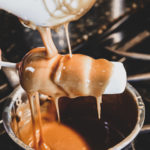
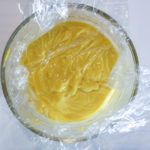
  2. Combine the butter and marshmallows in a medium sauce pan over medium-low heat. Stir constantly until marshmallows have melted and mixture is smooth.
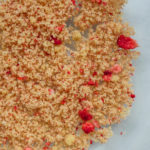
  3. Immediately dump in the Fruity Pebbles cereal and quickly mix to combine.
  4. Pour into the prepared pan and gently press mixture into place with a rubber spatula (or damp fingers, which is my favorite method). Set aside for at least an hour in the refrigerator (or 20 minutes in the freezer) so that the mixture can firm up enough to cut shapes.
  5. When the treats have firmed up, use a Mickey Mouse cutter to cut out your shapes. Set aside.
    Mickey Mouse Fruity Pebble Crispy Treats // magicaltreatsathome.com

For the white chocolate:

  1. Melt the white chocolate in the microwave inside a microwave safe bowl, like glass, for 20 seconds. Stir and microwave again for an additional 15-20 seconds. Keep stirring and microwaving in short bursts of 15-20 seconds until melted and smooth. You can alternatively use a double boiler for melting. OR you can directly melt in a heat safe pastry bag similar to how you’d melt in the bowl. (20 second bursts, kneading bag in-between)
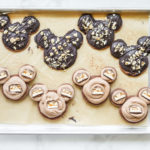
  2. When melted, transfer to a pastry bag (if you did not melt directly in one), snip off the tip, and drizzle over the crispy treat shapes. You can also drizzle with a spoon from the bowl.
    Mickey Mouse Fruity Pebble Crispy Treats // magicaltreatsathome.com
  3. Repeat with all treats. Set aside in the refrigerator for 15 minutes and then enjoy.
    Mickey Mouse Fruity Pebble Crispy Treats // magicaltreatsathome.com

Notes

  • Use a smaller pan than you think you’ll need for this. As the marshmallows melt into the butter, if there’s too much space in the pan, they will start to dry out and form strings. Keeping the marshmallows closer together in the pan will ensure they melt more evenly, creating a better mixture to add the cereal into.
  • When mixing cereal into the melted marshmallows, keep the mixture on the flame so that marshmallows stay liquid. Removing to mix in can seize up the liquid before the cereal is fully mixed.
  • After you’ve cut out your treats, extra cereal/marshmallow mixture can be recombined by hand and cut again (or just combined and shaped into another treat by hand).
  • Treats can be kept in an air-tight container refrigerated for up to 3 days.

Did you make this recipe?

Tag @magicaltreatsathome on Instagram and hashtag it #magicaltreatsathome

Mickey Mouse Fruity Pebble Crispy Treats // magicaltreatsathome.com

Share this:

  • Click to share on Facebook (Opens in new window) Facebook
  • Click to share on X (Opens in new window) X

Like this:

Like Loading...

Filed Under: Recipes, Treats Tagged With: cereal, cripsy treat, disneyland, Fruity Pebbles, krispie treat, krispy treat, marshmallow, Mickey Mouse, rice krispie treats, treat, WDW, white chocolate

Baked Fruity Pebbles Doughnuts

August 27, 2020 by Elana Lepkowski Leave a Comment

Fruity Pebbles Doughnuts // magicaltreatsathome.com

Where can I find the original treat?

  • This treat was found at the Jolly Holiday Bakery Cafe inside Disneyland.

Somehow summer is already over and everyone is starting to head back to school, in whatever form that looks like. Over here at Magical Treats Headquarters, we will be doing the entirety of the next school year (kinder and pre-k) virtually. There will be many bowls of cereal for future breakfasts. Or maybe it will be doughnuts covered in cereal, like today’s recipe The Fruity Pebbles Doughnut. Hey, we all need to do what we got to do to make it through the day. 

Fruity Pebbles Doughnuts // magicaltreatsathome.com

I’ve seen two versions of this at Disneyland, the classic circle and the rectangular Long John type, so basically you can make these whatever shape you’d like at home. The doughnut is also yeasted at the parks, and here today we will tweak that as well. 

A yeasted doughnut is really the perfect base for the sweet and crunchy topping because it’s light and airy and pushes your focus more to the Fruity Pebbles cereal and the lightly flavored lemon glaze than to the actual doughnut. Now, that said, it’s been quite hot here in SoCal, and deep frying anything inside, with all the windows shut and the air conditioning going, is not how I’m spending my day. Because of this hiccup in my baking schedule, I decided that I’d try these on baked doughnuts instead.

Fruity Pebbles Doughnuts // magicaltreatsathome.com

The verdict? Well, it’s definitely quicker to make everything and get to eating them, but using baked doughnuts is a lot more… well, doughnut! Baked doughnuts are like little round cakes and as such, are heavier and can have a more pronounced flavor. Did it taste bad? No! Not at all. But just a warning that using a baked doughnut, or a cake doughnut too, just means you end up with more dessert to contend with. And maybe that’s not all bad.

A note on the glaze. Consistency changes at the parks and again, I’ve had this lemon flavored, and not lemon flavored. Personally the lemon balances out the “fruity pebbles” flavor (which I find now as an adult to taste strongly of bergamot which you find in Earl Gray tea), however if you don’t want to add it in, or are having trouble locating a decent lemon flavoring (check out our rec below!), then go ahead and leave it out.

My kids were SUPER into these at the parks and at home. Once the doughnuts are cooled, kids can help dip the doughnut into the glaze and decorate with cereal topping. 

Fruity Pebbles Doughnuts // magicaltreatsathome.com

Ok, who needs a doughnut? If that’s you, remember to check out our helpful tips and tricks at the bottom of the recipe! Let’s bake (or fry)!

Print
clock clock iconcutlery cutlery iconflag flag iconfolder folder iconinstagram instagram iconpinterest pinterest iconfacebook facebook iconprint print iconsquares squares iconheart heart iconheart solid heart solid icon
Fruity Pebbles Doughnuts // magicaltreatsathome.com

Fruity Pebbles Doughnuts

5 Stars 4 Stars 3 Stars 2 Stars 1 Star No reviews
  • Author: Elana Lepkowski
  • Yield: 6 doughnuts 1x
Print Recipe
Pin Recipe

Description

Lemony Fruity Pebbles topped doughnuts are a sweet and crunchy dessert for snack time or breakfast time. A Disneyland-inspired treat.


Ingredients

Scale

For yeasted doughnuts, please check out the recipe here!

For the baked doughnuts:

  • 2 tablespoons butter
  • 25g (1/8 cup) vegetable oil (or refined coconut oil)
  • 49g (1/3 cup) granulated sugar
  • 35g (1/4 cup) brown sugar
  • 1 large egg
  • 3/4 teaspoons baking powder
  • 1/4 teaspoon baking soda
  • 1/4 teaspoon salt
  • 1/2 teaspoon vanilla extract
  • 159g (1–1/3 cups) Unbleached All-Purpose Flour
  • 113g (1/2 cup) milk (or milk substitute like almond milk)

For the glaze and topping:

  • 1/2 cup powdered sugar
  • 1/4 – 1/2 teaspoon pure lemon extract, optional (I used Nielsen-Massey lemon extract, see notes below about extracts)
  • 1 tablespoon milk (or milk alternative)
  • 2 to 3 drops of yellow food coloring (I used Lemon Yellow from Americolor)
  • 1 cup Fruity Pebbles cereal
    Fruity Pebbles Doughnuts // magicaltreatsathome.com

Instructions

For the doughnuts:

  1. Preheat the oven to 425°F. Lightly grease one standard doughnut pan.
  2. In a medium-sized mixing bowl, beat together the butter, vegetable oil, and sugars until smooth.
  3. Add the eggs, beating to combine.
  4. Stir in the baking powder, baking soda, salt, and vanilla.
  5. Stir the flour into the butter mixture alternately with the milk, beginning and ending with the flour and making sure everything is thoroughly combined. 
  6. Spoon the batter into the lightly greased doughnut pans, filling the wells to about 1/4″ shy of the rim.
  7. Bake the doughnuts for 10 minutes. Remove them from the oven, and wait 5 to 7 minutes before turning them out of the pans onto a rack.
    Fruity Pebbles Doughnuts // magicaltreatsathome.com

For the glaze and topping:

  1. Once the doughnuts are cool, in a bowl wide enough to fit a doughnut, whisk together the powdered sugar, lemon extract (if using), milk, and food coloring until smooth. Pour the Fruity Pebbles into a shallow, wide bowl that can accommodate a doughnut.
    Fruity Pebbles Doughnuts // magicaltreatsathome.com
  2. Dip the top half of each doughnut into the glaze, letting any excess glaze drip back into the bowl.
  3. Immediately press the doughnut glaze side down into the Fruity Pebbles. Gently press the doughnut down into the cereal and then gently lift and place on a drying rack to set. Repeat with the remaining doughnuts.
    Fruity Pebbles Doughnuts // magicaltreatsathome.com
  4. The glaze will take about 30-45 minutes to harden, however, don’t let that stop you from eating right away.

Notes

  • Don’t want to make doughnuts at all? Plain store bought doughnuts can be decorated instead!
  • Check the strength of your lemon extract  before adding more than a 1/4 teaspoon to your glaze. I had plenty of lemon flavor with a quarter teaspoon of my brand, but your brand might be different, so taste and adjust as necessary.
  • These are best eaten the day they are made as the Fruity Pebbles tend to go soft the longer they sit.

Did you make this recipe?

Tag @magicaltreatsathome on Instagram and hashtag it #magicaltreatsathome

Fruity Pebbles Doughnuts // magicaltreatsathome.com

Share this:

  • Click to share on Facebook (Opens in new window) Facebook
  • Click to share on X (Opens in new window) X

Like this:

Like Loading...

Filed Under: Recipes, Treats Tagged With: breakfast, cereal, disneyland, donut, donuts, doughnuts, Fruity Pebbles, glaze, lemon, treat

Jolly Holiday Maple Bacon Doughnuts

July 3, 2020 by Elana Lepkowski Leave a Comment

Maple Bacon Doughnut // magicaltreatsathome.com

Where can I find the original treat?

  • This treat was found at the Jolly Holiday Bakery Cafe in Disneyland.

The Donut Cart at Disneyland was always my favorite place to visit for a treat and to say I was bummed when they decided to get rid of it to widen the walkways around Sleeping Beauty Castle is an understatement. However, some of those fabulous doughnuts can be found over at the Jolly Holiday Bakery Cafe on occasion. (Although they will sell out quickly if it’s a good one!)

One of the last doughnuts I had while visiting the park this year was the Maple Bacon Doughnut, and let me tell you, the combination of sweet maple and salty bacon was *chef’s kiss*. I love sweet and salty treat combos, but I get it’s not for everyone (my husband picked all the bacon off and ate it separately). But I urge you to try the combo once, because it’s not just crispy bacon on top, it’s lacquered bacon and it gives another maple dimension to the doughnut.

Maple Bacon Doughnut // magicaltreatsathome.com

These are yeasted doughnuts so they require two rises, but they also make the most fluffiest, softest doughnuts and it’s worth the time you put in. However, if yeast is not available to you right now, or the time is not there, you could also bake a batch (like these doughnuts!) or even just buy some plain doughnuts and decorate. We’ve got all the recipes below for every component, so choose whatever option works for you.

I would not recommend that kids get involved for the actual frying part of the doughnut making, but mixing, shaping and decorating are all ways they can get involved. Although my kids just wanted to dip the bacon in the glaze.

Maple Bacon Doughnut // magicaltreatsathome.com

TIP: Now, if making homemade doughnuts seems like a chore, please let me assure you it’s not! Hope on over to our Instagram account and head to our doughnut making highlight bubble for lots of tips. And remember to read all our tips below in the notes section of the recipe card. Also, if you want doughnuts in the morning, make the dough up the night before! Here’s the run down from our Churro Gears post…

Don’t wake up at 4am for breakfast doughnuts! Start them the night before!

  • The night before, mix up the dough and instead of having it sit out to double in size for an hour and a half, cover and refrigerate it at least 8 hours and up to 12.
  • The next day, take them out of the fridge, let the dough sit for 5 minutes uncovered, and then roll out and proceed with making the doughnuts.
  • Once shaped, doughnuts need to rise for 45 minutes before frying off. So, during this time you can brew some coffee, scroll Instagram, make lunches, heat the oil, and whatever else eats up all that precious morning time every day.
  • You should definitely though start heating the oil around 15-20 minutes before your timer goes off. I start on high to get it warmed up quickly in my dutch oven, and then ease on down to medium-high or medium at around 320°f or so. Otherwise it can reach temp and then get too hot and you don’t want that to happen.
  • And from there you’ll start frying off doughnuts and have them ready to eat within 10 minutes!
Maple Bacon Doughnut // magicaltreatsathome.com

Have a magical weekend everyone! And if you try these in an air fryer, let me know how they turn out (I still haven’t bought one yet…).

Print
clock clock iconcutlery cutlery iconflag flag iconfolder folder iconinstagram instagram iconpinterest pinterest iconfacebook facebook iconprint print iconsquares squares iconheart heart iconheart solid heart solid icon
Maple Bacon Doughnut // magicaltreatsathome.com

Jolly Holiday Maple Bacon Doughnuts

5 Stars 4 Stars 3 Stars 2 Stars 1 Star No reviews
  • Author: Elana Lepkowski
  • Yield: 4 Maple Bacon Doughnuts 1x
Print Recipe
Pin Recipe

Description

This sweet and salty breakfast treat combines rich maple glaze and lacquered bacon on the softest yeast dougnut. A Disneyland-inspired treat.


Ingredients

Scale

For the doughnuts:

  • 3/4 teaspoon active dry yeast (not rapid rise)
  • 1 tablespoon warm water (around 110°f)
  • 1 cup (120 grams) all-purpose flour
  • 1/4 cup warmed whole milk, or milk alternative of your choice (see notes below)
  • 1 tablespoon unsalted butter, softened
  • 1 large egg yolk
  • 2 teaspoons granulated sugar
  • 1/2 teaspoon kosher salt
  • 4 cups neutral oil like avocado or canola

For the lacquered bacon:

  • 4 strips bacon
  • 1/4 cup maple syrup

For the maple glaze:

  • 1/3 cup maple syrup (I used a robust grade B for a richer flavor)
  • 1 tablespoon butter, unsalted
  • 1 cup powdered sugar
  • splash of cream or milk

Specialty Tools:

  • 1-1/4″ circle cutter
  • candy/frying thermometer
  • spider strainer

Instructions

For the doughnuts:

  1. Mix together yeast and warm water in a small bowl. Let sit for five minutes until bubbles form on top (if bubbles do not form, throw away and try again. Your yeast might be too old, or your water too hot/cold to activate yeast).
  2. While yeast sits, in the bowl of a stand mixer or a freestanding large bowl with a hand mixer, combine the flour, milk, butter, egg yolk, sugar and salt. Add in yeast mixture.
  3. Stir until just combined and then attach a dough hook and mix in the stand mixer on low until dough comes together. Then increase speed to high and mix for 3 more minutes. Alternatively, you can knead dough by hand for 5-7 minutes.
  4. Remove dough from the dough hook and let sit in the bowl, covered, at room temperature, for one hour until dough has doubled in size. (It will be done rising once you can leave an indentation in the dough with your finger and it doesn’t spring back)
  5. Next, sprinkle flour onto your counter and divide your dough into four equal pieces.
  6. Roll each segment into balls, and then shape them by either making a hole through them with your finger, or flattening into a circle and using a 1-1/4″ circle cutter to make a center hole, and let rise again for 30 minutes covered with a tea towel.
  7. About 20 minutes before the second rise is complete, heat oil in a dutch oven with a candy thermometer attached.
  8. When the oil reaches 350°f, carefully lower the dough into the hot oil. You can fry two to three doughnuts at a time in a wide dutch oven.
  9. Fry on each side about one minute. Then remove with a spider or slotted spoon onto a cooling rack with paper towels underneath. Let temperature in the pot come back to 350°f before frying next batch.
  10. Let doughnuts come to room temperature before glazing and filling.

For the lacquered bacon:

  1. Heat oven to 350°f.
  2. Cover the bottom of a sheet pan with foil and place a grate over the top. Set aside.
  3. In a bowl wide enough to accommodate the bacon, place bacon inside and then pour the maple syrup over them.
  4. Use your hands to massage the maple syrup into the bacon and to ensure all of the bacon is covered in the syrup.
  5. Lay the pieces of bacon flat on the grate and move into the oven.
  6. Bake for 20 minutes (starting to check at 18 to make sure it is not burning) until crisp and shiny.
  7. Remove from the oven and let cool. Then chop into 1-1/2″ sections. Set aside.

For the maple glaze:

  1. In a small sauce pan, melt the maple syrup and butter together.
  2. Remove from the heat and add in the powdered sugar. Mix until smooth. If too thick, add a splash of milk or cream.
  3. Move back to the stove on the lowest setting to keep warm.

To assemble the doughnuts:

  1. Dip a doughnut top into the maple glaze.
  2. Add pieces of bacon to the center.
  3. Set aside and repeat on remaining doughnuts.

Notes

  • This recipe can be doubled as is with no adjustments.
  • Frying reaches temperatures of over 350°F so please use caution in the kitchen! Wear gloves, an apron, closed toe shoes, and use a candy thermometer. Keep children away when handling hot dishes.
  • I made my batch of doughnuts with almond milk and they came out exactly the same as with cow milk, so feel free to use a milk alternative.
  • If you choose to cut out your doughnuts instead of hand shaping, save the doughnut holes and fry those off as well! 40 seconds on side one, and then 30 seconds on the other side.
  • Remember, bacon is a raw pork product, so clean your hands and any surfaces before handling cooked doughnuts.
  • Doughnuts are best the day they are made, but can be placed in an air-tight container and eaten the next day (but no longer than that!).
  • Extra glaze can be kept in an air-tight container in the refrigerator for up to 5 days and reheated on the stove with a splash of cream or milk.

Did you make this recipe?

Tag @magicaltreatsathome on Instagram and hashtag it #magicaltreatsathome

Maple Bacon Doughnut // magicaltreatsathome.com

Share this:

  • Click to share on Facebook (Opens in new window) Facebook
  • Click to share on X (Opens in new window) X

Like this:

Like Loading...

Filed Under: Recipes, Treats Tagged With: bacon, disneyland, donut, doughnut, maple, maple bacon, Sleeping Beauty

Make it Pink! Make it Blue! Frosting How To!

July 1, 2020 by Elana Lepkowski Leave a Comment

Make it Pink! Make it Blue! Frosting demo // magicaltreatsathome.com

Where can I find the original treat?

  • This frosting how-to is inspired by the Royal Cupcake at Disneyland found at the Jolly Holiday Bakery Cafe.

One of the easiest ways to make a dessert feel elevated, to seem really special, is to decorate it with fancy frosting and sprinkles. Cupcakes always seemed like a personal present to give to someone, and instead of sparkly bows and wrapping paper, we’ve got two-toned frosting and edible stars.

Make it Pink! Make it Blue! Frosting demo // magicaltreatsathome.com

When the Royal Cupcake debuted at Disneyland, its unofficial title was the Make it Pink! Make it Blue! cupcake, as the dueling fairies in Sleeping Beauty were known to yell at each other. And today we’ve actually got a short video to show two ways to make this frosting!

Make it Pink! Make it Blue! Frosting demo // magicaltreatsathome.com

Method one is adding the colored frosting to a piping bag directly. Each color is spooned in on opposite sides and when piped together, you get the two colors. This method produces a more blurred line between colors, although still distinct.

Method two is a little extra work, but has a sharper line between colors. You start by laying down a piece of plastic wrap and spooning your frosting colors in stripes longways (you can also pipe them out if you want but that was too much for me). Then you fold over your colors lengthwise, making a sausage with the plastic wrap, and insert that inside a piping bag fitted with a round tip. Pull the plastic wrap through the tip and cut off the extra that hangs out. Then pipe as you normally would!

Now it’s time for me to make some cupcakes disappear!

Make it Pink! Make it Blue! Frosting demo // magicaltreatsathome.com

Share this:

  • Click to share on Facebook (Opens in new window) Facebook
  • Click to share on X (Opens in new window) X

Like this:

Like Loading...

Filed Under: Recipes, Tips Tagged With: buttercream frosting, disneyland, frosting, Sleeping Beauty, tutorial

Mickey Waffles Three Ways

June 17, 2020 by Elana Lepkowski Leave a Comment

Mickey Mouse Waffles Three Ways // magicaltreatsathome.com
  • These were inspired by the Disney Parks classic Mickey Mouse waffles.

Since Disneyland’s closure this past March, I’ve definitely been trying to keep the magic up here at home, especially when my three year old asks on the daily when they will open again. We’ve done a Mary Poppins themed tea party, and ate egg bites while watching a POV ride through of It’s a Small World (and my IG followers know what that’s referencing at this point), and I’ve made a few recipes that I’ve posted on here too. It’s been a real… treat to hear from readers and followers that they’ve tried out a recipe they saw here because they, too, were missing the parks something fierce.

Mickey Mouse Waffles Three Ways // magicaltreatsathome.com

So today over on IG I launched a giveaway to say THANK YOU to all those followers and I thought they best way to do that… was with food! The contest only runs until Friday afternoon so I apologize in advance for talking about a contest that will most likely be over with by the time you are reading this, but I hope the sentiment remains, and that just by you, reader, showing up and considering making a recipe, I want you to know that means a lot to me to take me into your kitchen with you. So, thank you.

Mickey Mouse Waffles Three Ways // magicaltreatsathome.com

The contest is giving away the waffle maker pictured above, and also a canister of Golden Malted waffle mix, which happens to be THE brand used by Disneyland Parks. The original flavor is iconic, BUT, I thought I’d change it up a little and give you some options for when you don’t want plain waffles. So check out the recipes below for: Vanilla Bean Mickey Waffles, Chocolate Mickey Waffles, and Citrus Sprinkles Mickey Waffles.

If you make a batch and close your eyes, you’d swear you were walking down Main Street…

Print
clock clock iconcutlery cutlery iconflag flag iconfolder folder iconinstagram instagram iconpinterest pinterest iconfacebook facebook iconprint print iconsquares squares iconheart heart iconheart solid heart solid icon
Mickey Mouse Waffles Three Ways // magicaltreatsathome.com

Mickey Waffles Three Ways

5 Stars 4 Stars 3 Stars 2 Stars 1 Star No reviews
  • Author: Elana Lepkowski
  • Yield: Each recipe yields about 15 Mickey Mouse Waffles
Print Recipe
Pin Recipe

Description

Nothing beats the iconic Mickey Waffle, but these Vanilla Bean Mickey Waffles, Chocolate Mickey Waffles, and Citrus Sprinkles Mickey Waffles sure are tasty too! A Disneyland inspired recipe.


Ingredients

Scale

For the Vanilla Bean Mickey Waffles:

  • 1 egg
  • 5 ounces water
  • 1 cup Golden Malted waffle mix
  • 1 teaspoon vanilla bean paste OR vanilla extract with seeds scraped from half a vanilla bean
  • 1 teaspoon sugar
  • 2 tablespoons butter, melted
  • cooking spray

Chocolate Mickey Waffles:

  • 1 egg
  • 5 ounces water
  • 1 cup Golden Malted waffle mix
  • 1 tablespoon unsweetened cocoa powder (if you use sweetened, omit tablespoon of sugar)
  • 1 teaspoon sugar
  • 2 tablespoon melted butter
  • cooking spray

Citrus Sprinkle Mickey Waffles:

  • 1 egg
  • 5 ounces water
  • 1 cup Golden Malted waffle mix
  • 1/4 teaspoon Fiori di Sicilia extract OR 1 teaspoon of finely grated lemon peel plus 1/2 teaspoon of finely grated orange peel
  • 1 teaspoon sugar
  • 2 tablespoon sprinkles
  • 2 tablespoon melted butter
  • cooking spray

Specialty Tools:

  • Mickey Flip Waffle Maker

Instructions

For the Vanilla Bean Mickey Waffles:

  1. Preheat your waffle maker according to the manufacturer’s instructions.
  2. Mix the egg and water together until frothy.
  3. Pour in the Golden Malted waffle mix, vanilla bean paste, and sugar. Stir until smooth.
  4. Pour in the melted butter and mix until just combined.
  5. Pour the desired amount of mix into your waffle maker (for this particular Mickey Mouse 90th anniversary edition waffle maker you’ll need a few tablespoon, and fill each compartment all the way).
  6. Bake according to the waffle maker’s instruction and enjoy!

For the Chocolate Mickey Waffles:

  1. Preheat your waffle maker according to the manufacturer’s instructions.
  2. Mix the egg and water together until frothy.
  3. Pour in the Golden Malted waffle mix, cocoa powder, and sugar. Stir until smooth.
  4. Pour in the melted butter and mix until just combined.
  5. Pour the desired amount of mix into your waffle maker (for this particular Mickey Mouse 90th anniversary edition waffle maker you’ll need a few tablespoon, and fill each compartment all the way).
  6. Bake according to the waffle maker’s instruction and enjoy!

For the Citrus Sprinkles Mickey Waffles:

  1. Preheat your waffle maker according to the manufacturer’s instructions.
  2. Mix the egg and water together until frothy.
  3. Pour in the Golden Malted waffle mix, fiori di sicilia extract, and sugar. Stir until smooth.
  4. Pour in the melted butter and sprinkles and mix until just combined.
  5. Pour the desired amount of mix into your waffle maker (for this particular Mickey Mouse 90th anniversary edition waffle maker you’ll need a few tablespoon, and fill each compartment all the way).
  6. Bake according to the waffle maker’s instruction and enjoy!

Notes

  • For extra chocolate waffles, melt 2 ounces of semisweet chocolate and pour into the batter.
  • Waffles can be individually frozen up to 6 months.
  • Waffles will get soft if kept in the refrigerator overnight but you can toast in your toaster to crisp up!

Did you make this recipe?

Tag @magicaltreatsathome on Instagram and hashtag it #magicaltreatsathome

Mickey Mouse Waffles Three Ways // magicaltreatsathome.com

Share this:

  • Click to share on Facebook (Opens in new window) Facebook
  • Click to share on X (Opens in new window) X

Like this:

Like Loading...

Filed Under: Recipes, Treats Tagged With: breakfast, chocolate, citrus, Disney Waffle Maker, disneyland, easy, Golden Malted Waffle Mix, sprinkles, treat, vanilla, waffles

Jack Skellington Cake Pops

May 16, 2020 by Elana Lepkowski Leave a Comment

Jack Skellington Cake Pops // magicaltreatsathome.com

Where can I find the original treat?

  • This seasonal treat was found throughout the Disneyland Resort.

First, yes, I know it is May, however when Disney announced they were going to hold a special “Halfway to Halloween” event yesterday (Friday May 15th), and I just happened to have a batch of undecorated white chocolate coated cake pops in the fridge, instead of my original idea (which I’ll withhold for now since I’m still going to do it at another date) I pivoted to a batch of Jack Skellington cake pops instead. They are super easy to decorate. So let’s talk about that and make some!

Jack Skellington Cake Pops // magicaltreatsathome.com

The original Disneyland treat last year was a vanilla cake pop, which makes sense, since if you make a darker colored cake, which I did with chocolate, you will more than likely have to double coat these depending on how opaque your melted chocolate is. So, I’ve linked to our standard Disneyland cake pop recipes in the recipe below and you can choose the flavor you’d like best.

Jack Skellington Cake Pops // magicaltreatsathome.com

For decorating, I colored semisweet chocolate with some chocolate, oil based, food coloring in black. If you can get your hands on black candy melts I’d suggest that for one less step. Also, remember, never use water based (like gel) food coloring with chocolate. Water and chocolate don’t mix! It will make your chocolate seize up when you melt it.

Jack Skellington Cake Pops // magicaltreatsathome.com

One tip when decorating Jack’s face is to cut the smallest tip off your piping bag that you can get away with. It will make the line work on his smile all the easier if you have a fine line to control. If you want to use a tip with your bag, I’d go with Wilton’s #1 or #2 tip.

Jack Skellington Cake Pops // magicaltreatsathome.com

And that’s it! These look great and are really very easy to decorate. Whip up a batch to celebrate #Halfway2Halloween right now, or pin this recipe to welcome the actual Halloween season the first week of September.

Jack Skellington Cake Pops // magicaltreatsathome.com
Print
clock clock iconcutlery cutlery iconflag flag iconfolder folder iconinstagram instagram iconpinterest pinterest iconfacebook facebook iconprint print iconsquares squares iconheart heart iconheart solid heart solid icon
Jack Skellington Cake Pops // magicaltreatsathome.com

Jack Skellington Cake Pops

5 Stars 4 Stars 3 Stars 2 Stars 1 Star No reviews
  • Author: Elana Lepkowski
  • Yield: 8–10 Jack Skellington Cake Pops 1x
Print Recipe
Pin Recipe

Description

Get spooky with these easy to decorate Jack Skellington white chocolate coated cake pops! A Disneyland-inspired treat.


Ingredients

Scale

For the cake pops:

  • 8–10 cake balls (find our recipe here for the Disneyland-inspired vanilla, chocolate, and red velvet cake pops)
  • 1 cup white chocolate discs (like Merckens) or white candy melts
  • 1/4 cup black candy melts OR 1/4 cup semisweet chocolate discs + 3-4 drops oil based food coloring for chocolate in black

Specialty Tools:

  • lollipop sticks
  • cake pop drying rack

Instructions

  1. First, make your cake balls for the cake pops. I chose the chocolate flavor for this recipe.
  2. Push a lollipop stick halfway into each cake ball. Set aside into a cake pop stand, or make holes in the bottom of a shoe box and stick the cake pops in there.
  3. Refrigerate at least one hour to firm up, or up to two days.
    Jack Skellington Cake Pops // magicaltreatsathome.com
  4. Next, melt the white chocolate. You can do this one of several ways:
    1. Melt in a candy pot until smooth (Wilton makes this one for their candy melts I use for dipping projects like this). This can take up to 20 minutes to get fully smooth candy melts. Follow the directions for your particular pot!
    2. Melt in the microwave in a microwave safe bowl, like glass, for 30 seconds. Stir and microwave again for an additional 30 seconds. Keep stirring and microwaving in short bursts of 15-20 seconds until melted and smooth.
    3. Melt in a double boiler on the stove. In a medium saucepan, bring about an inch of water to a simmer. Place a glass bowl on top and add candy melts. Stir until melted and smooth.
  5. Make sure the cake pops have come to room temperature. If they’re too cold, the chocolate will seize up and harden too soon.
  6. Next, dip each cake pop into the white chocolate, tapping each stick against the bowl to pop any air bubbles and to remove all the excess chocolate. If your white chocolate is not opaque enough, dip all the cake pops a second time after you have finished the first round. Stick them back into the stand or box holder.
    Jack Skellington Cake Pops // magicaltreatsathome.com
  7. Let the cake pops firm up slightly again and melt the black candy melts (or chocolate with 3-4 drops of the food coloring) to finish decorating the cake pops. To melt, microwave inside a microwave safe bowl, like glass, for 30 seconds. Stir and microwave again for an additional 30 seconds. Keep stirring and microwaving in short bursts of 15-20 seconds until melted and smooth. You can alternatively use a double boiler for melting or melt candy melts in a piping bag, kneading the candy melts between microwaving.
  8. If not melting directly in a piping bag, transfer melted candy melts into a piping bag and cut a small amount of the tip off to decorate. See notes below on tip sizing if using a piping tip.
  9. Draw on Jack’s face with the piping bag on each cake pop. Start with the eyes making a small circle and moving outward until the eyes are large. Then make to small lines for the nose at angles, and then draw on a thin line for the smile and perpendicular lines for his mouth. Set aside and let firm up at least a half hour, or refrigerate until ready to eat.

Notes

  • Cake balls should not be too wet or too dry to hold their shape properly. If too wet, add more cake crumbles. If too dry, add more frosting a small bit at a time.
  • I like to dry the cake crumbles out a bit before mixing with the frosting, and then letting that mixture sit overnight in the fridge to set up. This ensures a more solid cake pop when dipping.
  • Boxed cake and canned frosting will also work for the cake pops if you don’t want to make them from scratch. Just follow the amounts for the crumbled cake and amount of frosting on those recipe pages listed above.
  • Cake balls can be made in advance and frozen in a single layer on a sheet pan. Then move the frozen balls to a freezer safe container until ready to use. You can keep cake balls in the freezer up to 6 months.
  • If cake balls are slipping off the sticks, dip lollipop stick tip in the melted chocolate and insert into cake ball. Refrigerate a few minutes to set.
  • Pure white chocolate, as opposed to candy melts, will have a thinner texture and may show dark spots after one dip due to its translucent nature. The first dip will also ensure that your marshmallows will adhere and not slide off into the chocolate on the second dip. If your kitchen is particularly warm, stick in the fridge for 10 minutes to harden slightly before second dip.
  • White chocolate can get too hot very easily. If the white chocolate looks like it is seizing on your spoon when you have dipped in the chocolate and let it drip off, it is too hot. Keep stirring the white chocolate to cool it down. It will be the right consistency to dip the cake pops in when it drips smoothly off your spoon. This can take anywhere sometimes from 20 to 30 minutes to melt, and then cool down to the right consistency.
  • If your white chocolate or candy melts is still very clumpy and thick, add a 1/4 teaspoon of coconut oil into it and continue mixing. This should thin out your mixture and get a smoother consistency.
  • If you want to use a tip with your bag for decorating Jack’s face, use Wilton’s #1 or #2 tip.
  • Save any extra white chocolate to reuse for another treat within a week. Let chocolate harden and then seal in an airtight container.
  • Cake pops will last up to one week in the refrigerator in an airtight container.

Did you make this recipe?

Tag @magicaltreatsathome on Instagram and hashtag it #magicaltreatsathome

Jack Skellington Cake Pops // magicaltreatsathome.com

Share this:

  • Click to share on Facebook (Opens in new window) Facebook
  • Click to share on X (Opens in new window) X

Like this:

Like Loading...

Filed Under: Recipes, Treats Tagged With: cake, cake ball, cake pop, cake pops, candy melts, chocolate, disneyland, fall-halloween, Halfway to Halloween, Jack Skellington, Nightmare Before Christmas, This is Halloween, treat, white chocolate

Strawberry Shortcake Marshmallow Wands

May 15, 2020 by Elana Lepkowski Leave a Comment

Strawberry Shortcake Marshmallow Wands // magicaltreatsathome.com

Where can I find the original treat?

  • This seasonal treat can be found all over the Disneyland resort.

I had opened our mini freezer the other day, the freezer that I keep all my backup ingredients in for this site, and for my drinks site, Stir and Strain, and realized I had everything before me to make another round of marshmallow wands. If you take away one good tidbit from this post, I hope it’s that marshmallow wands, after they have been coated in caramel, freeze beautifully. And even after almost 6 months, once fully decorated, they still taste fresh. But so anyways, I also had a bag of crumbled shortbread in that freezer. And a bag of freeze dried strawberries. I had everything ready to go to make Strawberry Shortcake Marshmallow Wands. So that’s what we’re making today!

Strawberry Shortcake Marshmallow Wands // magicaltreatsathome.com

This treat appeared during Valentine’s Day among the many other delicious treats on sticks at Disneyland. It definitely was a contender for the site, but I had to narrow it down to just a few items since the treats were released right before the holiday, and soon after would be leaving the cases. Since we’re in the middle of a hiatus from new park treats, I’ll be making a few past ones here until I’m back once again, strolling the candy cases and shoving chocolate in my face. Fingers crossed I don’t have to wait until a year from now to do that.

Strawberry Shortcake Marshmallow Wands // magicaltreatsathome.com

What I love about this treat is the buttery contrast of the cookie to the sweeeeeeeet white chocolate, caramel, and marshmallow. The strawberry bits add a nice zing to it as well. It’s definitely a sweet treat, but I wouldn’t write this off as just for kids.

But speaking of kids! Kids can help assemble these and dip in the chocolate and decorate. Older kids comfortable with a stove, and good common sense, can help dip in the caramel, but under supervision.

And if you’re wondering, the reason I had a container of marshmallow wands in the freezer is because I find melting the caramel in larger batches is easier to work with when making things like the wands. It stays liquid longer, and heats more evenly. The downside though is that there is a lot left over since I’m using more than I need. So now when I have extra caramel, I’ll just grab some lollipop sticks and some marshmallows (Another panic buy from March was a case of marshmallows. I’m thinking maybe I might start selling these as kits…), and I’ll coat a batch of marshmallows, place them on parchment and freeze. So far, after a 6 month hibernation, these were still great.

Strawberry Shortcake Marshmallow Wands // magicaltreatsathome.com

For the cookies, homemade or store bought is fine. But make sure you’re using a butter cookie, not a sugar cookie! And with that, I hope you enjoy these Strawberry Shortcake Marshmallow Wands!

Print
clock clock iconcutlery cutlery iconflag flag iconfolder folder iconinstagram instagram iconpinterest pinterest iconfacebook facebook iconprint print iconsquares squares iconheart heart iconheart solid heart solid icon
Strawberry Shortcake Marshmallow Wands // magicaltreatsathome.com

Strawberry Shortcake Marshmallow Wands

5 Stars 4 Stars 3 Stars 2 Stars 1 Star No reviews
  • Author: Elana Lepkowski
  • Yield: 6 Strawberry Shortcake Marshmallow Wands 1x
Print Recipe
Pin Recipe

Description

The classic caramel coated marshmallow wand gets a sweet upgrade with a layer of white chocolate and a buttery shortbread cookie crumble and tart strawberry coating! A Disneyland-inspired treat.


Ingredients

Scale
  • 18 marshmallows
  • 9 ounces (~32 candies) individually wrapped caramels (like Kraft)
  • 1–3/4 tablespoons water
  • 1/2 teaspoon of coconut oil
  • 10 ounces of white candy melts
  • 1 cup crushed shortbread cookies
  • 1/4 cup freeze dried strawberries, crushed
  • 6 lollipop sticks

Instructions

  1. Place 3 marshmallows on each lollipop stick and set aside on a parchment lined sheet pan.
    Churro Marshmallow Wand // magicaltreatsathome.com
  2. Mix together the crushed shortbread and freeze dried strawberries in a large, shallow bowl that can accommodate the length of the marshmallow wand. If you cannot crush the strawberries by hand (some brands are chewier than others), a quick blitz in the food processor or coffee grinder should render them fine enough to mix with the cookies. Set aside.
    Strawberry Shortcake Marshmallow Wands // magicaltreatsathome.com
  3. Unwrap all the caramels and add to a small saucepan. Pour water in and heat over medium-low heat.
  4. Stir constantly until everything has melted and caramels are smooth (about 7-8 minutes).
  5. Once melted (caramels should drip in a ribbon from a spoon back into the pan), dip each wand into the caramel, turning quickly to coat OR ladle the caramel over the wand, turning to coat. Let excess caramel drip off for at least 30 seconds, turning while it drips for even coating, tap the wand gently but firmly on the edge of the pan to remove any additional excess caramel, and then place back on the  parchment.
    Churro Marshmallow Wand // magicaltreatsathome.com
  6. When all the wands have been dipped, place the baking sheet in the refrigerator for 15-20 minutes so that the caramel will be set for dipping.
    Churro Marshmallow Wand // magicaltreatsathome.com
  7. While the caramels set, melt your white chocolate for coating. Combine the white candy melts and coconut oil in the microwave inside a microwave safe bowl, like glass, for 30 seconds. Stir and microwave again for an additional 30 seconds. Keep stirring and microwaving in short bursts of 15-20 seconds until melted and smooth. Use can alternatively use a double boiler for melting. Do not let the white chocolate get over 110°f as it can burn the chocolate (use a candy thermometer if you’re not sure about this).
  8. Remove the marshmallow wands from the refrigerator. You’ll know they are set when they lift easily off the parchment. If they still stick, keep them in 5 minutes longer.
  9. Set up the shortbread cookie and strawberry mix bowl next to your white chocolate.
  10. Dip the marshmallow wand in the white chocolate, or ladle chocolate over, turning to coat. Tap the stick firmly on the side of your pan to remove any excess chocolate. Then immediately roll in the cookie/strawberry mix, gently pressing the mix onto the white chocolate. Then place back on the parchment.
  11. Repeat with the remaining marshmallow wands.
  12. Let sit at least 30 minutes to firm up or in the refrigerator for quicker results. Enjoy!

Notes

  • Melted caramel is HOT! Use caution in the kitchen. Do not dip your fingers or hands into the caramel has it can adhere to skin and burn you. Keep away from children.
  • Use hot water to remove caramel from pans and utensils.
  • If the marshmallow wands start to stick to the parchment while you are dipping and coating, stick the pan with the un-coated wands back to chill in the refrigerator for a few minutes. If your kitchen is really hot, keep them in there the whole time, taking one at a time out to coat and decorate.
  • If you have extra melted caramel that has dried around your wand, use kitchen shears to remove it immediately after removing from the refrigerator.
  • Extra caramel coated marshmallow wands may be placed on a sheet of parchment in a single layer inside an airtight container and frozen for up to 6 months. No need to defrost them before use.
  • Did your chocolate coating break when you first dipped your wand in? Wait for the chocolate to cool down more. It should drip freely from a spoon without it seizing when the spoon is shaken slightly (will cause crevices in the chocolate on the spoon). If it breaks on the wand, your wand also might be too cool, so let them warm up more. And don’t worry, once that chocolate starts to firm up, you can dip it AGAIN into the chocolate to get a more even, although slightly thicker, coating.

Did you make this recipe?

Tag @magicaltreatsathome on Instagram and hashtag it #magicaltreatsathome

Strawberry Shortcake Marshmallow Wands // magicaltreatsathome.com

Share this:

  • Click to share on Facebook (Opens in new window) Facebook
  • Click to share on X (Opens in new window) X

Like this:

Like Loading...

Filed Under: Recipes, Treats Tagged With: caramel, disneyland, holiday, marshmallow, marshmallow-wand, shortbread, strawberry, treat, Valentine's Day, white chocolate

Double Chocolate Churro

April 30, 2020 by Elana Lepkowski Leave a Comment

Double Chocolate Churros // magicaltreatsathome.com

Where can I find the original treat?

  • This treat can be found in Critter Country in Disneyland.

When you are visiting Disneyland weekly (or sometimes even more frequently) in search of treats, chances are you’ll luck out and stumble upon something before it gets released fully to the public. This happened in March when I was determined to figure out what the Bear Paw Pastry was that had been listed on the Lemonade Stand menu on the Disneyland app for weeks and yet no one who worked there could tell me what it was. And then one day the Double Chocolate Churro appeared on that menu (and still that bear paw. What is it?????). And suddenly there was a sign at the booth that said “ask me about our specialty churro”, and so I did. And now today I’m sharing that creation with you all.

Double Chocolate Churros // magicaltreatsathome.com

These churros are chocolate throughout, reminiscent of a fudgy brownie, and are dipped in a sweetened, milk chocolate hot cocoa coating (with the requisite sugar and cinnamon). Now, while what you’ll get at the parks is a fried churro, today we are going to ALSO make a baked version of it, and quite frankly, it tastes almost THE SAME.

Here in Southern California we are finally starting to get some heat, and with that, I suddenly lost all interest in cranking up my stove and standing over a boiling pot of hot oil for upwards of a half hour. Also, I had polled all of the Instagram followers a few week backs to see if there was any interest in a baked churro recipe, and everyone said YES. I was hesitant while making these, I wasn’t sure just how they would come out, but keeping my expectations low meant that once I got them out of the oven and covered with sugar, I was REAL PLEASED with the result.

Double Chocolate Churros // magicaltreatsathome.com

The taste and texture is pretty similar to the fried version. The only downside of the baked version is that the bottom tends to get flat unless you rotate them during cooking. But, they are quite fragile until fully cooked, so they could break apart.

Make up a batch and let the kids pipe their own (my kiddos love making little nuggets to fry off). I would have them steer clear of the kitchen if you choose to fry these, but regardless of which method you use to cook, they’ll also love tossing them around in the chocolate sugar mixture. Just try to keep them from eating it!

Double Chocolate Churros // magicaltreatsathome.com

We’ve got both the baked version and the fried version below, as well as lots of tips and tricks in the notes section, including options for which pastry tip to use! Enjoy!

Print
clock clock iconcutlery cutlery iconflag flag iconfolder folder iconinstagram instagram iconpinterest pinterest iconfacebook facebook iconprint print iconsquares squares iconheart heart iconheart solid heart solid icon
Double Chocolate Churros // magicaltreatsathome.com

Double Chocolate Churro

5 Stars 4 Stars 3 Stars 2 Stars 1 Star No reviews
  • Author: Elana Lepkowski
  • Yield: 10–15 Double Chocolate Churros 1x
Print Recipe
Pin Recipe

Description

Chocolate lovers, this churro is for you! Chocolate churros are baked (or deep fried) and get dipped in a sweet, milk chocolate cocoa mixture. A Disneyland-inspired treat!


Ingredients

Scale
  • 1/2 cup granulated sugar
  • 1/2 teaspoon cinnamon
  • 1 tablespoon sweetened hot cocoa mix
  • vegetable oil for frying
  • 1 cup water
  • 1/2 cup unsalted butter
  • 1 tablespoon granulated sugar
  • 1/4 teaspoon salt
  • 1 cup all purpose flour
  • 1/4 cup cocoa powder, unsweetened
  • 2 eggs

Tools:

  • spider for frying
  • Wilton 1 M piping tip
  • Ateco #847 piping tip
  • pastry bag
  • candy thermometer

Instructions

  1. Line two half sized sheet pans with parchment, set aside. Mix together the 1/2 cup of granulated sugar, cinnamon and hot cocoa mix in a long shallow bowl or loaf pan, set aside.
  2. If you are baking your churros, turn your oven on to 425°f.
  3. In a medium sized saucepan over medium-high heat, combine water, butter, sugar and salt. Bring to a boil, or until butter has melted.
  4. Turn burner to low and sift in all the flour and cocoa powder. Stir until there are no visible flour lumps and dough has begun to stick together in a ball and pulled away from the sides of the pan. Remove pan from heat and let sit 5 minutes. Then stir in each egg until incorporated. Dough will appear to break or become lumpy. Continue to stir until it forms a smooth, sticky dough.
  5. Fill a pastry bag fitted with a Wilton 1 M open star tip OR Ateco #847 (check out our Churro Tips post for more on what tip works best for you!) half full with batter (see notes below on filling pastry bags) and pipe 8″ long dough onto the sheet pan. You can use kitchen shears to trim the ends. I was able to almost fill two sheet pans with all the batter. **If you are piping dough directly into hot oil, omit this step.
    Double Chocolate Churros // magicaltreatsathome.com
  6. For baking churros:
    • Move the sheet pans into the preheated oven and bake for 27-30 minutes, rotating the pans halfway through baking. When done, remove from the oven and let sit until any foaming subsides, 2-3 minutes. Then toss the churros in the sugar/cocoa mixture.
  7. For frying churros:
    • Refrigerate dough at least 30 minutes and up to two days. Batter will stiffen the more it sits, so let the dough come to room temperature before frying.
    • Fill a dutch oven or deep frying pan with vegetable oil at least 2″ up the side of the pan (I found a 1/2 gallon of avocado oil worked for me in my large dutch oven. See note below about reusing oil.). Heat oil to 340-350°f, using a candy thermometer to keep the temperature constant. You may need to adjust heat up or down during cooking.
    • Place churros 2-3 at a time in the cooking oil for 6 minutes, turning after 3 minutes with a spatula. Wait until oil comes back to temperature before adding next batch.
    • Using a spider or large spatula, remove churros from oil and drain on a cooling rack over parchment or on a paper towel. Wait at least a minute and then toss the churro in the chocolate cinnamon-sugar, tapping off any excess.

Notes

  • Do not overfill your pastry bag! Fill in two to three batches. If there is too much dough, it will seep out the top and will be hard to pipe.
  • Slowly pipe out dough all of a consistent size, smaller spots on the churro can cause them to become more fragile while handling and can break in the oil or while coating in sugar.
  • Churro dough can be piped out onto parchment and covered in the fridge up to 48 hours.
  • If you want to make you churros immediately after making dough without the chilling time, once oil has reached temp, starting about one inch above the oil, pipe a small line of dough down into oil and either snip end with scissors, or break the dough off the pastry tip on the side of your pan. Follow directions above for frying.
  • Thicker churros will require a longer cooking time to fully cook through the center. Test one churro first to adjust your cooking time.
  • Sugar not sticking to your baked churros? Melt 2-3 tablespoons of butter in a small saucepan, and then brush on the churro. Immediately toss in the sugar mixture and set aside on a grate to cool.
  • Cooking oil can be fine strained and stored again for another use. I strain back into the bottle it came from. Well strained oil can be stored in a cool, dry place and used up to several times.
  • Churros curling? That could be one of a few reasons. One is that it will naturally shrink and change shape as the dough hits the oil and puffs up. I found that the stiffer dough from sitting in the fridge resulted in straighter churros while fresher dough tending to curl more. Also, if you’re using a circular pot like a dutch oven, churros may rest against the inside edge of the pan while cooking causing them to take on the curved shape of the pan. To prevent this, nudge your churro with the spider or spatula immediately after placing in oil when it pops back up to the surface. Continue to nudge gently back and forth for about 20-40 seconds or until the dough has gotten stiff in the oil.

Did you make this recipe?

Tag @magicaltreatsathome on Instagram and hashtag it #magicaltreatsathome

https://www.magicaltreatsathome.com/2019/12/11/pastry-tips-for-churros/

Share this:

  • Click to share on Facebook (Opens in new window) Facebook
  • Click to share on X (Opens in new window) X

Like this:

Like Loading...

Filed Under: Recipes, Treats Tagged With: chocolate, churro, cinnamon, Critter Country, disneyland, milk chocolate

Mickey Shaped Caramel-Peanut-Milk Chocolate Macarons

April 26, 2020 by Elana Lepkowski 3 Comments

Mickey Caramel-Peanut-Milk Chocolate Macaron // magicaltreatsathome.com

Where can I find the original treat?

  • This specialty treat was found at the Off the Cob Booth as part of the Food and Wine Festival at Disney’s California Adventure Park.

Woo! Try saying this name five times fast! Well, you might have had to, as this specialty Mickey Shaped Caramel-Peanut-Milk Chocolate Macaron was a fan fav at the Food and Wine Festival this year and many guests found they had to ask for it multiple times because the booth was constantly sold out. So, if you missed it during the festival, you’re in luck today, as we’ve got a recipe that is as delicious as the real thing!

Mickey Caramel-Peanut-Milk Chocolate Macaron // magicaltreatsathome.com

Clearly we’re fans of macarons on here, and today we’ll be using our standard Mickey Mouse template to make these yummy macarons. Intimated by these french cookies? Don’t be! We’ve got lots of tips and tricks in the notes section below to help you make your best macaron yet!

These oversized macarons were milk chocolate at the parks, but right now, as we’re going through this crazy time, certain pantry items might not be available. When I made these at home I had to substitute semisweet chocolate instead of milk chocolate (I just couldn’t get my hands on any!), and that resulted in a darker exterior coating for the macarons. But you know what? It was still delicious! And a tad less sweeter than the original so that was OK by me. I’ll list both ingredients below and you can use what you have on hand. Also, I did not confirm, but those peanut caramel pieces studded throughout the macaron, once I removed them from the macaron to get a better look, sure seemed pretty similar to pieces of a Snickers bar, so…. that’s what we’ve got inside. If you just happen to have some caramel covered peanuts in your house, use those!

Mickey Caramel-Peanut-Milk Chocolate Macaron // magicaltreatsathome.com

Assembling the macarons from piping to putting the candy pieces in is kid friendly, as well as dipping and decorating the outside of these. Making the actual macarons might be a better task for older kids, or the adults.

If you’re looking for the link to the Mickey macaron templates, you can download that below. And check out the notes section for lots of tips and tricks. Now lets grab whatever chocolate we can get our hands on and BAKE!

Icon

3 inch mickey macaron template

1 file(s) 86.41 KB
Download
Print
clock clock iconcutlery cutlery iconflag flag iconfolder folder iconinstagram instagram iconpinterest pinterest iconfacebook facebook iconprint print iconsquares squares iconheart heart iconheart solid heart solid icon
Mickey Caramel-Peanut-Milk Chocolate Macaron // magicaltreatsathome.com

Mickey Shaped Caramel-Peanut-Milk Chocolate Macaron

5 Stars 4 Stars 3 Stars 2 Stars 1 Star No reviews
  • Author: Elana Lepkowski
  • Yield: 3 Caramel-Peanut-Milk Chocolate Macarons 1x
Print Recipe
Pin Recipe

Description

These Mickey Mouse shaped macarons are filled with sweet, milk chocolate buttercream, chunks of caramel-peanut candy, and topped with a coating of more chocolate and chopped peanuts. A Disneyland-inspired treat.


Ingredients

Scale

For the macarons:

  • 85g (1 cup minus one tablespoon) almond flour
  • 120g (1 cup) powdered sugar
  • 1 tablespoon (8g) unsweetened cocoa powder
  • pinch of salt
  • 70g egg whites, from about 2 large eggs
  • 1/4 teaspoon cream of tartar
  • 40g (3 tablespoons) granulated sugar

For the milk chocolate buttercream (adapted from Epicurious):

  • 1/3 cup whole milk, or milk substitute (this worked with almond milk)
  • 2 whole egg yolks
  • 2 teaspoons all purpose flour
  • 3/4 cup powdered sugar, divided
  • 1/2 teaspoon vanilla extract
  • 1–1/2 sticks (3/4 cup) unsalted butter
  • 4 ounces milk chocolate, melted and cooled
  • 1 ounce unsweetened baking chocolate, melted and cooled

For the filling and decoration:

  • 2 Snickers bars cut into 1/4” slices
  • 1 ounce milk chocolate (or semisweet chocolate), chopped finely
  • 1/4 cup roasted peanuts, chopped

Specialty Tools:

  • Mickey Mouse cutter

Instructions

For the macarons:

  1. First sift the almond flour, powdered sugar, cocoa powder, and salt back and forth four times between two bowls using a mesh strainer. Alternatively you can also pulse in a food processor 7-8 times. Set aside.
  2. Line a baking sheet with parchment. Either print and place the Mickey Mouse template (download link above!) under the parchment OR using the Mickey Mouse cookie cutter, trace six outlines using the cutter as a guide leaving at least an 1″ between shapes. Flip parchment over so that you can still see outlines, but the graphite will not transfer to macarons. Set aside.
  3. In the bowl of a stand mixer fitted with the whisk attachment, add in the egg white and whisk on medium-low until slightly foamy, about 30 seconds. Add in the cream of tartar and whisk on medium until soft peaks appear. Then slowly pour in the sugar. Whisk on high until stiff peaks form, about 2-3 minutes.
  4. Remove the bowl from the mixer. Sift the entire dry mixture into the egg whites. Fold them until all the dry ingredients are incorporated and no egg whites remain. Egg whites will deflate and mixture should be the consistency of cake batter when they are ready. See notes below.
  5. Add batter into a piping bag. Cut the tip off about 1/2″, and pipe shapes onto the parchment lined baking sheet keeping the tip in the center and squeezing out until about 1/4″ before the outside of the template. Then, pick up trays about 2″ from counter and let them fall down. Repeat. This helps to remove air bubbles from the batter. Let the batter sit about 45 minutes until a surface is no longer tacky when your finger touches it.
  6. Preheat your oven to 350°f about 15 minutes before the rest time is finished. Place cookies in oven to bake, and then lower the temperature to 300°f. Cook for 18-20 minutes.
  7. Let the macarons cool at least 20-30 minutes before decorating.

For the milk chocolate buttercream:

  1. Heat milk in a small saucepan over moderate heat until hot. Whisk together yolks, flour, 1/4 cup confectioners sugar, and a pinch of salt in a bowl, then add hot milk in a stream, whisking. Transfer custard to saucepan and bring to a boil over moderate heat while continually whisking (about 30 seconds to one minute). Reduce heat and simmer, whisking, until mixture becomes very thick, about 30 seconds more, then transfer to a medium sized bowl. Cover surface of custard with plastic wrap and cool completely, about 45 minutes.
    Hot Cocoa Macaron // magicaltreatsathome.com
  2. Add vanilla and remaining confectioners sugar to custard and beat at medium speed until combined well, then increase speed to medium-high and beat in butter, 2 tablespoons at a time, until smooth. Buttercream will look broken when mixing in butter but keep mixing and it will come together eventually!
  3. Scrape down bowl. Add chocolates and beat until combined well.

For the assembly:

  1. First, melt the 1/4 cup milk chocolate (or semisweet chocolate) in the microwave inside a microwave safe bowl, like glass, for 30 seconds. Stir and microwave again for an additional 30 seconds. Keep stirring and microwaving in short bursts of 15-20 seconds until melted and smooth.
  2. Set aside 3 macaron halves for the bottoms. With the remaining three, dip the tops in the bowl of melted chocolate, letting any excess drip away, or edges smooth with a scribe or toothpick. Place dipped side up on parchment, and then sprinkle with chopped peanuts. Repeat with the remaining macarons. Use the remaining chocolate in the bowl to drizzle over the decorated tops.
    Mickey Caramel-Peanut-Milk Chocolate Macaron // magicaltreatsathome.com
  3. Next, fill a piping bag with the buttercream. Cut the tip off about 1/4″ up from the tip and pipe the insides for the macarons.
    Mickey Caramel-Peanut-Milk Chocolate Macaron // magicaltreatsathome.com
  4. Then, place the Snickers slices inside the ears, and in the center of the macaron. Pipe more buttercream if so desired. Place tops on and enjoy!

Notes

  • Sifting the almond flour and powdered sugar together is necessary for the absorption of oils and to prevent clumping of batter.
  • When mixing the macaron batter, you want to push the batter against the side of the bowl to help mix and deflate the egg whites. The cocoa powder will dry out the mixture and you will want to keep mixing more than a normal batch of macarons.
  • Do not pipe all the way to the edge of the circle as the batter will spread a bit while resting.
  • If you want a smooth top to the macaron, besides dropping the sheet pan to get out air bubbles, how you pipe is also important. Position your piping bag over the center of the circle and continually squeeze out batter until you fill 3/4 of the circle. If you pipe in a spiral, you will have noticeable lines on the top. You can use a damp, not wet, finger to push down any batter that sticks up.
  • Any additional air bubbles that are not removed from the drop onto the counter can be poked with a scribe or toothpick before resting.
  • Any left over macaron batter can be piped into smaller cookies and baked off for 15 minutes.
  • If you are having any technical issues still with your macarons, I highly suggest looking up some tutorial videos on YouTube (that is until we have some of our own up!).
  • If your macaron cracks, or an ear comes off during dipping, just stick it all back together and let the chocolate set on the sheet pan. It will stay in one piece once everything hardens.
  • Leftover buttercream can be stored in the fridge up to one week, brought to room temperature, and whipped before using. It can also be stored in the freezer up to 3 months.
  • Macarons can be stored in the refrigerator up to one week. Let them sit 10-15 minutes to come to room temp before enjoying.

Did you make this recipe?

Tag @magicaltreatsathome on Instagram and hashtag it #magicaltreatsathome

Mickey Caramel-Peanut-Milk Chocolate Macaron // magicaltreatsathome.com

Share this:

  • Click to share on Facebook (Opens in new window) Facebook
  • Click to share on X (Opens in new window) X

Like this:

Like Loading...

Filed Under: Recipes, Treats Tagged With: caramel, character treat, chocolate, cookies, DCA, disneyland, Food and Wine Festival, macarons, Mickey Mouse, milk chocolate, peanuts, treat

5 Minute Treats: Cinnamon-Brown Sugar Affogato (Churro Affogato)

April 21, 2020 by Elana Lepkowski Leave a Comment

Churro Cinnamon-Brown Sugar Affogato // magicaltreatsathome.com

Where can I find the original treat?

  • This holiday time treat was available at Schmoozies! inside California Adventure.

We’re back again today with another quick treat in our 5 Minute Treats series! This holiday time Cinnamon-Brown Sugar Affogato was nicknamed the Churro Affogato because of its delicious ice cream base. And today you can either make, or buy, the ice cream depending on how quickly you’d like the treat!

Churro Cinnamon-Brown Sugar Affogato // magicaltreatsathome.com

While we’ve been stuck inside, the kids and I have been doing some fun kitchen experiments. Making ice cream has definitely been a favorite! If you can score some cinnamon ice cream at the store, then this recipe really is a super quick treat. However, if you’ve got the time, and an ice cream maker, then I’ve also included a recipe for a super creamy, custard based cinnamon-brown sugar ice cream. I don’t want to make the store bought people jealous, but this stuff is SO GOOD and SO CREAMY. I also love that you can adjust the amount of cinnamon and/or sugar to suite your tastes as well.

Churro Cinnamon-Brown Sugar Affogato // magicaltreatsathome.com

Affogatos are usually espresso based, but if all you’ve got is coffee right now, try brewing a stronger batch for this. The combination of the bittersweet coffee and the spicy cinnamon make for an extraordinary pairing. It’s reminiscent of the Mexican coffee, or cafe de olla that we get at a local restaurant here in Los Angeles. It’s also, quite tasty with a hunk of Churro Toffee dipped in as well.

Churro Cinnamon-Brown Sugar Affogato // magicaltreatsathome.com

I hope you enjoy this super simple, and yet very elegant, treat today! (Or tomorrow if you make the ice cream!) It’s about to get REAL HOT here in LA, so I’m thinking about making a few batches of ice cream this week. Have a magical week everyone!

Print
clock clock iconcutlery cutlery iconflag flag iconfolder folder iconinstagram instagram iconpinterest pinterest iconfacebook facebook iconprint print iconsquares squares iconheart heart iconheart solid heart solid icon
Churro Cinnamon-Brown Sugar Affogato // magicaltreatsathome.com

5 Minute Treats: Cinnamon-Brown Sugar Affogato (Churro Affogato)

5 Stars 4 Stars 3 Stars 2 Stars 1 Star No reviews
  • Author: Elana Lepkowski
  • Yield: 1 Cinnamon-Brown Sugar Churro Affogato + 1 quart ice cream 1x
Print Recipe
Pin Recipe

Description

Creamy, spicy cinnamon and brown sugar ice cream is topped with a healthy pour of bittersweet espresso in this 5 Minute Treat. A Disneyland-inspired recipe.


Ingredients

Scale

For the ice cream:
adapted from David Lebovitz

  • 1 cup (250ml) whole milk
  • 3/4 cup (150g) brown sugar
  • pinch of salt
  • 8 cinnamon sticks broken up (see notes below)
  • 2 cups (500ml) heavy cream
  • 5 large egg yolks
  • 1/4 teaspoon ground cinnamon

For the affogato

  • 1 shot of freshly brewed espresso
  • churro toffee chunks, optional (find the recipe here on our site!)

Instructions

For the ice cream:

  1. Heat the milk, brown sugar, salt, cinnamon sticks, and 1 cup of the heavy cream together in a medium saucepan. Cover, remove from heat, and let steep 1 hour.
  2. Place the pan back on the stove and rewarm the mixture, removing the cinnamon sticks with a slotted spoon. Be careful not to let the mixture start to boil or get too hot, you are just warming the milk up to barely simmering at this point.
  3. Nest a medium-sized bowl in a larger bowl that’s partially filled with ice water, to create an ice bath. Set a mesh strainer over the medium bowl and pour the remaining cream into the medium bowl.
  4. Whisk together the egg yolks in a small bowl and gradually add some of the warm cinnamon-infused milk to the yolks, whisking constantly. Scrape the warmed yolks back into the saucepan and cook over medium heat, stirring constantly and scraping the bottom with a heatproof spatula, until the custard thickens and coats the spatula.
  5. Remove from heat and immediately pour the custard through the strainer into the cream. Remove the strainer and stir the custard until cool, then chill thoroughly in the refrigerator at least 8 hours or overnight.
  6. Before churning, add the ground cinnamon. Gently stir to combine.
  7. Then, freeze the custard in your ice cream maker according to the manufacturer’s instructions. Store in an airtight container in the freezer until ready to use.

For the affogato:

  1. Place the desired amount of ice cream in a small bowl or heat proof cup (I like two small scoops for this dessert).
    Churro Cinnamon-Brown Sugar Affogato // magicaltreatsathome.com
  2. Pour the espresso over the ice cream.
  3. Optionally top with crumbled churro toffee pieces. Enjoy!

Notes

  • To break up cinnamon sticks, you can either grind them in a mortar and pestle (which is what I did, and really, you’re just breaking them up, not grinding into a powder), or wrap them in a kitchen towel and break them up with a hammer or meat tenderizer. I would not suggest a ziplock as is said in the original recipe, as they tend to poke through and tear the bag, getting pieces everywhere.
  • We are Nespresso users at home, so I found that a regular shot was plenty. The lungo shot was a bit too much and melted the ice cream more than I desired creating a warm soup.
  • If you want to make a batch for a party, portion out ice cream into small cups and freeze ahead of time. When ready to serve, brew lungo shots in a large measuring glass with a spout. Then you can pour small amounts of espresso all at once into each cup.

Did you make this recipe?

Tag @magicaltreatsathome on Instagram and hashtag it #magicaltreatsathome

Churro Cinnamon-Brown Sugar Affogato // magicaltreatsathome.com

Share this:

  • Click to share on Facebook (Opens in new window) Facebook
  • Click to share on X (Opens in new window) X

Like this:

Like Loading...

Filed Under: 5 Minute Treats, Recipes, Treats Tagged With: 5 Minute Treat, brown sugar, churro toffee, cinnamon, DCA, disneyland, holiday, ice cream, Schmoozies, treat

  • « Go to Previous Page
  • Go to page 1
  • Go to page 2
  • Go to page 3
  • Go to page 4
  • Go to page 5
  • Go to Next Page »

Primary Sidebar

Follow Us

  • Instagram
  • Facebook
  • X
  • Pinterest
  • Email
  • YouTube

Hi! My name is Elana, and that’s me shoving a Mickey Mouse shaped treat in my face. I love the treats at Disneyland. A lot. So much so I’ve dedicated an entire website to making all my favorites, and hopefully yours too, out of my home kitchen. My aim is to create Disneyland-inspired treats, with easy to follow directions, and many recipes geared towards getting the kids in the kitchen to help too! Because putting sprinkles on things is F-U-N.

Top With Sprinkles

Get Recipes in Your Inbox!

* indicates required

Look for this icon in posts to find Kid Friendly recipes!

Recent Posts

  • Matterhorn Macaroon
  • Caramel Gingerbread Cookie Sandwiches
  • Colorful Fruit Hand Pies
  • Classic Mickey Shaped Beignets
  • Carrot Cake Cookies

Archives

  • February 2023
  • December 2022
  • August 2022
  • January 2022
  • December 2021
  • November 2021
  • December 2020
  • November 2020
  • October 2020
  • September 2020
  • August 2020
  • July 2020
  • June 2020
  • May 2020
  • April 2020
  • March 2020
  • February 2020
  • January 2020
  • December 2019
  • November 2019
  • October 2019
  • September 2019
  • August 2019
  • July 2019
  • June 2019
  • May 2019

Copyright © 2025 Magical Treats at Home on the Foodie Pro Theme

%d