• Skip to primary navigation
  • Skip to main content
  • Skip to primary sidebar

Magical Treats at Home

  • About
  • Treats
  • Drinks
  • Savory
  • Favorite Tools
  • Etsy Shop

sprinkles

Twice Upon a Cupcake

December 23, 2020 by Elana Lepkowski Leave a Comment

Christmas Tree Cupcakes // magicaltreatsathome.com

Where can I find the original treat?

  • This holiday treat was found at the Main Street Bakery inside the Magic Kingdom in Walt Disney World.

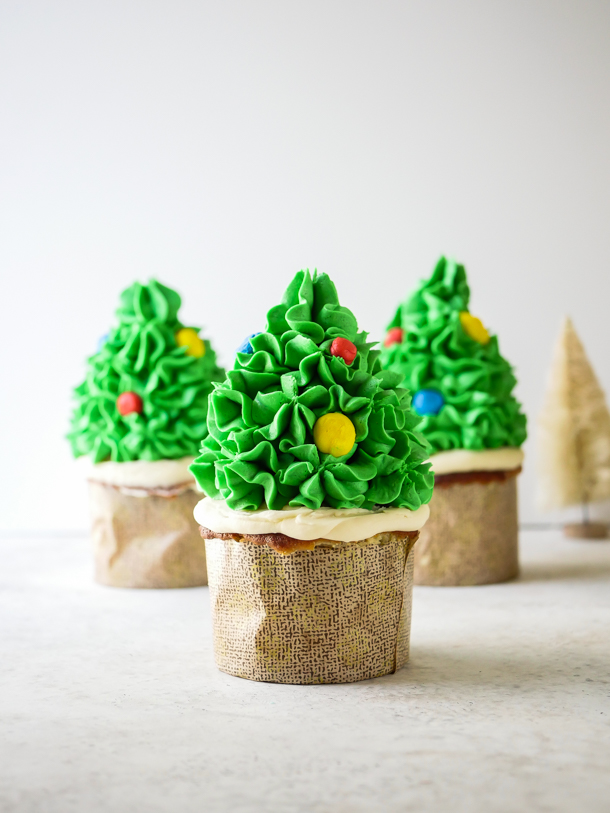
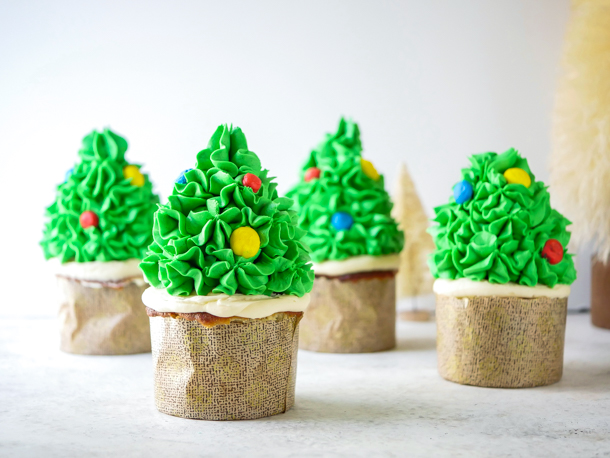
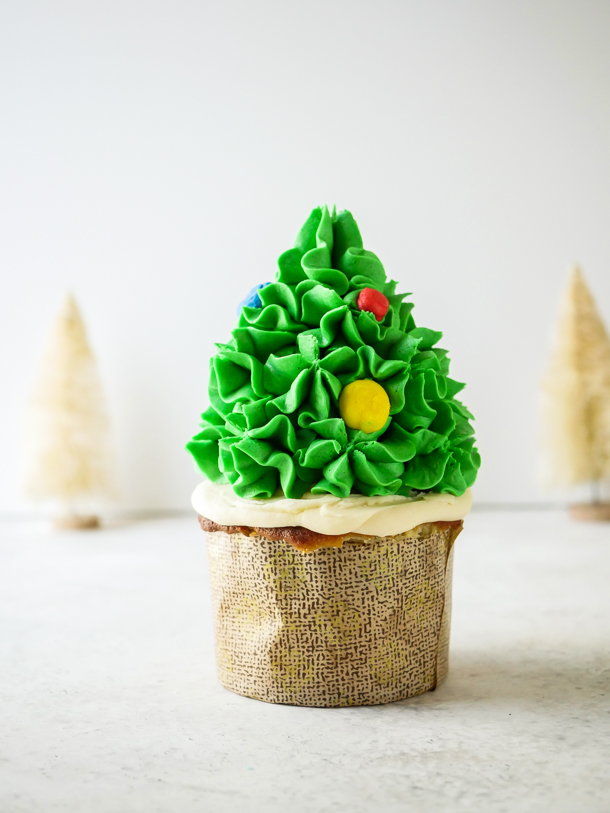
During the holidays your baking is allowed to be… extra. And today we’ve got an “extra” cupcake. As in, there is a cupcake sitting on top of another cupcake. See? Extra.
Christmas Tree Cupcakes // magicaltreatsathome.com

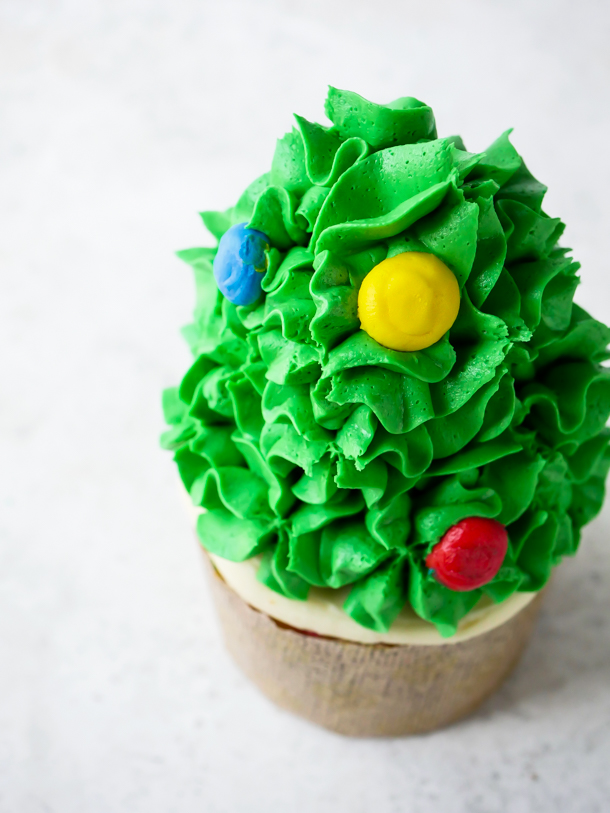
Actually, there is a cupcake sitting on top of a cupcake with a hidden Mickey cake ball inside. Sooooo extra. And let’s be real. This is fun to make, but there’s a lot of components. You can definitely make just some of these parts, but if you’re missing Disney treats on Main Street this holiday season, then this is a fun project.
Christmas Tree Cupcakes // magicaltreatsathome.com

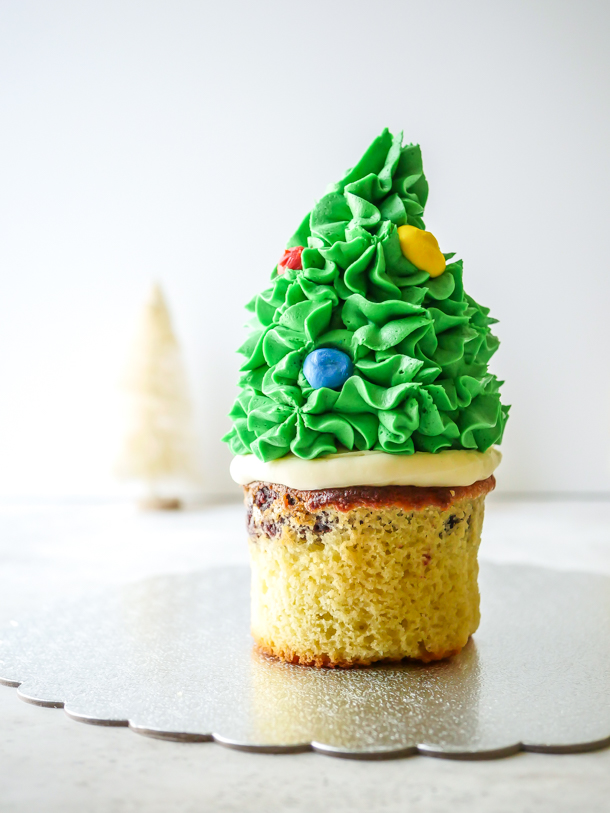
The recipe below is broken down into three components: cake balls, confetti tree cupcakes, and the surrounding base for the cupcake. These can be done simultaneously, or broken up into steps over days depending on how much time you have. I’m also noting that usually, I make the red velvet cake balls with cream cheese icing, but I found that regular American buttercream works better here (it doesn’t “weep” like the cream cheese does when molding and freezing).
Christmas Tree Cupcakes // magicaltreatsathome.com

The only thing I deviated from in the original treat was the sugar light bulbs. For a home baker, I thought going through this step would feel like overkill. Instead I piped out buttercream lights, refrigerated them, and used for the lights. Then, my 6 year old looked at the trees and asked “why didn’t I just use M&Ms?”, and honestly, I would have just done that had I thought of it. So, I’m recommending that for convenience here as well.

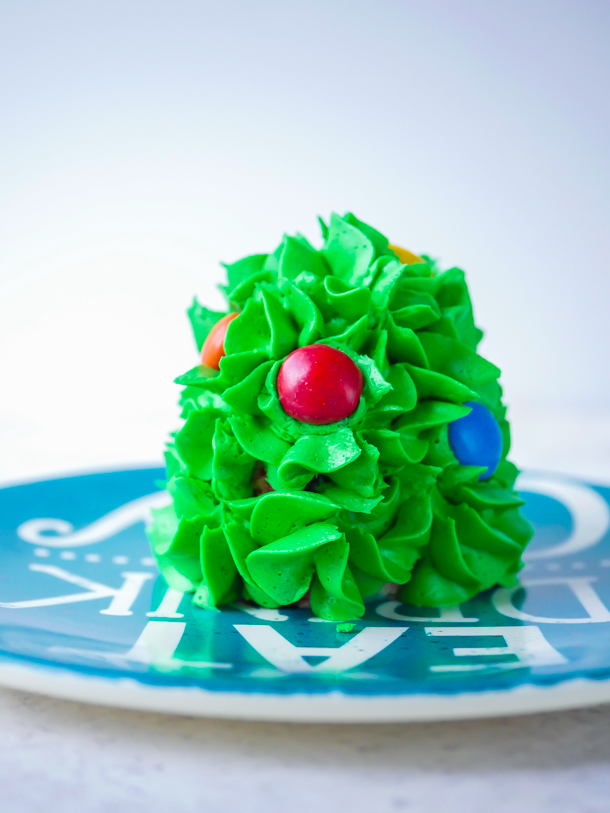
Kids can help in all parts of the baking and decorating stages here. My kids mostly liked adding the M&Ms to their half trees (in the picture below I piped some frosting onto an extra confetti “tree” cupcake and let them decorate and eat that part).
Christmas Tree Cupcakes // magicaltreatsathome.com
You can also make a single tree cupcake too!

Now, the hidden Mickey part of these is probably the hardest of these cupcakes. And what is the secret to getting a hidden Mickey every time you make a cut? Simple! You actually create a ring, or halo, over the ball in the center. Then no matter where you make the cut to reveal the hidden Mickey, you’ll get one! They are tricky though, and as you can see, mine were prone to separate when baking. My suggestion is that you really seal the ball and the ring together. I had placed mine just on top, and the cake batter pushed the ring up a bit. You could also pin them together with toothpicks and take the toothpicks out when done baking (and PLEASE remember to do that as I do not want you to harm your mouth eating treats!).
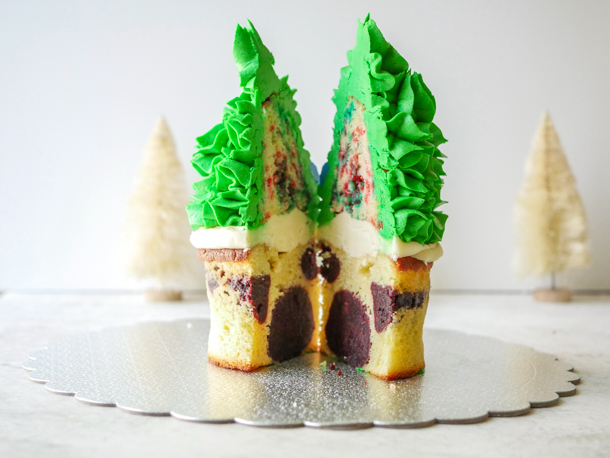
Christmas Tree Cupcakes // magicaltreatsathome.com

Anyway you decided to make these, whether the full cupcakes, just the trees, or without the hidden Mickey centers, these are a delightful treat to have this holiday week.

Happy baking, happy holidays, and I’ll see you all in the New Year!

Print
clock clock iconcutlery cutlery iconflag flag iconfolder folder iconinstagram instagram iconpinterest pinterest iconfacebook facebook iconprint print iconsquares squares iconheart heart iconheart solid heart solid icon
Christmas Tree Cupcakes // magicaltreatsathome.com

Twice Upon a Cupcake

5 Stars 4 Stars 3 Stars 2 Stars 1 Star No reviews
  • Author: Elana Lepkowski
  • Yield: 4–6 Twice Upon a Cupcake cupcakes 1x
Print Recipe
Pin Recipe

Description

A decadent holiday cupcake has TWO hidden treats inside that are revealed when you cut through the cupcake. Did you find the hidden Mickey? A Walt Disney World inspired treat.


Ingredients

Scale

For the Buttercream and decorations:

  • 1 pound powdered sugar, sifted
  • 1 cup butter, room temperature
  • pinch of salt
  • 1 tablespoon vanilla
  • 1 tablespoon cream
  • green food coloring (I used Americolor Leaf green)
  • Optional food coloring if making buttercream light decorations: red, yellow, blue
  • Red, yellow, and blue M&Ms for lights

For the red velvet hidden Mickey center:

Adapted from Dessert for Two

  • 95 g (3/4 cup) flour
  • 4 teaspoons cocoa powder, unsweetened
  • 1/2 tsp baking soda
  • 1/4 teaspoon salt
  • 1/2 cup coconut oil or neutral oil
  • 2 tablespoons warm water
  • 1/2 cup (99 g) granulated sugar
  • scant 1/4 cup (57 g) Greek yogurt
  • 1 egg
  • Red food coloring (see notes below for type and amounts)
  • 1/4 tsp vanilla

For the Cupcakes (and Sprinkle Funfetti Tree Cupcakes):

  • 1/2 cup (1 stick) unsalted butter
  • 3/4 cup (150 g) granulated sugar
  • 2 large eggs
  • 1/2 cup milk
  • 2 teaspoons vanilla
  • 1–1/2 cups (180 g) all purpose flour
  • 1–1/2 teaspoons baking powder
  • 1/2 teaspoon salt
  • 1/2 cup green and red sprinkles

Specialty Tools:

  • Tall baking cups
  • popover pan
  • piping bags
  • closed star tip (Ateco #847 used here)

Instructions

For the buttercream:

  1. First, make sure your powdered sugar is lump free. Sift if needed.
  2. Then, beat the butter and salt together for a minute until light and fluffy.
  3. Pour in the powdered sugar and slowly mix until they start to combine about 30 seconds. Then turn up the speed to high and beat together until mixture starts to become fluffy in texture.
  4. Add in the vanilla and cream, and beat on high an additional minute or two until desired texture is reached. If dry, add in an additional teaspoon of cream. Set aside covered with a damp, not wet, towel.

For the red velvet hidden Mickey center:

  1. Preheat oven to 350°f and grease and flour a 6″ round cake pan.
  2. In a small bowl, whisk together the flour, cocoa powder, baking soda, and salt. Set aside.
  3. In the bowl of a stand mixer, combine the oil, warm water, granulated sugar, Greek yogurt, egg, red food coloring, and vanilla.
  4. Add in the dry ingredients and mix until combined.
  5. Pour into prepared baking pan and bake 20-25 minutes, or until a cake tester comes out clean.
  6. Let cool in the pan 5 minutes, turn out the cake onto a cooling rack, and let completely cool at least one hour.
  7. Then crumble the cake into pea sized crumbs and place in a mixing bowl.
  8. Add to the crumbs about 1/4 cup of the buttercream frosting. Mix well until combined.
  9. Next, roll out 4-6 small round balls, these will be the heads. Set aside on a parchment lined baking sheet.
  10. With the remaining cake pop dough, roll out thin snakes (you can use plastic wrap to help roll out the snakes). Form the snakes into rings and place on the balls. You can use toothpicks to hold in place. Press firmly to help seal the two together. Place in freezer until ready to use.

For the cupcakes:

  1. Set the oven to 350°f. Set out tall cupcake holders (you will not need a cupcake tray for the freestanding molds). Then, using tin foil, shape out a conical mold for the tree tops. (You can use a popover pan to hold the molds in place, or place the tin foil mold in a tall baking cup). Make sure there are no gaps or holes or your batter will leak. Optionally, you can also cook off some funfetti cupcakes in regular molds, freeze, and then cut to shape.
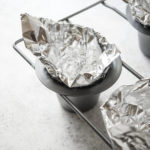
    Christmas Tree Cupcakes // magicaltreatsathome.com
  2. In a mixing bowl, beat butter and sugar together until light and fluffy.
  3. Next, beat in eggs one at a time until incorporated. Then add in vanilla and 1/4 cup of the milk.
  4. Mix in flour, baking powder, and salt, and then the rest of the milk. Set aside.
  5. Remove red velvet cake pops from freezer and place into freestanding baking molds. Spoon batter over cake pops until about 2/3 of mold is filled. Place in oven for 25-28 minutes.
  6. Next, add sprinkles to remaining batter and mix to combine. Do not over mix.
  7. Pour sprinkle batter into conical molds, and place in oven for 22-26 minutes. Both cupcakes can bake in the oven at the same time, but keep separate timers.
  8. When finished baking, let cool to room temperature. Funfetti cupcakes can be kept in the freezer for 30 minutes to firm up if they need to be cut to shape.

Decorating:

  1. If piping lights, remove about a half cup of frosting. Divide into three bowls and color one bowl red, another yellow, and lastly blue. Then transfer to small piping bags with a round tip. Pipe out circles onto a parchment lined baking sheet and refrigerate at least an hour to firm up.

    Christmas Tree Cupcakes // magicaltreatsathome.com
  2. If not piping lights and using M&Ms instead, remove about 1/2 cup of frosting into a plain tipped piping bag and pipe a circle on top of the base cupcakes. Place the funfetti trees on top of that. Then proceed to coloring all the remaining frosting green by adding 2-3 drops of gel food coloring into the frosting bowl. Mix well to fully incorporate the color and then transfer all of the frosting to a piping bag fitted with an closed star tip (I used Ateco #847).
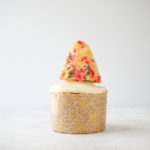
    Christmas Tree Cupcakes // magicaltreatsathome.com
  3. Pipe out closed stars for the trees all over the funfetti cakes.
    Christmas Tree Cupcakes // magicaltreatsathome.com
  4. Next, if using buttercream lights, remove those from the fridge and place immediately onto the green frosting. If you using M&Ms, place those on the frosting. Repeat until all cupcakes are decorated.
  5. Enjoy!

Notes

  • If cocoa powder is lumpy, sift before using.
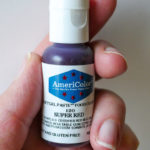
  • If you are using grocery store food coloring, you will need about 1-1/2 teaspoons of red food coloring to get the cake a nice bright red. If you were using a gel paste from like Americolor, you will need about a quarter teaspoon or two big squirts from the bottle.
    Mickey Mouse Red Velvet Cake Pop // magicaltreatsathome.com
  • Cake crumbs should be small and no larger than a pea.
  • Cake balls should not be too wet or too dry to hold their shape properly. If too wet, add more cake crumbles. If too dry, add more frosting a small bit at a time.
  • M&Ms candies can be used instead of piping buttercream lights.
  • To prevent cake pop from moving inside the cupcake when baking, use toothpicks to hold together in place. REMEMBER TO REMOVE THE TOOTHPICKS BEFORE DECORATING.
  • Cupcakes will keep up to 4 days refrigerated in an airtight container. Let come to room temperature before eating.
  • Extra buttercream can be kept in an airtight container up to a week, or frozen up to 3 months.
  • Extra cake batter can be baked off for regular cupcakes. Reduce bake time by 2-3 minutes.
Did you make this recipe?

Tag @magicaltreatsathome on Instagram and hashtag it #magicaltreatsathome

Christmas Tree Cupcakes // magicaltreatsathome.com

Share this:

  • Click to share on Facebook (Opens in new window) Facebook
  • Click to share on X (Opens in new window) X

Like this:

Like Loading...

Filed Under: Recipes, Treats Tagged With: buttercream frosting, cake ball, cake pop, Christmas, christmastimetreats, cupcakes, hidden Mickey, holiday, Magic Kingdom, Main Street Bakery, red velvet, sprinkles, treat, vanilla, WDW

Mickey Waffles Three Ways

June 17, 2020 by Elana Lepkowski Leave a Comment

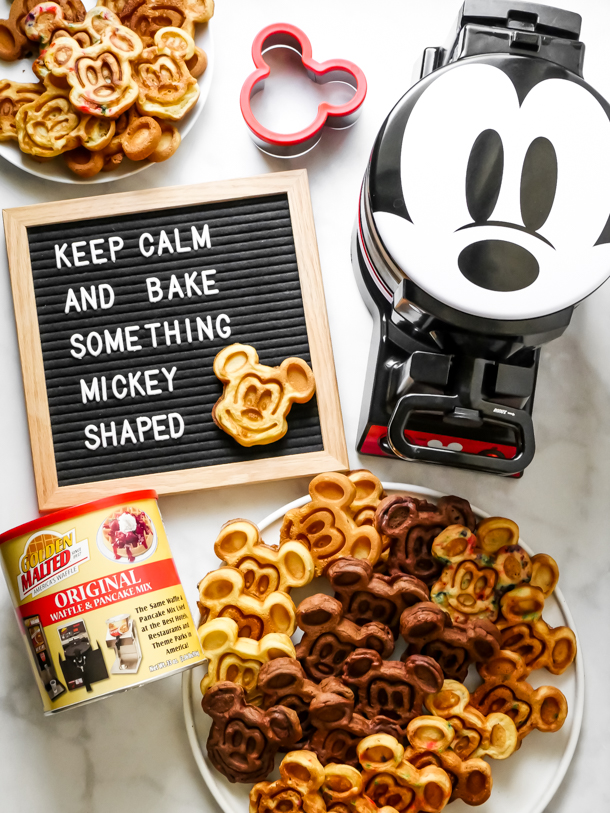
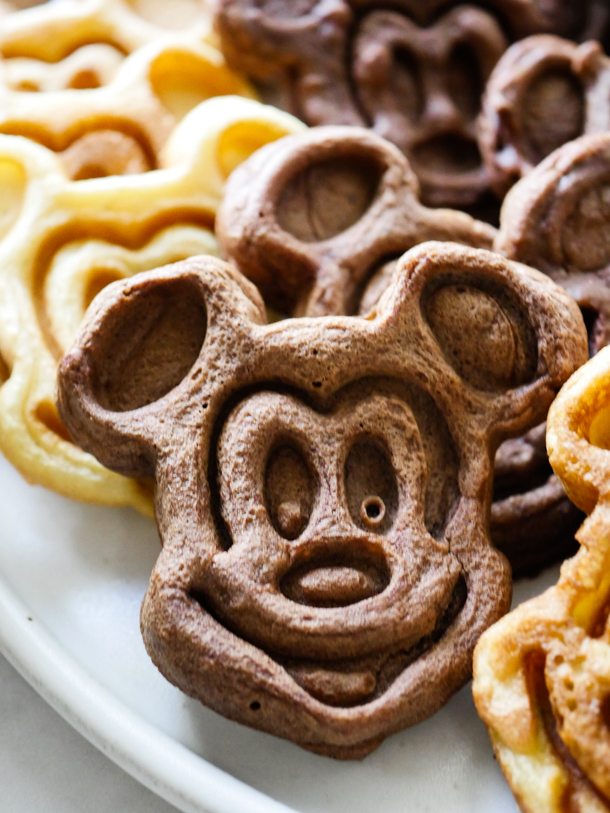
Mickey Mouse Waffles Three Ways // magicaltreatsathome.com
  • These were inspired by the Disney Parks classic Mickey Mouse waffles.

Since Disneyland’s closure this past March, I’ve definitely been trying to keep the magic up here at home, especially when my three year old asks on the daily when they will open again. We’ve done a Mary Poppins themed tea party, and ate egg bites while watching a POV ride through of It’s a Small World (and my IG followers know what that’s referencing at this point), and I’ve made a few recipes that I’ve posted on here too. It’s been a real… treat to hear from readers and followers that they’ve tried out a recipe they saw here because they, too, were missing the parks something fierce.

Mickey Mouse Waffles Three Ways // magicaltreatsathome.com

So today over on IG I launched a giveaway to say THANK YOU to all those followers and I thought they best way to do that… was with food! The contest only runs until Friday afternoon so I apologize in advance for talking about a contest that will most likely be over with by the time you are reading this, but I hope the sentiment remains, and that just by you, reader, showing up and considering making a recipe, I want you to know that means a lot to me to take me into your kitchen with you. So, thank you.

Mickey Mouse Waffles Three Ways // magicaltreatsathome.com

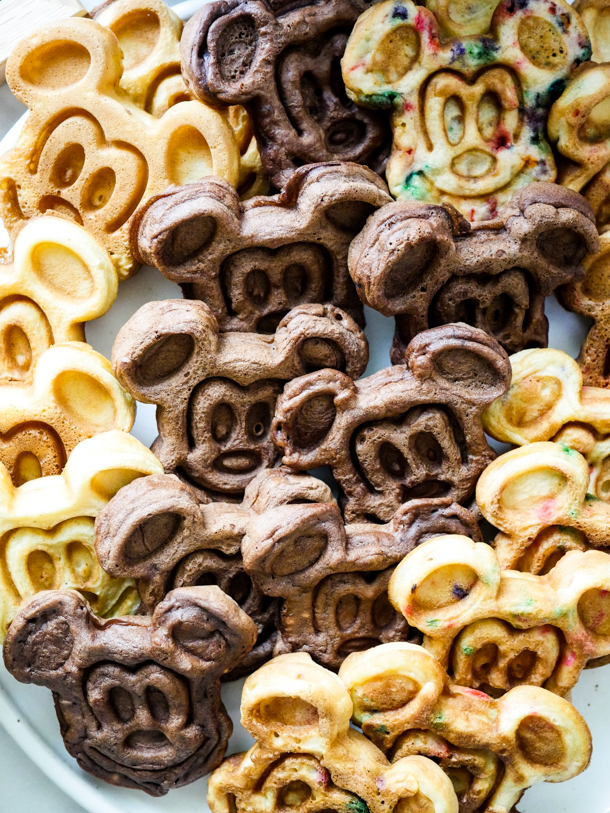
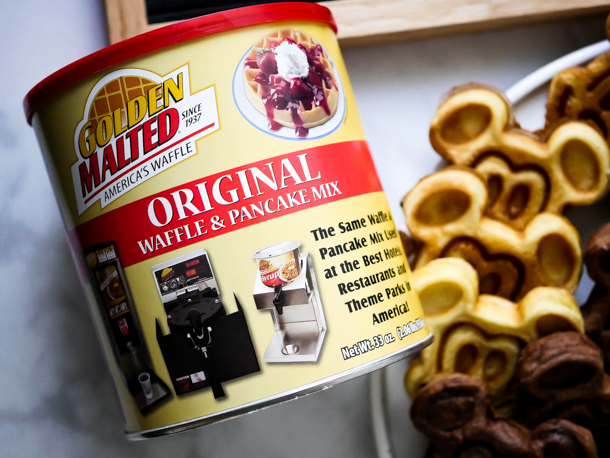
The contest is giving away the waffle maker pictured above, and also a canister of Golden Malted waffle mix, which happens to be THE brand used by Disneyland Parks. The original flavor is iconic, BUT, I thought I’d change it up a little and give you some options for when you don’t want plain waffles. So check out the recipes below for: Vanilla Bean Mickey Waffles, Chocolate Mickey Waffles, and Citrus Sprinkles Mickey Waffles.

If you make a batch and close your eyes, you’d swear you were walking down Main Street…

Print
clock clock iconcutlery cutlery iconflag flag iconfolder folder iconinstagram instagram iconpinterest pinterest iconfacebook facebook iconprint print iconsquares squares iconheart heart iconheart solid heart solid icon
Mickey Mouse Waffles Three Ways // magicaltreatsathome.com

Mickey Waffles Three Ways

5 Stars 4 Stars 3 Stars 2 Stars 1 Star No reviews
  • Author: Elana Lepkowski
  • Yield: Each recipe yields about 15 Mickey Mouse Waffles
Print Recipe
Pin Recipe

Description

Nothing beats the iconic Mickey Waffle, but these Vanilla Bean Mickey Waffles, Chocolate Mickey Waffles, and Citrus Sprinkles Mickey Waffles sure are tasty too! A Disneyland inspired recipe.


Ingredients

Scale

For the Vanilla Bean Mickey Waffles:

  • 1 egg
  • 5 ounces water
  • 1 cup Golden Malted waffle mix
  • 1 teaspoon vanilla bean paste OR vanilla extract with seeds scraped from half a vanilla bean
  • 1 teaspoon sugar
  • 2 tablespoons butter, melted
  • cooking spray

Chocolate Mickey Waffles:

  • 1 egg
  • 5 ounces water
  • 1 cup Golden Malted waffle mix
  • 1 tablespoon unsweetened cocoa powder (if you use sweetened, omit tablespoon of sugar)
  • 1 teaspoon sugar
  • 2 tablespoon melted butter
  • cooking spray

Citrus Sprinkle Mickey Waffles:

  • 1 egg
  • 5 ounces water
  • 1 cup Golden Malted waffle mix
  • 1/4 teaspoon Fiori di Sicilia extract OR 1 teaspoon of finely grated lemon peel plus 1/2 teaspoon of finely grated orange peel
  • 1 teaspoon sugar
  • 2 tablespoon sprinkles
  • 2 tablespoon melted butter
  • cooking spray

Specialty Tools:

  • Mickey Flip Waffle Maker

Instructions

For the Vanilla Bean Mickey Waffles:

  1. Preheat your waffle maker according to the manufacturer’s instructions.
  2. Mix the egg and water together until frothy.
  3. Pour in the Golden Malted waffle mix, vanilla bean paste, and sugar. Stir until smooth.
  4. Pour in the melted butter and mix until just combined.
  5. Pour the desired amount of mix into your waffle maker (for this particular Mickey Mouse 90th anniversary edition waffle maker you’ll need a few tablespoon, and fill each compartment all the way).
  6. Bake according to the waffle maker’s instruction and enjoy!

For the Chocolate Mickey Waffles:

  1. Preheat your waffle maker according to the manufacturer’s instructions.
  2. Mix the egg and water together until frothy.
  3. Pour in the Golden Malted waffle mix, cocoa powder, and sugar. Stir until smooth.
  4. Pour in the melted butter and mix until just combined.
  5. Pour the desired amount of mix into your waffle maker (for this particular Mickey Mouse 90th anniversary edition waffle maker you’ll need a few tablespoon, and fill each compartment all the way).
  6. Bake according to the waffle maker’s instruction and enjoy!

For the Citrus Sprinkles Mickey Waffles:

  1. Preheat your waffle maker according to the manufacturer’s instructions.
  2. Mix the egg and water together until frothy.
  3. Pour in the Golden Malted waffle mix, fiori di sicilia extract, and sugar. Stir until smooth.
  4. Pour in the melted butter and sprinkles and mix until just combined.
  5. Pour the desired amount of mix into your waffle maker (for this particular Mickey Mouse 90th anniversary edition waffle maker you’ll need a few tablespoon, and fill each compartment all the way).
  6. Bake according to the waffle maker’s instruction and enjoy!

Notes

  • For extra chocolate waffles, melt 2 ounces of semisweet chocolate and pour into the batter.
  • Waffles can be individually frozen up to 6 months.
  • Waffles will get soft if kept in the refrigerator overnight but you can toast in your toaster to crisp up!

Did you make this recipe?

Tag @magicaltreatsathome on Instagram and hashtag it #magicaltreatsathome

Mickey Mouse Waffles Three Ways // magicaltreatsathome.com

Share this:

  • Click to share on Facebook (Opens in new window) Facebook
  • Click to share on X (Opens in new window) X

Like this:

Like Loading...

Filed Under: Recipes, Treats Tagged With: breakfast, chocolate, citrus, Disney Waffle Maker, disneyland, easy, Golden Malted Waffle Mix, sprinkles, treat, vanilla, waffles

Valentine Heart Macaron

February 14, 2020 by Elana Lepkowski Leave a Comment

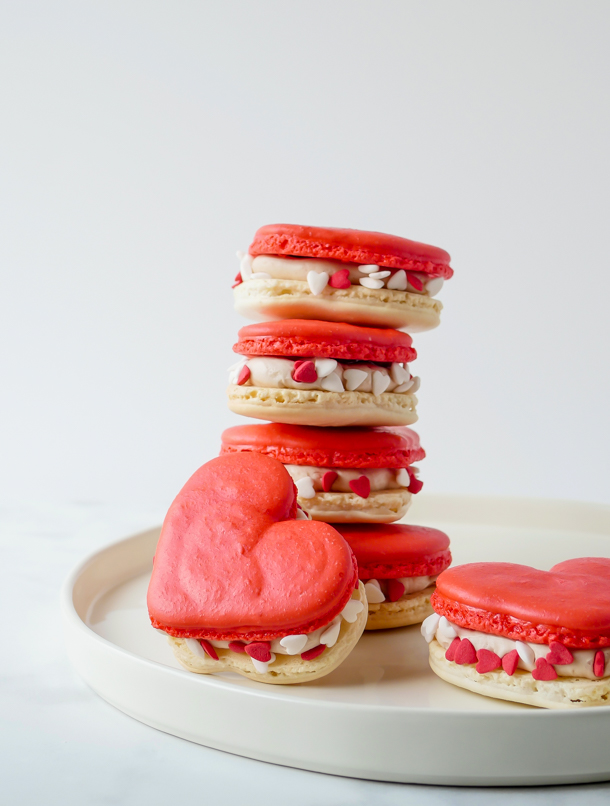
Heart Macarons for Valentine's Day // magicaltreatsathome.com

Where can I find the original treat?

  • This seasonal treat is available at Clarabelle’s in Disney California Adventure Park.

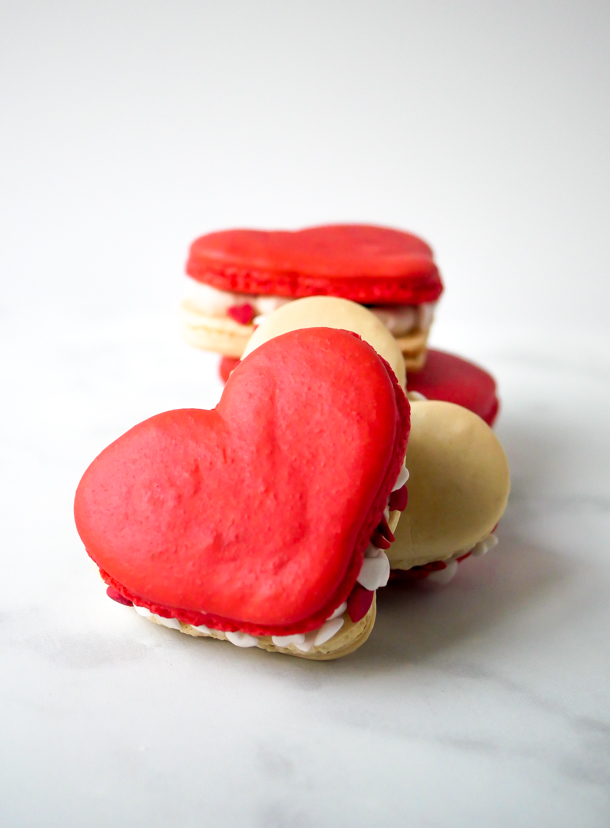
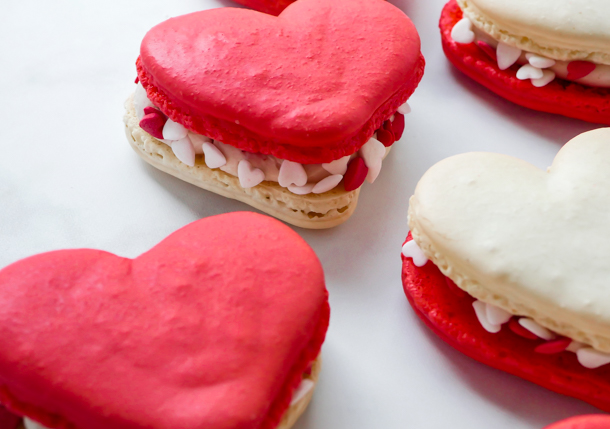
This past week, Disneyland released a bevy of pink and red treats in anticipation of Valentine’s Day and their after hours Sweethearts’ Nite. But what summed up this holiday the most for me (in treat form) was the oversized red and white heart macarons. And that’s what we’re making today!

Heart Macarons for Valentine's Day // magicaltreatsathome.com

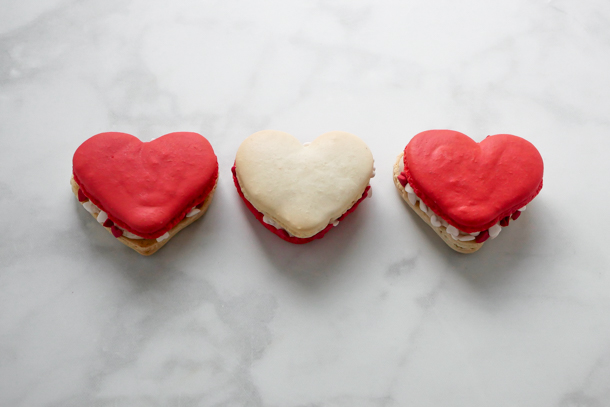
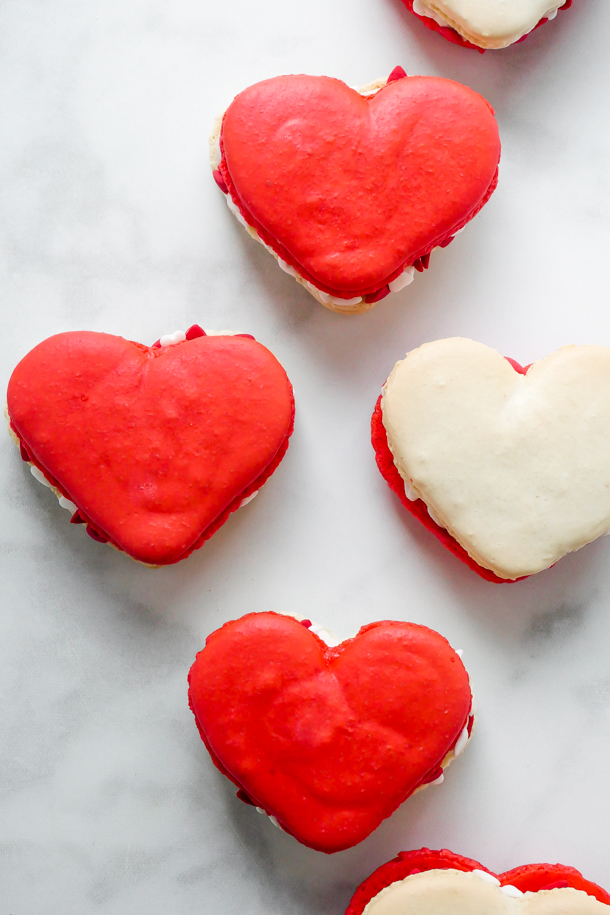
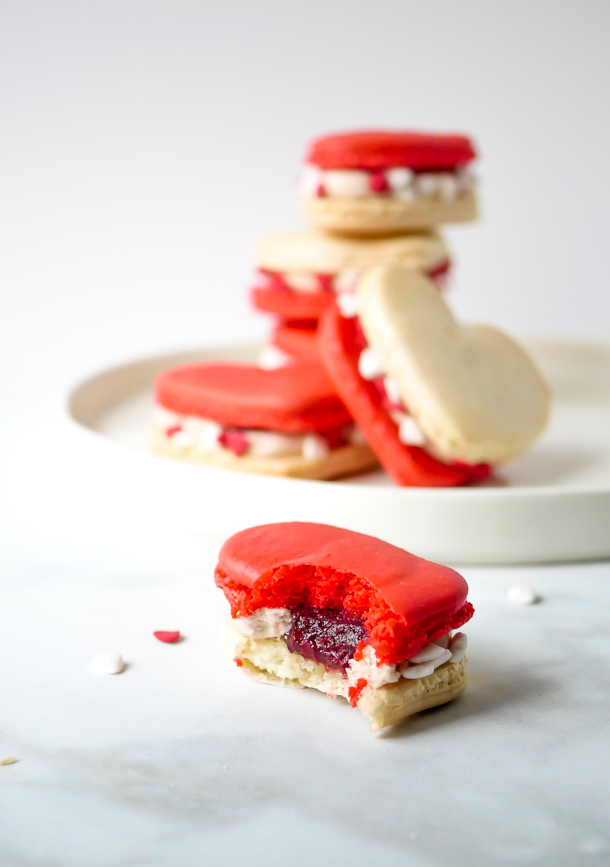
It’s a giant macaron heart, with a surprise strawberry jam filled center surrounded by strawberry buttercream and decorated with tiny candy hearts. I think it would make a sweet gift for a loved one (and you bet I’m gifting myself a few of these too..).

These use the classic macaron base (with a little food coloring), store bought or homemade strawberry jam, and a Swiss meringue buttercream frosting flavored with that same strawberry jam. Using a Swiss meringue buttercream, as opposed to an American style buttercream, yields a light and slightly sweet frosting that pipes beautifully and softens quickly out of the fridge. Yes, you need to whip out a double boiler to warm your egg whites here, but American buttercream would be much too sweet alongside the jam and the cookies. Trust me, it’s worth dirtying a few extra pans.

Heart Macarons for Valentine's Day // magicaltreatsathome.com

You could freehand pipe the hearts out, however, to make it easy on you all, I’ve gone ahead and created another FREE printable sheet you can download below to make the hearts. You’ll need to print two as this recipe yields around 8 heart macarons. Or you can enlarge on your printer and make bigger cookies. That would also work!

Icon

3 inch heart template

1 file(s) 88.45 KB
Download
Heart Macarons for Valentine's Day // magicaltreatsathome.com

More experienced kid bakers can help pipe out shapes, mix batters, weigh out ingredients by themselves, and younger hands can plop jam and decorate with the sprinkle hearts.

Heart Macarons for Valentine's Day // magicaltreatsathome.com

Lots of notes after the recipe as macarons can sometimes be a bit finicky, but you’ll get through this and create something awesome! Now let’s make some sweets for our sweets!

Print
clock clock iconcutlery cutlery iconflag flag iconfolder folder iconinstagram instagram iconpinterest pinterest iconfacebook facebook iconprint print iconsquares squares iconheart heart iconheart solid heart solid icon
Heart Macarons for Valentine's Day // magicaltreatsathome.com

Valentine Macaron

5 Stars 4 Stars 3 Stars 2 Stars 1 Star No reviews
  • Author: Elana Lepkowski
  • Yield: 8–10 Heart Macarons 1x
Print Recipe
Pin Recipe

Description

Oversized heart-shaped macarons filled with strawberry Swiss buttercream and strawberry jam are a special sweet for your valentine. A Disneyland-inspired treat.


Ingredients

Scale

For the macarons:

  • 180g (2 cups) almond flour
  • 240g (2 cups) powdered sugar
  • 1/4 teaspoon kosher salt
  • 140g egg whites, from about 4 large eggs
  • 1/2 teaspoon cream of tartar
  • 80g (6 tablespoons) granulated sugar
  • red gel food coloring, like Americolor

For the filling:

  • 35g egg whites, from about 1 large egg
  • 1/3 cup (67 g) sugar
  • pinch salt
  • 1/2 teaspoon of vanilla extract
  • 4 ounces (1 stick) unsalted butter, cut into small pieces
  • 4 tablespoons strawberry jelly or jam, divided

For the decoration:

  • heart decorettes/sprinkles

Special Tools:

  • mesh strainer
  • pastry bags

Instructions

  1. First sift the almond flour, powdered sugar, and salt back and forth twice between two bowls using a mesh strainer. Alternatively you can pulse a few times in a food processor as well. Set aside.
  2. Line two baking sheets with parchment and place the templates underneath if using. Set aside.
  3. In the bowl of a stand mixer fitted with the whisk attachment, add in the egg white and whisk until slightly foamy about 30 seconds on medium speed. Add in the cream of tartar and whisk until soft peaks appear. Then slowly pour in the sugar. Whisk on high until stiff peaks form, about 1-2 minutes more.
    Main Street Electrical Parade Ladybug Macarons // magicaltreatsathome.com
  4. Remove the bowl from the mixer.
  5. Sift half of the dry mixture into the egg whites and fold until barely incorporated, about 10 turns. Repeat with remaining dry mix. Fold until batter forms a ribbon when dropped into bowl.
  6. Add 1/2 of the batter into a piping bag and pipe out the white heart shapes, banging the sheet pan on the counter 2 or 3 times to remove any air bubbles.
  7. Next add two drops of red food coloring into the batter still in the bowl. Mix until no white streaks remain. (Batter will look light red in color but will bake bright red when finished.)
  8. Pour the red batter into a new piping bag and cut the tip off the bag. Pipe out the red hearts, banging the sheet pan on the counter 2 or 3 times to remove any air bubbles.
  9. Let both sheets of hearts rest 45 minutes on the counter. Do not cover.
  10. Preheat your oven to 350°f. Place cookies in oven to bake, and lower the temperature to 300°f. Cook for 17-18 minutes.
    Heart Macarons for Valentine's Day // magicaltreatsathome.com
  11. Let the macarons cool at least 20-30 minutes before filling.

For the buttercream:

  1. First make the Swiss strawberry buttercream frosting by whisking the egg whites, sugar, and salt together over a double boiler (or bowl set over simmering water on the stove), until temperature reaches 160°f.
  2. Pour heated egg whites into the bowl of a stand mixer and beat until stiff peaks form.
  3. When the bowl is cool to the touch, add the butter, one piece at a time, whipping between pieces to incorporate butter, but not fully mixing it in.
  4. Next, add in vanilla and strawberry jam. Whip everything on high until smooth.

To decorate:

  1. Place the frosting in a piping bag and pipe out along inside edges of the white macarons, leaving a center well to fill with the jam. *You may have leftover frosting. Storage instructions in notes below.
  2. Fill the wells with a small amount of jam.
    Heart Macarons for Valentine's Day // magicaltreatsathome.com
  3. Place red hearts on top of the filled white hearts.
  4. Then, over a bowl, sprinkle heart decorettes on the outside of the macarons where the frosting is. Set aside and repeat until all macarons are decorated. Enjoy!

Notes

  • Sifting the almond flour and powdered sugar together is necessary for the absorption of oils and to prevent clumping of batter.
  • Using gel based food coloring will give a much deeper, and vibrant color, than standard food dye.
  • Any left over macaron batter can be piped into smaller cookies and baked off for 15 minutes.
  • Swiss buttercream heats the egg whites to 160°f to kill off any bacteria.
  • Leftover buttercream can be stored in the fridge up to two weeks, brought to room temperature, and whipped before using. It can also be stored in the freezer up to 3 months.
  • Cookies can be stored in an airtight container up to one week.

Did you make this recipe?

Tag @magicaltreatsathome on Instagram and hashtag it #magicaltreatsathome

Heart Macarons for Valentine's Day // magicaltreatsathome.com

Share this:

  • Click to share on Facebook (Opens in new window) Facebook
  • Click to share on X (Opens in new window) X

Like this:

Like Loading...

Filed Under: Gluten Free, Recipes, Treats Tagged With: buttercream frosting, Clarabelle's, cookies, gluten free, heart, jam, macarons, sprinkles, strawberry, treat, Valentine

5 Minute Treats: Hand-dipped Ice Cream Bars

February 12, 2020 by Elana Lepkowski 3 Comments

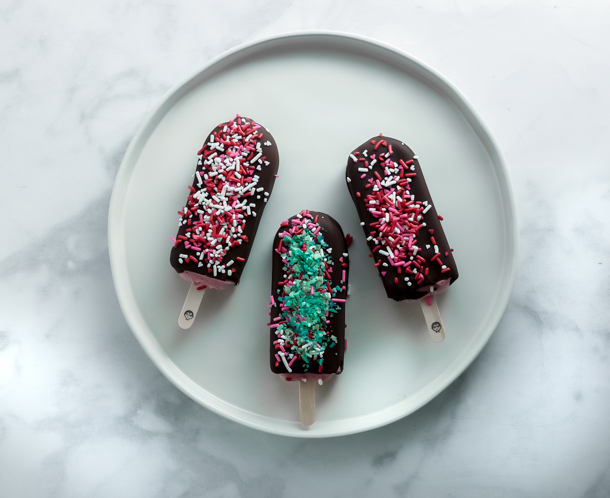
5 Minute Treats: Hand Dipped Ice Cream Bars // magicaltreatsathome.com

Where can I find the original treat?

  • This treat is available at Clarabelle’s in Disney California Adventure Park.

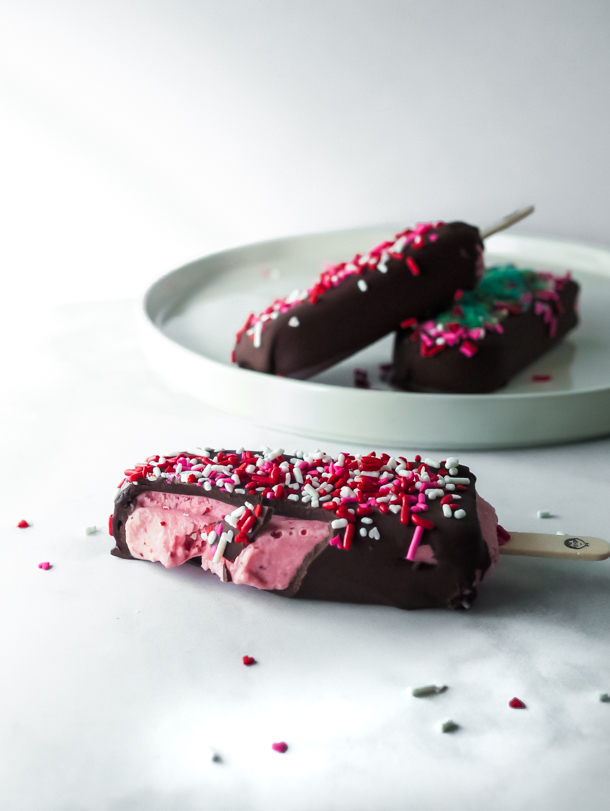
Welcome to the next post in our new series, 5 Minute Treats! And today’s recipe is just TWO ingredients! Sound too good to be true? Well, now you have the magic power to make Hand-dipped Ice Cream Bars!

5 Minute Treats: Hand Dipped Ice Cream Bars // magicaltreatsathome.com

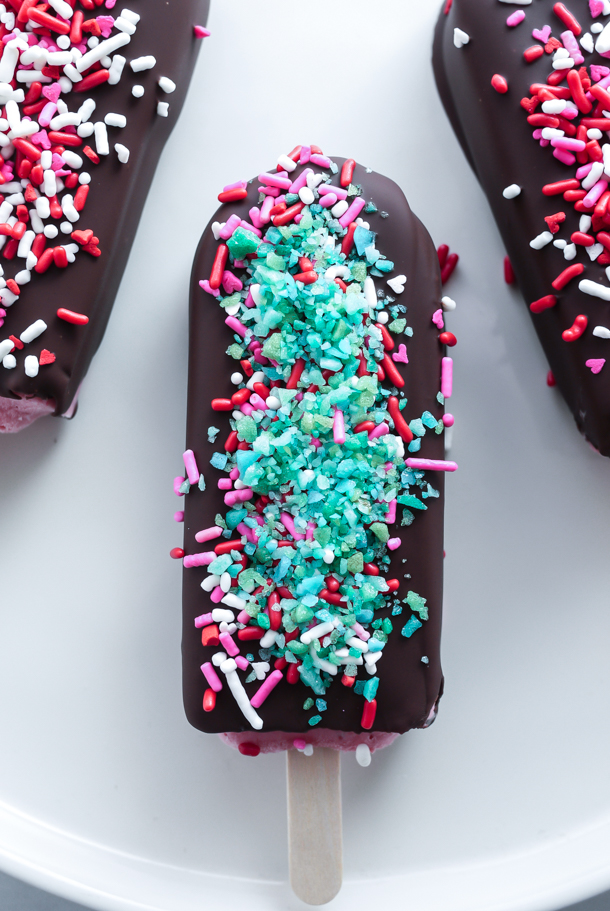
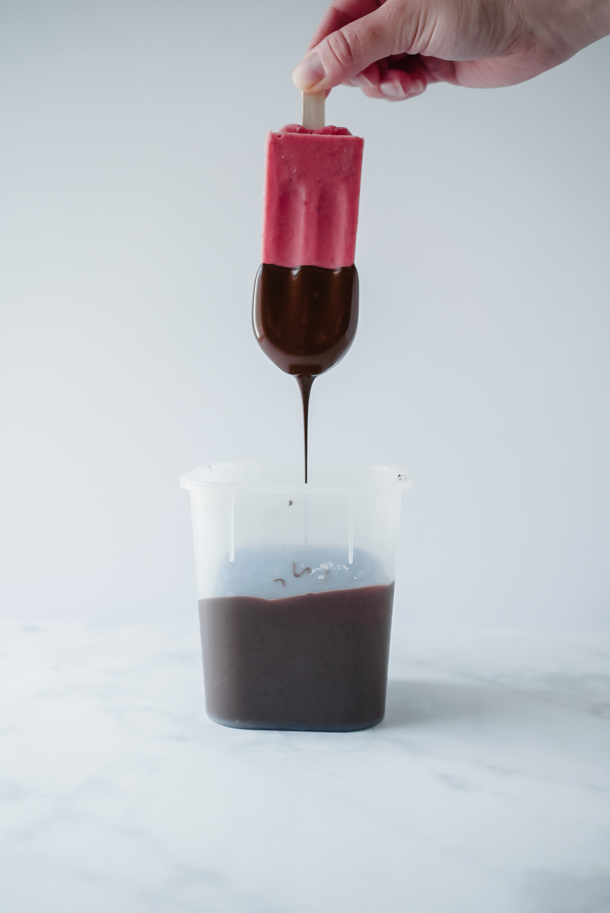
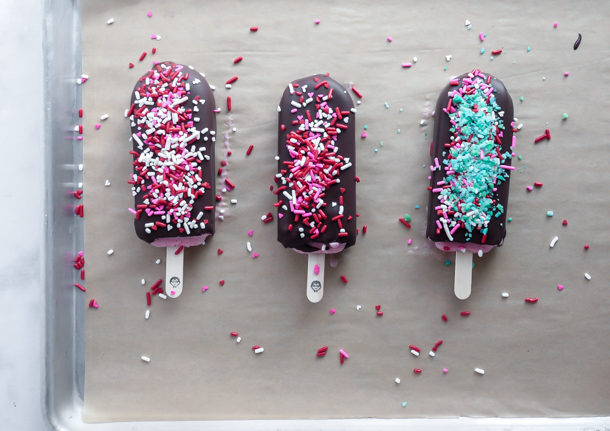
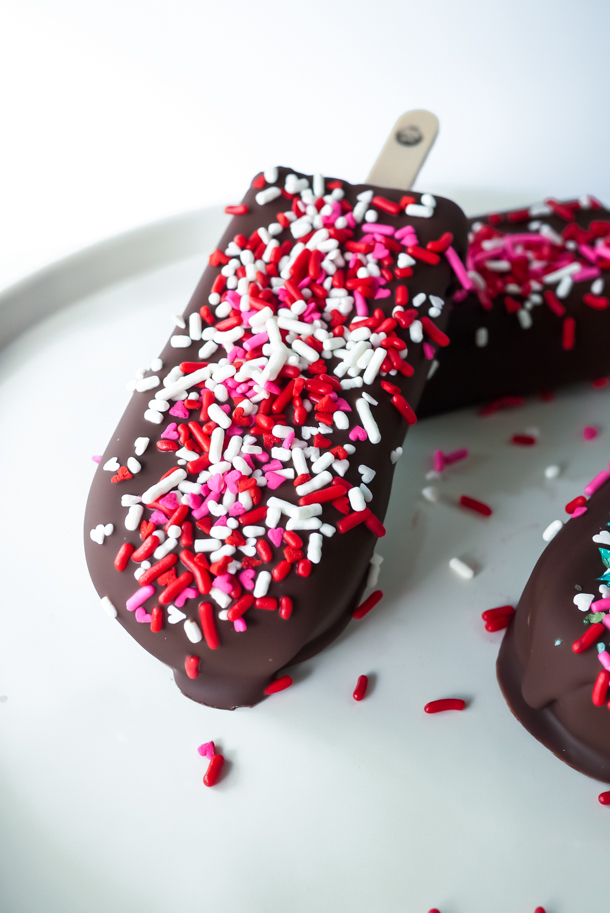
Otherwise known as magic shell, you just need chocolate (either milk or dark or somewhere in-between, or even white chocolate if you’d like) and coconut oil. That’s it! Melt them together, and when they hit the frozen ice cream… BAM! The chocolate is instantly hardened and ready to eat. You’ll need to time adding your ingredients so that they stick if you choose to do that. Clarabelle’s, where we originally tried this treat, has lots of options including sprinkles, chocolate chips, even POP ROCKS!! And if you get “The Whole Herd”, you get ALLLLLLLL the toppings. We usually go that route.

5 Minute Treats: Hand Dipped Ice Cream Bars // magicaltreatsathome.com

This is a really fun treat for kids to get involved in making. They can dip their ice cream and add all the toppings they want. And you can always drizzle on more chocolate sauce if you need a stronger “glue” for the items.

5 Minute Treats: Hand Dipped Ice Cream Bars // magicaltreatsathome.com

Now, the magic here happens because the frozen surface of the ice cream hardens the coconut oil (coconut oil reaches a solid state just below 76°f). If you dip non frozen items in this magic sauce, well, it won’t instantly harden. However, a quick trip to the freezer will take care of that!

5 Minute Treats: Hand Dipped Ice Cream Bars // magicaltreatsathome.com

Ok, grab some ice cream bars and get dipping!

Print
clock clock iconcutlery cutlery iconflag flag iconfolder folder iconinstagram instagram iconpinterest pinterest iconfacebook facebook iconprint print iconsquares squares iconheart heart iconheart solid heart solid icon
5 Minute Treats: Hand Dipped Ice Cream Bars // magicaltreatsathome.com

5 Minute Treats: Hand-dipped Ice Cream Bars

5 Stars 4 Stars 3 Stars 2 Stars 1 Star No reviews
  • Author: Elana Lepkowski
  • Yield: 2 cups Chocolate Magic Shell 1x
Print Recipe
Pin Recipe

Description

Magically turn chocolate sauce into a chocolate shell for your ice cream bars with our latest 5 Minute Treat for Hand-dipped Ice Cream Bars. And don’t forget to generously top with “The Whole Herd”. A Disneyland-inspired treat.


Ingredients

Scale

For the Magic Shell:

  • 2 cup chocolate chips (dark, milk, semisweet, white, or any combination)
  • 3 tablespoons refined coconut oil
  • pinch salt, optional

To serve:

  • ice cream bars
  • sprinkles
  • decorettes
  • chocolate chips
  • Pop Rocks

Instructions

For the Magic Shell:

  • In a microwave safe bowl, combine chocolate chips, coconut oil, and salt if using. Microwave on high 30 seconds, stir, and then repeat microwaving at 20 second intervals, stirring between, until melted and smooth. Let cool to room temp and use.
  • Can be stored in the refrigerator up to one month. Gently rewarm cold magic shell in the microwave in short bursts, stirring between.

To serve:

  1. Let magic shell cool at least 5 minutes.
  2. Quickly dip the ice cream in the sauce and then place on a piece of parchment.
  3. Immediately cover in toppings.
  4. If more “glue” is needed to hold toppings, drizzle on some additional sauce. Serve immediately! 

Notes

  • If using blocks of chocolate, finely chop before melting.
  • Store in a tall, narrow container (tupperware works!) to make dipping ice cream easier.
  • Magic Shell can be stored in the refrigerator up to one month. Gently rewarm cold magic shell in the microwave in short bursts (5-10 seconds), stirring in between.
  • If you want to dip with non-frozen items, like fruit, dip, place on parchment, and then freeze at least 5-10 minutes.
Did you make this recipe?

Tag @magicaltreatsathome on Instagram and hashtag it #magicaltreatsathome

5 Minute Treats: Hand Dipped Ice Cream Bars // magicaltreatsathome.com

Share this:

  • Click to share on Facebook (Opens in new window) Facebook
  • Click to share on X (Opens in new window) X

Like this:

Like Loading...

Filed Under: 5 Minute Treats, Recipes, Treats Tagged With: 5 Minute Treat, chocolate, Clarabelle's, coconut oil, DCA, ice cream, sprinkles

Peanut Butter Mickey Mouse Rice Krispie Treat Pops

January 20, 2020 by Elana Lepkowski Leave a Comment

Mickey Mouse Peanut Butter Rice Krispie Treat Pops // magicaltreatsathome.com

Where can I find the original treat?

  • This treat can be found throughout the Disneyland resort.

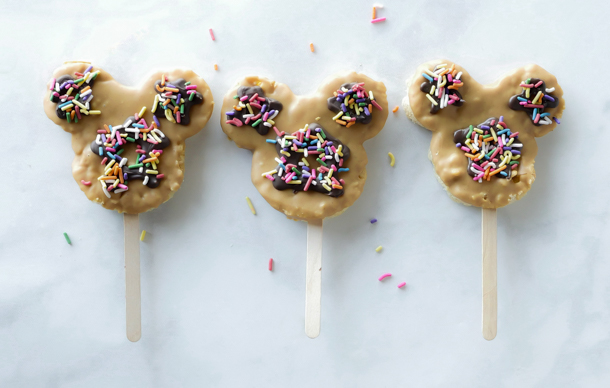
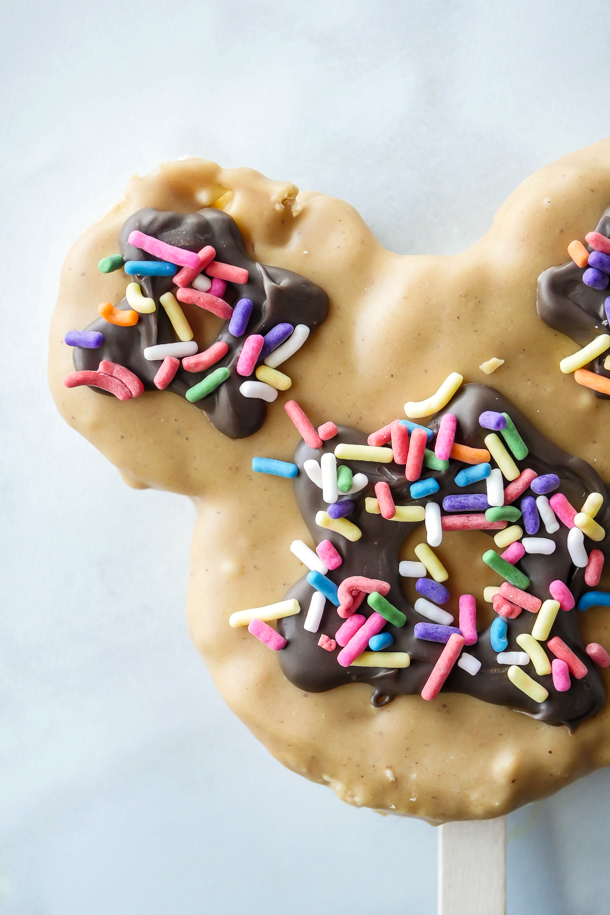
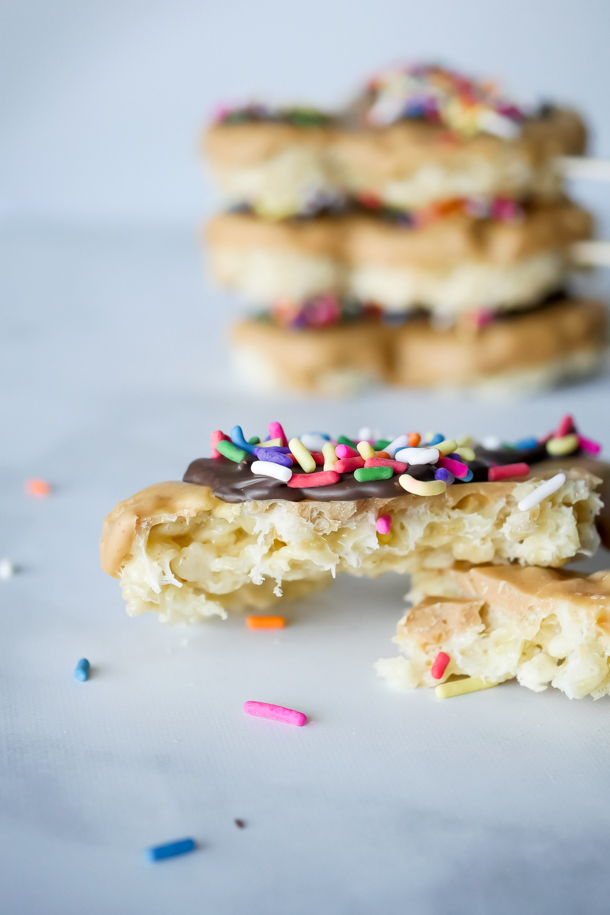
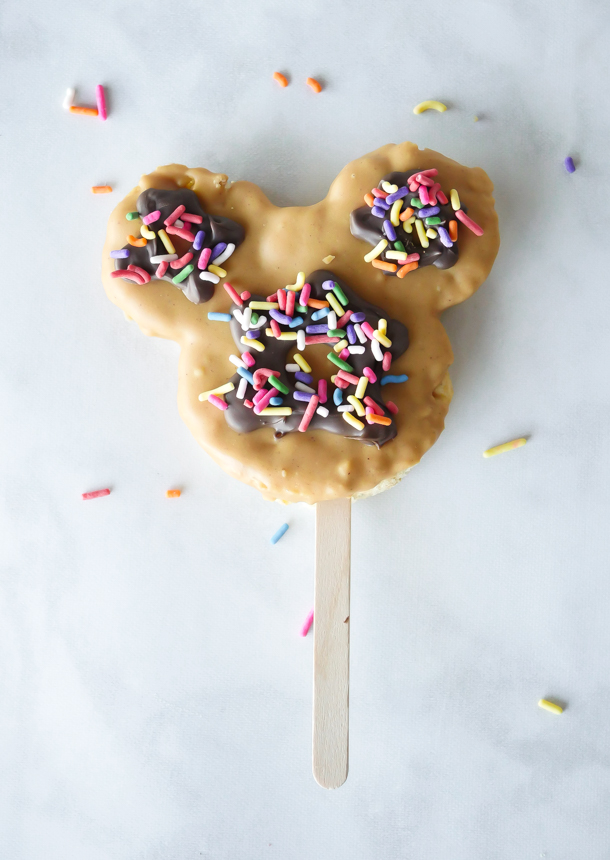
Are your eyes deceiving you? Is that the iconic Mickey Cookie… on a rice krispie treat?! Disney sure knows what they’re doing with the treats. Combining two of my favs from the parks, and then covering them in peanut butter and chocolate? YES please! And besides being so tasty, our latest recipe is so easy to make too.

Mickey Mouse Peanut Butter Rice Krispie Treat Pops // magicaltreatsathome.com

With most all of the holiday treats cleared out of the cases now, most of us treat lovers have been anxiously awaiting what’s next. Well, it seems every day something new is slowly trickling in. This crispy rice treat is the standard treat pop, with a thin layer of peanut butter coating on the front to represent the Mickey Mouse cookie, and chocolate icing and sprinkles (instead of the nonpareils like the cookies) for decoration.

Kids can help a lot here too! From dipping the rice krispie treats to adding sprinkles. All levels of experience can participate.
Mickey Mouse Peanut Butter Rice Krispie Treat Pops // magicaltreatsathome.com

BONUS: if you really love peanut butter and you want to make this even more peanut butter-y, go ahead and add in about a 1/2 cup of peanut butter chips (you’ll have extra left over from the bag) when you mix in the crisped rice cereal.

Mickey Mouse Peanut Butter Rice Krispie Treat Pops // magicaltreatsathome.com

So, if you’re a peanut butter chocolate lover, I really think you’ll love this recipe. There’s a great balance so that one ingredient doesn’t necessarily overpower the others (sometimes peanut butter can do that). And they just come together so quickly and easily, that you can double or triple this if you’re in need of a class treat or something for a pot luck (please take photos and send them to me if you bring these to a pot luck). And remember, lots of helpful tips below the recipe, so please read it all the way through before starting.

Print
clock clock iconcutlery cutlery iconflag flag iconfolder folder iconinstagram instagram iconpinterest pinterest iconfacebook facebook iconprint print iconsquares squares iconheart heart iconheart solid heart solid icon
Mickey Mouse Peanut Butter Rice Krispie Treat Pops // magicaltreatsathome.com

Peanut Butter Mickey Mouse Rice Krispie Treat Pops

5 Stars 4 Stars 3 Stars 2 Stars 1 Star No reviews
  • Author: Elana Lepkowski
  • Yield: 3–4 Peanut Butter Mickey Mouse Rice Krispie Treats 1x
Print Recipe
Pin Recipe

Description

Crispy, chewy Mickey Mouse Rice Krispie Treats are dipped in peanut butter sauce and topped with chocolate icing and sprinkles just like the iconic Mickey Mouse cookie. A Disneyland-inspired treat.


Ingredients

Scale

For the rice krispie treat:

  • 2 tablespoons butter, unsalted
  • 157 g (2 cups) mini marshmallows or 20 regular sized marshmallows
  • 2 cups crisped rice cereal

For the topping:

  • 3/4 cup peanut butter chips
  • 1/2 teaspoon refined coconut oil
  • 1–1/2 ounces semisweet chocolate
  • sprinkles

Tools:

  • Mickey Mouse cutter
  • 3 Popsicle sticks

Instructions

For the rice krispie treat:

  1. Before beginning, line a 8×8″ baking pan with parchment for thinner treats (you should yield 4 with the cutter listed above), or a loaf pan for thicker treats (you’ll yield 3 using cutter above).
  2. Combine the butter and marshmallows in a medium sauce pan over medium-low heat. Stir constantly until marshmallows have melted and mixture is smooth.
  3. Immediately dump in the crisped rice cereal and mix to combine.
  4. Pour into the prepared pan and gently press mixture into place with a rubber spatula (or damp fingers). Set aside for at least an hour in the refrigerator so that the mixture can firm up enough to cut shapes.
  5. Once firm, use parchment to lift out cereal and marshmallow mix. Use a Mickey Mouse shaped cutter to cut out shapes and set aside.
For the decorations:

  1. In a small saucepan over medium-low heat, combine the peanut butter chips and the coconut oil.
  2. Continually stir until smooth and no lumps remain.
  3. Remove from heat and pour into a shallow, flat bottomed, heat-proof bowl.
  4. Dip the smooth side of each treat into the sauce, setting aside on a parchment lined sheet pan until all are coated. Refrigerate through the next step to harden.
  5. Then, melt semisweet chocolate in a microwave safe bowl, like glass, for 30 seconds. Stir and microwave again for an additional 30 seconds. Keep stirring and microwaving in short bursts of 15-20 seconds until melted and smooth. Use can alternatively use a double boiler for melting. You can also melt directly in a heavy duty, heat safe, piping bag using the same microwave method (I find this easiest when I will be piping without a tip on the bag).
  6. Remove the treats from the fridge and transfer chocolate to a heat-proof piping bag. Chocolate should be warm, not hot. Cut the tip from the piping bag.
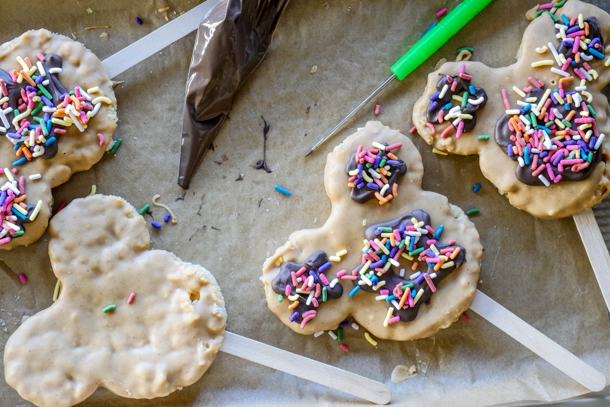
  7. For each treat, pipe 5 sided stars (without filling in the centers, since it should look like the cookie decoration) on each ear, and in the center of the treat. Immediately cover the chocolate with sprinkles. Set aside and repeat with remaining treats.
  8. Let the treats sit at least 30 minutes for the chocolate to harden, and then enjoy!

Notes

  • These scale very easily at a 1:1 ratio of marshmallows to cereal. Mini marshmallows you can scoop but I like to weigh out the regular or jumbo sized marshmallows. The butter though you do not necessarily need to scale along with the other ingredients. 1-3 cups use 2 tablespoons, 3-5 cups use 3 tablespoons.
  • Use a smaller pan than you think you’ll need for this. As the marshmallows melt into the butter, if there’s too much space in the pan they will start to dry out and form strings. Keeping the marshmallows closer together in the pan will ensure they melt more evenly, creating a better mixture to add the cereal into.
  • When mixing crisped rice cereal into the melted marshmallows, keep the mixture on the flame so that marshmallows stay liquid. Removing to mix in can seize up the liquid before the cereal is fully mixed.
  • You can add in a 1/2 cup of peanut butter chips when combining the cereal to the marshmallows for extra peanut butter flavor.
  • You can combine some extra rice krispie treat scraps into the mold to shape additional Mickey Mouse treats.
  • To smooth out the chocolate when piping the decoration, use a scribe or toothpick to move the chocolate into the pattern you’d like while also removing any air bubbles.
  • Treats can be kept in an air-tight container for up to 3 days.

Did you make this recipe?

Tag @magicaltreatsathome on Instagram and hashtag it #magicaltreatsathome

Mickey Mouse Peanut Butter Rice Krispie Treat Pops // magicaltreatsathome.com

Share this:

  • Click to share on Facebook (Opens in new window) Facebook
  • Click to share on X (Opens in new window) X

Like this:

Like Loading...

Filed Under: Recipes, Treats Tagged With: character treat, chocolate, disneyland, Mickey Mouse, peanut butter, rice krispie treat, sprinkles, treat

Minnie Witch Shake

October 14, 2019 by Elana Lepkowski Leave a Comment

Minnie Witch Shake // magicaltreatsathome.com

Where can I find the original treat?

  • The Minnie Witch Shake can be found at Schmoozies! in Disney’s California Adventure Park.

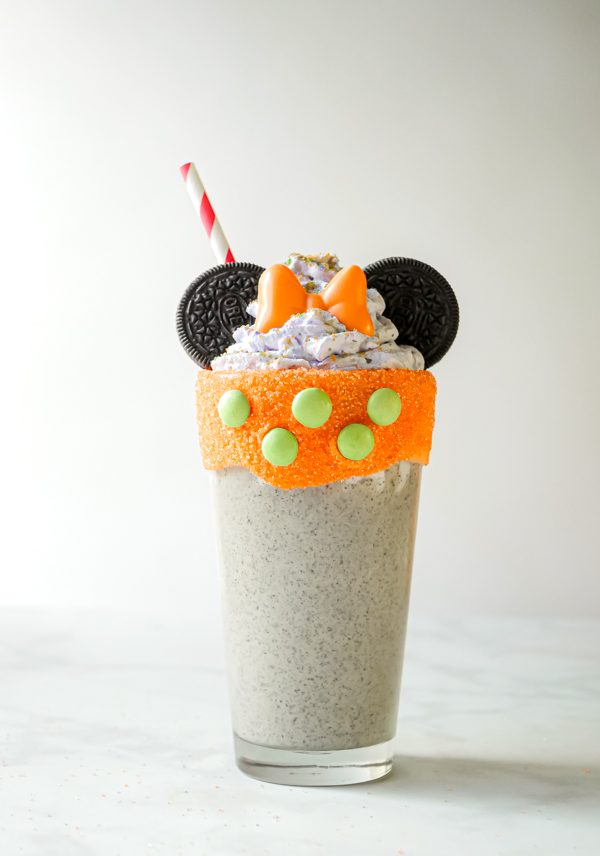
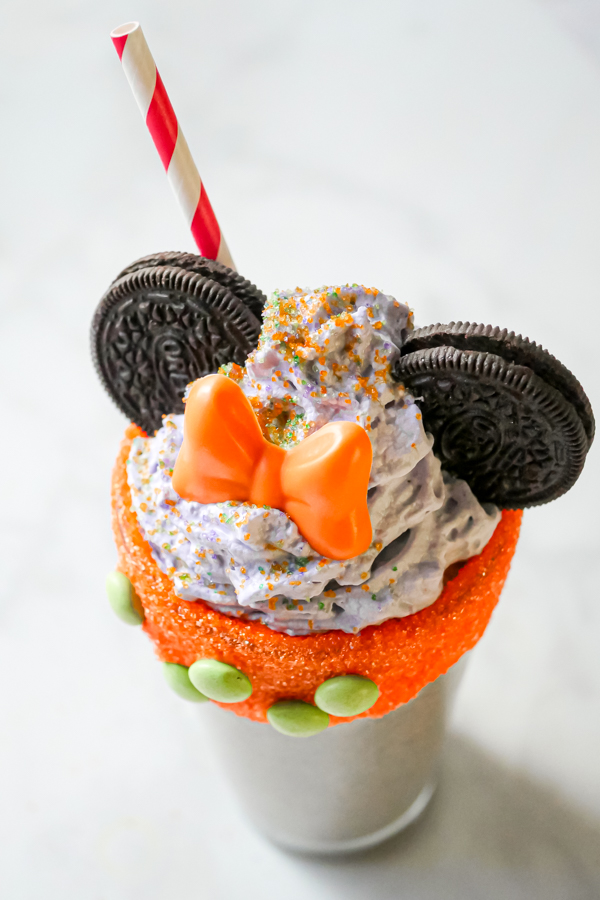
A shake in October?! YES when you live in SoCal! One thing people don’t realize is that here in Southern California, it’s still hot in October, like, 85° hot. And so a spooky Minnie Mouse Witch Shake is definitely in order!

Minnie Witch Shake // magicaltreatsathome.com

Mint chocolate chip is my favorite old school ice cream flavor (peanut butter cup is my favorite “new school” flavor in case you were interested), but we never have it at home since 1. My husband detests the combination of mint and chocolate together and 2. Mint oil now gives him a migraine. So I just don’t keep it around, but when I see it out I most definitely order it.

Minnie Witch Shake // magicaltreatsathome.com

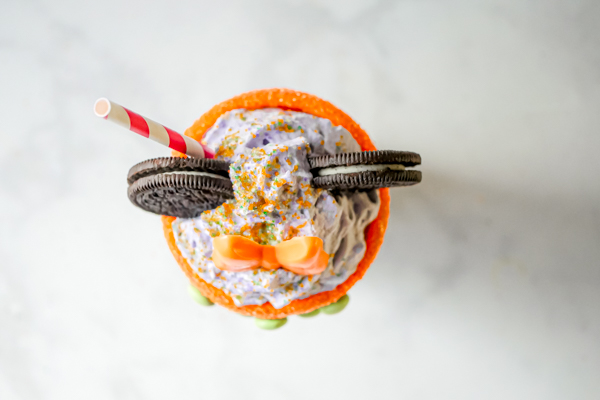
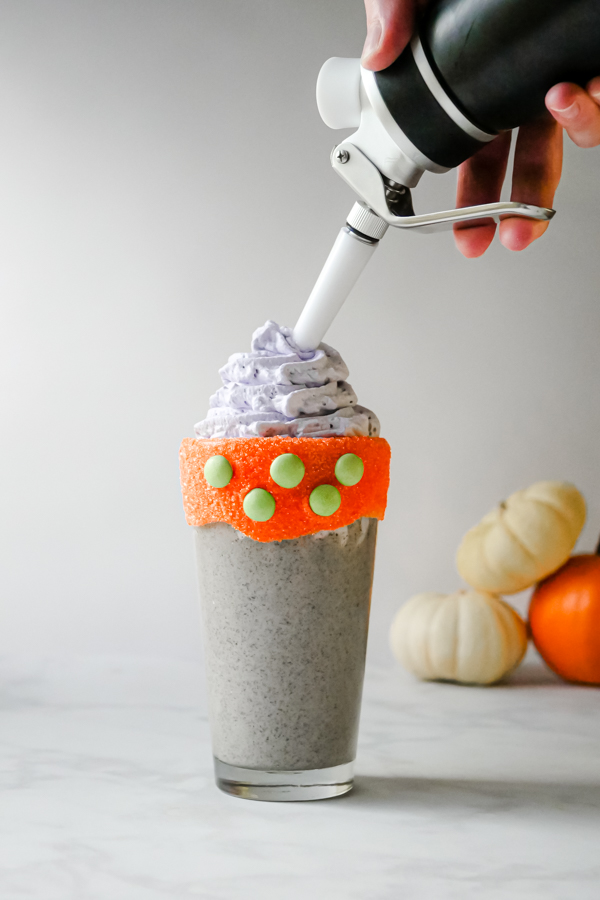
And this shake delivered! So, I had to sneak a pint of mint chocolate ice cream home to recreate this recipe for all of you. But first, let me explain a bit about the ingredients. First, as someone pointed out on IG, Disney calls this a mint chocolate chip shake, but the chocolate in mine was not snappy, like chips of chocolate, but rather soft, like cookies. So, for this recipe I’ve blended up mint chocolate chip ice cream and Oreos for that softer, chocolate cookie piece texture. Second, the whipped cream. Now, I don’t know if it’s the stabilizers in the whipped cream or what, but the whipped cream on the shake in the park had a marshmallow-like texture and wasn’t super soft like regular whipped cream. Maybe like cool whip? Maybe, except it’s been so long since I’ve had it I can’t remember exactly what it’s like. Anyways, I have a whip cream dispenser at home that I use so I’m making fresh whipped cream for my shake. However, whatever way you like your whipped cream you should use that!

Minnie Witch Shake // magicaltreatsathome.com

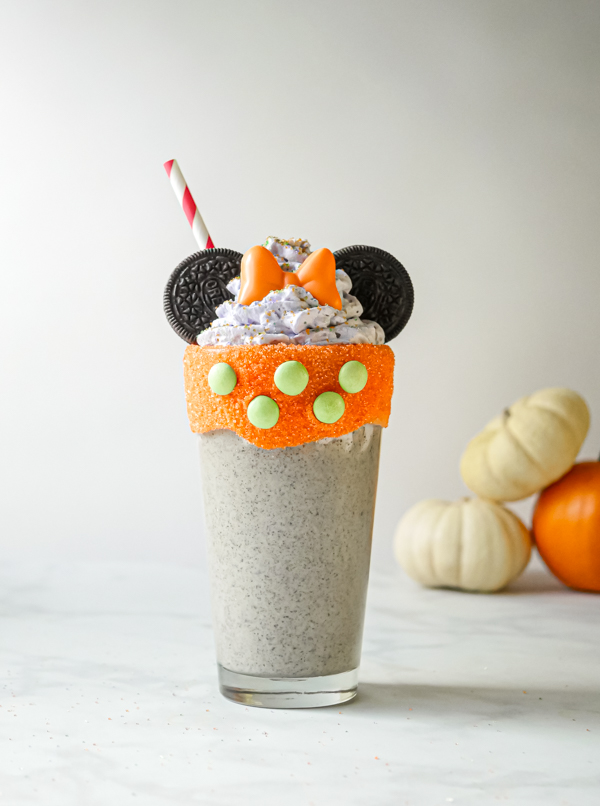
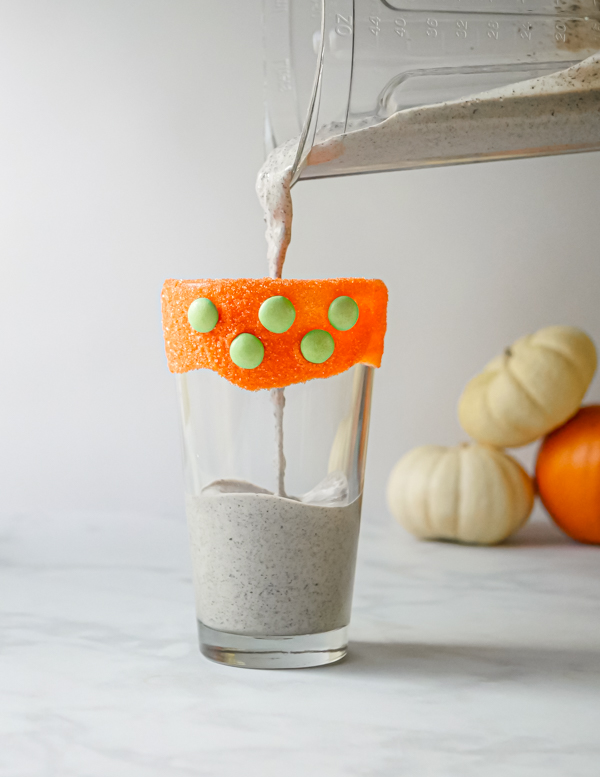
This recipe is for a single serve shake, but can very easily be expanded to as many shakes as you’d like to make (or made into a few tiny shakes for the kiddos!). I think the glass looks super cute with the orange sanding sugar and the green polka dots, but if you want to make this with less steps, I think you could leave out this part and be fine.

Minnie Witch Shake // magicaltreatsathome.com

Also, if you are making this with/for kids, I’d use plastic cups and forgo the glass like I’m using in the photos. Kids can dip their cups in warm, not hot, melted chocolate and decorate with the sanding sugar and chocolate candies. I’d even let them pour their shakes and top with whipped cream and sprinkles. Adults can make the chocolate bows beforehand as you’re handling hot chocolate and there’s a risk of burns.

As usual, a few notes below the recipe, so please read through the whole thing first before making. Ok?! Let’s start those blenders!!!

Minnie Witch Shake // magicaltreatsathome.com
Print
clock clock iconcutlery cutlery iconflag flag iconfolder folder iconinstagram instagram iconpinterest pinterest iconfacebook facebook iconprint print iconsquares squares iconheart heart iconheart solid heart solid icon
Minnie Witch Shake // magicaltreatsathome.com

Minnie Witch Shake

5 Stars 4 Stars 3 Stars 2 Stars 1 Star No reviews
  • Author: Elana Lepkowski
  • Yield: 1 Minnie Witch Shake 1x
Print Recipe
Pin Recipe

Description

Cool off this Halloween with a minty Minnie Witch Shake! A Disneyland-inspired treat.


Ingredients

Scale

Mint Chip Cookies and Cream Shake:

  • 3, 2 ounce scoops mint chocolate chip ice cream
  • 3 Oreo cookies, crushed
  • 1/4 cup milk, more or less to taste

Toppings and Decorations:

  • 4 ounces orange candy melts
  • 1/2 cup orange sanding sugar
  • 5 green M&Ms candies
  • orange, green, and purple sanding sugar mix (this can be pre-packaged if you find it, or mix together yourself)
  • whipped cream (or 1 cup heavy cream, 1 teaspoon each vanilla extract and simple syrup or liquid sweetener of your choice with directions below for making from scratch)
  • purple food coloring
  • 2 Oreo cookies

Special Tools:

  • Minnie Mouse bow mold
  • whipped cream canister
  • N2O chargers
  • soda fountain pint glasses
  • striped straws

Instructions

For the shake:

  1. In a blender, combine the mint ice cream, crushed cookies, and milk. Blend until smooth. Set aside.

For the glass decoration and chocolate bow:

  1. Pour the orange sanding sugar into a wide, shallow bowl. Set aside.
  2. Melt the orange candy melts in a microwave safe bowl, like glass. Microwave for 30 seconds. Stir and microwave again for an additional 30 seconds. Keep stirring and microwaving in short bursts of 15-20 seconds until melted and smooth. Use can alternatively use a double boiler for melting.
  3. Dip and coat the outer rim of a glass with the melted candy melts. Then dip in the orange sanding sugar, turning to coat the entire outside rim.
  4. Then, pour some of the melted orange candy melts in your bow mold(s). Let set at least 10 minutes in the refrigerator.
  5. Remove the bow from the mold when hardened and set aside. Repeat molding for additional bows.

To make the purple whipped cream:

  1. If using ready made whipped cream: Spray whipped cream into a small bowl and using a toothpick, add a drop of purple food coloring. Mix and set aside.
  2. If using a whipped cream canister: Add heavy cream, vanilla extract, simple syrup, and one drop of purple food coloring to a chilled whipped cream canister. Add N2O cartridge and twist to activate. Shake the container for a few seconds and set aside.
  3. If making whipped cream with a mixer: Add heavy cream and one drop of purple food coloring to a chilled mixing bowl. Mix until medium peaks form. Set aside.

Assembly:

  1. In the prepared glass, pour in the mint shake mixture. (Any extra set aside to top off later!)
  2. Spoon or spray prepared whipped cream on top.
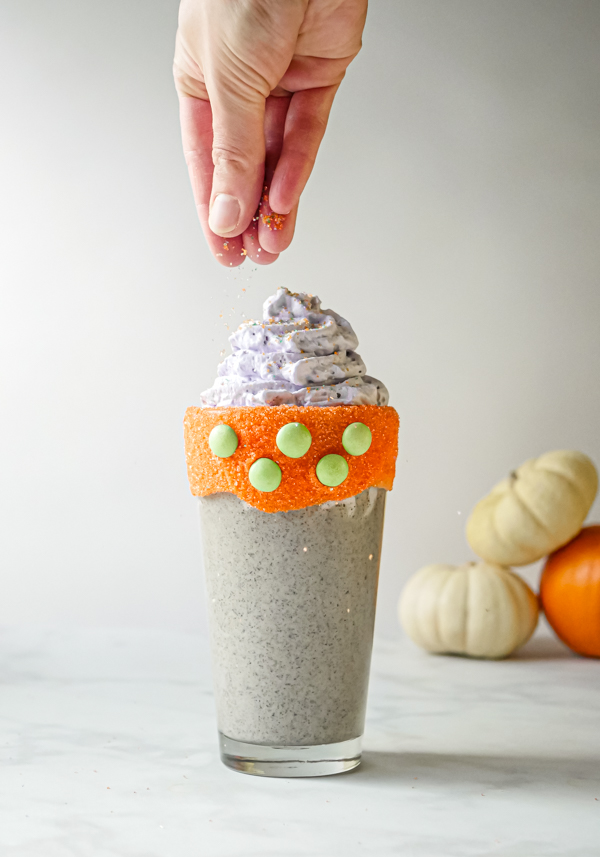
  3. Sprinkle with orange, green, and purple sanding sugar mix.
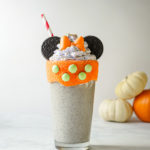
  4. Place the bow and the Oreo “ears” on top of whipped cream. Enjoy with a fun straw!

Notes

  • Glasses can be prepared up to a week ahead and stored in the refrigerator.
  • Bows can be prepared up to three days and stored in refrigerator.
  • If dairy is not your thing, try a dairy alternative ice cream and “milk”! You can also make the whipped cream with cream of coconut but be prepared for a less stiff cream on top.
  • If your ice cream is too soft, use less milk, and alternatively, if your ice cream is pretty hard, use a splash more milk.
  • You can pre-mix your own sprinkles for future baking projects. There are a lot of bulk options on Amazon for sprinkles and sanding sugars (check out our Favorite Supplies list for some examples!).

Did you make this recipe?

Tag @magicaltreatsathome on Instagram and hashtag it #magicaltreatsathome

Minnie Witch Shake // magicaltreatsathome.com

Share this:

  • Click to share on Facebook (Opens in new window) Facebook
  • Click to share on X (Opens in new window) X

Like this:

Like Loading...

Filed Under: Drinks, Recipes, Treats Tagged With: character treat, chocolate, cookies, Disney's California Adventure, fall-halloween, Minnie Mouse, mint, Oreos, Schmoozies, sprinkles, treat, whipped cream

“Celebrate Mickey” Chicken and Waffles

June 30, 2019 by Elana Lepkowski Leave a Comment

Celebrate Mickey Chicken and Waffles // magicaltreatsathome.com

Where can I find the original treat?

  • This specialty treat was part of the Get Your Ears on Celebration and was located at the Carnation Cafe in Disneyland.

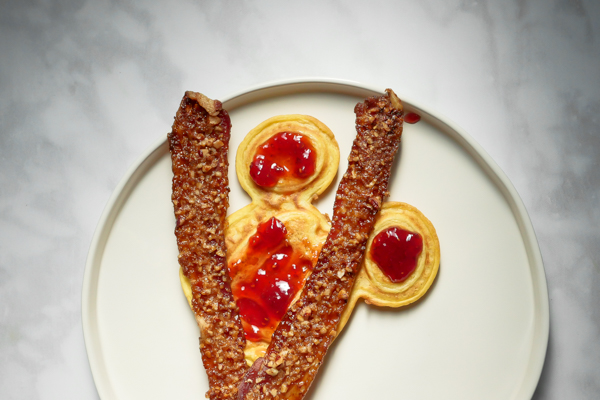
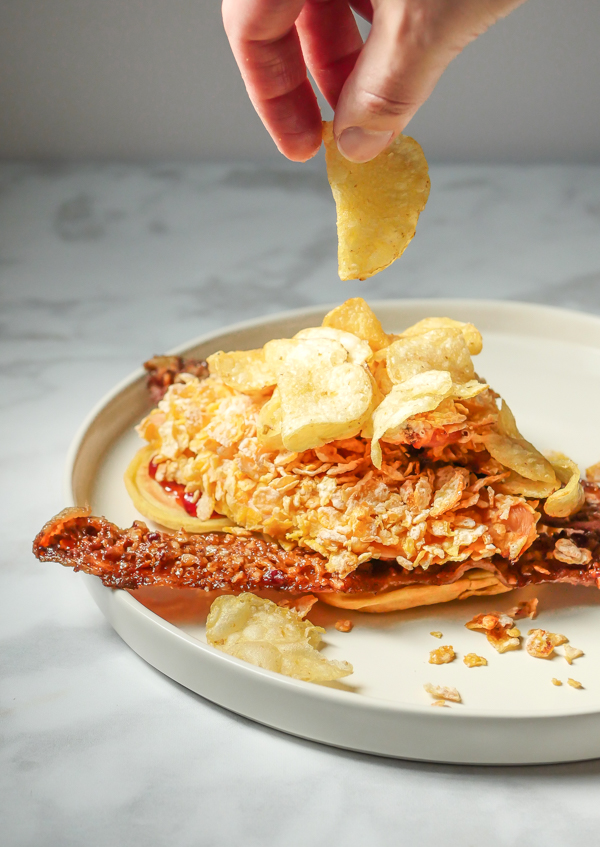
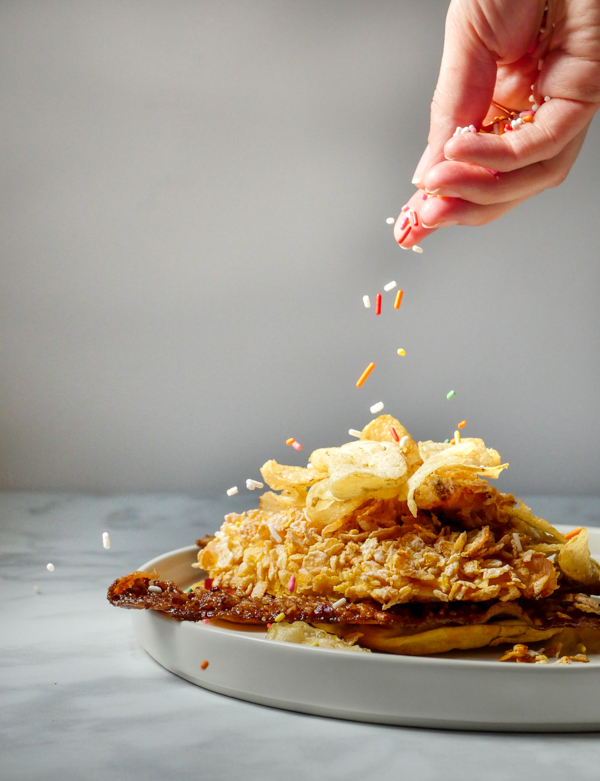
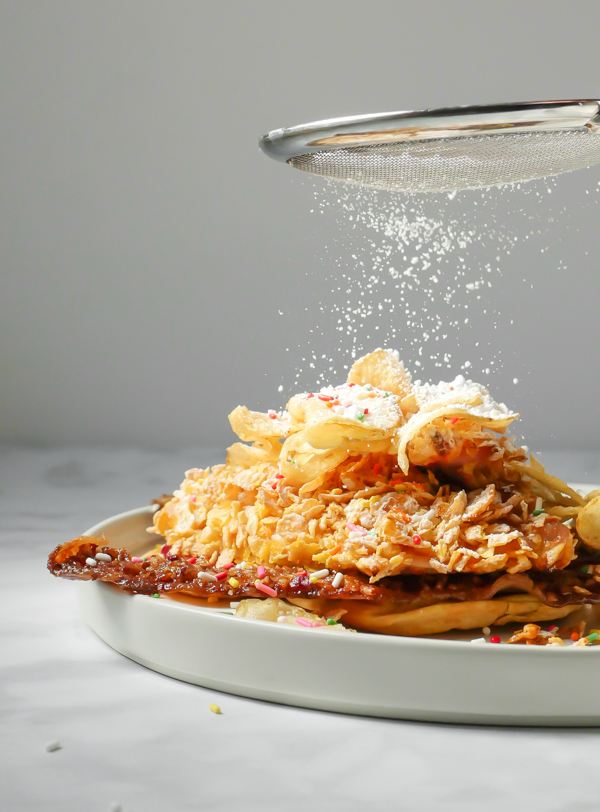
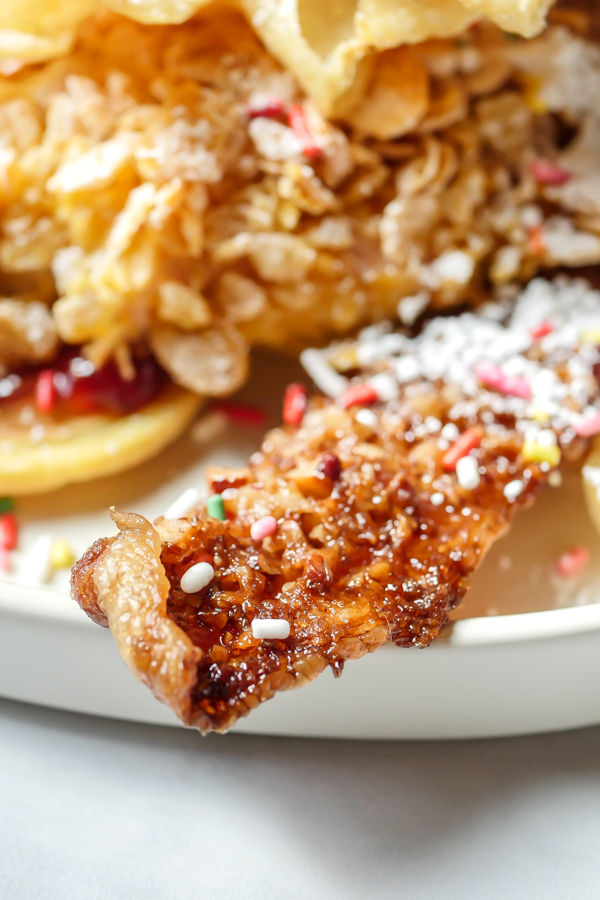
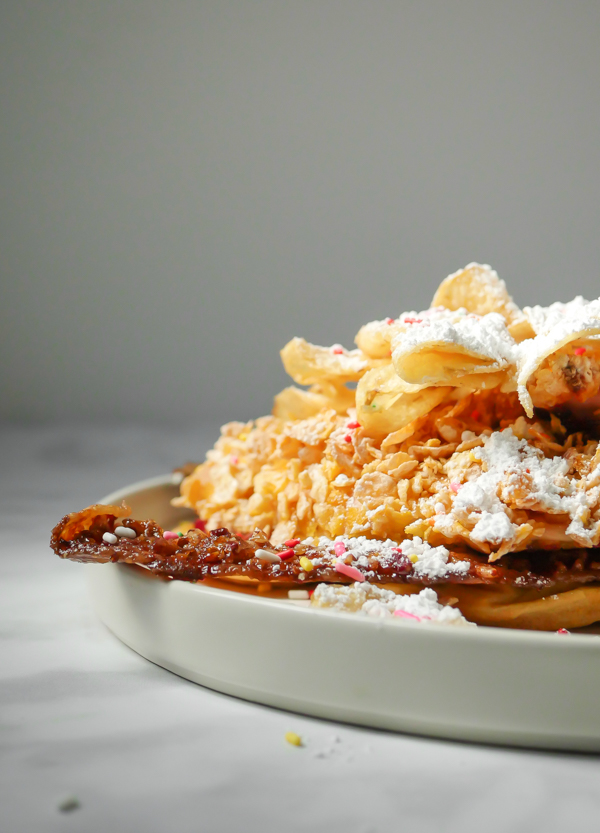
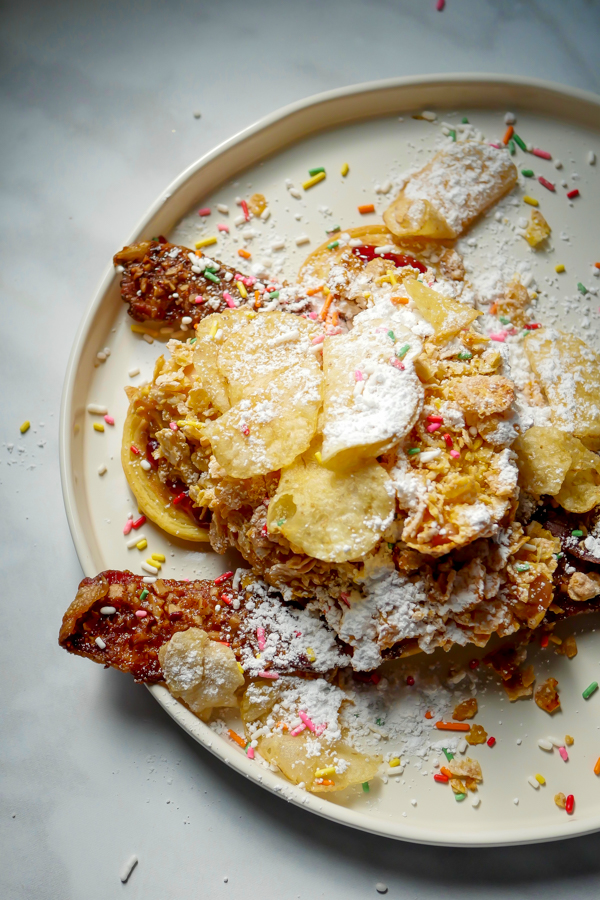
We’re squeezing in our last and final recipe from the “Get Your Ears On” celebration for this month with this festive dish, the “Celebrate Mickey” Chicken and Waffles Breakfast Special. Now, I’m a big fan of chicken and waffles any time, but cover that with candied bacon, berry compote, potato chips, powdered sugar, and sprinkles and well, now I’m even more excited.

Celebrate Mickey Chicken and Waffles // magicaltreatsathome.com

This dish has a number of components, but don’t fret, they easily can all be made ahead of time. In fact, I had to make several components well in advance while I was doing all the testing for the Piranha Lemonade Slushy.

Celebrate Mickey Chicken and Waffles // magicaltreatsathome.com

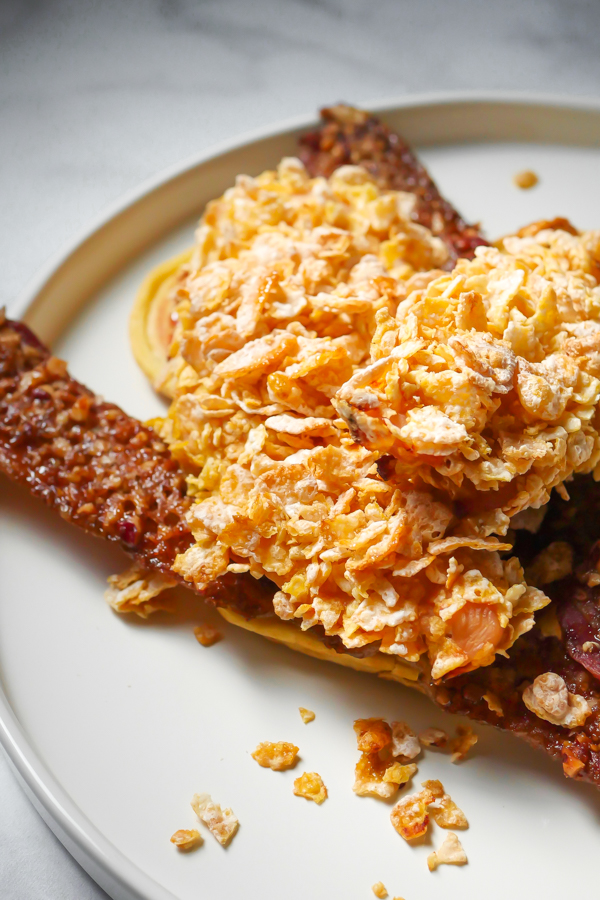
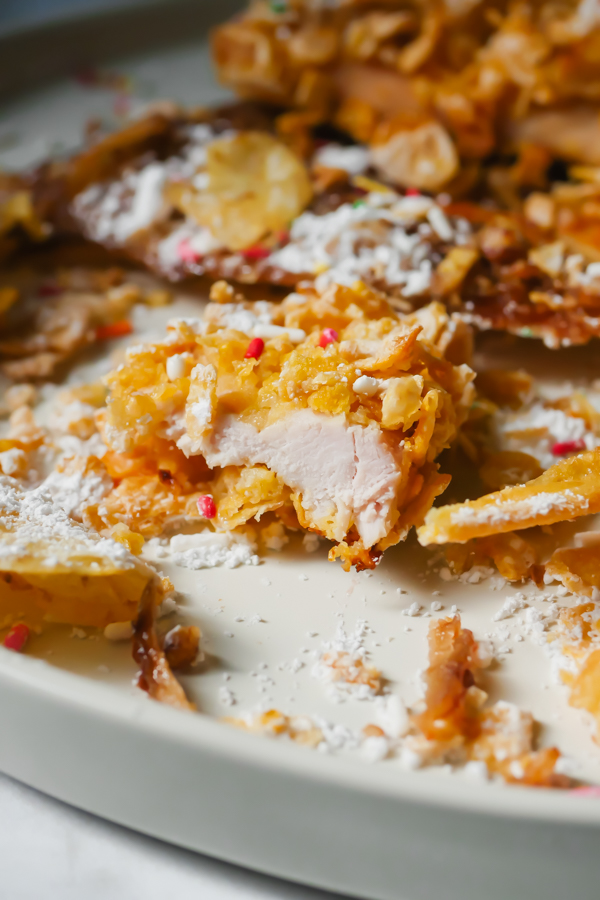
The one change I made from the original is that I did not pan fry the chicken. I wasn’t sure how the cereal coating would hold up to frying, so I decided to bake the battered chicken. And it worked out great! If you’re not up to pan frying these, the baked option keeps the topping crisp still but it does take longer to make. I like having the hands off option and less oil to deal with. It loses some of its golden color baking it, but I think it was just as tasty.

Celebrate Mickey Chicken and Waffles // magicaltreatsathome.com

If you’re looking for a special breakfast spread, or if you’re having guests over for brunch, I think this dish would be perfect. You could make stacks of each component and let your guests fill their plates as they’d like. And of course, kids LOVE making their own breakfast plate with these components, and aren’t going to say no to adding powdered sugar and SPRINKLES to their breakfast. Oh yeah, and potato chips too!

Celebrate Mickey Chicken and Waffles // magicaltreatsathome.com

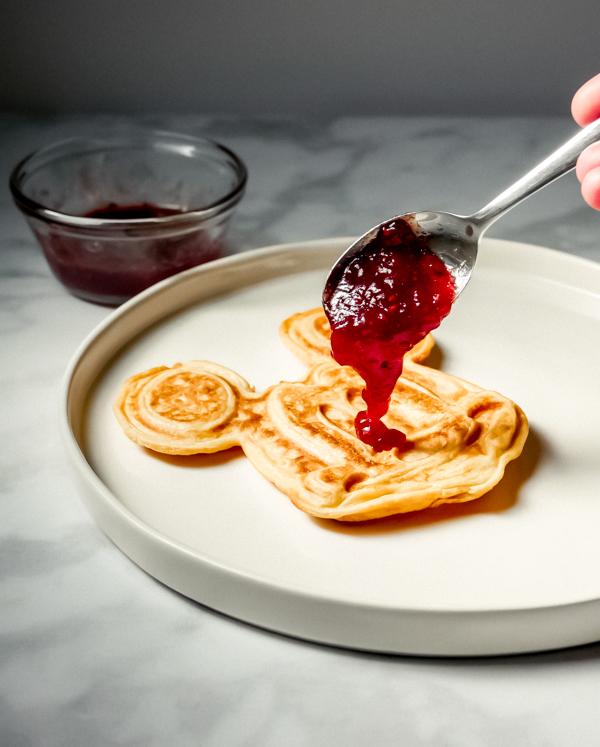
Note, this dish uses the same mix that Disneyland uses in all their waffles, Golden Malt. Surprisingly this is easily available on Amazon and possibly in your local grocery store. However, if you’ve got a waffle mix you like, either store bought or homemade, go ahead and use that. Also, I opted to mix strawberry and raspberry preserves to make my own compote for the dish. If you have a mixed berry jam already at home, that would also work. The berries give a nice tang to the whole dish that I think works really well with the savory elements.

Celebrate Mickey Chicken and Waffles // magicaltreatsathome.com

And that concludes some our favorite dishes from the “Get Your Ears On’ celebration at Disneyland! Stay tuned for next month’s recipes, where we will be serving up a month of CHURROS! Until then, let’s celebrate with some chicken and waffles.

Celebrate Mickey Chicken and Waffles // magicaltreatsathome.com
Print
clock clock iconcutlery cutlery iconflag flag iconfolder folder iconinstagram instagram iconpinterest pinterest iconfacebook facebook iconprint print iconsquares squares iconheart heart iconheart solid heart solid icon
Celebrate Mickey Chicken and Waffles // magicaltreatsathome.com

“Celebrate Mickey” Chicken and Waffles

5 Stars 4 Stars 3 Stars 2 Stars 1 Star No reviews
  • Author: Elana Lepkowski
  • Yield: 2 servings 1x
Print Recipe
Pin Recipe

Description

Let’s “Celebrate Mickey” with this over-the-top Disney-inspired chicken and waffles dish topped with berry compote, candied pecan bacon, potato chips, powdered sugar, and SPRINKLES! Found at Carnation Cafe during the “Get Your Ears On” celebration at Disneyland.


Ingredients

Scale

For the waffles:

  • 1 cup Golden Malted Waffle Mix
  • 1 egg
  • 5 ounces water
  • 2 tablespoons melted butter

For the berry compote:

  • 2 tablespoons strawberry jam
  • 1 tablespoon raspberry jam

For the candied pecan bacon:

  • 5 slices bacon
  • 3 tablespoons brown sugar
  • 1/3 cup crushed pecans

For the cereal crusted chicken:

  • 4 cups crushed frosted cereal flakes
  • 1 egg
  • 1–1/3 cup milk
  • 4 chicken breasts
  • salt

Toppings:

  • potato chips (I use kettle chips for this dish)
  • powdered sugar
  • rainbow sprinkles

Special Tools

  • Mickey Mouse Waffle Maker

Instructions

For the waffles (makes 4 waffles in Mickey Waffle Maker):

  1. Beat eggs and liquid together.
  2. Add flour and mix well.
  3. Stir in melted butter and mix thoroughly.
  4. Ladle onto hot Gourmet Waffle Baker and remove when golden brown.

For the berry compote:

  1. Mix together jams in a small bowl.
  2. Set aside.

For the candied pecan bacon:

  1. Heat oven to 400.
  2. Line a baking sheet with foil and place a cooling rack on top. Place bacon on the cooling rack.
  3. Combine brown sugar and pecans in a small bowl. Spoon mixture over bacon, pushing down into bacon evenly.
  4. Bake 20-25 minutes until brown and crispy.

For the cereal crusted chicken:

  1. Preheat oven to 375°f.
  2. Grease a 9×12 baking pan.
  3. Season chicken breasts with salt on both sides (about 1/2 teaspoon each).
  4. Crush cereal into even pieces (I used my hands as I measured it out) and place into a shallow bowl large enough to lay chicken in.
  5. In another shallow bowl of equal size, pour milk in and beat the egg into it.
  6. Next, dip chicken breast into the milk, letting excess drip back into bowl, and then dip into the cereal on both sides. Place in baking dish and repeat with the rest of chicken. 
  7. Bake in the oven for about 40 minutes or until a thermometer reads 165°f.

Assembly:

  1. Place the waffle on a plate and top with jam.
  2. Lay the bacon pieces next and then place chicken on top.
  3. Cover with potato chips, powdered sugar, and sprinkles. Enjoy!

Notes

  • Waffles can be made ahead of time and frozen individually between sheets of parchment and placed in a ziplock until ready to use. They can be toasted in a toaster oven or toaster the same as frozen waffles.
  • Bacon can be made ahead of time and placed in an airtight container in the fridge until ready to use up to 3 days. Let the bacon come to room temp, or warm in a toaster oven when ready to eat.
  • Chicken can be made ahead of time and placed in an airtight container in the fridge until ready to use up to 3 days. Warm in oven or toaster oven when ready to eat.
  • Jam can be mixed and stored in an airtight container in the refrigerator up to two weeks.
  • Waffles will deflate after cooking slightly.

Did you make this recipe?

Tag @magicaltreatsathome on Instagram and hashtag it #magicaltreatsathome

Celebrate Mickey Chicken and Waffles // magicaltreatsathome.com

Share this:

  • Click to share on Facebook (Opens in new window) Facebook
  • Click to share on X (Opens in new window) X

Like this:

Like Loading...

Filed Under: Recipes, Savory Tagged With: bacon, breakfast, Carnation Cafe, cereal, chicken, Mickey Mouse, potato chips, savory, sprinkles, waffles

Primary Sidebar

Follow Us

  • Instagram
  • Facebook
  • X
  • Pinterest
  • Email
  • YouTube

Hi! My name is Elana, and that’s me shoving a Mickey Mouse shaped treat in my face. I love the treats at Disneyland. A lot. So much so I’ve dedicated an entire website to making all my favorites, and hopefully yours too, out of my home kitchen. My aim is to create Disneyland-inspired treats, with easy to follow directions, and many recipes geared towards getting the kids in the kitchen to help too! Because putting sprinkles on things is F-U-N.

Top With Sprinkles

Get Recipes in Your Inbox!

* indicates required

Look for this icon in posts to find Kid Friendly recipes!

Recent Posts

  • Matterhorn Macaroon
  • Caramel Gingerbread Cookie Sandwiches
  • Colorful Fruit Hand Pies
  • Classic Mickey Shaped Beignets
  • Carrot Cake Cookies

Archives

  • February 2023
  • December 2022
  • August 2022
  • January 2022
  • December 2021
  • November 2021
  • December 2020
  • November 2020
  • October 2020
  • September 2020
  • August 2020
  • July 2020
  • June 2020
  • May 2020
  • April 2020
  • March 2020
  • February 2020
  • January 2020
  • December 2019
  • November 2019
  • October 2019
  • September 2019
  • August 2019
  • July 2019
  • June 2019
  • May 2019

Copyright © 2025 Magical Treats at Home on the Foodie Pro Theme

%d