• Skip to primary navigation
  • Skip to main content
  • Skip to primary sidebar

Magical Treats at Home

  • About
  • Treats
  • Drinks
  • Savory
  • Favorite Tools
  • Etsy Shop

cookies

Caramel Gingerbread Cookie Sandwiches

December 18, 2022 by Elana Lepkowski Leave a Comment

Where can I find the original treat?

Whoopie pies, mini cakes, giant cookies, give me a handheld dessert to walk around and snack on at the parks and I’m a happy person. One favorite handheld dessert at EPCOT has a cult-like following, and for good reason, it’s DELICIOUS.
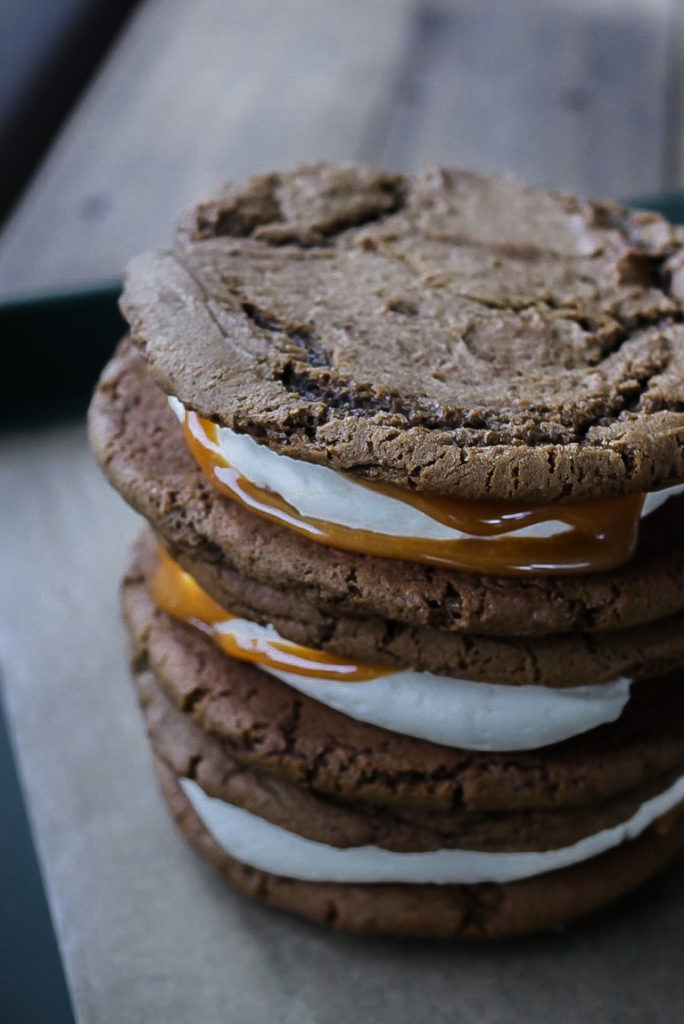
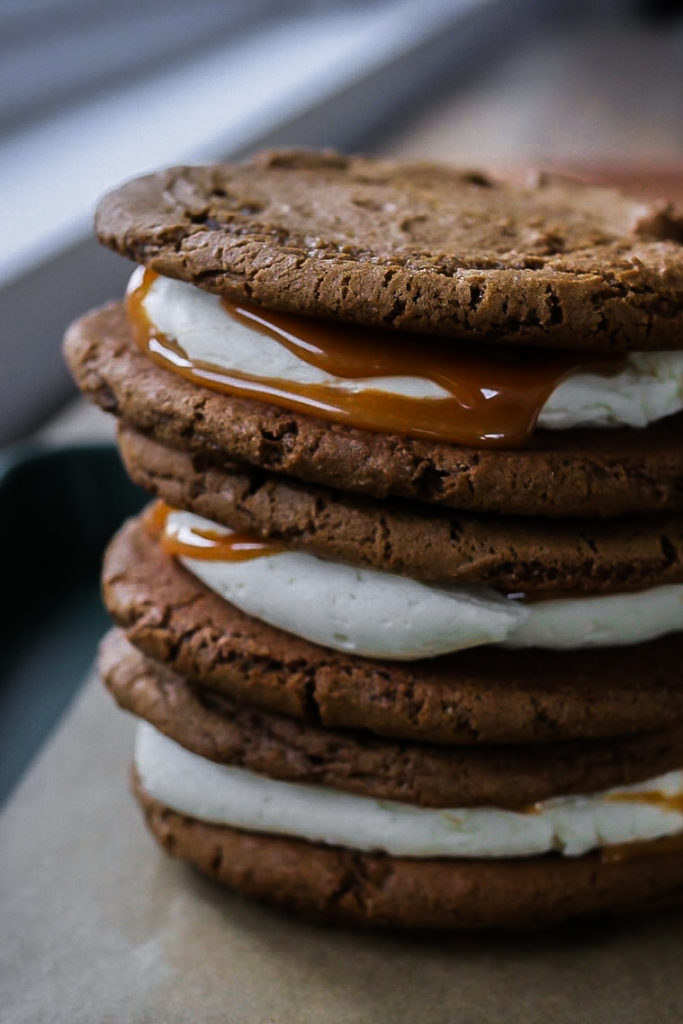
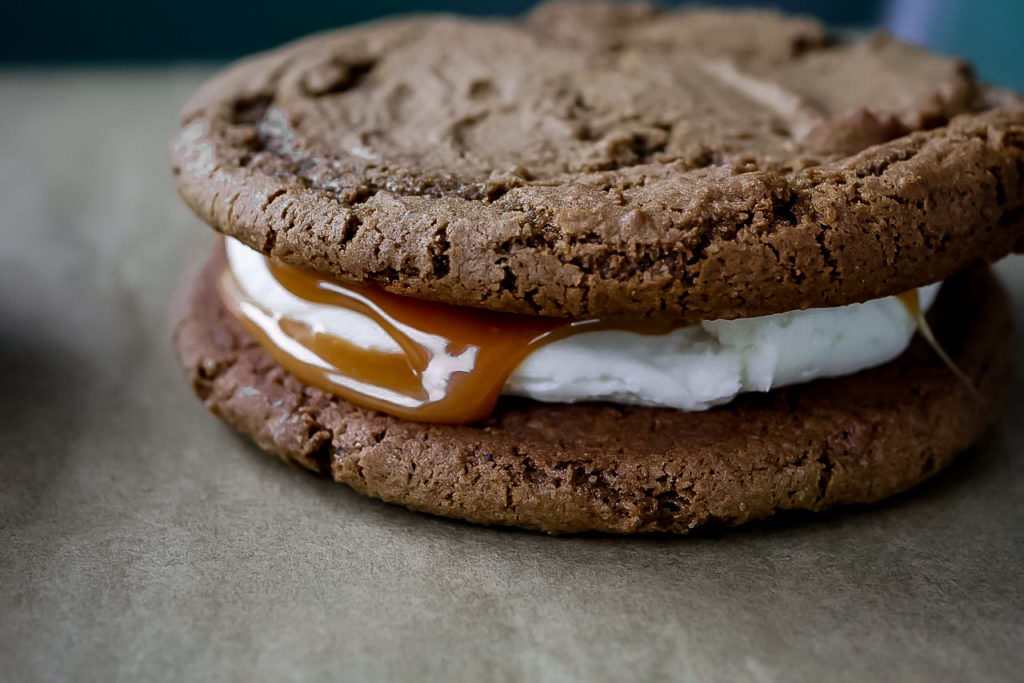
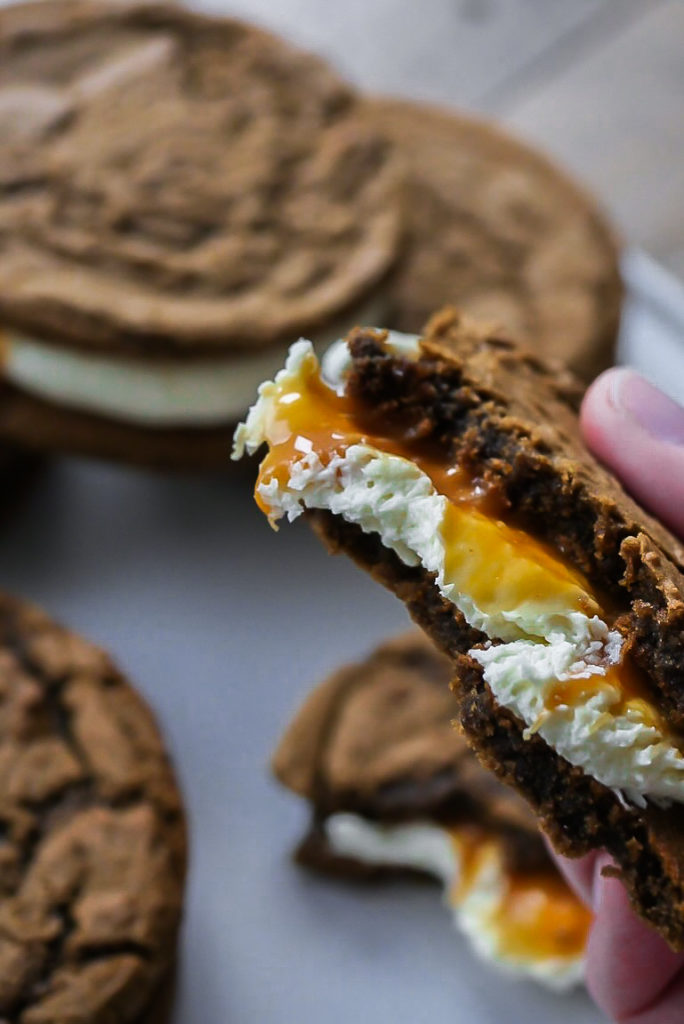
If you’re a caramel fan, then you’ve more than likely made your way over to Karamell-Küche (“caramel kitchen”) in EPCOT and tried one of the many, many amazing caramel-themed treats there. One absolute favorite on the menu is the seasonal Caramel Gingerbread cookie sandwiches. They are a sizeable handful of two oversized gingerbread cookies stuffed with American-style buttercream and oozing with Werther’s caramel. SO. GOOD.
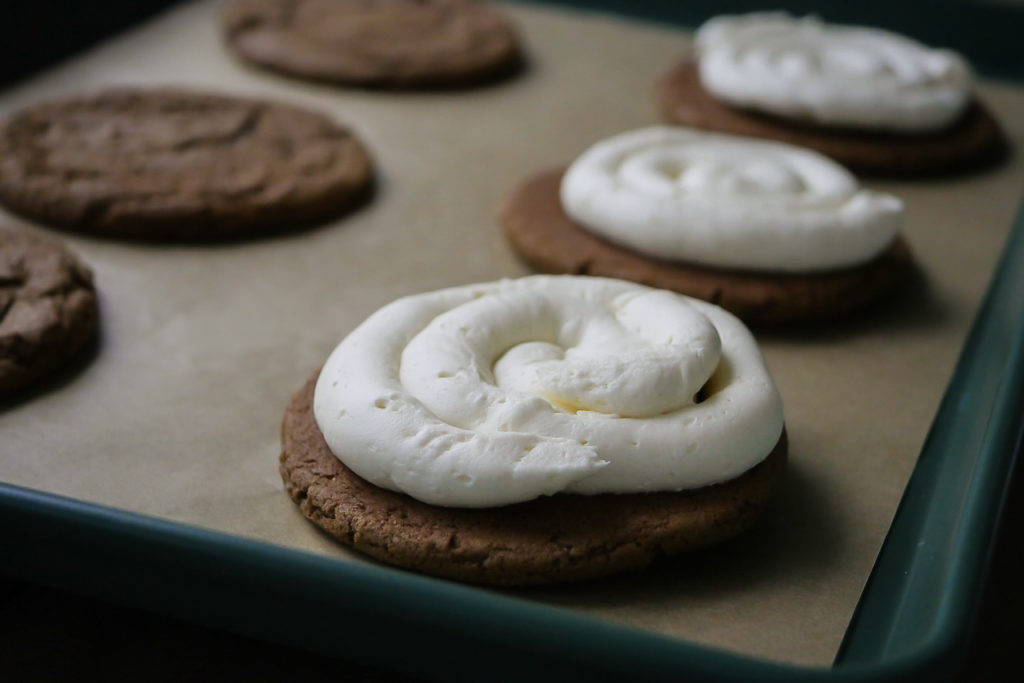
So good in fact I had to make them at my home and share the recipe with you all, because after you’ve run out of your stash and your next trip is months away, this should hold you over.

Although there are three separate parts to this cookie, it comes together rather quickly. To keep it in-theme with the park version, I actually use Werther’s soft caramels and add some salt to them. It cuts down on making the caramel from scratch, although if that’s something you’d like to do, go for it!
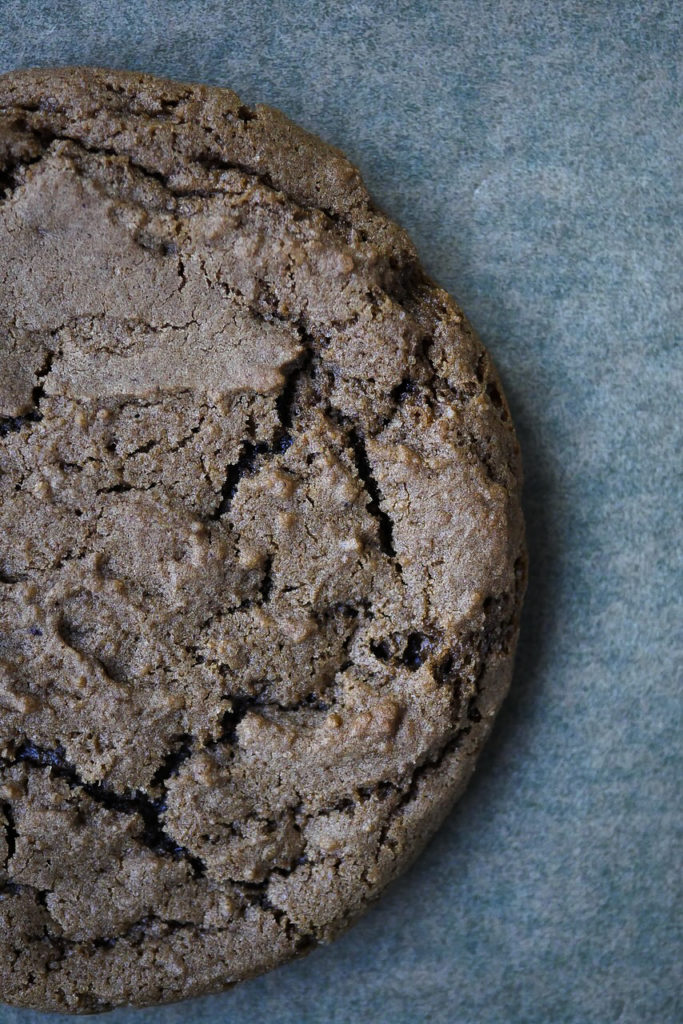
The dough recipe is easy to work with and requires minimal chilling. They do spread, which is why I recommend scooping into balls and baking them without flattening. If you want to make these cookies smaller, reduce the bake time by a few minutes or they’ll get too hard.

And the buttercream is straight-up American style, so nothing fancy here. Just whip up the butter, powdered sugar, vanilla, and cream and you’re done.
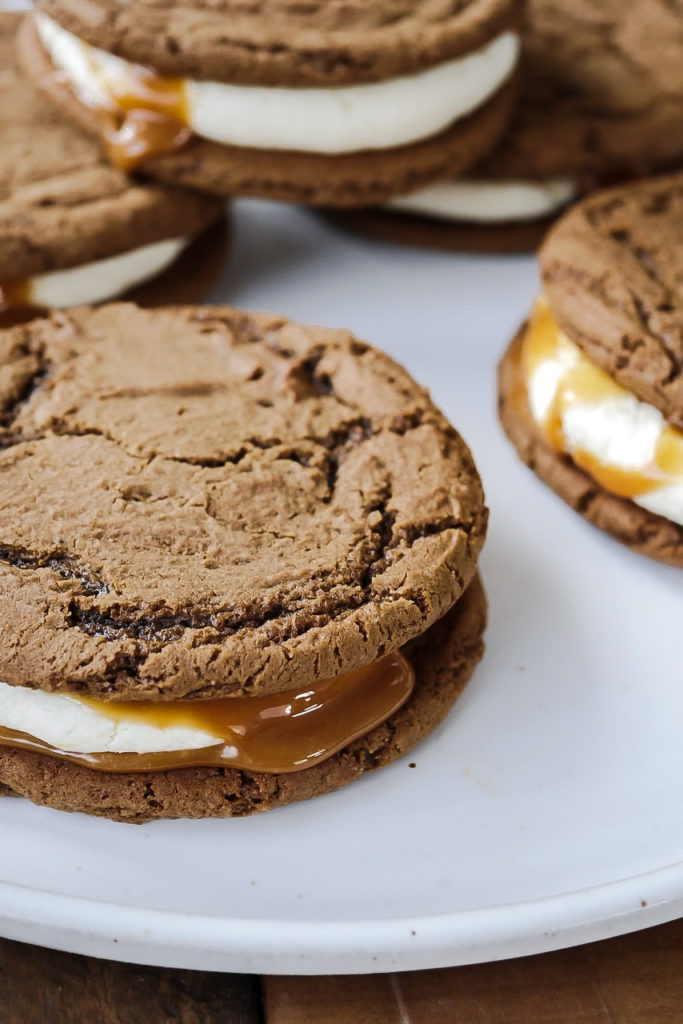
This is super kid-friendly recipe, and most components can be done by even the littlest hands. Older kids can definitely help with the caramel melting by themselves, and since you’re just warming those candies, even younger kids with supervision can do that part. Let’s just remind them not to stick their fingers into the hot pan. And even some of the adults might need that reminder too…

So let’s make our own caramel kitchen today and bake some cookies! And remember to check all the way through the recipe for helpful tips and tricks.
Print
clock clock iconcutlery cutlery iconflag flag iconfolder folder iconinstagram instagram iconpinterest pinterest iconfacebook facebook iconprint print iconsquares squares iconheart heart iconheart solid heart solid icon

Caramel Gingerbread Cookie Sandwiches

5 Stars 4 Stars 3 Stars 2 Stars 1 Star No reviews
  • Author: Elana Lepkowski
  • Yield: 5 cookies 1x
  • Category: Dessert
  • Cuisine: German
Print Recipe
Pin Recipe

Description

These oversized, beautifully spiced gingerbread cookies sandwich a generous amount of buttercream and salted caramel. Inspired by the Karamell-Küche cookies found at EPCOT in WDW.


Ingredients

Scale

For the cookies:

  • 1 stick (½ cup) unsalted butter, room temperature
  • 1 cup granulated sugar
  • 1 large egg
  • ¼ cup molasses
  • 1 tablespoon water
  • 2–¼ cups all-purpose flour
  • 2 teaspoons ground ginger
  • 1 teaspoon baking soda
  • 1 teaspoon ground cinnamon
  • ½ teaspoon ground cloves
  • pinch of kosher salt

For the buttercream:

  • 1 cup (2 sticks) unsalted butter, room temperature
  • 4 cups (454 grams) powdered sugar, sifted
  • pinch of kosher salt
  • 3 tablespoons heavy cream
  • 1 tablespoon pure vanilla extract

For the salted caramel sauce:

  • 6 ounces (about 25 candies) Werther’s soft caramel candies, unwrapped
  • 1 tablespoon water
  • ½ teaspoon kosher salt

Special Tools:

  • 2 ounce disher
  • #6 round piping tip
  • piping bag

Instructions

For the cookies:

  1. In a mixing bowl, cream together the butter and sugar until whipped and fluffy-about 2 minutes, scraping the sides of the bowl half-way through.
  2. Add in the egg and mix until fully incorporated. Then mix in the molasses and water.
  3. Next, dump in the flour, ground ginger, baking soda, cinnamon, cloves, and salt. Mix on low until no flour is visible, and then mix for an additional 30 seconds on medium-high until dough reaches the consistency of Play Doh.
  4. Chill the dough for 15-20 minutes (I keep it in the mixing bowl). While dough chills, preheat oven to 350°f.
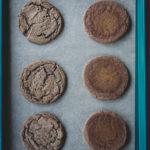
  5. Line two cookie sheets with parchment. When dough is done chilling, use a 2 ounce disher (blue handled, #16) or ¼ cup measuring cup to scoop out balls of dough placing 5 balls on each cookie sheet. Keep about 2-3” of space between cookies, as these spread out while they bake.
  6. Bake for 14-15 minutes. Cool on cookie sheets until room temperature. Cookies will still be soft but will firm up as they cool.
For the buttercream frosting:

  1. While the cookies are baking, make the frosting by first whipping the butter until creamy and lighter in color, about 1 minute. Next add in the powdered sugar, mixing on lowest setting until the powdered sugar has absorbed most of the butter. Stop, scrap down the sides, and then mix on medium high until it starts to whip up and resemble frosting.
  2. Next, add in vanilla and cream, mixing on low, and then gradually increasing to high. Whip for two minutes until light and fluffy. Set aside.
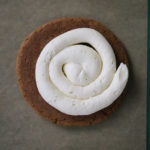
  3. When cookies are room temperature, move frosting to a piping bag fitting with a round piping tip. Pipe the frosting onto the bottom cookie half in a spiral starting from the center and moving outward. Set aside.
For the salted caramel sauce:

  1. To make the caramel sauce, combine the unwrapped caramels, water, and salt into a small saucepan over medium-low heat. When the caramels start to soften, mix continuously until smooth. Remove from the heat and let cool for 5 minutes, stirring frequently.

  2. When the caramel is still pourable, but not super liquidy, drizzle over the buttercream halves (if the caramel is too hot, it will melt the buttercream). Top with the other cookie half and enjoy!

Notes

  • Dough can be made in advance and stored in an airtight container in the refrigerator for up to 3 days.
  • If you want to make smaller cookies, reduce cooking time by about 5 minutes.
  • Cookies can be baked ahead of time and stored in an airtight container on the counter for up to 5 days. They can also be individually wrapped and frozen up to 4 months.
  • This frosting will make slightly more than you need. Extra frosting can be stored in an airtight container in the refrigerator for up to a week. Let come to room temp and re-whip if necessary before using.
  • Frosting can also be spread onto the cookies instead of piped if you prefer.
  • Any unused caramel sauce can be stored in an airtight container in the refrigerator for up to a month. If sauce sticks in the pan, re-warm slightly until soft and then transfer to the container.
  • Assembled cookies can be stored tightly wrapped in the refrigerator for up to 3 days.

Nutrition

  • Serving Size: 5 Cookies
Did you make this recipe?

Tag @magicaltreatsathome on Instagram and hashtag it #magicaltreatsathome

Share this:

  • Click to share on Facebook (Opens in new window) Facebook
  • Click to share on X (Opens in new window) X

Like this:

Like Loading...

Filed Under: Recipes, Treats Tagged With: buttercream frosting, caramel, cookies, Epcot, Germany, gingerbread, holiday, treat, WDW

Carrot Cake Cookies
January 30, 2022 by Elana Lepkowski Leave a Comment

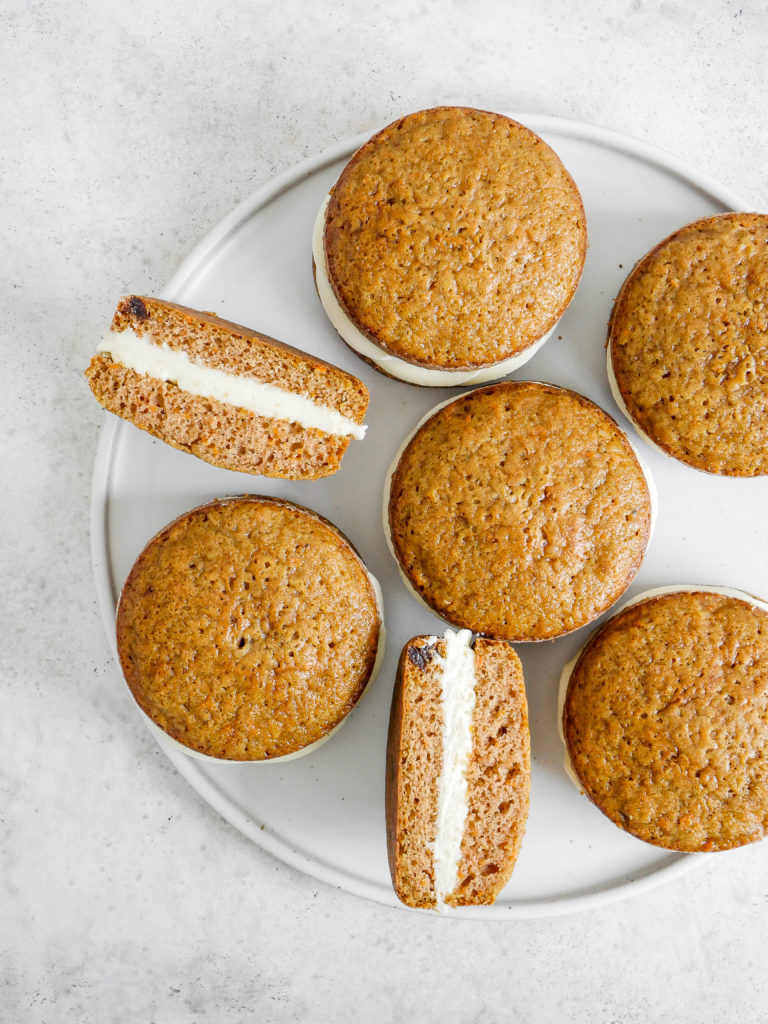
Carrot Cake Cookies // magicaltreatsathome.com
Where can I find the original treat?

  • This treat can be found at the Trolley Car Cafè inside Disney’s Hollywood Studios.

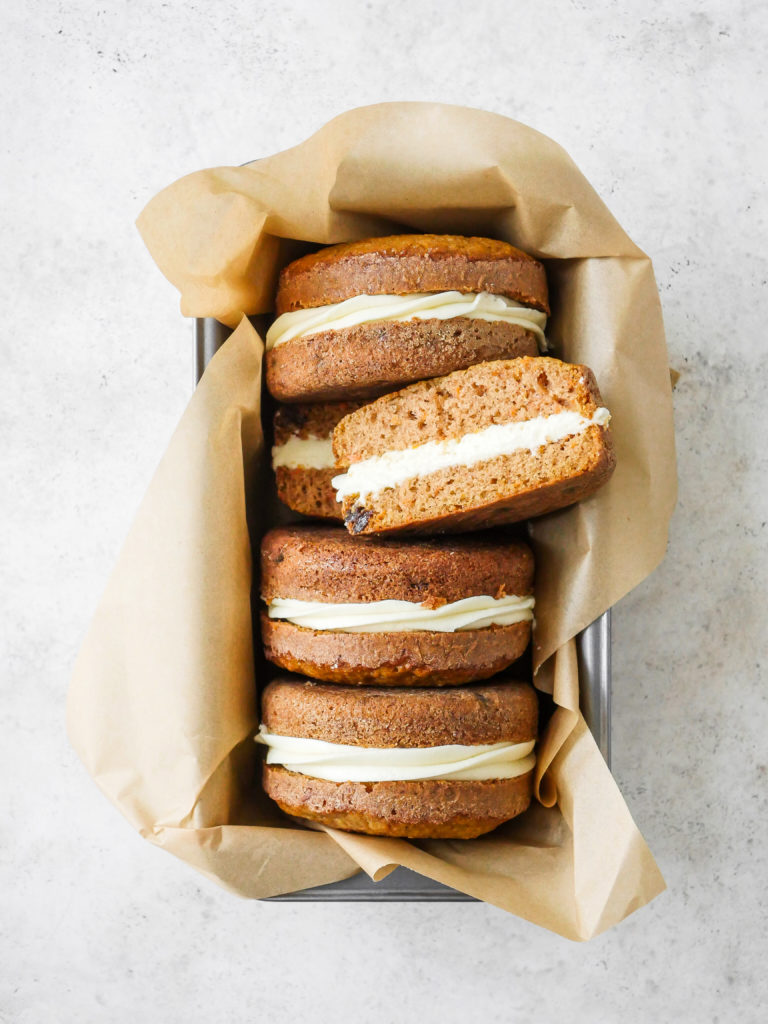
Carrot cake is high up there on my list of desserts I’m more than happy to consume on a regular basis. And, if Disney is calling their cakes cookies now, encouraging me to believe that their handheld treat could quite possibly be a one person, one serving item (cause a singular cookie would fit that bill), then I’m here for this logic. I’m also here today to show you how to make your own version at home.
Carrot Cake Cookies // magicaltreatsathome.com
I’m just throwing it out there that this might be one of my favorite recipes on this site so far. I was more than happy to test this recipe many times, and my recipe testers came back saying they licked their plates clean. So I hope you walk away from this with the same enthusiasm.

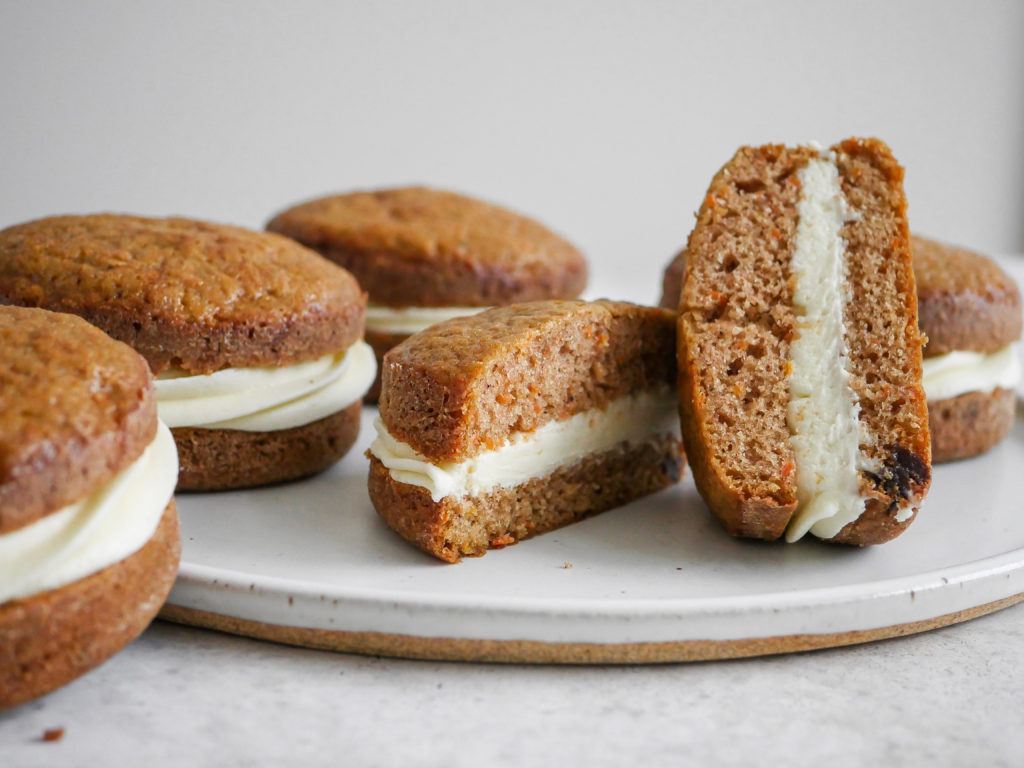
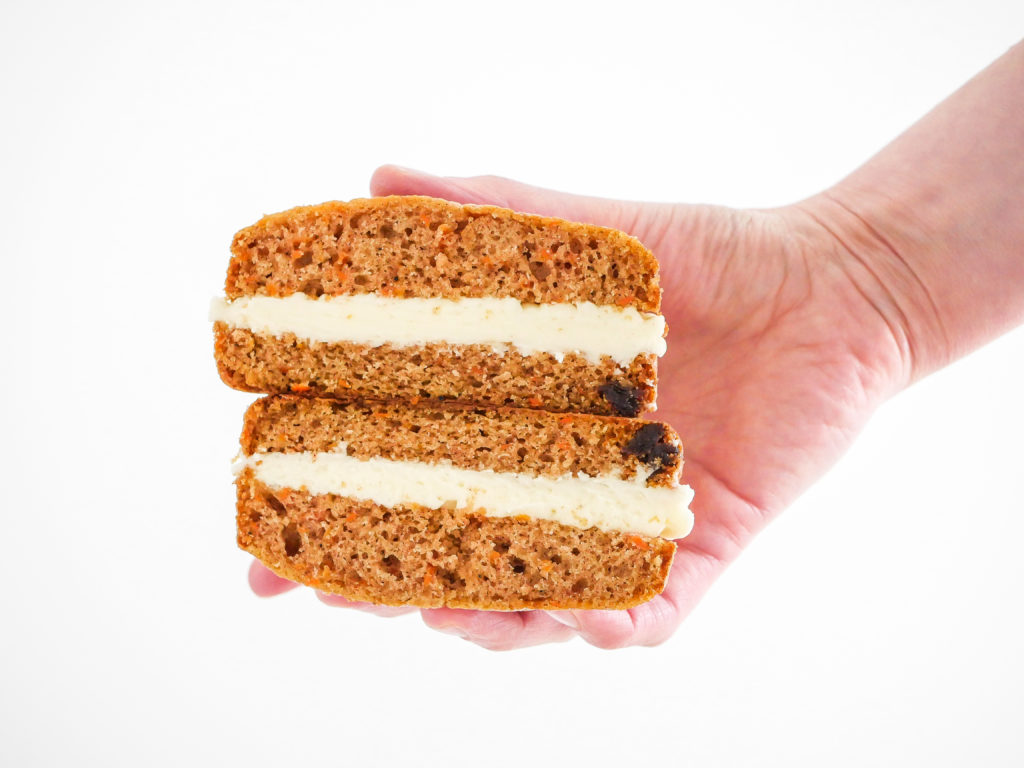
What makes these great is that the cakes are moist, and with the small grate on the carrots, they’re evenly spread out throughout the cakes with lots of cinnamon spice. And the frosting! OMG the frosting is so good and makes plenty to fill these cakes, erm, cookies with. You might even have some extra left over in which case you should put that to good use on some butter cookies, or, you know, just eat it straight.
Carrot Cake Cookies // magicaltreatsathome.com
Older kids in the kitchen can help grate the carrots, and kids of all ages can help mix the batter and frosting. Small kids can even help pipe the frosting once you’ve put it in the bag for them.
What pan should I use to make these?

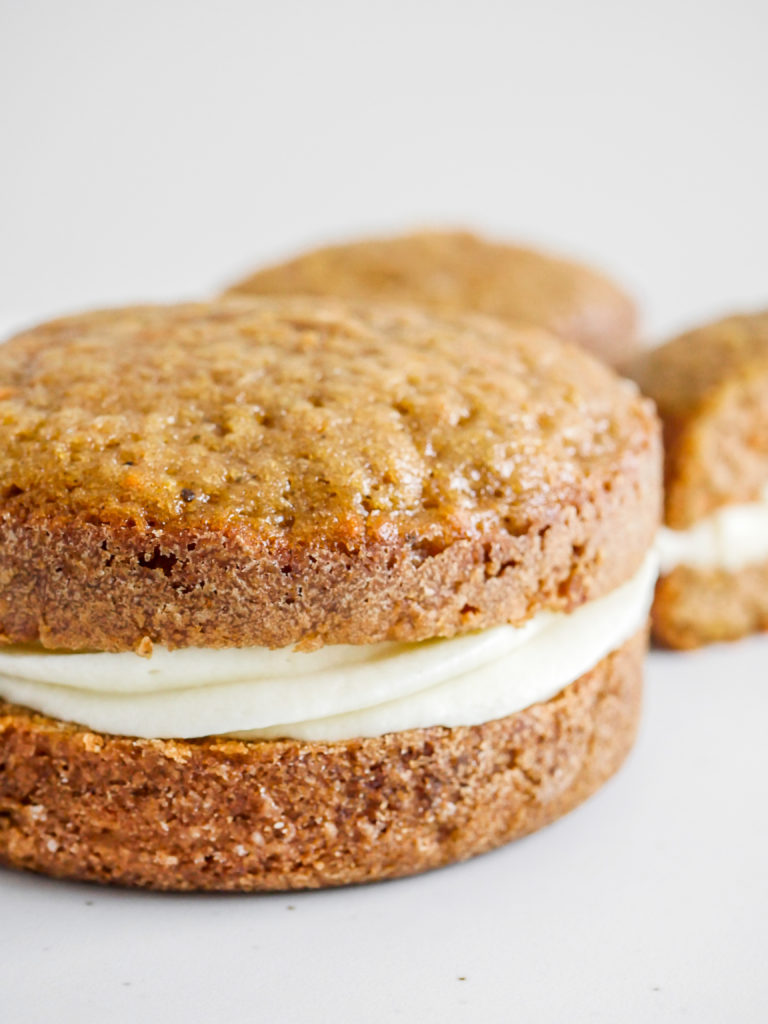
While many fans of this “cookie” refer to them as whoopie pies, you would think to use a whoopie pie pan. But, look at those sides!! You cannot get that height with a standard whoopie pie pan (and yes, this is an actual baking tool that exists and you can buy). What I found to work are 4″ cake pans. These give a great straight edge and hold lots of batter too.

Carrot Cake Cookies // magicaltreatsathome.com

So, if you’re New Year’s resolution was to eat more vegetables, or cake, you can knock both of those out with these cookies. Enjoy!

Print
clock clock iconcutlery cutlery iconflag flag iconfolder folder iconinstagram instagram iconpinterest pinterest iconfacebook facebook iconprint print iconsquares squares iconheart heart iconheart solid heart solid icon
Carrot Cake Cookies // magicaltreatsathome.com

Carrot Cake Cookies

5 Stars 4 Stars 3 Stars 2 Stars 1 Star No reviews
  • Author: Elana Lepkowski
  • Prep Time: 15 minutes
  • Cook Time: 30
  • Total Time: 45 minutes
  • Yield: 6 Carrot Cake Cookies 1x
  • Category: Dessert
  • Method: Baking
  • Cuisine: Comfort Food
Print Recipe
Pin Recipe

Description

Sweet, cream cheese frosting is sandwiched between two oversized carrot cake “cookies” in this shareable snack for two! A Disney World-inspired treat.


Ingredients

Scale

Carrot Cake Cookies:

  • 2 cups (240 g) all purpose flour
  • 1 1/2 cups (297 g) granulated sugar
  • 2 teaspoons ground cinnamon
  • 1 teaspoon baking soda
  • 1/2 teaspoon ground nutmeg
  • 1/4 teaspoon ground allspice
  • 1/4 teaspoon salt
  • 3/4 cup buttermilk, room temperature
  • 1/3 cup neutral oil, like avocado or canola
  • 3 eggs
  • 2 teaspoons real vanilla extract
  • 2 cups (105 g) carrots, grated
  • 1/2 cup (70 g) raisins

Cream Cheese Frosting:

  • 8 ounces cream cheese, not whipped, room temperature
  • 1/2 cup (1 stick) of unsalted butter, room temperature
  • 4 cups (454 g) powdered sugar, sifted
  • 1 teaspoon vanilla extract

Special Tools

  • 6 4″ cake pans
  • piping bags
  • closed star pastry tip

Instructions

For the carrot cake cookies:

  1. Preheat oven to 350°f. Grease and flour 6 4″ cake pans and set aside.
  2. In a large mixing bowl, combine the flour, granulated sugar, cinnamon, baking soda, nutmeg, allspice, and salt. Whisk to combine and set aside.
  3. In a large mixing glass, combine the buttermilk, oil, eggs, and vanilla extract. Whisk well to combine and pour into the dry ingredients.
  4. Mix the dry and wet ingredients together until no flour pockets remain. Gently stir the carrots and raisins in until evenly distributed.
  5. Divide the mixture evenly between the 6 cake pans (each will get just over a 1/2 cup of mixture). Give the pans a tap on the counter to release any air bubbles and even out the mixture.
    Carrot Cake Cookies // magicaltreatsathome.com
  6. Bake 25 to 30 minutes until a toothpick or cake tester comes out clean.
  7. Let the cakes cool about 10 minutes and then remove them to a wire rack to completely cool.
    Carrot Cake Cookies // magicaltreatsathome.com

Cream Cheese Frosting and decoration:

  1. While cakes are cooling, make the frosting.
  2. In a mixing bowl, whip together the cream cheese and butter until smooth.
  3. Add in the powdered sugar and slowly begin to mix (speed 1-2) until it starts to combine, and then turn to high (speed 10) until well combined. Add in vanilla extract and whip until smooth and creamy.
  4. Transfer frosting to a piping bag fitted with a closed star tip nozzle.
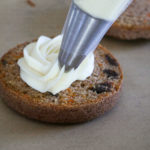
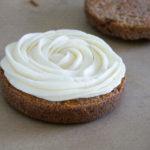
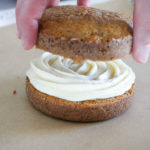
  5. Take each cooled cake and cut in half lengthwise (across the equator). Pipe a swirl of frosting covering the entire cut side of the bottom cake. Place the top half of cake on top and set aside. Continue with all 5 cakes.
    Carrot Cake Cookies // magicaltreatsathome.comCarrot Cake Cookies // magicaltreatsathome.comCarrot Cake Cookies // magicaltreatsathome.com
  6. Enjoy immediately or store in an air-tight container up to 5 days in the refrigerator.

Notes

  • I’ve found that the bagged grated carrots from the store are too large for this recipe and also have a very “earthy” flavor. I would suggest grating the carrots by hand on a box grater for a smaller size, or, cutting down the pre-shredded carrots before mixing into the batter.
  • Want to quickly warm up your butter and cream cheese without fear of melting in the microwave? Cube both into small pieces and they should be warm enough to whip up in about 15 minutes.
  • If you’re having trouble cutting the cakes in half, wait several hours until they are fully cooled. If they’re still giving you trouble, freeze them for an hour to help them firm up more. Use a serrated knife to help cut through lengthwise.
  • Extra frosting can be refrigerated up to 4 days in an air-tight container, or frozen up to 3 months. Re-whip once defrosted.

Did you make this recipe?

Tag @magicaltreatsathome on Instagram and hashtag it #magicaltreatsathome

Carrot Cake Cookies // magicaltreatsathome.com

Share this:

  • Click to share on Facebook (Opens in new window) Facebook
  • Click to share on X (Opens in new window) X

Like this:

Like Loading...

Filed Under: Recipes, Treats Tagged With: cake, carrot cake, carrots, cookies, cream cheese, frosting, Hollywood Studios, raisins, treat, Trolley Car Cafe, WDW

Peanut Butter and Chocolate Cookie Pie

December 31, 2021 by Elana Lepkowski 2 Comments

Peaut Butter Chocolate Cookie Pie // magicaltreatsathome.com

Where can I find the original treat?

  • The original treat can be found at the Candy Palace in Disneyland.

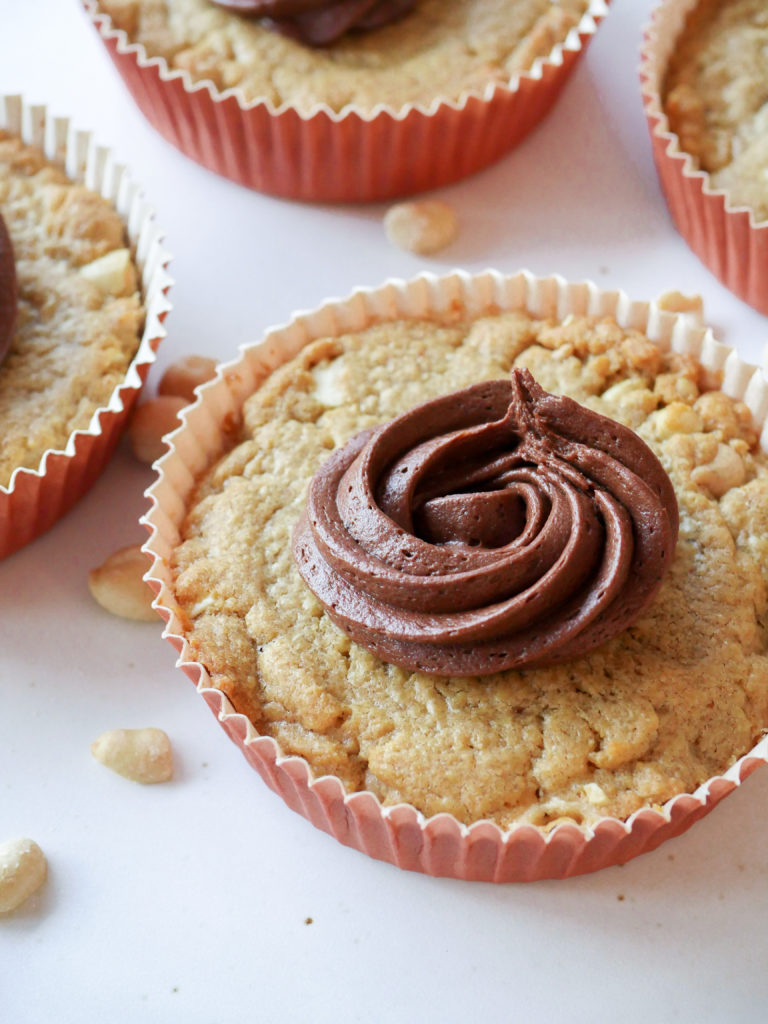
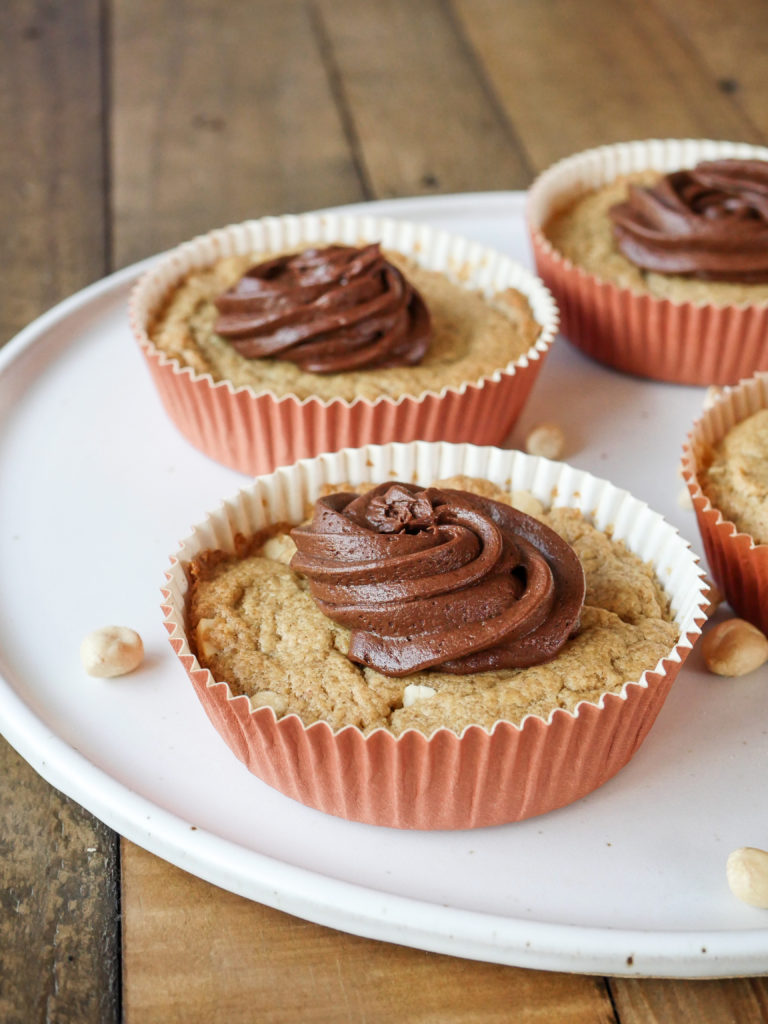
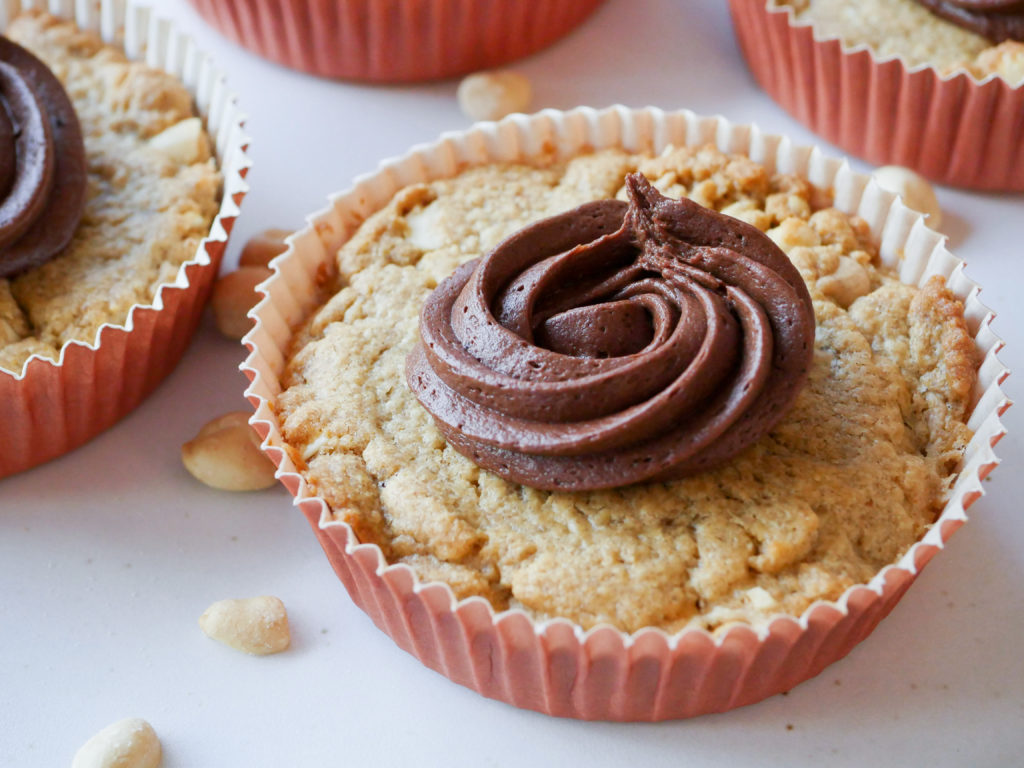
We’re closing out the year squeezing this recipe in just before the clock rings midnight. While I am a huge fan of chocolate and peppermint, I know there are some of you (my husband being the most vocal) who cannot take that delicious holiday combo. So I thought I’d add in my second favorite of the cookie/brownie “pies” over at Disneyland with this yummy treat. The Peanut Butter and Chocolate Cookie Pie is both salty and sweet, and just as richly decadent as the other new treats found over at the Candy Palace. It’s big enough to share… if you want.

Peaut Butter Chocolate Cookie Pie // magicaltreatsathome.com

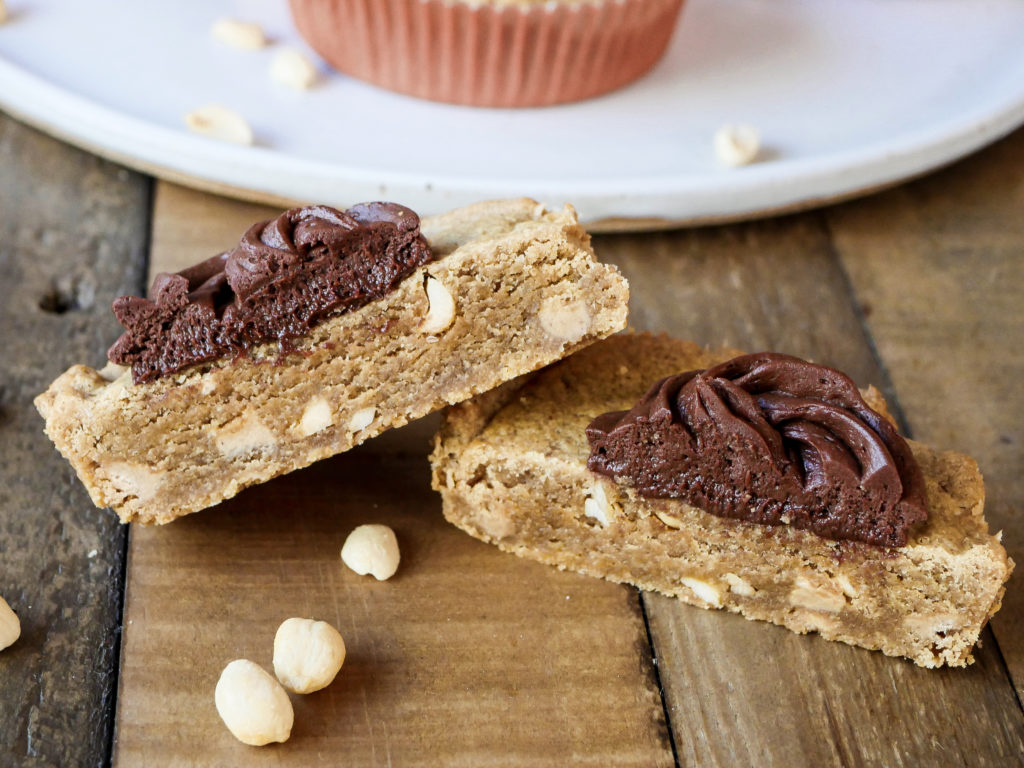
These have a similar base to the Peanut Butter Blondies, but the fillings and toppings are different. The cookie base here is chock full of peanut butter chips and chopped peanuts, topped with a swirl of fudgey chocolate frosting. I’ve pared down the recipe to make four, but if that still seems like a lot to have on hand, these will freeze well wrapped for several months.

If you’ve got kids in the kitchen, this is an all-levels recipe with opportunities for small hands to help chop, stir, and mix. We’ve been practicing piping techniques and I’ve recently been introduced to these great squeeze bulbs that are easy for kids to hold instead of the larger piping bags.

Peaut Butter Chocolate Cookie Pie // magicaltreatsathome.com

The time and temperature I’ve put in the recipe will result in the peanut butter cookie pies having a firm exterior and moist center, but not so moist as to fall apart. You can take the time down a few minutes if you prefer your cookie pies to have that very soft cookie center. How much chocolate you add to the top is also to you. Did I test one completely covered in chocolate on top? Yes, yes I did. The chocolate gives this a much needed sweet bite that complements the salty peanut butter (but don’t worry, it’s not too salty-savory). If you find that your frosting is too stiff, add a teaspoon of cream until it is soft enough for your liking.

I’ve really enjoyed these new “pies” at the parks, and I’d love to see some new treat formats in 2022. Maybe an actual pie? On a stick?

Peaut Butter Chocolate Cookie Pie // magicaltreatsathome.com

Happy New Year everyone! As always, leave us a comment here or on our socials if you’ve tried one of our recipes, or if you have one you’d like to see. Thanks for visiting and making magic in your kitchen with us!

Print
clock clock iconcutlery cutlery iconflag flag iconfolder folder iconinstagram instagram iconpinterest pinterest iconfacebook facebook iconprint print iconsquares squares iconheart heart iconheart solid heart solid icon
Peaut Butter Chocolate Cookie Pie // magicaltreatsathome.com

Peanut Butter and Chocolate Cookie Pie

5 Stars 4 Stars 3 Stars 2 Stars 1 Star No reviews
  • Author: Elana Lepkowski
  • Prep Time: 20
  • Cooling Time: 15
  • Cook Time: 26
  • Total Time: 1 hour 1 minutes
  • Yield: 4 Peanut Butter and Chocolate Cookie Pies 1x
  • Category: Dessert
  • Method: Baking
  • Cuisine: Holiday
Print Recipe
Pin Recipe

Description

The classic combination of peanut butter and chocolate create a shareable treat that satisfies both your sweet and savory tastes in this oversized cookie “pie”. A Disneyland-inspired recipes.


Ingredients

Scale

Peanut Butter Base:

  • 1 stick butter (1/2 cup)
  • 1/2 cup (120 g) creamy peanut butter
  • 3/4 cup (150 g) light brown sugar
  • 1 egg
  • 1/2 teaspoon kosher salt
  • 1 teaspoon vanilla extract
  • 1 cup (120 g) flour
  • 1/2 cup (127 g) peanut butter chips
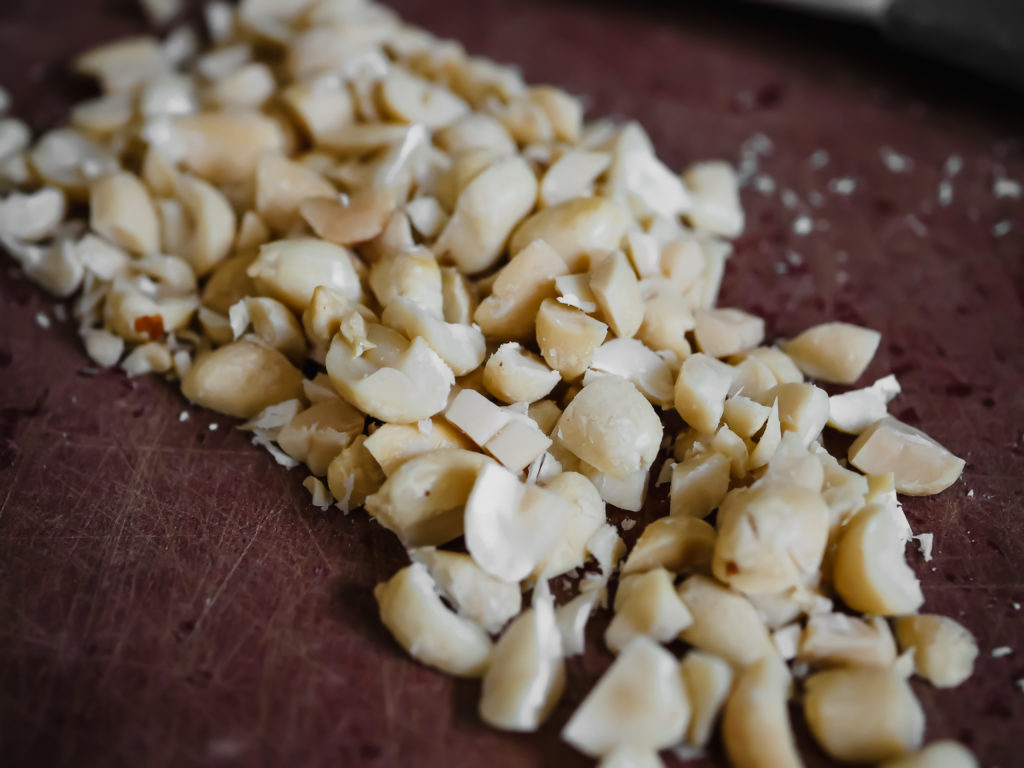
  • 1/4 cup (31 g) roasted peanuts, chopped

Fudge Frosting:

  • 1/4 cup (4 tablespoons) unsalted butter
  • 2 ounces (57 g) unsweetened baking chocolate, chopped
  • 1/2 pound (227 g) powdered sugar, sifted
  • 2 tablespoons unsweetened cocoa powder, sifted
  • 1/4 teaspoon pure vanilla extract
  • 4 tablespoons cream

Special Tools:

  • Oversized baking cups/molds
  • Wilton 1 M tip
  • Small 12″ pastry bags

Instructions

For the base:

  1. Preheat the oven to 350°f.
  2. Melt the butter in a small saucepan, or in the microwave.
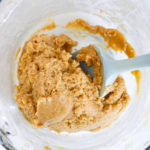
  3. In a large mixing bowl, combine the melted butter, peanut butter, and brown sugar. Whisk until smooth.
  4. Mix in the egg, salt and vanilla extract until smooth.
  5. Stir in the flour until just combined.
    Peaut Butter Chocolate Cookie Pie // magicaltreatsathome.com
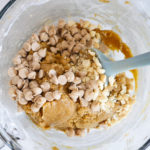
  6. Fold in the peanut butter chips and chopped peanuts.
    Peaut Butter Chocolate Cookie Pie // magicaltreatsathome.com
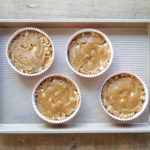
  7. Pour the mixture into 4 of the baking cups (the mixture will be on the stiff side), and smooth the tops.
    Peaut Butter Chocolate Cookie Pie // magicaltreatsathome.com
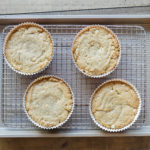
  8. Bake for 25-30 minutes.
    Peaut Butter Chocolate Cookie Pie // magicaltreatsathome.com
  9. When done, let fully cool before frosting. To help create a space for the frosting to sit, depress the center of the cookie pies with the back of a spoon.
    Peaut Butter Chocolate Cookie Pie // magicaltreatsathome.com

For the fudge frosting and finishing:

  1. Melt butter and chocolate in a double boiler, or microwave, in a heat proof bowl. For a double boiler, stir constantly over a low simmer until melted and smooth. If using a microwave, do short bursts of 15-20 second intervals, stirring in-between, until fully melted and smooth.
  2. Stir together the powdered sugar, cocoa powder, and melted chocolate and butter. Add in the vanilla extract and cream.
  3. Whip together on medium high speed (8), until well combined and smooth.
  4. Transfer frosting to a piping bag fitted with the Wilton 1M tip.
  5. Pipe rosettes in middle of the peanut butter cookie pies.
    Peaut Butter Chocolate Cookie Pie // magicaltreatsathome.com
  6. Enjoy!

Notes

  • You can also bake this in an 8×8″ baking pan lined with parchment.
  • If you’re using salted peanut butter, reduce salt in recipe to 1/4 teaspoon.
  • Extra frosting can be refrigerated up to 4 days in an air-tight container, or frozen up to 3 months. Re-whip once defrosted.
  • Bases can be wrapped with or without frosting and frozen for up to 3 months.

Did you make this recipe?

Tag @magicaltreatsathome on Instagram and hashtag it #magicaltreatsathome

Peaut Butter Chocolate Cookie Pie // magicaltreatsathome.com

Share this:

  • Click to share on Facebook (Opens in new window) Facebook
  • Click to share on X (Opens in new window) X

Like this:

Like Loading...

Filed Under: Recipes, Treats Tagged With: blondies, Candy Palace, chocolate, cookies, disneyland, holiday, peanut butter, peanuts, treat

Thanksgiving Recipe Round Up

November 23, 2021 by Elana Lepkowski Leave a Comment

Hello everyone and welcome back to Magical Treats at Home! It’s been almost a year since we’ve been able to bring you some theme park inspired treats, and well, you’ll still need to sit tight for a new one but we’ll squeeze one in before year-end. Promise! Until then, THANK YOU for visiting, and THANK YOU for making these treats!

Now let’s look check out some Thanksgiving Day (or week!) treats to make!

Pecan Pie Crispy Treat // magicaltreatsathome.com

Pecan Pie Crispy Treat

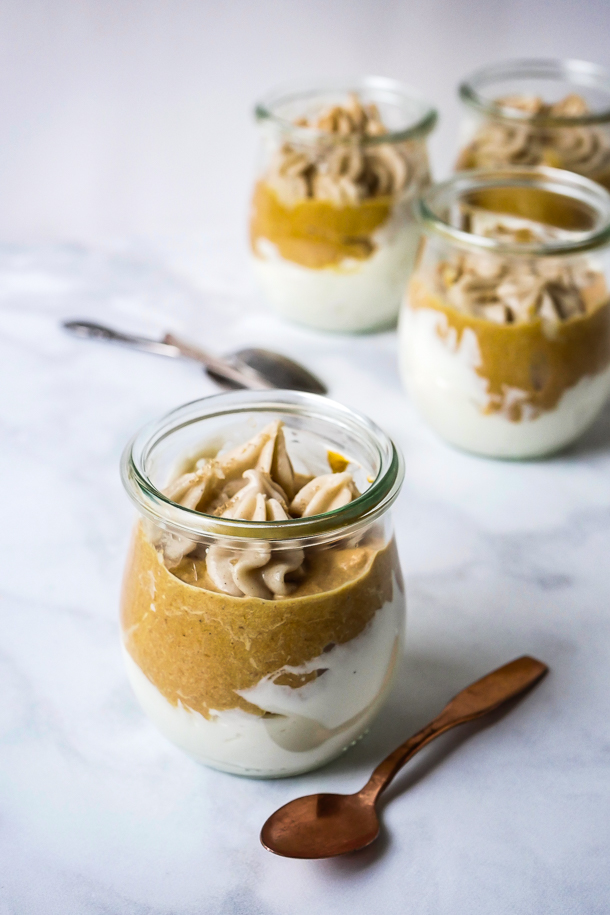
Layered Pumpkin Cheesecakes

Layered Pumpkin Cheesecakes

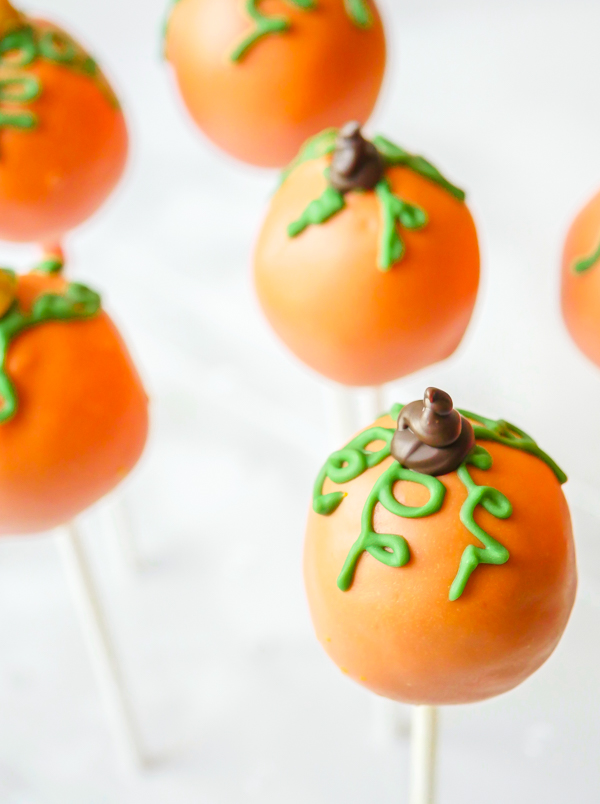
Pumpkin Spice Cake Pops

Pumpkin Spice Cake Pops

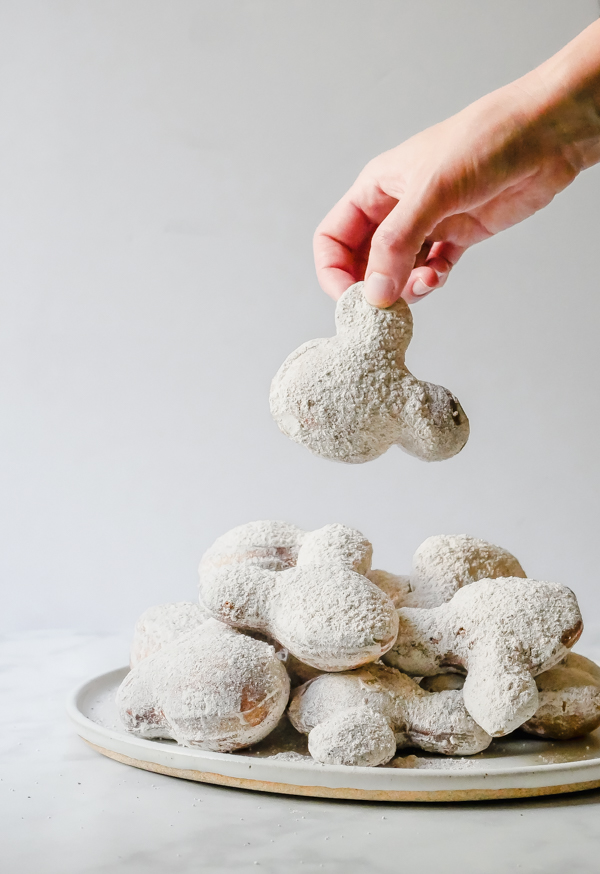
MIckey Mouse Pumpkin Spice Beignets // magicaltreatsathome.com

Mickey Mouse Pumpkin Spice Beignets

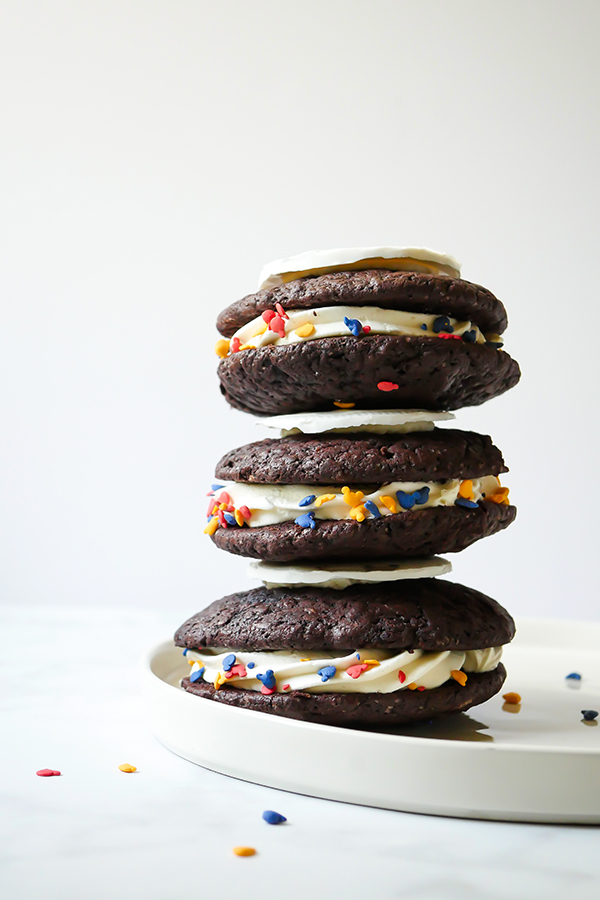
Mickey Mouse Celebration Whoopie Pies // magicaltreatsathome.com

Mickey Mouse Celebration Whoopie Pies

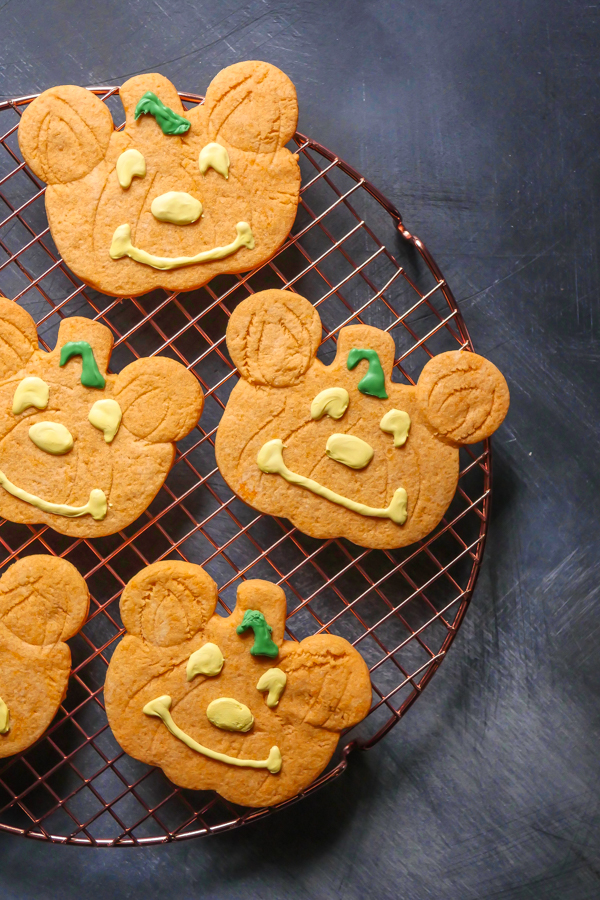
Mickey Mouse Pumpkin Cookie // magicaltreatsathome.com

Mickey Mouse Pumpkin Cookie

Peanut Butter Blondie for peanut butter lovers // magicaltreatsathome.com

Peanut Butter Blondies

Mickey Mouse Gingerbread Man // magicaltreatsathome.com

Mickey Mouse Gingerbread Man

Share this:

  • Click to share on Facebook (Opens in new window) Facebook
  • Click to share on X (Opens in new window) X

Like this:

Like Loading...

Filed Under: Recipes, Treats Tagged With: beignet, cake pop, character treat, cookies, crispy treat, disneyland, Mickey Mouse, peanut butter, Pumpkin, pumpkin spice, Thanksgiving, treat

Mickey Mouse Holiday Gingerbread Cookie 2020

December 15, 2020 by Elana Lepkowski 3 Comments

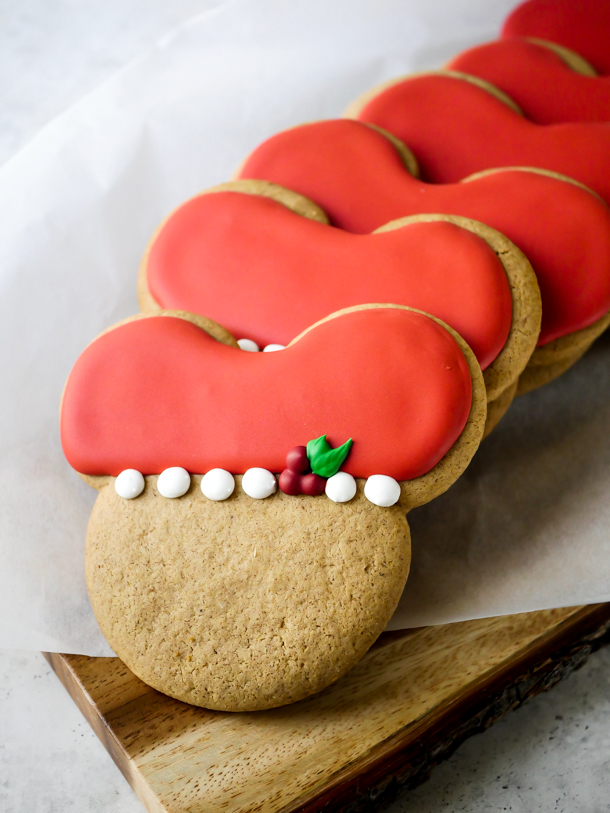
Mickey Holly Christmas Cookies 2020 // magicaltreatsathome.com

Where can I find the original treat?

  • This holiday treat was found a Marceline’s and Trolley Treats at the Disneyland resort.

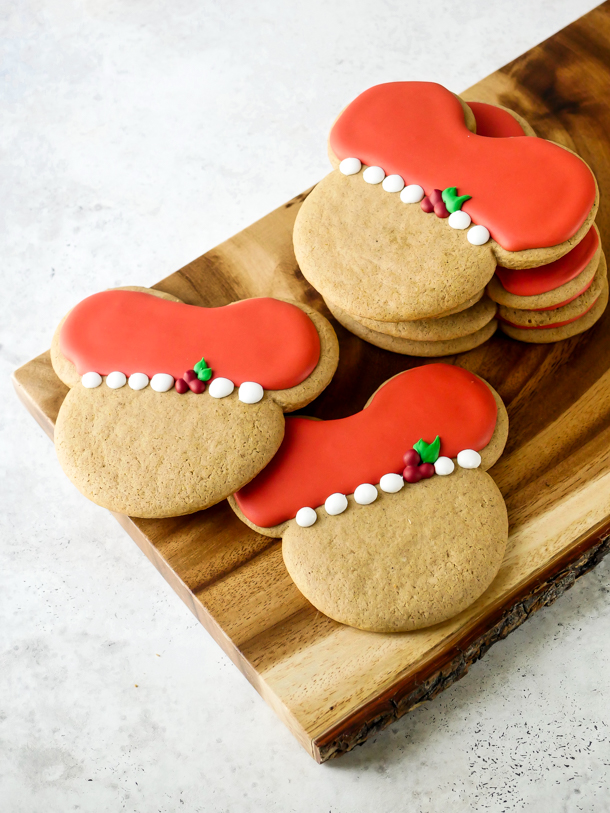
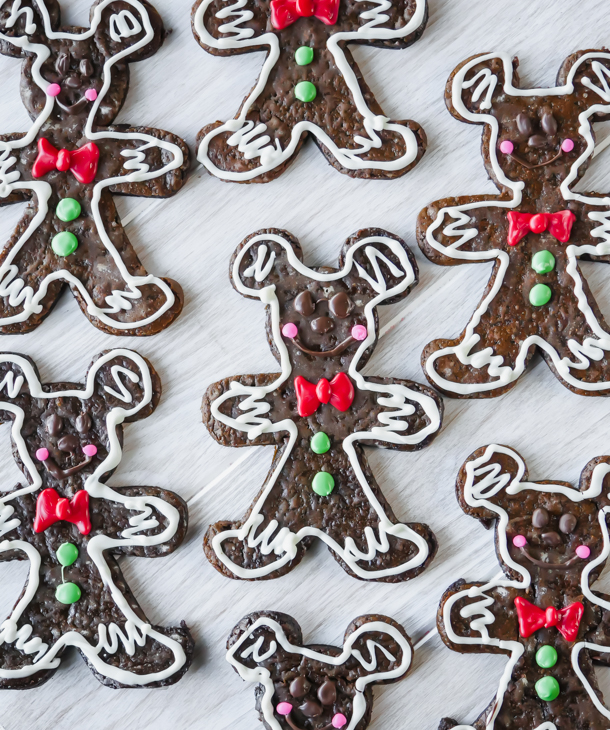
It’s that wonderful time of year where it’s totally acceptable to bake dozens upon dozens of cookies in one weekend: holiday cookie season. And I’ve been doing just that but with one goal: to perfect the light colored gingerbread cookie found at Disneyland this year. And you know what? I think I did it!

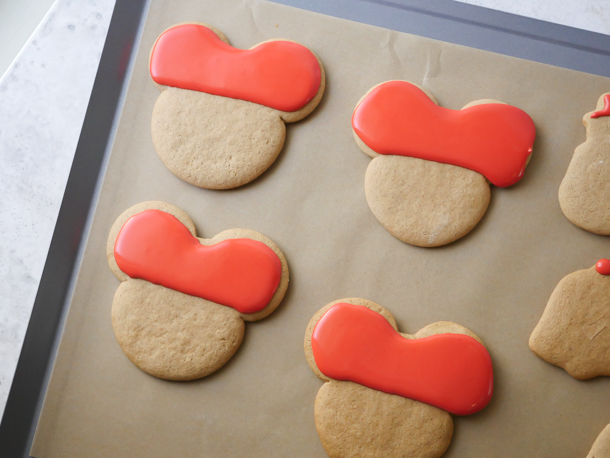
Mickey Holly Christmas Cookies 2020 // magicaltreatsathome.com

The secret to light gingerbread? Brown rice syrup, or honey, instead of molasses. You still get some molasses in the brown sugar, but it doesn’t overwhelm the whole cookie like the more traditional darker versions. I found this technique on Leite’s Culinaria and it was such an “AH-HA” moment! This has also been a game changer for my husband who gets food related migraines as molasses is a trigger and now he can have the cookies too.

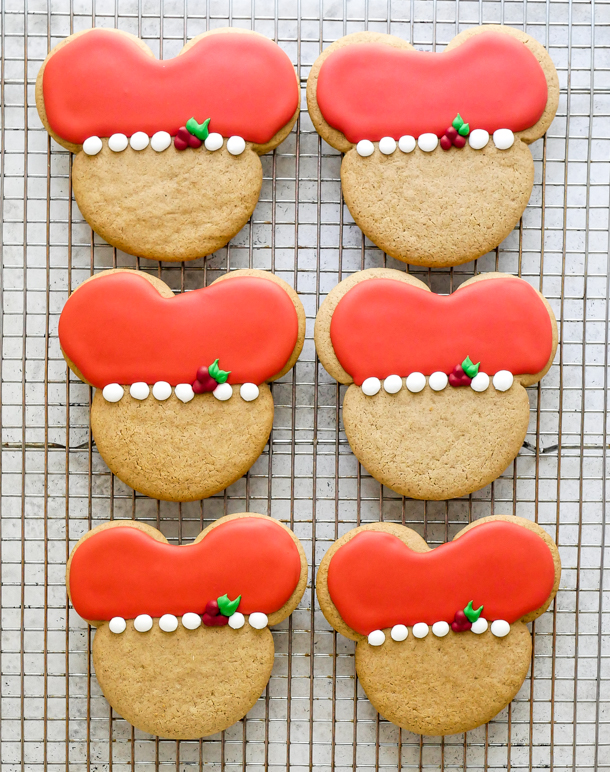
Mickey Holly Christmas Cookies 2020 // magicaltreatsathome.com

I’ve made a “half batch” of royal icing in the recipe below but to be honest, it still make a lot. The nice thing is with meringue powder instead of fresh egg whites, it’s shelf stable and you can just put extra in air tight containers and store until you’re ready to use again. The consistency turns out about halfway between a stiff piping icing and a flood so I found it great to use for most of the decorations on the cookie. I did pull some out and set aside for the holly decorations as I wanted them to hold their shape more. I’ve made notes in the recipe below about that.

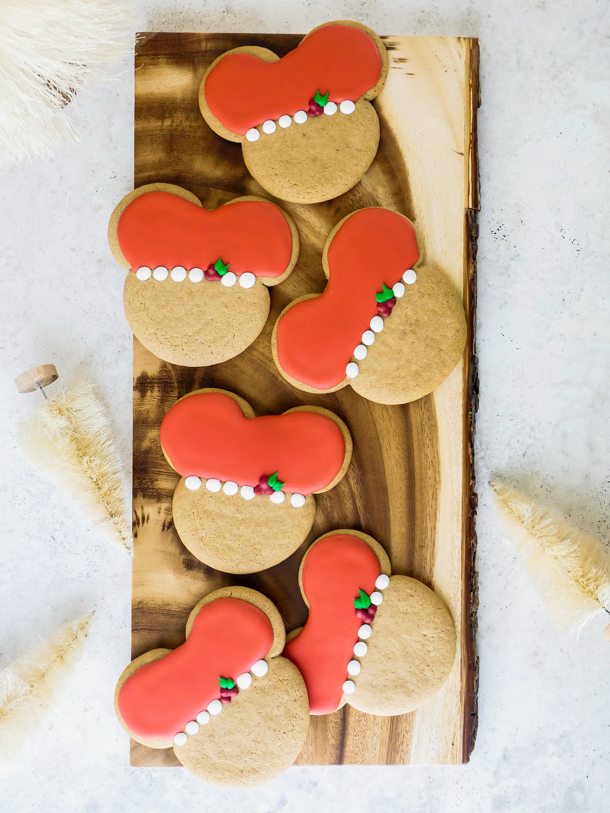
Mickey Holly Christmas Cookies 2020 // magicaltreatsathome.com

Kids can really get involved in all aspects of this recipe. From making the dough, to rolling, shaping, and even decorating. This is a fun, family friendly recipe, and getting everyone involved in a holiday activity is a big win for me.

These cookies felt very special for me this year as they really felt like there was a part of Disneyland at home with us. Holiday time there is just so special and it’s been a real bummer not being able to go and experience that (and eat all the treats). Making SO many of these cookies (and gifting quite a few away to other friends who are missing Disneyland too) has felt like a gift and I hope you’ll be able to make a batch and bring home the magic too.

Mickey Holly Christmas Cookies 2020 // magicaltreatsathome.com

Ok, let’s get baking!

Print
clock clock iconcutlery cutlery iconflag flag iconfolder folder iconinstagram instagram iconpinterest pinterest iconfacebook facebook iconprint print iconsquares squares iconheart heart iconheart solid heart solid icon
Mickey Holly Christmas Cookies 2020 // magicaltreatsathome.com

Mickey Mouse Holiday Gingerbread Cookie 2020

5 Stars 4 Stars 3 Stars 2 Stars 1 Star No reviews
  • Author: Elana Lepkowski
  • Yield: 15–18 Mickey Gingerbread Cookies 1x
  • Category: Baking
  • Cuisine: Holiday
Print Recipe
Pin Recipe

Description

Make your holiday cookie platter even more magical with an oversized Mickey Mouse shaped gingerbread cookie in holiday themed royal icing. A Disneyland-inspired treat.


Ingredients

Scale

For the gingerbread cookie:

  • 8 tablespoons unsalted butter
  • 3/4 cup light brown sugar, packed
  • 1/2 cup brown rice syrup or honey
  • 1 egg, room temperature
  • 1 teaspoon vanilla extract
  • 3–1/2 cups all purpose flour
  • 1 teaspoon baking soda
  • 2 tablespoons arrowroot powder or cornstarch
  • 1 tablespoon ground ginger
  • 1 tablespoon ground cinnamon
  • 1/2 teaspoon ground nutmeg
  • 1/2 teaspoon ground cloves
  • 1/2 teaspoon kosher salt

For the half batch royal icing:

  • 255 g powdered sugar
  • 3 tablespoons water
  • 1 tablespoons + 3/4 teaspoon meringue powder
  • 1/2 teaspoon vanilla extract
  • red and green food coloring
    • Americolor Super Red for hat
    • Americolor Red Red for berries
    • Americolor Leaf Green for leaves

Specialty Tools:

  • Mickey Mouse cutter
  • piping bags

Instructions

For the cookies:

  1. Beat the butter at high speed (10) until light and creamy, about 1 minute. Scrape down the sides of the bowl then add in brown sugar and brown rice syrup (or honey). Beat together until combined and creamy. Scrape down sides again.
  2. Add in the egg and vanilla and continue to beat at high speed (10) until the mixture is light and fluffy, 1 to 2 minutes.
  3. Next, add in flour, baking soda, arrowroot powder (or cornstarch), ginger, cinnamon, nutmeg, cloves, and salt. Beat together on medium-low speed (4) until combined and dough becomes stiff.
  4. Divide the dough in half, and then transfer each half of the dough into two gallon size ziplock bags. Flatten out to fill the space of the bag with a rolling pin so that dough is evenly dispersed. Refrigerate at least 4 hours or overnight. Dough can also be frozen at this point to use later.
  5. When ready to bake, preheat oven to 350°f. and cover two cookie sheets with parchment. Set aside.
  6. Generously flour your counter and remove dough from the bag (I usually cut the sides to open the bag, flip the open side down towards the floured surface and peel the rest of the bag off the dough). Roll out to 1/4″ thickness (or leave as is if you’d like thicker cookies).
  7. Cut out Mickey shapes from dough and place on parchment lined cookie sheet. Recombine the dough, flour your rolling pin and continue to cut shapes and recombine dough until finished. One bag of dough should fill one and a half to two cookie sheets.
    Mickey Holly Christmas Cookies 2020 // magicaltreatsathome.com
  8. Bake for 5 minutes, rotate sheet pans and bake an additional 5 minutes. If you’d like crispier cookies (or cookies that will withstand transportation), bake an additional 1 to 2 minutes.
  9. Let cool in the pans and then transfer to a wire rack to fully cool before decorating.

For the royal icing and decorations:

  1. Sift your powdered sugar first so that there are no lumps.
  2. Combine the water, meringue powder, and vanilla extract in a large measuring cup and whisk until there are no longer any lumps or powder. Mixture will froth a bit.
  3. Whisk the powdered sugar with the liquid until smooth. At this point the royal icing should hold its shape when dropped on itself. Set some aside, about a 1/4 of the mix, for the holly decorations by placing in a bowl and putting a damp, not wet, tea towel over the bowl so mix will not dry out.
  4. Add a teaspoon more water to the mix and beat the icing again. The icing should smooth out after about 20 seconds. You do not want it too runny though or it will run off the cookie.
  5. Once the desired consistency is achieved, remove about 1/4 of the mixture for the white dot decoration straight into a piping bag.
  6. The rest of the royal icing will be for the red decoration. Add about a teaspoon of the red food coloring to the bowl and mix until desired color is achieved. Transfer to a large piping bag.
  7. Next divide the icing for the holly decorations into two separate bowls. Add red food coloring to one bowl, mix, and then transfer to a piping bag. In the second bowl mix in green food coloring, and then transfer to a piping bag.
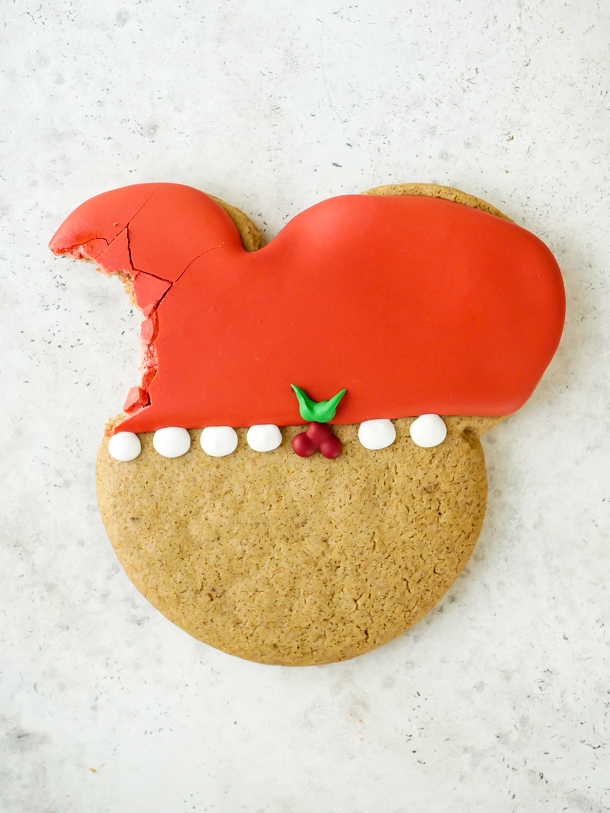
  8. To decorate the cookies, on the top half of the cookies, outline and then flood with large red royal icing. Let dry until no longer shiny, then then pipe 6 white dots (4 to the left and 2 to the right leaving space for the holly) along the bottom edge of the red outline. Let dry. Then finally pipe the smaller red royal icing as 3 combined dots for the holly, followed by the green for the leaves on the holly.
    Mickey Holly Christmas Cookies 2020 // magicaltreatsathome.com
  9. Let the icing dry at least 8 hours or overnight before packaging, or eating. Enjoy!

Notes

  • If you’d like even lighter colored cookies, replace all of the brown sugar with white granulated sugar.
  • Letting the dough chill ensures the cookies won’t spread and let’s the spices infuse throughout the dough.
  • Arrowroot powder also ensures cookies will not spread or puff up too much. This ingredient is optional.
  • For softer cookies, add in two tablespoons of butter.
  • For crispier cookies, cook 1 – 2 minutes longer.
  • For darker cookies, sub in molasses for the brown rice syrup.
  • If you freeze the cookie dough, let it defrost overnight in the refrigerator and proceed to rolling out step.
  • You will have extra royal icing left over from the recipe. This can be stored in the refrigerator in an air tight container for weeks.
  • Icing should fully dry between decorating so that the colors will not bleed.
  • Cookies can be stored at room temperature up to one week for best flavor.

Did you make this recipe?

Tag @magicaltreatsathome on Instagram and hashtag it #magicaltreatsathome

Mickey Holly Christmas Cookies 2020 // magicaltreatsathome.com

Share this:

  • Click to share on Facebook (Opens in new window) Facebook
  • Click to share on X (Opens in new window) X

Like this:

Like Loading...

Filed Under: Recipes, Treats Tagged With: Christmas, christmastimetreats, cookies, disneyland, gingerbread, holiday, Marceline's, Mickey Mouse, royal icing, treat, Trolley Treats

Mandalorian Macarons

December 6, 2020 by Elana Lepkowski Leave a Comment

Mandalorian Macarons // magicaltreatsathome.com
  • These treats were inspired by Disney’s The Mandalorian show.

We love macarons around here. LOVE THEM. But most of the recipes we’ve done require some design work. Not today. Why? Because we’ve been inspired by a simple recipe we saw on t.v… and Baby Yoda.

Mandalorian Macarons // magicaltreatsathome.com

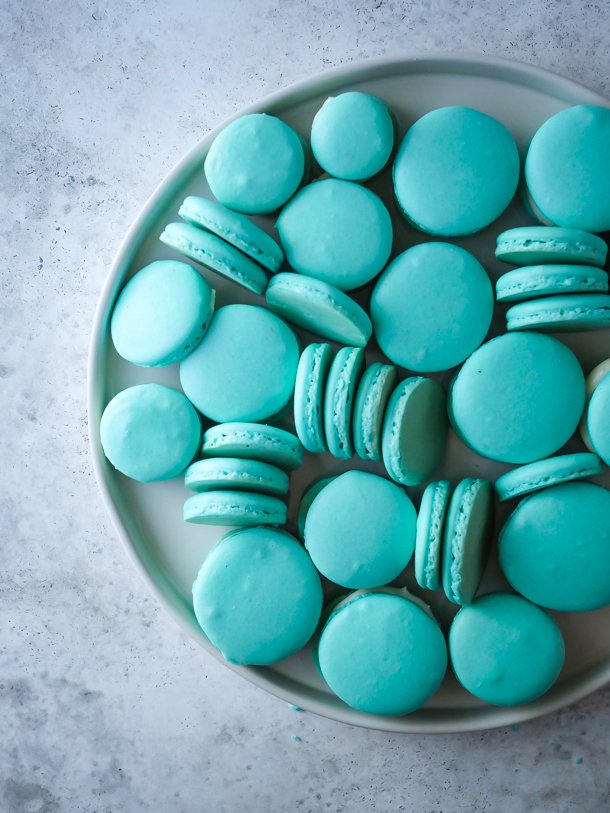
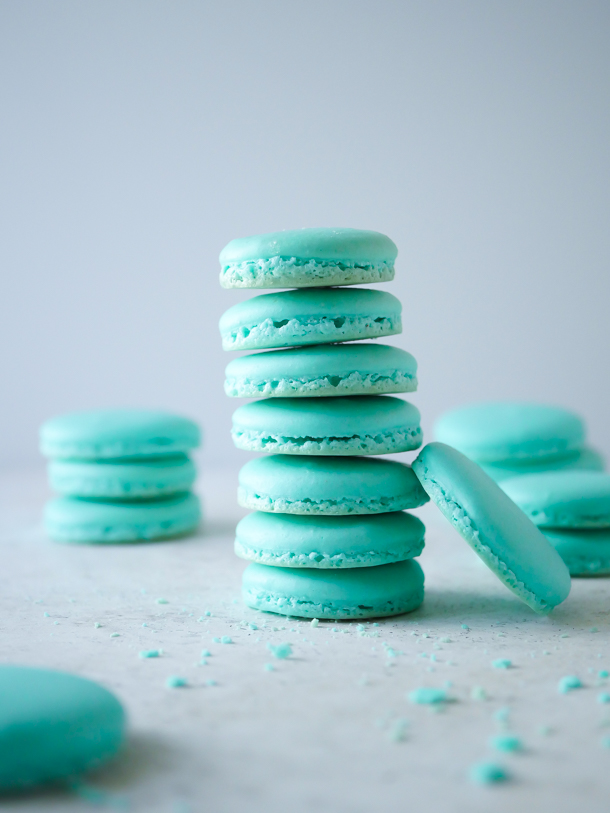
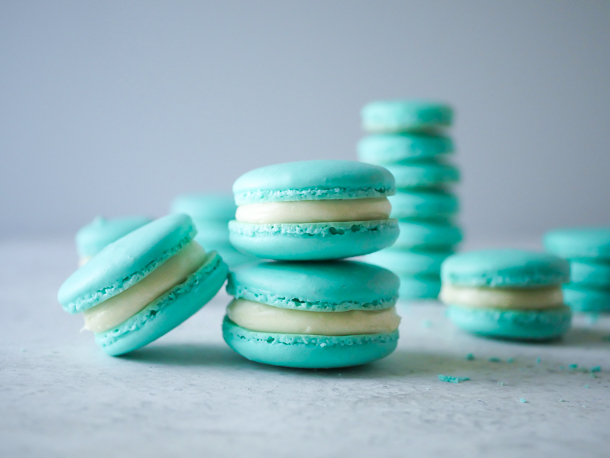
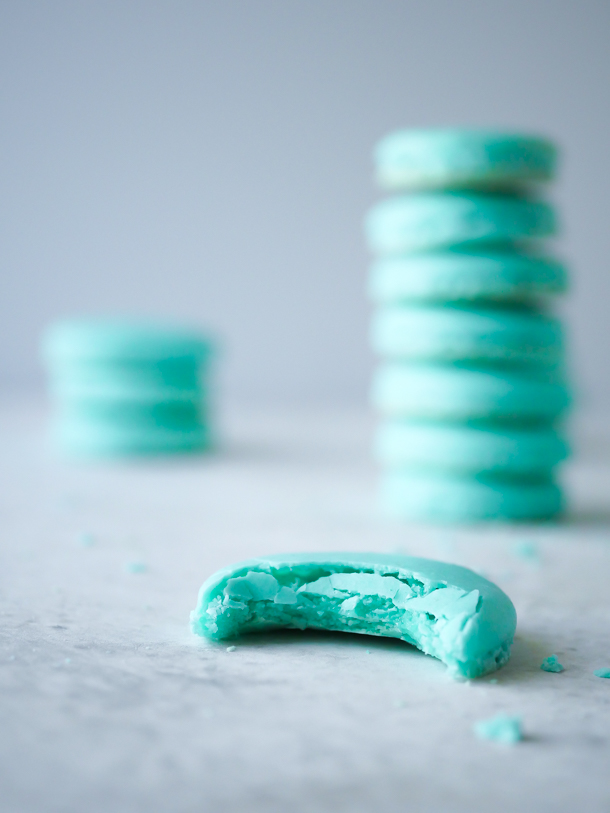
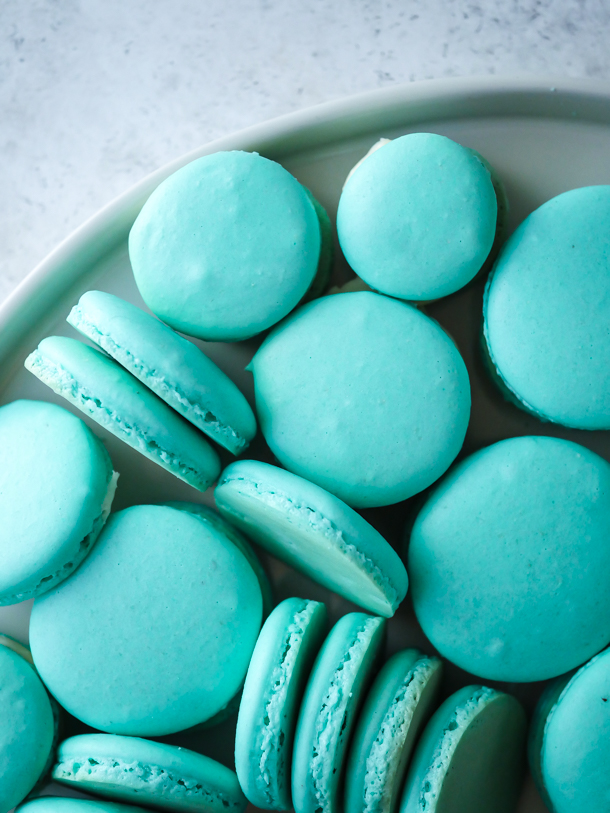
Yes, if you’ve been watching The Mandalorian these past few weeks (and if not, I don’t think this is a spoiler), then you spotted that cute little baby munching on.. macarons. They weren’t given a name in the show, so we’re calling them Manadalorian Macarons. Although, if you head to Williams Sonoma they’ve dubbed them Nevarro Nummies™️. And not to be a cantankerous fan, but I have a few issues with the ones they’re selling. But mostly, after the price point, the color is WRONG. They’re grey! Well, blue-grey, but still…

On the show they’re just the plain cookies, not filled. I’m showing both since everything is better with frosting. Also, Americolor makes a turquoise food gel color that is just perfect here and I’m linking to that because I’m so in love with it.

Mandalorian Macarons // magicaltreatsathome.com

If you’ve made some of my macaron recipes before, then you might notice I’ve included a new ingredient in the list: meringue powder. I got this tip from the Dessert for Two blog and I’ve noticed that it’s improved the stability of my egg whites when making french macarons. This ingredient is optional, but I’ve found the batter more forgiving with this addition.

Mandalorian Macarons // magicaltreatsathome.com

If your kids are comfortable with a piping bag, they can help pipe the macarons. They can also help pipe frosting as well if you’re doing that (you should totally do that).

As always, please check out all the tips after the recipe. This is the way.

Print
clock clock iconcutlery cutlery iconflag flag iconfolder folder iconinstagram instagram iconpinterest pinterest iconfacebook facebook iconprint print iconsquares squares iconheart heart iconheart solid heart solid icon
Mandalorian Macarons // magicaltreatsathome.com

Mandalorian Macarons

5 Stars 4 Stars 3 Stars 2 Stars 1 Star No reviews
  • Author: Elana Lepkowski
  • Yield: Apx. 48 Mandalorian Macarons
Print Recipe
Pin Recipe

Description

Baby Yoda knew a good thing when he saw it, and now you can enjoy your own Mandalorian Macarons at home with this no fail recipe! Inspired by the Mandalorian television show.


Ingredients

Scale

For the macarons:

  • 1 cup (100 g) almond flour
  • 2 cups (200 g) powdered sugar
  • 3 large egg whites, room temperature
  • pinch salt
  • 3 tablespoon of meringue powder (optional)
  • 3 tablespoons granulated sugar
  • 1/2 teaspoon Americolor Turquoise Food Gel Color

For the buttercream (optional):

  • 1 stick (1/2 cup) butter
  • 2 cups powdered sugar
  • 1 teaspoon vanilla extract
  • 1 teaspoon heavy cream, milk, or nondairy milk

Specialty Items:

  • piping bags
  • open sided cookie sheet

Instructions

For the macarons:

  1. Line two open sided cookie sheets with parchment. Set aside.
  2. In a food processor, pulse together the almond flour and powdered sugar. If you do not have a food processor, sift well to combine. Set aside.
  3. In the bowl of a mixer, add egg whites and salt and whisk on low until foamy. Then slowly pour in the meringue powder and increase speed to medium.
  4. When soft peaks appear, add in granulated sugar. Now whip just until just about stiff peaks form.
  5. Add in food coloring to the bowl and slowly mix to incorporate (I sometimes take the whisk attachment off and just stir by hand. Don’t worry about streaks at this point as you’ll mix more when you add dry ingredients in).
  6. Sift a third of the dry mixture into the egg whites and fold until barely incorporated, about 10 turns. Repeat twice with remaining dry mix. Mix gently until all of the almond mixture has been absorbed and there are no visible lumps in batter. Then continue to fold the mixture, pushing the batter against the sides of the bowl and scraping until it falls off your spoon in ribbons like cake batter. (This technique for mixing is called macaronage and I highly suggest looking up some videos on this if you’re serious about getting a great macaron.)
  7. Add batter into a piping bag and pipe circles onto the parchment lined baking sheet. Let the batter sit about 30 minutes to 1 hour. You want the macarons to form a skin, so that when you touch them, no batter comes off on your finger.
  8. Preheat your oven to 325°f about 15 minutes before your cookies are ready to bake.
  9. Bake the cookies about 10-11 minutes, turning the cookie sheet around about halfway through.
    Mandalorian Macarons // magicaltreatsathome.com
  10. Cool on the sheet and store in an airtight container.

For the buttercream (optional):

  1. If frosting, fully cool to room temperature before decorating.
  2. Cream the butter in a mixer until light and fluffy; about 1 – 2 minutes.
  3. Add in powdered sugar and mix until all the sugar is incorporated.
  4. Pour in vanilla and cream/milk and beat again for an additional 30 seconds.
  5. Spread filling between two cookie halves and sandwich together. Enjoy!

Notes

  • Meringue powder helps to ensure stability with your egg whites. It helps them form better, and less likely to deflate when mixing in the dry ingredients. This ingredient is optional.
  • Sifting the almond flour and powdered sugar together is necessary for the absorption of oils and to prevent clumping of batter.
  • Using gel based food coloring will give a much deeper, and vibrant color, than standard food dye.
  • An open sided cookie sheet allows air to move freely and your macarons will cook more evenly.
  • Cookies can be stored in an airtight container up to one week.

Did you make this recipe?

Tag @magicaltreatsathome on Instagram and hashtag it #magicaltreatsathome

Mandalorian Macarons // magicaltreatsathome.com

Share this:

  • Click to share on Facebook (Opens in new window) Facebook
  • Click to share on X (Opens in new window) X

Like this:

Like Loading...

Filed Under: Gluten Free, Recipes, Treats Tagged With: Baby Yoda, blue, buttercream frosting, cookies, macarons, Mandalorian, Star Wars, treat, turquoise

Shop Favorites: Mickey Mouse Cookie Cutters & Molds

November 19, 2020 by Elana Lepkowski Leave a Comment

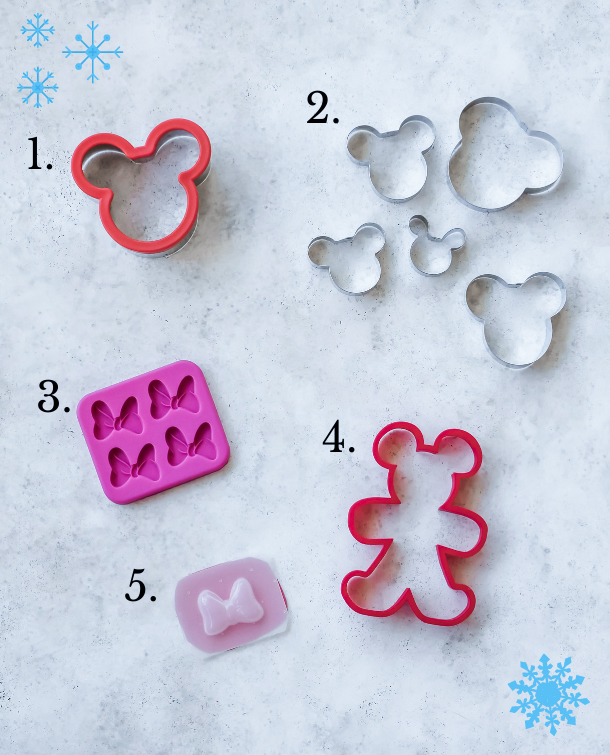
It’s not the holidays without cookies in my house. And a Mickey Mouse shaped cookie is always extra special. I’ve rounded up a few of my favorite cutters and molds I use at home today to help you find your favorite holiday baking cookie cutters, Mickey style. I’ve also thrown in a few Minnie Bow molds for when you need a 3D effect (or just want to make a bunch of chocolate bows to snack on. Perfectly normal.)

  1. 4″ Mickey Mouse Cutter: My favorite all purpose cutter! Sturdy enough for cutting out crispy treats, large enough for big cookies, and a classic shape.
  2. 5 Piece Mickey Mouse Cutter Set: This pack is great for smaller items. I like to make sandwich cookies with the medium ones and I’ve used the small ones for crackers.
  3. Minnie Mouse Bow Molds: These 4 Minnie Bow molds come in handy when I’m doing multiple treats that need bows. These are more shallow than my other mold, but still produce the right shape and I love how flexible the mold is.
  4. 5.5″ Mickey Mouse Gingerbread Cutter: This Mickey Gingerbread Man cutter is the perfect shape to make the gingerbread cookies from last year. And if you need a recipe you can check out ours here!
  5. Minnie Mouse Bow Mold: This single Minnie Bow mold is as close as I’ve gotten so far to the one at the parks. Use it to add a 3D effect for cookies, or top a Minnie Shake with this shape.

Share this:

  • Click to share on Facebook (Opens in new window) Facebook
  • Click to share on X (Opens in new window) X

Like this:

Like Loading...

Filed Under: Shop Favorites Tagged With: cookie cutters, cookies, gift guide, holiday, Mickey Mouse

Mickey Shaped Caramel-Peanut-Milk Chocolate Macarons

April 26, 2020 by Elana Lepkowski 3 Comments

Mickey Caramel-Peanut-Milk Chocolate Macaron // magicaltreatsathome.com

Where can I find the original treat?

  • This specialty treat was found at the Off the Cob Booth as part of the Food and Wine Festival at Disney’s California Adventure Park.

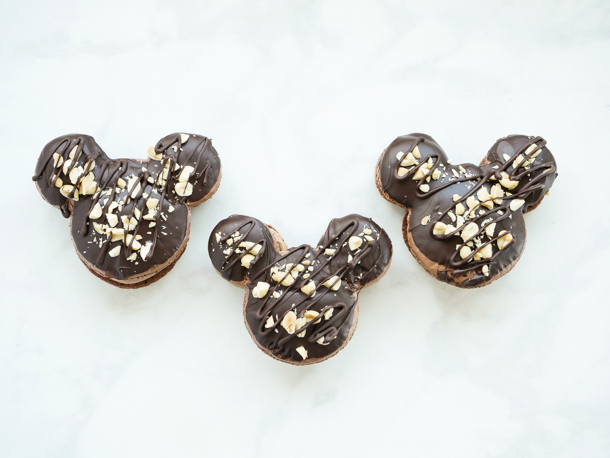
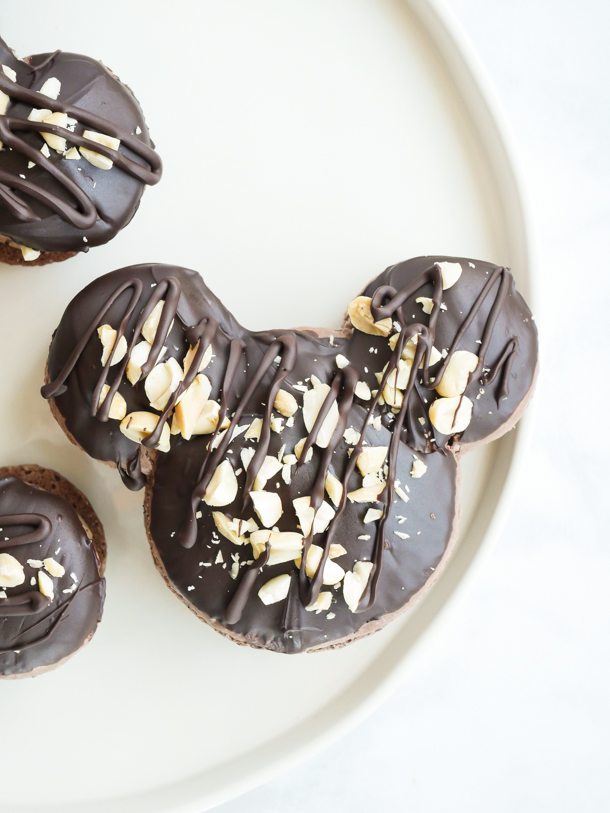
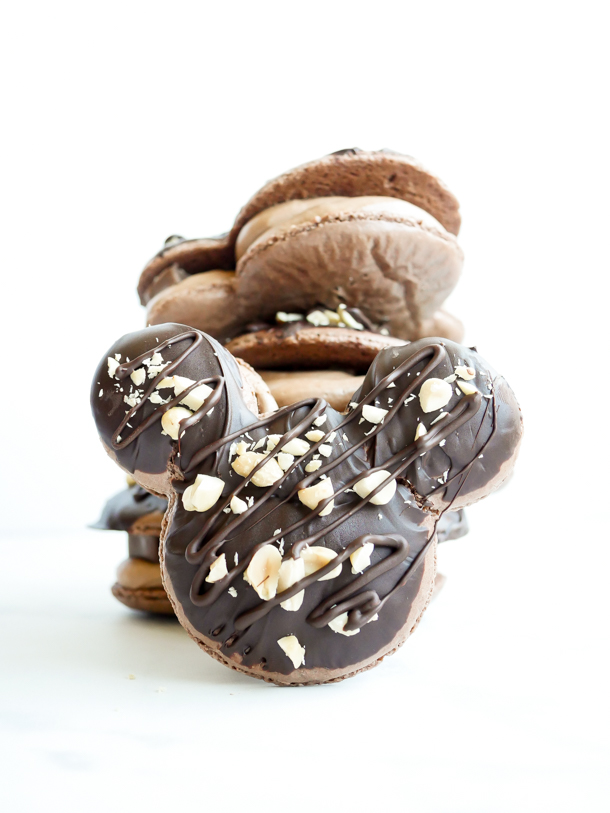
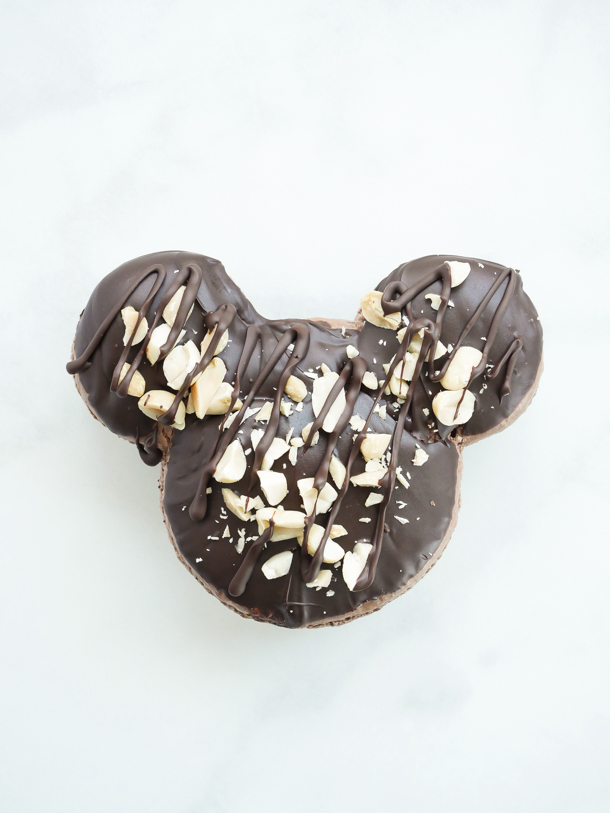
Woo! Try saying this name five times fast! Well, you might have had to, as this specialty Mickey Shaped Caramel-Peanut-Milk Chocolate Macaron was a fan fav at the Food and Wine Festival this year and many guests found they had to ask for it multiple times because the booth was constantly sold out. So, if you missed it during the festival, you’re in luck today, as we’ve got a recipe that is as delicious as the real thing!

Mickey Caramel-Peanut-Milk Chocolate Macaron // magicaltreatsathome.com

Clearly we’re fans of macarons on here, and today we’ll be using our standard Mickey Mouse template to make these yummy macarons. Intimated by these french cookies? Don’t be! We’ve got lots of tips and tricks in the notes section below to help you make your best macaron yet!

These oversized macarons were milk chocolate at the parks, but right now, as we’re going through this crazy time, certain pantry items might not be available. When I made these at home I had to substitute semisweet chocolate instead of milk chocolate (I just couldn’t get my hands on any!), and that resulted in a darker exterior coating for the macarons. But you know what? It was still delicious! And a tad less sweeter than the original so that was OK by me. I’ll list both ingredients below and you can use what you have on hand. Also, I did not confirm, but those peanut caramel pieces studded throughout the macaron, once I removed them from the macaron to get a better look, sure seemed pretty similar to pieces of a Snickers bar, so…. that’s what we’ve got inside. If you just happen to have some caramel covered peanuts in your house, use those!

Mickey Caramel-Peanut-Milk Chocolate Macaron // magicaltreatsathome.com

Assembling the macarons from piping to putting the candy pieces in is kid friendly, as well as dipping and decorating the outside of these. Making the actual macarons might be a better task for older kids, or the adults.

If you’re looking for the link to the Mickey macaron templates, you can download that below. And check out the notes section for lots of tips and tricks. Now lets grab whatever chocolate we can get our hands on and BAKE!

Icon

3 inch mickey macaron template

1 file(s) 86.41 KB
Download
Print
clock clock iconcutlery cutlery iconflag flag iconfolder folder iconinstagram instagram iconpinterest pinterest iconfacebook facebook iconprint print iconsquares squares iconheart heart iconheart solid heart solid icon
Mickey Caramel-Peanut-Milk Chocolate Macaron // magicaltreatsathome.com

Mickey Shaped Caramel-Peanut-Milk Chocolate Macaron

5 Stars 4 Stars 3 Stars 2 Stars 1 Star No reviews
  • Author: Elana Lepkowski
  • Yield: 3 Caramel-Peanut-Milk Chocolate Macarons 1x
Print Recipe
Pin Recipe

Description

These Mickey Mouse shaped macarons are filled with sweet, milk chocolate buttercream, chunks of caramel-peanut candy, and topped with a coating of more chocolate and chopped peanuts. A Disneyland-inspired treat.


Ingredients

Scale

For the macarons:

  • 85g (1 cup minus one tablespoon) almond flour
  • 120g (1 cup) powdered sugar
  • 1 tablespoon (8g) unsweetened cocoa powder
  • pinch of salt
  • 70g egg whites, from about 2 large eggs
  • 1/4 teaspoon cream of tartar
  • 40g (3 tablespoons) granulated sugar

For the milk chocolate buttercream (adapted from Epicurious):

  • 1/3 cup whole milk, or milk substitute (this worked with almond milk)
  • 2 whole egg yolks
  • 2 teaspoons all purpose flour
  • 3/4 cup powdered sugar, divided
  • 1/2 teaspoon vanilla extract
  • 1–1/2 sticks (3/4 cup) unsalted butter
  • 4 ounces milk chocolate, melted and cooled
  • 1 ounce unsweetened baking chocolate, melted and cooled

For the filling and decoration:

  • 2 Snickers bars cut into 1/4” slices
  • 1 ounce milk chocolate (or semisweet chocolate), chopped finely
  • 1/4 cup roasted peanuts, chopped

Specialty Tools:

  • Mickey Mouse cutter

Instructions

For the macarons:

  1. First sift the almond flour, powdered sugar, cocoa powder, and salt back and forth four times between two bowls using a mesh strainer. Alternatively you can also pulse in a food processor 7-8 times. Set aside.
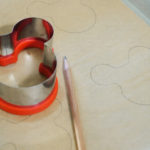
  2. Line a baking sheet with parchment. Either print and place the Mickey Mouse template (download link above!) under the parchment OR using the Mickey Mouse cookie cutter, trace six outlines using the cutter as a guide leaving at least an 1″ between shapes. Flip parchment over so that you can still see outlines, but the graphite will not transfer to macarons. Set aside.
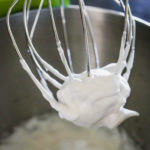
  3. In the bowl of a stand mixer fitted with the whisk attachment, add in the egg white and whisk on medium-low until slightly foamy, about 30 seconds. Add in the cream of tartar and whisk on medium until soft peaks appear. Then slowly pour in the sugar. Whisk on high until stiff peaks form, about 2-3 minutes.
  4. Remove the bowl from the mixer. Sift the entire dry mixture into the egg whites. Fold them until all the dry ingredients are incorporated and no egg whites remain. Egg whites will deflate and mixture should be the consistency of cake batter when they are ready. See notes below.
  5. Add batter into a piping bag. Cut the tip off about 1/2″, and pipe shapes onto the parchment lined baking sheet keeping the tip in the center and squeezing out until about 1/4″ before the outside of the template. Then, pick up trays about 2″ from counter and let them fall down. Repeat. This helps to remove air bubbles from the batter. Let the batter sit about 45 minutes until a surface is no longer tacky when your finger touches it.
  6. Preheat your oven to 350°f about 15 minutes before the rest time is finished. Place cookies in oven to bake, and then lower the temperature to 300°f. Cook for 18-20 minutes.
  7. Let the macarons cool at least 20-30 minutes before decorating.

For the milk chocolate buttercream:

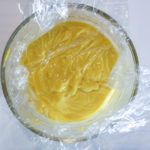
  1. Heat milk in a small saucepan over moderate heat until hot. Whisk together yolks, flour, 1/4 cup confectioners sugar, and a pinch of salt in a bowl, then add hot milk in a stream, whisking. Transfer custard to saucepan and bring to a boil over moderate heat while continually whisking (about 30 seconds to one minute). Reduce heat and simmer, whisking, until mixture becomes very thick, about 30 seconds more, then transfer to a medium sized bowl. Cover surface of custard with plastic wrap and cool completely, about 45 minutes.
    Hot Cocoa Macaron // magicaltreatsathome.com
  2. Add vanilla and remaining confectioners sugar to custard and beat at medium speed until combined well, then increase speed to medium-high and beat in butter, 2 tablespoons at a time, until smooth. Buttercream will look broken when mixing in butter but keep mixing and it will come together eventually!
  3. Scrape down bowl. Add chocolates and beat until combined well.

For the assembly:

  1. First, melt the 1/4 cup milk chocolate (or semisweet chocolate) in the microwave inside a microwave safe bowl, like glass, for 30 seconds. Stir and microwave again for an additional 30 seconds. Keep stirring and microwaving in short bursts of 15-20 seconds until melted and smooth.
  2. Set aside 3 macaron halves for the bottoms. With the remaining three, dip the tops in the bowl of melted chocolate, letting any excess drip away, or edges smooth with a scribe or toothpick. Place dipped side up on parchment, and then sprinkle with chopped peanuts. Repeat with the remaining macarons. Use the remaining chocolate in the bowl to drizzle over the decorated tops.
    Mickey Caramel-Peanut-Milk Chocolate Macaron // magicaltreatsathome.com
  3. Next, fill a piping bag with the buttercream. Cut the tip off about 1/4″ up from the tip and pipe the insides for the macarons.
    Mickey Caramel-Peanut-Milk Chocolate Macaron // magicaltreatsathome.com
  4. Then, place the Snickers slices inside the ears, and in the center of the macaron. Pipe more buttercream if so desired. Place tops on and enjoy!

Notes

  • Sifting the almond flour and powdered sugar together is necessary for the absorption of oils and to prevent clumping of batter.
  • When mixing the macaron batter, you want to push the batter against the side of the bowl to help mix and deflate the egg whites. The cocoa powder will dry out the mixture and you will want to keep mixing more than a normal batch of macarons.
  • Do not pipe all the way to the edge of the circle as the batter will spread a bit while resting.
  • If you want a smooth top to the macaron, besides dropping the sheet pan to get out air bubbles, how you pipe is also important. Position your piping bag over the center of the circle and continually squeeze out batter until you fill 3/4 of the circle. If you pipe in a spiral, you will have noticeable lines on the top. You can use a damp, not wet, finger to push down any batter that sticks up.
  • Any additional air bubbles that are not removed from the drop onto the counter can be poked with a scribe or toothpick before resting.
  • Any left over macaron batter can be piped into smaller cookies and baked off for 15 minutes.
  • If you are having any technical issues still with your macarons, I highly suggest looking up some tutorial videos on YouTube (that is until we have some of our own up!).
  • If your macaron cracks, or an ear comes off during dipping, just stick it all back together and let the chocolate set on the sheet pan. It will stay in one piece once everything hardens.
  • Leftover buttercream can be stored in the fridge up to one week, brought to room temperature, and whipped before using. It can also be stored in the freezer up to 3 months.
  • Macarons can be stored in the refrigerator up to one week. Let them sit 10-15 minutes to come to room temp before enjoying.

Did you make this recipe?

Tag @magicaltreatsathome on Instagram and hashtag it #magicaltreatsathome

Mickey Caramel-Peanut-Milk Chocolate Macaron // magicaltreatsathome.com

Share this:

  • Click to share on Facebook (Opens in new window) Facebook
  • Click to share on X (Opens in new window) X

Like this:

Like Loading...

Filed Under: Recipes, Treats Tagged With: caramel, character treat, chocolate, cookies, DCA, disneyland, Food and Wine Festival, macarons, Mickey Mouse, milk chocolate, peanuts, treat

Raspberry Rose Mickey Macarons

March 29, 2020 by Elana Lepkowski 2 Comments

Raspberry Rose Mickey Macaron // magicaltreatsathome.com

Where can I find the original treat?

  • This treat can be found at the Jolly Holiday Bakery Cafe in Disneyland.

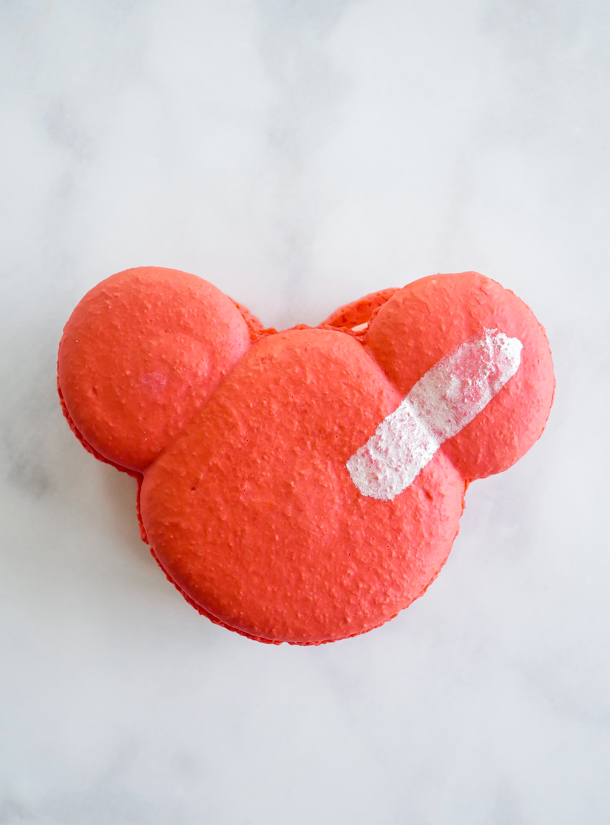
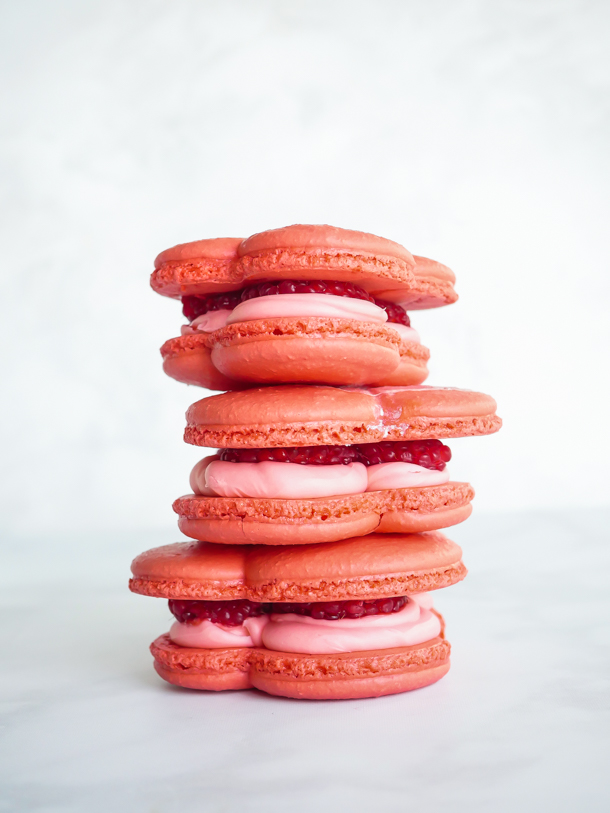
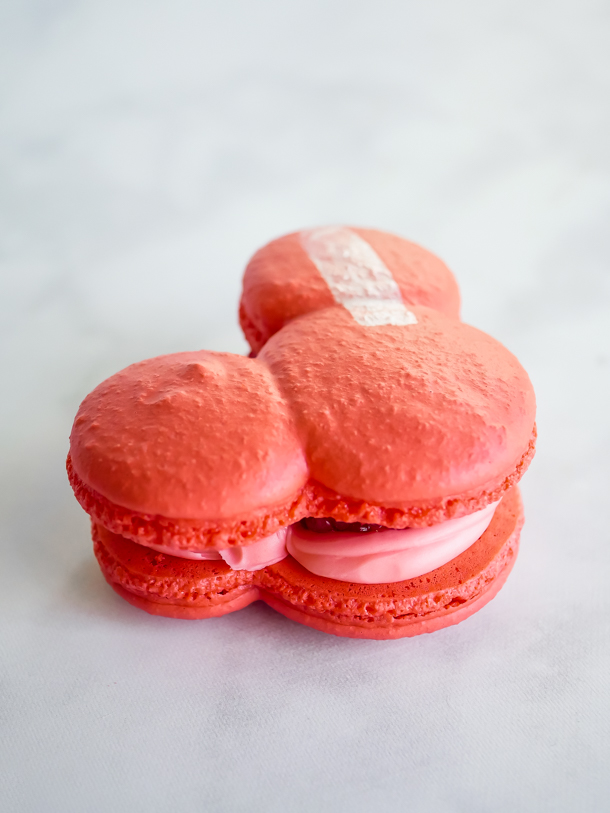
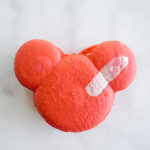
Right now I’m missing so many Disneyland treats being stuck at home during this quarantine. Although I love the specialty treats, some of the perennial treats are those I long for the most. One of those treats is the Raspberry Rose Mickey Mouse Macaron, and that’s what we’re making today.

Raspberry Rose Mickey Macaron // magicaltreatsathome.com

I received a package of raspberries in my grocery delivery this past week and finally made that extra step to stick them in a vinegar bath to make them last longer. I wanted them to last a few days so I could try out a few techniques for making macarons during this bizarre food shortage, although this week I’ve been happy to report that eggs seem to be plentiful on the grocery shelves, at least here in LA. So perhaps the panic buying is starting to slow down now.

And let’s talk about replacing egg whites here! The good news is that if you don’t have fresh eggs you can make a macaron. The bad news is that many issues can arise and that I never really got them looking perfect. The first substitute I considered was aquafaba. Aquafaba is a fancy name for the liquid of cooked chickpeas. I’ve written extensively about using aquafaba in place of egg whites in cocktails on my other site and have also found this a great substitute for meringues. However, when making macarons I found them to be less stable than egg whites. I had instances of macaron batter leaking and tops cracking. And then I tried using pasteurized carton egg whites. Again, many wrinkled tops and unstable shells. They were definitely edible and held their shape, but did not have the smooth, risen tops I would have like to see. So, if you just want some cookies and aren’t too picky about how they look, and don’t have fresh eggs, you can consider one of these subs. I’ve included all the substitutions in the recipe below.

Raspberry Rose Mickey Macaron // magicaltreatsathome.com

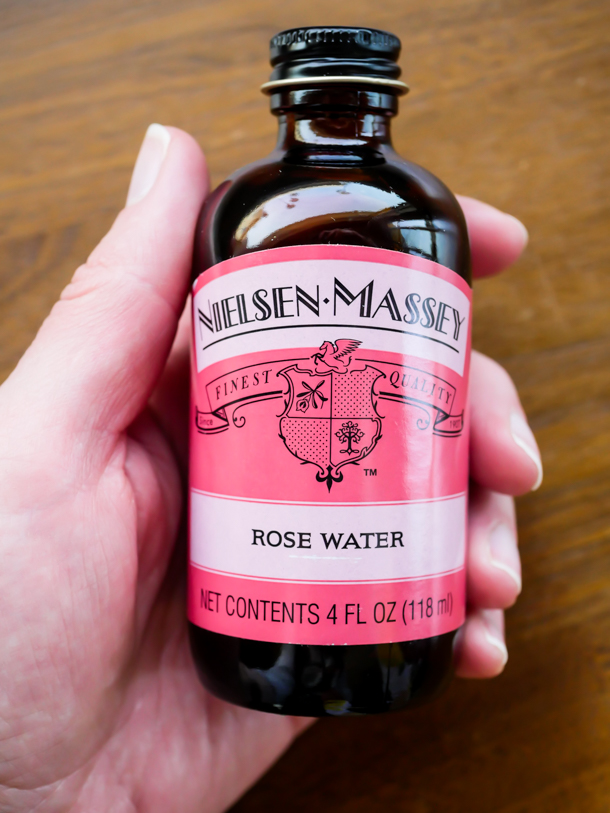
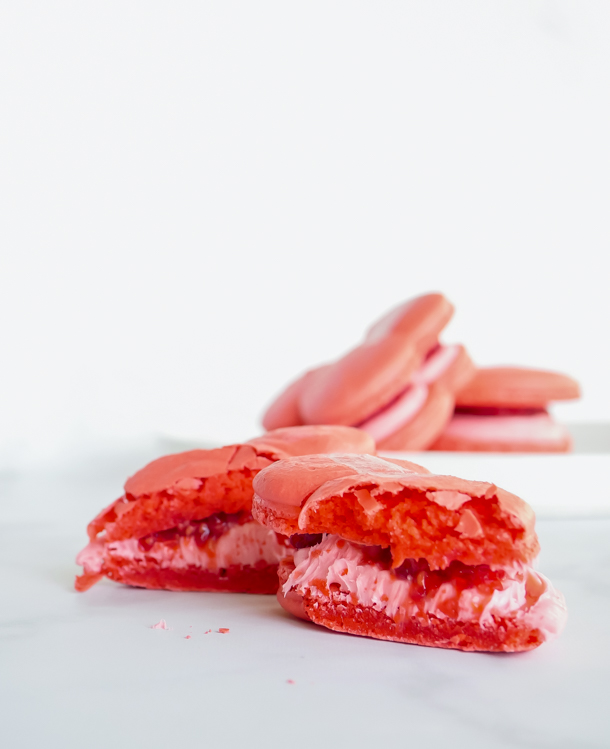
Now on to the flavor of these. Raspberry is definitely the most dominant flavor with these macarons. The rose I’ve always found so faint it was hardly detectable. At home though, you can adjust to your own liking. I wouldn’t though go too overboard with the rose water as it can overpower the whole treat. If fresh raspberries are hard to come by right now, sub in some raspberry jam in the center, or mix right in to the buttercream.

Raspberry Rose Mickey Macaron // magicaltreatsathome.com

Kids can help pipe the macarons (even if they don’t do Mickey Mouse they can make some shapes). They can also help assemble the cookie as well.

One last note I’ll leave here is the glittery decoration on the outside of the macaron; this is called luster dust (or edible glitter). First, I only had silver so that’s what ended up on the macarons today. It is usually gold but I wasn’t doing an Amazon order just for one tiny container. Second, decorating works best with a high proof alcohol. I know that some states don’t allow certain high proofs, so use what you got. I happened to have a bottle of Everclear from another project and that is 95 proof. You want a higher proof to quickly evaporate and just leave the glitter on the macaron without leaving the cookie soggy. Remember, this is totally optional too! The cookie tastes great without the glitter.

Raspberry Rose Mickey Macaron // magicaltreatsathome.com

I’ve highlighted these notes in the notes section below. Also, if you are having lots of issues with the macarons not looking like how you’d expect, I’d highly suggest you YouTube some real time macaron making videos to see techniques. Sometimes seeing is better to understand than reading.

Icon

3 inch mickey macaron template

1 file(s) 86.41 KB
Download

Ok, let’s bake!

Print
clock clock iconcutlery cutlery iconflag flag iconfolder folder iconinstagram instagram iconpinterest pinterest iconfacebook facebook iconprint print iconsquares squares iconheart heart iconheart solid heart solid icon
Raspberry Rose Mickey Macaron // magicaltreatsathome.com

Raspberry Rose Mickey Macarons

5 Stars 4 Stars 3 Stars 2 Stars 1 Star No reviews
  • Author: Elana Lepkowski
  • Yield: 3 Raspberry Rose Mickey Macarons 1x
Print Recipe
Pin Recipe

Description

These Mickey Mouse shaped macarons are filled with sweet-tart raspberry buttercream and a hint of rose. A Disneyland-inspired treat.


Ingredients

Scale

For the macarons:

  • 130 g (1 cup plus 3 tablespoons) almond flour
  • 130 g (1 cup plus 2 tablespoons) powdered sugar
  • pinch salt
  • 90 g egg whites (about 3 large egg whites)
  • 1/4 teaspoon cream of tartar
  • 100 g (6 tablespoons) superfine sugar
  • 2 drops red food gel (Americolor Super Red used here)

For the filling and decoration:

  • 114 g (3/4 cup) granulated sugar
  • 1/4 cup or 2 medium egg whites
  • pinch of salt
  • 1 cup (2 sticks) butter
  • 1/2 teaspoon raspberry extract
  • 1/8 teaspoon rose water, optional
  • 9–12 whole raspberries
  • gold luster dust
  • Everclear or neutral high proof spirit

Specialty Tools:

  • Mickey Mouse cutter (or use our free printable Mickey template)
  • mesh strainer
  • clean cake decorating paint brushes

Instructions

For the macarons:

  1. First sift the almond flour, powdered sugar, and salt back and forth four times between two bowls using a mesh strainer. Set aside.
  2. Line a baking sheet with parchment. Using a pencil, trace 6 Mickey Mouses uses the cutter as a guide, leaving at least an 1″ between shapes. Flip parchment over so that you can still see outlines, but the graphite will not transfer to macarons. Set aside. Or print out our free template linked above and slip under the parchment. Pipe on parchment and remove template gently before baking.
    Mickey Mouse Mummy Macarons // magicaltreatsathome.com
  3. In the bowl of a stand mixer fitted with the whisk attachment, add in the egg white and whisk until slightly foamy. Add in the cream of tartar and whisk until soft peaks appear. Then slowly pour in the sugar. Whisk on high until stiff peaks form, adding in the food gel right at the end.
    Main Street Electrical Parade Ladybug Macarons // magicaltreatsathome.com
  4. Sift a third of the dry mixture into the egg whites and fold until barely incorporated, about 10 turns. Repeat twice with remaining dry mix. Mix gently until all of the almond mixture has been absorbed and there are no visible lumps in batter. Then continue to fold the mixture, pushing the batter against the sides of the bowl and scraping until it falls off your spoon in ribbons like cake batter. (This technique for mixing is called macaronage and I highly suggest looking up some videos on this if you’re serious about getting a great macaron.)
  5. Add batter into a piping bag and pipe shapes onto the parchment lined baking sheet. Let the batter sit about 30 minutes to 1 hour. You want the macarons to form a skin, so that when you touch them, no batter comes off on your finger.
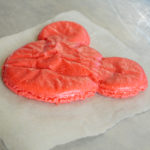
  6. Preheat your oven to 350°f. Place cookies in oven to bake, and then lower the temperature to 320°f. Cook for 17-18 minutes.
  7. Let the macarons cool at least 20-30 minutes before decorating.

For the filling and decoration:

  1. In a mixing bowl, combine egg whites, sugar, and salt over a medium saucepan filled with 1/2″ of water.
  2. Bring the water to a simmer while constantly whisking the mixture. Once the mixture reaches 160°f, remove the bowl from the pan.
  3. Using a hand mixer, beat the mixture until it forms stiff peaks.
  4. Then, add chunks of the butter in, one at a time, until incorporated into the mixture, scraping down the bowl a few times during mixing.
  5. Add in the raspberry extract and rose extract if using and beat an additional 30 seconds.
  6. Transfer the buttercream to a piping bag. Cut off the tip and pipe on one side of the macaron in three circles. Set aside and repeat with remaining macaron halves.
  7. Next, place 3-4 fresh raspberries into the buttercream and top with the other half of the macaron. Set aside.
  8. Mix together 1/2 teaspoon of a neutral high proof spirit (like Everclear, or a high proof unflavored vodka) and a 1/4-1/2 teaspoon of the luster dust. Mix together with a clean paintbrush and tap off any excess liquid and then paint a stripe across the top of the macaron. Repeat with the others.
  9. These can be eaten straight away, or sealed in an air tight container in the refrigerator up to 1 week.

Notes

  • Sifting the almond flour and powdered sugar together is necessary for the absorption of oils and to prevent clumping of batter.
  • As mentioned in the copy above, aquafaba can be subbed 1:1 for egg whites however macarons are not as stable. Carton pasteurized egg whites may also be used, but make sure they are solely egg whites and be aware that some brands add water in which will weaken the meringue and you may not reach stiff peaks or also have issues with stability in baking.
    Raspberry Rose Mickey Macaron // magicaltreatsathome.com
  • Using gel based food coloring will give a much deeper, and vibrant color, than standard food dye.
  • Any left over macaron batter can be piped into smaller cookies and baked off for 15 minutes.
  • Swiss buttercream heats the egg whites to 160°f to kill off any bacteria.
  • Leftover buttercream can be stored in the fridge up to two weeks, brought to room temperature, and whipped before using. It can also be stored in the freezer up to 3 months.
  • Cookies can be stored in an airtight container up to one week.

Did you make this recipe?

Tag @magicaltreatsathome on Instagram and hashtag it #magicaltreatsathome

Raspberry Rose Mickey Macaron // magicaltreatsathome.com

Share this:

  • Click to share on Facebook (Opens in new window) Facebook
  • Click to share on X (Opens in new window) X

Like this:

Like Loading...

Filed Under: Gluten Free, Recipes, Treats Tagged With: buttercream frosting, character treat, cookies, disneyland, gluten free, jolly holiday bakery cafe, Mickey Mouse, raspberry, rose, treat

Valentine Heart Macaron

February 14, 2020 by Elana Lepkowski Leave a Comment

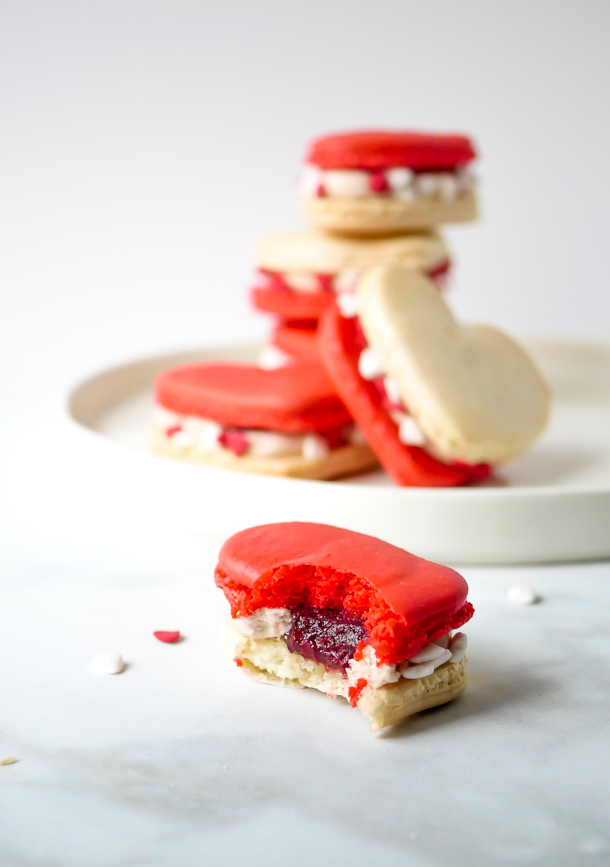
Heart Macarons for Valentine's Day // magicaltreatsathome.com

Where can I find the original treat?

  • This seasonal treat is available at Clarabelle’s in Disney California Adventure Park.

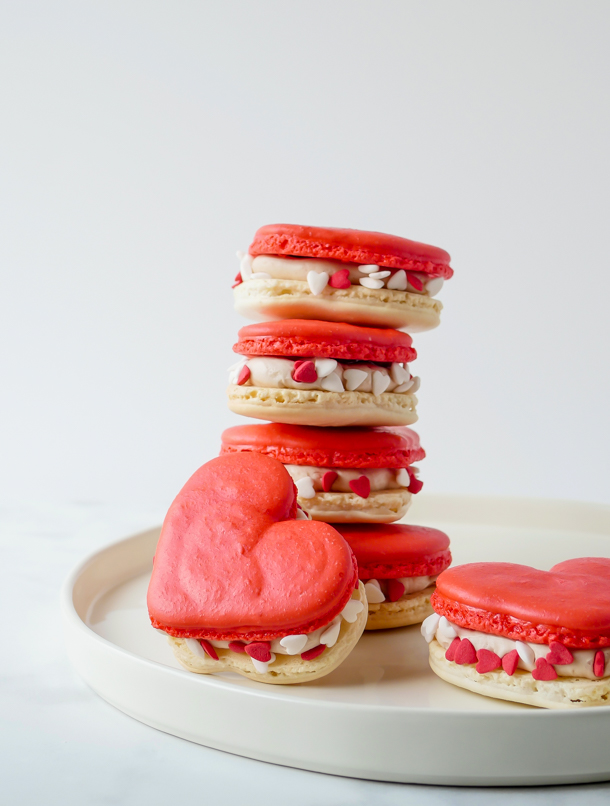
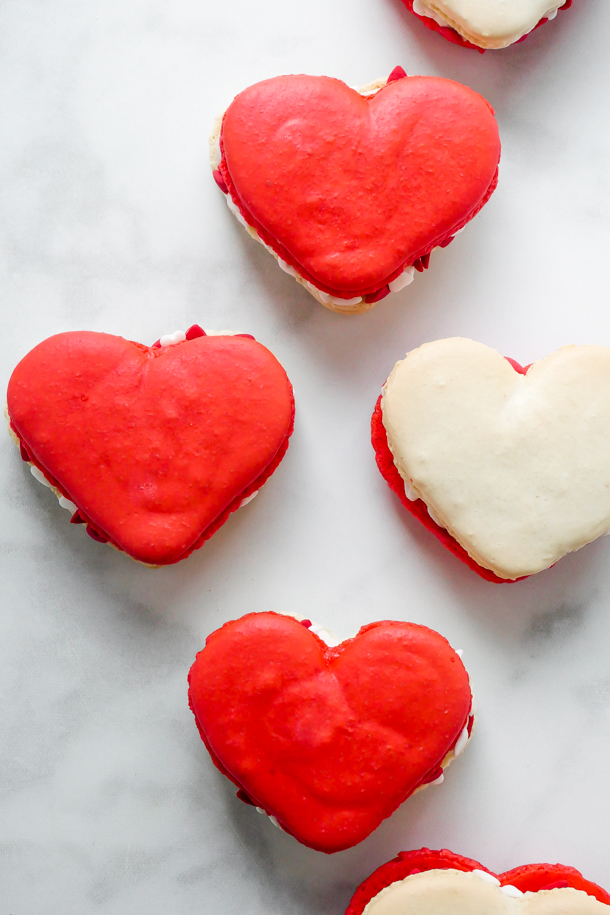
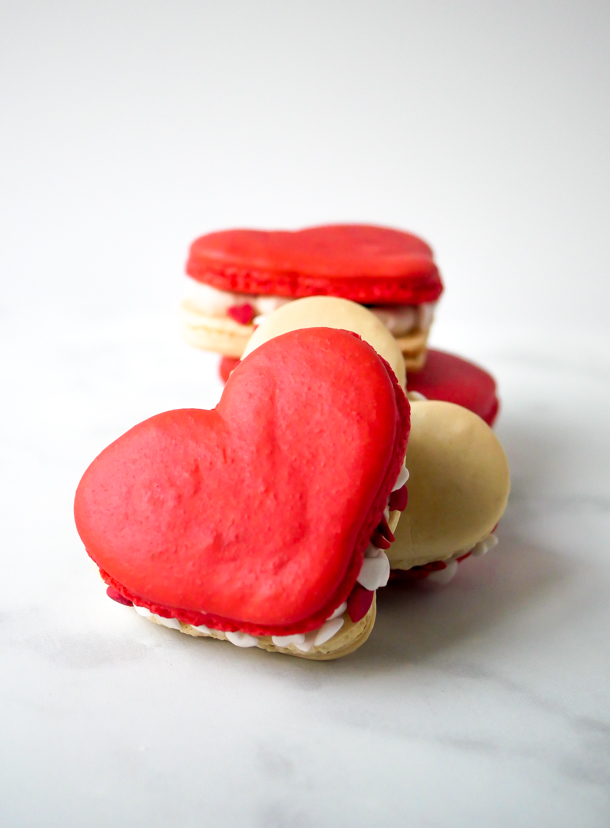
This past week, Disneyland released a bevy of pink and red treats in anticipation of Valentine’s Day and their after hours Sweethearts’ Nite. But what summed up this holiday the most for me (in treat form) was the oversized red and white heart macarons. And that’s what we’re making today!

Heart Macarons for Valentine's Day // magicaltreatsathome.com

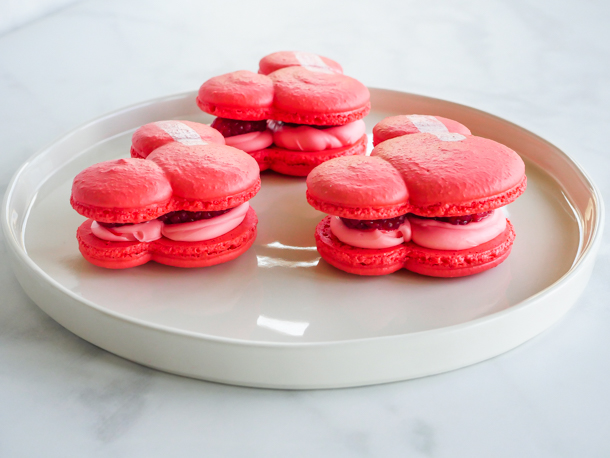
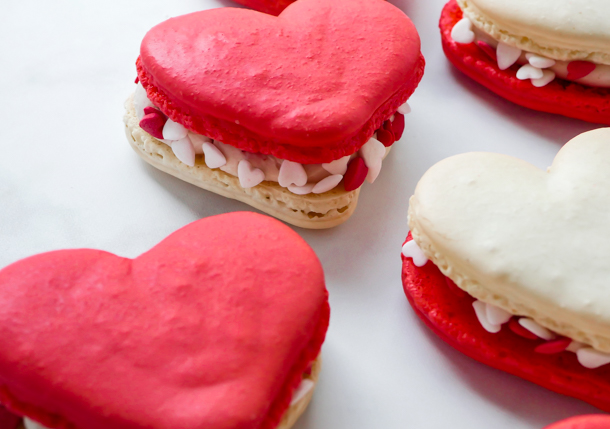
It’s a giant macaron heart, with a surprise strawberry jam filled center surrounded by strawberry buttercream and decorated with tiny candy hearts. I think it would make a sweet gift for a loved one (and you bet I’m gifting myself a few of these too..).

These use the classic macaron base (with a little food coloring), store bought or homemade strawberry jam, and a Swiss meringue buttercream frosting flavored with that same strawberry jam. Using a Swiss meringue buttercream, as opposed to an American style buttercream, yields a light and slightly sweet frosting that pipes beautifully and softens quickly out of the fridge. Yes, you need to whip out a double boiler to warm your egg whites here, but American buttercream would be much too sweet alongside the jam and the cookies. Trust me, it’s worth dirtying a few extra pans.

Heart Macarons for Valentine's Day // magicaltreatsathome.com

You could freehand pipe the hearts out, however, to make it easy on you all, I’ve gone ahead and created another FREE printable sheet you can download below to make the hearts. You’ll need to print two as this recipe yields around 8 heart macarons. Or you can enlarge on your printer and make bigger cookies. That would also work!

Icon

3 inch heart template

1 file(s) 88.45 KB
Download
Heart Macarons for Valentine's Day // magicaltreatsathome.com

More experienced kid bakers can help pipe out shapes, mix batters, weigh out ingredients by themselves, and younger hands can plop jam and decorate with the sprinkle hearts.

Heart Macarons for Valentine's Day // magicaltreatsathome.com

Lots of notes after the recipe as macarons can sometimes be a bit finicky, but you’ll get through this and create something awesome! Now let’s make some sweets for our sweets!

Print
clock clock iconcutlery cutlery iconflag flag iconfolder folder iconinstagram instagram iconpinterest pinterest iconfacebook facebook iconprint print iconsquares squares iconheart heart iconheart solid heart solid icon
Heart Macarons for Valentine's Day // magicaltreatsathome.com

Valentine Macaron

5 Stars 4 Stars 3 Stars 2 Stars 1 Star No reviews
  • Author: Elana Lepkowski
  • Yield: 8–10 Heart Macarons 1x
Print Recipe
Pin Recipe

Description

Oversized heart-shaped macarons filled with strawberry Swiss buttercream and strawberry jam are a special sweet for your valentine. A Disneyland-inspired treat.


Ingredients

Scale

For the macarons:

  • 180g (2 cups) almond flour
  • 240g (2 cups) powdered sugar
  • 1/4 teaspoon kosher salt
  • 140g egg whites, from about 4 large eggs
  • 1/2 teaspoon cream of tartar
  • 80g (6 tablespoons) granulated sugar
  • red gel food coloring, like Americolor

For the filling:

  • 35g egg whites, from about 1 large egg
  • 1/3 cup (67 g) sugar
  • pinch salt
  • 1/2 teaspoon of vanilla extract
  • 4 ounces (1 stick) unsalted butter, cut into small pieces
  • 4 tablespoons strawberry jelly or jam, divided

For the decoration:

  • heart decorettes/sprinkles

Special Tools:

  • mesh strainer
  • pastry bags

Instructions

  1. First sift the almond flour, powdered sugar, and salt back and forth twice between two bowls using a mesh strainer. Alternatively you can pulse a few times in a food processor as well. Set aside.
  2. Line two baking sheets with parchment and place the templates underneath if using. Set aside.
  3. In the bowl of a stand mixer fitted with the whisk attachment, add in the egg white and whisk until slightly foamy about 30 seconds on medium speed. Add in the cream of tartar and whisk until soft peaks appear. Then slowly pour in the sugar. Whisk on high until stiff peaks form, about 1-2 minutes more.
    Main Street Electrical Parade Ladybug Macarons // magicaltreatsathome.com
  4. Remove the bowl from the mixer.
  5. Sift half of the dry mixture into the egg whites and fold until barely incorporated, about 10 turns. Repeat with remaining dry mix. Fold until batter forms a ribbon when dropped into bowl.
  6. Add 1/2 of the batter into a piping bag and pipe out the white heart shapes, banging the sheet pan on the counter 2 or 3 times to remove any air bubbles.
  7. Next add two drops of red food coloring into the batter still in the bowl. Mix until no white streaks remain. (Batter will look light red in color but will bake bright red when finished.)
  8. Pour the red batter into a new piping bag and cut the tip off the bag. Pipe out the red hearts, banging the sheet pan on the counter 2 or 3 times to remove any air bubbles.
  9. Let both sheets of hearts rest 45 minutes on the counter. Do not cover.
  10. Preheat your oven to 350°f. Place cookies in oven to bake, and lower the temperature to 300°f. Cook for 17-18 minutes.
    Heart Macarons for Valentine's Day // magicaltreatsathome.com
  11. Let the macarons cool at least 20-30 minutes before filling.

For the buttercream:

  1. First make the Swiss strawberry buttercream frosting by whisking the egg whites, sugar, and salt together over a double boiler (or bowl set over simmering water on the stove), until temperature reaches 160°f.
  2. Pour heated egg whites into the bowl of a stand mixer and beat until stiff peaks form.
  3. When the bowl is cool to the touch, add the butter, one piece at a time, whipping between pieces to incorporate butter, but not fully mixing it in.
  4. Next, add in vanilla and strawberry jam. Whip everything on high until smooth.

To decorate:

  1. Place the frosting in a piping bag and pipe out along inside edges of the white macarons, leaving a center well to fill with the jam. *You may have leftover frosting. Storage instructions in notes below.
  2. Fill the wells with a small amount of jam.
    Heart Macarons for Valentine's Day // magicaltreatsathome.com
  3. Place red hearts on top of the filled white hearts.
  4. Then, over a bowl, sprinkle heart decorettes on the outside of the macarons where the frosting is. Set aside and repeat until all macarons are decorated. Enjoy!

Notes

  • Sifting the almond flour and powdered sugar together is necessary for the absorption of oils and to prevent clumping of batter.
  • Using gel based food coloring will give a much deeper, and vibrant color, than standard food dye.
  • Any left over macaron batter can be piped into smaller cookies and baked off for 15 minutes.
  • Swiss buttercream heats the egg whites to 160°f to kill off any bacteria.
  • Leftover buttercream can be stored in the fridge up to two weeks, brought to room temperature, and whipped before using. It can also be stored in the freezer up to 3 months.
  • Cookies can be stored in an airtight container up to one week.

Did you make this recipe?

Tag @magicaltreatsathome on Instagram and hashtag it #magicaltreatsathome

Heart Macarons for Valentine's Day // magicaltreatsathome.com

Share this:

  • Click to share on Facebook (Opens in new window) Facebook
  • Click to share on X (Opens in new window) X

Like this:

Like Loading...

Filed Under: Gluten Free, Recipes, Treats Tagged With: buttercream frosting, Clarabelle's, cookies, gluten free, heart, jam, macarons, sprinkles, strawberry, treat, Valentine

  • Go to page 1
  • Go to page 2
  • Go to Next Page »

Primary Sidebar

Follow Us

  • Instagram
  • Facebook
  • X
  • Pinterest
  • Email
  • YouTube

Hi! My name is Elana, and that’s me shoving a Mickey Mouse shaped treat in my face. I love the treats at Disneyland. A lot. So much so I’ve dedicated an entire website to making all my favorites, and hopefully yours too, out of my home kitchen. My aim is to create Disneyland-inspired treats, with easy to follow directions, and many recipes geared towards getting the kids in the kitchen to help too! Because putting sprinkles on things is F-U-N.

Top With Sprinkles

Get Recipes in Your Inbox!

* indicates required

Look for this icon in posts to find Kid Friendly recipes!

Recent Posts

  • Matterhorn Macaroon
  • Caramel Gingerbread Cookie Sandwiches
  • Colorful Fruit Hand Pies
  • Classic Mickey Shaped Beignets
  • Carrot Cake Cookies

Archives

  • February 2023
  • December 2022
  • August 2022
  • January 2022
  • December 2021
  • November 2021
  • December 2020
  • November 2020
  • October 2020
  • September 2020
  • August 2020
  • July 2020
  • June 2020
  • May 2020
  • April 2020
  • March 2020
  • February 2020
  • January 2020
  • December 2019
  • November 2019
  • October 2019
  • September 2019
  • August 2019
  • July 2019
  • June 2019
  • May 2019

Copyright © 2025 Magical Treats at Home on the Foodie Pro Theme

%d