• Skip to primary navigation
  • Skip to main content
  • Skip to primary sidebar

Magical Treats at Home

  • About
  • Treats
  • Drinks
  • Savory
  • Favorite Tools
  • Etsy Shop

Archives for April 2020

Double Chocolate Churro

April 30, 2020 by Elana Lepkowski Leave a Comment

Double Chocolate Churros // magicaltreatsathome.com

Where can I find the original treat?

  • This treat can be found in Critter Country in Disneyland.

When you are visiting Disneyland weekly (or sometimes even more frequently) in search of treats, chances are you’ll luck out and stumble upon something before it gets released fully to the public. This happened in March when I was determined to figure out what the Bear Paw Pastry was that had been listed on the Lemonade Stand menu on the Disneyland app for weeks and yet no one who worked there could tell me what it was. And then one day the Double Chocolate Churro appeared on that menu (and still that bear paw. What is it?????). And suddenly there was a sign at the booth that said “ask me about our specialty churro”, and so I did. And now today I’m sharing that creation with you all.

Double Chocolate Churros // magicaltreatsathome.com

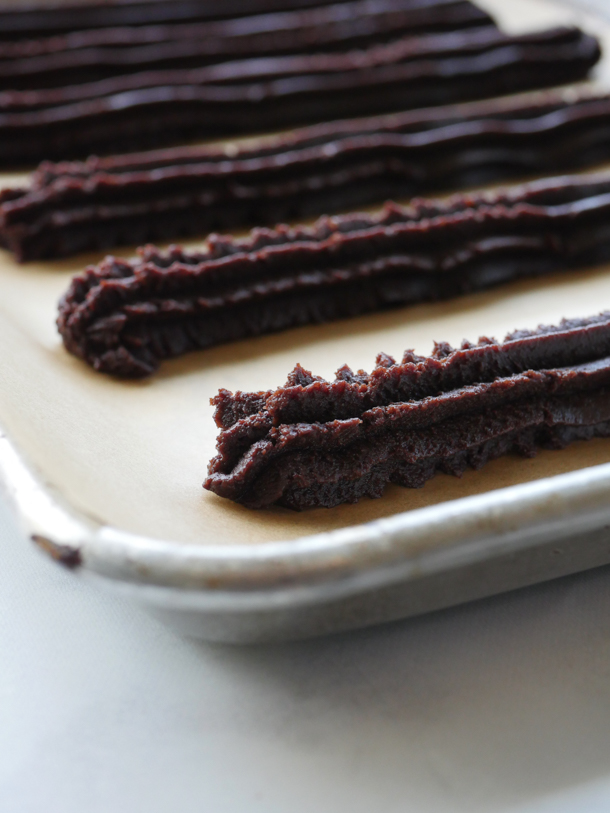
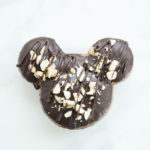
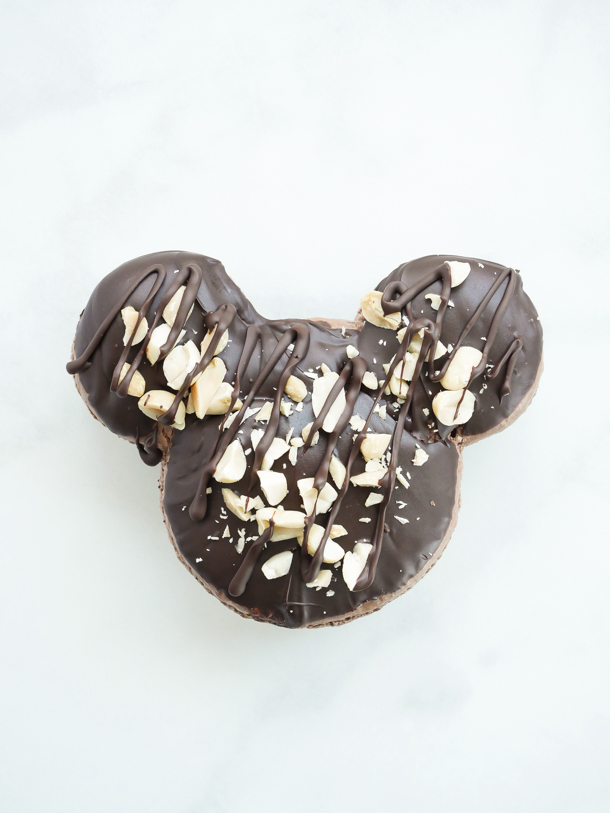
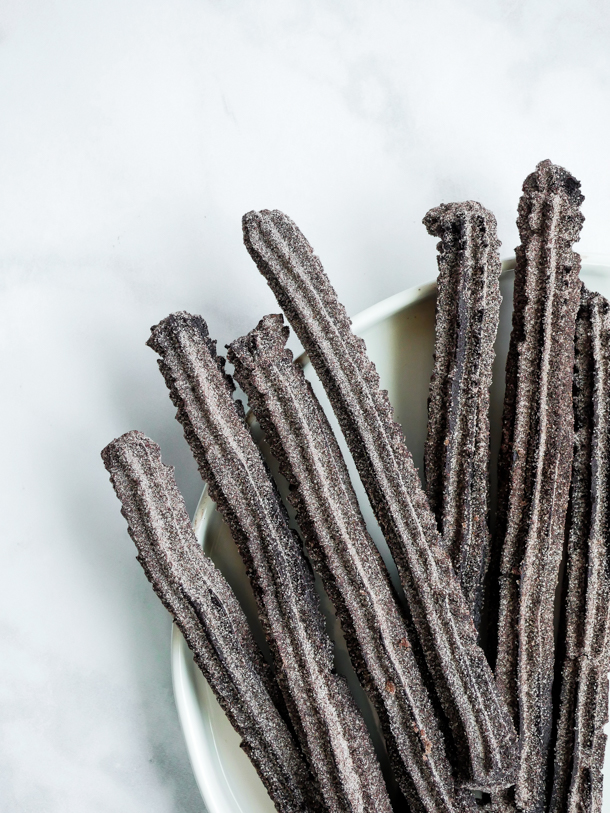
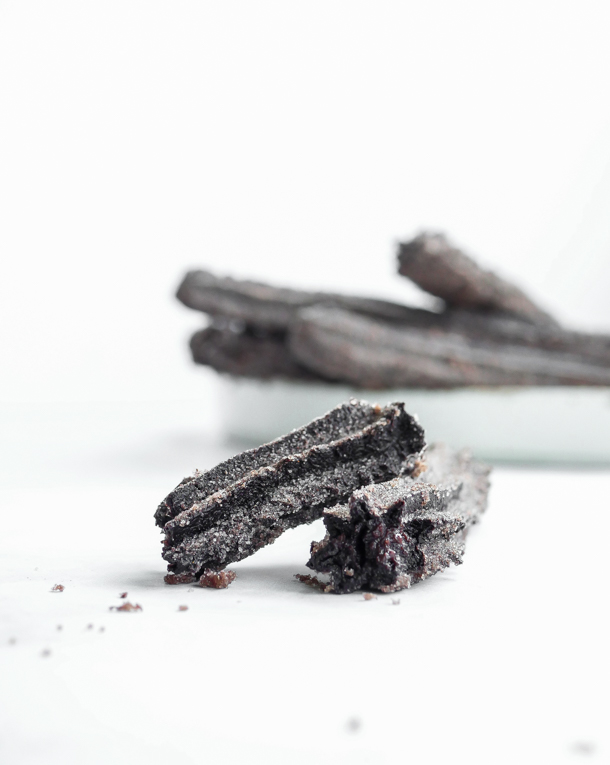
These churros are chocolate throughout, reminiscent of a fudgy brownie, and are dipped in a sweetened, milk chocolate hot cocoa coating (with the requisite sugar and cinnamon). Now, while what you’ll get at the parks is a fried churro, today we are going to ALSO make a baked version of it, and quite frankly, it tastes almost THE SAME.

Here in Southern California we are finally starting to get some heat, and with that, I suddenly lost all interest in cranking up my stove and standing over a boiling pot of hot oil for upwards of a half hour. Also, I had polled all of the Instagram followers a few week backs to see if there was any interest in a baked churro recipe, and everyone said YES. I was hesitant while making these, I wasn’t sure just how they would come out, but keeping my expectations low meant that once I got them out of the oven and covered with sugar, I was REAL PLEASED with the result.

Double Chocolate Churros // magicaltreatsathome.com

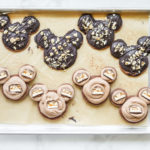
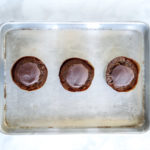
The taste and texture is pretty similar to the fried version. The only downside of the baked version is that the bottom tends to get flat unless you rotate them during cooking. But, they are quite fragile until fully cooked, so they could break apart.
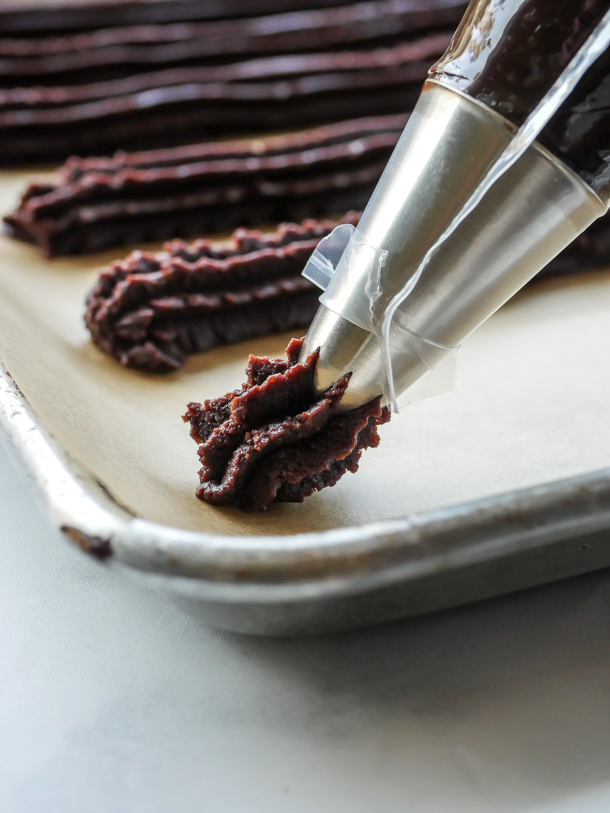
Make up a batch and let the kids pipe their own (my kiddos love making little nuggets to fry off). I would have them steer clear of the kitchen if you choose to fry these, but regardless of which method you use to cook, they’ll also love tossing them around in the chocolate sugar mixture. Just try to keep them from eating it!

Double Chocolate Churros // magicaltreatsathome.com

We’ve got both the baked version and the fried version below, as well as lots of tips and tricks in the notes section, including options for which pastry tip to use! Enjoy!

Print
clock clock iconcutlery cutlery iconflag flag iconfolder folder iconinstagram instagram iconpinterest pinterest iconfacebook facebook iconprint print iconsquares squares iconheart heart iconheart solid heart solid icon
Double Chocolate Churros // magicaltreatsathome.com

Double Chocolate Churro

5 Stars 4 Stars 3 Stars 2 Stars 1 Star No reviews
  • Author: Elana Lepkowski
  • Yield: 10–15 Double Chocolate Churros 1x
Print Recipe
Pin Recipe

Description

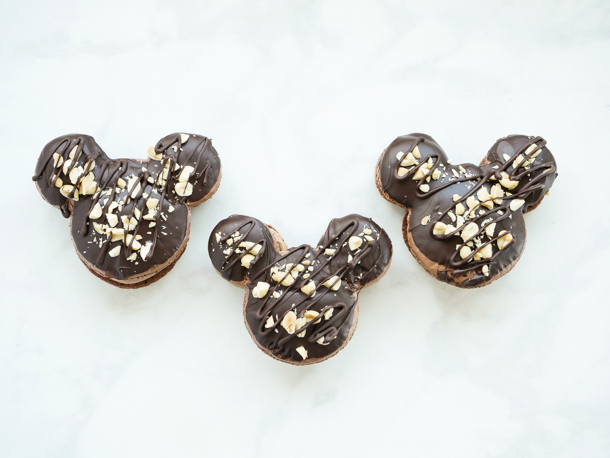
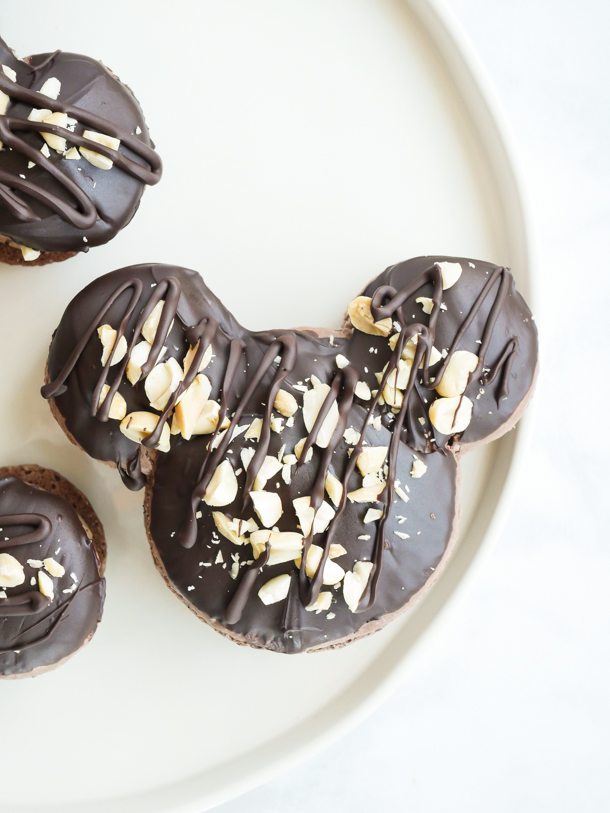
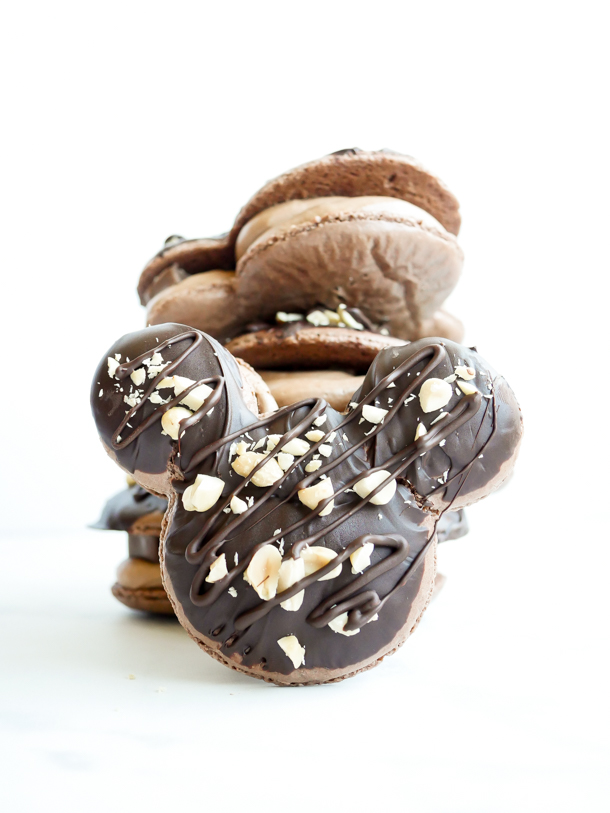
Chocolate lovers, this churro is for you! Chocolate churros are baked (or deep fried) and get dipped in a sweet, milk chocolate cocoa mixture. A Disneyland-inspired treat!


Ingredients

Scale
  • 1/2 cup granulated sugar
  • 1/2 teaspoon cinnamon
  • 1 tablespoon sweetened hot cocoa mix
  • vegetable oil for frying
  • 1 cup water
  • 1/2 cup unsalted butter
  • 1 tablespoon granulated sugar
  • 1/4 teaspoon salt
  • 1 cup all purpose flour
  • 1/4 cup cocoa powder, unsweetened
  • 2 eggs

Tools:

  • spider for frying
  • Wilton 1 M piping tip
  • Ateco #847 piping tip
  • pastry bag
  • candy thermometer

Instructions

  1. Line two half sized sheet pans with parchment, set aside. Mix together the 1/2 cup of granulated sugar, cinnamon and hot cocoa mix in a long shallow bowl or loaf pan, set aside.
  2. If you are baking your churros, turn your oven on to 425°f.
  3. In a medium sized saucepan over medium-high heat, combine water, butter, sugar and salt. Bring to a boil, or until butter has melted.
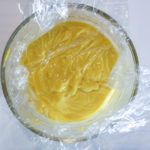
  4. Turn burner to low and sift in all the flour and cocoa powder. Stir until there are no visible flour lumps and dough has begun to stick together in a ball and pulled away from the sides of the pan. Remove pan from heat and let sit 5 minutes. Then stir in each egg until incorporated. Dough will appear to break or become lumpy. Continue to stir until it forms a smooth, sticky dough.
  5. Fill a pastry bag fitted with a Wilton 1 M open star tip OR Ateco #847 (check out our Churro Tips post for more on what tip works best for you!) half full with batter (see notes below on filling pastry bags) and pipe 8″ long dough onto the sheet pan. You can use kitchen shears to trim the ends. I was able to almost fill two sheet pans with all the batter. **If you are piping dough directly into hot oil, omit this step.
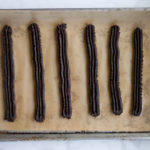
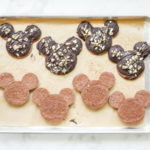
    Double Chocolate Churros // magicaltreatsathome.com
  6. For baking churros:
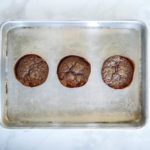
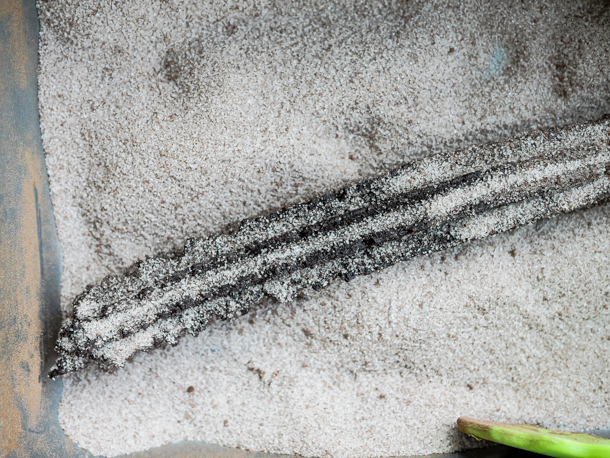
    • Move the sheet pans into the preheated oven and bake for 27-30 minutes, rotating the pans halfway through baking. When done, remove from the oven and let sit until any foaming subsides, 2-3 minutes. Then toss the churros in the sugar/cocoa mixture.
  7. For frying churros:
    • Refrigerate dough at least 30 minutes and up to two days. Batter will stiffen the more it sits, so let the dough come to room temperature before frying.
    • Fill a dutch oven or deep frying pan with vegetable oil at least 2″ up the side of the pan (I found a 1/2 gallon of avocado oil worked for me in my large dutch oven. See note below about reusing oil.). Heat oil to 340-350°f, using a candy thermometer to keep the temperature constant. You may need to adjust heat up or down during cooking.
    • Place churros 2-3 at a time in the cooking oil for 6 minutes, turning after 3 minutes with a spatula. Wait until oil comes back to temperature before adding next batch.
    • Using a spider or large spatula, remove churros from oil and drain on a cooling rack over parchment or on a paper towel. Wait at least a minute and then toss the churro in the chocolate cinnamon-sugar, tapping off any excess.

Notes

  • Do not overfill your pastry bag! Fill in two to three batches. If there is too much dough, it will seep out the top and will be hard to pipe.
  • Slowly pipe out dough all of a consistent size, smaller spots on the churro can cause them to become more fragile while handling and can break in the oil or while coating in sugar.
  • Churro dough can be piped out onto parchment and covered in the fridge up to 48 hours.
  • If you want to make you churros immediately after making dough without the chilling time, once oil has reached temp, starting about one inch above the oil, pipe a small line of dough down into oil and either snip end with scissors, or break the dough off the pastry tip on the side of your pan. Follow directions above for frying.
  • Thicker churros will require a longer cooking time to fully cook through the center. Test one churro first to adjust your cooking time.
  • Sugar not sticking to your baked churros? Melt 2-3 tablespoons of butter in a small saucepan, and then brush on the churro. Immediately toss in the sugar mixture and set aside on a grate to cool.
  • Cooking oil can be fine strained and stored again for another use. I strain back into the bottle it came from. Well strained oil can be stored in a cool, dry place and used up to several times.
  • Churros curling? That could be one of a few reasons. One is that it will naturally shrink and change shape as the dough hits the oil and puffs up. I found that the stiffer dough from sitting in the fridge resulted in straighter churros while fresher dough tending to curl more. Also, if you’re using a circular pot like a dutch oven, churros may rest against the inside edge of the pan while cooking causing them to take on the curved shape of the pan. To prevent this, nudge your churro with the spider or spatula immediately after placing in oil when it pops back up to the surface. Continue to nudge gently back and forth for about 20-40 seconds or until the dough has gotten stiff in the oil.

Did you make this recipe?

Tag @magicaltreatsathome on Instagram and hashtag it #magicaltreatsathome

https://www.magicaltreatsathome.com/2019/12/11/pastry-tips-for-churros/

Share this:

  • Click to share on Facebook (Opens in new window) Facebook
  • Click to share on X (Opens in new window) X

Like this:

Like Loading...

Filed Under: Recipes, Treats Tagged With: chocolate, churro, cinnamon, Critter Country, disneyland, milk chocolate

Mickey Shaped Caramel-Peanut-Milk Chocolate Macarons

April 26, 2020 by Elana Lepkowski 3 Comments

Mickey Caramel-Peanut-Milk Chocolate Macaron // magicaltreatsathome.com

Where can I find the original treat?

  • This specialty treat was found at the Off the Cob Booth as part of the Food and Wine Festival at Disney’s California Adventure Park.

Woo! Try saying this name five times fast! Well, you might have had to, as this specialty Mickey Shaped Caramel-Peanut-Milk Chocolate Macaron was a fan fav at the Food and Wine Festival this year and many guests found they had to ask for it multiple times because the booth was constantly sold out. So, if you missed it during the festival, you’re in luck today, as we’ve got a recipe that is as delicious as the real thing!

Mickey Caramel-Peanut-Milk Chocolate Macaron // magicaltreatsathome.com

Clearly we’re fans of macarons on here, and today we’ll be using our standard Mickey Mouse template to make these yummy macarons. Intimated by these french cookies? Don’t be! We’ve got lots of tips and tricks in the notes section below to help you make your best macaron yet!

These oversized macarons were milk chocolate at the parks, but right now, as we’re going through this crazy time, certain pantry items might not be available. When I made these at home I had to substitute semisweet chocolate instead of milk chocolate (I just couldn’t get my hands on any!), and that resulted in a darker exterior coating for the macarons. But you know what? It was still delicious! And a tad less sweeter than the original so that was OK by me. I’ll list both ingredients below and you can use what you have on hand. Also, I did not confirm, but those peanut caramel pieces studded throughout the macaron, once I removed them from the macaron to get a better look, sure seemed pretty similar to pieces of a Snickers bar, so…. that’s what we’ve got inside. If you just happen to have some caramel covered peanuts in your house, use those!

Mickey Caramel-Peanut-Milk Chocolate Macaron // magicaltreatsathome.com

Assembling the macarons from piping to putting the candy pieces in is kid friendly, as well as dipping and decorating the outside of these. Making the actual macarons might be a better task for older kids, or the adults.

If you’re looking for the link to the Mickey macaron templates, you can download that below. And check out the notes section for lots of tips and tricks. Now lets grab whatever chocolate we can get our hands on and BAKE!

Icon

3 inch mickey macaron template

1 file(s) 86.41 KB
Download
Print
clock clock iconcutlery cutlery iconflag flag iconfolder folder iconinstagram instagram iconpinterest pinterest iconfacebook facebook iconprint print iconsquares squares iconheart heart iconheart solid heart solid icon
Mickey Caramel-Peanut-Milk Chocolate Macaron // magicaltreatsathome.com

Mickey Shaped Caramel-Peanut-Milk Chocolate Macaron

5 Stars 4 Stars 3 Stars 2 Stars 1 Star No reviews
  • Author: Elana Lepkowski
  • Yield: 3 Caramel-Peanut-Milk Chocolate Macarons 1x
Print Recipe
Pin Recipe

Description

These Mickey Mouse shaped macarons are filled with sweet, milk chocolate buttercream, chunks of caramel-peanut candy, and topped with a coating of more chocolate and chopped peanuts. A Disneyland-inspired treat.


Ingredients

Scale

For the macarons:

  • 85g (1 cup minus one tablespoon) almond flour
  • 120g (1 cup) powdered sugar
  • 1 tablespoon (8g) unsweetened cocoa powder
  • pinch of salt
  • 70g egg whites, from about 2 large eggs
  • 1/4 teaspoon cream of tartar
  • 40g (3 tablespoons) granulated sugar

For the milk chocolate buttercream (adapted from Epicurious):

  • 1/3 cup whole milk, or milk substitute (this worked with almond milk)
  • 2 whole egg yolks
  • 2 teaspoons all purpose flour
  • 3/4 cup powdered sugar, divided
  • 1/2 teaspoon vanilla extract
  • 1–1/2 sticks (3/4 cup) unsalted butter
  • 4 ounces milk chocolate, melted and cooled
  • 1 ounce unsweetened baking chocolate, melted and cooled

For the filling and decoration:

  • 2 Snickers bars cut into 1/4” slices
  • 1 ounce milk chocolate (or semisweet chocolate), chopped finely
  • 1/4 cup roasted peanuts, chopped

Specialty Tools:

  • Mickey Mouse cutter

Instructions

For the macarons:

  1. First sift the almond flour, powdered sugar, cocoa powder, and salt back and forth four times between two bowls using a mesh strainer. Alternatively you can also pulse in a food processor 7-8 times. Set aside.
  2. Line a baking sheet with parchment. Either print and place the Mickey Mouse template (download link above!) under the parchment OR using the Mickey Mouse cookie cutter, trace six outlines using the cutter as a guide leaving at least an 1″ between shapes. Flip parchment over so that you can still see outlines, but the graphite will not transfer to macarons. Set aside.
  3. In the bowl of a stand mixer fitted with the whisk attachment, add in the egg white and whisk on medium-low until slightly foamy, about 30 seconds. Add in the cream of tartar and whisk on medium until soft peaks appear. Then slowly pour in the sugar. Whisk on high until stiff peaks form, about 2-3 minutes.
  4. Remove the bowl from the mixer. Sift the entire dry mixture into the egg whites. Fold them until all the dry ingredients are incorporated and no egg whites remain. Egg whites will deflate and mixture should be the consistency of cake batter when they are ready. See notes below.
  5. Add batter into a piping bag. Cut the tip off about 1/2″, and pipe shapes onto the parchment lined baking sheet keeping the tip in the center and squeezing out until about 1/4″ before the outside of the template. Then, pick up trays about 2″ from counter and let them fall down. Repeat. This helps to remove air bubbles from the batter. Let the batter sit about 45 minutes until a surface is no longer tacky when your finger touches it.
  6. Preheat your oven to 350°f about 15 minutes before the rest time is finished. Place cookies in oven to bake, and then lower the temperature to 300°f. Cook for 18-20 minutes.
  7. Let the macarons cool at least 20-30 minutes before decorating.

For the milk chocolate buttercream:

  1. Heat milk in a small saucepan over moderate heat until hot. Whisk together yolks, flour, 1/4 cup confectioners sugar, and a pinch of salt in a bowl, then add hot milk in a stream, whisking. Transfer custard to saucepan and bring to a boil over moderate heat while continually whisking (about 30 seconds to one minute). Reduce heat and simmer, whisking, until mixture becomes very thick, about 30 seconds more, then transfer to a medium sized bowl. Cover surface of custard with plastic wrap and cool completely, about 45 minutes.
    Hot Cocoa Macaron // magicaltreatsathome.com
  2. Add vanilla and remaining confectioners sugar to custard and beat at medium speed until combined well, then increase speed to medium-high and beat in butter, 2 tablespoons at a time, until smooth. Buttercream will look broken when mixing in butter but keep mixing and it will come together eventually!
  3. Scrape down bowl. Add chocolates and beat until combined well.

For the assembly:

  1. First, melt the 1/4 cup milk chocolate (or semisweet chocolate) in the microwave inside a microwave safe bowl, like glass, for 30 seconds. Stir and microwave again for an additional 30 seconds. Keep stirring and microwaving in short bursts of 15-20 seconds until melted and smooth.
  2. Set aside 3 macaron halves for the bottoms. With the remaining three, dip the tops in the bowl of melted chocolate, letting any excess drip away, or edges smooth with a scribe or toothpick. Place dipped side up on parchment, and then sprinkle with chopped peanuts. Repeat with the remaining macarons. Use the remaining chocolate in the bowl to drizzle over the decorated tops.
    Mickey Caramel-Peanut-Milk Chocolate Macaron // magicaltreatsathome.com
  3. Next, fill a piping bag with the buttercream. Cut the tip off about 1/4″ up from the tip and pipe the insides for the macarons.
    Mickey Caramel-Peanut-Milk Chocolate Macaron // magicaltreatsathome.com
  4. Then, place the Snickers slices inside the ears, and in the center of the macaron. Pipe more buttercream if so desired. Place tops on and enjoy!

Notes

  • Sifting the almond flour and powdered sugar together is necessary for the absorption of oils and to prevent clumping of batter.
  • When mixing the macaron batter, you want to push the batter against the side of the bowl to help mix and deflate the egg whites. The cocoa powder will dry out the mixture and you will want to keep mixing more than a normal batch of macarons.
  • Do not pipe all the way to the edge of the circle as the batter will spread a bit while resting.
  • If you want a smooth top to the macaron, besides dropping the sheet pan to get out air bubbles, how you pipe is also important. Position your piping bag over the center of the circle and continually squeeze out batter until you fill 3/4 of the circle. If you pipe in a spiral, you will have noticeable lines on the top. You can use a damp, not wet, finger to push down any batter that sticks up.
  • Any additional air bubbles that are not removed from the drop onto the counter can be poked with a scribe or toothpick before resting.
  • Any left over macaron batter can be piped into smaller cookies and baked off for 15 minutes.
  • If you are having any technical issues still with your macarons, I highly suggest looking up some tutorial videos on YouTube (that is until we have some of our own up!).
  • If your macaron cracks, or an ear comes off during dipping, just stick it all back together and let the chocolate set on the sheet pan. It will stay in one piece once everything hardens.
  • Leftover buttercream can be stored in the fridge up to one week, brought to room temperature, and whipped before using. It can also be stored in the freezer up to 3 months.
  • Macarons can be stored in the refrigerator up to one week. Let them sit 10-15 minutes to come to room temp before enjoying.

Did you make this recipe?

Tag @magicaltreatsathome on Instagram and hashtag it #magicaltreatsathome

Mickey Caramel-Peanut-Milk Chocolate Macaron // magicaltreatsathome.com

Share this:

  • Click to share on Facebook (Opens in new window) Facebook
  • Click to share on X (Opens in new window) X

Like this:

Like Loading...

Filed Under: Recipes, Treats Tagged With: caramel, character treat, chocolate, cookies, DCA, disneyland, Food and Wine Festival, macarons, Mickey Mouse, milk chocolate, peanuts, treat

5 Minute Treats: Cinnamon-Brown Sugar Affogato (Churro Affogato)

April 21, 2020 by Elana Lepkowski Leave a Comment

Churro Cinnamon-Brown Sugar Affogato // magicaltreatsathome.com

Where can I find the original treat?

  • This holiday time treat was available at Schmoozies! inside California Adventure.

We’re back again today with another quick treat in our 5 Minute Treats series! This holiday time Cinnamon-Brown Sugar Affogato was nicknamed the Churro Affogato because of its delicious ice cream base. And today you can either make, or buy, the ice cream depending on how quickly you’d like the treat!

Churro Cinnamon-Brown Sugar Affogato // magicaltreatsathome.com

While we’ve been stuck inside, the kids and I have been doing some fun kitchen experiments. Making ice cream has definitely been a favorite! If you can score some cinnamon ice cream at the store, then this recipe really is a super quick treat. However, if you’ve got the time, and an ice cream maker, then I’ve also included a recipe for a super creamy, custard based cinnamon-brown sugar ice cream. I don’t want to make the store bought people jealous, but this stuff is SO GOOD and SO CREAMY. I also love that you can adjust the amount of cinnamon and/or sugar to suite your tastes as well.

Churro Cinnamon-Brown Sugar Affogato // magicaltreatsathome.com

Affogatos are usually espresso based, but if all you’ve got is coffee right now, try brewing a stronger batch for this. The combination of the bittersweet coffee and the spicy cinnamon make for an extraordinary pairing. It’s reminiscent of the Mexican coffee, or cafe de olla that we get at a local restaurant here in Los Angeles. It’s also, quite tasty with a hunk of Churro Toffee dipped in as well.

Churro Cinnamon-Brown Sugar Affogato // magicaltreatsathome.com

I hope you enjoy this super simple, and yet very elegant, treat today! (Or tomorrow if you make the ice cream!) It’s about to get REAL HOT here in LA, so I’m thinking about making a few batches of ice cream this week. Have a magical week everyone!

Print
clock clock iconcutlery cutlery iconflag flag iconfolder folder iconinstagram instagram iconpinterest pinterest iconfacebook facebook iconprint print iconsquares squares iconheart heart iconheart solid heart solid icon
Churro Cinnamon-Brown Sugar Affogato // magicaltreatsathome.com

5 Minute Treats: Cinnamon-Brown Sugar Affogato (Churro Affogato)

5 Stars 4 Stars 3 Stars 2 Stars 1 Star No reviews
  • Author: Elana Lepkowski
  • Yield: 1 Cinnamon-Brown Sugar Churro Affogato + 1 quart ice cream 1x
Print Recipe
Pin Recipe

Description

Creamy, spicy cinnamon and brown sugar ice cream is topped with a healthy pour of bittersweet espresso in this 5 Minute Treat. A Disneyland-inspired recipe.


Ingredients

Scale

For the ice cream:
adapted from David Lebovitz

  • 1 cup (250ml) whole milk
  • 3/4 cup (150g) brown sugar
  • pinch of salt
  • 8 cinnamon sticks broken up (see notes below)
  • 2 cups (500ml) heavy cream
  • 5 large egg yolks
  • 1/4 teaspoon ground cinnamon

For the affogato

  • 1 shot of freshly brewed espresso
  • churro toffee chunks, optional (find the recipe here on our site!)

Instructions

For the ice cream:

  1. Heat the milk, brown sugar, salt, cinnamon sticks, and 1 cup of the heavy cream together in a medium saucepan. Cover, remove from heat, and let steep 1 hour.
  2. Place the pan back on the stove and rewarm the mixture, removing the cinnamon sticks with a slotted spoon. Be careful not to let the mixture start to boil or get too hot, you are just warming the milk up to barely simmering at this point.
  3. Nest a medium-sized bowl in a larger bowl that’s partially filled with ice water, to create an ice bath. Set a mesh strainer over the medium bowl and pour the remaining cream into the medium bowl.
  4. Whisk together the egg yolks in a small bowl and gradually add some of the warm cinnamon-infused milk to the yolks, whisking constantly. Scrape the warmed yolks back into the saucepan and cook over medium heat, stirring constantly and scraping the bottom with a heatproof spatula, until the custard thickens and coats the spatula.
  5. Remove from heat and immediately pour the custard through the strainer into the cream. Remove the strainer and stir the custard until cool, then chill thoroughly in the refrigerator at least 8 hours or overnight.
  6. Before churning, add the ground cinnamon. Gently stir to combine.
  7. Then, freeze the custard in your ice cream maker according to the manufacturer’s instructions. Store in an airtight container in the freezer until ready to use.

For the affogato:

  1. Place the desired amount of ice cream in a small bowl or heat proof cup (I like two small scoops for this dessert).
    Churro Cinnamon-Brown Sugar Affogato // magicaltreatsathome.com
  2. Pour the espresso over the ice cream.
  3. Optionally top with crumbled churro toffee pieces. Enjoy!

Notes

  • To break up cinnamon sticks, you can either grind them in a mortar and pestle (which is what I did, and really, you’re just breaking them up, not grinding into a powder), or wrap them in a kitchen towel and break them up with a hammer or meat tenderizer. I would not suggest a ziplock as is said in the original recipe, as they tend to poke through and tear the bag, getting pieces everywhere.
  • We are Nespresso users at home, so I found that a regular shot was plenty. The lungo shot was a bit too much and melted the ice cream more than I desired creating a warm soup.
  • If you want to make a batch for a party, portion out ice cream into small cups and freeze ahead of time. When ready to serve, brew lungo shots in a large measuring glass with a spout. Then you can pour small amounts of espresso all at once into each cup.

Did you make this recipe?

Tag @magicaltreatsathome on Instagram and hashtag it #magicaltreatsathome

Churro Cinnamon-Brown Sugar Affogato // magicaltreatsathome.com

Share this:

  • Click to share on Facebook (Opens in new window) Facebook
  • Click to share on X (Opens in new window) X

Like this:

Like Loading...

Filed Under: 5 Minute Treats, Recipes, Treats Tagged With: 5 Minute Treat, brown sugar, churro toffee, cinnamon, DCA, disneyland, holiday, ice cream, Schmoozies, treat

Bunny Butt Easter Crispy Treats

April 10, 2020 by Elana Lepkowski Leave a Comment

Bunny Butt Crispy Treats for Easter // magicaltreatsathome.com

Where can I find the original treat?

  • This seasonal treat can be found all over the Disneyland resort.

We’re back again today with another Disneyland park inspired Easter treat. Similar in style to yesterday’s Bunny Butt Cake Pop, today we’re not getting quite so technical with this Bunny Butt Easter Crispy Treat.

Yes! Disneyland did it again with some super cute crispy treats shaped like Peter Cottontail’s, er, cottontail. I just loved seeing these and the cake pops on my last few visits to the park in March. It was hard to narrow down what treats to make for Easter, but in the end, the bunnies won.

Bunny Butt Crispy Treats for Easter // magicaltreatsathome.com

Unlike the smaller cake pops, these treats use flaked coconut to make a big tail for these Easter rabbits and the feet decorations are piped on. (And if you’ve got a large Mickey Mouse cutter at home, you’re in luck, since these use that shape, but flipped upside down to create the bunny butt!) Our batch below makes 3 generously sized crispy treats but you can definitely double this recipe using the handy button in the recipe too!

If you’ve saved your leftover white chocolate from yesterday, then you should still have plenty leftover to coat these and do some piping work. If not, no worries! These are still super easy to make even with a little extra time melting chocolate.

Bunny Butt Crispy Treats for Easter // magicaltreatsathome.com

One trick I learned with these this time, is that you can speed the firming up stage by sticking these straight into the freezer for a little bit right after pouring the mixture in the pan. Then go straight to cutting out the shapes. I’d still stick them back in the fridge after cutting so they don’t un-firm up quickly though before coating and decorating. This trick came in handy when I realized I was late for snack time this week and needed to put something in front of my kids ASAP.

Speaking of kids, this is a fun treat for kids to decorate. I like to stay clear of small hands touching the molten marshmallows, but that cools down very quickly once it’s out of the saucepan and into the baking pan to set.

Bunny Butt Crispy Treats for Easter // magicaltreatsathome.com

Ok, now let’s make some bunnies! And don’t forget to check the notes below for more tips!

Print
clock clock iconcutlery cutlery iconflag flag iconfolder folder iconinstagram instagram iconpinterest pinterest iconfacebook facebook iconprint print iconsquares squares iconheart heart iconheart solid heart solid icon
Bunny Butt Crispy Treats for Easter // magicaltreatsathome.com

Bunny Butt Easter Crispy Treats

5 Stars 4 Stars 3 Stars 2 Stars 1 Star No reviews
  • Author: Elana Lepkowski
  • Yield: 3 Bunny Butt Crispy Treats 1x
Print Recipe
Pin Recipe

Description

Sweet, chewy, crispy treats get the Cottontail treatment in these cute, Easter themed Bunny Butt dessert. A Disneyland-inspired treat.


Ingredients

Scale

For the crispy treat:

  • 2 tablespoons butter, unsalted
  • 2–1/2 cups mini marshmallows or 25 regular sized marshmallows
  • 2-1/2 cups crisped rice cereal

For the decoration:

  • 1 cup white chocolate, finely chopped (or candy white candy melts)
  • 1/4 cup light pink candy melts
  • 2 marshmallows, cut in half
  • 1/3 cup shredded coconut (sweetened or unsweetened)

Specialty Tools:

  • Mickey Mouse cutter
  • piping bags

Instructions

For the crispy treat:

  1. Before beginning, line a loaf pan with parchment.
  2. Combine the butter and marshmallows in a medium sauce pan over medium-low heat. Stir constantly until marshmallows have melted and mixture is smooth.
  3. Immediately dump in the crisped rice cereal and mix to combine.
  4. Pour into the prepared pan and gently press mixture into place with a rubber spatula (or damp fingers). Set aside for at least an hour in the refrigerator (or 20 minutes in the freezer) so that the mixture can firm up enough to cut shapes.
  5. When the treats have firmed up, use a Mickey Mouse cutter to cut out your shapes. Set aside.

For the decoration:

  1. First, melt the white chocolate (or candy melts) in the microwave inside a microwave safe bowl, like glass, for 30 seconds. Stir and microwave again for an additional 30 seconds. Keep stirring and microwaving in short bursts of 15-20 seconds until melted and smooth. Use can alternatively use a double boiler for melting.
  2. Dip the top of the treat into the melted chocolate, letting any excess drip off back into the bowl. Repeat for other treats.
  3. Then attach the half marshmallow, cut side down, into the center of the largest part of the crispy treat. Repeat with all the treats and set aside. (You’ll have half a marshmallow left over)
  4. Next, pour all the remaining white chocolate into a piping bag. Set aside.
  5. Melt the pink candy melts now in the microwave inside a microwave safe bowl, like glass, for 30 seconds. Stir and microwave again for an additional 30 seconds. Keep stirring and microwaving in short bursts of 15-20 seconds until melted and smooth. Use can alternatively melt directly in a heavy duty piping bag. If you haven’t melted in a piping bag, transfer the melted candy melts to one now. Set aside.
  6. Start piping the feet with the melted white chocolate first, outlining the circles for the feet. Then over the marshmallow with white chocolate and immediately press the shredded coconut onto it to create the cottontail.
  7. Then, using the pink candy melts, pipe the feet decorations. Start by squeezing until a large circle forms, and then using a quick motion, pipe three small dots.
  8. Let the treats firm up at least an hour in the refrigerator before serving. Enjoy!

Notes

  • Use a smaller pan than you think you’ll need for this. As the marshmallows melt into the butter, if there’s too much space in the pan, they will start to dry out and form strings. Keeping the marshmallows closer together in the pan will ensure they melt more evenly, creating a better mixture to add the cereal into.
  • When mixing crisped rice cereal into the melted marshmallows, keep the mixture on the flame so that marshmallows stay liquid. Removing to mix in can seize up the liquid before the cereal is fully mixed.
  • If crisped rice cereal is unavailable right now, use any kind of puffed grain, or cereal. Fruity Pebbles would work here too!
  • After you’ve cut out your treats, extra cereal/marshmallow mixture can be recombined by hand and cut again (or just combined and shaped into another treat by hand).
  • Melted white chocolate is thinner than candy melts. If you find your first dip in the white chocolate is too thin, wait 5-10 minutes and then dip a second time AND THEN adhere the marshmallow.
  • At the parks, they use marshmallow creme to hold the coconut tail in place. If you’ve got fluff in a jar, that would work here too!
  • Save any extra white chocolate or candy melts to reuse for another treat within a week for white chocolate and a month for candy melts. Let harden and then seal in an airtight container.
  • Treats can be kept in an air-tight container for up to 3 days.

Did you make this recipe?

Tag @magicaltreatsathome on Instagram and hashtag it #magicaltreatsathome

Bunny Butt Crispy Treats for Easter // magicaltreatsathome.com

Share this:

  • Click to share on Facebook (Opens in new window) Facebook
  • Click to share on X (Opens in new window) X

Like this:

Like Loading...

Filed Under: Recipes, Treats Tagged With: candy melts, coconut, crispy treat, disneyland, Easter, marshmallow, rice krispie treat, treat, white chocolate

Bunny Butt Easter Cake Pop

April 9, 2020 by Elana Lepkowski 2 Comments

Bunny Butt Cake Pops // magicaltreatsathome.com

Where can I find the original treat?

  • This seasonal treat can be found all over the Disneyland resort.

On one of our last visits to the park we were lucky enough to catch the appearance of all the Easter/spring treats hitting the bakery shelves. Out of all the adorable items, the bunny cake pops were definitely a favorite (for both the kids and the adults). So we’re making up a batch today for our Easter festivities this week!

These bunny butt cake pops are the standard chocolate cake pops found at Disneyland, with two marshmallows for the feet, and a bit of marshmallow for the tail. It’s dipped in white chocolate, and then gets pink candy melts for decoration.

Bunny Butt Cake Pops // magicaltreatsathome.com

After a bit of trial and error, we found the best and most efficient way to put these together, and that require a double dip in the white chocolate. We used baking white chocolate instead of white candy melts here and to get a nice, solid, opaque coating, dipping twice is essential. Dipping twice is also how we firmly adhere the marshmallows on so they stay in place to fully cover the cake pop.

Please check out the notes below for our tips working with white chocolate for coating. Especially if you’re having trouble with the white chocolate “breaking” when you dip in your cake pops.

Bunny Butt Cake Pops // magicaltreatsathome.com

Kids can help through many of the steps here. Adult supervision is required for melting the chocolate, and for using the oven, but otherwise kids can mix, bake, dip, and decorate this cute Disneyland-inspired Easter treat!

Bunny Butt Cake Pops // magicaltreatsathome.com

Ok, let’s make some bunnies! And remember to hop back over here this week for another cute Disneyland-inspired Easter treat!

Print
clock clock iconcutlery cutlery iconflag flag iconfolder folder iconinstagram instagram iconpinterest pinterest iconfacebook facebook iconprint print iconsquares squares iconheart heart iconheart solid heart solid icon
Bunny Butt Cake Pops // magicaltreatsathome.com

Bunny Butt Easter Cake Pop

5 Stars 4 Stars 3 Stars 2 Stars 1 Star No reviews
  • Author: Elana Lepkowski
  • Yield: 5 Bunny Butt Cake Pops 1x
Print Recipe
Pin Recipe

Description

These cute bunny cake pops are filled with chocolate cake, and adorned with marshmallow feet and tail, all covered with white chocolate and pink candy melts. A Disneyland-inspired treat.


Ingredients

Scale

For the cake pops:

  • 2 cups crumbled chocolate cake, lightly packed (or check out our post on making Mickey cake pops for cake recipes including chocolate, vanilla, and red velvet)
  • 1/4 cup cream cheese frosting

For the decoration:

  • 2–1/2 cups white chocolate
  • 6 large marshmallows
  • 2 tablespoons pink candy melts

Special tools:

  • circle cutter
  • lollipop sticks

Instructions

For the cake pops:

  1. Combine the cake crumbles and cream cheese together until smooth and no white streaks remain (either with a mixer, or by hand).
  2. Form into a 1/2″, 5″x5″ block (I use half of a loaf pan to help keep the shape), and let sit, refrigerated, overnight or for at least 6 hours. This helps the cake pops keep their shape. You could alternatively let these sit in the freezer as well for an hour or two depending on how cold your freezer is. Do not let them freeze.
  3. After the form has rested, using a 1-1/2″ circle cutter, cut 5 circles out of the block. Any extra cake can be combined to form new shapes, or can be formed into balls and frozen for later use.
  4. Insert lollipop sticks and set aside.
    Bunny Butt Cake Pops // magicaltreatsathome.com

For the decoration:

  1. First, cut the 5 marshmallows in half (I found kitchen shears were the best tool for this job). Set these aside for the feet. Then take the 6th marshmallow and cut or rip sections off to form the tails. Set aside.
  2. Next, melt the white chocolate. You can do this one of several ways:
    1. Melt in a candy pot until smooth (Wilton makes this one for their candy melts I use for dipping projects like this). This can take up to 20 minutes to get fully smooth chocolate or candy melts (see notes below about melting white chocolate). Follow the directions for your particular pot!
    2. Melt in the microwave in a microwave safe bowl, like glass, for 30 seconds. Stir and microwave again for an additional 30 seconds. Keep stirring and microwaving in short bursts of 15-20 seconds until melted and smooth.
    3. Melt in a double boiler on the stove. In a medium saucepan, bring about an inch of water to a simmer. Place a glass bowl on top and add candy melts. Stir until melted and smooth.
  3. Make sure the cake pops have come to room temperature. If they’re too cold, the chocolate will seize up and harden too soon.
  4. Next, dip each cake pop into the white chocolate, tapping each stick against the bowl to pop any air bubbles and to remove all the excess chocolate. Place on a parchment lined sheet pan and place the marshmallow feet and tail on the cake pop, pressing lightly to help adhere. Repeat with the rest of the cake pops and then let them firm up a little before doing the second dip.
  5. Once the cake pops have firmed up slightly, dip the whole cake pop a second time, again, tapping it against the side of the bowl to pop any air bubbles and to remove excess chocolate. Place back on the parchment and repeat with the rest of the cake pops.
  6. Let the cake pops firm up slightly again and melt the pink candy melts to finish decorating the cake pops. To melt the pink candy melts, microwave inside a microwave safe bowl, like glass, for 30 seconds. Stir and microwave again for an additional 30 seconds. Keep stirring and microwaving in short bursts of 15-20 seconds until melted and smooth. You can alternatively use a double boiler for melting or melt candy melts in a piping bag, kneading the candy melts between microwaving.
  7. If not melting directly in a piping bag, transfer melted candy melts into a piping bag and cut a small amount of the tip off to decorate.
  8. Draw on the feet with the piping bag on each cake pop. Set aside and let firm up at least a half hour, or refrigerate until ready to eat.

Notes

  • Cake balls should not be too wet or too dry to hold their shape properly. If too wet, add more cake crumbles. If too dry, add more frosting a small bit at a time.
  • I like to dry the cake crumbles out a bit before mixing with the frosting, and then letting that mixture sit overnight in the fridge to set up. This ensures a more solid cake pop when dipping.
  • Boxed cake and canned frosting will also work for the cake pops if you don’t want to make them from scratch. Just follow the amounts for the crumbled cake and amount of frosting on those recipe pages listed above.
  • If cake balls are slipping off the sticks, dip lollipop stick tip in the melted chocolate and insert into cake ball. Refrigerate a few minutes to set.
  • Pure white chocolate, as opposed to candy melts, will have a thinner texture and may show dark spots after one dip due to its translucent nature. The first dip will also ensure that your marshmallows will adhere and not slide off into the chocolate on the second dip. If your kitchen is particularly warm, stick in the fridge for 10 minutes to harden slightly before second dip.
  • White chocolate can get too hot very easily. If the white chocolate looks like it is seizing on your spoon when you have dipped in the chocolate and let it drip off, it is too hot. Keep stirring the white chocolate to cool it down. It will be the right consistency to dip the cake pops in when it drips smoothly off your spoon. This can take anywhere sometimes from 20 to 30 minutes to melt, and then cool down to the right consistency.
  • If your white chocolate or candy melts is still very clumpy and thick, add a 1/4 teaspoon of coconut oil into it and continue mixing. This should thin out your mixture and get a smoother consistency.
  • Save any extra white chocolate to reuse for another treat within a week. Let chocolate harden and then seal in an airtight container.
  • Cake pops will last up to one week in the refrigerator in an airtight container.

Did you make this recipe?

Tag @magicaltreatsathome on Instagram and hashtag it #magicaltreatsathome

Bunny Butt Cake Pops // magicaltreatsathome.com

Share this:

  • Click to share on Facebook (Opens in new window) Facebook
  • Click to share on X (Opens in new window) X

Like this:

Like Loading...

Filed Under: Recipes, Treats Tagged With: bunny, cake, cake pop, chocolate, disneyland, Easter, marshmallow, treat, white chocolate

African Sunshine Cupcake (Sunflower Cupcake)

April 4, 2020 by Elana Lepkowski Leave a Comment

African Sunshine Sunflower Cupcake // magicaltreatsathome.com

Where can I find the original treat?

  • This treat was originally found at The Mara in Disney’s Animal Kingdom Lodge.

How is it already a week since our last recipe?! Time sure is strange right now, at least for all of us at home. But, another week, another Disney treat. And this week we’re traveling from our home base here in SoCal to Florida to make the African Sunshine Cupcake that was at The Mara in Disney’s Animal Kingdom Lodge!

This sunflower cupcake was a request from a follower on Instagram. So, just a reminder to everyone that if there’s something you’d like to make and you don’t see it here on the site yet, just ask us and we’ll see if it’s something we can make! I’ll also point out that even though the cupcake recipe makes 12 total cupcakes, the buttercream should decorate about 6, as the other remaining 6 cupcakes we’ll crumble and use for our cake pop recipe in a few days!

African Sunshine Sunflower Cupcake // magicaltreatsathome.com

This treat is a chocolate cupcake flavored with orange extract and topped with a layer of fudge, chocolate crisp pearls, and yellow and green vanilla buttercream frosting. They sure are a pop of sunshine! And don’t let all those individual petals scare you into thinking this is more of an advanced decorating project; it’s not! I’ve got a quick video I’ll link to on our YouTube page (yes, we have one but it’s a bit sparse!) and it shows the technique for piping on the petals. In summary, you’ll want to start the tip at the inner edge of the baking cup and fold up and over to create some height for the flower petals since you’ll want an area to catch all the pearls in.

While you might want perfect petals for your cupcake, kids can help mix the cupcake batter, and pipe their own petals for the flowers. It’s a good lesson in patience to slowly get the buttercream to come out!

African Sunshine Sunflower Cupcake // magicaltreatsathome.com

If you’re wondering where the name comes from, Disney states that South Africa is the 10th largest producer of sunflowers in the world. Now let’s make some buttercream sunshine!

Print
clock clock iconcutlery cutlery iconflag flag iconfolder folder iconinstagram instagram iconpinterest pinterest iconfacebook facebook iconprint print iconsquares squares iconheart heart iconheart solid heart solid icon
African Sunshine Sunflower Cupcake // magicaltreatsathome.com

African Sunshine Cupcake (Sunflower Cupcake)

5 Stars 4 Stars 3 Stars 2 Stars 1 Star No reviews
  • Author: Elana Lepkowski
  • Yield: 6 Sunflower Cupcakes 1x
Print Recipe
Pin Recipe

Description

Bring a little sunshine into your home with these orange-chocolate cupcakes topped with bright yellow and green vanilla buttercream surrounding a pool of fudge and crisp chocolate pearls. A Walt Disney World inspired treat.


Ingredients

Scale

For the cupcakes (adapted from Sally’s Baking Addiction):

  • 3/4 cup (95g) all-purpose flour
  • 1/2 cup (45g) unsweetened natural cocoa powder
  • 3/4 teaspoon baking powder
  • 1/2 teaspoon baking soda
  • 1/4 teaspoon salt
  • 2 large eggs, at room temperature
  • 1/2 cup (100g) granulated sugar
  • 1/2 cup (100g) packed light brown sugar
  • 1/3 cup melted coconut oil or vegetable oil
  • 1 teaspoons pure vanilla extract
  • 1–1/2 teaspoons orange extract
  • 1/2 cup Greek yogurt, at room temperature

For the fudge:

  • 4 ounces sweetened condensed milk
  • 4 ounces semisweet chocolate, finely chopped
  • 1/2 teaspoon vanilla extract

For the buttercream:

  • 1 stick (1/2 cup) butter
  • 2 cups powdered sugar
  • 1 teaspoon vanilla extract
  • 1 teaspoon heavy cream, milk, or nondairy milk
  • green gel paste food coloring (I used Americolor Leaf Green)
  • yellow gel paste food coloring (I used Americolor Lemon Yellow)

Chocolate crisp pearls for decoration

Specialty Tools:

  • piping bags
  • leaf tip
  • baking cups

Instructions

For the cupcakes:

  1. Preheat the oven to 350°F. Line a 12-cup muffin pan with the baking cups. Set aside.
  2. Whisk the flour, cocoa powder, baking powder, baking soda, and salt together in a large bowl until thoroughly combined. Set aside. In a medium bowl, whisk the eggs, granulated sugar, brown sugar, oil, vanilla, and orange extract together until combined. Pour half of the wet ingredients into the dry ingredients. Then half of the Greek yogurt. Gently whisk until just combined. Repeat alternating with the remaining wet ingredients and Greek yogurt. Stir only until there are no visible white streaks of yogurt to avoid over-mixing the batter. This is a thin batter!
  3. Fill baking cups halfway with batter. Bake for 18-21 minutes, or until a toothpick inserted in the center comes out clean. Allow to cool completely before decorating. ** You will only need 6 for this recipe. Save the others for the cake pop recipe we’ll have in a few days!
    African Sunshine Sunflower Cupcake // magicaltreatsathome.com

For the fudge:

  1. While the cupcakes are baking, combine the sweetened condensed milk and chocolate in a heat safe bowl and microwave for 30 seconds. Stir and microwave an additional 30 seconds. If chocolate is still lumpy, microwave an additional 15 seconds. Stir rapidly until smooth.
  2. Add vanilla extract in and stir to combine.
  3. Set aside in fridge while cupcakes continue to bake. You’ll want a pour-able, but thick consistency. See notes below for making ahead.

For the frosting and decoration:

  1. Cream the butter in a mixer until light and fluffy; about 1 – 2 minutes.
  2. Add in powdered sugar and mix until all the sugar is incorporated.
  3. Pour in vanilla and cream/milk and beat again for an additional 30 seconds. You want a stiffer buttercream to pipe the sharp edges of the leaf and flower petals. If buttercream seems too wet (flops off your spoon), beat in an additional 1-2 tablespoons of powdered sugar.
  4. Once desired consistency has been reached, scoop out 1/4 of the buttercream and put in a bowl big enough to mix it around in. Add in 2 drops of green food coloring for the leaves. Mix the frosting until no white remains and then transfer to a piping bag fitted with the leaf tip. Set aside.
  5. Grab your fudge and spoon a small circle of fudge in the center of each cupcake, leaving room to pipe frosting on the outside (about a 1/4″).
    African Sunshine Sunflower Cupcake // magicaltreatsathome.com
  6. Then, pipe 3-4 leaves on each cupcake starting from the fudge and moving to the edge of the wrapper, set aside. Remove piping tip, clean it, and fit onto a new piping bag.
    African Sunshine Sunflower Cupcake // magicaltreatsathome.com
  7. To the remaining white frosting, add in 2-3 drops of the yellow food coloring. Mix well until there are no longer any white streaks. Transfer the yellow buttercream to the new piping bag.
  8. Pipe sunflower petals around the edges of the fudge in 2-3 layers, piping over the leaves until desired number of petals have been created. You’ll want a small well to pour in the crisp pearls so keep that in mind when building your layers.
  9. Finish your cupcakes by spooning about a tablespoon of chocolate crisp pearls into the center of each cupcake. Enjoy immediately or refrigerate in an airtight container up to 3 days.

Notes

  • The remaining cupcakes can be tightly wrapped in clingwrap and frozen for up to 6 months or crumbled and saved for cake pops.
  • If fudge is made ahead of time, remove from the refrigerator at least an hour to hour and a half prior to cupcakes being cool for decoration. If fudge is still stodgy, scoop out a small ball and warm between your hands, forming a disc to top cupcake with.
  • If petal or leaf tips are not available, you can make a DIY tip with just a pastry bag. Cut an inverse V in the tip of the bag and continue with the same piping movements.
  • Any extra buttercream can be frozen for up to 3 months. Defrost in the refrigerator the day before needed and rewhip until spreadable.

Did you make this recipe?

Tag @magicaltreatsathome on Instagram and hashtag it #magicaltreatsathome

African Sunshine Sunflower Cupcake // magicaltreatsathome.com

Share this:

  • Click to share on Facebook (Opens in new window) Facebook
  • Click to share on X (Opens in new window) X

Like this:

Like Loading...

Filed Under: Recipes, Treats Tagged With: buttercream frosting, chocolate, chocolate pearls, cupcakes, fudge, orange, sunflower, treat, WDW

Primary Sidebar

Follow Us

  • Instagram
  • Facebook
  • X
  • Pinterest
  • Email
  • YouTube

Hi! My name is Elana, and that’s me shoving a Mickey Mouse shaped treat in my face. I love the treats at Disneyland. A lot. So much so I’ve dedicated an entire website to making all my favorites, and hopefully yours too, out of my home kitchen. My aim is to create Disneyland-inspired treats, with easy to follow directions, and many recipes geared towards getting the kids in the kitchen to help too! Because putting sprinkles on things is F-U-N.

Top With Sprinkles

Get Recipes in Your Inbox!

* indicates required

Look for this icon in posts to find Kid Friendly recipes!

Recent Posts

  • Matterhorn Macaroon
  • Caramel Gingerbread Cookie Sandwiches
  • Colorful Fruit Hand Pies
  • Classic Mickey Shaped Beignets
  • Carrot Cake Cookies

Archives

  • February 2023
  • December 2022
  • August 2022
  • January 2022
  • December 2021
  • November 2021
  • December 2020
  • November 2020
  • October 2020
  • September 2020
  • August 2020
  • July 2020
  • June 2020
  • May 2020
  • April 2020
  • March 2020
  • February 2020
  • January 2020
  • December 2019
  • November 2019
  • October 2019
  • September 2019
  • August 2019
  • July 2019
  • June 2019
  • May 2019

Copyright © 2025 Magical Treats at Home on the Foodie Pro Theme

%d