• Skip to primary navigation
  • Skip to main content
  • Skip to primary sidebar

Magical Treats at Home

  • About
  • Treats
  • Drinks
  • Savory
  • Favorite Tools
  • Etsy Shop

peppermint

Chocolate and Peppermint Brownie Pie

December 16, 2021 by Elana Lepkowski 2 Comments

Chocolate Peppermint Brownie Pies // magicaltreatsathome.com

Where can I find the original treat?

  • The original treat can be found at the Candy Palace in Disneyland.

Hi everyone! It’s been a minute hasn’t it? Many, many minutes, but I couldn’t let a whole year go by without a new recipe, and now that they’ve opened up the gates at the parks, we’ve got all new treats to enjoy, and make!

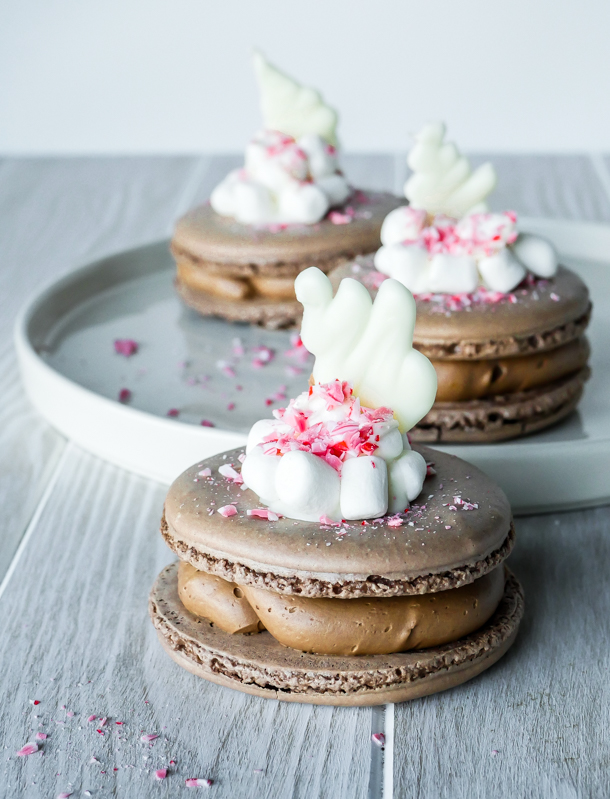
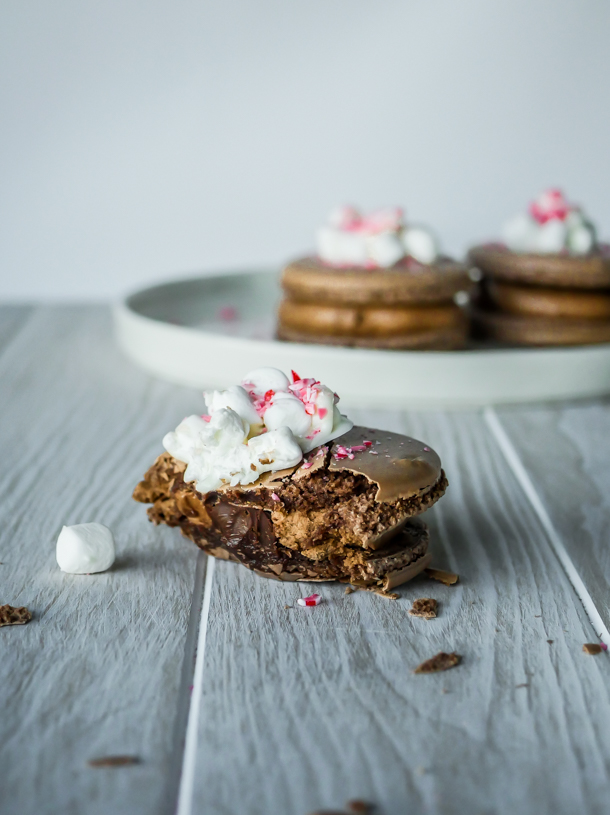
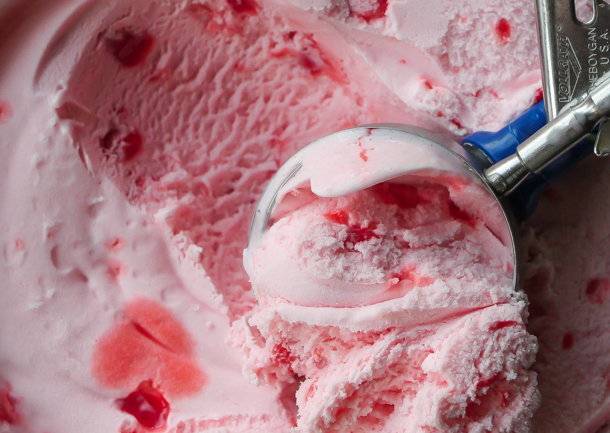
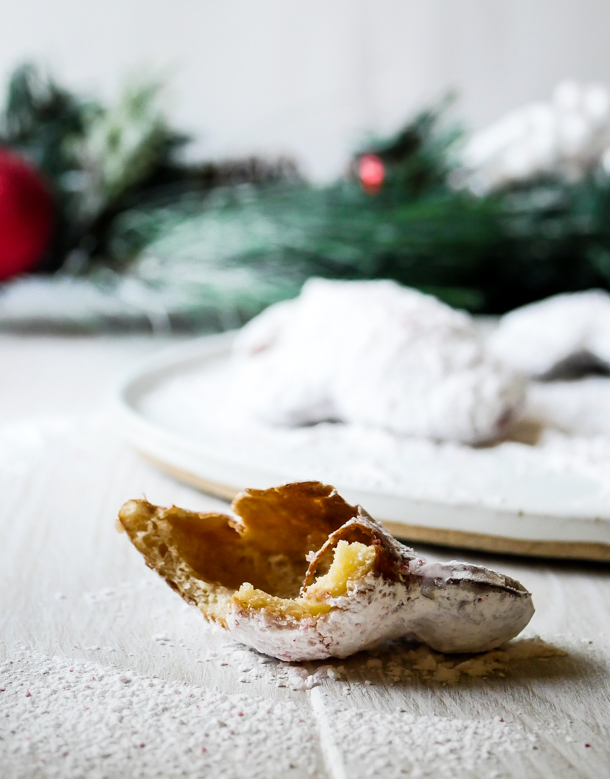
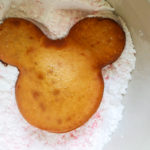
While Disneyland and DCA tend to have the same formats for treats, and rotate or create new flavors for those, recently they’ve introduced these “pies” that are similar to giant saucer-like cookies and brownies. I’ve found that one is the perfect size for two people to share. Or eat one half in the car on the way back from the park, and the other half after the kids are asleep later that evening. Whatever works for you.

Chocolate Peppermint Brownie Pies // magicaltreatsathome.com

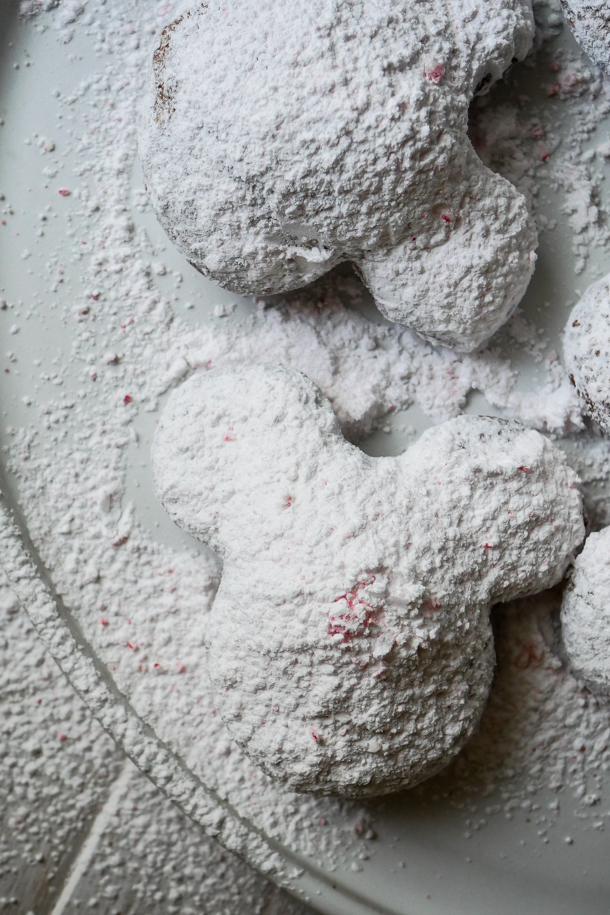
I’ve always been a big fan of chocolate and peppermint together in treats. I think perhaps it might have something to do with those Andes Mints we got on hotel pillows growing up (does anyone still do that?!). I get though that this combination is not for everyone, but don’t worry, I’ve got something for those that fall into that camp coming soon.

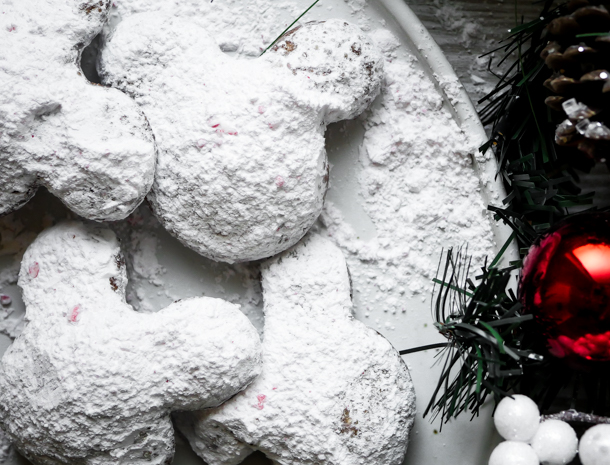
Anyways, these would make a pretty magical edible gift if you baked up a batch this holiday season. I’ve got a few going out the door this week for neighbors. 
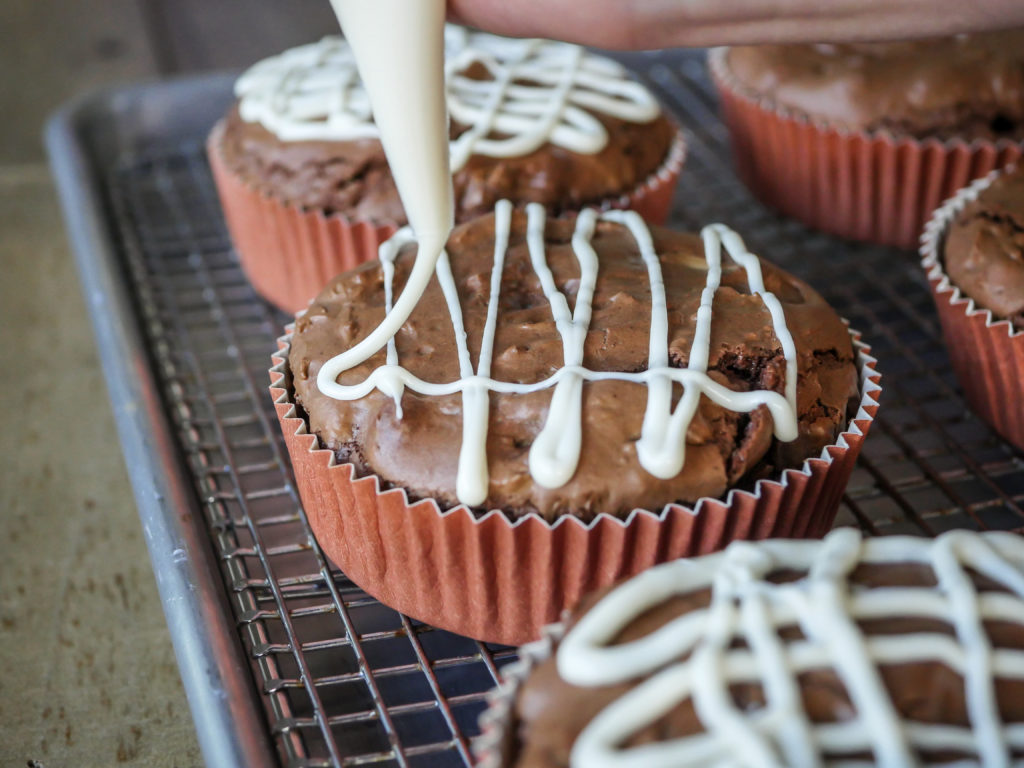
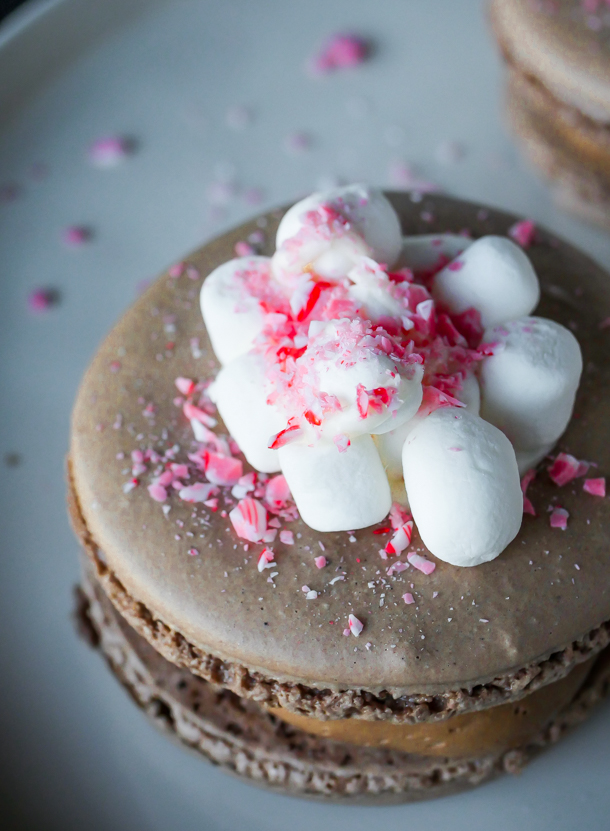
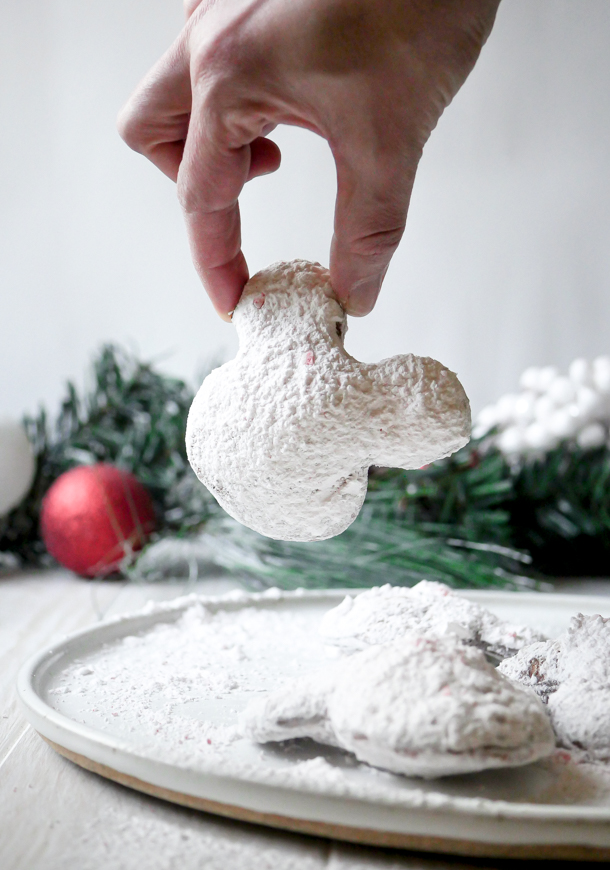
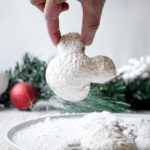
Chocolate Peppermint Brownie Pies // magicaltreatsathome.com

If you’ve got kids in the kitchen there are a few more advanced techniques here with melting the chocolate. My 4 and 7 year old are pros at the decorating bits and especially adding the candy canes, although I suspect that they’re slipping a few of those into their pockets for later. 

It feels so good to be back in this space making treats again for all of you. I truly hope you get to make and enjoy this special recipe soon!

Print
clock clock iconcutlery cutlery iconflag flag iconfolder folder iconinstagram instagram iconpinterest pinterest iconfacebook facebook iconprint print iconsquares squares iconheart heart iconheart solid heart solid icon
Chocolate Peppermint Brownie Pies // magicaltreatsathome.com

Chocolate and Peppermint Brownie Pie

5 Stars 4 Stars 3 Stars 2 Stars 1 Star No reviews
  • Author: Elana Lepkowski
  • Prep Time: 10 minutes
  • Cook Time: 25 minutes
  • Total Time: 35 minutes
  • Yield: 6 Chocolate and Peppermint Brownie Pies 1x
  • Category: Dessert
  • Method: Baking
  • Cuisine: Holiday
Print Recipe
Pin Recipe

Description

Is it a brownie? Is it a pie? It’s both! And with the classic holiday combination of chocolate and peppermint, these shareable treats will be a hit this season. A Disneyland-inspired recipe.


Ingredients

Scale
  • 6 tablespoons unsalted butter
  • 8 ounces bittersweet chocolate (60% cacao)
  • 1/2 cup (60 g) flour
  • 1/3 cup (35 g) unsweetened cocoa powder, dutch processed (I used Valrhona)
  • 1/2 teaspoon salt
  • 3 large eggs
  • 1 cup (198 g) granulated sugar
  • 1 teaspoon vanilla extract
  • 1/2 teaspoon peppermint extract
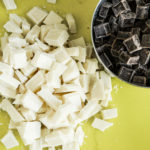
  • 1 cup semi-sweet chocolate chunks
  • 1–1/3 cups white chocolate chunks, divided
  • 6 mini candy canes

Special Tools

  • Oversized baking cups/molds

Instructions

  1. Preheat the oven to 350°f. Set out 6 of the oversized bake cups on a half size sheet pan. Set aside.
    Chocolate Peppermint Brownie Pies // magicaltreatsathome.com
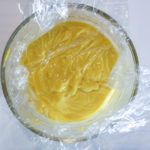
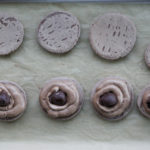
  2. In a double boiler, melt the butter and chopped bittersweet chocolate, stirring frequently until melted and smooth. Alternatively you can melt them together in the microwave inside a microwave safe bowl, like glass, for 20 seconds. Stir and microwave again for an additional 20 seconds. Keep stirring and microwaving in short bursts of 15-20 seconds until melted and smooth. Set aside to cool.
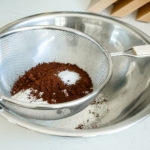
  3. Next, sift together the flour, unsweetened cocoa powder, and salt into a medium sized bowl. Set aside.
    Chocolate Peppermint Brownie Pies // magicaltreatsathome.com
  4. Whip together the eggs and sugar on high speed (10) for 5 minutes until light and frothy. This should be done with either a stand mixer or hand mixer. Then pour in the melted chocolate, vanilla extract, and peppermint extract. Stir to combine until there are no more white streaks.
  5. Next, dump in the sifted flour/cocoa/salt mix and, by hand, fold that in to combine until there are no longer any visible flour streaks.
  6. Then fold in semi-sweet chocolate and 1 cup of the white chocolate chunks, setting the additional third of a cup aside.
    Chocolate Peppermint Brownie Pies // magicaltreatsathome.com
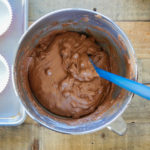
  7. Scoop about a 1/2 cup of the mixture into each baking cup, smoothing out the top.
    Chocolate Peppermint Brownie Pies // magicaltreatsathome.com
  8. Bake for around 25-30 minutes until a toothpick comes out clean. Let cool to room temperature.
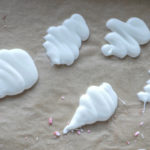
  9. While the brownie pies cool, melt the remaining 1/3 cup of white chocolate chunks. You can either melt them in the microwave in short bursts like the above direction, in a small double boiler, or using a candy melting pot (my favorite way of melting small amounts of chocolate and candy melts).
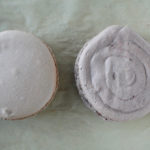
  10. Transfer the melted white chocolate to a heat-safe piping bag and make crisscrossing lines over the tops of the room-temp brownies. Immediately at the candy cane to each one after you finish decorating so that it will adhere to the top. Wait 30 minutes for the chocolate to set up (or more if your kitchen is warm), and enjoy!

Notes

  • I’m using a bittersweet chocolate for my brownie base, however, if you prefer yours sweeter, up that to 68 or 70% cacao.
  • Looking for that light, crackly brownie crust? Don’t skip on whipping the sugar and the eggs together for what seems like an awfully long time. That crust is actually a meringue that forms while baking. This does create a more delicate top that is prone to cracks, but if you love a shiny, crackly top, you want that!
  • Any remaining melted white chocolate can be kept in the piping bag and refrigerated. Seal off the ends with twist ties. Large chunks can be broken up and re-melted.

Did you make this recipe?

Tag @magicaltreatsathome on Instagram and hashtag it #magicaltreatsathome

Chocolate Peppermint Brownie Pies // magicaltreatsathome.com

Share this:

  • Click to share on Facebook (Opens in new window) Facebook
  • Click to share on X (Opens in new window) X

Like this:

Like Loading...

Filed Under: Recipes, Treats Tagged With: brownie, Candy Palace, chocolate, disneyland, holiday, peppermint, treat, white chocolate

Hot Cocoa Macaron

January 13, 2020 by Elana Lepkowski Leave a Comment

Hot Cocoa Macaron // magicaltreatsathome.com

Where can I find the original treat?

  • This holiday treat was part of the Festival of Holidays at Disney California Adventure Park.

Welcome back and Happy New Year! Are you in need of a comforting treat? Me too. Sometimes January can feel like someone let the air out of the balloon. There’s the big let down after all the holiday food and decorations have been put away for the year. And yeah, maybe there’s still a little of that, but now January marks the cozy season for me. Also, my youngest celebrates a birthday at the end of the month…. so I’m still party planning even after I put away the Christmas decorations.

Hot Cocoa Macaron // magicaltreatsathome.com

Our first treat of 2020 is like a warm sweater by the fire in cookie form: the Hot Cocoa Macaron! This oversized cookie was part of the Festival of Holidays celebration at DCA and you could have found this at the Making Spirits Bright kiosk.

It really did remind me of the flavors of a cup of hot cocoa, I think part of that was the combination of chocolates, especially the milk chocolate filling with semisweet ganache center. The mound of mini marshmallows on top didn’t hurt either.

Hot Cocoa Macaron // magicaltreatsathome.com

I love making macarons. (We have two other recipes on the site if you’re looking for more after this too!) They require a little patience and technique but honestly, they’re pretty quick to put together and they definitely wow people when you tell them you made them. If you’re looking ahead towards Valentine’s Day presents, these would be a pretty special gift (I might just gift myself another batch…).

I have a whole new set of tips and tricks with these, as the addition of cocoa powder to the macaron mix changes the consistency and texture a bit. So please read through all those before starting the recipe. They will ensure you will have a good batch (and not need to make them 4 times to be perfect… like some people I know *coughcough*).

Hot Cocoa Macaron // magicaltreatsathome.com

BONUS! As a special gift to all of you who want to try this recipe, first, thank you, and second, I’ve made a printable template for perfectly shaped macarons. You really need both halves to match up in order to sandwich the filling, and this template will help you make sure that happens.

Icon

3 inch circle template

1 file(s) 86.61 KB
Download

I’m so excited to kick off a whole new year of treats with all of you! If there’s anything at the parks you’d like to see made on here, drop us a line in the comments below or shoot us an email!

Hot Cocoa Macaron // magicaltreatsathome.com
Print
clock clock iconcutlery cutlery iconflag flag iconfolder folder iconinstagram instagram iconpinterest pinterest iconfacebook facebook iconprint print iconsquares squares iconheart heart iconheart solid heart solid icon
Hot Cocoa Macaron // magicaltreatsathome.com

Hot Cocoa Macaron

5 Stars 4 Stars 3 Stars 2 Stars 1 Star No reviews
  • Author: Elana Lepkowski
  • Yield: 3 Oversized Hot Cocoa Macarons 1x
Print Recipe
Pin Recipe

Description

Cozy up with this oversized hot cocoa inspired Macaron filled with two kinds of chocolate filling and topped with a mound of mini marshmallows and dusted with peppermint. A Disneyland-inspired recipe.


Ingredients

Scale

For the macarons:

  • 85g (1 cup minus one tablespoon) almond flour
  • 120g (1 cup) powdered sugar
  • 1 tablespoon (8g) unsweetened cocoa powder
  • pinch of salt
  • 70g egg whites, from about 2 large eggs
  • 1/4 teaspoon cream of tartar
  • 40g (3 tablespoons) granulated sugar

For the chocolate ganache:

  • 1/4 cup heavy cream
  • 2 ounces semisweet chocolate, chopped
  • 1 tablespoon unsalted butter

For the milk chocolate buttercream (adapted from Epicurious):

  • 1/3 cup whole milk, or milk substitute (this worked with almond milk)
  • 2 whole egg yolks
  • 2 teaspoons all purpose flour
  • 3/4 cup powdered sugar, divided
  • 1/2 teaspoon vanilla extract
  • 1–1/2 sticks (3/4 cup) unsalted butter
  • 4 ounces milk chocolate, melted and cooled
  • 1 ounce unsweetened baking chocolate, melted and cooled

For the topping:

  • 1 ounce white chocolate
  • 1 cup mini marshmallows
  • 1 candy cane, crushed

Special Tools:

  • 3″ circle cookie cutter

Instructions

For the macarons:

  1. First sift the almond flour, powdered sugar, cocoa powder, and salt back and forth four times between two bowls using a mesh strainer. Alternatively you can also pulse in a food processor 7-8 times. Set aside.
  2. Line a baking sheet with parchment. Using a pencil, trace six 3″ circles using the cutter as a guide leaving at least an 1″ between shapes. Flip parchment over so that you can still see outlines, but the graphite will not transfer to macarons. Alternatively,  place the free downloadable template (see notes above recipe for download) under the sheet of parchment. Set aside.
  3. In the bowl of a stand mixer fitted with the whisk attachment, add in the egg white and whisk on medium-low until slightly foamy, about 30 seconds. Add in the cream of tartar and whisk on medium until soft peaks appear. Then slowly pour in the sugar. Whisk on high until stiff peaks form, about 2-3 minutes.
  4. Remove the bowl from the mixer. Sift the entire dry mixture into the egg whites. Fold them until all the dry ingredients are incorporated and no egg whites remain. Egg whites will deflate and mixture should be the consistency of cake batter when they are ready. See notes below.
  5. Add batter into a piping bag. Cut the tip off about 1/2″, and pipe shapes onto the parchment lined baking sheet keeping the tip in the center and squeezing out until about 1/4″ before the outside of the circle. Then, pick up trays about 2″ from counter and let them fall down. Repeat. This helps to remove air bubbles from the batter. Let the batter sit about 45 minutes.
  6. Preheat your oven to 350°f about 15 minutes before the rest time is finished. Place cookies in oven to bake, and then lower the temperature to 300°f. Cook for 18-20 minutes.
  7. Let the macarons cool at least 20-30 minutes before decorating.

For the ganache:

  1. In a small sauce pan, heat the heavy cream until hot (about 181°f). Turn off the heat and add in the chocolate and stir to combine.
  2. Next, add in the butter and continue to stir until everything is incorporated and smooth.
  3. Transfer to a heat proof bowl and let cool to room temperature. Then cover and refrigerate until firm (about 30 minutes).

For the milk chocolate buttercream:

  1. Heat milk in a small saucepan over moderate heat until hot. Whisk together yolks, flour, 1/4 cup confectioners sugar, and a pinch of salt in a bowl, then add hot milk in a stream, whisking. Transfer custard to saucepan and bring to a boil over moderate heat while continually whisking (about 30 seconds to one minute). Reduce heat and simmer, whisking, until mixture becomes very thick, about 30 seconds more, then transfer to a medium sized bowl. Cover surface of custard with plastic wrap and cool completely, about 45 minutes.
    Hot Cocoa Macaron // magicaltreatsathome.com
  2. Add vanilla and remaining confectioners sugar to custard and beat at medium speed until combined well, then increase speed to medium-high and beat in butter, 2 tablespoons at a time, until smooth. Buttercream will look broken when mixing in butter but keep mixing and it will come together eventually!
  3. Scrape down bowl. Add chocolates and beat until combined well.

Assembly:

  1. Using a #100 disher or melon baller, scoop out small circle of ganache and place in the center of the macron bottom. Repeat with remaining macarons. See notes below for storing leftover ganache.
  2. Fill a piping bag 1/2 with frosting, cut about 1/2″ from the tip of the bag, and pipe circles of frosting around in a spiral until you hit the ganache center. Repeat with remaining macarons. See notes below for storing leftover frosting.
    Hot Cocoa Macaron // magicaltreatsathome.com
  3. Place macaron tops gently to form cookies sandwiches. Set aside.
  4. Melt the white chocolate in the microwave inside a microwave safe bowl, like glass, for 30 seconds. Stir and microwave again for an additional 30 seconds. Keep stirring and microwaving in short bursts of 15-20 seconds until melted and smooth. Spoon a small mound in the center top of each macaron. Place the mini marshmallows on top to set. Drizzle a small amount of the white chocolate on top and then sprinkle crushed peppermint on the tops of each macaron.
  5. Wait about 10 minutes for the chocolate to set and then enjoy!

Bonus! Making the white flames:

  1. Any left over melted white chocolate can be thinly spread on a sheet of parchment in the shape of a flame. Refrigerate 5 to 10 minutes to set. Remove from refrigerator and gently remove from the parchment. These can be placed on top of the macarons to resemble the decorations at DCA.
    Hot Cocoa Macaron // magicaltreatsathome.com

Notes

  • Sifting the almond flour and powdered sugar together is necessary for the absorption of oils and to prevent clumping of batter.
  • When mixing the macaron batter, you want to push the batter against the side of the bowl to help mix and deflate the egg whites. The cocoa powder will dry out the mixture and you will want to keep mixing more than a normal batch of macarons.
  • Do not pipe all the way to the edge of the circle as the batter will spread a bit while resting.
  • If you want a smooth top to the macaron, besides dropping the sheet pan to get out air bubbles, how you pipe is also important. Position your piping bag over the center of the circle and continually squeeze out batter until you fill 3/4 of the circle. If you pipe in a spiral, you will have noticeable lines on the top. You can use a damp, not wet, finger to push down any batter that sticks up. See below.
    Hot Cocoa Macaron // magicaltreatsathome.com
  • Any additional air bubbles that are not removed from the drop onto the counter can be poked with a scribe or toothpick before resting.
  • Any left over macaron batter can be piped into smaller cookies and baked off for 15 minutes.
  • If you are having any technical issues still with your macarons, I highly suggest looking up some tutorial videos on YouTube (that is until we have some of our own up!).
  • Leftover buttercream can be stored in the fridge up to one week, brought to room temperature, and whipped before using. It can also be stored in the freezer up to 3 months.
  • Leftover ganache can be stored in an airtight container in the refrigerator up to 3 weeks.
  • Macarons can be stored in the refrigerator up to one week. Let them sit 10-15 minutes to come to room temp before enjoying.

Did you make this recipe?

Tag @magicaltreatsathome on Instagram and hashtag it #magicaltreatsathome

Share this:

  • Click to share on Facebook (Opens in new window) Facebook
  • Click to share on X (Opens in new window) X

Like this:

Like Loading...

Filed Under: Gluten Free, Recipes, Treats Tagged With: buttercream frosting, chocolate, christmastimetreats, DCA, Festival of Holidays, ganache, gluten free, holiday, macarons, peppermint, treat, white chocolate

5 Minute Treats: Peppermint Affogato

December 13, 2019 by Elana Lepkowski Leave a Comment

Peppermint Affogato // magicaltreatsathome.com

Where can I find the original treat?

  • This holiday time treat is available at Schmoozies! inside California Adventure.

What?! Another new series this week on the site?! YES! Today we’re launching what I hope will be a new series that will appear on here from time to time: 5 Minute Treats. And today we’re starting with this Peppermint Affogato.

Peppermint Affogato // magicaltreatsathome.com

What is an affogato? An affogato is an Italian dessert that consists of two delicious things: ice cream (or gelato) and espresso. And while it may be a simple recipe, the end result is anything but simple. Over at Schmoozies! in DCA, they regularly have the classic vanilla topped with a large pour of espresso, but this holiday season, they had both a peppermint ice cream and a cinnamon-sugar (churro!) ice cream option.

Peppermint Affogato // magicaltreatsathome.com

The peppermint ice cream affogato was just pure deliciousness, with the hot espresso slowly melting my peppermint candy specked pink ice cream, it came a whole other flavor once combined. The slightly bitter espresso was tamed by the sweetness of the ice cream and I found myself slurping up the whole thing unaware, or caring, who was watching me enjoy it.

Peppermint Affogato // magicaltreatsathome.com

But here’s why I’m giving you this “recipe” today. It’s holiday time, but that doesn’t mean you have to make complicated desserts. Especially when something simple like this tastes just so good. If you’re neck-deep in cookies and just want something easy to make, this is it. Bust this out after a meal and no one is going to ask you how long it took to make, or “is this it?”, because they’ll be too busy scarfing it down.

Peppermint Affogato // magicaltreatsathome.com

My hope with these “5 Minute Treats” is that you give yourself the space to not always feel like treats need to be complicated. They can be simple, but these recipes will always be good. I hope you enjoy one of these Peppermint Affogatos tonight or this weekend. Maybe treat yourself while you start wrapping presents and need an extra boost of caffeine (and that’s exactly what I did this week). Enjoy!

Print
clock clock iconcutlery cutlery iconflag flag iconfolder folder iconinstagram instagram iconpinterest pinterest iconfacebook facebook iconprint print iconsquares squares iconheart heart iconheart solid heart solid icon
Peppermint Affogato // magicaltreatsathome.com

5 Minute Treats: Peppermint Affogato

5 Stars 4 Stars 3 Stars 2 Stars 1 Star No reviews
  • Author: Elana Lepkowski
  • Total Time: 5 minutes
  • Yield: 1 Peppermint Affogato 1x
Print Recipe
Pin Recipe

Description

This two-ingredient creamy Peppermint Affogato comes together in just minutes! A Disneyland-inspired treat.


Ingredients

Scale
  • 1–2 scoops peppermint ice cream (with the candy pieces!)
  • 1 shot espresso, freshly made

Extra Tools

  • heat proof espresso glasses
  • demitasse spoons

Instructions

  1. Brew your espresso shot.
  2. Scoop out ice cream into a heat proof glass mug or small bowl.
  3. Pour espresso over the ice cream and enjoy!

Notes

  • We are Nespresso users at home, so I found that a regular shot was plenty. The lungo shot was a bit too much and melted the ice cream more than I desired creating a warm soup.
  • If you want to make a batch for a party, portion out ice cream into small cups and freeze ahead of time. When ready to serve, brew lungo shots in a large measuring glass with a spout. Then you can pour small amounts of espresso all at once into each cup.

Did you make this recipe?

Tag @magicaltreatsathome on Instagram and hashtag it #magicaltreatsathome

Peppermint Affogato // magicaltreatsathome.com

Share this:

  • Click to share on Facebook (Opens in new window) Facebook
  • Click to share on X (Opens in new window) X

Like this:

Like Loading...

Filed Under: 5 Minute Treats, Gluten Free, Recipes, Treats Tagged With: 5 Minute Treat, christmastimetreats, Disney's California Adventure, espresso, ice cream, peppermint, Schmoozies, treat

Mickey Mouse Peppermint Beignets

December 2, 2019 by Elana Lepkowski Leave a Comment

Mickey Mouse Peppermint Beignets // magicaltreatsathome.com

Where can I find the original treat?

  • This holiday time treat can be found at the Mint Julep Bar at the Disneyland Resort.

Peppermint is a very holiday time flavor. From candy canes to chocolate bark to all manner of baked goods, you cannot escape this refreshing addition to treats this time of year. At Disneyland, there is an obvious peppermint theme going on… there are even Mickey Mouse peppermint candy shaped pillows this year. And they smell of peppermint, and yes, I’ve bought a couple for Christmas decorating. So of course I also had to try a batch of the holiday time favorite at the park, the Mickey Mouse shaped Peppermint Beignets.

Mickey Mouse Peppermint Beignets // magicaltreatsathome.com

What I love about these is that they don’t go overboard on the peppermint. It’s a nice balance between the sweet powdered sugar with enough of a “touch” of peppermint so that you can taste and see it (pink powdered sugar!), but your mouth isn’t overwhelmed by the bracing coolness that can accompany peppermint.

Making these at home you can adjust that up or down to your preference. I kept my peppermint addition close to what I feel you get at the parks but if you looooove some peppermint flavor, you’ll definitely want to up the candy canes here. And yes! We’re using ground up candy canes to flavor the powdered sugar!

Mickey Mouse Peppermint Beignets // magicaltreatsathome.com

These beignets follow the same recipe as the classic beignets, or any of the other flavored ones on this site. It’s the addition of the peppermint that gives these the unique holiday twist.

Mickey Mouse Peppermint Beignets // magicaltreatsathome.com

One question I got last time was about freezing the dough. The short answer is yes, you can do the 30 minute proof in the bowl, roll it out, cut the shapes, and then freeze in plastic wrap. You can keep it frozen up to a month. When ready to use, you can remove from the freezer, and let thaw overnight in the refrigerator. Then unwrap from plastic, move to your counter, cover with a towel, and let rise two hours. I found that they did not puff up as well in the oil, but I only did one test of these so there could have been other factors here I haven’t taken into consideration. If you’ve frozen and then fried, let me know how yours turned out!

Also, remember to read through all the notes after the recipe for some helpful tricks and notes! OK, now let’s get that oil hot and make some holiday beignets!

Mickey Mouse Peppermint Beignets // magicaltreatsathome.com
Print
clock clock iconcutlery cutlery iconflag flag iconfolder folder iconinstagram instagram iconpinterest pinterest iconfacebook facebook iconprint print iconsquares squares iconheart heart iconheart solid heart solid icon
Mickey Mouse Peppermint Beignets // magicaltreatsathome.com

Mickey Mouse Peppermint Beignets

5 Stars 4 Stars 3 Stars 2 Stars 1 Star No reviews
  • Author: Elana Lepkowski
  • Yield: 15 – 18 Mickey Mouse Peppermint Beignets 1x
Print Recipe
Pin Recipe

Description

Melt-in-your-mouth Mickey Mouse Peppermint Beignets are full of holiday spirit with a minty crushed candy canes and lots of powdered sugar! A Disneyland-inspired treat.


Ingredients

Scale
  • 1/2 teaspoon dry yeast
  • 1/4 cup warm water (105º)
  • 1/4 cup (50 g) sugar
  • 2 tablespoons vegetable shortening (I used refined coconut oil)
  • 1/2 teaspoon salt
  • 1/2 cup heavy cream
  • 1 egg
  • 4 cups all-purpose flour
  • 1/2 cup boiling water
  • Vegetable oil for frying, like avocado
  • 1 cup powdered sugar
  • 2–3 mini candy canes, crushed (I used a coffee grinder for fine and small chunks of candy)

Specialty Tools:

  • heavy bottomed dutch oven
  • candy thermometer
  • Mickey Mouse cutter

Instructions

  1. Sprinkle yeast over warm water in a small bowl, gently stirring to dissolve. Let stand for 5 minutes.
  2. Combine sugar, shortening, salt, heavy cream, egg, flour and boiling water in a large bowl. Mix until everything is just combined and then stir in yeast mixture. With the dough hook attachment of an electric mixer on medium speed, mix the dough just until combined and smooth. About 3-4 minutes. Let dough rest for 30 minutes in the bowl.
  3. Flour your surface and roll to 1/4-inch thickness. Using the Mickey Mouse cutter, cut dough pieces, twisting slightly, and carefully removing dough from around cutter before releasing. You may have to combine dough and roll out again to cut more shapes out. Cover with a towel and let dough rise until doubled in size in a warm, draft-free area, about 1-1/2 to 2 hours.
    Mickey Mouse Peppermint Beignets // magicaltreatsathome.com
  4. While dough is rising, mix together the powdered sugar and crushed candy canes in a large bowl. Set aside.
  5. Pour enough oil into a deep-sided, heavy bottomed pot until it reaches 2 inches up sides; heat oil over medium heat to 370°F.
  6. Add 2-3 beignets to oil; fry until golden brown on both sides, about a minute each, turning once.
  7. Remove from hot oil with a slotted spoon and place on a baking sheet lined with paper towels.
  8. Let rest at least five minutes, and then toss in the powdered sugar and candy cane mix. You can sift extra sugar over all the beignets before serving.
    Mickey Mouse Peppermint Beignets // magicaltreatsathome.com

Notes

  • Candy canes clumping when you crush them? Add a teaspoon of powdered sugar to the mix. It will absorb some of the excess oil the candy might give off.
  • If you are in a higher altitude, your dough may need less time to rise for the second proof.
  • Dough may have to be recombined and rolled a second time if you have a lot of scraps.
  • Wait for oil to come back to temperature before adding next batch of beignets to the pot.
  • No dough hook attachment? Knead dough until smooth and shiny, about 5-8 minutes and then proceed with the recipe.
  • Want to make these at night for the next morning? After cutting Mickey Mouse shapes out. Transfer to a baking sheet and let rest, covered with a towel, in the refrigerator overnight. Let come to room temperature before frying in the morning. Dough shapes can also be frozen and then left in refrigerator overnight and fried off.
  • If your dough gets a skin while rising, put the sticky side down first into the oil to avoid tearing while the beignet expands.
  • Strain your oil after it reaches room temperature. It can be used again!

Did you make this recipe?

Tag @magicaltreatsathome on Instagram and hashtag it #magicaltreatsathome

Mickey Mouse Peppermint Beignets // magicaltreatsathome.com

Share this:

  • Click to share on Facebook (Opens in new window) Facebook
  • Click to share on X (Opens in new window) X

Like this:

Like Loading...

Filed Under: Recipes, Treats Tagged With: beignet, christmastimetreats, doughnut, Mickey Mouse, Mint Julep Bar, peppermint, treat

Primary Sidebar

Follow Us

  • Instagram
  • Facebook
  • X
  • Pinterest
  • Email
  • YouTube

Hi! My name is Elana, and that’s me shoving a Mickey Mouse shaped treat in my face. I love the treats at Disneyland. A lot. So much so I’ve dedicated an entire website to making all my favorites, and hopefully yours too, out of my home kitchen. My aim is to create Disneyland-inspired treats, with easy to follow directions, and many recipes geared towards getting the kids in the kitchen to help too! Because putting sprinkles on things is F-U-N.

Top With Sprinkles

Get Recipes in Your Inbox!

* indicates required

Look for this icon in posts to find Kid Friendly recipes!

Recent Posts

  • Matterhorn Macaroon
  • Caramel Gingerbread Cookie Sandwiches
  • Colorful Fruit Hand Pies
  • Classic Mickey Shaped Beignets
  • Carrot Cake Cookies

Archives

  • February 2023
  • December 2022
  • August 2022
  • January 2022
  • December 2021
  • November 2021
  • December 2020
  • November 2020
  • October 2020
  • September 2020
  • August 2020
  • July 2020
  • June 2020
  • May 2020
  • April 2020
  • March 2020
  • February 2020
  • January 2020
  • December 2019
  • November 2019
  • October 2019
  • September 2019
  • August 2019
  • July 2019
  • June 2019
  • May 2019

Copyright © 2025 Magical Treats at Home on the Foodie Pro Theme

%d