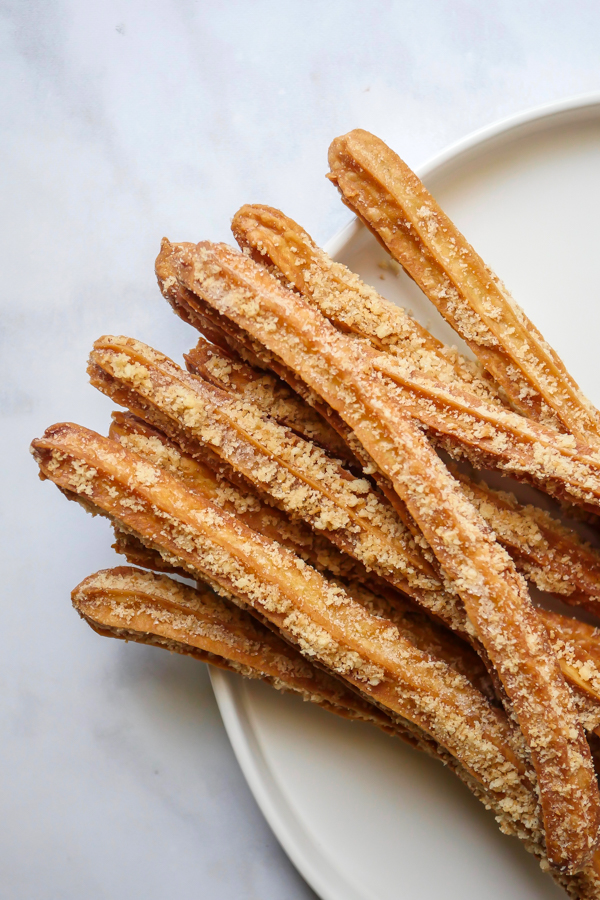
Where can I find the original treat?
- This specialty churro was part of the “Get Your Ears On” celebration found near the Small World Promenade at the Disneyland resort.
Well, July is almost over and that means that Churro Month is coming to an end (for now). And to conclude this on a celebratory note, today we’ve got Mickey’s Celebration Churro for our final churro recipe.
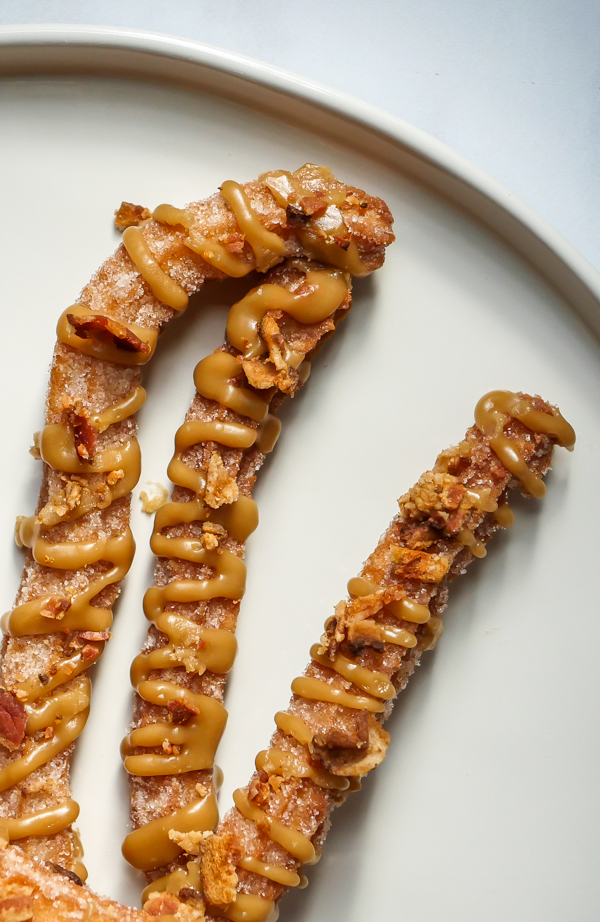
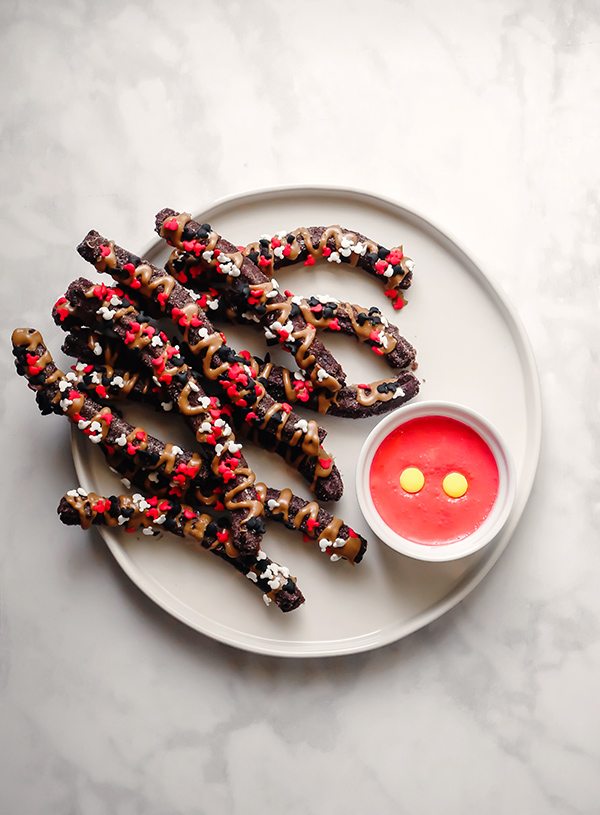
This fun chocolate churro was another favorite of mine, mostly because it was doused in warm cookie butter. And I heard from a number of followers that this too was a win, albeit a bit messy!
Remember, check out all the notes following the recipe below for some tips and tricks to making churros at home. These are definitely easy to make once you get the hang of everything.

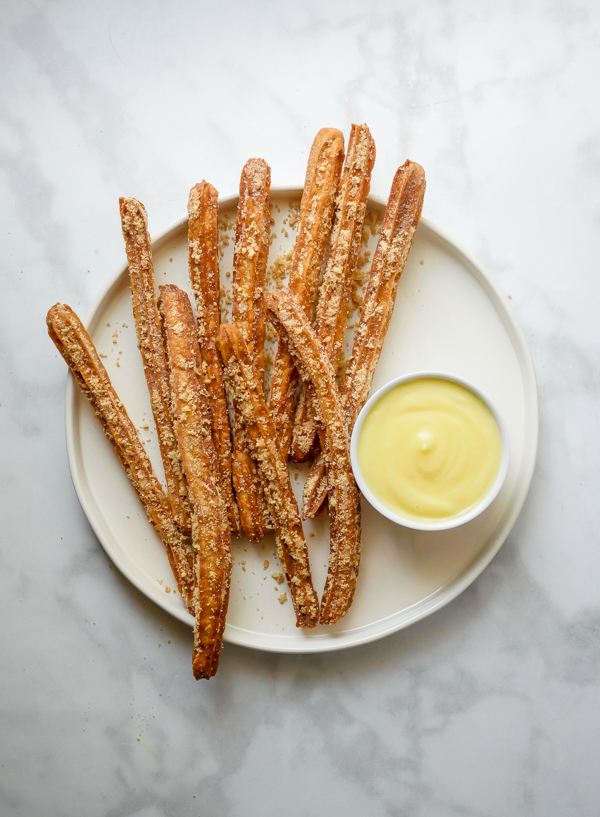
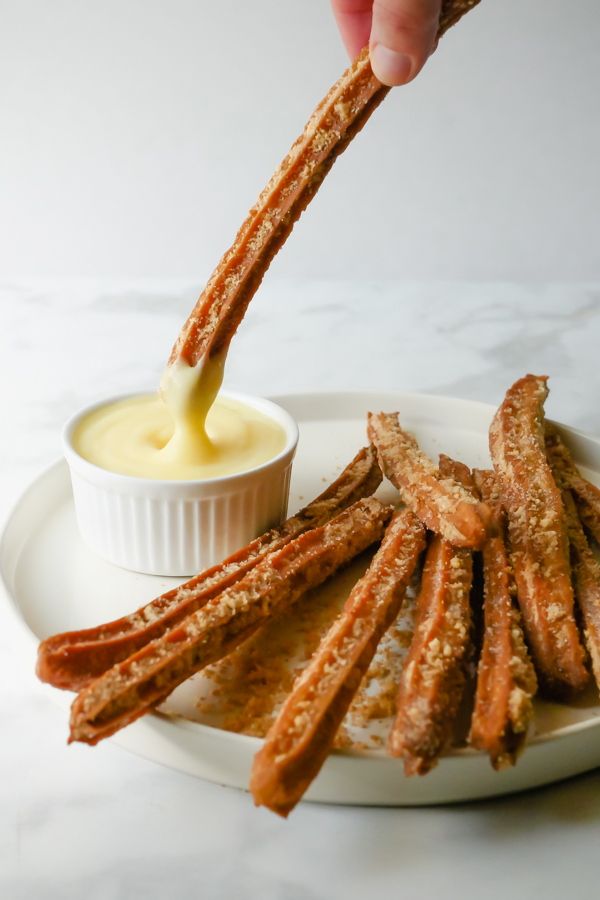
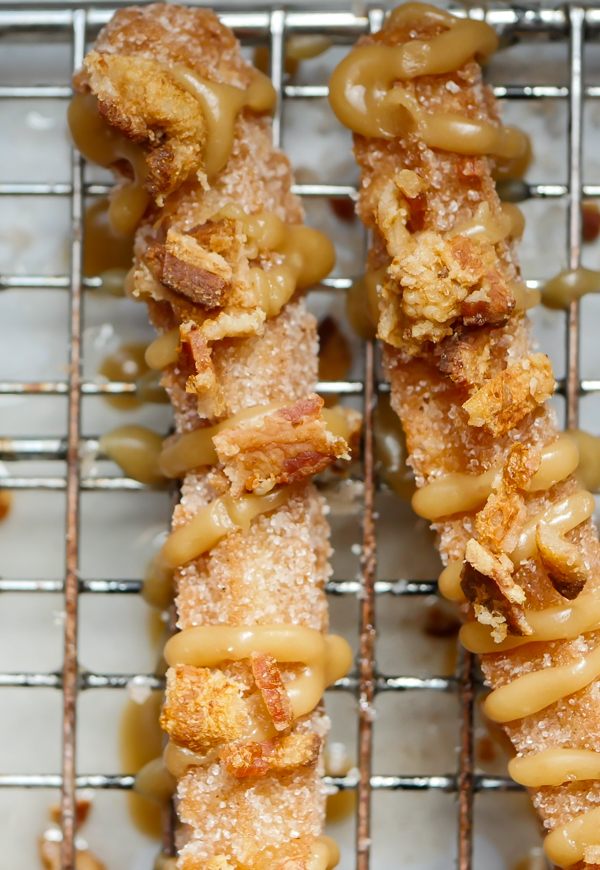
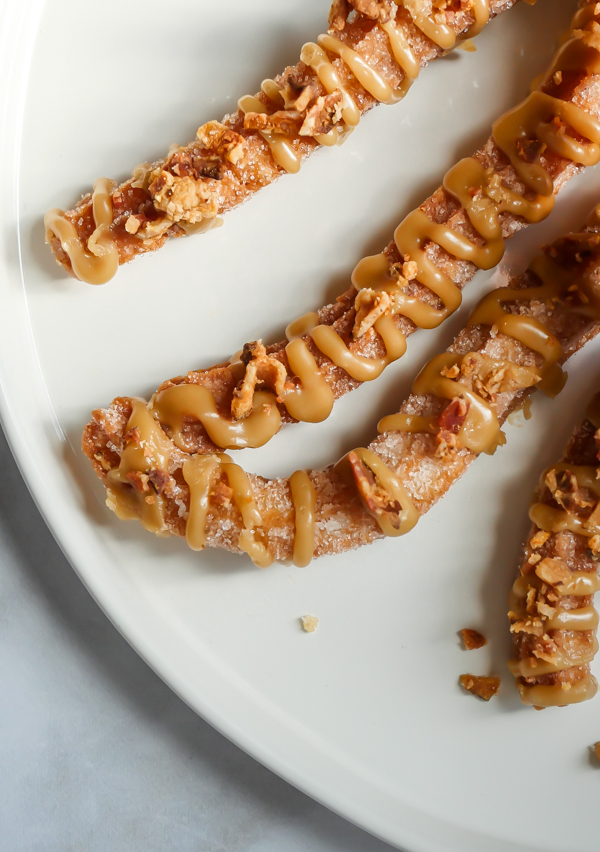
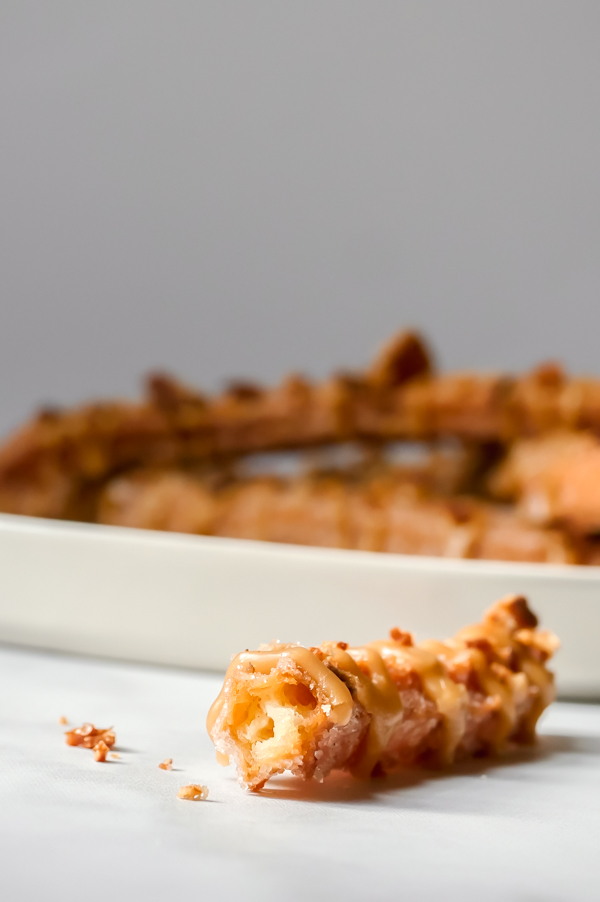
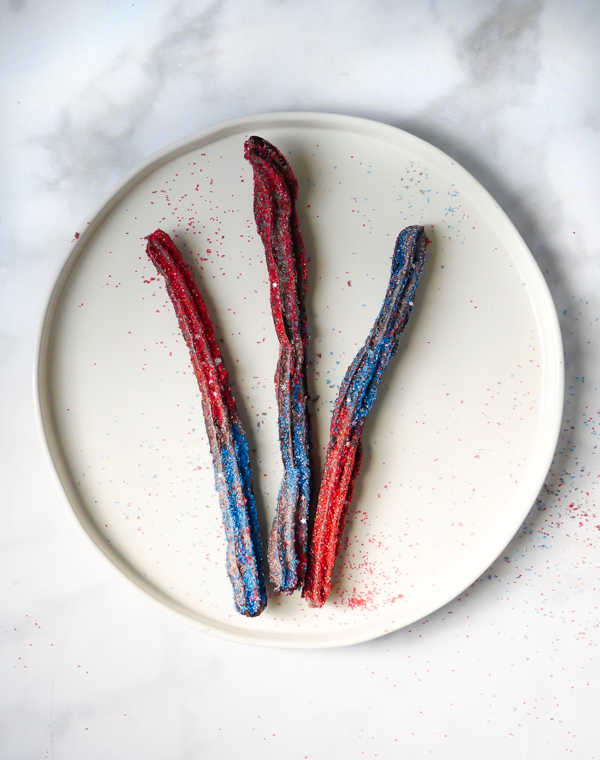
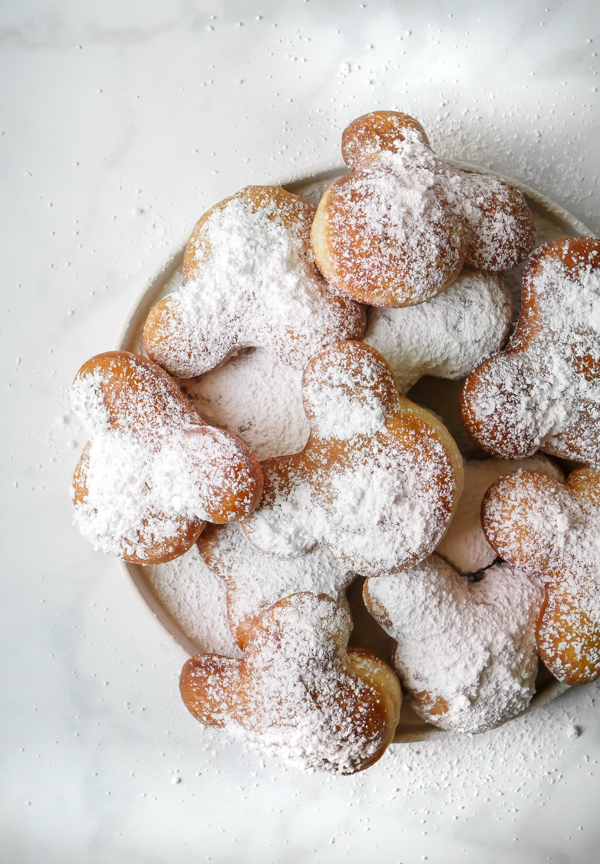
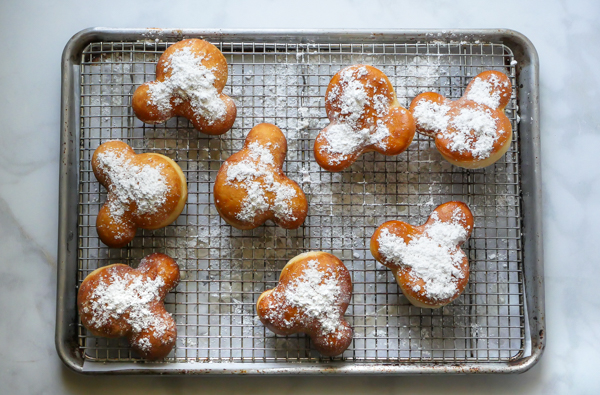
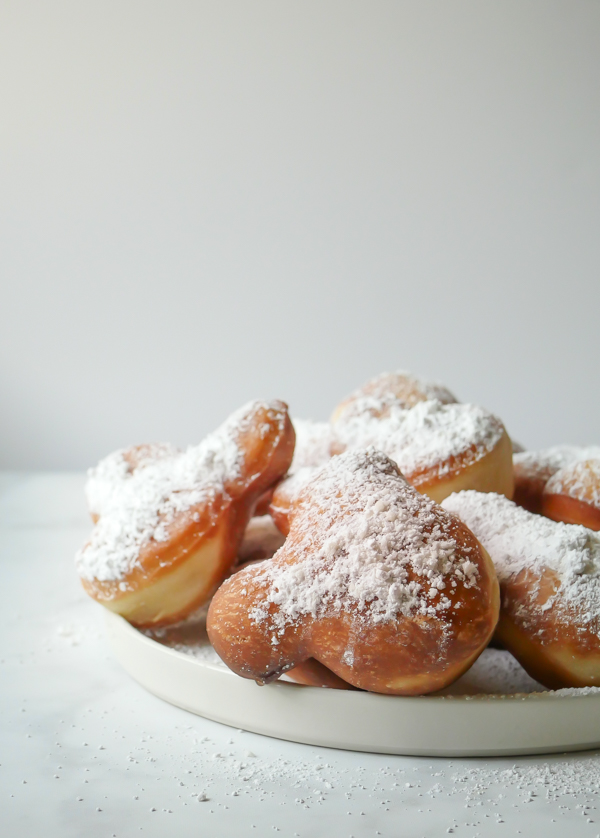
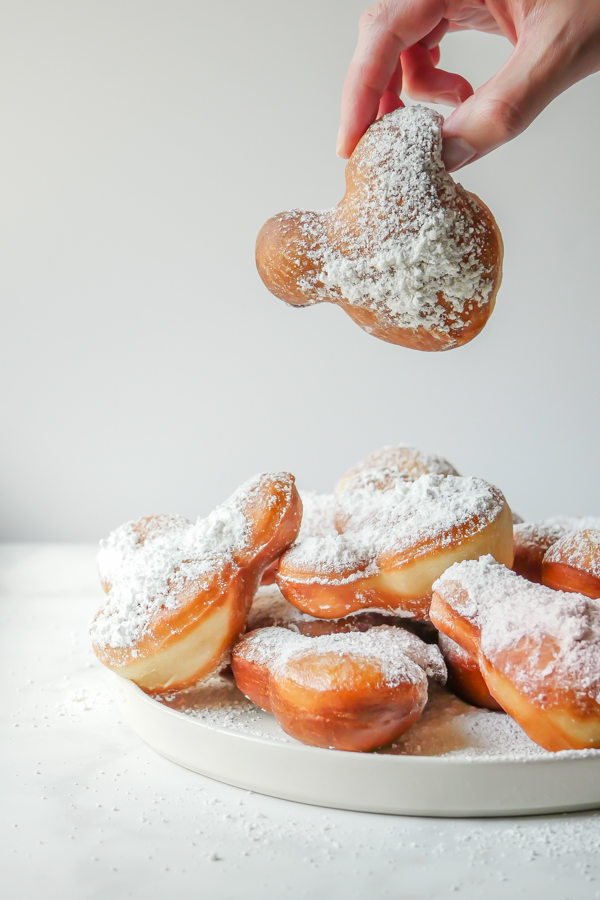
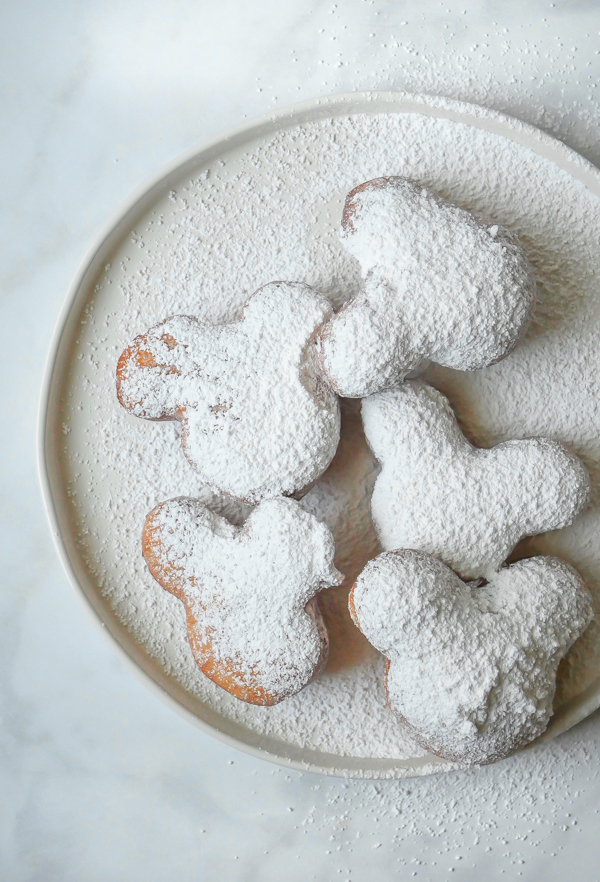
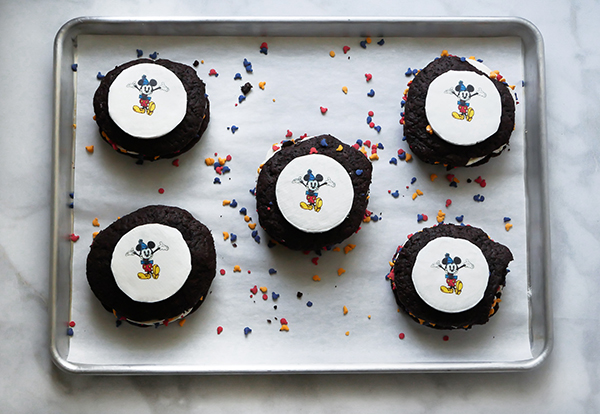
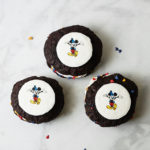
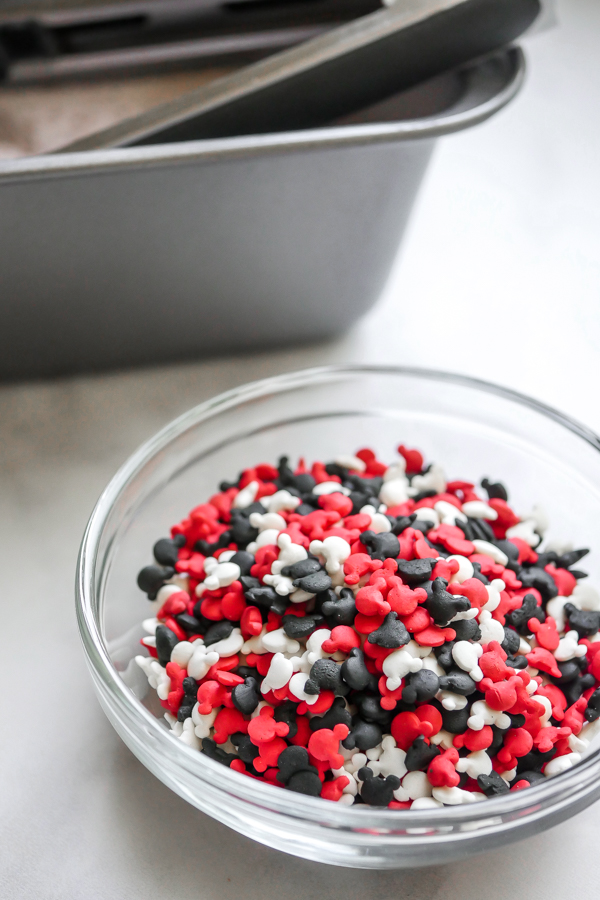
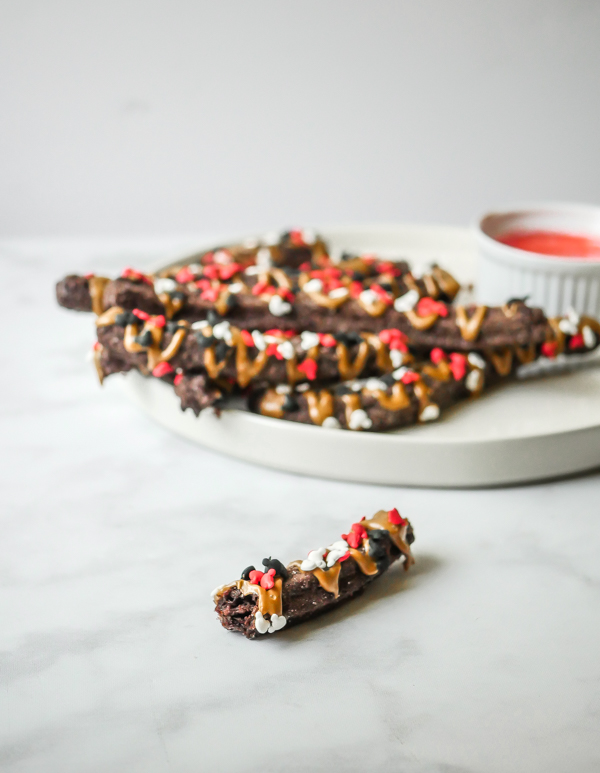
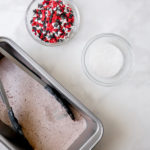
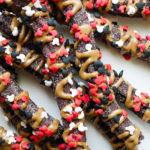
Here we’ve got a chocolate churro that’s been covered in chocolate cinnamon sugar, drizzled with cookie butter, sprinkled with sparkling sugar crystals, and then it gets covered in black, white, and red Mickey Mouse decorettes. I opted to purchase cookie butter for ease of use with this recipe, but if you have a recipe for it you like, go ahead and use that! I’ve found that the cookie butter spread at Trader Joes was similar in taste to what was at the park. Also, if you enjoy making Disneyland-inspired treats at home, Amazon has a wealth of options currently for this Mickey Mouse decorettes.
Ok, let’s start up that cooking oil one last time and make some churros!
Print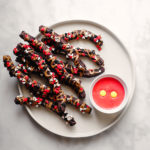
Mickey’s Celebration Churro
- Yield: 16 – 18 churros 1x
Description
Celebrate Mickey with this chocolate churro covered with chocolate cinnamon-sugar, warm cookie butter, sugar crystals, and black, white, and red Mickey Mouse decorettes! A Disneyland-inspired treat.
Ingredients
Chocolate Churros
- 1/2 cup granulated sugar
- 1/2 teaspoon cinnamon
- 1 teaspoon cocoa powder
- 1/4 cup white sugar crystals
- 1/2 cup cookie butter (I used Trader Joes brand here)
- black, white, and red Mickey Mouse decorettes
- vegetable oil for frying
- 1 cup water
- 1/2 cup unsalted butter
- 1 tablespoon granulated sugar
- 1/4 teaspoon salt
- 1 cup all purpose flour
- 1/4 cup cocoa powder
- 2 eggs
Marshmallow Creme
- 3/4 cup glucose or corn syrup
- 1 ounce egg white
- 1/4 teaspoon salt
- 3/4 cup powdered sugar
- 3 tablespoons vanilla extract
- 1–2 tablespoons milk (start with one and increase if needed)
- red food dye
- yellow “buttons” (I used M&Ms)
Tools:
Instructions
Chocolate Churros:
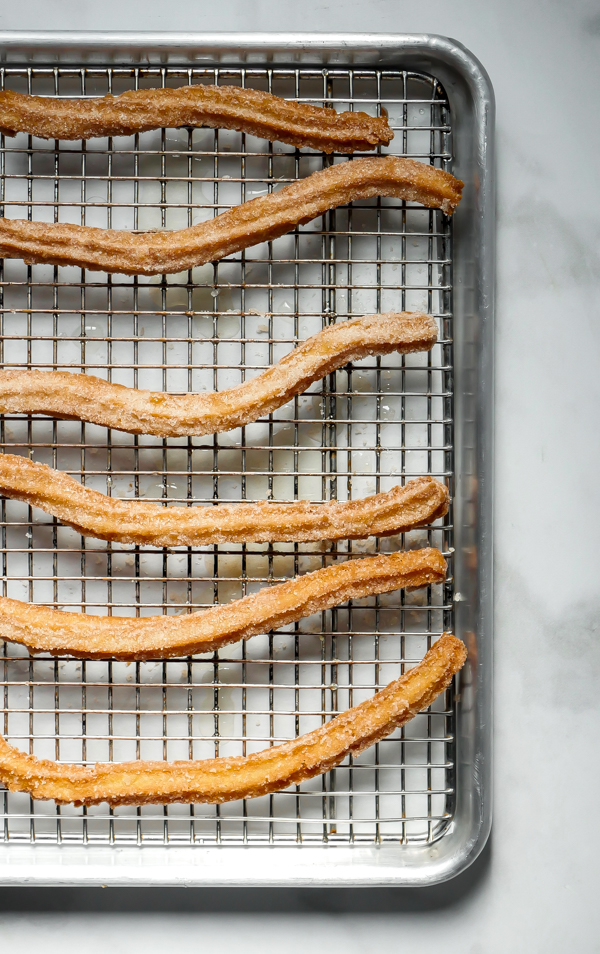
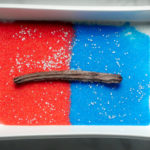
- Line two half sized sheet pans with parchment, set aside. Mix together the 1/2 cup of granulated sugar, cinnamon and cocoa powder in a long shallow bowl or loaf pan, set aside.
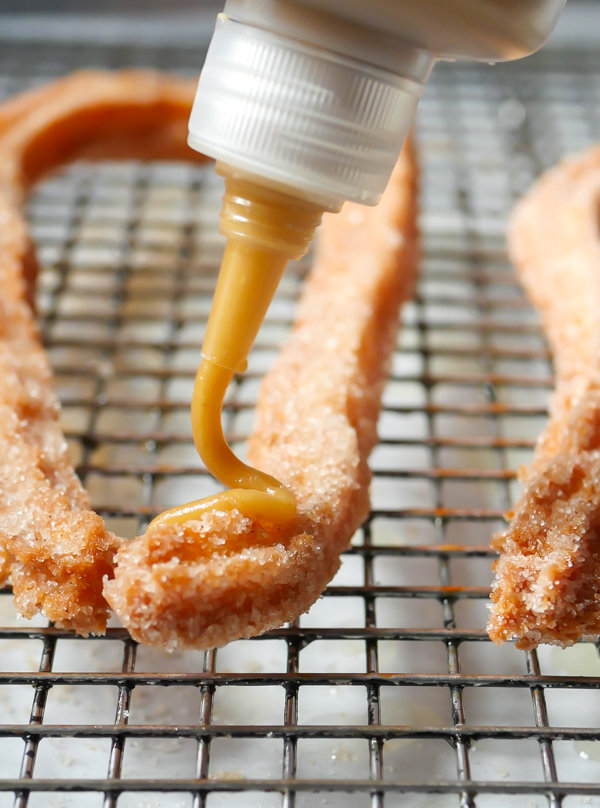
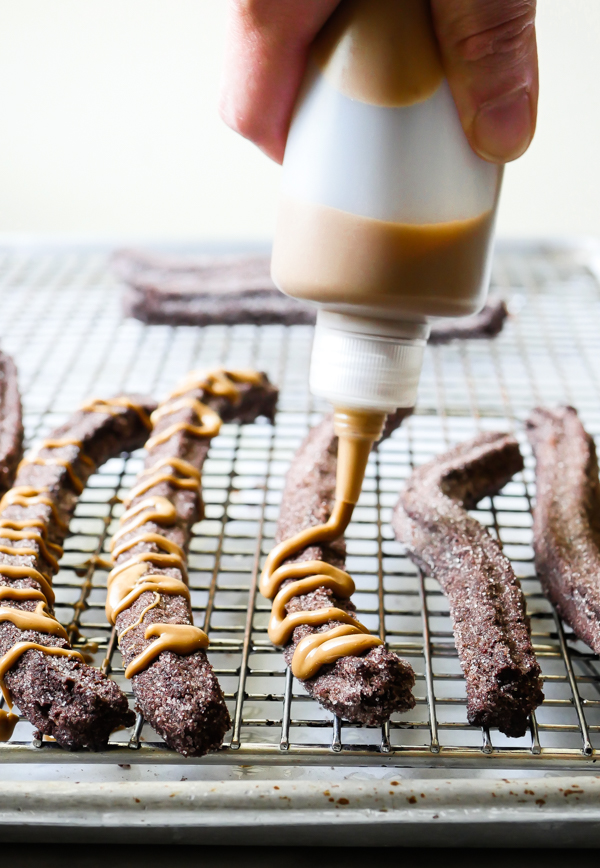
- Warm the cookie butter in the microwave about 45 seconds. Stir and set aside. Optionally, you can pour the warmed cookie butter into squeeze bottle. Keep near the stove while cooking so it stays warm.
- In a medium sized saucepan over medium-high heat, combine water, butter, sugar and salt. Bring to a boil, or until butter has melted.
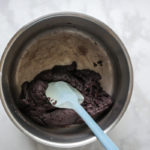
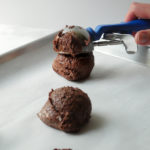
- Turn burner to low and sift in all the flour and cocoa powder. Stir until there are no visible flour lumps and dough has begun to stick together in a ball and pulled away from the sides of the pan. Remove pan from heat and let sit 5 minutes. Then stir in each egg until incorporated. Dough will appear to break or become lumpy. Continue to stir until it forms a smooth, sticky dough.
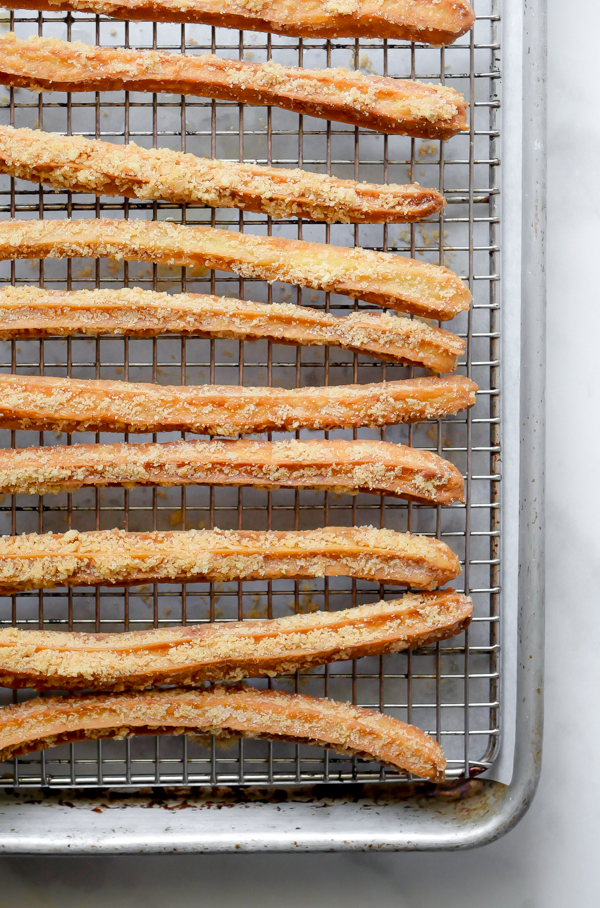
- Fill a pastry bag fitted with a Wilton 1 M open star tip half full with batter (see notes below on filling pastry bags) and pipe 8″ long dough onto the sheet pan. I was able to fill two sheet pans with all the batter.
- Refrigerate dough at least 30 minutes and up to two days. Batter will stiffen the more it sits, so let the dough come to room temperature before frying.
- Fill a dutch oven or deep frying pan with vegetable oil at least 2″ up the side of the pan (I found a 1/2 gallon of avocado oil worked for me in my large dutch oven. See note below about reusing oil.). Heat oil to 340-350°f, using a candy thermometer to keep the temperature constant. You may need to adjust heat up or down during cooking.
- Place churros 2-3 at a time in the cooking oil for 6 minutes, turning after 3 minutes with a spatula. Wait until oil comes back to temperature before adding next batch.
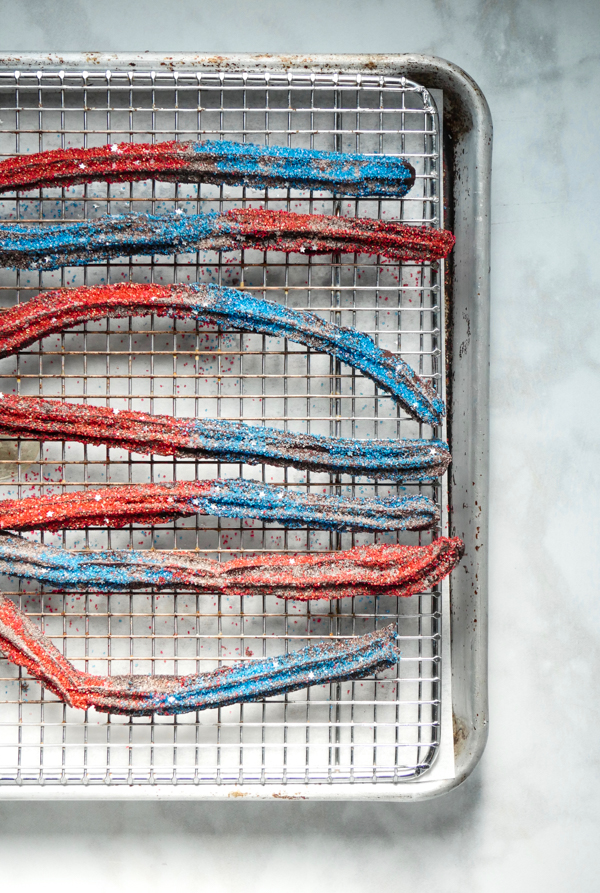
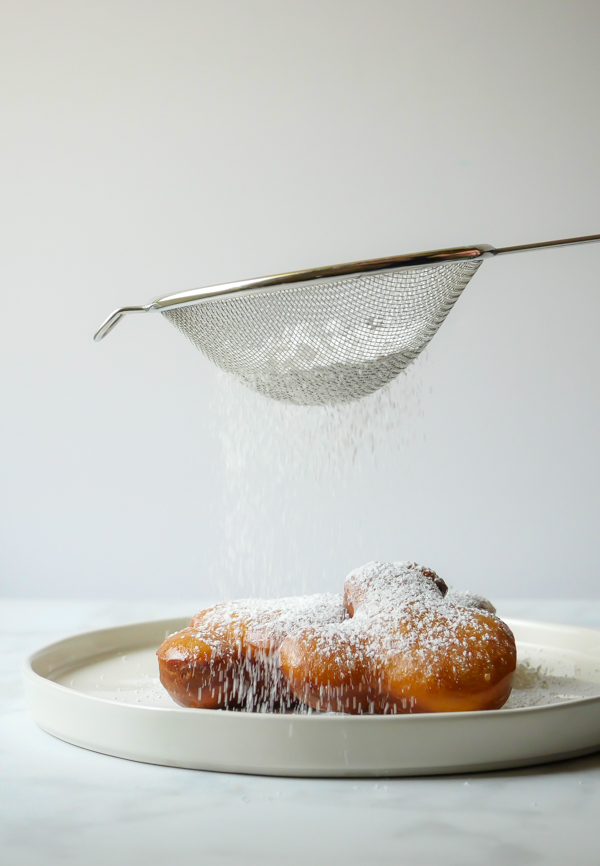
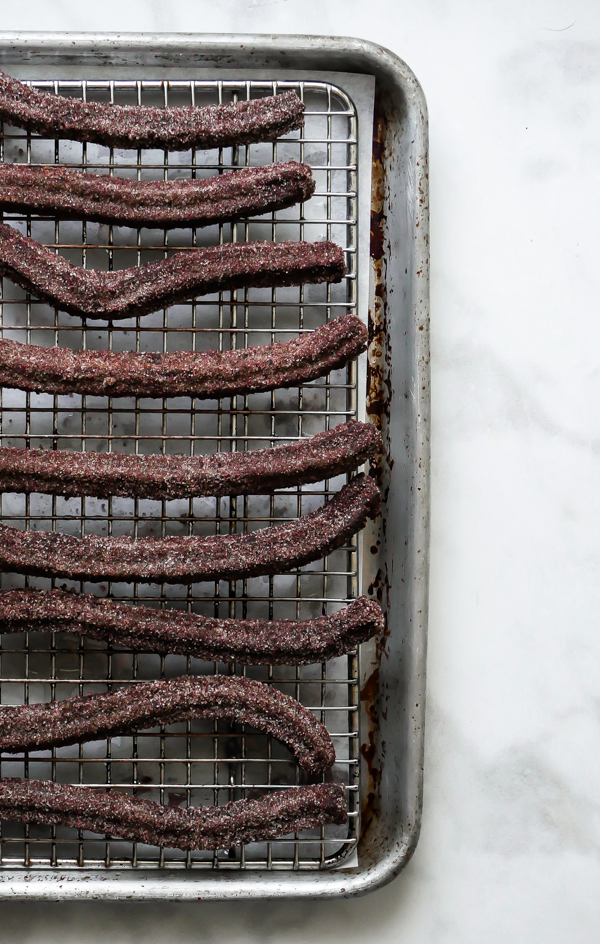
- Using a spider or large spatula, remove churros from oil and drain on a cooling rack over parchment or on a paper towel. Wait at least a minute and then toss the churro in the chocolate cinnamon-sugar, tapping off any excess. Then move them back to the cooling rack. Drizzle cookie butter on the churros, sprinkle the sugar crystals, and then the Mickey decorettes.
- While churros cool slightly, make the marshmallow creme dip.
Marshmallow Creme:
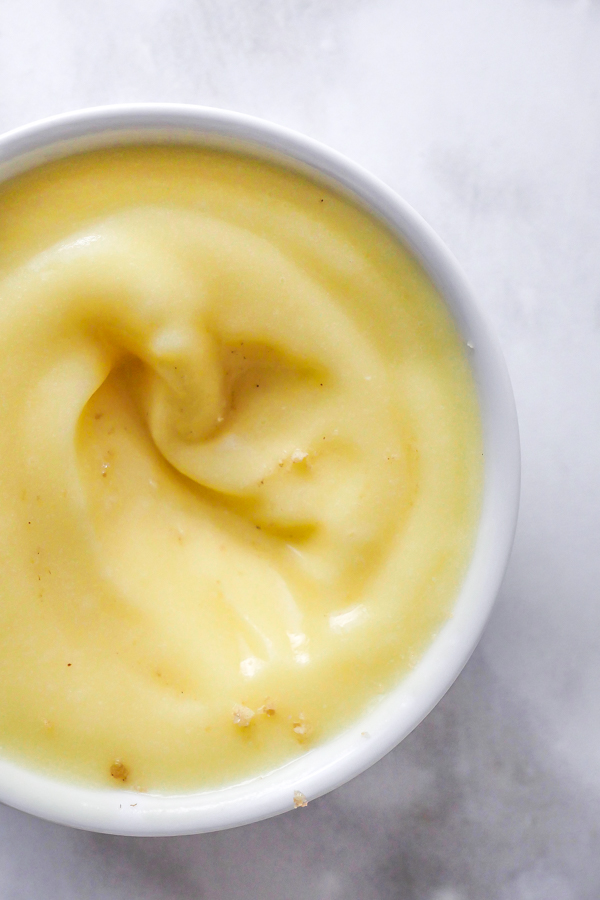
- Combine glucose or corn syrup, egg white, and salt in the bowl of a stand mixer. Beat on high for 5-10 minutes until doubled in size.
- Once doubled, move speed to low and pour in powdered sugar in a constant stream and mix until fully combined. You may have to stop and scrape down sides of bowl. Add in one tablespoon of milk. Add in additional milk if you’d like the creme runnier. Mix in vanilla extract.
- Remove 1/2 cup of mixture into a separate container and add in 3-4 drops of red food dye until desired color is reached. Top marshmallow creme with the yellow M&M “buttons”.
- The rest of the marshmallow creme can be sealed in an air-tight container and refrigerated up to a month.
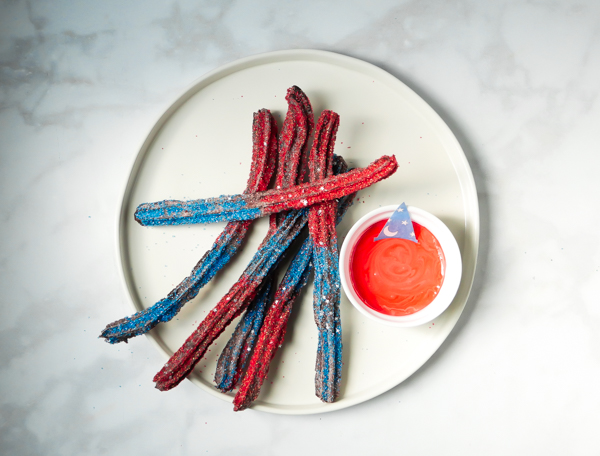
- Dip churros in marshmallow creme. Enjoy!
Notes
- Do not overfill your pastry bag! Fill in two to three batches. If there is too much dough, it will seep out the top and will be hard to pipe.
- Slowly pipe out dough all of a consistent size, smaller spots on the churro can cause them to become more fragile while handling and can break in the oil or while coating in sugar.
- Churro dough can be piped out onto parchment and covered in the fridge up to 48 hours.
- If you want to make you churros immediately after making dough without the chilling time, once oil has reached temp, starting about one inch above the oil, pipe a small line of dough down into oil and either snip end with scissors, or break the dough off the pastry tip on the side of your pan. Follow directions above for frying.
- Thicker churros will require a longer cooking time to fully cook through the center. Test one churro first to adjust your cooking time.
- Cooking oil can be fine strained and stored again for another use. I strain back into the bottle it came from. Well strained oil can be stored in a cool, dry place and used up to several times.
- Churros curling? That could be one of a few reasons. One is that it will naturally shrink and change shape as the dough hits the oil and puffs up. I found that the stiffer dough from sitting in the fridge resulted in straighter churros while fresher dough tending to curl more. Also, if you’re using a circular pot like a dutch oven, churros may rest against the inside edge of the pan while cooking causing them to take on the curved shape of the pan. To prevent this, nudge your churro with the spider or spatula immediately after placing in oil when it pops back up to the surface. Continue to nudge gently back and forth for about 20-40 seconds or until the dough has gotten stiff in the oil.