Where can I find the original treat?
- This treat can be found at the Jolly Holiday Bakery Cafe in Disneyland.
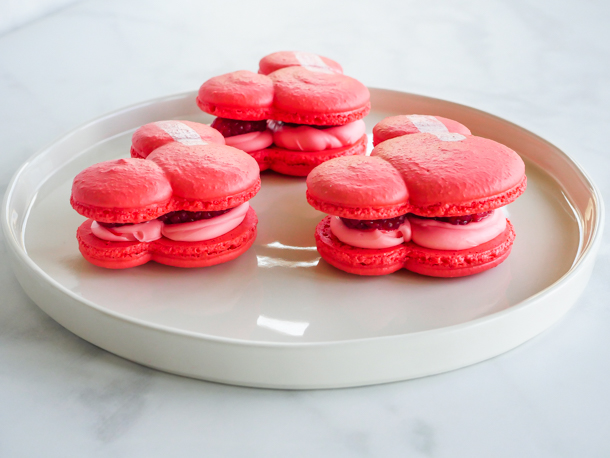
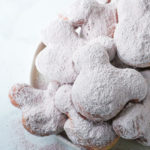
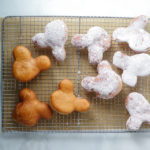
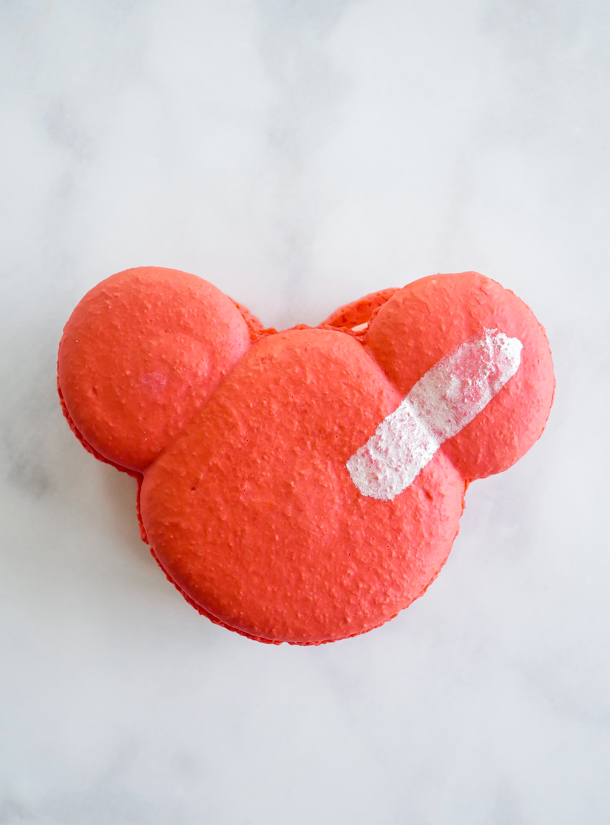
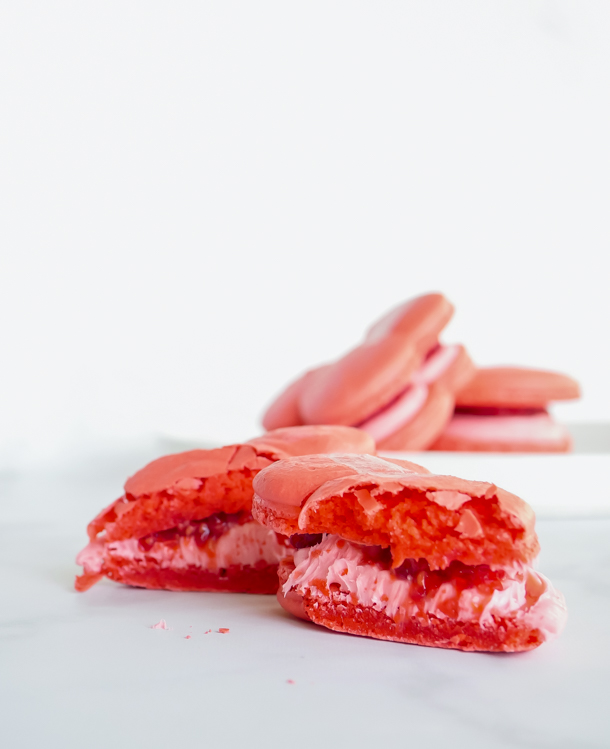
Right now I’m missing so many Disneyland treats being stuck at home during this quarantine. Although I love the specialty treats, some of the perennial treats are those I long for the most. One of those treats is the Raspberry Rose Mickey Mouse Macaron, and that’s what we’re making today.
I received a package of raspberries in my grocery delivery this past week and finally made that extra step to stick them in a vinegar bath to make them last longer. I wanted them to last a few days so I could try out a few techniques for making macarons during this bizarre food shortage, although this week I’ve been happy to report that eggs seem to be plentiful on the grocery shelves, at least here in LA. So perhaps the panic buying is starting to slow down now.
And let’s talk about replacing egg whites here! The good news is that if you don’t have fresh eggs you can make a macaron. The bad news is that many issues can arise and that I never really got them looking perfect. The first substitute I considered was aquafaba. Aquafaba is a fancy name for the liquid of cooked chickpeas. I’ve written extensively about using aquafaba in place of egg whites in cocktails on my other site and have also found this a great substitute for meringues. However, when making macarons I found them to be less stable than egg whites. I had instances of macaron batter leaking and tops cracking. And then I tried using pasteurized carton egg whites. Again, many wrinkled tops and unstable shells. They were definitely edible and held their shape, but did not have the smooth, risen tops I would have like to see. So, if you just want some cookies and aren’t too picky about how they look, and don’t have fresh eggs, you can consider one of these subs. I’ve included all the substitutions in the recipe below.
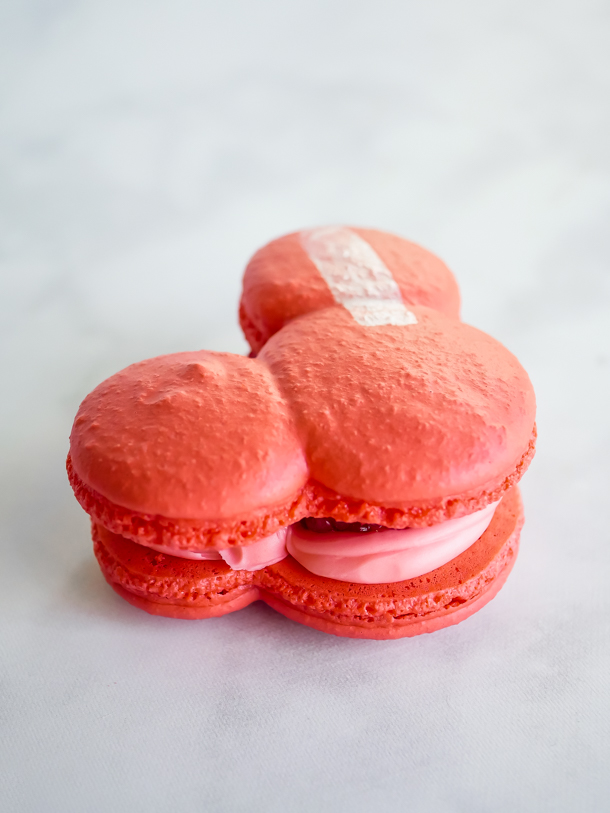
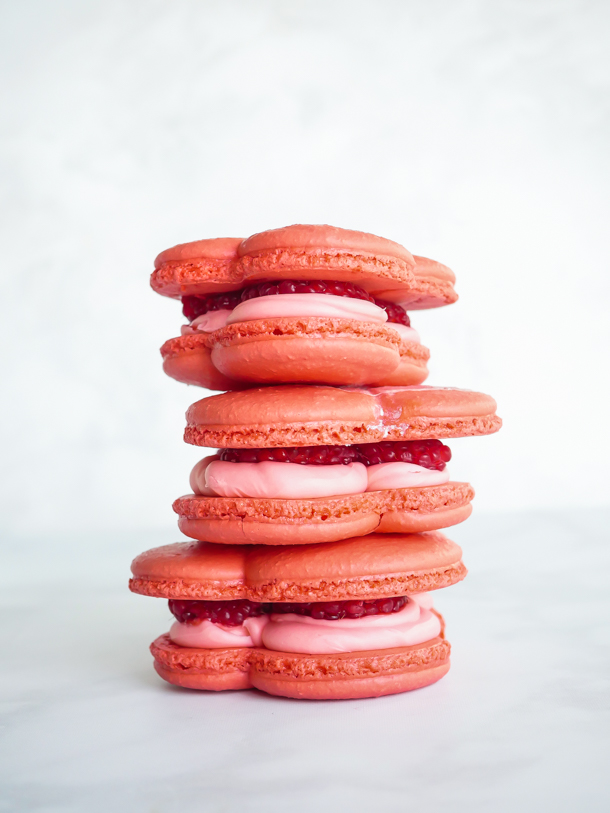
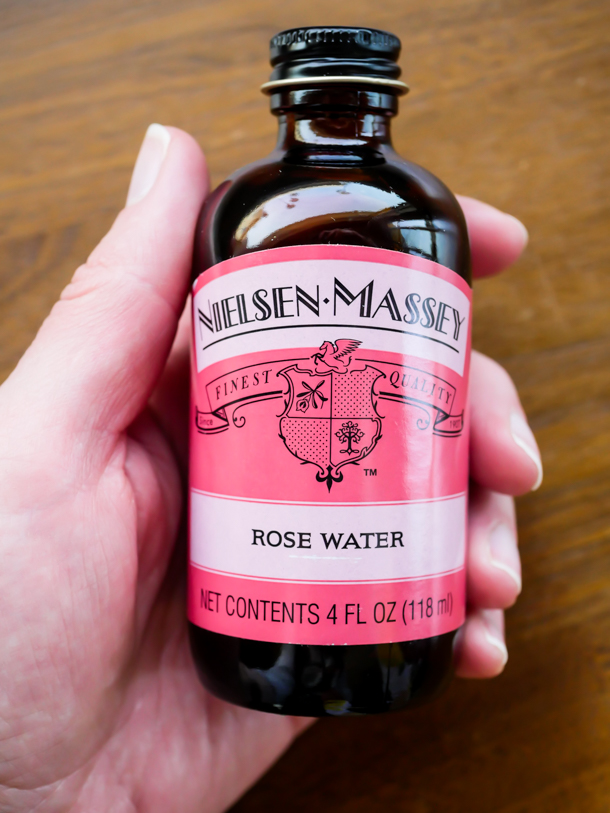
Now on to the flavor of these. Raspberry is definitely the most dominant flavor with these macarons. The rose I’ve always found so faint it was hardly detectable. At home though, you can adjust to your own liking. I wouldn’t though go too overboard with the rose water as it can overpower the whole treat. If fresh raspberries are hard to come by right now, sub in some raspberry jam in the center, or mix right in to the buttercream.
![]() Kids can help pipe the macarons (even if they don’t do Mickey Mouse they can make some shapes). They can also help assemble the cookie as well.
Kids can help pipe the macarons (even if they don’t do Mickey Mouse they can make some shapes). They can also help assemble the cookie as well.
One last note I’ll leave here is the glittery decoration on the outside of the macaron; this is called luster dust (or edible glitter). First, I only had silver so that’s what ended up on the macarons today. It is usually gold but I wasn’t doing an Amazon order just for one tiny container. Second, decorating works best with a high proof alcohol. I know that some states don’t allow certain high proofs, so use what you got. I happened to have a bottle of Everclear from another project and that is 95 proof. You want a higher proof to quickly evaporate and just leave the glitter on the macaron without leaving the cookie soggy. Remember, this is totally optional too! The cookie tastes great without the glitter.
I’ve highlighted these notes in the notes section below. Also, if you are having lots of issues with the macarons not looking like how you’d expect, I’d highly suggest you YouTube some real time macaron making videos to see techniques. Sometimes seeing is better to understand than reading.
Ok, let’s bake!
Print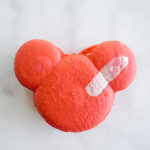
Raspberry Rose Mickey Macarons
- Yield: 3 Raspberry Rose Mickey Macarons 1x
Description
These Mickey Mouse shaped macarons are filled with sweet-tart raspberry buttercream and a hint of rose. A Disneyland-inspired treat.
Ingredients
For the macarons:
- 130 g (1 cup plus 3 tablespoons) almond flour
- 130 g (1 cup plus 2 tablespoons) powdered sugar
- pinch salt
- 90 g egg whites (about 3 large egg whites)
- 1/4 teaspoon cream of tartar
- 100 g (6 tablespoons) superfine sugar
- 2 drops red food gel (Americolor Super Red used here)
For the filling and decoration:
- 114 g (3/4 cup) granulated sugar
- 1/4 cup or 2 medium egg whites
- pinch of salt
- 1 cup (2 sticks) butter
- 1/2 teaspoon raspberry extract
- 1/8 teaspoon rose water, optional
- 9–12 whole raspberries
- gold luster dust
- Everclear or neutral high proof spirit
Specialty Tools:
Instructions
For the macarons:
- First sift the almond flour, powdered sugar, and salt back and forth four times between two bowls using a mesh strainer. Set aside.
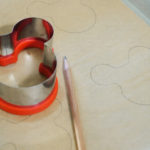
- Line a baking sheet with parchment. Using a pencil, trace 6 Mickey Mouses uses the cutter as a guide, leaving at least an 1″ between shapes. Flip parchment over so that you can still see outlines, but the graphite will not transfer to macarons. Set aside. Or print out our free template linked above and slip under the parchment. Pipe on parchment and remove template gently before baking.
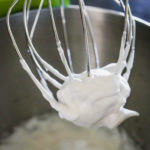
- In the bowl of a stand mixer fitted with the whisk attachment, add in the egg white and whisk until slightly foamy. Add in the cream of tartar and whisk until soft peaks appear. Then slowly pour in the sugar. Whisk on high until stiff peaks form, adding in the food gel right at the end.
- Sift a third of the dry mixture into the egg whites and fold until barely incorporated, about 10 turns. Repeat twice with remaining dry mix. Mix gently until all of the almond mixture has been absorbed and there are no visible lumps in batter. Then continue to fold the mixture, pushing the batter against the sides of the bowl and scraping until it falls off your spoon in ribbons like cake batter. (This technique for mixing is called macaronage and I highly suggest looking up some videos on this if you’re serious about getting a great macaron.)
- Add batter into a piping bag and pipe shapes onto the parchment lined baking sheet. Let the batter sit about 30 minutes to 1 hour. You want the macarons to form a skin, so that when you touch them, no batter comes off on your finger.
- Preheat your oven to 350°f. Place cookies in oven to bake, and then lower the temperature to 320°f. Cook for 17-18 minutes.
- Let the macarons cool at least 20-30 minutes before decorating.
For the filling and decoration:
- In a mixing bowl, combine egg whites, sugar, and salt over a medium saucepan filled with 1/2″ of water.
- Bring the water to a simmer while constantly whisking the mixture. Once the mixture reaches 160°f, remove the bowl from the pan.
- Using a hand mixer, beat the mixture until it forms stiff peaks.
- Then, add chunks of the butter in, one at a time, until incorporated into the mixture, scraping down the bowl a few times during mixing.
- Add in the raspberry extract and rose extract if using and beat an additional 30 seconds.
- Transfer the buttercream to a piping bag. Cut off the tip and pipe on one side of the macaron in three circles. Set aside and repeat with remaining macaron halves.
- Next, place 3-4 fresh raspberries into the buttercream and top with the other half of the macaron. Set aside.
- Mix together 1/2 teaspoon of a neutral high proof spirit (like Everclear, or a high proof unflavored vodka) and a 1/4-1/2 teaspoon of the luster dust. Mix together with a clean paintbrush and tap off any excess liquid and then paint a stripe across the top of the macaron. Repeat with the others.
- These can be eaten straight away, or sealed in an air tight container in the refrigerator up to 1 week.
Notes
- Sifting the almond flour and powdered sugar together is necessary for the absorption of oils and to prevent clumping of batter.
- As mentioned in the copy above, aquafaba can be subbed 1:1 for egg whites however macarons are not as stable. Carton pasteurized egg whites may also be used, but make sure they are solely egg whites and be aware that some brands add water in which will weaken the meringue and you may not reach stiff peaks or also have issues with stability in baking.

- Using gel based food coloring will give a much deeper, and vibrant color, than standard food dye.
- Any left over macaron batter can be piped into smaller cookies and baked off for 15 minutes.
- Swiss buttercream heats the egg whites to 160°f to kill off any bacteria.
- Leftover buttercream can be stored in the fridge up to two weeks, brought to room temperature, and whipped before using. It can also be stored in the freezer up to 3 months.
- Cookies can be stored in an airtight container up to one week.