Where can I find the original treat?
- This treat can be found at Maurice’s Treats at the Disneyland resort.
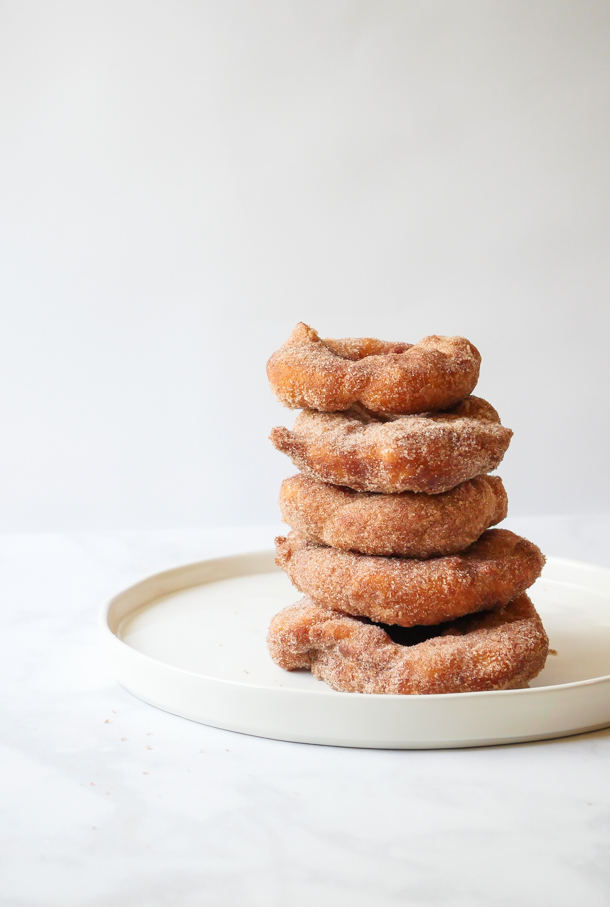
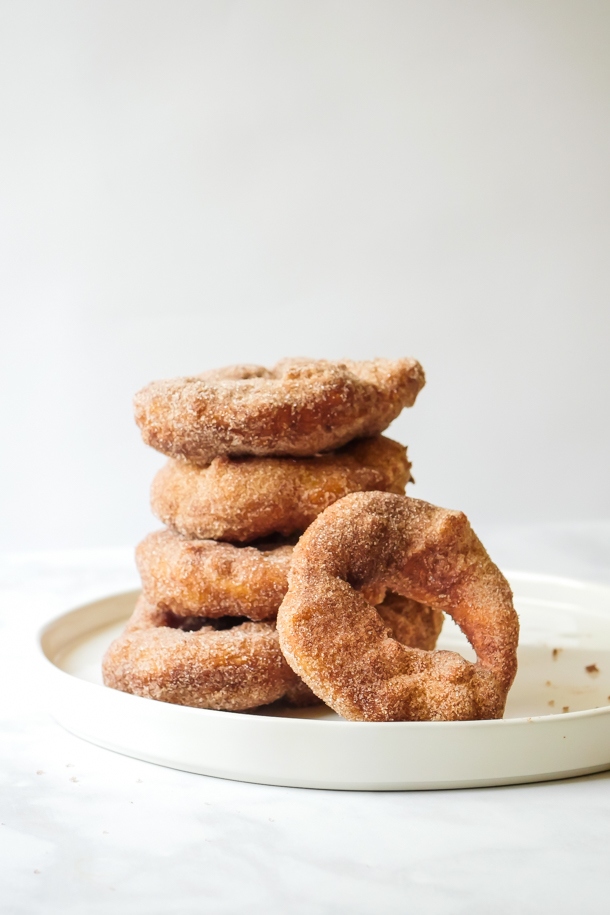
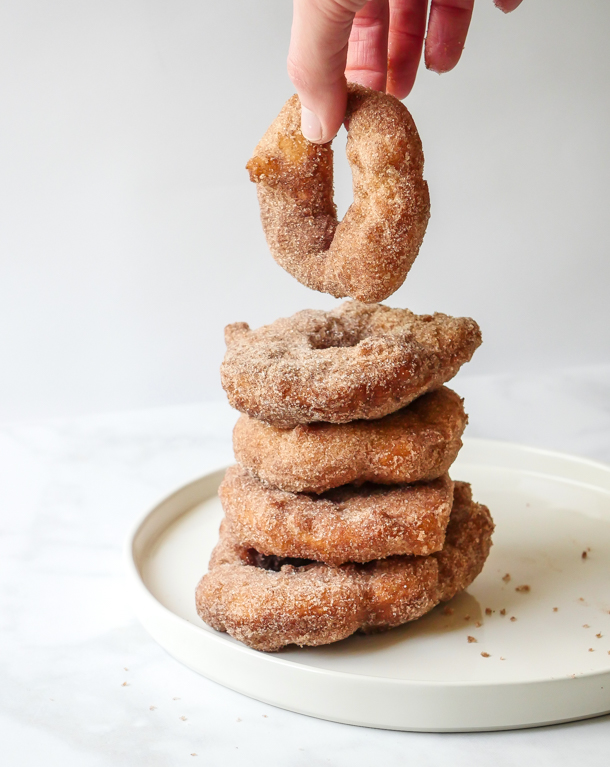
There are now multiple ways to get your churro fix at Disneyland beyond an actual churro (like churro toffee or a churro marshmallow wand), and today we’re over in Fantasyland for their latest one: Churro Gears, AKA Churro Doughnuts. Yes, you’re going to make doughnuts (or donuts if you prefer) at home today. And it’s going to be so easy.
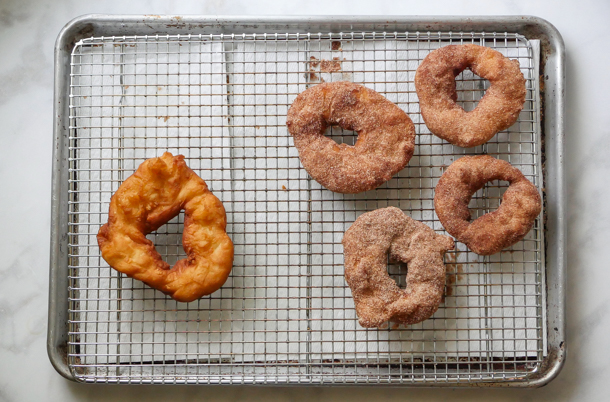
First, let’s talk about the doughnuts. At the park you get them served to you WARM, which, honestly is the only way to eat these. Although, coming in a strong second is cold and hours old. That is also a delicious option. These are yeasted doughnuts which means, unfortunately, there is some waiting. However, I’ve outlined below the best option for making these and having them for breakfast that does not include waking up at 4am.
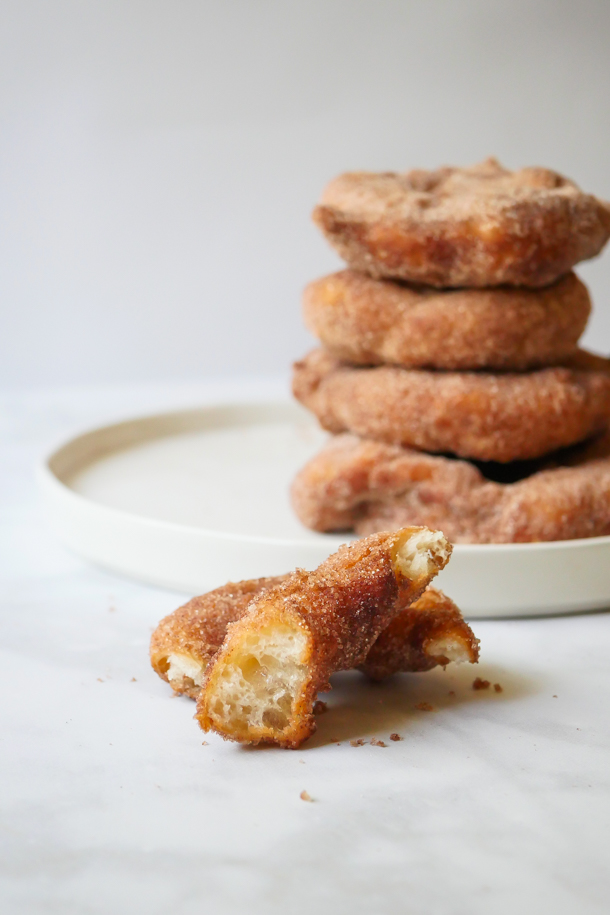
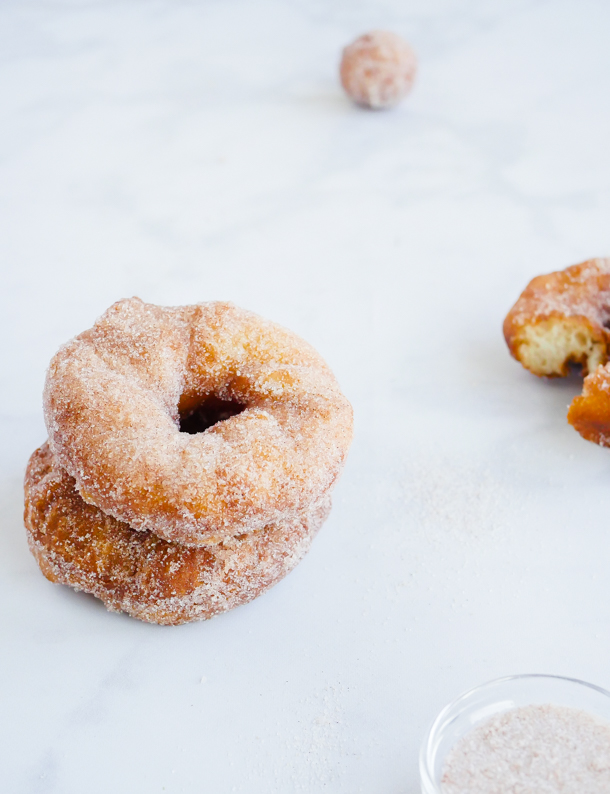
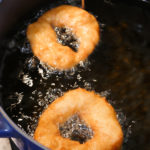
Yeasted doughnuts though provide for a chewy, soft interior with a slightly crisp outside. Similar to the style of a churro, and these too are covered in cinnamon-sugar and hence the name Churro Doughnuts. The dough itself is twisted to look like a “gear”, and while that might not be necessary with your homemade batch, what that does do for your doughnut is provide lots of pockets for that sprinkling of cinnamon-sugar to fall into. YUM.
![]() Can kids help with this recipe? Absolutely, but know your kids first. Older kids with some experience in the kitchen might find it a fun challenge to roll out and shape the dough. And younger kids can flip the cooled doughnuts around in the cinnamon-sugar. Just beware of the very hot oil on the stove, and also the doughnuts stay warm for awhile, so test them out before handing them off for sugaring.
Can kids help with this recipe? Absolutely, but know your kids first. Older kids with some experience in the kitchen might find it a fun challenge to roll out and shape the dough. And younger kids can flip the cooled doughnuts around in the cinnamon-sugar. Just beware of the very hot oil on the stove, and also the doughnuts stay warm for awhile, so test them out before handing them off for sugaring.
BONUS: This recipe only calls for a handful of ingredients and with just one change, swapping out the milk for a non-dairy alternative, means you can also have VEGAN doughnuts too. I tried this recipe with almond milk and got excellent results. Also, extra bonus, any small chunks of dough leftover can be rolled into balls and made into doughnut holes! See notes below for instruction.
Don’t wake up at 4am for breakfast doughnuts! Start them the night before!
- The night before, mix up the dough and instead of having it sit out to double in size for an hour and a half, cover and refrigerate it at least 8 hours and up to 12.
- The next day, take them out of the fridge, let the dough sit for 5 minutes uncovered, and then roll out and proceed with making the doughnuts.
- Once shaped, doughnuts need to rise for 45 minutes before frying off. So, during this time you can brew some coffee, scroll Instagram, make lunches, heat the oil, and whatever else eats up all that precious morning time every day.
- You should definitely though start heating the oil around 15-20 minutes before your timer goes off. I start on high to get it warmed up quickly in my dutch oven, and then ease on down to medium-high or medium at around 320°f or so. Otherwise it can reach temp and then get too hot and you don’t want that to happen.
- And from there you’ll start frying off doughnuts and have them ready to eat within 10 minutes!
I believe that making a batch of these Churro Doughnuts at home is easy for a few reasons. First, it’s a small, doable amount of ingredients and I bet you have most, if not all of them, at home (and if instant yeast is not in your pantry I’ve linked to that below in the ingredient list). Second, the steps to making them are pretty straightforward. There isn’t a technique here that is only going to be taught in pastry school. YOU GOT THIS. If the dough is sticking to everything (that can happen), and you’re not getting perfect circles, don’t worry they’ll still taste amazing. And third, it’s mainly hands off time. Yes, from complete start to finish it’s a few hours. But if you break it up and start the night before, and fill the wait time with something else, making the actual doughnut is fairly quick! And you’ve got doughnuts! At home! And they’re fresh and warm!
Ok let’s make doughnuts! Churro doughnuts!
Print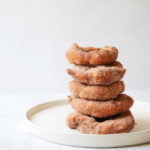
Churro Gears (aka Churro Doughnuts)
- Yield: 5–6 Churro Gears 1x
Description
Chewy, crispy, cinnamon-sugar laden Churro Gears (AKA Churro Doughnuts), are an easy treat to try day or night! A Disneyland-inspired treat.
Ingredients
For the doughnuts:
- 1/2 cup whole milk, buttermilk, or almond milk (for vegan version)
- 1 tablespoons refined coconut oil
- 1 cup (120 grams) all-purpose flour
- 1 tablespoons sugar
- 1 teaspoon (6 grams) instant yeast
- 1/2 teaspoon kosher salt
- 6 cups to 1/2 gallon (8 cups) avocado oil (or other high heat oil)
For the topping:
- 1 cup granulated sugar
- 1 teaspoon ground cinnamon
Specialty Tools:
Instructions
- In a glass measuring cup, pour in milk or milk alternative. Add coconut oil. Microwave at full power 15-20 seconds. Using at instant read thermometer, bring the milk down (or up, microwaving in short bursts of 5 seconds) to 110°f.
- In a medium sized bowl, whisk together flour, sugar, instant yeast, and salt.
- Pour the milk mixture into the dry ingredients and stir to combine using a rubber spatula. You only need to just incorporate the ingredients. Do not over mix (some lumps in the batter are fine!).
- Cover the bowl with plastic wrap or a tea towel and leave on a counter away from drafts for one and a half hours, or until doubled in size. (If prepping overnight, follow timeline above in post or in notes below)
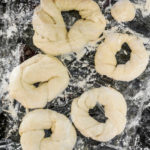
- After dough has doubled in size, flour your counter and turn the dough out. The dough will be very, very sticky. Make sure to flour your surfaces, your hands, and your rolling pin.
- Roll out about 1/2″ thick into approximately a 8″x8″ square.
- Using a dough cutter or bench scraper or sharp knife, cut dough into about 1-1/2″ thick strips. You should get about 5 strips with a small section left over. The small section can be cut into small squares and rolled into balls for doughnut holes.
- Flour your hands again and carefully lift the first section. Fold the dough in half and then twist the dough. Take the ends and pinch together. Set aside on floured counter. Repeat with other strips.
- When all the doughnut shapes are ready, cover lightly with plastic wrap or a tea towel. Let sit 45 minutes until puffy.
- In a shallow bowl, combine sugar and cinnamon together. Set aside.
- About 15-20 minutes before the dough has finished its final rest, pour the avocado oil into a dutch oven until the oil reaches 345°f on a candy thermometer.
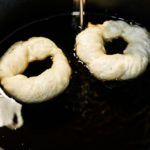
- Working in batches, carefully lower the dough down into the oil. Do not plop it in or it will splash and burn you. You can also use tongs to lower, see notes below. Cook for 1-1/2 to 2 minutes on one side, and cook for an additional 1-1/2 minutes on the second side. Use a spider or strainer to remove the cooked doughnuts and place on a paper towel lined sheet pan. Repeat with remaining doughnuts. If making doughnut holes, cook for a few seconds less.
- Let doughnuts cool at least 5 minutes, and then toss in the cinnamon-sugar mix, spooning on extra sugar to fully coat. Place on a cooling rack and repeat with the remaining doughnuts. Enjoy warm!
Notes
- To start doughnuts the previous day: the night before, mix up the dough and instead of having it sit out to double in size for an hour and a half, cover and refrigerate it at least 8 hours and up to 12. The next day, take them out of the fridge, let the dough sit for 5 minutes uncovered, and then roll out and proceed with making the doughnuts. Start the second rise and proceed with the rest of the instructions above.
- Oil temperatures are extremely hot. Please use caution in the kitchen! Wear gloves, an apron, closed toe shoes, and use a candy thermometer. Keep children away when handling hot dishes.
- If you are absolutely terrified of dropping anything into the oil with your fingers, or think you might get burned, definitely go ahead and flour a pair of high heat proof tongs to put the doughnut down into the hot oil.
- Wait for oil to come back to temperature before adding next batch of doughnuts to the pot.
- Cooking oil can be fine strained and stored again for another use. I strain back into the bottle it came from. Well strained oil can be stored in a cool, dry place and used up to several times.