Where can I find the original treat?
- This specialty treat was part of the Get Your Ears on Celebration and was located at the Carnation Cafe in Disneyland.
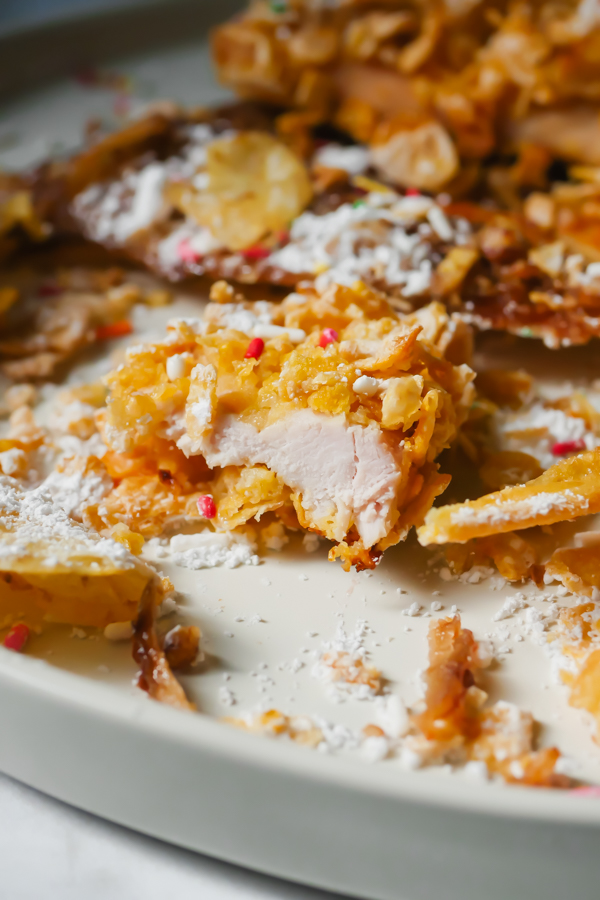
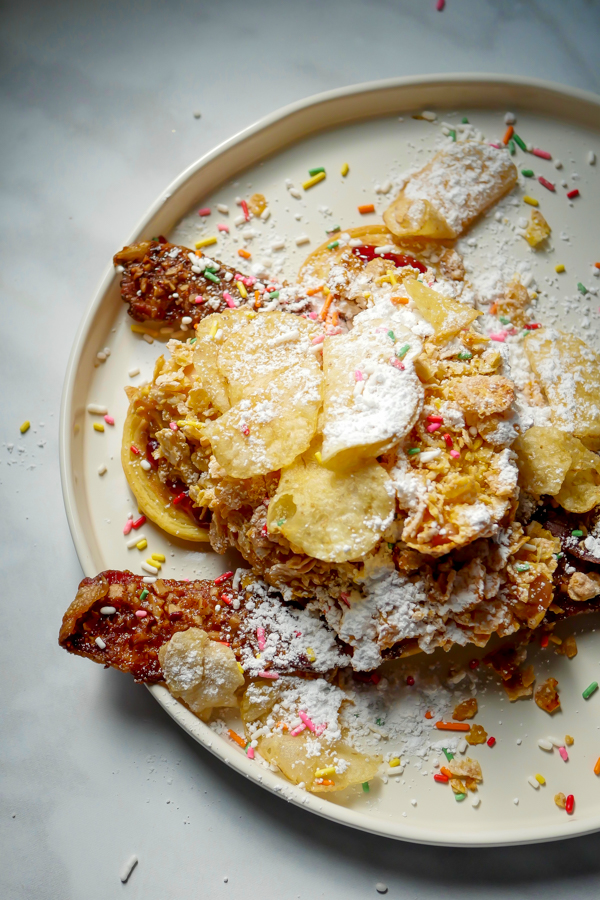
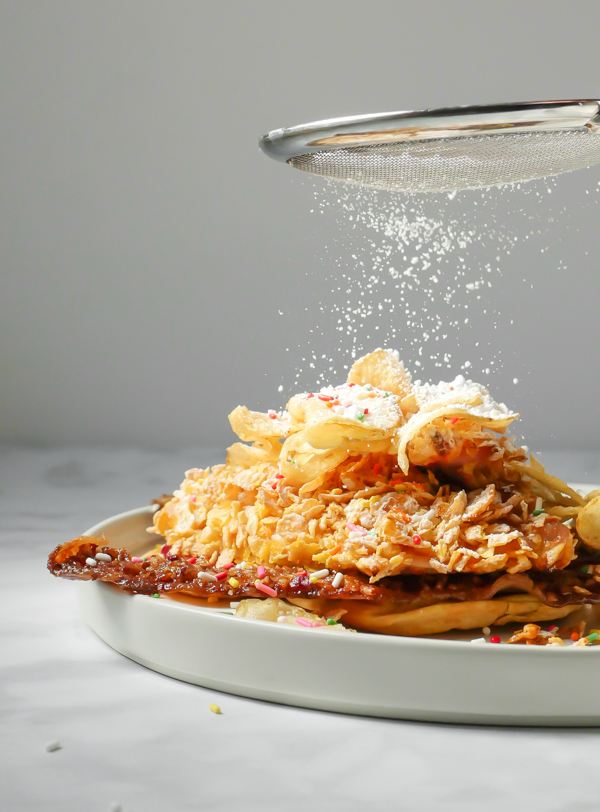
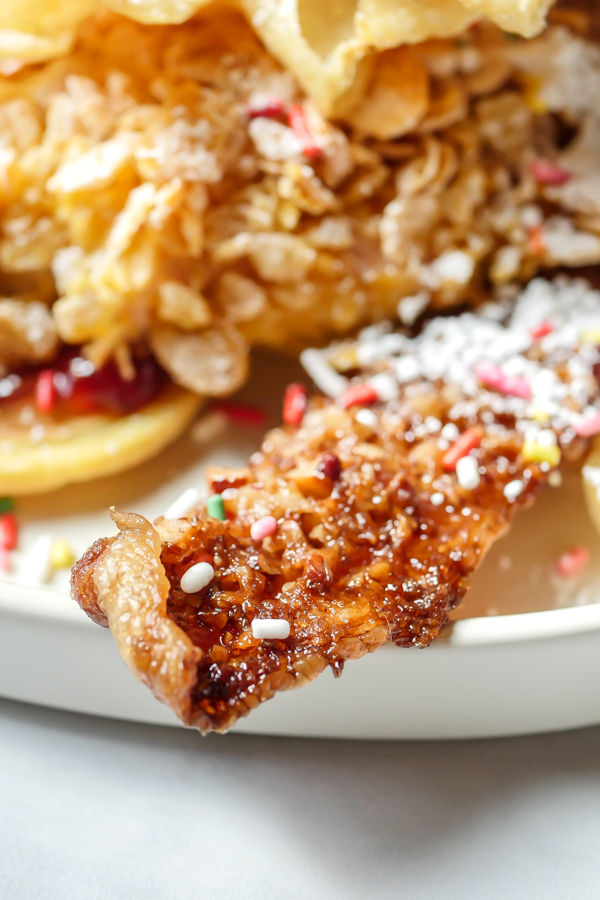
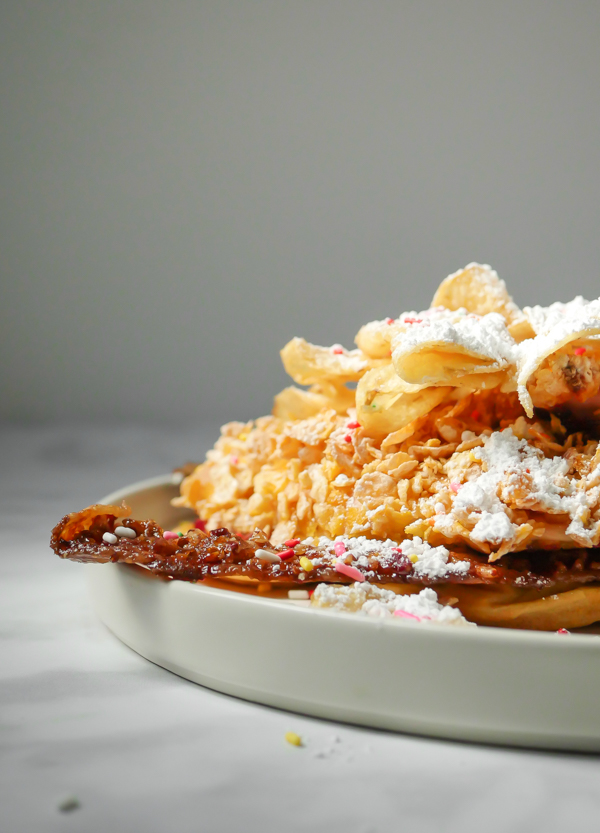
We’re squeezing in our last and final recipe from the “Get Your Ears On” celebration for this month with this festive dish, the “Celebrate Mickey” Chicken and Waffles Breakfast Special. Now, I’m a big fan of chicken and waffles any time, but cover that with candied bacon, berry compote, potato chips, powdered sugar, and sprinkles and well, now I’m even more excited.
This dish has a number of components, but don’t fret, they easily can all be made ahead of time. In fact, I had to make several components well in advance while I was doing all the testing for the Piranha Lemonade Slushy.
The one change I made from the original is that I did not pan fry the chicken. I wasn’t sure how the cereal coating would hold up to frying, so I decided to bake the battered chicken. And it worked out great! If you’re not up to pan frying these, the baked option keeps the topping crisp still but it does take longer to make. I like having the hands off option and less oil to deal with. It loses some of its golden color baking it, but I think it was just as tasty.

If you’re looking for a special breakfast spread, or if you’re having guests over for brunch, I think this dish would be perfect. You could make stacks of each component and let your guests fill their plates as they’d like. And of course, kids LOVE making their own breakfast plate with these components, and aren’t going to say no to adding powdered sugar and SPRINKLES to their breakfast. Oh yeah, and potato chips too!
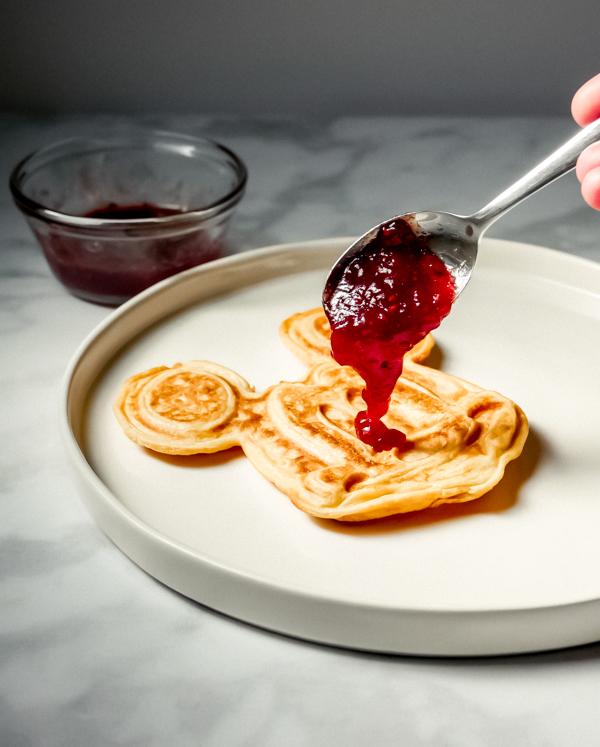
Note, this dish uses the same mix that Disneyland uses in all their waffles, Golden Malt. Surprisingly this is easily available on Amazon and possibly in your local grocery store. However, if you’ve got a waffle mix you like, either store bought or homemade, go ahead and use that. Also, I opted to mix strawberry and raspberry preserves to make my own compote for the dish. If you have a mixed berry jam already at home, that would also work. The berries give a nice tang to the whole dish that I think works really well with the savory elements.
And that concludes some our favorite dishes from the “Get Your Ears On’ celebration at Disneyland! Stay tuned for next month’s recipes, where we will be serving up a month of CHURROS! Until then, let’s celebrate with some chicken and waffles.

“Celebrate Mickey” Chicken and Waffles
- Yield: 2 servings 1x
Description
Let’s “Celebrate Mickey” with this over-the-top Disney-inspired chicken and waffles dish topped with berry compote, candied pecan bacon, potato chips, powdered sugar, and SPRINKLES! Found at Carnation Cafe during the “Get Your Ears On” celebration at Disneyland.
Ingredients
For the waffles:
- 1 cup Golden Malted Waffle Mix
- 1 egg
- 5 ounces water
- 2 tablespoons melted butter
For the berry compote:
- 2 tablespoons strawberry jam
- 1 tablespoon raspberry jam
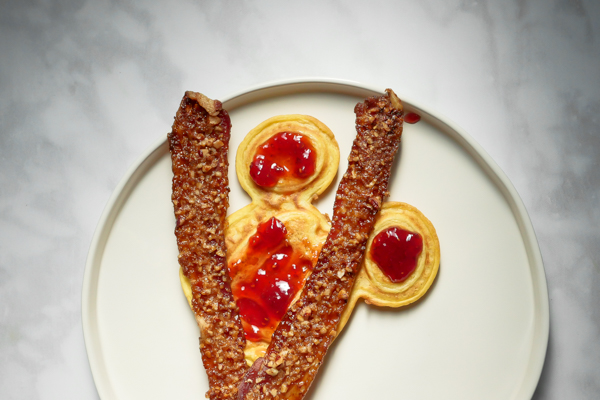
For the candied pecan bacon:
- 5 slices bacon
- 3 tablespoons brown sugar
- 1/3 cup crushed pecans
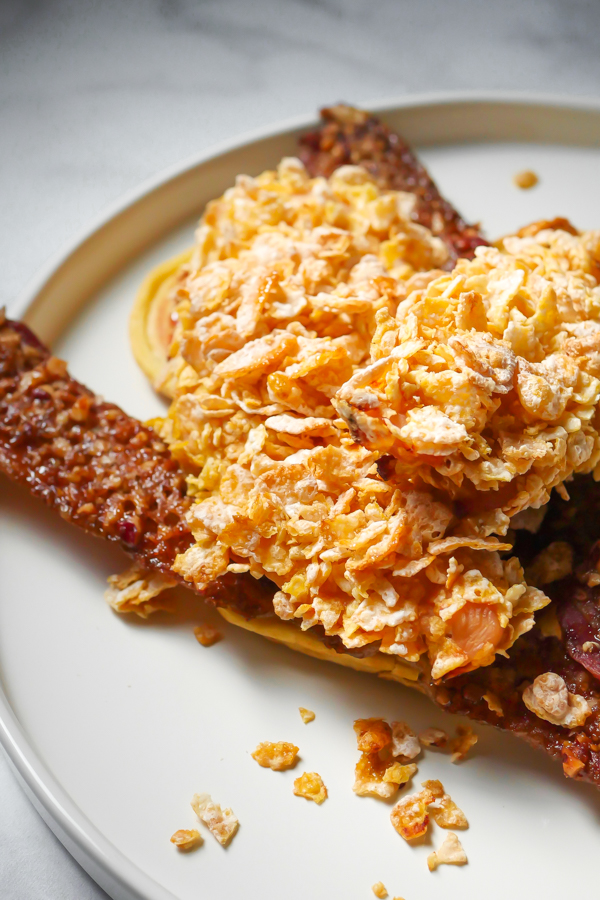
For the cereal crusted chicken:
- 4 cups crushed frosted cereal flakes
- 1 egg
- 1–1/3 cup milk
- 4 chicken breasts
- salt
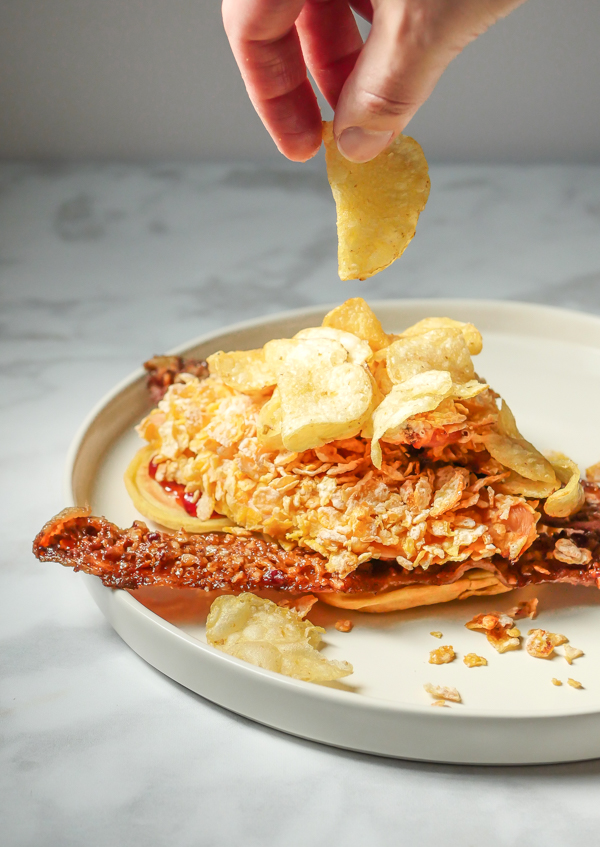
Toppings:
- potato chips (I use kettle chips for this dish)
- powdered sugar
- rainbow sprinkles
Special Tools
Instructions
For the waffles (makes 4 waffles in Mickey Waffle Maker):
- Beat eggs and liquid together.
- Add flour and mix well.
- Stir in melted butter and mix thoroughly.
- Ladle onto hot Gourmet Waffle Baker and remove when golden brown.
For the berry compote:
- Mix together jams in a small bowl.
- Set aside.
For the candied pecan bacon:
- Heat oven to 400.
- Line a baking sheet with foil and place a cooling rack on top. Place bacon on the cooling rack.
- Combine brown sugar and pecans in a small bowl. Spoon mixture over bacon, pushing down into bacon evenly.
- Bake 20-25 minutes until brown and crispy.
For the cereal crusted chicken:
- Preheat oven to 375°f.
- Grease a 9×12 baking pan.
- Season chicken breasts with salt on both sides (about 1/2 teaspoon each).
- Crush cereal into even pieces (I used my hands as I measured it out) and place into a shallow bowl large enough to lay chicken in.
- In another shallow bowl of equal size, pour milk in and beat the egg into it.
- Next, dip chicken breast into the milk, letting excess drip back into bowl, and then dip into the cereal on both sides. Place in baking dish and repeat with the rest of chicken.
- Bake in the oven for about 40 minutes or until a thermometer reads 165°f.
Assembly:
- Place the waffle on a plate and top with jam.
- Lay the bacon pieces next and then place chicken on top.
- Cover with potato chips, powdered sugar, and sprinkles. Enjoy!
Notes
- Waffles can be made ahead of time and frozen individually between sheets of parchment and placed in a ziplock until ready to use. They can be toasted in a toaster oven or toaster the same as frozen waffles.
- Bacon can be made ahead of time and placed in an airtight container in the fridge until ready to use up to 3 days. Let the bacon come to room temp, or warm in a toaster oven when ready to eat.
- Chicken can be made ahead of time and placed in an airtight container in the fridge until ready to use up to 3 days. Warm in oven or toaster oven when ready to eat.
- Jam can be mixed and stored in an airtight container in the refrigerator up to two weeks.
- Waffles will deflate after cooking slightly.