• Skip to primary navigation
  • Skip to main content
  • Skip to primary sidebar

Magical Treats at Home

  • About
  • Treats
  • Drinks
  • Savory
  • Favorite Tools
  • Etsy Shop

strawberry

Colorful Fruit Hand Pies

December 3, 2022 by Elana Lepkowski Leave a Comment

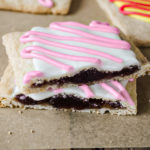
Fruity Hand Pies // magicaltreatsathome.com

I get visibly excited anytime the Disney parks roll out a new form factor of treats. I may even exclaim an audible “ooooh” in public when I see them. So, suffice to say, I was on the verge of hopping up and down when Disneyland announced not just one, or two, or three, but five new hand pies earlier this year. 

Usually one could catch a seasonal hand pie at the Jolly Holiday Bakery Cafe, although many times, but not always, it was strawberry filled with different decorations, my favorite exception being the Coco hand pies with the guava filling from 2020 right before the park temporarily closed (and I was going to make these for the site and even sourced the sugar skulls! I might still one day…). I had, incorrectly, assumed that these were going to be a temporary summer treat, but lo! They’re with us 6 months later, and still popular with guests. Similarly to the year-round treats found at The Candy Palace, Pooh Corner, Trolley Treats, Bing Bong’s, and Marceline’s, the hand pies span both parks and Downtown Disney, the catch is, each store has a different flavor, so if you want a specific kind, you need to be in the right place. 
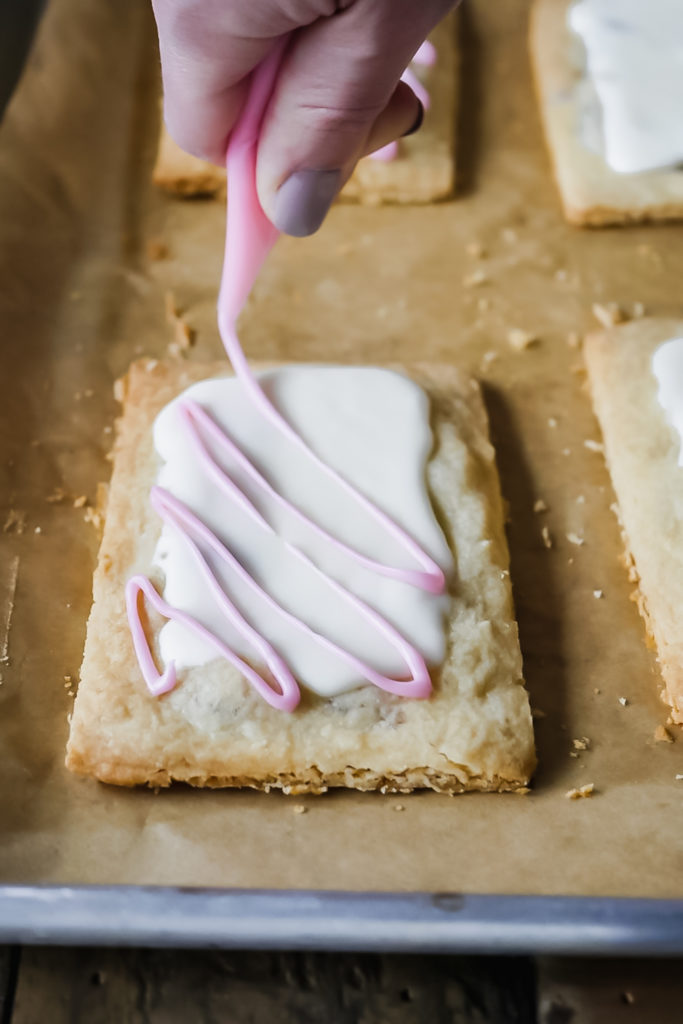
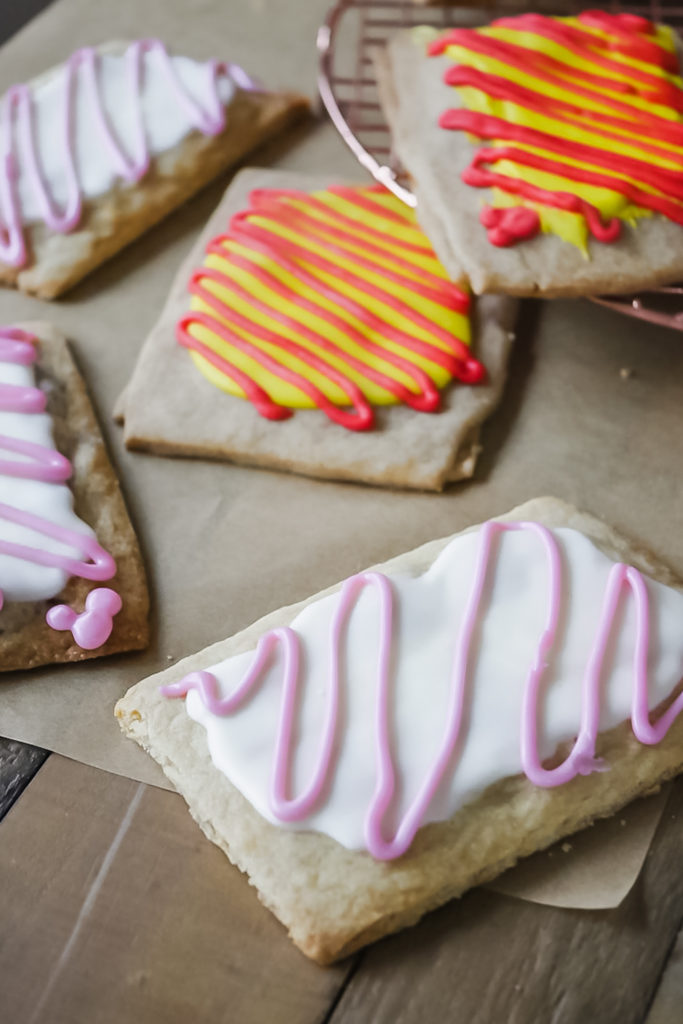
Or you can make them at home! Which is what I’ve got for you all today. In the recipe below, I’m giving you my tried and tested pop tart base recipe and icing ratios. Then you can choose your own adventure when it comes to the filling. I’m also including the Americolor food coloring names that correspond to each flavor decoration to take the guesswork out of that (unless you are using another brand of food coloring, in which case, you will be guessing, sorry!). 
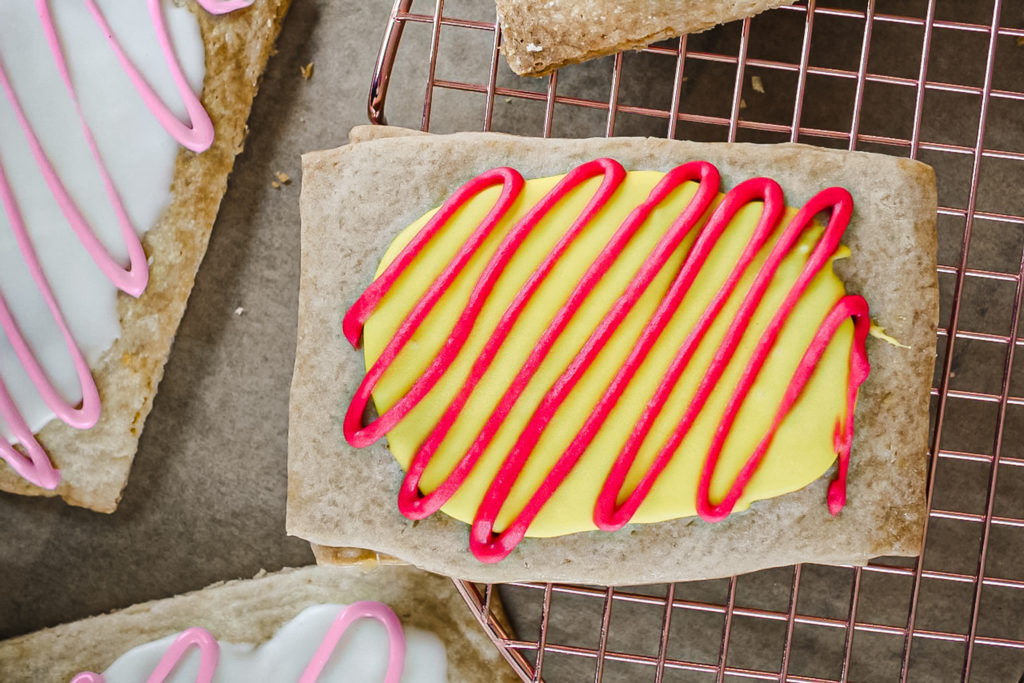
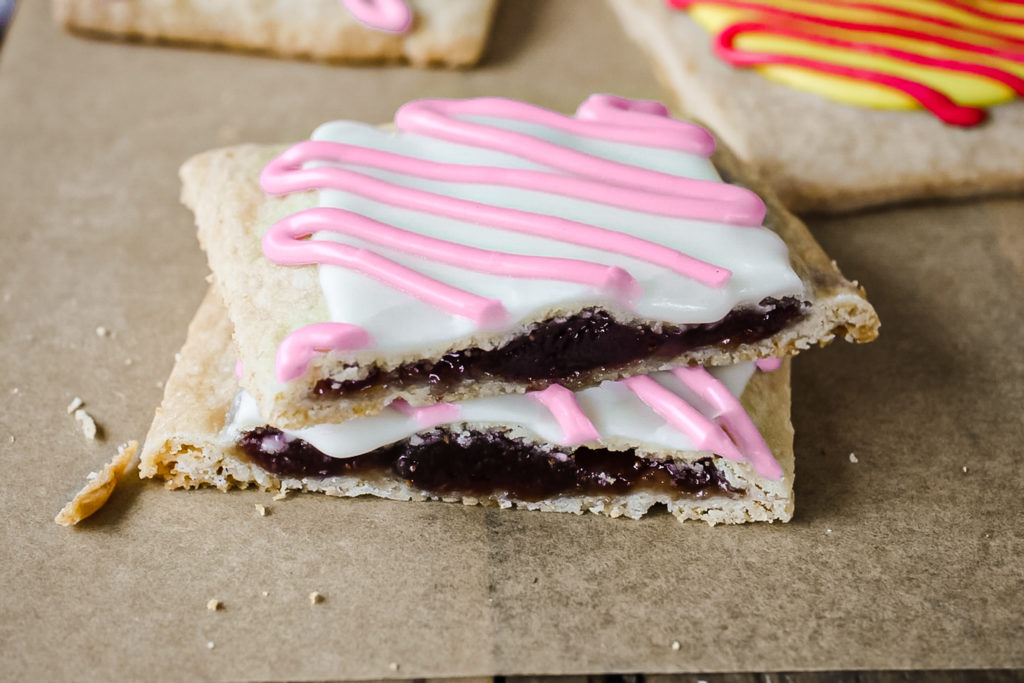
I opted to not include filling recipes, as I’ve found that store bought jams, curds, and pastes work just as well as homemade (but if you want to make one of the fillings from scratch, let me know and I can amend below). I made a lemon curd and tested it against a store bought curd for the lemon filling, and my only complaint is that the store bought was not as vibrant, but still tasted fine.

For the base, go with an all purpose flour. I tested pastry flour and found it went too soft on me. And FYI, my lemon hand pies here look a little darker than the strawberry, as I went with a stone ground all purpose from Janie’s Mill which gives a darker color than the standard AP flour you find at the grocery store (like King Arthur or Gold Medal). Both AP flours though are great no matter which you go with. 
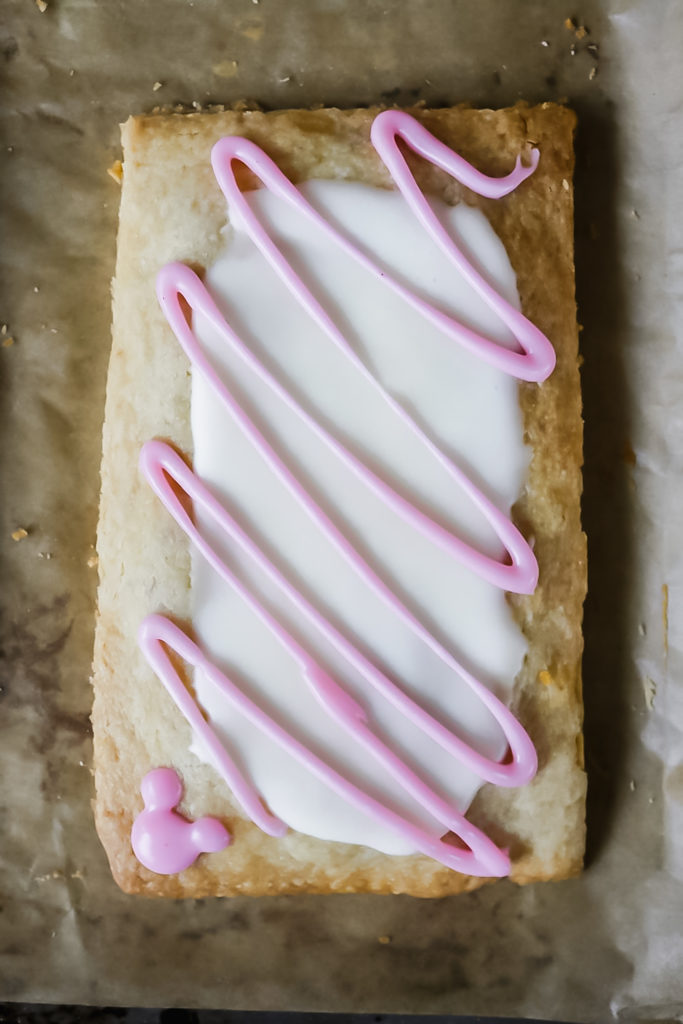
And finally, the icing takes, at a minimum, 30 minutes to set up. So, if you wanted to, say, put a bunch of sprinkles on top, that would be the time to do it. Also, remember to read all the tips and tricks in the recipe card below for your best bake!

Let me know which flavors you make! And happy baking!
Print
clock clock iconcutlery cutlery iconflag flag iconfolder folder iconinstagram instagram iconpinterest pinterest iconfacebook facebook iconprint print iconsquares squares iconheart heart iconheart solid heart solid icon

Colorful Fruit Hand Pies

5 Stars 4 Stars 3 Stars 2 Stars 1 Star No reviews
  • Author: Elana Lepkowski
  • Prep Time: 90 minutes
  • Chill time: 30 minutes
  • Cook Time: 15 minutes
  • Total Time: 2 hours 15 minutes
  • Yield: 4 Hand Pies 1x
  • Category: Dessert
  • Cuisine: American
Print Recipe
Pin Recipe

Description

Inspired by the summery hand pies found throughout the Disneyland Resort.


Ingredients

Scale

This base dough was adapted from the Bravetart Cookbook.

Dough:

  • 150 g (5.3 oz, 1–1/2 heaping cups) All Purpose Flour
  • 25 g (.8 oz, 1/8 cup) granulated sugar
  • 1/2 teaspoon baking powder
  • pinch of salt
  • 1 stick of butter, cut into cubes
  • 92 g (3.2 oz, 1/4 cup) light corn syrup

Icing:

  • 100 g (3.5 oz, 3/4 cup plus 2 tablespoons) powdered sugar
  • 2–3 tablespoons heavy cream, divided
  • 1/2 teaspoon vanilla extract
  • pinch salt

Fillings:

  • smooth strawberry jam
  • lemon curd
  • raspberry jam
  • blueberry jam
  • guava paste

Americolor Gel Paste Color Combos (Base/Drizzle):

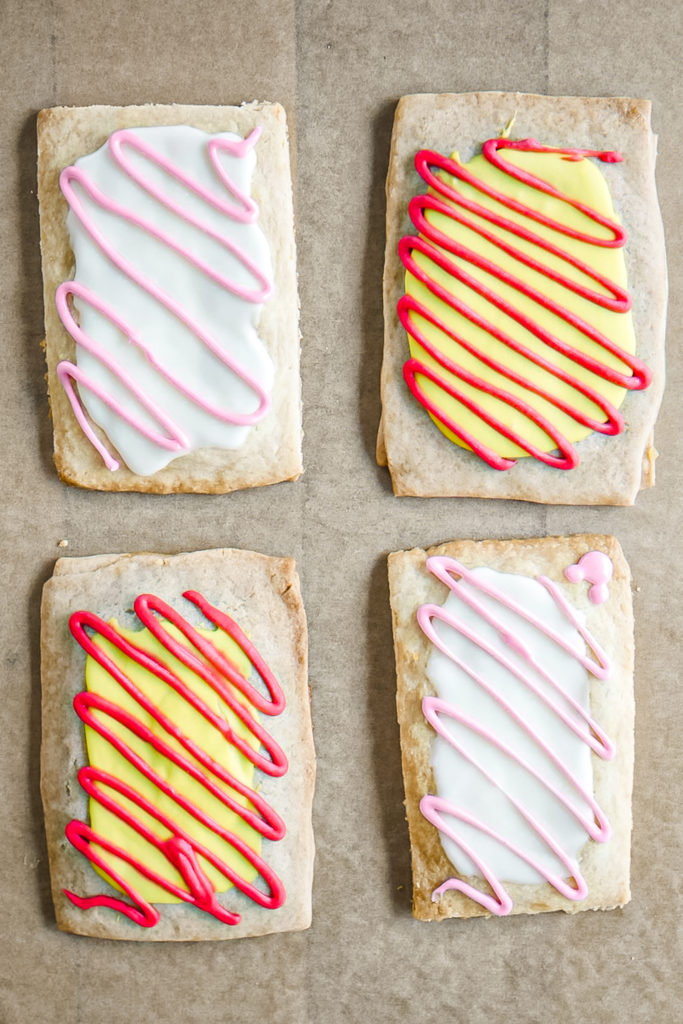
  • Strawberry: White (no color on base)// Deep Pink
  • Lemon: Lemon Yellow // Red Red
  • Raspberry: Deep Pink // Violet
  • Guava: Orange // Leaf Green
  • Blueberry: Turquoise // White (no color on drizzle)

Instructions

For the dough:

  1. In a mixing bowl, whisk together the flour, sugar, baking powder, and salt.
  2. Add in the butter and combine until the mixture resembles wet sand (the butter should be fully incorporated with no chunks).
  3. Next, pour in the corn syrup and mix until it comes together and forms a thick dough.
  4. Form into a ball and then flatten into a disc. At this point you can either use the dough, or wrap tightly with plastic wrap or alternative wrap and refrigerate up to a week. (Chilled dough will need to sit out and reach room temperature, about 30 minutes, first.)
  5. On a floured work surface, roll dough out into a 13″ by 10″ rectangle. Divide dough in lengthwise to create to rectangles 5″ high. Next divide dough vertically into 4 long rectangles that measure 3-1/4″ wide. This will give you 8 total rectangles. (Note: I find drawing the entire dimensions listed on a piece of parchment first and then scoring the dough with a ruler or chopstick helpful for cutting later)
  6. Place 4 of the rectangles on a parchment lined sheet pan, and spread about 1 tablespoon of your filling evenly and thinly on each rectangle, leaving a 1/2″ border around all four edges.
  7. Cover these rectangles with the unused dough, placing them directly over the filling and bottom rectangles. Lightly pat the dough down over the filling and lightly press around all edges (no need to crimp the dough together).
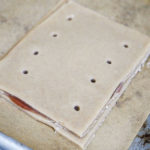
  8. Poke 8 holes in each hand pie, and then cover tightly with plastic wrap or alternative wrap. Refrigerated for 30 minutes.
  9. Preheat oven to 350°f during this time.
  10. Remove tray from the refrigerator after 30 minutes, remove plastic wrap, and place in oven for 14 to 16 minutes until still light blonde in color but dry.
  11. Cool on the sheet pan until room temperature.

For the icing:

  1. In a small mixing bowl, combine the powdered sugar, 1-1/2 tablespoons cream, vanilla extract, and salt until stiff and no powdered sugar remains visible.
  2. Remove 1/4 of the mixture to a piping bag for the drizzle. You can add a drop of food coloring directly to the bag and knead until uniform in color. Set aside.
  3. Next, add another tablespoon of cream to the remaining mixture. If your icing is still too stiff, add another teaspoon or two until smooth and easily spreadable. If you go too far and it’s so runny it immediately drips off the hand pie, you can mix in a tablespoon or two of powdered sugar.
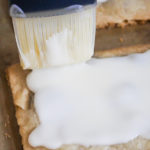
  4. At this point you can leave white for the strawberry hand pie, or mix in the desired color using the color combos above.
  5. Spread an even layer of the base icing on the hand pie, let the icing for a crust before adding the drizzle, otherwise the drizzle will sink into the base and the colors will bleed.
  6. Allow 30 minutes for the icing to harden up, however with the cream, it will be a ‘soft’ icing and not brittle.

Notes

  • Recipe can be doubled to make 8 hand pies.
  • Corn syrup may be “vanilla” flavored or plain.
  • If your dough is sticky when rolling out, place the dough between two sheets of parchment.
  • You can trim the edges with a knife or pizza cutter when they come out of the oven for sharper, defined lines.
  • Store at room temperature for up to 5 days, refrigerated for 1 week.
  • The longer the base and drizzle colors sit together, the greater chance they will begin to bleed together.
Did you make this recipe?

Tag @magicaltreatsathome on Instagram and hashtag it #magicaltreatsathome

Share this:

  • Click to share on Facebook (Opens in new window) Facebook
  • Click to share on X (Opens in new window) X

Like this:

Like Loading...

Filed Under: Recipes, Treats Tagged With: blueberry, disneyland, guava, hand pies, icing, lemon curd, pastry dough, raspberry, strawberry, treat

Strawberry Shortcake Marshmallow Wands

May 15, 2020 by Elana Lepkowski Leave a Comment

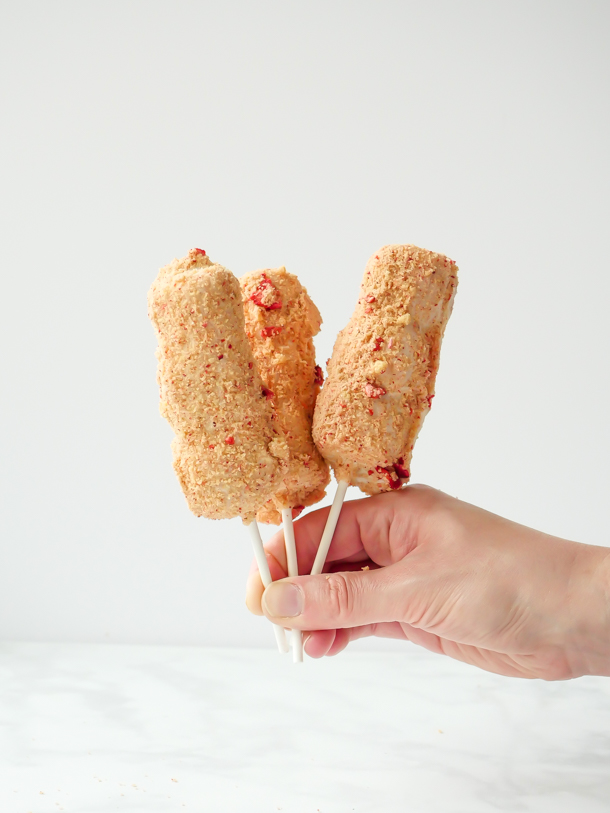
Strawberry Shortcake Marshmallow Wands // magicaltreatsathome.com

Where can I find the original treat?

  • This seasonal treat can be found all over the Disneyland resort.

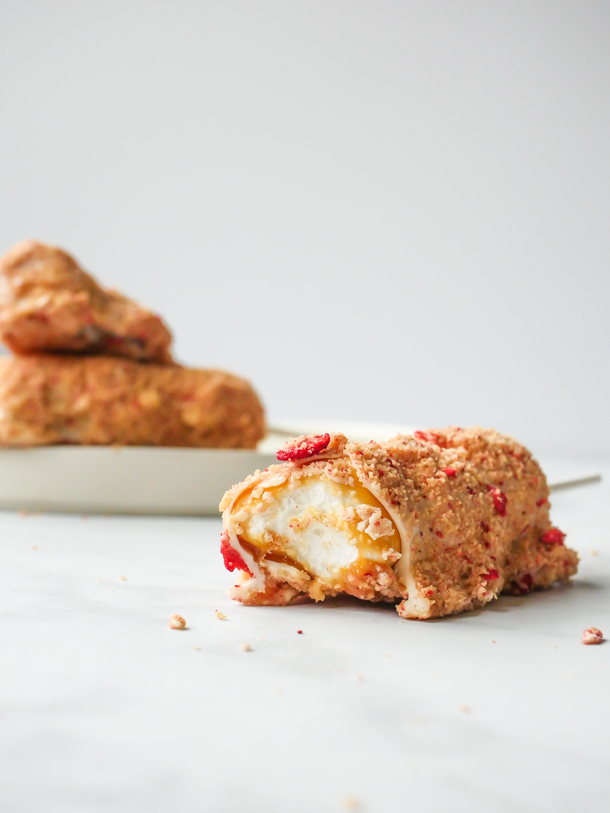
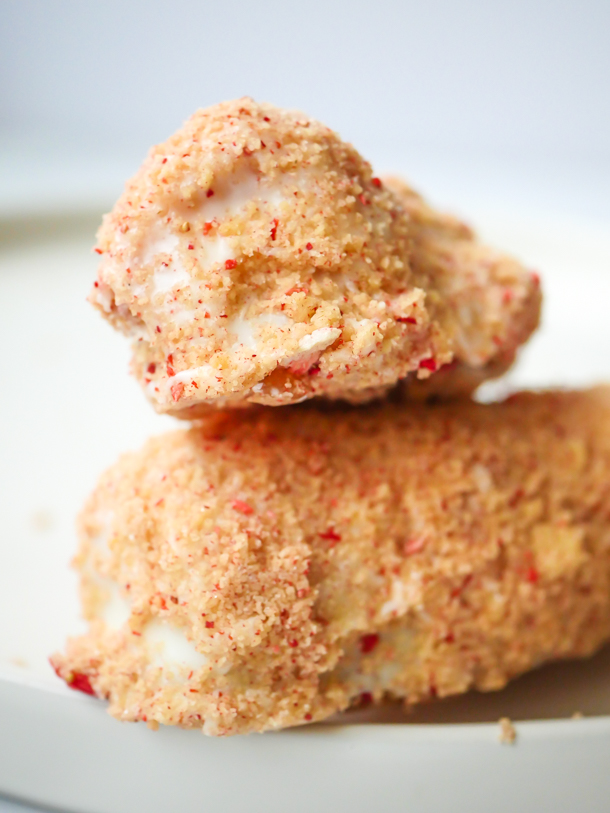
I had opened our mini freezer the other day, the freezer that I keep all my backup ingredients in for this site, and for my drinks site, Stir and Strain, and realized I had everything before me to make another round of marshmallow wands. If you take away one good tidbit from this post, I hope it’s that marshmallow wands, after they have been coated in caramel, freeze beautifully. And even after almost 6 months, once fully decorated, they still taste fresh. But so anyways, I also had a bag of crumbled shortbread in that freezer. And a bag of freeze dried strawberries. I had everything ready to go to make Strawberry Shortcake Marshmallow Wands. So that’s what we’re making today!
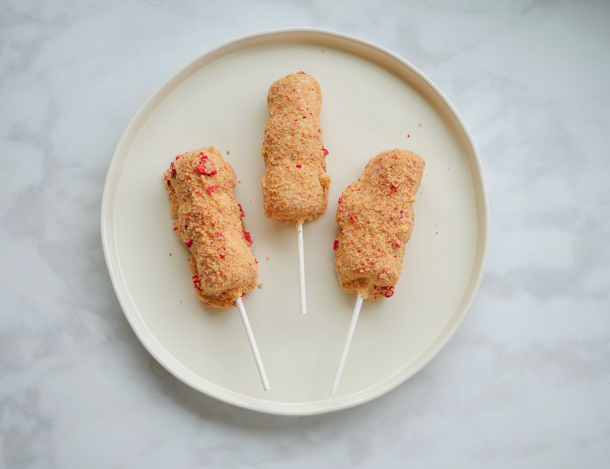
Strawberry Shortcake Marshmallow Wands // magicaltreatsathome.com

This treat appeared during Valentine’s Day among the many other delicious treats on sticks at Disneyland. It definitely was a contender for the site, but I had to narrow it down to just a few items since the treats were released right before the holiday, and soon after would be leaving the cases. Since we’re in the middle of a hiatus from new park treats, I’ll be making a few past ones here until I’m back once again, strolling the candy cases and shoving chocolate in my face. Fingers crossed I don’t have to wait until a year from now to do that.

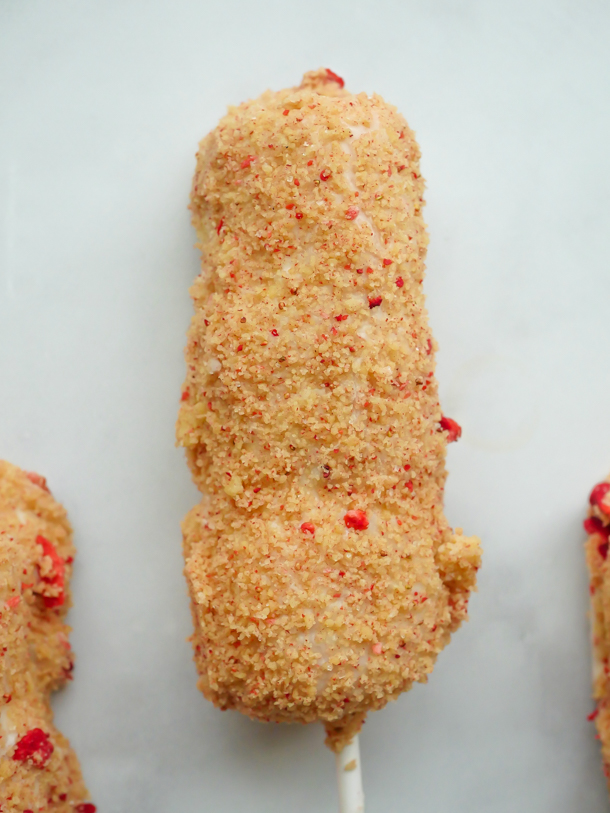
Strawberry Shortcake Marshmallow Wands // magicaltreatsathome.com

What I love about this treat is the buttery contrast of the cookie to the sweeeeeeeet white chocolate, caramel, and marshmallow. The strawberry bits add a nice zing to it as well. It’s definitely a sweet treat, but I wouldn’t write this off as just for kids.

But speaking of kids! Kids can help assemble these and dip in the chocolate and decorate. Older kids comfortable with a stove, and good common sense, can help dip in the caramel, but under supervision.

And if you’re wondering, the reason I had a container of marshmallow wands in the freezer is because I find melting the caramel in larger batches is easier to work with when making things like the wands. It stays liquid longer, and heats more evenly. The downside though is that there is a lot left over since I’m using more than I need. So now when I have extra caramel, I’ll just grab some lollipop sticks and some marshmallows (Another panic buy from March was a case of marshmallows. I’m thinking maybe I might start selling these as kits…), and I’ll coat a batch of marshmallows, place them on parchment and freeze. So far, after a 6 month hibernation, these were still great.

Strawberry Shortcake Marshmallow Wands // magicaltreatsathome.com

For the cookies, homemade or store bought is fine. But make sure you’re using a butter cookie, not a sugar cookie! And with that, I hope you enjoy these Strawberry Shortcake Marshmallow Wands!

Print
clock clock iconcutlery cutlery iconflag flag iconfolder folder iconinstagram instagram iconpinterest pinterest iconfacebook facebook iconprint print iconsquares squares iconheart heart iconheart solid heart solid icon
Strawberry Shortcake Marshmallow Wands // magicaltreatsathome.com

Strawberry Shortcake Marshmallow Wands

5 Stars 4 Stars 3 Stars 2 Stars 1 Star No reviews
  • Author: Elana Lepkowski
  • Yield: 6 Strawberry Shortcake Marshmallow Wands 1x
Print Recipe
Pin Recipe

Description

The classic caramel coated marshmallow wand gets a sweet upgrade with a layer of white chocolate and a buttery shortbread cookie crumble and tart strawberry coating! A Disneyland-inspired treat.


Ingredients

Scale
  • 18 marshmallows
  • 9 ounces (~32 candies) individually wrapped caramels (like Kraft)
  • 1–3/4 tablespoons water
  • 1/2 teaspoon of coconut oil
  • 10 ounces of white candy melts
  • 1 cup crushed shortbread cookies
  • 1/4 cup freeze dried strawberries, crushed
  • 6 lollipop sticks

Instructions

  1. Place 3 marshmallows on each lollipop stick and set aside on a parchment lined sheet pan.
    Churro Marshmallow Wand // magicaltreatsathome.com
  2. Mix together the crushed shortbread and freeze dried strawberries in a large, shallow bowl that can accommodate the length of the marshmallow wand. If you cannot crush the strawberries by hand (some brands are chewier than others), a quick blitz in the food processor or coffee grinder should render them fine enough to mix with the cookies. Set aside.
    Strawberry Shortcake Marshmallow Wands // magicaltreatsathome.com
  3. Unwrap all the caramels and add to a small saucepan. Pour water in and heat over medium-low heat.
  4. Stir constantly until everything has melted and caramels are smooth (about 7-8 minutes).
  5. Once melted (caramels should drip in a ribbon from a spoon back into the pan), dip each wand into the caramel, turning quickly to coat OR ladle the caramel over the wand, turning to coat. Let excess caramel drip off for at least 30 seconds, turning while it drips for even coating, tap the wand gently but firmly on the edge of the pan to remove any additional excess caramel, and then place back on the  parchment.
    Churro Marshmallow Wand // magicaltreatsathome.com
  6. When all the wands have been dipped, place the baking sheet in the refrigerator for 15-20 minutes so that the caramel will be set for dipping.
    Churro Marshmallow Wand // magicaltreatsathome.com
  7. While the caramels set, melt your white chocolate for coating. Combine the white candy melts and coconut oil in the microwave inside a microwave safe bowl, like glass, for 30 seconds. Stir and microwave again for an additional 30 seconds. Keep stirring and microwaving in short bursts of 15-20 seconds until melted and smooth. Use can alternatively use a double boiler for melting. Do not let the white chocolate get over 110°f as it can burn the chocolate (use a candy thermometer if you’re not sure about this).
  8. Remove the marshmallow wands from the refrigerator. You’ll know they are set when they lift easily off the parchment. If they still stick, keep them in 5 minutes longer.
  9. Set up the shortbread cookie and strawberry mix bowl next to your white chocolate.
  10. Dip the marshmallow wand in the white chocolate, or ladle chocolate over, turning to coat. Tap the stick firmly on the side of your pan to remove any excess chocolate. Then immediately roll in the cookie/strawberry mix, gently pressing the mix onto the white chocolate. Then place back on the parchment.
  11. Repeat with the remaining marshmallow wands.
  12. Let sit at least 30 minutes to firm up or in the refrigerator for quicker results. Enjoy!

Notes

  • Melted caramel is HOT! Use caution in the kitchen. Do not dip your fingers or hands into the caramel has it can adhere to skin and burn you. Keep away from children.
  • Use hot water to remove caramel from pans and utensils.
  • If the marshmallow wands start to stick to the parchment while you are dipping and coating, stick the pan with the un-coated wands back to chill in the refrigerator for a few minutes. If your kitchen is really hot, keep them in there the whole time, taking one at a time out to coat and decorate.
  • If you have extra melted caramel that has dried around your wand, use kitchen shears to remove it immediately after removing from the refrigerator.
  • Extra caramel coated marshmallow wands may be placed on a sheet of parchment in a single layer inside an airtight container and frozen for up to 6 months. No need to defrost them before use.
  • Did your chocolate coating break when you first dipped your wand in? Wait for the chocolate to cool down more. It should drip freely from a spoon without it seizing when the spoon is shaken slightly (will cause crevices in the chocolate on the spoon). If it breaks on the wand, your wand also might be too cool, so let them warm up more. And don’t worry, once that chocolate starts to firm up, you can dip it AGAIN into the chocolate to get a more even, although slightly thicker, coating.

Did you make this recipe?

Tag @magicaltreatsathome on Instagram and hashtag it #magicaltreatsathome

Strawberry Shortcake Marshmallow Wands // magicaltreatsathome.com

Share this:

  • Click to share on Facebook (Opens in new window) Facebook
  • Click to share on X (Opens in new window) X

Like this:

Like Loading...

Filed Under: Recipes, Treats Tagged With: caramel, disneyland, holiday, marshmallow, marshmallow-wand, shortbread, strawberry, treat, Valentine's Day, white chocolate

Chocolate Strawberry Mickey Mouse Beignets

March 6, 2020 by Elana Lepkowski Leave a Comment

Mickey Mouse Chocolate Strawberry Beignets // magicaltreatsathome.com

Where can I find the original treat?

  • This seasonal treat can be found at the Mint Julep Bar in Disneyland.

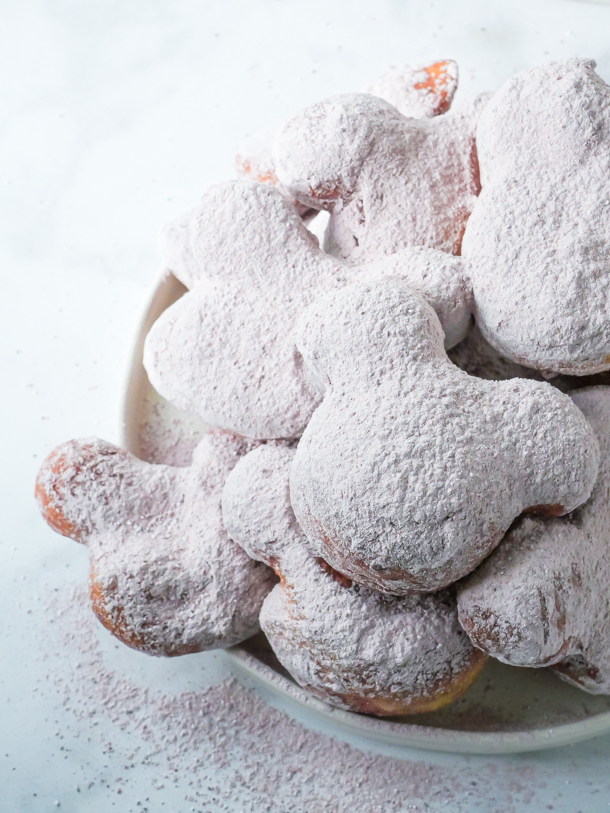
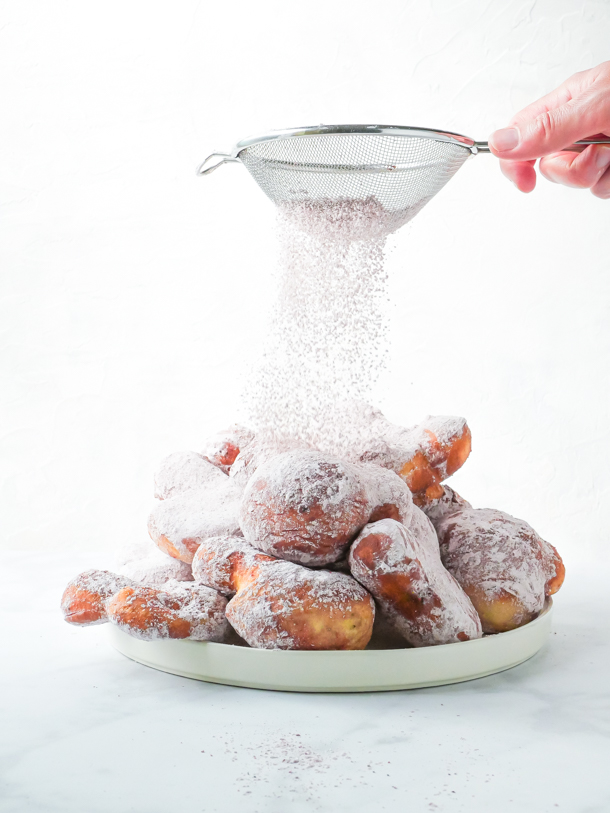
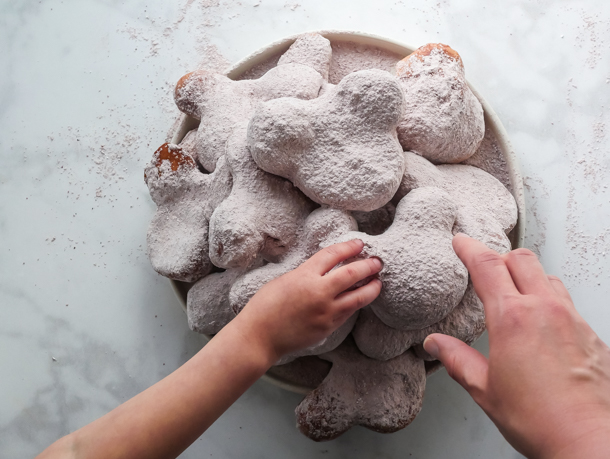
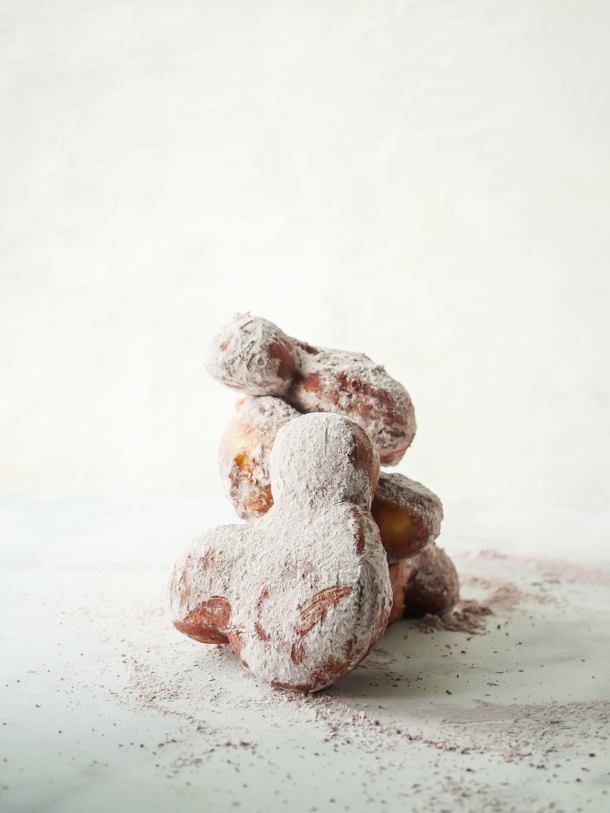
Valentine’s Day at Disneyland brought a whole lot of strawberry-themed treats this year. Including beignets! So today we’re whipping up a batch of the Chocolate Strawberry Mickey Mouse Shaped Beignets that you can enjoy all year long.

Mickey Mouse Chocolate Strawberry Beignets // magicaltreatsathome.com

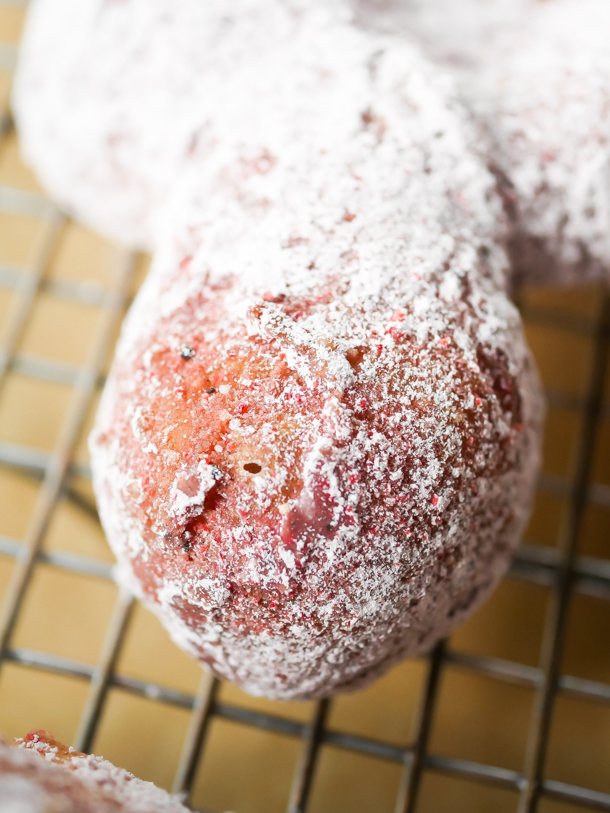
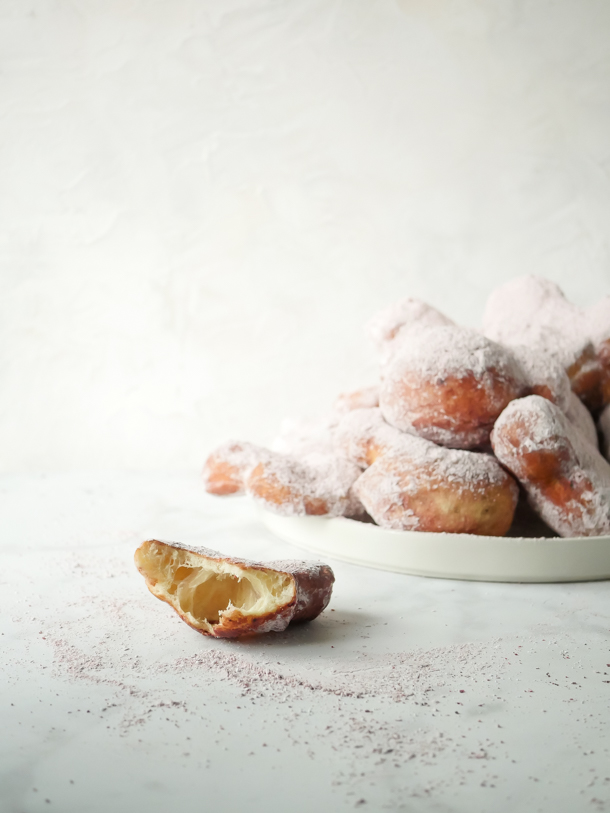
These are currently “seasonal” beyond Valentine’s Day right now, but they’re definitely reminiscent of the flavors of chocolate covered strawberries. And that’s due to the use of finely ground dehydrated strawberries (or strawberry powder if you can find it!). The powder still has a nice tart super strawberry flavor that stands out while the beignets melt in your mouth. I found the beignets at the park were more strawberry tasting than chocolate tasting, so I’ve kept just a hint of chocolate here with some Valrhona cocoa powder (which is insanely good cocoa powder and I highly suggest trying some).

Mickey Mouse Chocolate Strawberry Beignets // magicaltreatsathome.com

Now, strawberry powder might seem convenient, but it will come with a price tag. I’ve seen bags over $20 for very little in the actual bag. My suggestion here is to pick up a bag of dehydrated strawberries from your local supermarket (I found bags at Trader Joe’s and Sprouts). If your local mart doesn’t carry them, I’ve linked out to Amazon below. A quick spin in a coffee grinder pulverized them, but you could get to the same place crushing them in a baggie with a rolling pin too. I like grinding mine over the already ground powder because you also get a little inconsistency in size and that makes for some extra pops of strawberry flavor in some bites, and pretty red speckles all over your beignets.

For this recipe I tried something a little different with the flour and subbed in bread flour for the all purpose I generally use in these recipes. And you know what? You can sub these flours here 1:1. I’ve heard that bread flour can help with a yeasted recipe’s rise, and that you can get a chewier end product… but every step here felt the same as if I was making the beignet recipe with all purpose. So, if you suddenly crave some beignets, but only have bread flour in the house (hey, it could happen!), fear not! They’ll come out just fine.

Mickey Mouse Chocolate Strawberry Beignets // magicaltreatsathome.com

Kids can help here in the kitchen to toss the beignets in the powder. Beyond that I wouldn’t recommend any other help. That is unless you have maybe a teenager who is pretty comfortable around a stove and hot oil, and I’d still recommend supervision.

Mickey Mouse Chocolate Strawberry Beignets // magicaltreatsathome.com

Alright, there’s a few notes after the recipe so please read through before starting. Now let’s fry up some dough!

Print
clock clock iconcutlery cutlery iconflag flag iconfolder folder iconinstagram instagram iconpinterest pinterest iconfacebook facebook iconprint print iconsquares squares iconheart heart iconheart solid heart solid icon
Mickey Mouse Chocolate Strawberry Beignets // magicaltreatsathome.com

Chocolate Strawberry Mickey Beignets

5 Stars 4 Stars 3 Stars 2 Stars 1 Star No reviews
  • Author: Elana Lepkowski
  • Yield: 15–18 Mickey Mouse Chocolate Strawberry Beignets 1x
Print Recipe
Pin Recipe

Description

Melt-in-your-mouth Mickey Mouse Chocolate Strawberry Beignets are reminiscent of sweet-tart chocolate covered strawberries! A Disneyland-inspired treat.


Ingredients

Scale
  • 1/2 teaspoon dry yeast
  • 1/4 cup warm water (110º)
  • 1/4 cup (50 g) sugar
  • 2 tablespoons vegetable shortening (I used refined coconut oil)
  • 1/2 teaspoon salt
  • 1/2 cup heavy cream, or alternative milk
  • 1 egg
  • 4 cups all-purpose flour
  • 1/2 cup boiling water
  • Vegetable oil for frying, like avocado
  • 1 cup powdered sugar
  • 2 teaspoons unsweetened cocoa powder
  • 1/2 cup dehydrated strawberries, ground

Specialty Tools:

  • heavy bottomed dutch oven
  • candy thermometer
  • Mickey Mouse cutter

Instructions

  1. Sprinkle yeast over warm water in a small bowl, gently stirring to dissolve. Let stand for 5 minutes.
  2. Combine sugar, shortening, salt, heavy cream, egg, flour and boiling water in a large bowl. Mix until everything is just combined and then stir in yeast mixture. With the dough hook attachment of an electric mixer on medium-low speed, mix the dough just until combined and smooth. About 3-4 minutes. Let dough rest for 30 minutes in the bowl.
  3. Flour your surface and roll to 1/4-inch thickness. Using the Mickey Mouse cutter, cut dough pieces, twisting slightly, and carefully removing dough from around cutter before releasing. You may have to combine dough and roll out again to cut more shapes out. Cover with a towel and let dough rise until doubled in size in a warm, draft-free area, about 1-1/2 to 2 hours.
  4. While dough is rising, sift together the powdered sugar, cocoa powder, and ground dehydrated strawberries in a large bowl. Set aside.
  5. Pour enough oil into a deep-sided, heavy bottomed pot until it reaches 2 inches up sides; heat oil over medium heat to 370°F.
  6. Add 2-3 beignets to oil; fry until golden brown on both sides, about a minute each, turning once.
    Mickey Mouse Chocolate Strawberry Beignets // magicaltreatsathome.com
  7. Remove from hot oil with a slotted spoon and place on a baking sheet lined with paper towels.
  8. Let rest at least five minutes, and then toss in the powdered sugar mix. You can sift extra sugar over all the beignets before serving.
    Mickey Mouse Chocolate Strawberry Beignets // magicaltreatsathome.com

Notes

  • Sifting the powdered sugar, cocoa powder, and strawberries helps to loosen any clumps, especially in the cocoa powder.
  • If you are in a higher altitude, your dough may need less time to rise for the second proof.
  • Dough may have to be recombined and rolled a second time if you have a lot of scraps.
  • Wait for oil to come back to temperature before adding next batch of beignets to the pot.
  • No dough hook attachment? Knead dough until smooth and shiny, about 5-8 minutes and then proceed with the recipe.
  • Want to make these at night for the next morning? After cutting Mickey Mouse shapes out. Transfer to a baking sheet and let rest, covered with a towel, in the refrigerator overnight. Let come to room temperature before frying in the morning. Dough shapes can also be frozen and then left in refrigerator overnight and fried off.
  • If your dough gets a skin while rising, put the sticky side down first into the oil to avoid tearing while the beignet expands.
  • Strain your oil after it reaches room temperature. It can be used again!

Did you make this recipe?

Tag @magicaltreatsathome on Instagram and hashtag it #magicaltreatsathome

Mickey Mouse Chocolate Strawberry Beignets // magicaltreatsathome.com

Share this:

  • Click to share on Facebook (Opens in new window) Facebook
  • Click to share on X (Opens in new window) X

Like this:

Like Loading...

Filed Under: Recipes, Treats Tagged With: beignet, character treat, chocolate, doughnut, Mickey Mouse, Mint Julep Bar, strawberry, treat

Valentine Heart Macaron

February 14, 2020 by Elana Lepkowski Leave a Comment

Heart Macarons for Valentine's Day // magicaltreatsathome.com

Where can I find the original treat?

  • This seasonal treat is available at Clarabelle’s in Disney California Adventure Park.

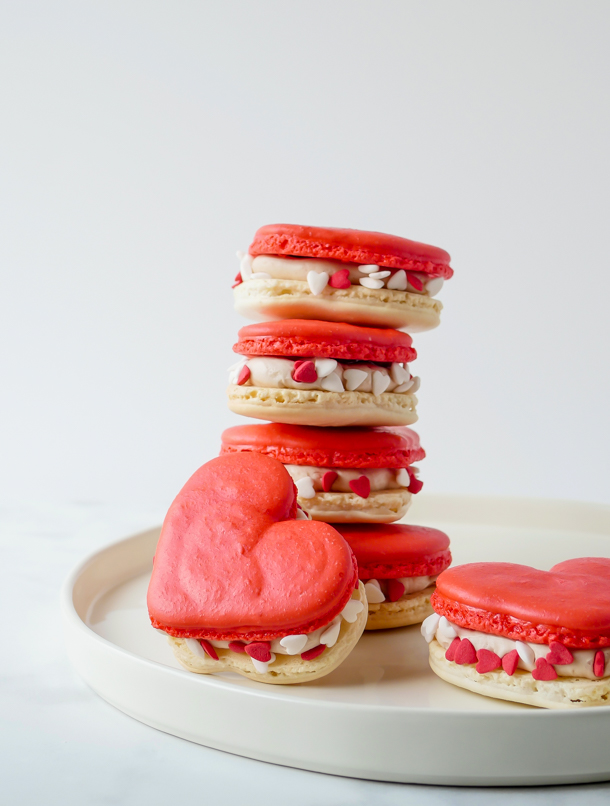
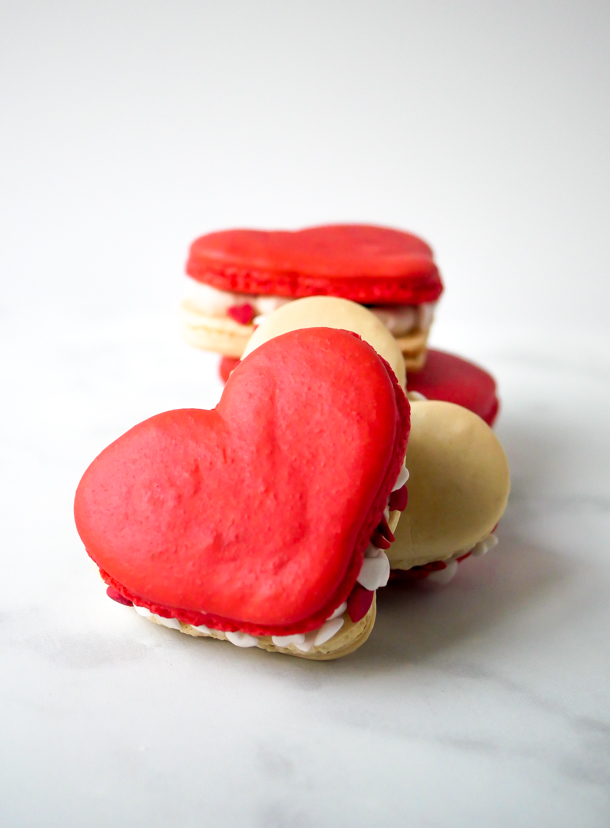
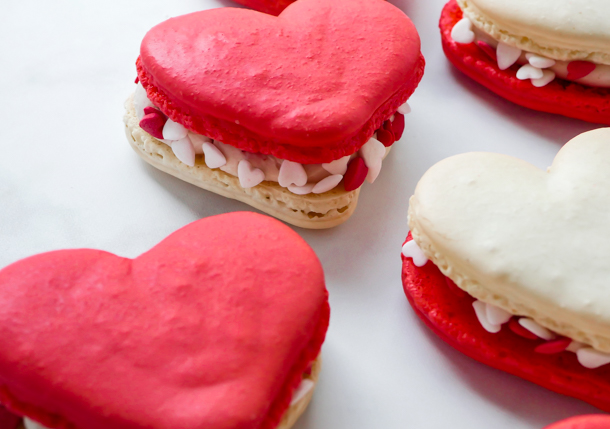
This past week, Disneyland released a bevy of pink and red treats in anticipation of Valentine’s Day and their after hours Sweethearts’ Nite. But what summed up this holiday the most for me (in treat form) was the oversized red and white heart macarons. And that’s what we’re making today!

Heart Macarons for Valentine's Day // magicaltreatsathome.com

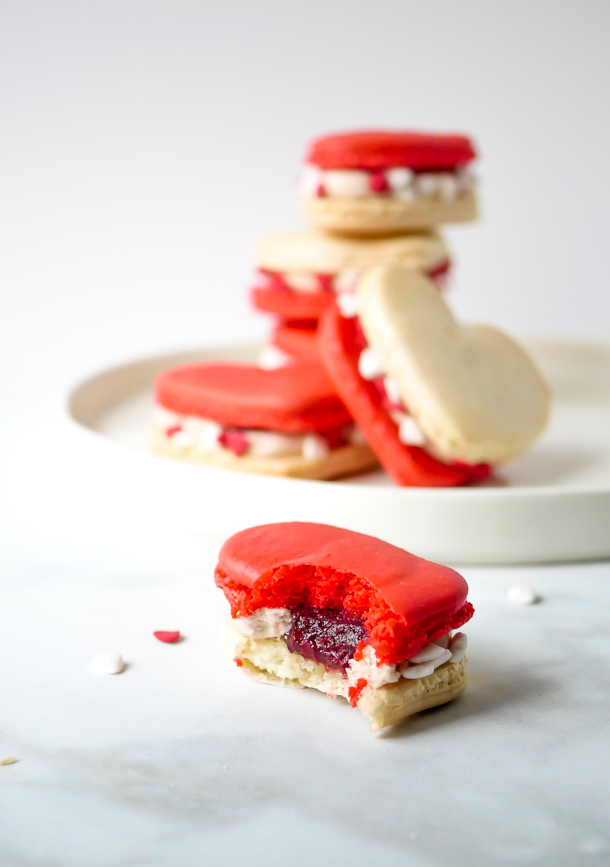
It’s a giant macaron heart, with a surprise strawberry jam filled center surrounded by strawberry buttercream and decorated with tiny candy hearts. I think it would make a sweet gift for a loved one (and you bet I’m gifting myself a few of these too..).

These use the classic macaron base (with a little food coloring), store bought or homemade strawberry jam, and a Swiss meringue buttercream frosting flavored with that same strawberry jam. Using a Swiss meringue buttercream, as opposed to an American style buttercream, yields a light and slightly sweet frosting that pipes beautifully and softens quickly out of the fridge. Yes, you need to whip out a double boiler to warm your egg whites here, but American buttercream would be much too sweet alongside the jam and the cookies. Trust me, it’s worth dirtying a few extra pans.

Heart Macarons for Valentine's Day // magicaltreatsathome.com

You could freehand pipe the hearts out, however, to make it easy on you all, I’ve gone ahead and created another FREE printable sheet you can download below to make the hearts. You’ll need to print two as this recipe yields around 8 heart macarons. Or you can enlarge on your printer and make bigger cookies. That would also work!

Icon

3 inch heart template

1 file(s) 88.45 KB
Download
Heart Macarons for Valentine's Day // magicaltreatsathome.com

More experienced kid bakers can help pipe out shapes, mix batters, weigh out ingredients by themselves, and younger hands can plop jam and decorate with the sprinkle hearts.

Heart Macarons for Valentine's Day // magicaltreatsathome.com

Lots of notes after the recipe as macarons can sometimes be a bit finicky, but you’ll get through this and create something awesome! Now let’s make some sweets for our sweets!

Print
clock clock iconcutlery cutlery iconflag flag iconfolder folder iconinstagram instagram iconpinterest pinterest iconfacebook facebook iconprint print iconsquares squares iconheart heart iconheart solid heart solid icon
Heart Macarons for Valentine's Day // magicaltreatsathome.com

Valentine Macaron

5 Stars 4 Stars 3 Stars 2 Stars 1 Star No reviews
  • Author: Elana Lepkowski
  • Yield: 8–10 Heart Macarons 1x
Print Recipe
Pin Recipe

Description

Oversized heart-shaped macarons filled with strawberry Swiss buttercream and strawberry jam are a special sweet for your valentine. A Disneyland-inspired treat.


Ingredients

Scale

For the macarons:

  • 180g (2 cups) almond flour
  • 240g (2 cups) powdered sugar
  • 1/4 teaspoon kosher salt
  • 140g egg whites, from about 4 large eggs
  • 1/2 teaspoon cream of tartar
  • 80g (6 tablespoons) granulated sugar
  • red gel food coloring, like Americolor

For the filling:

  • 35g egg whites, from about 1 large egg
  • 1/3 cup (67 g) sugar
  • pinch salt
  • 1/2 teaspoon of vanilla extract
  • 4 ounces (1 stick) unsalted butter, cut into small pieces
  • 4 tablespoons strawberry jelly or jam, divided

For the decoration:

  • heart decorettes/sprinkles

Special Tools:

  • mesh strainer
  • pastry bags

Instructions

  1. First sift the almond flour, powdered sugar, and salt back and forth twice between two bowls using a mesh strainer. Alternatively you can pulse a few times in a food processor as well. Set aside.
  2. Line two baking sheets with parchment and place the templates underneath if using. Set aside.
  3. In the bowl of a stand mixer fitted with the whisk attachment, add in the egg white and whisk until slightly foamy about 30 seconds on medium speed. Add in the cream of tartar and whisk until soft peaks appear. Then slowly pour in the sugar. Whisk on high until stiff peaks form, about 1-2 minutes more.
    Main Street Electrical Parade Ladybug Macarons // magicaltreatsathome.com
  4. Remove the bowl from the mixer.
  5. Sift half of the dry mixture into the egg whites and fold until barely incorporated, about 10 turns. Repeat with remaining dry mix. Fold until batter forms a ribbon when dropped into bowl.
  6. Add 1/2 of the batter into a piping bag and pipe out the white heart shapes, banging the sheet pan on the counter 2 or 3 times to remove any air bubbles.
  7. Next add two drops of red food coloring into the batter still in the bowl. Mix until no white streaks remain. (Batter will look light red in color but will bake bright red when finished.)
  8. Pour the red batter into a new piping bag and cut the tip off the bag. Pipe out the red hearts, banging the sheet pan on the counter 2 or 3 times to remove any air bubbles.
  9. Let both sheets of hearts rest 45 minutes on the counter. Do not cover.
  10. Preheat your oven to 350°f. Place cookies in oven to bake, and lower the temperature to 300°f. Cook for 17-18 minutes.
    Heart Macarons for Valentine's Day // magicaltreatsathome.com
  11. Let the macarons cool at least 20-30 minutes before filling.

For the buttercream:

  1. First make the Swiss strawberry buttercream frosting by whisking the egg whites, sugar, and salt together over a double boiler (or bowl set over simmering water on the stove), until temperature reaches 160°f.
  2. Pour heated egg whites into the bowl of a stand mixer and beat until stiff peaks form.
  3. When the bowl is cool to the touch, add the butter, one piece at a time, whipping between pieces to incorporate butter, but not fully mixing it in.
  4. Next, add in vanilla and strawberry jam. Whip everything on high until smooth.

To decorate:

  1. Place the frosting in a piping bag and pipe out along inside edges of the white macarons, leaving a center well to fill with the jam. *You may have leftover frosting. Storage instructions in notes below.
  2. Fill the wells with a small amount of jam.
    Heart Macarons for Valentine's Day // magicaltreatsathome.com
  3. Place red hearts on top of the filled white hearts.
  4. Then, over a bowl, sprinkle heart decorettes on the outside of the macarons where the frosting is. Set aside and repeat until all macarons are decorated. Enjoy!

Notes

  • Sifting the almond flour and powdered sugar together is necessary for the absorption of oils and to prevent clumping of batter.
  • Using gel based food coloring will give a much deeper, and vibrant color, than standard food dye.
  • Any left over macaron batter can be piped into smaller cookies and baked off for 15 minutes.
  • Swiss buttercream heats the egg whites to 160°f to kill off any bacteria.
  • Leftover buttercream can be stored in the fridge up to two weeks, brought to room temperature, and whipped before using. It can also be stored in the freezer up to 3 months.
  • Cookies can be stored in an airtight container up to one week.

Did you make this recipe?

Tag @magicaltreatsathome on Instagram and hashtag it #magicaltreatsathome

Heart Macarons for Valentine's Day // magicaltreatsathome.com

Share this:

  • Click to share on Facebook (Opens in new window) Facebook
  • Click to share on X (Opens in new window) X

Like this:

Like Loading...

Filed Under: Gluten Free, Recipes, Treats Tagged With: buttercream frosting, Clarabelle's, cookies, gluten free, heart, jam, macarons, sprinkles, strawberry, treat, Valentine

MSEP Ladybug Macarons

September 9, 2019 by Elana Lepkowski 1 Comment

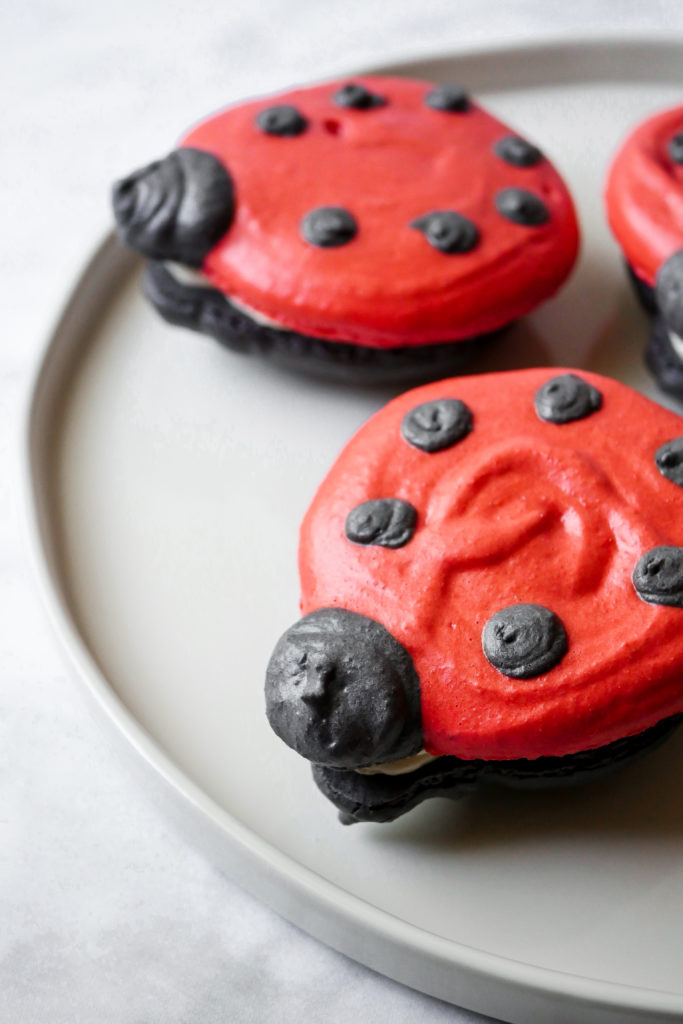
Main Street Electrical Parade Ladybug Macarons // magicaltreatsathome.com

Where can I find the original treat?

  • This treat can be found at the Jolly Holiday Bakery Cafe in Disneyland.

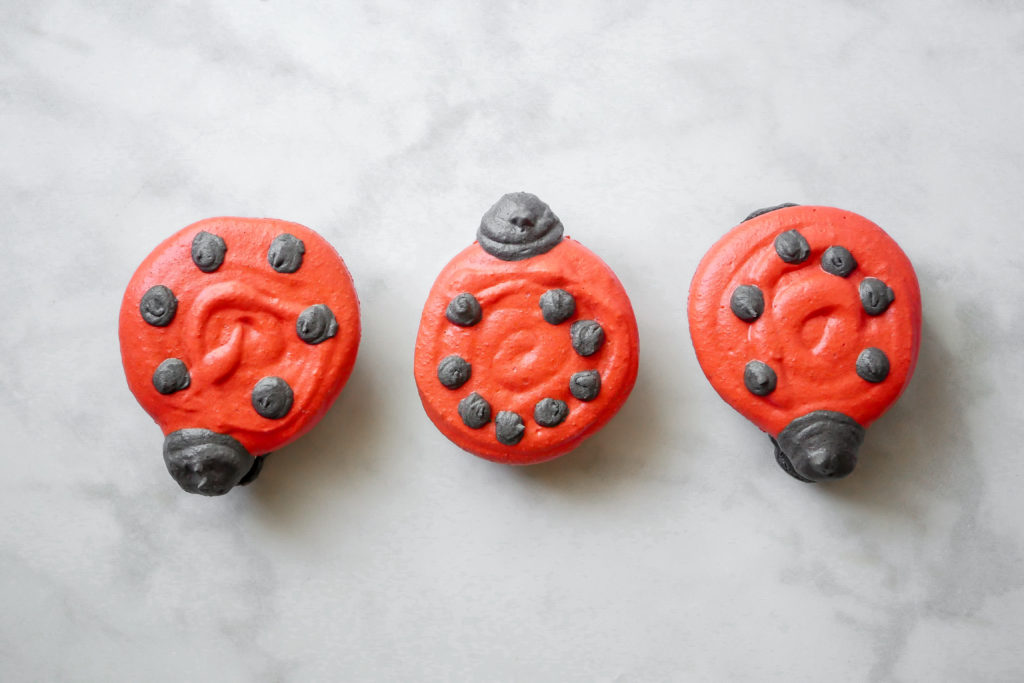
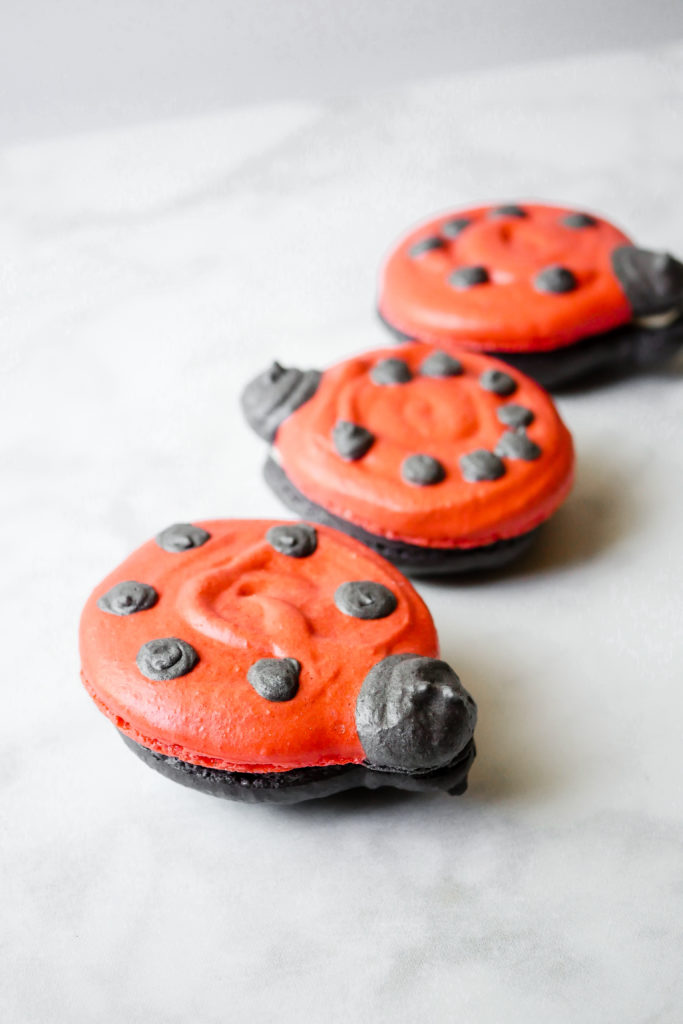
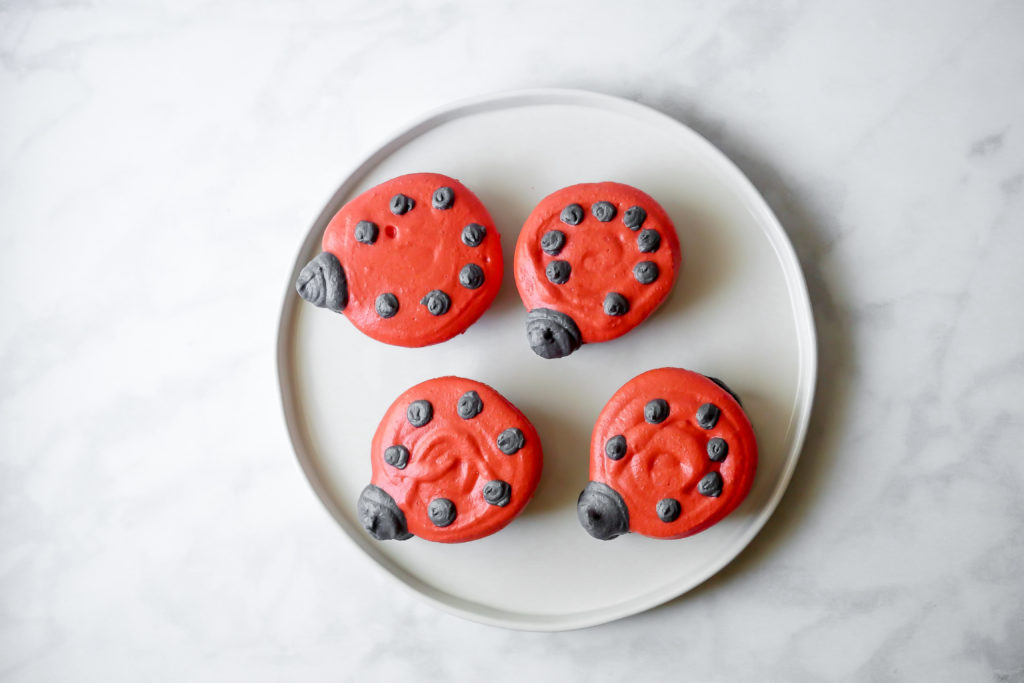
This past summer, Disneyland brought back the beloved Main Street Electrical Parade (MSEP) for a short run, ending September 30th. Besides the thousands of glittering lights, they also brought out a slew of tasty treats to commemorate the event. Like the giant Ladybug Macaron.

Main Street Electrical Parade Ladybug Macarons // magicaltreatsathome.com

This treat is not new to the park, and was last seen in 2017 during a longer run of the MSEP, and I’m sure will be ending its run at the Jolly Holiday Bakery Cafe when the parade closes. But now that we’ve recreated the recipe, you can enjoy it again until the next (hopefully longer) run of the parade returns!

Main Street Electrical Parade Ladybug Macarons // magicaltreatsathome.com

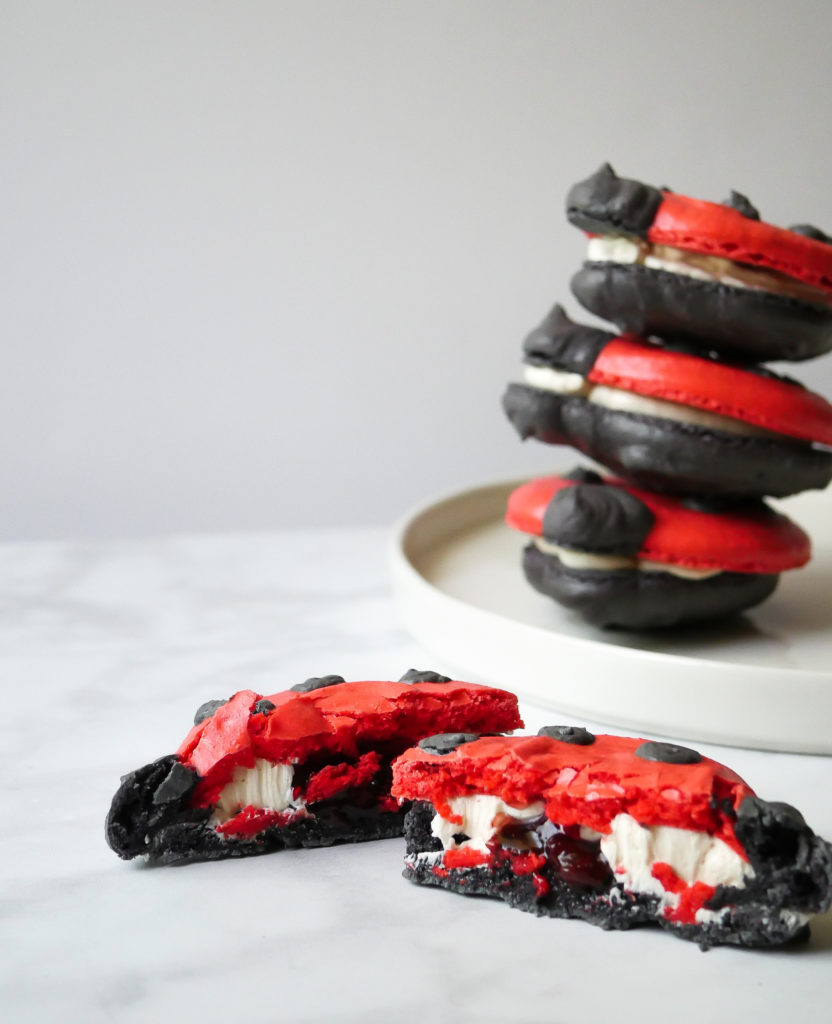
This oversized ladybug-shaped macaron is filled with strawberry buttercream, strawberry jelly, and freeze dried strawberry pieces. These are also gluten free, as the cookies are made using ground almonds and no gluten containing flour if that’s an issue.

Main Street Electrical Parade Ladybug Macarons // magicaltreatsathome.com

I’ve included some additional notes below the recipe, so please read all the way through before making these. However, I will point out that sifting the almond flour and the powdered sugar together is a must. It might seem crazy to sift it four times, but you need that amount of sifting to make sure the sugar has absorbed the oils from the almonds otherwise it will be clumpy. Also, working with egg whites means you need to have a gentle hand when folding in the mix, or even pouring in the sugar. Patience and steadiness will result in great puffy macarons.

Main Street Electrical Parade Ladybug Macarons // magicaltreatsathome.com

BONUS: Download our printable template for these Main Street Electrical Parade Ladybug Macarons below! Perfectly shaped and spaced, with outlines for both colors. Never worry about mismatched macaron halves!

Icon

4 inch MSEP ladybug template

1 file(s) 89 KB
Download

Questions? Leave them in the comments below and you’ll probably be helping out another reader! Now let’s bake!

Print
clock clock iconcutlery cutlery iconflag flag iconfolder folder iconinstagram instagram iconpinterest pinterest iconfacebook facebook iconprint print iconsquares squares iconheart heart iconheart solid heart solid icon
Main Street Electrical Parade Ladybug Macarons // magicaltreatsathome.com

MSEP Ladybug Macarons

5 Stars 4 Stars 3 Stars 2 Stars 1 Star No reviews
  • Author: Elana Lepkowski
  • Yield: 3–4 large macarons 1x
Print Recipe
Pin Recipe

Description

Oversized ladybug shaped macarons with three kinds of strawberry filling to commemorate the Main Street Electrical Parade. A Disneyland-inspired treat.


Ingredients

Scale

For the black macarons:

  • 67g (apx. 3/4 cup) almond flour
  • 90g (apx. 3/4 cup) powdered sugar
  • 52g egg whites, from about 1–1/2 eggs
  • 1/8 teaspoon cream of tartar
  • 30g (1–1/2 heaping tablespoons) granulated sugar
  • gel based black food dye

For the red macarons:

  • 645g (apx. 1/2 cup) almond flour
  • 60g (apx. 1/2 cup) powdered sugar
  • 35g egg whites, from about 1 large egg
  • 1/8 teaspoon cream of tartar
  • 20g (1–1/4 heaping tablespoons) granulated sugar
  • gel based red food dye

For the filling:

  • 35g egg whites, from about 1 large egg
  • 1/4 cup (52 g) sugar
  • pinch salt
  • 1/2 teaspoon of vanilla extract
  • 1/2 teaspoon of strawberry extract (or bakery emulsion)
  • 4 ounces (1 stick) unsalted butter, cut into small pieces
  • 2 tablespoons strawberry jelly or jam
  • 1 teaspoon freeze dried strawberry pieces

Special Tools:

  • mesh strainer
  • pastry bags

Instructions

For the black macarons:

  1. First sift the almond flour, powdered sugar, and salt back and forth four times between two bowls using a mesh strainer. Set aside.
  2. Line a baking sheet with parchment. Set aside.
  3. In the bowl of a stand mixer fitted with the whisk attachment, add in the egg white and whisk until slightly foamy. Add in the cream of tartar and whisk until soft peaks appear. Then slowly pour in the sugar. Whisk on high until stiff peaks form.
    Main Street Electrical Parade Ladybug Macarons // magicaltreatsathome.com
  4. Add in four drops of the black food coloring to the egg whites and slowly whisk to combine. Remove the bowl from the mixer.
  5. Sift a third of the dry mixture into the colored egg whites and fold until barely incorporated, about 10 turns. Repeat twice with remaining dry mix. Fold until batter forms a ribbon when dropped into bowl.
  6. Add about 1/4 of the batter into a piping bag and set aside. Pour remaining batter into a new piping bag and cut the tip off the bag. You want it large enough to pipe out the large ladybugs.
  7. Pipe the bottom lady bug shape onto a parchment lined baking sheet. Let the batter sit about 1 hour.
  8. Preheat your oven to 350°f. Place cookies in oven to bake, and lower the temperature to 300°f. Cook for 17-18 minutes.
  9. Let the macarons cool at least 20-30 minutes before decorating.

For the red macarons:

  1. Follow steps 1-5 above, adding in RED food coloring instead of the black.
  2. Place all the batter into a piping bag, cut the tip of the bag, and pipe out the top ladybug halves as circles.
  3. Using the black macaron batter that was set aside, pipe heads and spots on the red batter to represent ladybugs.
  4. Again, let batter sit for one hour and follow cooking directions from above.
    Main Street Electrical Parade Ladybug Macarons // magicaltreatsathome.com

For the filling:

  1. First make the Swiss strawberry buttercream frosting by stirring the egg whites, sugar, and salt together over a double boiler (or bowl set over simmering water on the stove), until temperature reaches 160°f.
  2. Pour heated egg whites into the bowl of a stand mixer and beat until stiff peaks form.
  3. When the bowl is cool to the touch, add the butter, one piece at a time, whipping between pieces to incorporate butter, but not fully mixing it in.
  4. Next, add in vanilla and strawberry extracts. Whip everything on high until smooth.
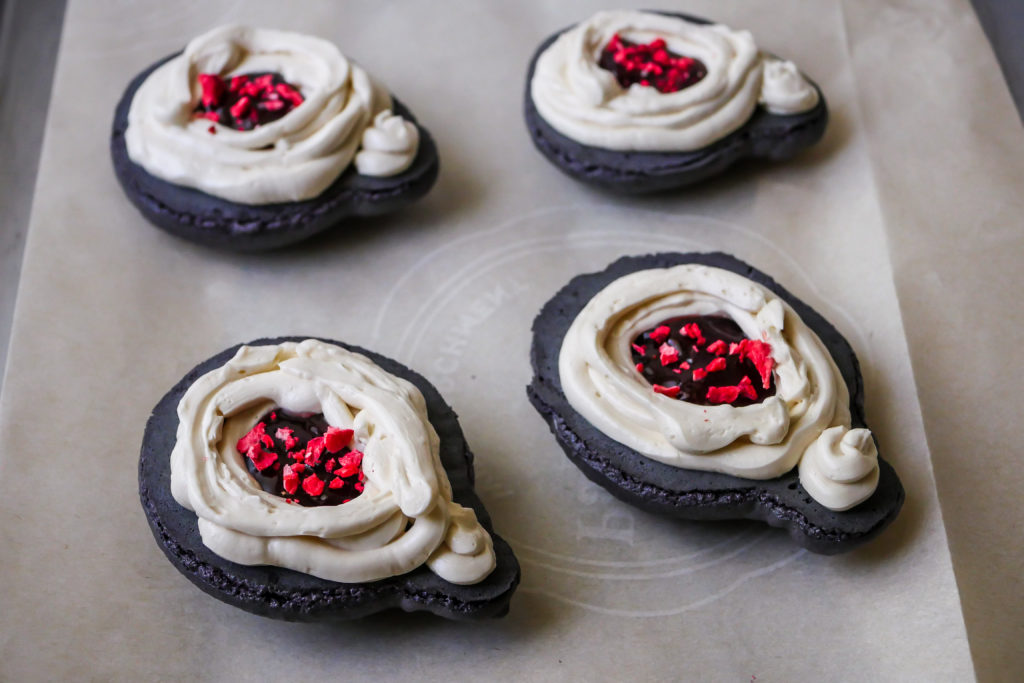
  5. Place the frosting in a piping bag and pipe out along inside edges of the black macarons, leaving a center well to fill with the jam. *You may have leftover frosting. Storage instructions in notes below.
  6. Fill well with strawberry jelly/jam and sprinkle freeze-dried strawberry pieces on top.
  7. Attach top and enjoy!

Notes

  • Sifting the almond flour and powdered sugar together is necessary for the absorption of oils and to prevent clumping of batter.
  • Using gel based food coloring will give a much deeper, and vibrant color, than standard food dye.
  • Any left over macaron batter can be piped into smaller cookies and baked off for 15 minutes.
  • Swiss buttercream heats the egg whites to 160°f to kill off any bacteria.
  • Leftover buttercream can be stored in the fridge up to two weeks, brought to room temperature, and whipped before using. It can also be stored in the freezer up to 3 months.

Did you make this recipe?

Tag @magicaltreatsathome on Instagram and hashtag it #magicaltreatsathome

Main Street Electrical Parade Ladybug Macarons // magicaltreatsathome.com

Share this:

  • Click to share on Facebook (Opens in new window) Facebook
  • Click to share on X (Opens in new window) X

Like this:

Like Loading...

Filed Under: Gluten Free, Recipes, Treats Tagged With: buttercream frosting, disneyland, gluten free, ladybug, macarons, Main Street Electrical Parade, strawberry, treat

Cheshire Cat Tails

August 5, 2019 by Elana Lepkowski 2 Comments

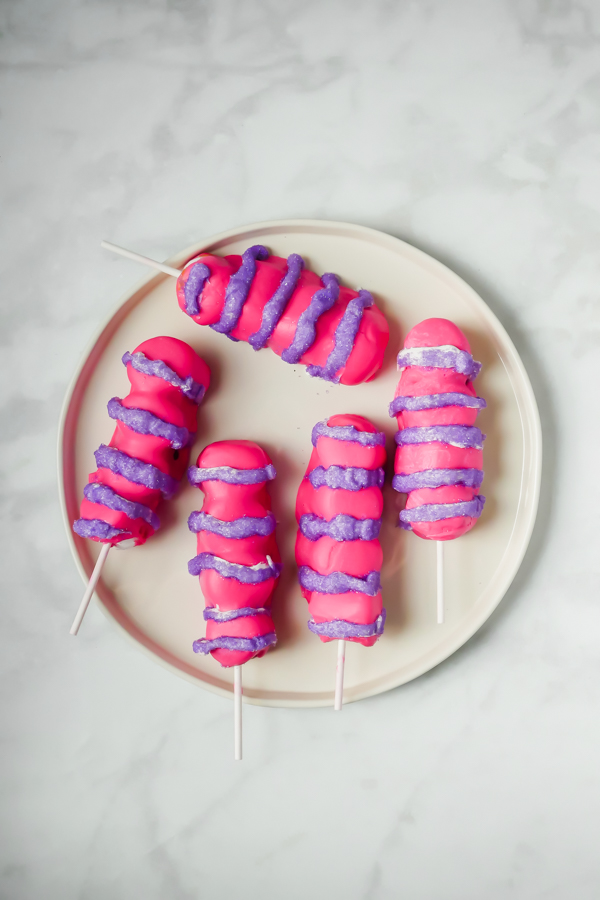
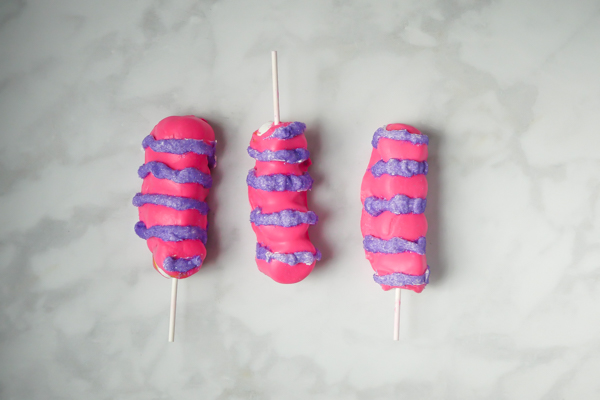
Cheshire Cat Tail // magicaltreatsathome.com

Where can I find the original treat?

  • These treats can be found at the Candy Palace on Main Street in Disneyland.

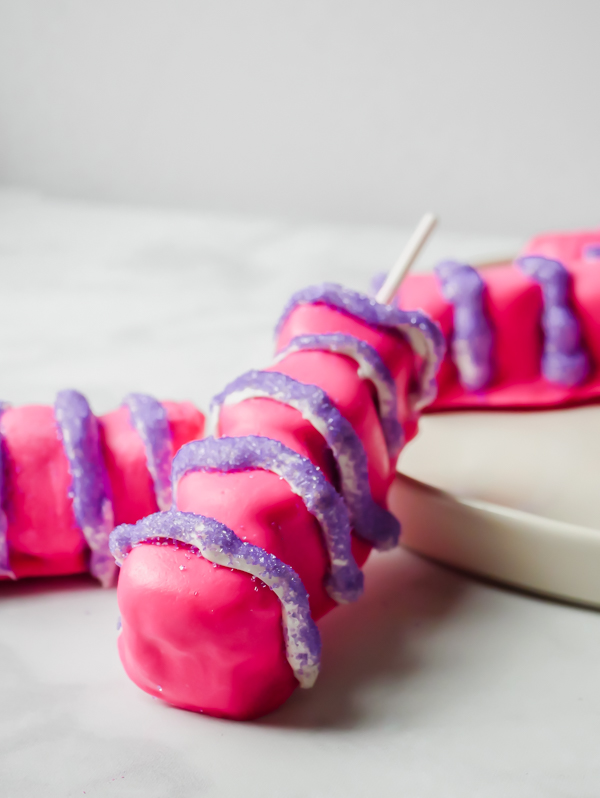
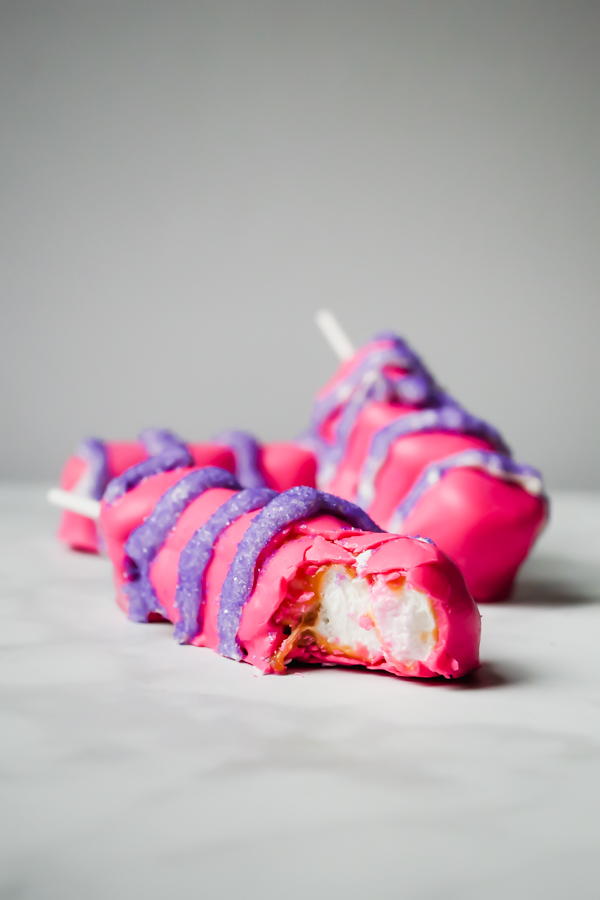
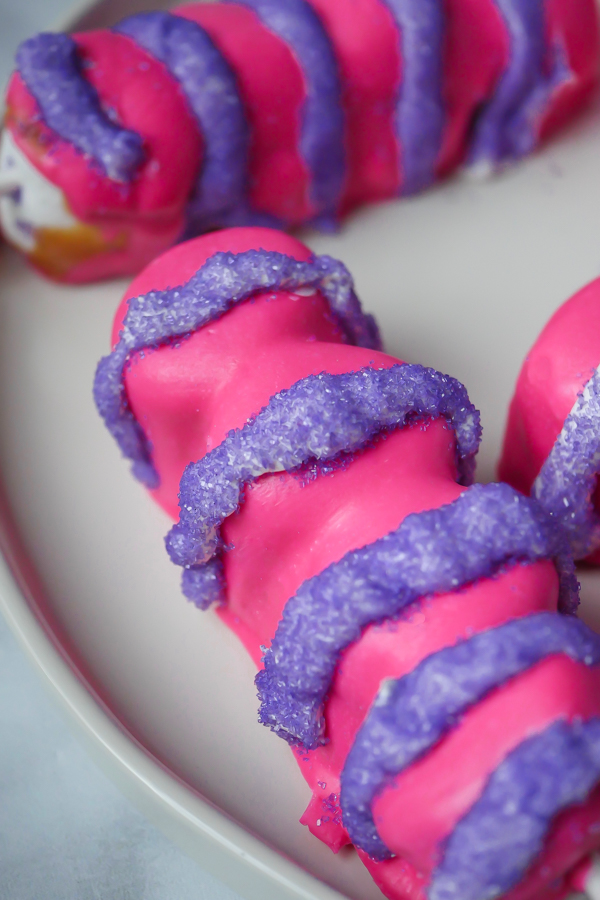
These sweet treats, based on the iconic pink and purple coloring of Alice in Wonderland’s Cheshire Cat, are more than meets the eye. At its base, it’s a marshmallow wand, enrobed in a layer of caramel, and then dipped in pink colored white chocolate. The white chocolate is strawberry flavored, and the whole thing is finished with stripes of purple sanding sugar held on with white chocolate.

Cheshire Cat Tail // magicaltreatsathome.com
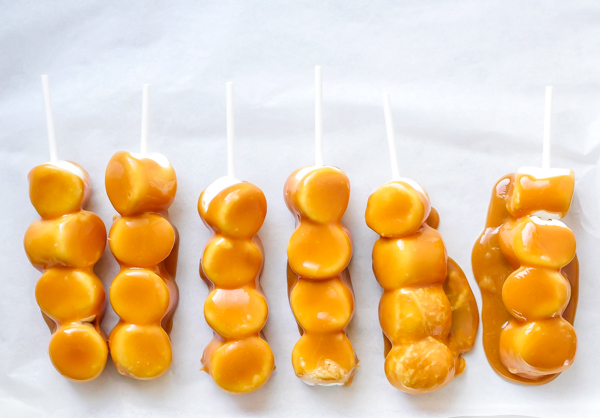
Wands on the left have have had excess caramel removed. Wands on the right were placed immediately onto sheet without excess caramel removed.

While these marshmallow wands might seem straightforward, there is actually a lot of temperature control needed, as well as precise ingredients. Why? Because we’re dealing with caramel and chocolate.

Now, admittedly I started this recipe off with the wrong caramel recipe. See, I have this super yummy salted caramel recipe that I love. So without thinking I started there and only when I tried to dip the marshmallows in it, and it just started falling off the marshmallows, did I realize that this yummy recipe was in fact the wrong type of caramel. A soft, liquid-y caramel is not what one wants here for two reasons. One, well, it falls off the marshmallows and does not become fully solid. And two, when the not fully solid caramel hits the very warm white chocolate… it all just melts off into a puddle. Yuck.

Cheshire Cat Tail // magicaltreatsathome.com

So, melting caramels are a good bet here. And on second try this was the perfect solution to getting a firm caramel that held up to being dipped in warm chocolate. Alternatively, there are homemade caramel recipes out there that will become solid, you’ll just need to use that type of recipe. Usually there is corn syrup in it.

With melting chocolate, there are a few factors you need to remember. First, the type of chocolate you’re using will determine how hot you can get your temperature. White chocolate, which isn’t technically chocolate, should not go above 110°f. If you temper your chocolate you will lose its temper and you also risk burning your chocolate if you get it too hot. Also, if you get your chocolate too hot, it will start to “break” when you try to coat items like these caramel covered marshmallow wands. Check out the notes below the recipe for tips dealing with this if it happens. The trick with coating is to get it warm enough to drip off your spoon and keep it warm, not hot, for even coating.

Cheshire Cat Tail // magicaltreatsathome.com

I did say this was a “kid friendly” recipe and you might think I have lost my mind. Molten caramel! Scalding hot chocolate! What the heck?! But really, the fun part for kids is the decorating. Older kids can dip wands into the pink white chocolate because really, at the dipping point the chocolate should not be hot enough to burn skin. And small kids will have lots of fun covering their marshmallow wands with purple sprinkles. And it’s OK if adults enjoy it just as much (I do!!).

So let’s get into the kitchen and whip up a batch of Cheshire Cat Tails! They’re sure to make you grin!

Cheshire Cat Tail // magicaltreatsathome.com
Print
clock clock iconcutlery cutlery iconflag flag iconfolder folder iconinstagram instagram iconpinterest pinterest iconfacebook facebook iconprint print iconsquares squares iconheart heart iconheart solid heart solid icon
Cheshire Cat Tail // magicaltreatsathome.com

Cheshire Cat Tails

5 Stars 4 Stars 3 Stars 2 Stars 1 Star No reviews
  • Author: Elana Lepkowski
  • Yield: 6 Cheshire Cat Tails 1x
Print Recipe
Pin Recipe

Description

These ooey-gooey marshmallow wands found at the Candy Palace at the Disneyland Resort are more than meets the eye! Sweet, buttery caramel covers a marshmallow wand while the whole treat get covered in strawberry flavored pink white chocolate and topped with purple sanding sugar stripes… just like the Cheshire Cat’s tail. A Disneyland-inspired treat.


Ingredients

Scale
  • 24 marshmallows
  • 1 eleven ounce package of individually wrapped caramels (like Kraft)
  • 2 tablespoons water
  • 11 ounces of pink candy melts
  • 1 tablespoon of coconut oil
  • 1/4 teaspoon of strawberry flavor oil (like Lorann – must be oil based not water based! See notes below)
  • 6 ounces of white candy melts
  • 1 cup purple sanding sugar
  • 6 lollipop sticks

Instructions

  1. Place four marshmallows, round side facing out, on each lollipop stick. Set aside.
  2. Place a sheet of parchment on a sheet pan. Butter it lightly and set aside.
  3. Unwrap all the caramels and add to a small saucepan. Pour water in and heat over medium-low heat.
  4. Stir constantly until everything has melted and caramels are smooth (about 7-8 minutes).
  5. Once melted (caramels should drip in a ribbon from a spoon back into the pan), dip each wand into the caramel, turning quickly to coat. Let excess caramel drip off for at least 30 seconds, turning while it drips for even coating, and then place on the buttered parchment.
  6. When all the wands have been dipped, refrigerate for thirty minutes.
  7. About 15 minutes to wands coming out of refrigerator, set up your sanding sugar station by setting out an empty wide, shallow bowl and another bowl with sanding sugar in it.
  8. Remove wands from the refrigerator. Then, in a double boiler, combine pink candy melts, strawberry flavoring, and coconut oil (this can alternatively be melted in the microwave as well. Please see notes below.). Melt over medium heat, stirring constantly until smooth. Do not let the temperature go above 110°f (you might want to use a candy thermometer if you’re unsure).
  9. Once smooth, dip caramel covered marshmallow wands in the chocolate, turning evenly to coat and fill in any gaps. Let the pink chocolate drip back into pan and lightly scrape one side on the edge of pan to remove any additional excess. Place back on buttered parchment. Repeat for all wands and let coating dry about 30 minutes.
  10. Next, melt the white chocolate (you can melt in a heavy duty piping bag as well), and create stripes on the first marshmallow wand, and immediately pour the purple sanding sugar over the stripes, letting excess catch in the empty bowl. You can press the wand lightly into sugar if you’d like a more thicker coating (I was fine with the lighter stripes). Set aside. Repeat with additional wands. If sanding sugar adheres to the pink coating, use a small brush to brush crystals away after fully dried. Then enjoy!

Notes

  • Melted caramel is HOT! Use caution in the kitchen. Do not dip your fingers or hands into the caramel has it can adhere to skin and burn you. Keep away from children.
  • Use hot water to remove caramel from pans and utensils.
  • If you wish to microwave your candy melts, combine them with strawberry flavoring, and coconut oil in a microwave safe bowl, and heat for 30 seconds on half power, stir, and continue to microwave in about 15-20 second increments until smooth.
  • If you have extra melted caramel that has dried around your wand, use kitchen shears to remove it immediately after removing from the refrigerator.
  • Did your chocolate coating break when you first dipped your wand in? Wait for the chocolate to cool down more. It should drip freely from a spoon without it seizing when the spoon is shaken slightly (will cause crevices in the chocolate on the spoon). If it breaks on the wand, your wand also might be too cool, so let them warm up more. And don’t worry, once that chocolate starts to firm up, you can dip it AGAIN into the chocolate to get a more even, although slightly thicker, coating.

Did you make this recipe?

Tag @magicaltreatsathome on Instagram and hashtag it #magicaltreatsathome

Cheshire Cat Tail // magicaltreatsathome.com

Share this:

  • Click to share on Facebook (Opens in new window) Facebook
  • Click to share on X (Opens in new window) X

Like this:

Like Loading...

Filed Under: Gluten Free, Recipes, Treats Tagged With: candy melts, Candy Palace, caramel, character treat, Cheshire Cat, disneyland, marshmallow, marshmallow-wand, strawberry, treat

Primary Sidebar

Follow Us

  • Instagram
  • Facebook
  • X
  • Pinterest
  • Email
  • YouTube

Hi! My name is Elana, and that’s me shoving a Mickey Mouse shaped treat in my face. I love the treats at Disneyland. A lot. So much so I’ve dedicated an entire website to making all my favorites, and hopefully yours too, out of my home kitchen. My aim is to create Disneyland-inspired treats, with easy to follow directions, and many recipes geared towards getting the kids in the kitchen to help too! Because putting sprinkles on things is F-U-N.

Top With Sprinkles

Get Recipes in Your Inbox!

* indicates required

Look for this icon in posts to find Kid Friendly recipes!

Recent Posts

  • Matterhorn Macaroon
  • Caramel Gingerbread Cookie Sandwiches
  • Colorful Fruit Hand Pies
  • Classic Mickey Shaped Beignets
  • Carrot Cake Cookies

Archives

  • February 2023
  • December 2022
  • August 2022
  • January 2022
  • December 2021
  • November 2021
  • December 2020
  • November 2020
  • October 2020
  • September 2020
  • August 2020
  • July 2020
  • June 2020
  • May 2020
  • April 2020
  • March 2020
  • February 2020
  • January 2020
  • December 2019
  • November 2019
  • October 2019
  • September 2019
  • August 2019
  • July 2019
  • June 2019
  • May 2019

Copyright © 2025 Magical Treats at Home on the Foodie Pro Theme

%d