• Skip to primary navigation
  • Skip to main content
  • Skip to primary sidebar

Magical Treats at Home

  • About
  • Treats
  • Drinks
  • Savory
  • Favorite Tools
  • Etsy Shop

M&Ms

Disneyland Holiday Cupcakes 2019

November 25, 2019 by Elana Lepkowski Leave a Comment

Disneyland Holiday Cupcakes 2019 // magicaltreatsathome.com

Where can I find the original treat?

  • This holiday time treat can be found at the Jolly Holiday Bakery Cafe at the Disneyland resort.

I’m having a pretty hard time this year trying to narrow down what to eat treat-wise every week at the park; the offerings this year are just so good! One of my stops is always the Jolly Holiday Bakery Cafe because the baked goods there almost never disappoint. Case in point, the Holiday Cupcake. Which is what we’re making this week!
Disneyland Holiday Cupcakes 2019 // magicaltreatsathome.com

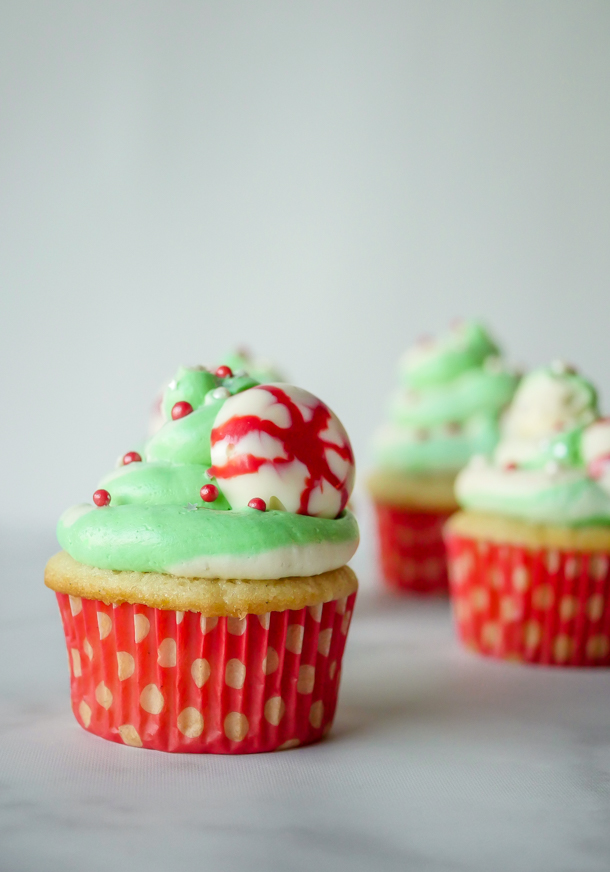
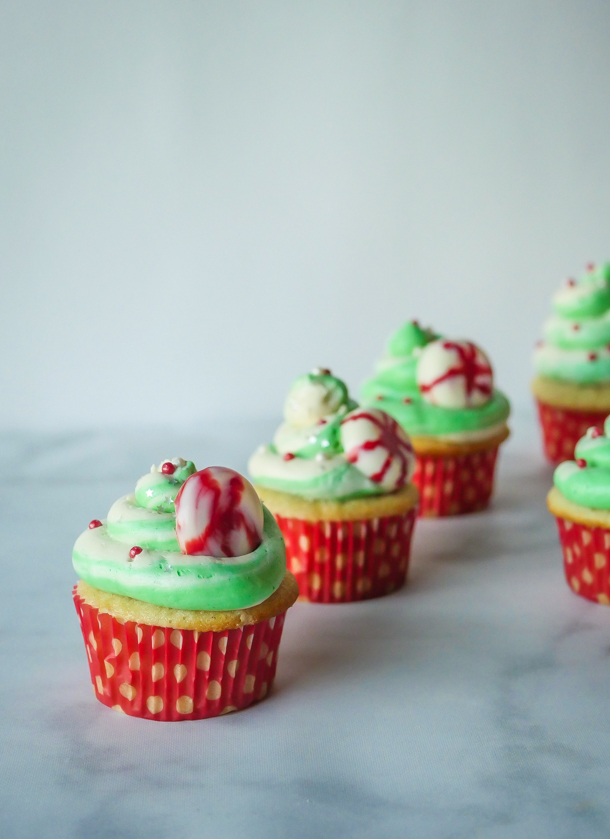
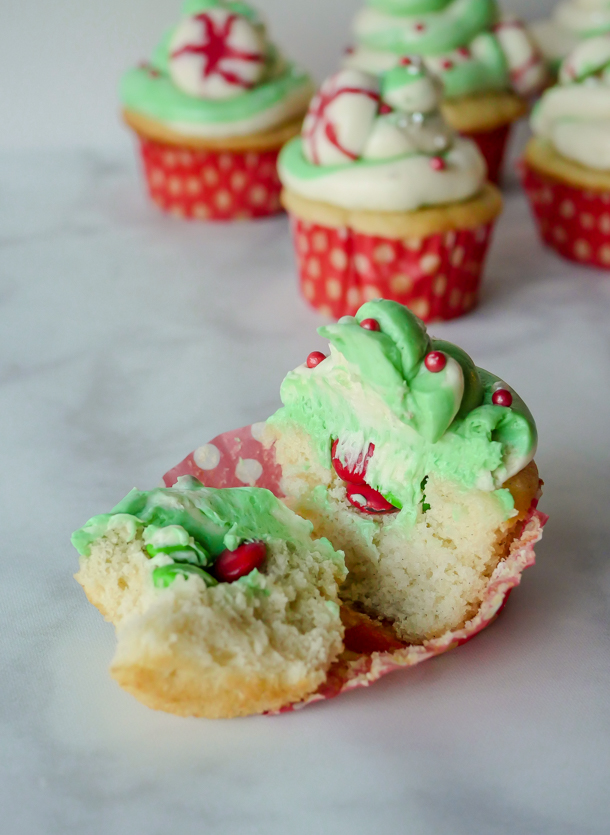
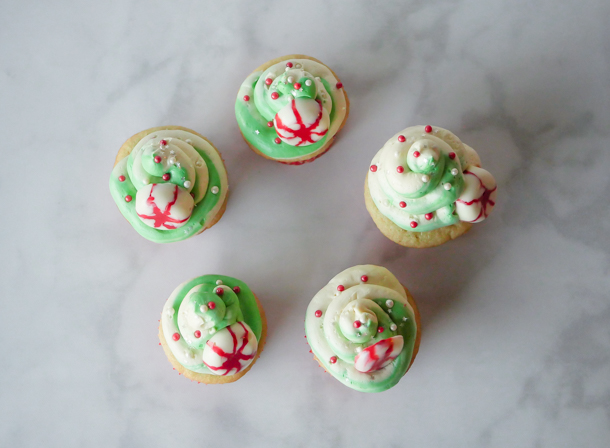
With such a nondescript name, the “Holiday Cupcake” could be anything, and what it is, is a moist vanilla bean cupcake with a tight crumb, lightly sweetened two-tone frosting, delicate red and white sugar pearl decorations, edible silver stars, a peppermint-inspired white chocolate candy, and a surprise filling of red and green M&M’s candies. What a mouthful! What could easily be a treat too sweet to finish, is actually pretty balanced in that department and I think it has to do with the lightly sweetened frosting. Landing somewhere between an Italian buttecream and Ermine frosting, it’s light like whipped cream, but stable, and very lightly sweetened.
Disneyland Holiday Cupcakes 2019 // magicaltreatsathome.com

So, for this recipe I’m going with Ermine frosting, a boiled milk style frosting, which might not be a familiar name to some people, but it’s actually been around for some time. Ermine has a whipped cream like texture when made fresh, and was the original type of frosting for red velvet cakes before the ubiquitous cream cheese frosting took over. I love to use it on cakes as a filling and outer layer, and then decorate with American buttercream for decorations as I get the sharper edges I am looking for when I want stars and lines. I hope you try the combination, people I’ve served it to love the contrast in frostings!

The vanilla cupcake base utilizes vanilla bean paste so you get to see all the tiny vanilla bean seeds throughout the cake. It’s moist but holds up to cutting as you’ll need a bit of a tighter crumb for hollowing out the center to fill with candy.
Disneyland Holiday Cupcakes 2019 // magicaltreatsathome.com

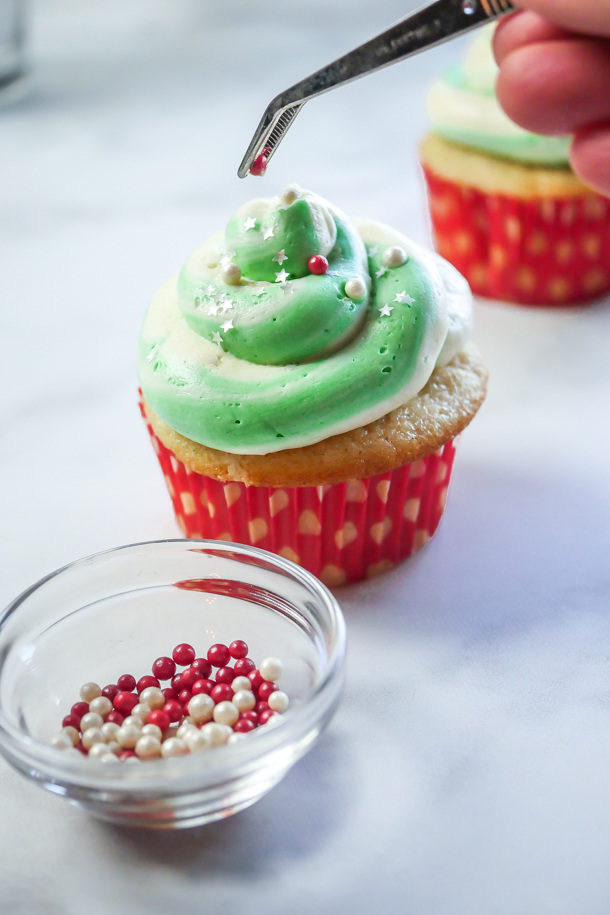
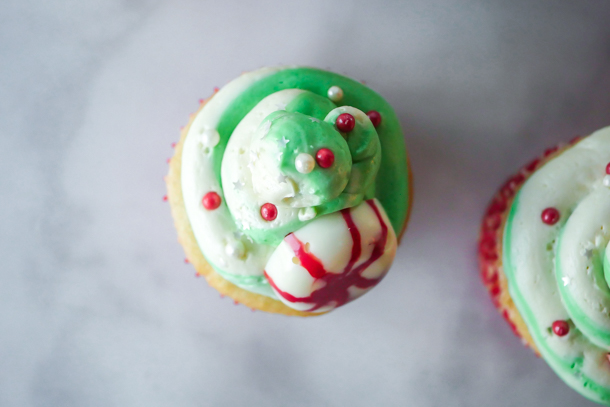
And the decorations, well, here you can go as big and bold as you want. Or tone it down too. The sugar pearls and the edible stars can easily be purchased from Amazon or your local craft store like Michael’s. The peppermint inspired white chocolates can be made at home (I know these are definitely looking homemade!), but you could also sub in an actual peppermint here too, and I think that would look pretty.
Disneyland Holiday Cupcakes 2019 // magicaltreatsathome.com

Kids can help in a few ways here. My 2-1/2 year old helped me mix the cupcakes, fill them, and decorate. But I’d say maybe 5 and up could handle piping out the frosting too.

Decorating cupcakes in such a festive way has really gotten me into the holiday spirit this year. And I hope they bring a little magic into your home and kitchen too!

Print
clock clock iconcutlery cutlery iconflag flag iconfolder folder iconinstagram instagram iconpinterest pinterest iconfacebook facebook iconprint print iconsquares squares iconheart heart iconheart solid heart solid icon
Disneyland Holiday Cupcakes 2019 // magicaltreatsathome.com

Disneyland Holiday Cupcakes 2019

5 Stars 4 Stars 3 Stars 2 Stars 1 Star No reviews
  • Author: Elana Lepkowski
  • Yield: 12 Holiday Cupcakes 1x
Print Recipe
Pin Recipe

Description

The Holiday Cupcake is a festively decorated vanilla bean cupcake topped with two-toned, lightly sweetened ermine frosting, with a candy filled surprise center. A Disneyland-inspired treat.


Ingredients

Scale

For the cupcakes (adapted from Sally’s Baking Addiction):

  • 1 and 2/3 cup (210g) all-purpose flour
  • 1/2 teaspoon baking powder
  • 1/4 teaspoon baking soda
  • 1/2 teaspoon salt
  • 1 cup (200g) granulated sugar
  • 1/2 cup (115g) unsalted butter, melted and slightly cooled
  • 2 large egg whites
  • 1/4 cup (60g) Greek yogurt
  • 3/4 cup (180ml) milk (or non-dairy milk)
  • 2 teaspoons vanilla bean paste

For the frosting (adapted from Wilton):

  • 1 cup granulated sugar
  • 1/4 cup all-purpose flour
  • 1/4 teaspoon salt
  • 1 cup cream
  • 1 cup butter, softened (2 sticks)
  • 1 teaspoon vanilla extract

For the decoration:

  • green food coloring gel (Leaf green from Americolor used here)
  • red sugar pearls
  • white sugar pearls
  • silver edible stars
  • 1 cup white melting chocolate wafers
  • 1 ounce red candy melts
  • red and green M&M’s (~72)

Specialty Tools:

  • holiday cupcake liners
  • 3/4” round cutter (I use one from this set)
  • pastry bags
  • Wilton 2A pastry tip
  • hemisphere mold

Instructions

For the cupcakes:

  1. Preheat oven to 350°F (177°C). Line muffin pan with 12 cupcake liners. Set aside.
  2. In a medium bowl, mix together flour, baking powder, baking soda, and salt. Set aside. In a large microwave-safe bowl, melt butter in the microwave. Whisk in sugar – mixture will be gritty. Whisk in egg whites, yogurt, milk or milk substitute, and vanilla bean paste until combined.
  3. Slowly mix dry ingredients into the wet ingredients until no lumps remain. Batter will be thick.
  4. Divide batter among 12 cupcake liners and bake for 20 minutes or until a toothpick inserted in the center comes out clean. Allow to cool.

For the frosting:

  1. In medium saucepan, stir together sugar, flour and salt. Whisk in cream until smooth. Cook over medium heat, stirring constantly, until very thick, about 5-7 minutes. Remove from heat and pour into medium bowl; press plastic wrap over top of mixture and sides of bowl to seal completely and prevent a skin from forming. Let cool to room temperature, about 1 to 1-1/2 hours.
  2. In a stand mixer, beat butter at medium speed for 5 minutes until light and fluffy. Slowly drizzle cream mixture into whipped butter and beat until smooth, scraping down bottom and sides of bowl often. Add vanilla and beat 3 more minutes, or until frosting reaches the consistency of whipped cream.
  3. Remove 2/3 of the frosting and spread it into a large piping bag, fitted with a Wilton 2A tip, on one side of the bag. Set aside.
  4. To the remaining frosting, add one drop of the leaf green food coloring. Whip until all the frosting is green.
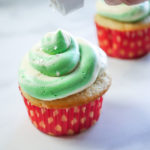
  5. To make the two tones frosting, you’ll need to spread the green frosting inside the pastry bag on top of the white cream, so that it is in two layers. Twist the bag and push the frosting towards the tip. Pipe some of the frosting out in a swirl until both colors have appeared. Set aside.

For the decorations:

  1. At least one hour before decorating the cupcakes, melt the white chocolate in the microwave inside a microwave safe bowl, like glass, for 30 seconds. Stir and microwave again for an additional 30 seconds. Keep stirring and microwaving in short bursts of 15-20 seconds until melted and smooth. Use can alternatively use a double boiler for melting. Repeat for the red candy melts and transfer them into a small pastry bag. Cut a small amount of the tip off the end.
  2. Pipe the red candy melts as lines mimicking peppermint candy swirls inside the round molds. Then pour the white chocolate over the red and, using a toothpick, swirl the two together. Refrigerate about 45 minutes to an hour. Then pop out the candies and set aside.
  3. Take the 3/4″ cutter and press firmly into the center of the cupcake. Twist and lift the cutter to remove the center. Repeat for all the cupcakes. Save the insides for cake pops, or eat them if you wish!
  4. Fill each center of the cupcake with 6 red and green M&M’s candy. Set aside and repeat with the other cupcakes.
  5. Next, pipe out a swirl of frosting on each cupcake, and then sprinkle the edible silver stars on top. Place red and white sugar pearls on the frosting.
    Disneyland Holiday Cupcakes 2019 // magicaltreatsathome.com
  6. Finally, place a peppermint inspired white chocolate (or real peppermint if you choose) on the cupcake. Enjoy!

Notes

  • If you cannot find vanilla bean paste, you can substitute vanilla extract 1:1 and scrape in some vanilla bean seeds from half a pod, or leave out the seeds entirely.
  • Store cupcakes in an airtight container at room temperature for up to 3 days and in the refrigerator up to 7.
  • The cream mixture can be refrigerated up to three days and brought to room temperature before mixing into the butter.
  • Ermine frosting can be refrigerated up to 3-4 days in an airtight container. It needs to be whipped again before using. If frosting is too cold when whipped it will appear to break. But don’t worry! Keep whipping for several minutes and it will combine and become smooth again like whipped cream.
Did you make this recipe?

Tag @magicaltreatsathome on Instagram and hashtag it #magicaltreatsathome

Disneyland Holiday Cupcakes 2019 // magicaltreatsathome.com

Share this:

  • Click to share on Facebook (Opens in new window) Facebook
  • Click to share on X (Opens in new window) X

Like this:

Like Loading...

Filed Under: Recipes, Treats Tagged With: christmastimetreats, cupcakes, ermine frosting, holiday, jolly holiday bakery cafe, M&Ms, treat, vanilla, white chocolate

Mickey Mummy Macarons

October 21, 2019 by Elana Lepkowski 1 Comment

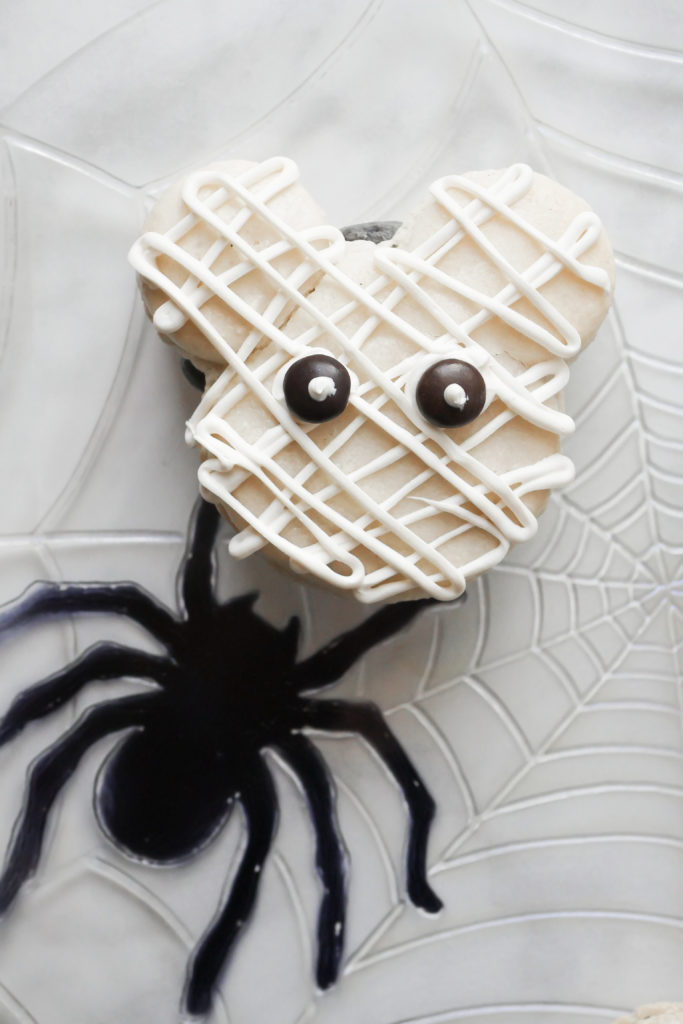
Mickey Mouse Mummy Macarons // magicaltreatsathome.com

Where can I find the original treat?

  • This treat can be found at the Jolly Holiday Bakery in Disneyland.

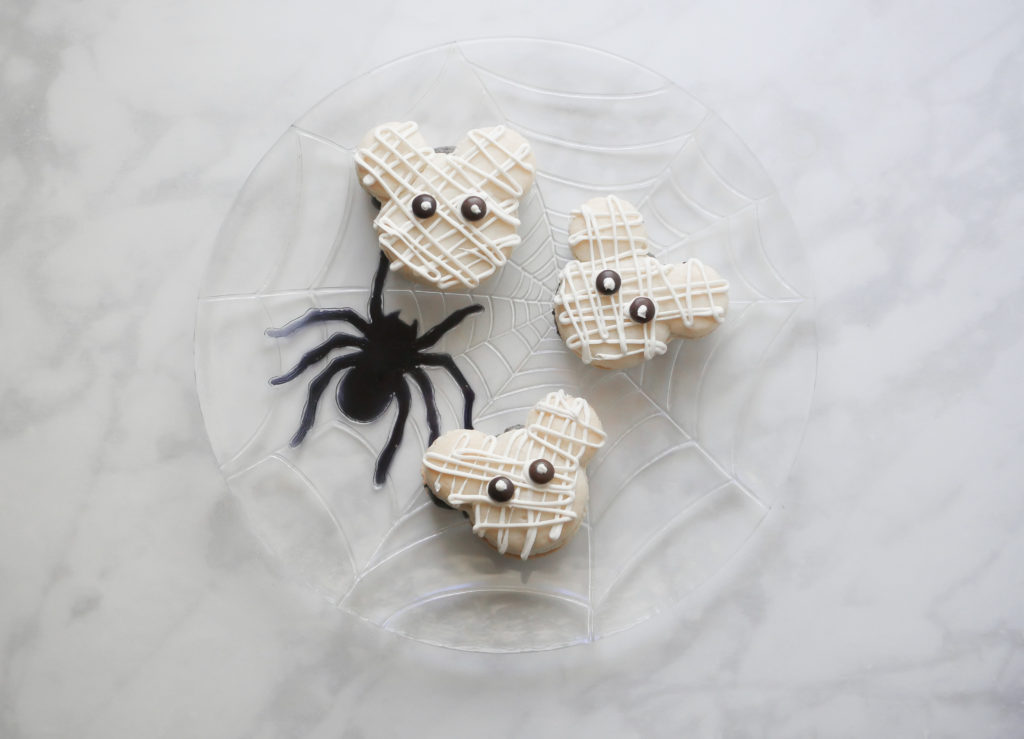
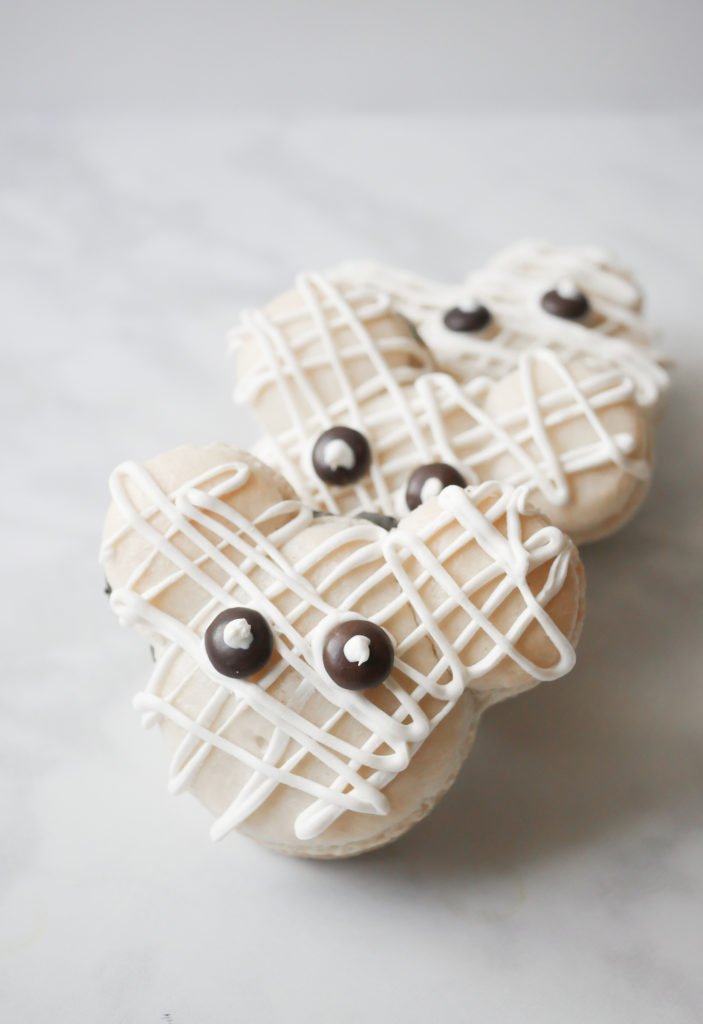
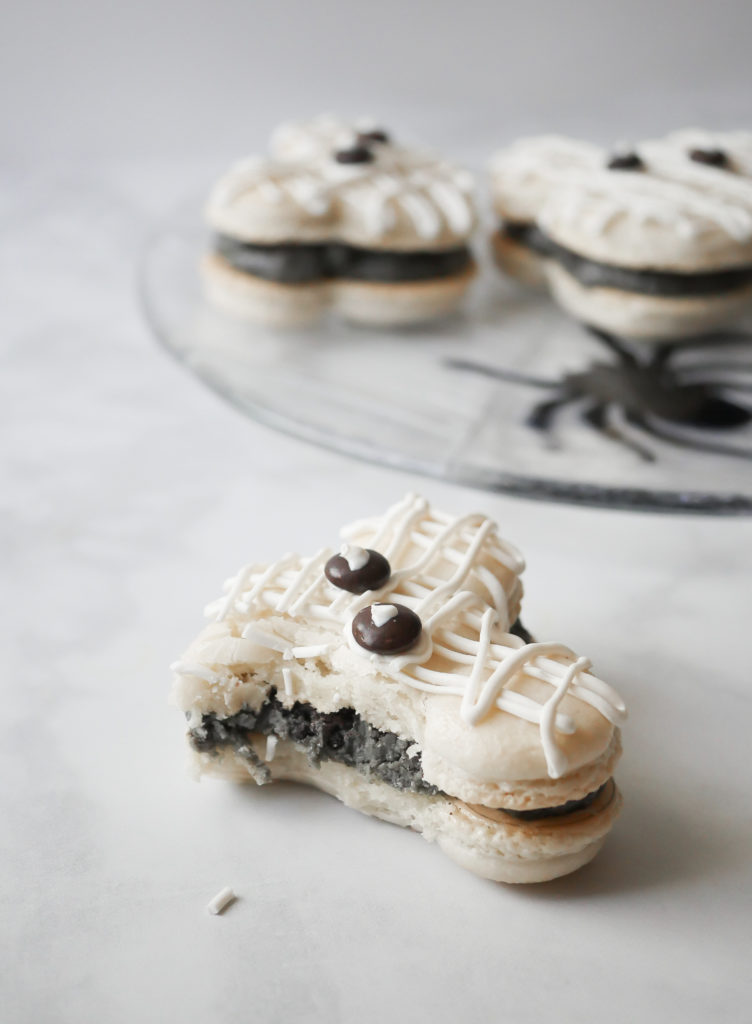
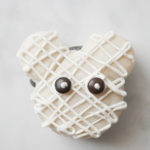
Need a spooky treat for a Halloween party? Well, these cookies and cream Mickey Mouse shaped Mummy Macarons would be a delicious addition to any cookie spread.

Mickey Mouse Mummy Macarons // magicaltreatsathome.com

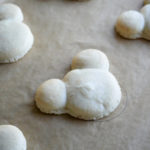
If the idea of French-style macarons scare you silly, don’t be afraid! You just need a gentle hand and these come together fairly easily. One tip I will have for making filled cookies like this, that need a top and a bottom, is that you should really use a stencil to map out how big to make them. Then they’ll all be uniform in size. Just remember to turn the parchment sheet over before you pipe them or you’ll get the outline on your cookies when you bake them (I speak from experience here. Whoops!).

Mickey Mouse Mummy Macarons // magicaltreatsathome.com

These macarons are not overpoweringly sweet. I hold back on the sugar in the actual cookie part so that you taste more of the center filling. I feel like that gives the overall treat a nice balance. If you feel like this is not sweet enough for you, feel free to add another tablespoon of sugar into the mix.

Mickey Mouse Mummy Macarons // magicaltreatsathome.com

Once these are baked, kids here can help fill and assemble them. An adult should help melt the candy melts, but since it only ever gets warm, not hot, small hands can hold the piping bag, or spoon, to help create the decorations.

BONUS: now you can create perfectly shaped Mickey macarons without a cookie cutter. Print out our 3″ Mickey Macaron template below and just slip under your parchment when piping! Easy!

Icon

3 inch mickey macaron template

1 file(s) 86.41 KB
Download

So let’s get in the kitchen and make these chewy, creamy, sweet treats for Halloween time! Boo to you!

Print
clock clock iconcutlery cutlery iconflag flag iconfolder folder iconinstagram instagram iconpinterest pinterest iconfacebook facebook iconprint print iconsquares squares iconheart heart iconheart solid heart solid icon
Mickey Mouse Mummy Macarons // magicaltreatsathome.com

Mickey Mummy Macarons

5 Stars 4 Stars 3 Stars 2 Stars 1 Star No reviews
  • Author: Elana Lepkowski
  • Yield: 3 large Mickey Mummy Macarons 1x
Print Recipe
Pin Recipe

Description

Enjoy these cookies and cream filled Mickey Mouse Mummy Macarons this Halloween season, or any time of year! A Disneyland-inspired treat.


Ingredients

Scale

For the macarons:

  • 90g (1 cup) almond flour
  • 120g (1 cup) powdered sugar
  • 70g egg whites, from about 2 large eggs
  • 1/4 teaspoon cream of tartar
  • 40g (3 tablespoons) granulated sugar

For the filling:

  • 35g egg whites, from about 1 large egg
  • 1/3 cup (67 g) sugar
  • pinch salt
  • 4 ounces (1 stick) unsalted butter, cut into small pieces
  • 1/2 teaspoon of vanilla extract
  • 3–4 Oreo cookies, crumbled into fine pieces, divided
  • 1 drop black food gel paste

Special Tools:

  • Mickey Mouse cutter

Instructions

For the macarons:

  1. First sift the almond flour, powdered sugar, and salt back and forth four times between two bowls using a mesh strainer. Set aside.
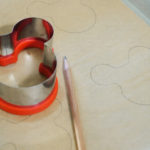
  2. Line a baking sheet with parchment. Using a pencil, trace 6 Mickey Mouses uses the cutter as a guide, leaving at least an 1″ between shapes. Flip parchment over so that you can still see outlines, but the graphite will not transfer to macarons. Set aside.
    Mickey Mouse Mummy Macarons // magicaltreatsathome.com
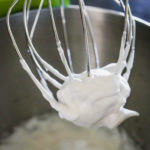
  3. In the bowl of a stand mixer fitted with the whisk attachment, add in the egg white and whisk until slightly foamy. Add in the cream of tartar and whisk until soft peaks appear. Then slowly pour in the sugar. Whisk on high until stiff peaks form.
    Main Street Electrical Parade Ladybug Macarons // magicaltreatsathome.com
  4. Sift a third of the dry mixture into the egg whites and fold until barely incorporated, about 10 turns. Repeat twice with remaining dry mix. Mix gently until all of the almond mixture has been absorbed and there are no visible lumps in batter.
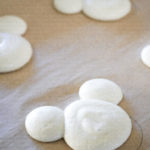
  5. Add batter into a piping bag and pipe shapes onto the parchment lined baking sheet. Let the batter sit about 1 hour.
    Mickey Mouse Mummy Macarons // magicaltreatsathome.com
  6. Preheat your oven to 350°f. Place cookies in oven to bake, and then lower the temperature to 300°f. Cook for 17-18 minutes.
  7. Let the macarons cool at least 20-30 minutes before decorating.
    Mickey Mouse Mummy Macarons // magicaltreatsathome.com

For the filling and decoration:

  1. First make the Swiss cookies and cream buttercream frosting by stirring the egg whites, sugar, and salt together over a double boiler (or bowl set over simmering water on the stove), until temperature reaches 160°f.
  2. Pour heated egg whites into the bowl of a stand mixer and beat until glossy, soft peaks form.
  3. When the bowl is cool to the touch, add the butter, one piece at a time, whipping between pieces to incorporate butter, but not fully mixing it in.
  4. Next, add in vanilla extract and black food coloring. Whip everything on high until smooth.
  5. Then, add in 2/3 of the Oreo cookie pieces and stir until well combined.
  6. Place the frosting in a piping bag (with either a round tip attached, or just the tip of the bag cut off) and pipe filling onto bottom half of the macaron. *You may have leftover frosting. Storage instructions in notes below.
  7. Sprinkle reserved cookie pieces on top of the frosting and lightly press the other macaron to top.
  8. Next, melt the white candy melts in the microwave inside a microwave safe bowl, like glass, for 30 seconds. Stir and microwave again for an additional 30 seconds. Keep stirring and microwaving in short bursts of 15-20 seconds until melted and smooth. Use can alternatively use a double boiler for melting.
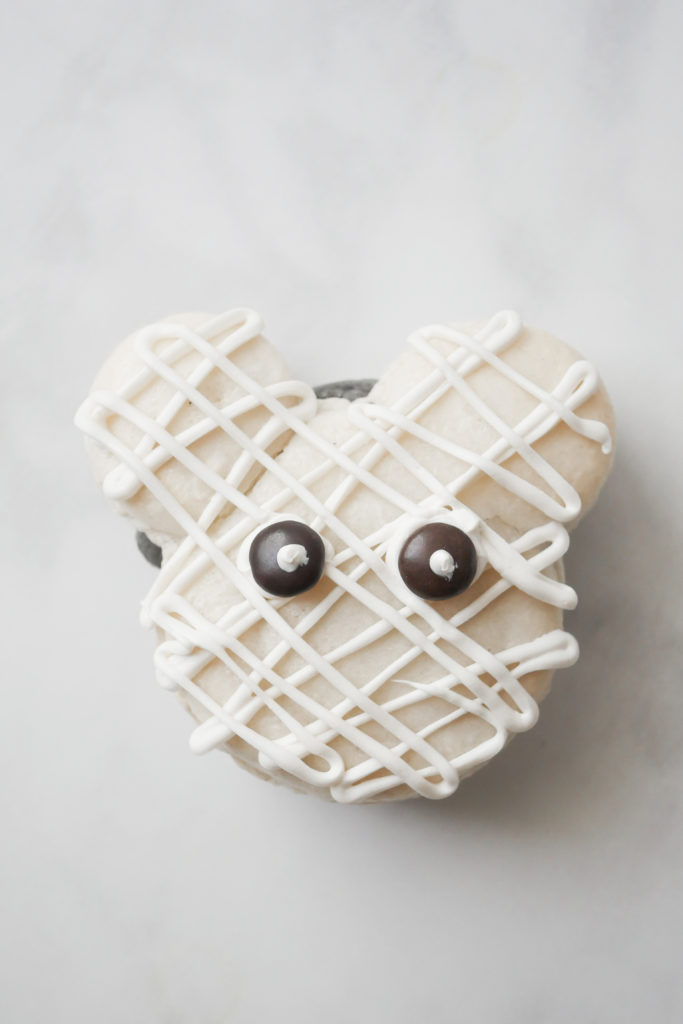
  9. Transfer to a piping bag with the tip cut off, or using a spoon, drizzle over the top of the macaron in a crisscross pattern.
  10. Put two small dots of candy melts where you want the eyes and place the M&M’s there. Then make a small dot in the center of the M&M’s.
  11. Let the macarons set for about 15-20 minutes then enjoy!

Notes

  • Sifting the almond flour and powdered sugar together is necessary for the absorption of oils and to prevent clumping of batter.
  • Any left over macaron batter can be piped into smaller cookies and baked off for 15 minutes.
  • Swiss buttercream heats the egg whites to 160°f to kill off any bacteria.
  • Leftover buttercream can be stored in the fridge up to two weeks, brought to room temperature, and whipped before using. It can also be stored in the freezer up to 3 months.
  • Macarons can be stored in the refrigerator up to one week. Let them sit 10-15 minutes to come to room temp before enjoying.

Did you make this recipe?

Tag @magicaltreatsathome on Instagram and hashtag it #magicaltreatsathome

Mickey Mouse Mummy Macarons // magicaltreatsathome.com

Share this:

  • Click to share on Facebook (Opens in new window) Facebook
  • Click to share on X (Opens in new window) X

Like this:

Like Loading...

Filed Under: Gluten Free, Recipes, Treats Tagged With: character treat, chocolate, cookies, fall-halloween, gluten free, Halloween, M&Ms, macarons, Mickey Mouse, Oreos, treat, white chocolate

M&M’s Mickey Mouse Rice Krispie Treats

August 19, 2019 by Elana Lepkowski 1 Comment

Mickey M&M's Rice Krispie Treat // magicaltreatsathome.com

Where can I find the original treat?

  • These treats can be found all over the Disneyland Resort.

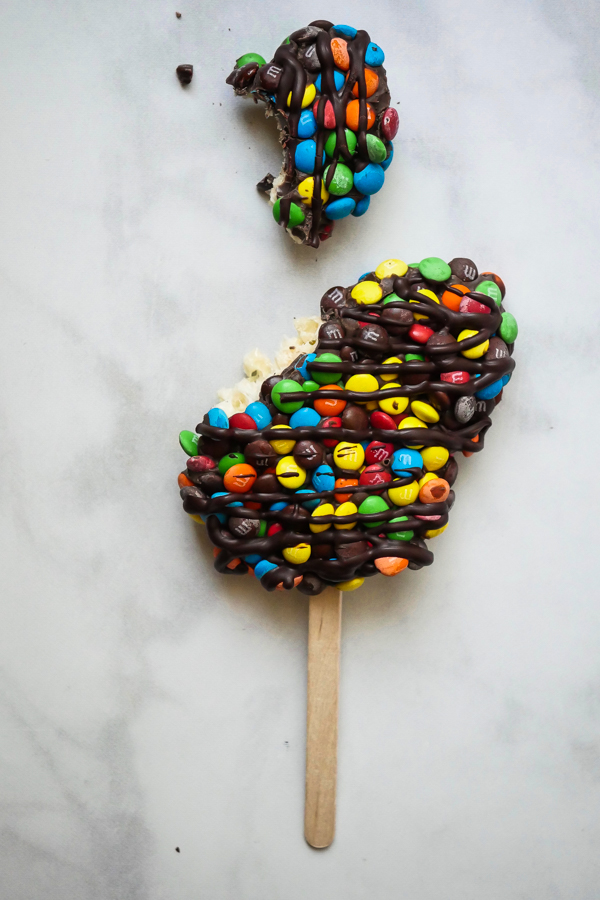
I love a rice krispie treat and the Disneyland resort does not shy away from several varieties on their property. It’s been a few months since making the Minnie Mouse Rice Krispie treats, so I thought it was about time we all made another of these fun, kid friendly, treats.

Mickey M&M's Rice Krispie Treat // magicaltreatsathome.com

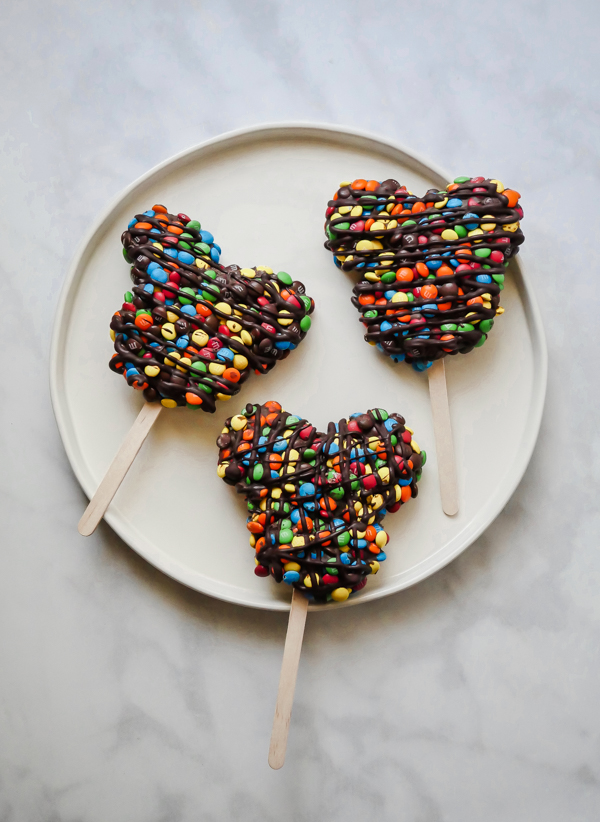
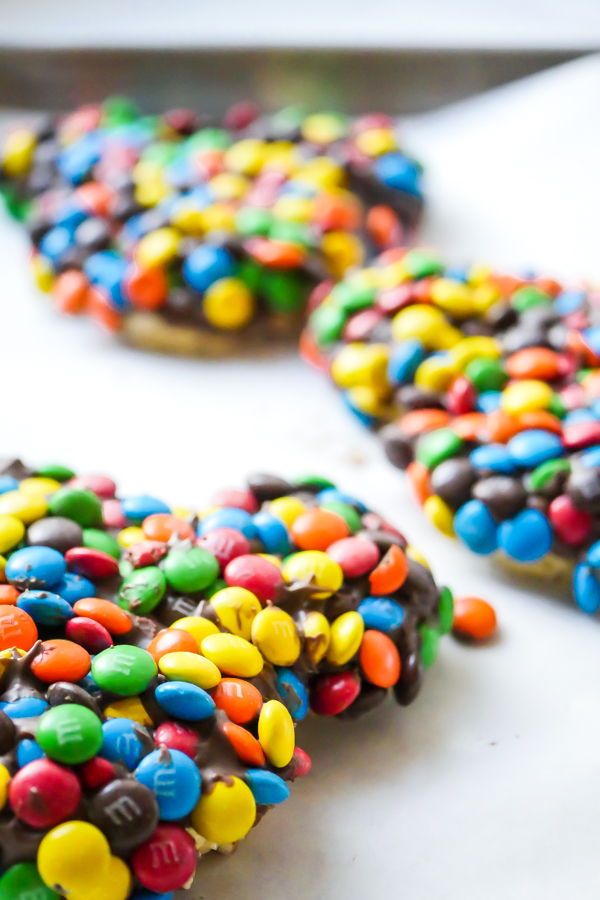
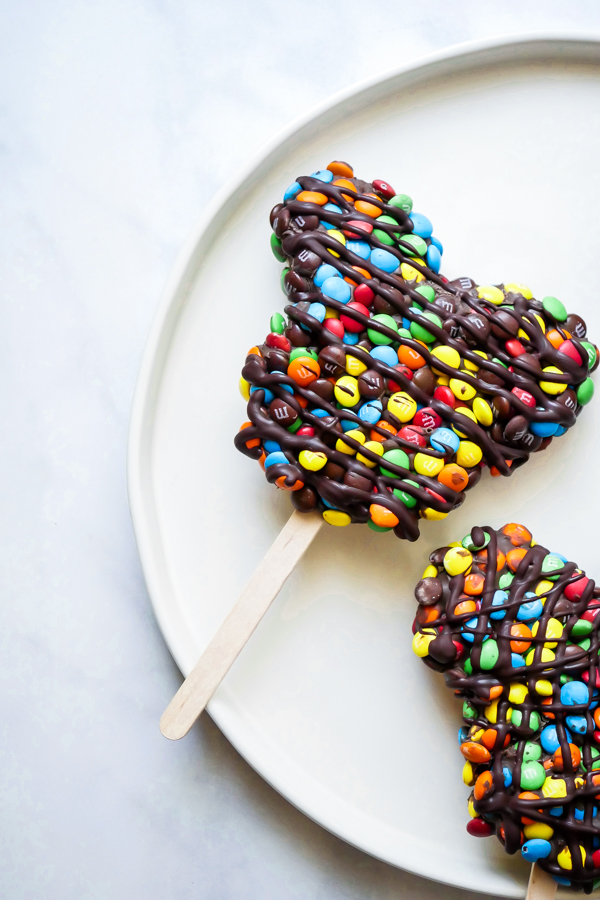
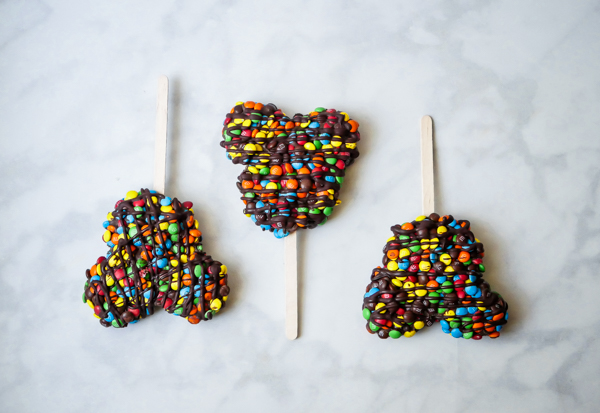
Using a standard rice krispie base, these treats are then dipped into milk chocolate, and then dunked into a sea of mini M&M’s, covering the entire front of the treat in tiny candies. And if that didn’t sound good enough already, then the whole thing gets a nice drizzle of semisweet chocolate. Because, why not?

Mickey M&M's Rice Krispie Treat // magMickey M&M's Rice Krispie Treat // magicaltreatsathome.com
Mickey M&M's Rice Krispie Treat // magicaltreatsathome.com

Actually, that drizzle helps secure many of those mini M&M’s from falling off, and it’s a nice little contrast in chocolate from the milk chocolate holding the candies on. This recipe makes 3 treats, but the beauty of this particular recipe is that is doubles, and even triples, easily (just use the multiplier option in the recipe below!).

Mickey M&M's Rice Krispie Treat // magicaltreatsathome.com

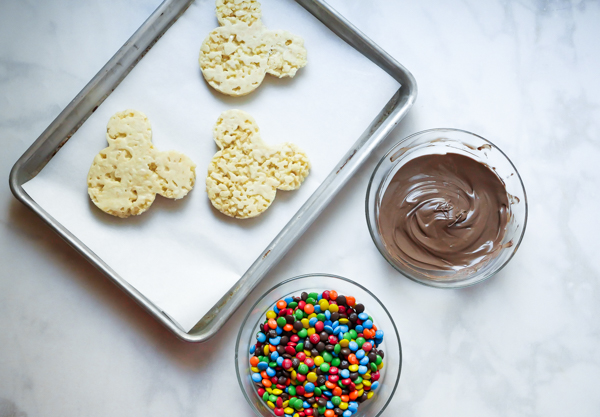
If you’re new to making rice krispie treats, or working with marshmallows, be sure to read the notes at the end of the recipe. There’s some helpful tips! Also, this recipe qualifies as “kid friendly” for the assembly! Once the base has cooled, kids can help cut out shapes, dip into chocolate and the M&M’s, and even help drizzle the final chocolate on top. Kids love decorating treats and it’s a great way for them to get involved in the kitchen!

Mickey M&M's Rice Krispie Treat // magicaltreatsathome.com
Print
clock clock iconcutlery cutlery iconflag flag iconfolder folder iconinstagram instagram iconpinterest pinterest iconfacebook facebook iconprint print iconsquares squares iconheart heart iconheart solid heart solid icon
Mickey M&M's Rice Krispie Treat // magicaltreatsathome.com

M&M’s Mickey Rice Krispie Treats

5 Stars 4 Stars 3 Stars 2 Stars 1 Star No reviews
  • Author: Elana Lepkowski
  • Yield: 3 M&M’s Mickey Rice Krispie treats 1x
Print Recipe
Pin Recipe

Description

Crispy, chewy Mickey Mouse Rice Krispie Treats are dipped in a sea of M&M’s candies and topped with a chocolate drizzle. A sweet, Disneyland-inspired treat.


Ingredients

Scale

For the rice krispie treat:

  • 2 tablespoons butter, unsalted
  • 157 g ( 2 cups) mini marshmallows or 20 regular sized marshmallows
  • 1–3/4 cups crisped rice cereal

For the topping:

  • 3–1/2 ounces (100 g) light cocoa candy melts
  • 1 cup mini M&M’s
  • 1–1/2 ounces semisweet chocolate

Tools:

  • Mickey Mouse cutter
  • 3 Popsicle sticks

Instructions

For the rice krispie treat:

  1. Before beginning, line a 8×8″ baking pan with parchment.
  2. Combine the butter and marshmallows in a medium sauce pan over medium-low heat. Stir constantly until marshmallows have melted and mixture is smooth.
  3. Immediately dump in the crisped rice cereal and mix to combine.
  4. Pour into the prepared pan and gently press mixture into place with a rubber spatula (or damp fingers). Set aside for at least an hour in the refrigerator so that the mixture can firm up enough to cut shapes.
  5. Once firm, use parchment to lift out rice krispie treats. Use a Mickey Mouse shaped cutter to cut out shapes and set aside.

To decorate:

  1. First, melt the light cocoa candy melts in the microwave inside a microwave safe bowl, like glass, for 30 seconds. Stir and microwave again for an additional 30 seconds. Keep stirring and microwaving in short bursts of 15-20 seconds until melted and smooth. Use can alternatively use a double boiler for melting.
  2. Next, fill a shallow bowl with the M&M’s candies. Set aside.
  3. Insert a popsicle stick into each treat (this will make it easier to handle the chocolate and candies later).
  4. Dip a treat into the melted chocolate, letting any excess drip off back into the bowl, and then immediately dip into the mini M&M’s. Press firmly and then set aside candy side up. Repeat for other treats. Place treats on a piece of parchment lined sheet pan and press candies firmly into place on the treat.
    Mickey M&M's Rice Krispie Treat // magicaltreatsathome.com
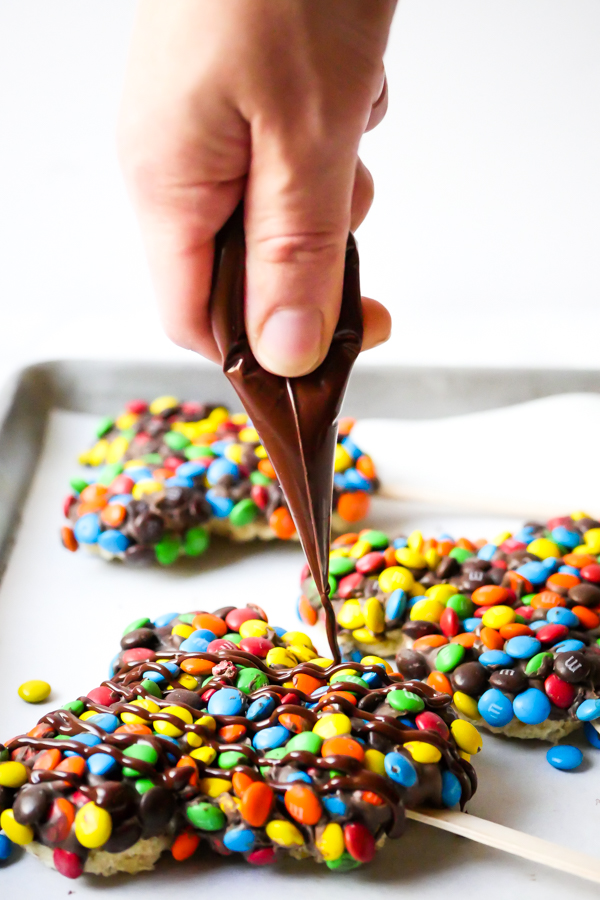
  5. Then, melt semisweet chocolate in a microwave safe bowl, like glass, for 30 seconds. Stir and microwave again for an additional 30 seconds. Keep stirring and microwaving in short bursts of 15-20 seconds until melted and smooth. Use can alternatively use a double boiler for melting. You can also melt directly in a heavy duty, heat safe, piping bag using the same microwave method (I find this easiest when I will be piping without a tip on the bag).
  6. Drizzle or pipe the semisweet chocolate across the M&M’s coated treats. Refrigerate to set about 1 hour. Enjoy!

Notes

  • Use a smaller pan than you think you’ll need for this. As the marshmallows melt into the butter, if there’s too much space in the pan they will start to dry out and form strings. Keeping the marshmallows closer together in the pan will ensure they melt more evenly, creating a better mixture to add the cereal into.
  • When mixing crisped rice cereal into the melted marshmallows, keep the mixture on the flame so that marshmallows stay liquid. Removing to mix in can seize up the liquid before the cereal is fully mixed.
  • You can combine some extra rice krispie treat scraps into the mold to shape additional Mickey Mouse treats.
  • Treats can be kept in an air-tight container for up to 3 days.

Did you make this recipe?

Tag @magicaltreatsathome on Instagram and hashtag it #magicaltreatsathome

Mickey M&M's Rice Krispie Treat // magicaltreatsathome.com

Share this:

  • Click to share on Facebook (Opens in new window) Facebook
  • Click to share on X (Opens in new window) X

Like this:

Like Loading...

Filed Under: Recipes, Treats Tagged With: chocolate, M&Ms, marshmallow, Mickey Mouse, rice krispie treat, treat

Primary Sidebar

Follow Us

  • Instagram
  • Facebook
  • X
  • Pinterest
  • Email
  • YouTube

Hi! My name is Elana, and that’s me shoving a Mickey Mouse shaped treat in my face. I love the treats at Disneyland. A lot. So much so I’ve dedicated an entire website to making all my favorites, and hopefully yours too, out of my home kitchen. My aim is to create Disneyland-inspired treats, with easy to follow directions, and many recipes geared towards getting the kids in the kitchen to help too! Because putting sprinkles on things is F-U-N.

Top With Sprinkles

Get Recipes in Your Inbox!

* indicates required

Look for this icon in posts to find Kid Friendly recipes!

Recent Posts

  • Matterhorn Macaroon
  • Caramel Gingerbread Cookie Sandwiches
  • Colorful Fruit Hand Pies
  • Classic Mickey Shaped Beignets
  • Carrot Cake Cookies

Archives

  • February 2023
  • December 2022
  • August 2022
  • January 2022
  • December 2021
  • November 2021
  • December 2020
  • November 2020
  • October 2020
  • September 2020
  • August 2020
  • July 2020
  • June 2020
  • May 2020
  • April 2020
  • March 2020
  • February 2020
  • January 2020
  • December 2019
  • November 2019
  • October 2019
  • September 2019
  • August 2019
  • July 2019
  • June 2019
  • May 2019

Copyright © 2025 Magical Treats at Home on the Foodie Pro Theme

%d