Where can I find the original treat?
- This treat can be found at the Refreshment Corner in Disneyland.
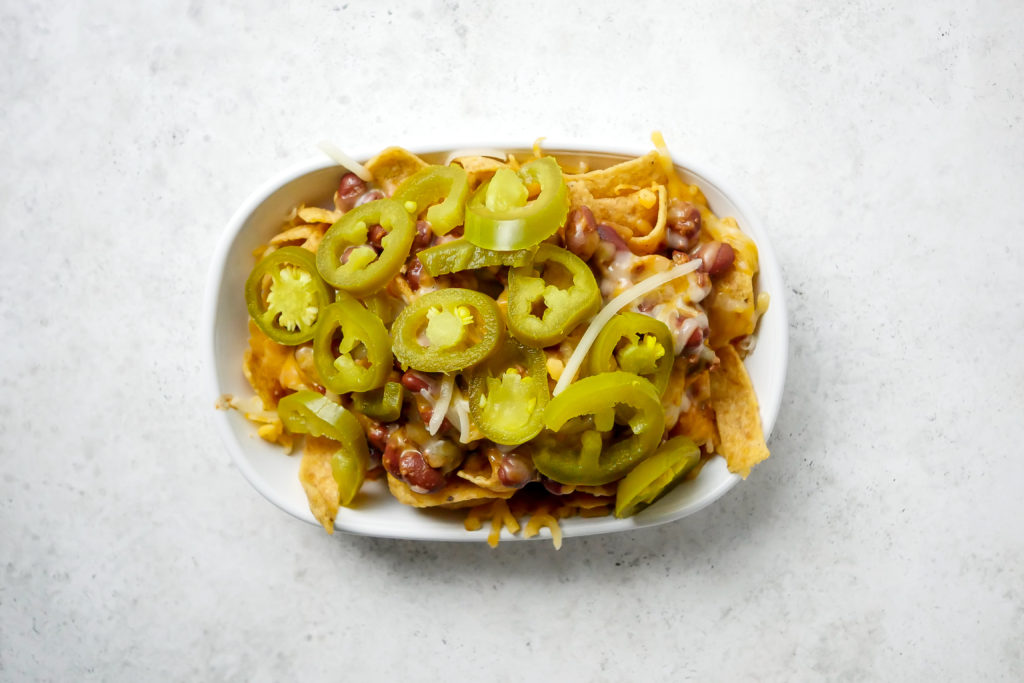
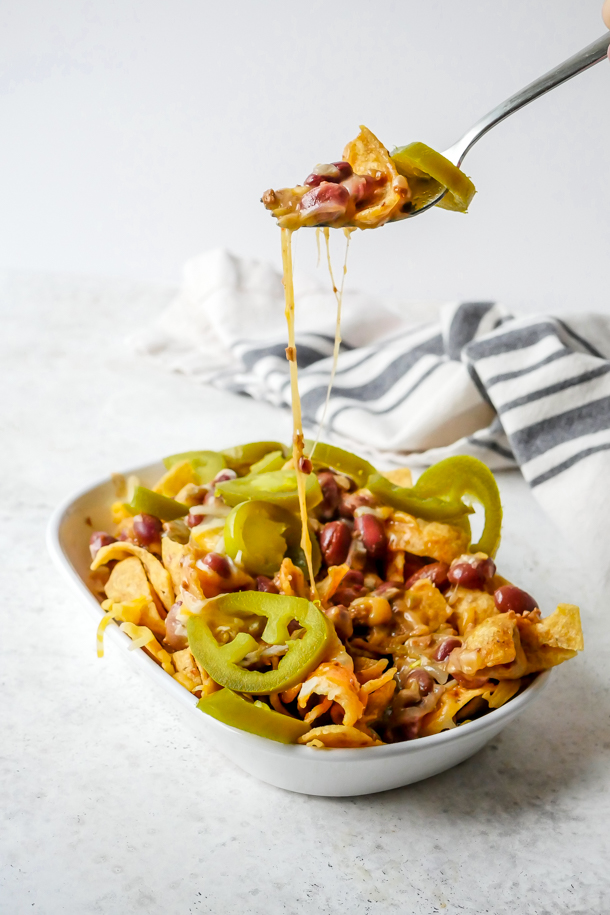
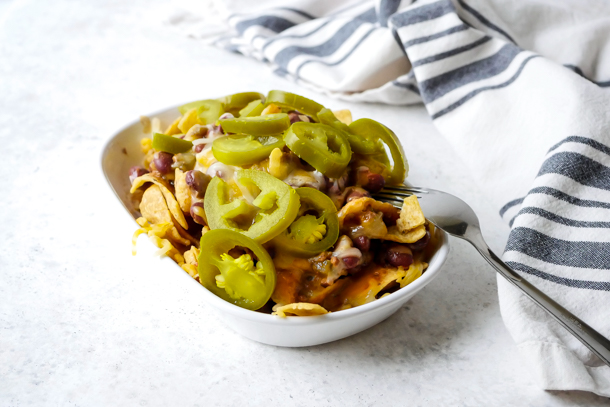
It’s not always sweet treats around here, and today we’ve got a super yummy, super spicy savory treat. If you’re a fan of Frito Pie in a Bag, then you’re gonna love these Firefly Chips!
Crunchy, salt corn chips are smothered in a bean and meat chili, and then topped with cheese and spicy jalapenos. This hits allll the right notes for me when I want a savory treat at the parks, or at home.
Now, I’m including a recipe for our favorite family chili below, but you could also turn this into a 5 Minute Treat if you opt to use canned chili instead. We love a good short cut and since you don’t need a huge amount of chili to make this, go right ahead and crack that can open if you want!
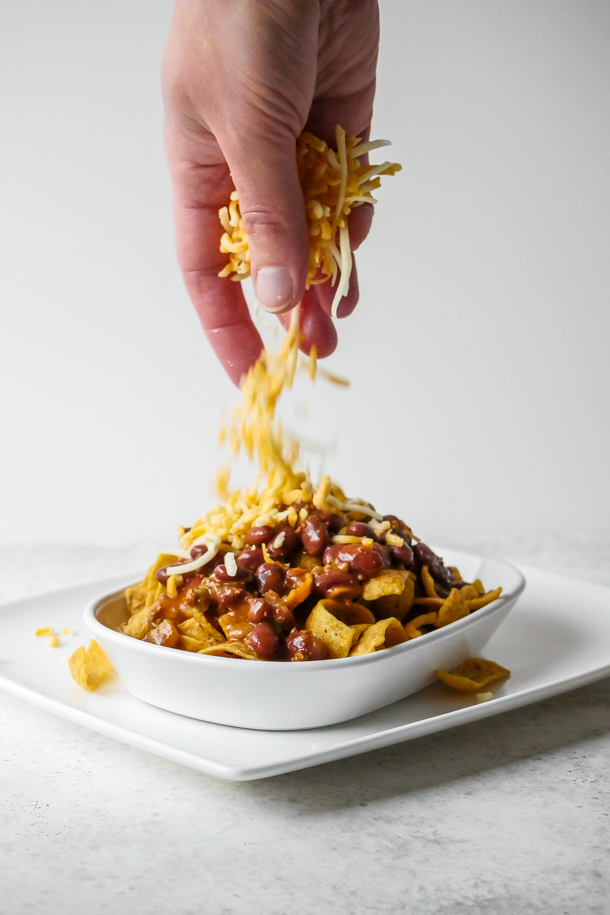
![]() I made this into a kid DIY snack station and both kids (5 and under), had a lot of fun putting on their own toppings. Sure, it’s a few more dishes to wash, but giving them these small opportunities in the kitchen I feel really helps to improve their independent kitchen skills and foster self-confidence in cooking… even if it is just piling on more cheese than anyone needs.
I made this into a kid DIY snack station and both kids (5 and under), had a lot of fun putting on their own toppings. Sure, it’s a few more dishes to wash, but giving them these small opportunities in the kitchen I feel really helps to improve their independent kitchen skills and foster self-confidence in cooking… even if it is just piling on more cheese than anyone needs.
If spicy is not your thing, there are some companies that make ‘mild’ jalapenos that have much less of a spicy factor than regular jarred ones. And if you just hate spice, well, leave ’em off! Maybe add a dollop of sour cream because that would be the delicious thing to do.
Alright, let’s make some chili!
Print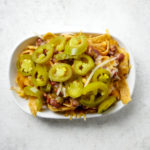
Firefly Chips
Description
These spicy, crunchy Firefly chips are layers of corn chips, meat and bean chili, shredded cheese, and jalapeno peppers! A Disneyland-inspired treat.
Ingredients
For the chili:
- 1 tablespoon avocado oil
- 1 lb. ground beef
- 1 medium yellow onion, diced
- 1–1/2 teaspoons kosher salt
- 3 cloves garlic, minced
- 2 tablespoons tomato paste
- 1 tablespoon chili powder
- 1/4 teaspoon cayenne pepper
- 1 teaspoon cumin
- 1 teaspoon Worcestershire sauce
- 1 can crushed fire-roasted tomatoes, drained
- 2 cans red or pinto beans or mix of both with liquid
- 1 cup chicken or beef broth
- salt and pepper to taste
For the Firefly chips:
- corn chips, like Fritos
- meat and bean chili (see recipe above, or canned chili is also fine)
- shredded Mexican cheese blend
- jalapeno pepper slices
Instructions
For the chili:
- In a large dutch oven, warm the avocado oil over medium-high heat.
- Add in the ground beef, breaking it up as it cooks and browns.
- Add in the yellow onion, salt, garlic, and tomato paste. Saute until onions begin to turn translucent, about 5-8 minutes.
- Next, add in chili powder, cayenne powder, cumin, Worcestershire sauce, tomatoes, beans, and broth. Bring to a boil, and then turn down to a simmer. Cover and cook about 20-25 minutes.
- Remove the cover and continue to simmer an additional 10 minutes if you’d like a thicker stew, or remove from the heat and let cool slightly before serving. Salt and pepper to taste.
To assemble the Firefly Chips:
- Pour a layer of corn chips in the bottom of a small bowl (or if you’re serving for multiple people, a serving sized bowl).
- Top with chili, shredded cheese, and jalapeno pepper slices.
- Enjoy!
Notes
- Chili can be cooled to room temperature and stored in an airtight container refrigerated up to 3 days.
- This recipe can be scaled to individual portions, or served as an appetizer to a large crowd.
- The Refreshment Corner also a hotdog topped with Firefly chips and I think you all should try doing that with this recipe at least once.