• Skip to primary navigation
  • Skip to main content
  • Skip to primary sidebar

Magical Treats at Home

  • About
  • Treats
  • Drinks
  • Savory
  • Favorite Tools
  • Etsy Shop

Candy Palace

Peanut Butter and Chocolate Cookie Pie

December 31, 2021 by Elana Lepkowski 2 Comments

Peaut Butter Chocolate Cookie Pie // magicaltreatsathome.com

Where can I find the original treat?

  • The original treat can be found at the Candy Palace in Disneyland.

We’re closing out the year squeezing this recipe in just before the clock rings midnight. While I am a huge fan of chocolate and peppermint, I know there are some of you (my husband being the most vocal) who cannot take that delicious holiday combo. So I thought I’d add in my second favorite of the cookie/brownie “pies” over at Disneyland with this yummy treat. The Peanut Butter and Chocolate Cookie Pie is both salty and sweet, and just as richly decadent as the other new treats found over at the Candy Palace. It’s big enough to share… if you want.
Peaut Butter Chocolate Cookie Pie // magicaltreatsathome.com

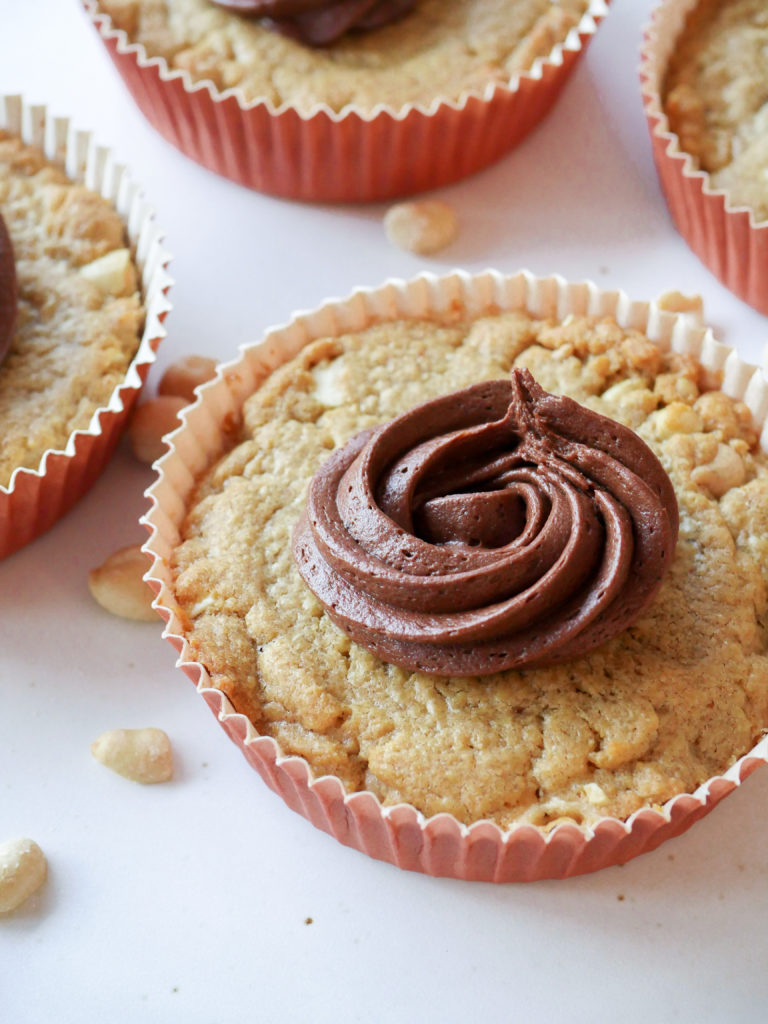
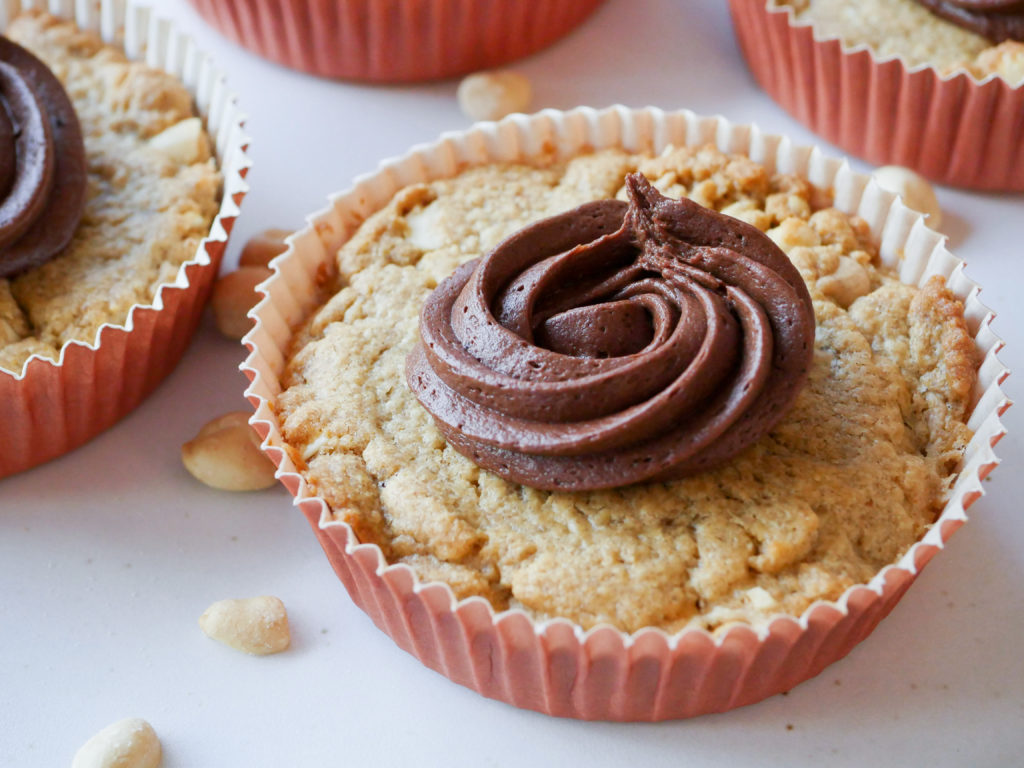
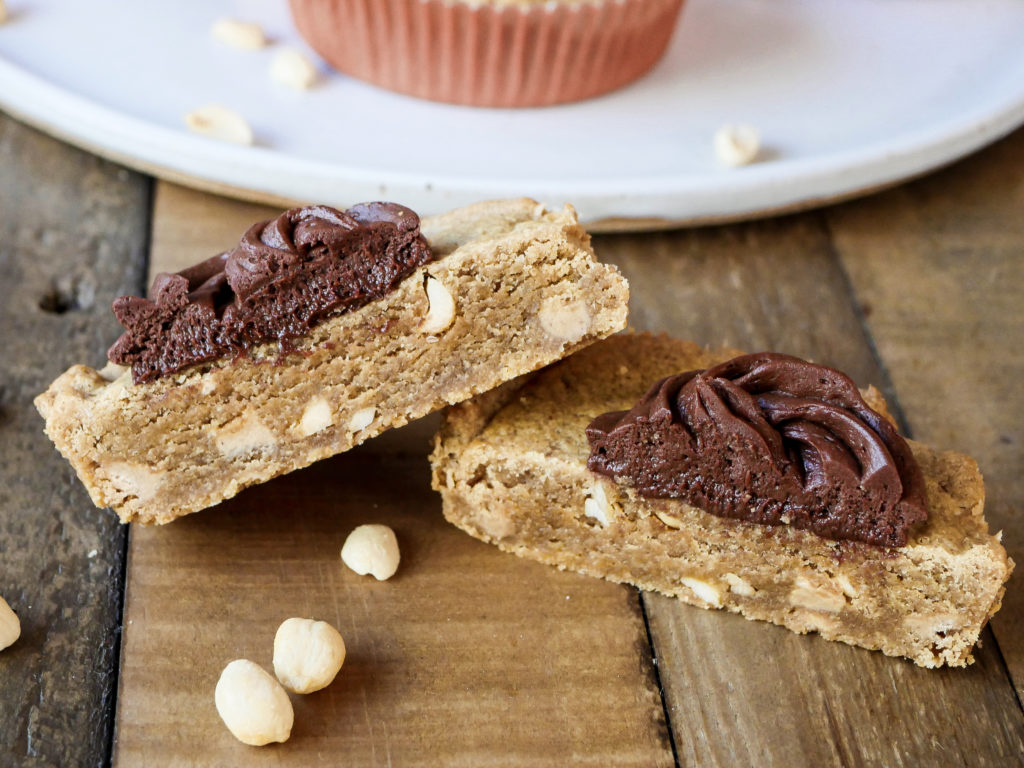
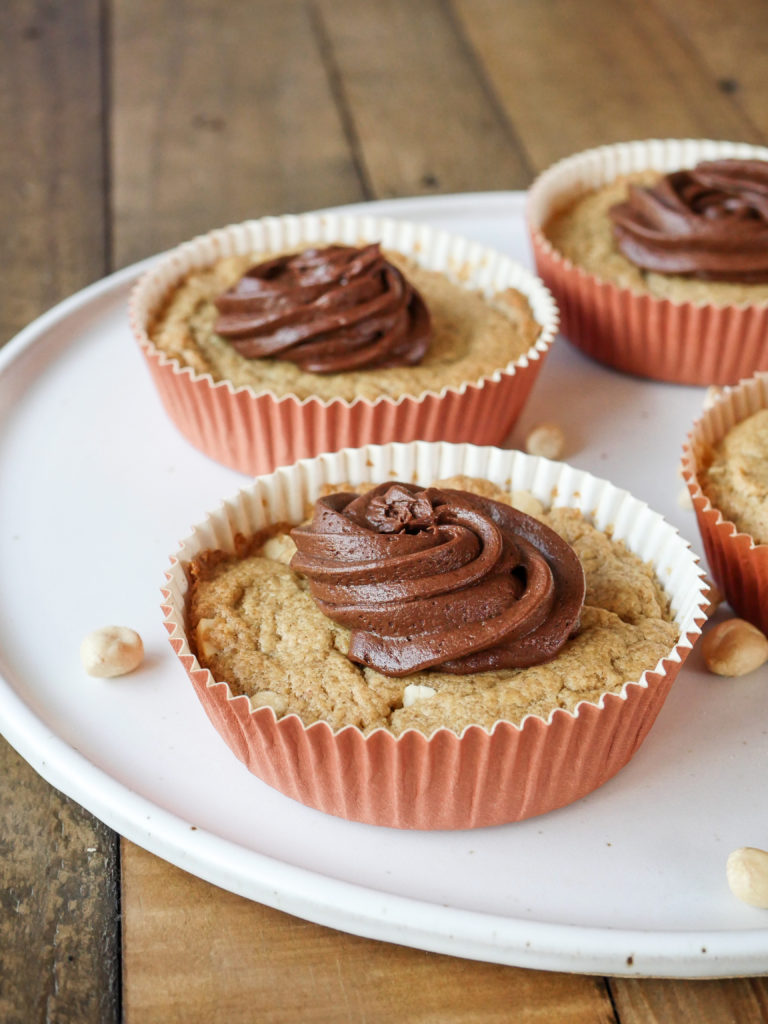
These have a similar base to the Peanut Butter Blondies, but the fillings and toppings are different. The cookie base here is chock full of peanut butter chips and chopped peanuts, topped with a swirl of fudgey chocolate frosting. I’ve pared down the recipe to make four, but if that still seems like a lot to have on hand, these will freeze well wrapped for several months.

If you’ve got kids in the kitchen, this is an all-levels recipe with opportunities for small hands to help chop, stir, and mix. We’ve been practicing piping techniques and I’ve recently been introduced to these great squeeze bulbs that are easy for kids to hold instead of the larger piping bags.
Peaut Butter Chocolate Cookie Pie // magicaltreatsathome.com

The time and temperature I’ve put in the recipe will result in the peanut butter cookie pies having a firm exterior and moist center, but not so moist as to fall apart. You can take the time down a few minutes if you prefer your cookie pies to have that very soft cookie center. How much chocolate you add to the top is also to you. Did I test one completely covered in chocolate on top? Yes, yes I did. The chocolate gives this a much needed sweet bite that complements the salty peanut butter (but don’t worry, it’s not too salty-savory). If you find that your frosting is too stiff, add a teaspoon of cream until it is soft enough for your liking.

I’ve really enjoyed these new “pies” at the parks, and I’d love to see some new treat formats in 2022. Maybe an actual pie? On a stick?
Peaut Butter Chocolate Cookie Pie // magicaltreatsathome.com

Happy New Year everyone! As always, leave us a comment here or on our socials if you’ve tried one of our recipes, or if you have one you’d like to see. Thanks for visiting and making magic in your kitchen with us!

Print
clock clock iconcutlery cutlery iconflag flag iconfolder folder iconinstagram instagram iconpinterest pinterest iconfacebook facebook iconprint print iconsquares squares iconheart heart iconheart solid heart solid icon
Peaut Butter Chocolate Cookie Pie // magicaltreatsathome.com

Peanut Butter and Chocolate Cookie Pie

5 Stars 4 Stars 3 Stars 2 Stars 1 Star No reviews
  • Author: Elana Lepkowski
  • Prep Time: 20
  • Cooling Time: 15
  • Cook Time: 26
  • Total Time: 1 hour 1 minutes
  • Yield: 4 Peanut Butter and Chocolate Cookie Pies 1x
  • Category: Dessert
  • Method: Baking
  • Cuisine: Holiday
Print Recipe
Pin Recipe

Description

The classic combination of peanut butter and chocolate create a shareable treat that satisfies both your sweet and savory tastes in this oversized cookie “pie”. A Disneyland-inspired recipes.


Ingredients

Scale

Peanut Butter Base:

  • 1 stick butter (1/2 cup)
  • 1/2 cup (120 g) creamy peanut butter
  • 3/4 cup (150 g) light brown sugar
  • 1 egg
  • 1/2 teaspoon kosher salt
  • 1 teaspoon vanilla extract
  • 1 cup (120 g) flour
  • 1/2 cup (127 g) peanut butter chips
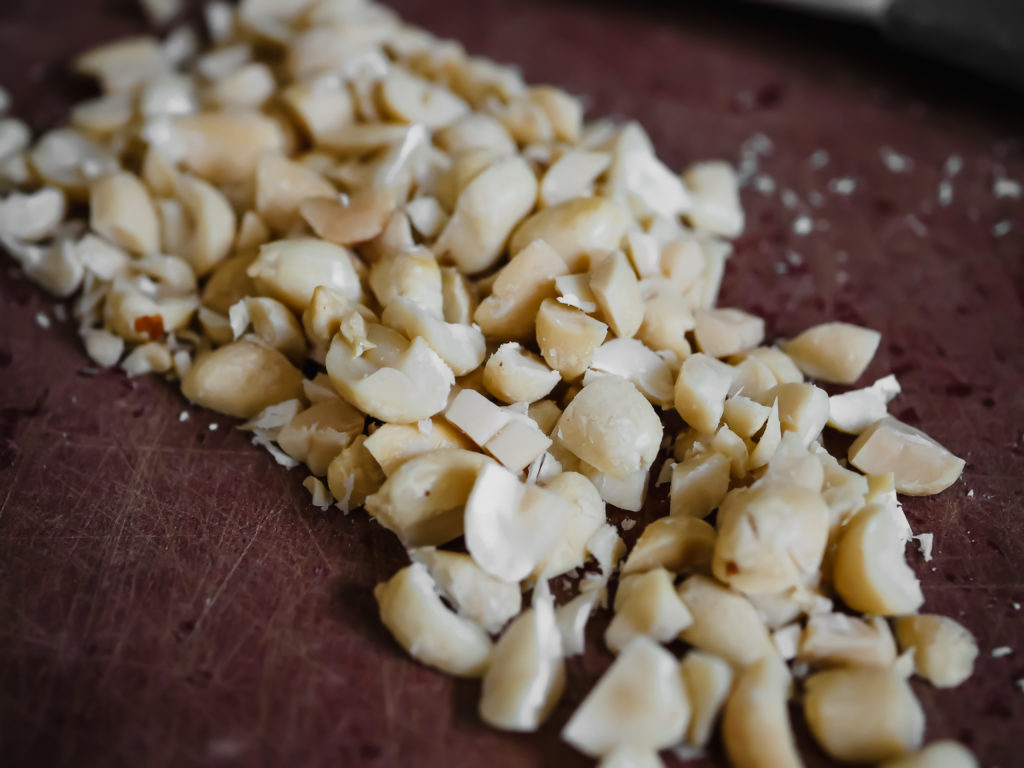
  • 1/4 cup (31 g) roasted peanuts, chopped

Fudge Frosting:

  • 1/4 cup (4 tablespoons) unsalted butter
  • 2 ounces (57 g) unsweetened baking chocolate, chopped
  • 1/2 pound (227 g) powdered sugar, sifted
  • 2 tablespoons unsweetened cocoa powder, sifted
  • 1/4 teaspoon pure vanilla extract
  • 4 tablespoons cream

Special Tools:

  • Oversized baking cups/molds
  • Wilton 1 M tip
  • Small 12″ pastry bags

Instructions

For the base:

  1. Preheat the oven to 350°f.
  2. Melt the butter in a small saucepan, or in the microwave.
  3. In a large mixing bowl, combine the melted butter, peanut butter, and brown sugar. Whisk until smooth.
  4. Mix in the egg, salt and vanilla extract until smooth.
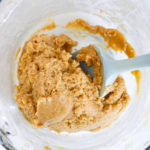
  5. Stir in the flour until just combined.
    Peaut Butter Chocolate Cookie Pie // magicaltreatsathome.com
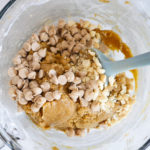
  6. Fold in the peanut butter chips and chopped peanuts.
    Peaut Butter Chocolate Cookie Pie // magicaltreatsathome.com
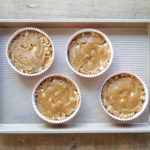
  7. Pour the mixture into 4 of the baking cups (the mixture will be on the stiff side), and smooth the tops.
    Peaut Butter Chocolate Cookie Pie // magicaltreatsathome.com
  8. Bake for 25-30 minutes.
    Peaut Butter Chocolate Cookie Pie // magicaltreatsathome.com
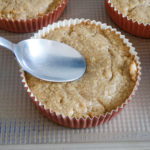
  9. When done, let fully cool before frosting. To help create a space for the frosting to sit, depress the center of the cookie pies with the back of a spoon.
    Peaut Butter Chocolate Cookie Pie // magicaltreatsathome.com

For the fudge frosting and finishing:

  1. Melt butter and chocolate in a double boiler, or microwave, in a heat proof bowl. For a double boiler, stir constantly over a low simmer until melted and smooth. If using a microwave, do short bursts of 15-20 second intervals, stirring in-between, until fully melted and smooth.
  2. Stir together the powdered sugar, cocoa powder, and melted chocolate and butter. Add in the vanilla extract and cream.
  3. Whip together on medium high speed (8), until well combined and smooth.
  4. Transfer frosting to a piping bag fitted with the Wilton 1M tip.
  5. Pipe rosettes in middle of the peanut butter cookie pies.

    Peaut Butter Chocolate Cookie Pie // magicaltreatsathome.com
  6. Enjoy!

Notes

  • You can also bake this in an 8×8″ baking pan lined with parchment.
  • If you’re using salted peanut butter, reduce salt in recipe to 1/4 teaspoon.
  • Extra frosting can be refrigerated up to 4 days in an air-tight container, or frozen up to 3 months. Re-whip once defrosted.
  • Bases can be wrapped with or without frosting and frozen for up to 3 months.
Did you make this recipe?

Tag @magicaltreatsathome on Instagram and hashtag it #magicaltreatsathome

Peaut Butter Chocolate Cookie Pie // magicaltreatsathome.com

Share this:

  • Click to share on Facebook (Opens in new window) Facebook
  • Click to share on X (Opens in new window) X

Like this:

Like Loading...

Filed Under: Recipes, Treats Tagged With: blondies, Candy Palace, chocolate, cookies, disneyland, holiday, peanut butter, peanuts, treat

Chocolate and Peppermint Brownie Pie

December 16, 2021 by Elana Lepkowski 2 Comments

Chocolate Peppermint Brownie Pies // magicaltreatsathome.com

Where can I find the original treat?

  • The original treat can be found at the Candy Palace in Disneyland.

Hi everyone! It’s been a minute hasn’t it? Many, many minutes, but I couldn’t let a whole year go by without a new recipe, and now that they’ve opened up the gates at the parks, we’ve got all new treats to enjoy, and make!

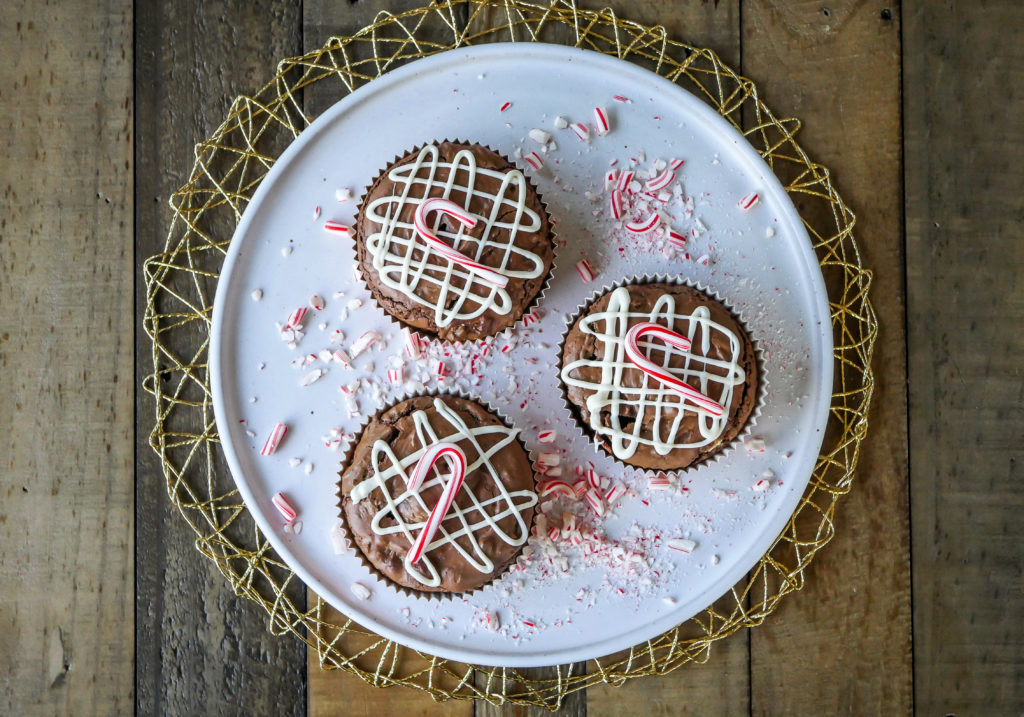
While Disneyland and DCA tend to have the same formats for treats, and rotate or create new flavors for those, recently they’ve introduced these “pies” that are similar to giant saucer-like cookies and brownies. I’ve found that one is the perfect size for two people to share. Or eat one half in the car on the way back from the park, and the other half after the kids are asleep later that evening. Whatever works for you.

Chocolate Peppermint Brownie Pies // magicaltreatsathome.com

I’ve always been a big fan of chocolate and peppermint together in treats. I think perhaps it might have something to do with those Andes Mints we got on hotel pillows growing up (does anyone still do that?!). I get though that this combination is not for everyone, but don’t worry, I’ve got something for those that fall into that camp coming soon.

Anyways, these would make a pretty magical edible gift if you baked up a batch this holiday season. I’ve got a few going out the door this week for neighbors. 

Chocolate Peppermint Brownie Pies // magicaltreatsathome.com

If you’ve got kids in the kitchen there are a few more advanced techniques here with melting the chocolate. My 4 and 7 year old are pros at the decorating bits and especially adding the candy canes, although I suspect that they’re slipping a few of those into their pockets for later. 

It feels so good to be back in this space making treats again for all of you. I truly hope you get to make and enjoy this special recipe soon!

Print
clock clock iconcutlery cutlery iconflag flag iconfolder folder iconinstagram instagram iconpinterest pinterest iconfacebook facebook iconprint print iconsquares squares iconheart heart iconheart solid heart solid icon
Chocolate Peppermint Brownie Pies // magicaltreatsathome.com

Chocolate and Peppermint Brownie Pie

5 Stars 4 Stars 3 Stars 2 Stars 1 Star No reviews
  • Author: Elana Lepkowski
  • Prep Time: 10 minutes
  • Cook Time: 25 minutes
  • Total Time: 35 minutes
  • Yield: 6 Chocolate and Peppermint Brownie Pies 1x
  • Category: Dessert
  • Method: Baking
  • Cuisine: Holiday
Print Recipe
Pin Recipe

Description

Is it a brownie? Is it a pie? It’s both! And with the classic holiday combination of chocolate and peppermint, these shareable treats will be a hit this season. A Disneyland-inspired recipe.


Ingredients

Scale
  • 6 tablespoons unsalted butter
  • 8 ounces bittersweet chocolate (60% cacao)
  • 1/2 cup (60 g) flour
  • 1/3 cup (35 g) unsweetened cocoa powder, dutch processed (I used Valrhona)
  • 1/2 teaspoon salt
  • 3 large eggs
  • 1 cup (198 g) granulated sugar
  • 1 teaspoon vanilla extract
  • 1/2 teaspoon peppermint extract
  • 1 cup semi-sweet chocolate chunks
  • 1–1/3 cups white chocolate chunks, divided
  • 6 mini candy canes

Special Tools

  • Oversized baking cups/molds

Instructions

  1. Preheat the oven to 350°f. Set out 6 of the oversized bake cups on a half size sheet pan. Set aside.
    Chocolate Peppermint Brownie Pies // magicaltreatsathome.com
  2. In a double boiler, melt the butter and chopped bittersweet chocolate, stirring frequently until melted and smooth. Alternatively you can melt them together in the microwave inside a microwave safe bowl, like glass, for 20 seconds. Stir and microwave again for an additional 20 seconds. Keep stirring and microwaving in short bursts of 15-20 seconds until melted and smooth. Set aside to cool.
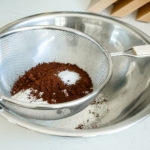
  3. Next, sift together the flour, unsweetened cocoa powder, and salt into a medium sized bowl. Set aside.
    Chocolate Peppermint Brownie Pies // magicaltreatsathome.com
  4. Whip together the eggs and sugar on high speed (10) for 5 minutes until light and frothy. This should be done with either a stand mixer or hand mixer. Then pour in the melted chocolate, vanilla extract, and peppermint extract. Stir to combine until there are no more white streaks.
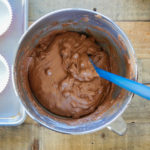
  5. Next, dump in the sifted flour/cocoa/salt mix and, by hand, fold that in to combine until there are no longer any visible flour streaks.
  6. Then fold in semi-sweet chocolate and 1 cup of the white chocolate chunks, setting the additional third of a cup aside.
    Chocolate Peppermint Brownie Pies // magicaltreatsathome.com
  7. Scoop about a 1/2 cup of the mixture into each baking cup, smoothing out the top.
    Chocolate Peppermint Brownie Pies // magicaltreatsathome.com
  8. Bake for around 25-30 minutes until a toothpick comes out clean. Let cool to room temperature.
  9. While the brownie pies cool, melt the remaining 1/3 cup of white chocolate chunks. You can either melt them in the microwave in short bursts like the above direction, in a small double boiler, or using a candy melting pot (my favorite way of melting small amounts of chocolate and candy melts).
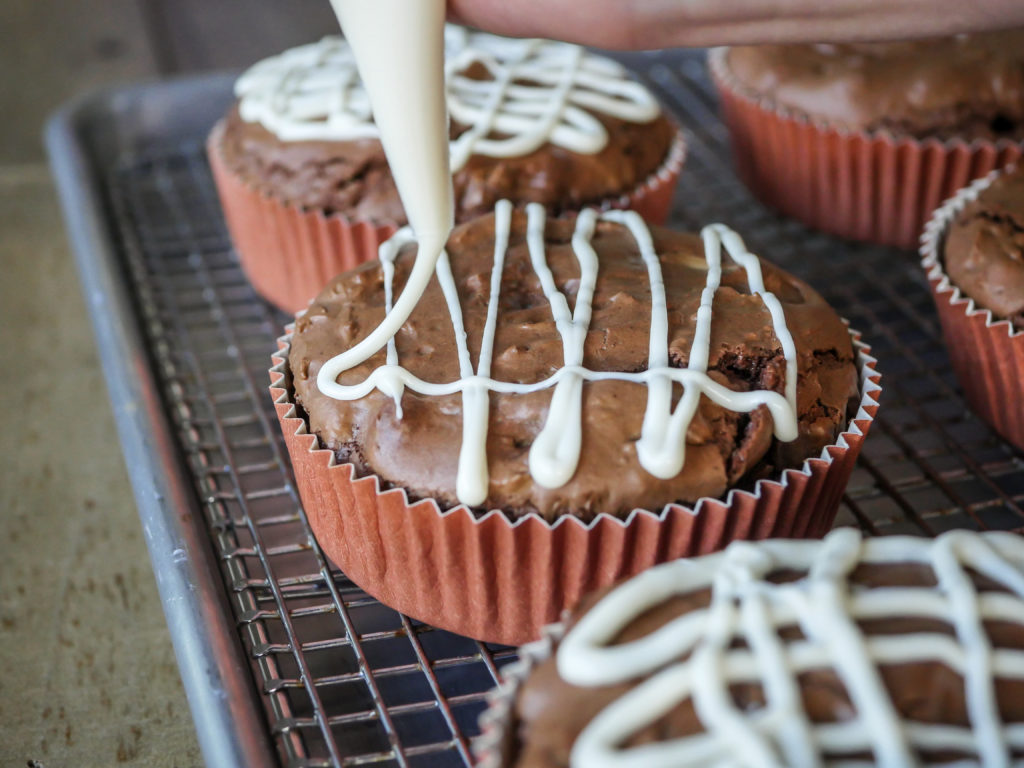
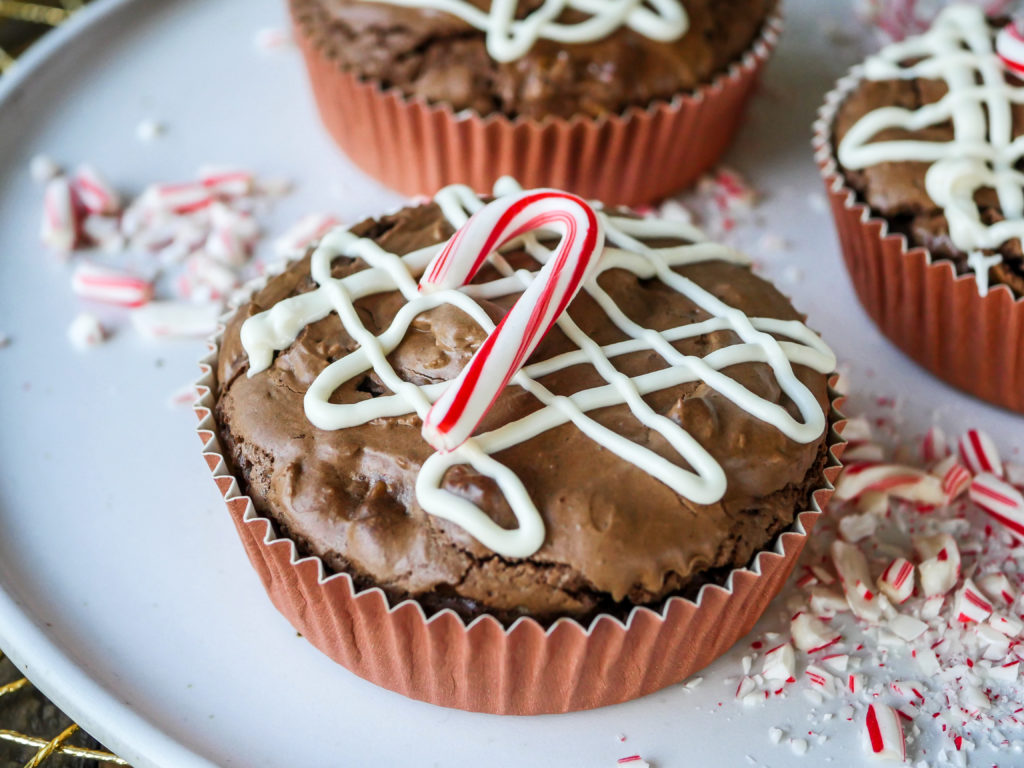
  10. Transfer the melted white chocolate to a heat-safe piping bag and make crisscrossing lines over the tops of the room-temp brownies. Immediately at the candy cane to each one after you finish decorating so that it will adhere to the top. Wait 30 minutes for the chocolate to set up (or more if your kitchen is warm), and enjoy!

Notes

  • I’m using a bittersweet chocolate for my brownie base, however, if you prefer yours sweeter, up that to 68 or 70% cacao.
  • Looking for that light, crackly brownie crust? Don’t skip on whipping the sugar and the eggs together for what seems like an awfully long time. That crust is actually a meringue that forms while baking. This does create a more delicate top that is prone to cracks, but if you love a shiny, crackly top, you want that!
  • Any remaining melted white chocolate can be kept in the piping bag and refrigerated. Seal off the ends with twist ties. Large chunks can be broken up and re-melted.

Did you make this recipe?

Tag @magicaltreatsathome on Instagram and hashtag it #magicaltreatsathome

Chocolate Peppermint Brownie Pies // magicaltreatsathome.com

Share this:

  • Click to share on Facebook (Opens in new window) Facebook
  • Click to share on X (Opens in new window) X

Like this:

Like Loading...

Filed Under: Recipes, Treats Tagged With: brownie, Candy Palace, chocolate, disneyland, holiday, peppermint, treat, white chocolate

Cheshire Cat Tails

August 5, 2019 by Elana Lepkowski 2 Comments

Cheshire Cat Tail // magicaltreatsathome.com

Where can I find the original treat?

  • These treats can be found at the Candy Palace on Main Street in Disneyland.

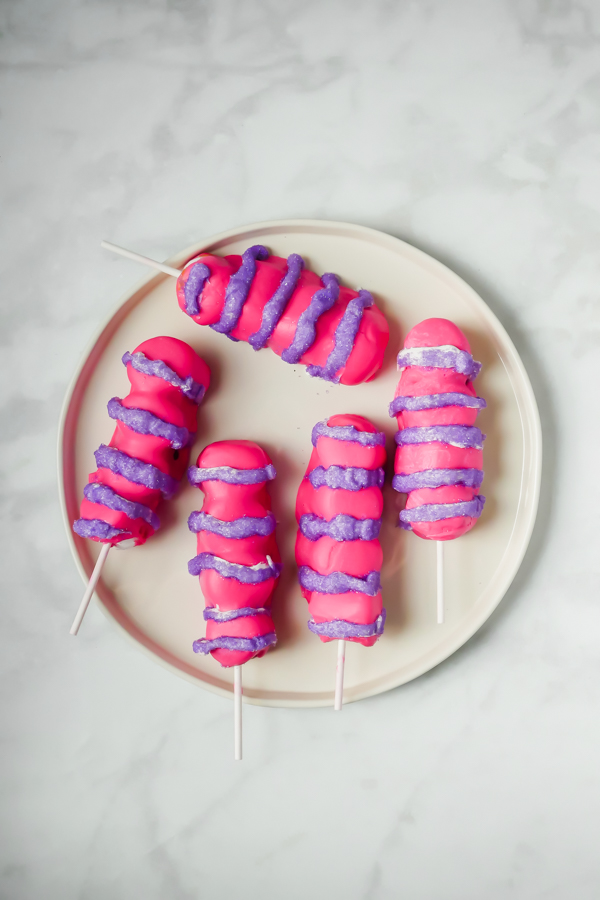
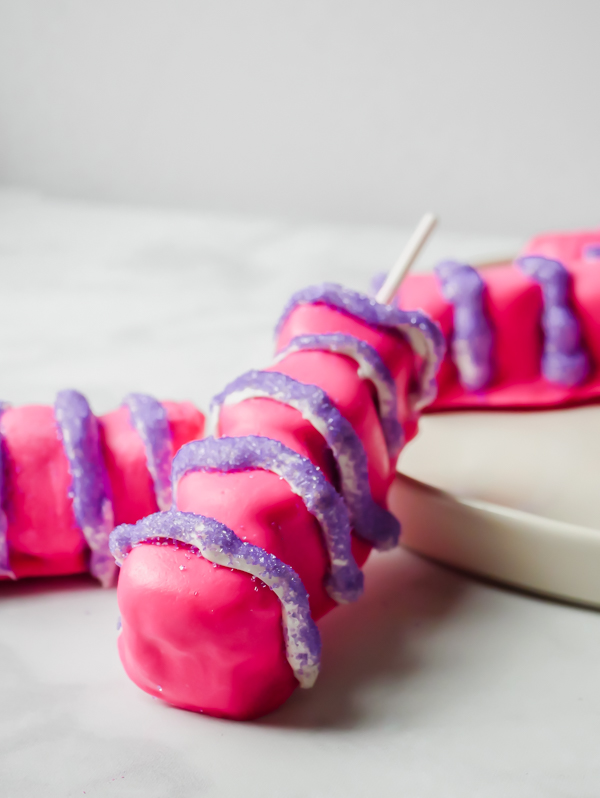
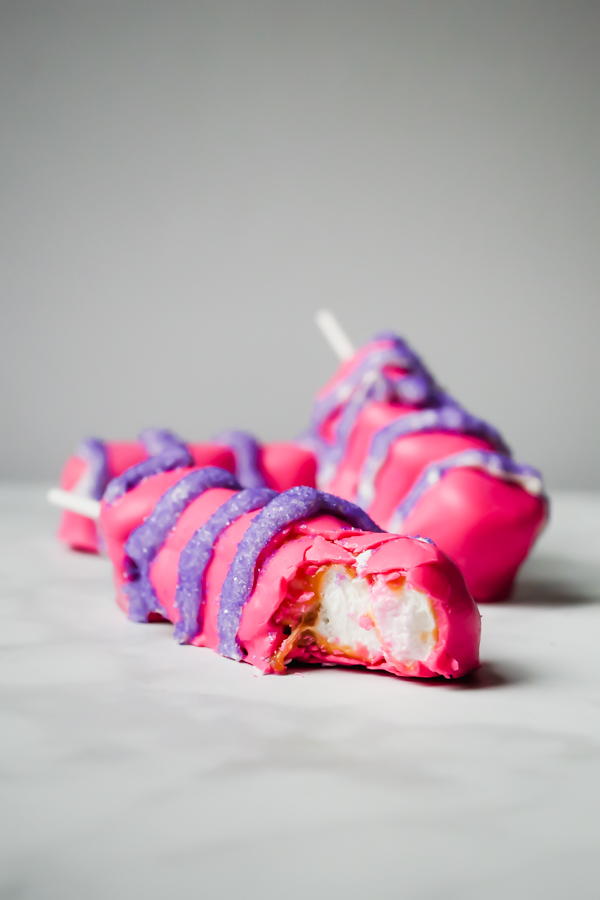
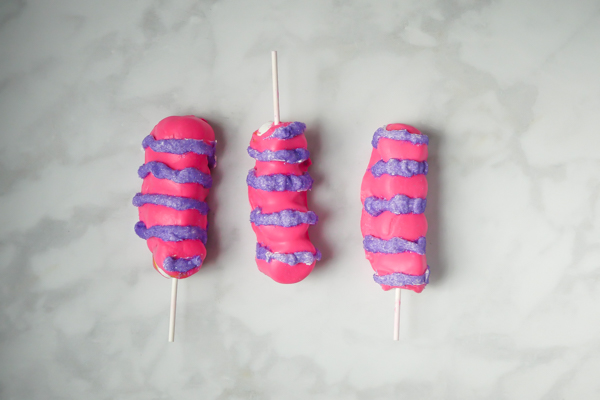
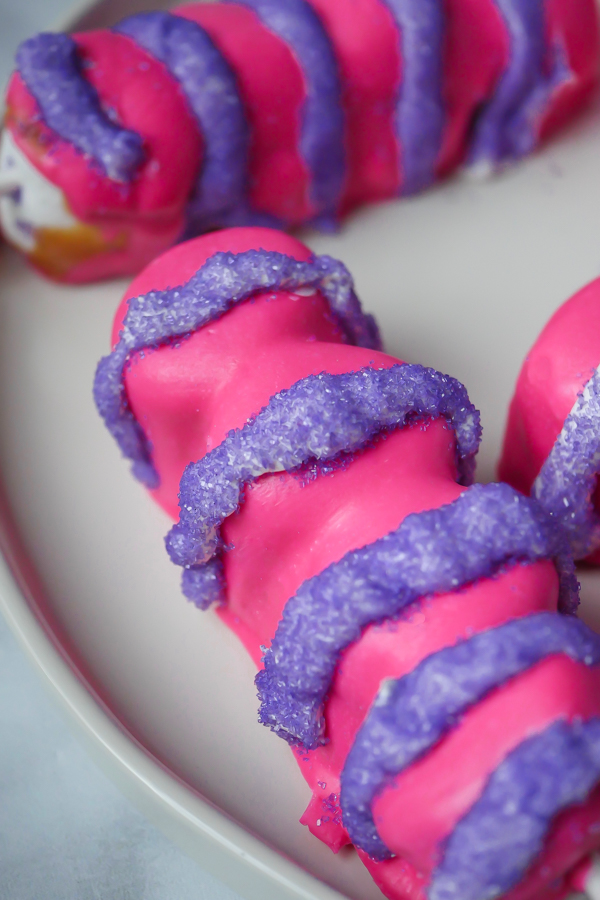
These sweet treats, based on the iconic pink and purple coloring of Alice in Wonderland’s Cheshire Cat, are more than meets the eye. At its base, it’s a marshmallow wand, enrobed in a layer of caramel, and then dipped in pink colored white chocolate. The white chocolate is strawberry flavored, and the whole thing is finished with stripes of purple sanding sugar held on with white chocolate.

Cheshire Cat Tail // magicaltreatsathome.com
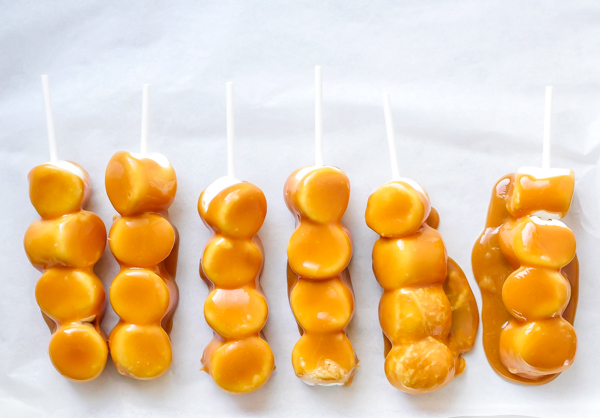
Wands on the left have have had excess caramel removed. Wands on the right were placed immediately onto sheet without excess caramel removed.

While these marshmallow wands might seem straightforward, there is actually a lot of temperature control needed, as well as precise ingredients. Why? Because we’re dealing with caramel and chocolate.

Now, admittedly I started this recipe off with the wrong caramel recipe. See, I have this super yummy salted caramel recipe that I love. So without thinking I started there and only when I tried to dip the marshmallows in it, and it just started falling off the marshmallows, did I realize that this yummy recipe was in fact the wrong type of caramel. A soft, liquid-y caramel is not what one wants here for two reasons. One, well, it falls off the marshmallows and does not become fully solid. And two, when the not fully solid caramel hits the very warm white chocolate… it all just melts off into a puddle. Yuck.

Cheshire Cat Tail // magicaltreatsathome.com

So, melting caramels are a good bet here. And on second try this was the perfect solution to getting a firm caramel that held up to being dipped in warm chocolate. Alternatively, there are homemade caramel recipes out there that will become solid, you’ll just need to use that type of recipe. Usually there is corn syrup in it.

With melting chocolate, there are a few factors you need to remember. First, the type of chocolate you’re using will determine how hot you can get your temperature. White chocolate, which isn’t technically chocolate, should not go above 110°f. If you temper your chocolate you will lose its temper and you also risk burning your chocolate if you get it too hot. Also, if you get your chocolate too hot, it will start to “break” when you try to coat items like these caramel covered marshmallow wands. Check out the notes below the recipe for tips dealing with this if it happens. The trick with coating is to get it warm enough to drip off your spoon and keep it warm, not hot, for even coating.

Cheshire Cat Tail // magicaltreatsathome.com

I did say this was a “kid friendly” recipe and you might think I have lost my mind. Molten caramel! Scalding hot chocolate! What the heck?! But really, the fun part for kids is the decorating. Older kids can dip wands into the pink white chocolate because really, at the dipping point the chocolate should not be hot enough to burn skin. And small kids will have lots of fun covering their marshmallow wands with purple sprinkles. And it’s OK if adults enjoy it just as much (I do!!).

So let’s get into the kitchen and whip up a batch of Cheshire Cat Tails! They’re sure to make you grin!

Cheshire Cat Tail // magicaltreatsathome.com
Print
clock clock iconcutlery cutlery iconflag flag iconfolder folder iconinstagram instagram iconpinterest pinterest iconfacebook facebook iconprint print iconsquares squares iconheart heart iconheart solid heart solid icon
Cheshire Cat Tail // magicaltreatsathome.com

Cheshire Cat Tails

5 Stars 4 Stars 3 Stars 2 Stars 1 Star No reviews
  • Author: Elana Lepkowski
  • Yield: 6 Cheshire Cat Tails 1x
Print Recipe
Pin Recipe

Description

These ooey-gooey marshmallow wands found at the Candy Palace at the Disneyland Resort are more than meets the eye! Sweet, buttery caramel covers a marshmallow wand while the whole treat get covered in strawberry flavored pink white chocolate and topped with purple sanding sugar stripes… just like the Cheshire Cat’s tail. A Disneyland-inspired treat.


Ingredients

Scale
  • 24 marshmallows
  • 1 eleven ounce package of individually wrapped caramels (like Kraft)
  • 2 tablespoons water
  • 11 ounces of pink candy melts
  • 1 tablespoon of coconut oil
  • 1/4 teaspoon of strawberry flavor oil (like Lorann – must be oil based not water based! See notes below)
  • 6 ounces of white candy melts
  • 1 cup purple sanding sugar
  • 6 lollipop sticks

Instructions

  1. Place four marshmallows, round side facing out, on each lollipop stick. Set aside.
  2. Place a sheet of parchment on a sheet pan. Butter it lightly and set aside.
  3. Unwrap all the caramels and add to a small saucepan. Pour water in and heat over medium-low heat.
  4. Stir constantly until everything has melted and caramels are smooth (about 7-8 minutes).
  5. Once melted (caramels should drip in a ribbon from a spoon back into the pan), dip each wand into the caramel, turning quickly to coat. Let excess caramel drip off for at least 30 seconds, turning while it drips for even coating, and then place on the buttered parchment.
  6. When all the wands have been dipped, refrigerate for thirty minutes.
  7. About 15 minutes to wands coming out of refrigerator, set up your sanding sugar station by setting out an empty wide, shallow bowl and another bowl with sanding sugar in it.
  8. Remove wands from the refrigerator. Then, in a double boiler, combine pink candy melts, strawberry flavoring, and coconut oil (this can alternatively be melted in the microwave as well. Please see notes below.). Melt over medium heat, stirring constantly until smooth. Do not let the temperature go above 110°f (you might want to use a candy thermometer if you’re unsure).
  9. Once smooth, dip caramel covered marshmallow wands in the chocolate, turning evenly to coat and fill in any gaps. Let the pink chocolate drip back into pan and lightly scrape one side on the edge of pan to remove any additional excess. Place back on buttered parchment. Repeat for all wands and let coating dry about 30 minutes.
  10. Next, melt the white chocolate (you can melt in a heavy duty piping bag as well), and create stripes on the first marshmallow wand, and immediately pour the purple sanding sugar over the stripes, letting excess catch in the empty bowl. You can press the wand lightly into sugar if you’d like a more thicker coating (I was fine with the lighter stripes). Set aside. Repeat with additional wands. If sanding sugar adheres to the pink coating, use a small brush to brush crystals away after fully dried. Then enjoy!

Notes

  • Melted caramel is HOT! Use caution in the kitchen. Do not dip your fingers or hands into the caramel has it can adhere to skin and burn you. Keep away from children.
  • Use hot water to remove caramel from pans and utensils.
  • If you wish to microwave your candy melts, combine them with strawberry flavoring, and coconut oil in a microwave safe bowl, and heat for 30 seconds on half power, stir, and continue to microwave in about 15-20 second increments until smooth.
  • If you have extra melted caramel that has dried around your wand, use kitchen shears to remove it immediately after removing from the refrigerator.
  • Did your chocolate coating break when you first dipped your wand in? Wait for the chocolate to cool down more. It should drip freely from a spoon without it seizing when the spoon is shaken slightly (will cause crevices in the chocolate on the spoon). If it breaks on the wand, your wand also might be too cool, so let them warm up more. And don’t worry, once that chocolate starts to firm up, you can dip it AGAIN into the chocolate to get a more even, although slightly thicker, coating.

Did you make this recipe?

Tag @magicaltreatsathome on Instagram and hashtag it #magicaltreatsathome

Cheshire Cat Tail // magicaltreatsathome.com

Share this:

  • Click to share on Facebook (Opens in new window) Facebook
  • Click to share on X (Opens in new window) X

Like this:

Like Loading...

Filed Under: Gluten Free, Recipes, Treats Tagged With: candy melts, Candy Palace, caramel, character treat, Cheshire Cat, disneyland, marshmallow, marshmallow-wand, strawberry, treat

Primary Sidebar

Follow Us

  • Instagram
  • Facebook
  • X
  • Pinterest
  • Email
  • YouTube

Hi! My name is Elana, and that’s me shoving a Mickey Mouse shaped treat in my face. I love the treats at Disneyland. A lot. So much so I’ve dedicated an entire website to making all my favorites, and hopefully yours too, out of my home kitchen. My aim is to create Disneyland-inspired treats, with easy to follow directions, and many recipes geared towards getting the kids in the kitchen to help too! Because putting sprinkles on things is F-U-N.

Top With Sprinkles

Get Recipes in Your Inbox!

* indicates required

Look for this icon in posts to find Kid Friendly recipes!

Recent Posts

  • Matterhorn Macaroon
  • Caramel Gingerbread Cookie Sandwiches
  • Colorful Fruit Hand Pies
  • Classic Mickey Shaped Beignets
  • Carrot Cake Cookies

Archives

  • February 2023
  • December 2022
  • August 2022
  • January 2022
  • December 2021
  • November 2021
  • December 2020
  • November 2020
  • October 2020
  • September 2020
  • August 2020
  • July 2020
  • June 2020
  • May 2020
  • April 2020
  • March 2020
  • February 2020
  • January 2020
  • December 2019
  • November 2019
  • October 2019
  • September 2019
  • August 2019
  • July 2019
  • June 2019
  • May 2019

Copyright © 2025 Magical Treats at Home on the Foodie Pro Theme

%d