• Skip to primary navigation
  • Skip to main content
  • Skip to primary sidebar

Magical Treats at Home

  • About
  • Treats
  • Drinks
  • Savory
  • Favorite Tools
  • Etsy Shop

Mickey Mouse

Mickey S’more Square

August 12, 2019 by Elana Lepkowski Leave a Comment

Mickey S'more Square // magicaltreatsathome.com

Where can I find the original treat?

  • These treats can be found all over the Disneyland Resort.

Did you know that Saturday was National S’mores Day? Don’t worry, you won’t find it marked on the calendar, and there isn’t an elf that sneaks into your house at night and leaves s’mores in your shoes. It’s just an excuse to enjoy one of the BEST treats for summer. And Disneyland has you covered… with no fire required!
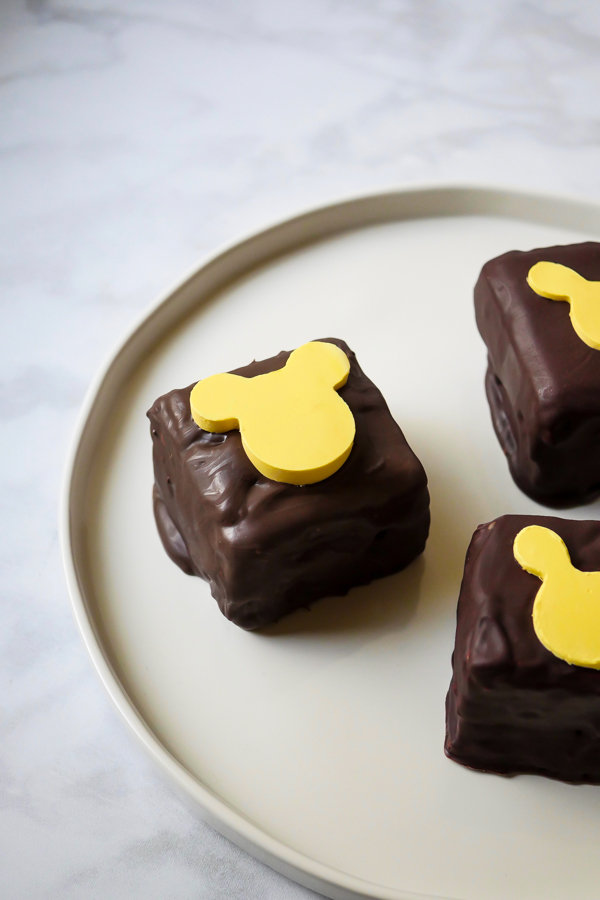
Mickey S'more Square // magicaltreatsathome.com

One of the year-round favorites at the resort, you can usually find this square at Candy Palace, Pooh Corner, Marceline’s in Downtown Disney, and Trolley Treats at DCA. And now you can have it at home too!
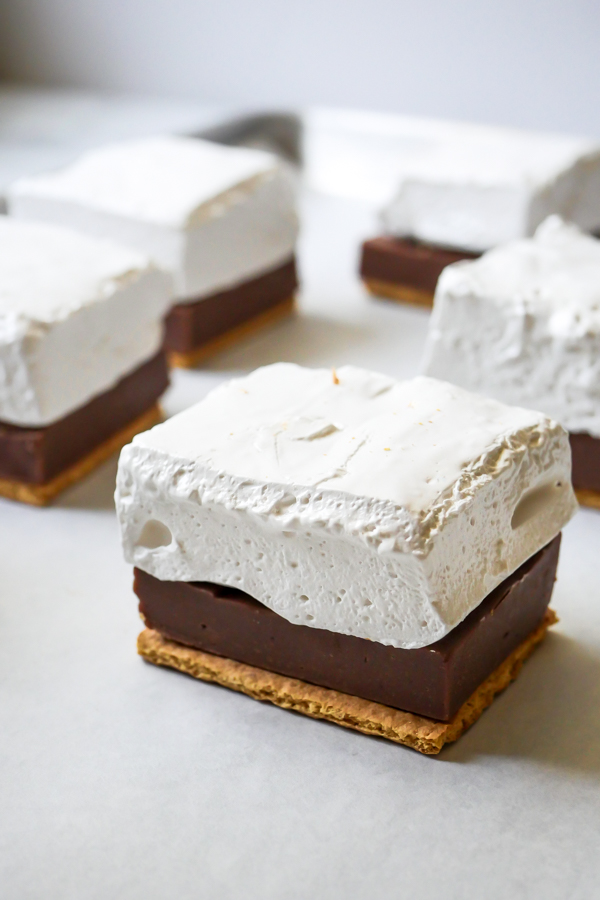
Mickey S'more Square // magicaltreatsathome.com

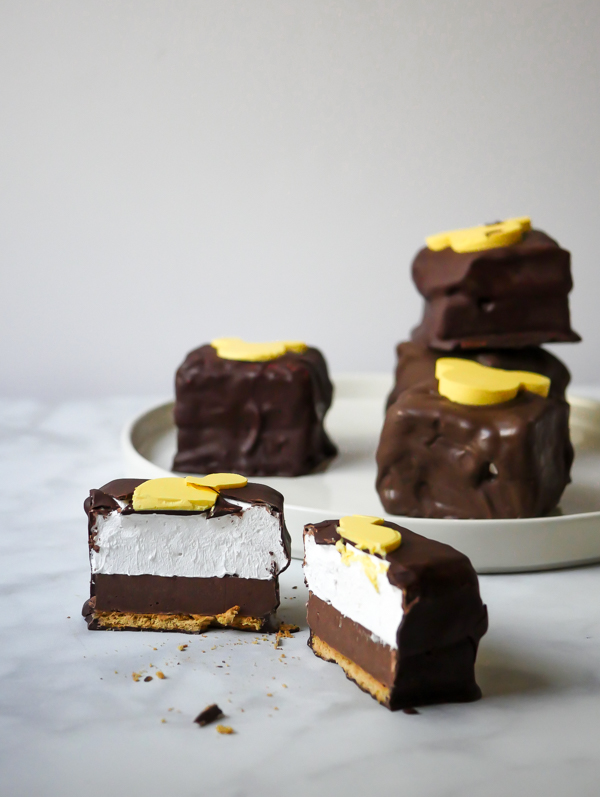
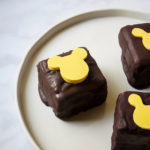
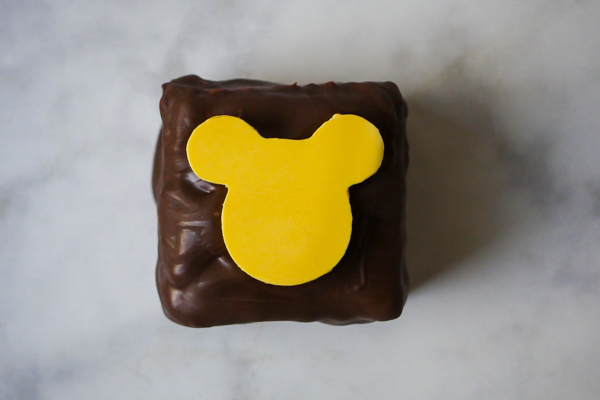
The Mickey S’more square is made up of a crisp graham cracker base, a layer of rich milk chocolate fudge, a layer of thick marshmallow, and it’s all covered in a semi-sweet chocolate topped with a yellow chocolate Mickey Mouse. Our recipe below has a few steps, but it all comes together fairly easily once you’re ready to assemble. There’s just the added wait time for the fudge to set up, and the chocolate to set. You WILL NOT need to make graham crackers for this recipe, however, if you do have a homemade recipe you love, by all means use it! We’re using store bought here for consistency and time. For your final square, the Mickey chocolate on top is definitely optional, but we do give an easy way to make one below too, just in case you want a few to snack on!
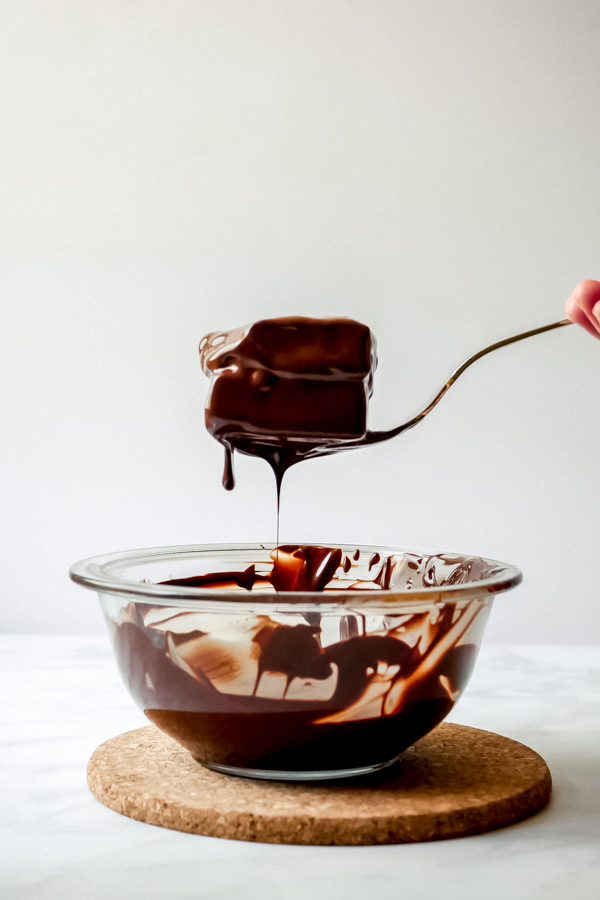
Mickey S'more Square // magicaltreatsathome.com

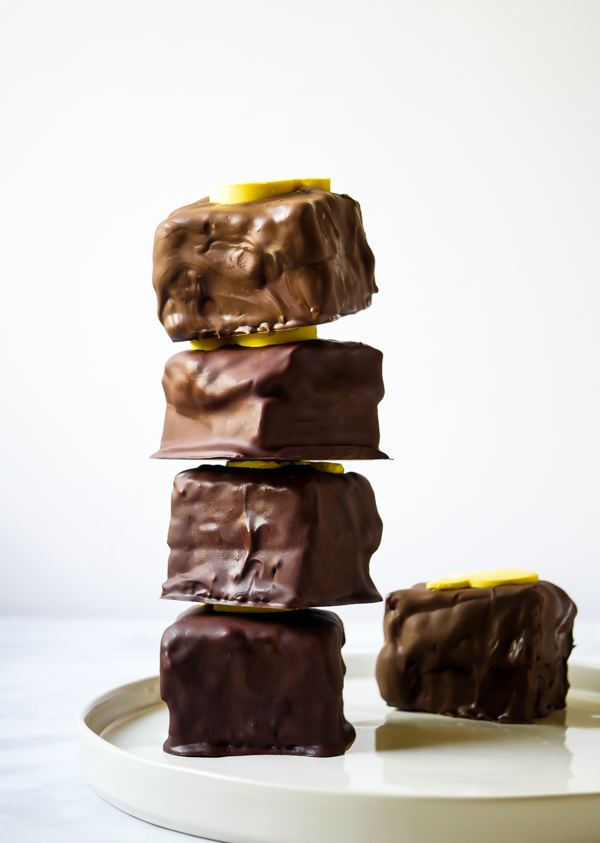
We won’t be making any campfires for this recipe, and the only fire you’ll see is on a gas stove, but you’ll definitely know you’re eating a S’more when you take a bite of this yummy treat.
Print
clock clock iconcutlery cutlery iconflag flag iconfolder folder iconinstagram instagram iconpinterest pinterest iconfacebook facebook iconprint print iconsquares squares iconheart heart iconheart solid heart solid icon
Mickey S'more Square // magicaltreatsathome.com

Mickey S’more Square

5 Stars 4 Stars 3 Stars 2 Stars 1 Star No reviews
  • Author: Elana Lepkowski
  • Yield: 6 S’mores Squares 1x
Print Recipe
Pin Recipe

Description

Layers of crisp graham crackers, rich milk chocolate fudge, and gooey marshmallow are covered in semi-sweet chocolate and topped with a yellow Mickey Mouse chocolate in this dessert reminiscent of the classic s’mores. A Disneyland-inspired treat!


Ingredients

Scale

For the Milk Chocolate Fudge:

  • 8 ounces (227 g) milk chocolate, finely chopped
  • 2 tablespoons unsalted butter
  • 7 ounces sweetened condensed milk
  • pinch teaspoon salt

For the Marshmallows:

  • 1–1/2 cups granulated sugar
  • 3/4 corn light corn syrup
  • pinch salt
  • 1 teaspoon vanilla extract
  • 2 packets of gelatine
  • 2/3 cups of water, divided

For assembly:

  • 6 graham cracker squares (3 large sheets broken in half)
  • 12 ounces (340 g) semi-sweet chocolate, finely chopped and divided
  • 2–1/2 ounces white chocolate (71 g), chopped, optional
  • yellow oil-based chocolate covering, optional

Special Tools:

  • Candy Thermometer
  • Mickey Mouse mold

Instructions

For the Milk Chocolate Fudge:

  1. Line a loaf pan with parchment paper or wax paper.
  2. In a double boiler, combine milk chocolate, butter, sweetened condensed milk, and salt. Stir occasionally, until smooth.
  3. Pour into loaf pan and chill, uncovered, until firm, about 4 hours. Set aside.

For the Marshmallows:

  1. Grease a loaf pan and line with parchment paper or wax paper. Grease top of paper as well. Set aside.
  2. In a medium saucepan over high heat, combine sugar, corn syrup, salt, and 1/3 cup of water. Stir to dissolve sugar. Once mixture reaches a boil, do not disturb. Let the mixture reach “soft ball” stage, approximately 238°F (use a candy thermometer or probe thermometer to get an accurate temperature).
  3. While syrup is boiling, in the bowl of a stand mixer, pour in the other 1/3 cup of water and sprinkle gelatine over it. Let sit for five minutes so water can absorb the gelatine. Not all of it will absorb and that’s ok.
  4. Then, attach the whisk attachment and turn mixer on slowest speed. Wearing oven mitts in case of splashing, slowly pour in the syrup mixture into the mixer. Whisk two minutes and then raise speed to medium. Whisk another two minutes and then gradually move speed to highest. Whisk another 3-5 minutes until mixture is stiff. Beat in vanilla extract for 30 seconds and then pour everything into the prepared pan. Mixture will be very sticky and you might not be able to get everything out of the bowl. See notes below. Mickey S'more Square // magicaltreatsathome.com
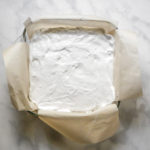
  5. Use wet fingers to smooth out the marshmallow top and let sit out, uncovered, until firm. About 3 hours.

Mickey Mouse chocolate toppers (optional)

  1. In a microwave safe bowl, combine chopped white chocolate and a few drops of the oil-based yellow food coloring.
  2. Heat in microwave for 30 seconds, stir, and continue to microwave in short 15 -20 second bursts, stirring between, until chocolate is melted and smooth.
  3. Pour into molds and let sit in the refrigerator about 30 minutes to harden. Remove from molds and set aside.

Assembly:

  1. First, temper the semi-sweet chocolate for coating: In a microwave safe bowl, add 2/3 of the chocolate. Microwave for 30 seconds, stir, microwave for another 30 seconds. Stir again and microwave in short bursts of 15-20 seconds until chocolate has uniformly melted and has reached between 114° – 118°F. Then add in some of the remaining chocolate, stir to completely melt and then add more (I did three batches). Continue to stir the chocolate until it has cooled to 88° – 89°F (this can take several minutes of stirring). The chocolate is now tempered and ready to use. Set aside.
  2. Un-mold the fudge from the pan and using a graham cracker as a guide, divide and cut the fudge to fit on the base of cracker. You may need to combine some pieces of fudge if your graham crackers are larger.
  3. Next, remove the marshmallow from the pan keeping it on the parchment. To square off ends of marshmallows, use a long, sharp knife to trim sides. Clean knife with hot water between cuts.
  4. Then, using a graham cracker as a guide, divide the pan into roughly 9 squares, using the same, long, sharp knife to make cuts. You will only need six of the marshmallows for this recipe. See notes below for storing extra marshmallows. Use damp fingers to remove marshmallows from each other if they get stuck together.
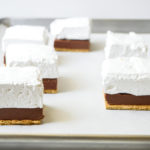
  5. Create each stack by starting with the graham cracker base, a piece of fudge, and then top with the marshmallow. Set aside on a sheet pan lined with parchment.
    Mickey S'more Square // magicaltreatsathome.com
  6. Dip each stack into the tempered chocolate, using a spoon to pour chocolate on top and let drip down sides. Use a chocolate fork or slotted spatula to remove the stack from the chocolate. Allow the chocolate to drip from the stack for a minute or two (or you’ll end up with lots of pooled chocolate) and then place on sheet pan. Repeat until all stacks have been dipped.
  7. If you are using the yellow chocolate Mickey Mouse topper, place one on each stack after you have dipped it.
  8. Allow everything to set at least 4 hours or overnight. Enjoy!

Notes

  • Making marshmallows is a sticky, hot mess. You will need to wear an apron, close toed shoes, and make sure you have a candy thermometer and the clear space to work.
  • Be OK with the fact that you were going to lose some of the marshmallow in the mixing bowl, on your spoon, and probably on your hands. It’s OK! You’ll have plenty left over.
  • Any leftover marshmallows in the pan can be cut and tossed in powdered sugar. Keep in an airtight container up to a week.
  • When tempering chocolate, keep all moisture and liquids away from the chocolate.
  • If chocolate starts to cool after it is tempered, microwave for 5-10 seconds.
  • A note on pan sizes. I mention that the fudge is made in a loaf pan and the marshmallows are made in an 8″ square pan. Both hold around 8 cups capacity so you would be able to make both in the 8″ square pan. I was able to get 6 squares of fudge from the loaf pan, I just had to smoosh a few pieces together as noted in the recipe above. Force of habit of making fudge in a loaf pan automatically had me write the recipe this way!
Did you make this recipe?

Tag @magicaltreatsathome on Instagram and hashtag it #magicaltreatsathome

Mickey S'more Square // magicaltreatsathome.com

Share this:

  • Click to share on Facebook (Opens in new window) Facebook
  • Click to share on X (Opens in new window) X

Like this:

Like Loading...

Filed Under: Recipes, Treats Tagged With: chocolate, DCA, disneyland, Downtown Disneyland, fudge, graham cracker, marshmallow, Mickey Mouse, treat

Mickey’s Celebration Churro

July 29, 2019 by Elana Lepkowski Leave a Comment

Mickey's Celebration Churro // magicaltreatsathome.com

Where can I find the original treat?

  • This specialty churro was part of the “Get Your Ears On” celebration found near the Small World Promenade at the Disneyland resort.

Well, July is almost over and that means that Churro Month is coming to an end (for now). And to conclude this on a celebratory note, today we’ve got Mickey’s Celebration Churro for our final churro recipe.

Mickey's Celebration Churro // magicaltreatsathome.com

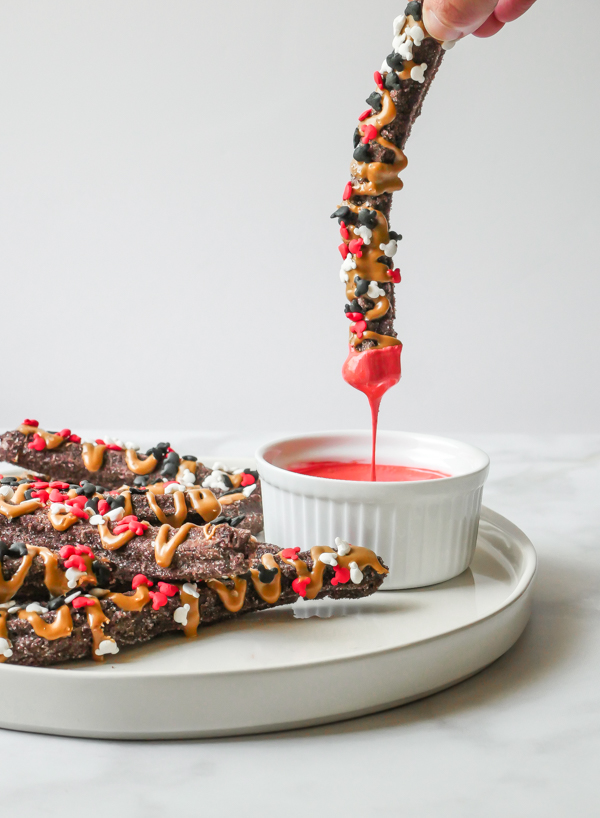
This fun chocolate churro was another favorite of mine, mostly because it was doused in warm cookie butter. And I heard from a number of followers that this too was a win, albeit a bit messy!
Mickey's Celebration Churro // magicaltreatsathome.com

Remember, check out all the notes following the recipe below for some tips and tricks to making churros at home. These are definitely easy to make once you get the hang of everything.

Mickey's Celebration Churro // magicaltreatsathome.com

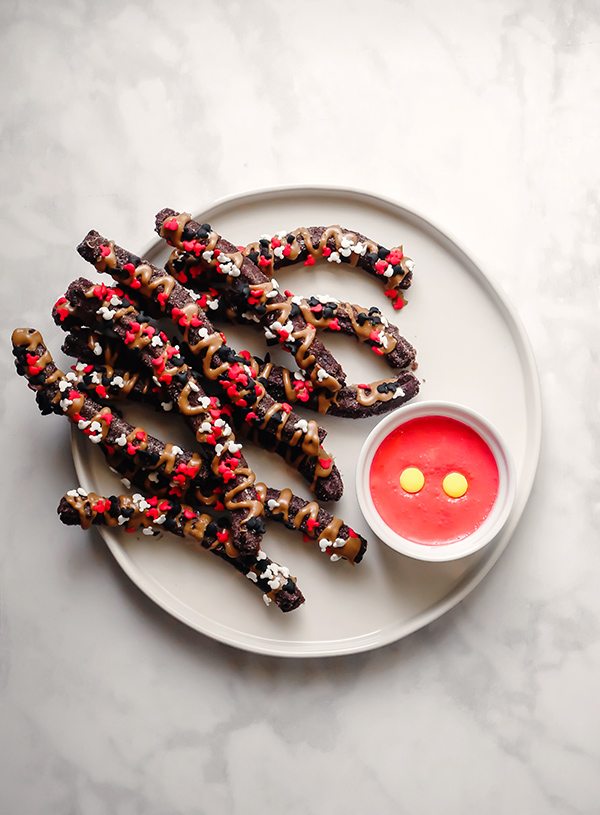
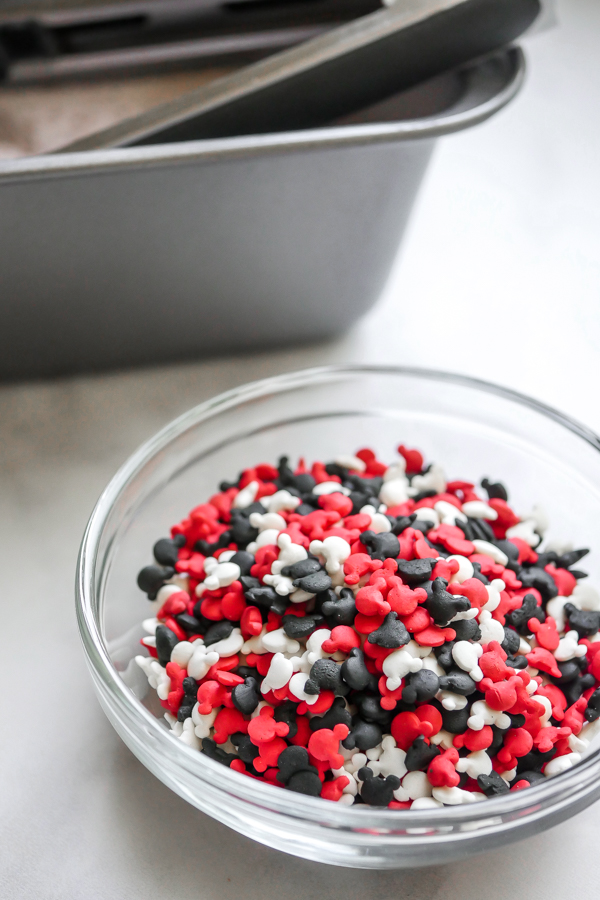
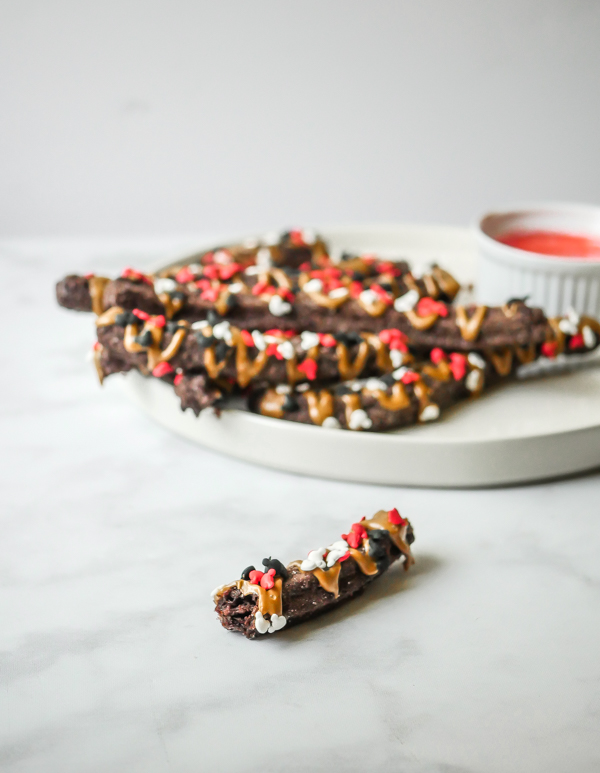
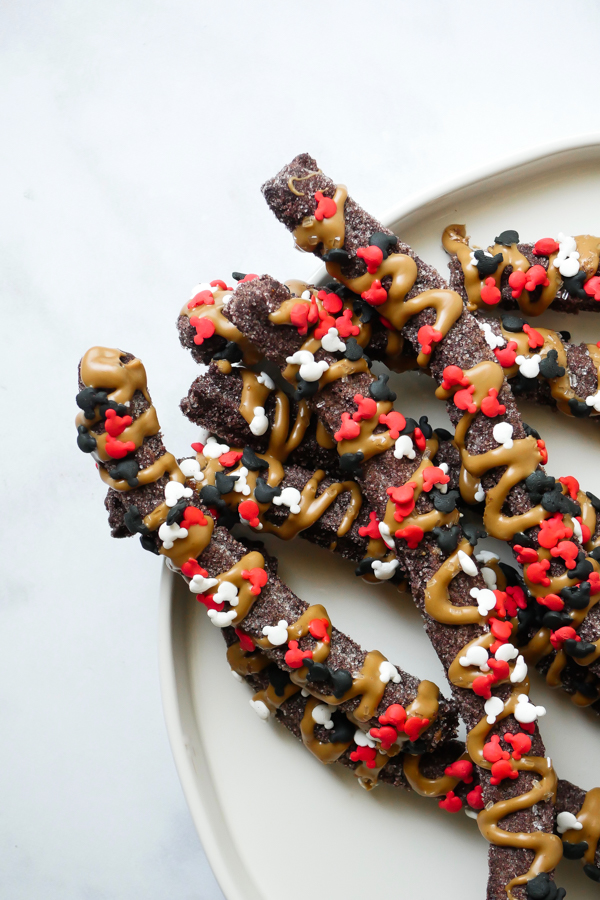
Here we’ve got a chocolate churro that’s been covered in chocolate cinnamon sugar, drizzled with cookie butter, sprinkled with sparkling sugar crystals, and then it gets covered in black, white, and red Mickey Mouse decorettes. I opted to purchase cookie butter for ease of use with this recipe, but if you have a recipe for it you like, go ahead and use that! I’ve found that the cookie butter spread at Trader Joes was similar in taste to what was at the park. Also, if you enjoy making Disneyland-inspired treats at home, Amazon has a wealth of options currently for this Mickey Mouse decorettes.
Mickey's Celebration Churro // magicaltreatsathome.com

Ok, let’s start up that cooking oil one last time and make some churros!

Print
clock clock iconcutlery cutlery iconflag flag iconfolder folder iconinstagram instagram iconpinterest pinterest iconfacebook facebook iconprint print iconsquares squares iconheart heart iconheart solid heart solid icon
Mickey's Celebration Churro // magicaltreatsathome.com

Mickey’s Celebration Churro

5 Stars 4 Stars 3 Stars 2 Stars 1 Star No reviews
  • Author: Elana Lepkowski
  • Yield: 16 – 18 churros 1x
Print Recipe
Pin Recipe

Description

Celebrate Mickey with this chocolate churro covered with chocolate cinnamon-sugar, warm cookie butter, sugar crystals, and black, white, and red Mickey Mouse decorettes! A Disneyland-inspired treat.


Ingredients

Scale

Chocolate Churros

  • 1/2 cup granulated sugar
  • 1/2 teaspoon cinnamon
  • 1 teaspoon cocoa powder
  • 1/4 cup white sugar crystals
  • 1/2 cup cookie butter (I used Trader Joes brand here)
  • black, white, and red Mickey Mouse decorettes


  • vegetable oil for frying
  • 1 cup water
  • 1/2 cup unsalted butter
  • 1 tablespoon granulated sugar
  • 1/4 teaspoon salt
  • 1 cup all purpose flour
  • 1/4 cup cocoa powder
  • 2 eggs

Marshmallow Creme

  • 3/4 cup glucose or corn syrup
  • 1 ounce egg white
  • 1/4 teaspoon salt
  • 3/4 cup powdered sugar
  • 3 tablespoons vanilla extract
  • 1–2 tablespoons milk (start with one and increase if needed)
  • red food dye
  • yellow “buttons” (I used M&Ms)

Tools:

  • spider for frying
  • Wilton 1 M piping tip
  • pastry bag
  • candy thermometer

Instructions

Chocolate Churros:

  1. Line two half sized sheet pans with parchment, set aside. Mix together the 1/2 cup of granulated sugar, cinnamon and cocoa powder in a long shallow bowl or loaf pan, set aside.
    Mickey's Celebration Churro // magicaltreatsathome.com
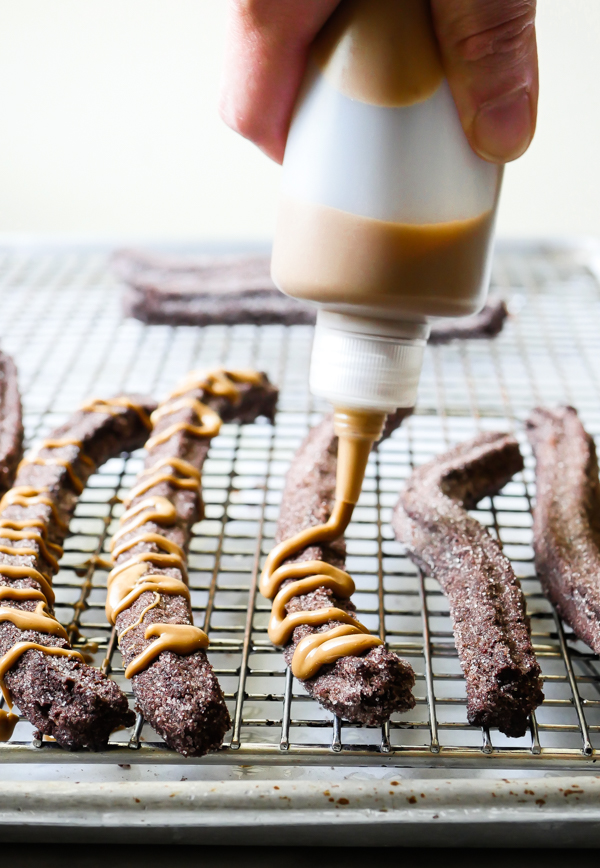
  2. Warm the cookie butter in the microwave about 45 seconds. Stir and set aside. Optionally, you can pour the warmed cookie butter into squeeze bottle. Keep near the stove while cooking so it stays warm.
  3. In a medium sized saucepan over medium-high heat, combine water, butter, sugar and salt. Bring to a boil, or until butter has melted.
  4. Turn burner to low and sift in all the flour and cocoa powder. Stir until there are no visible flour lumps and dough has begun to stick together in a ball and pulled away from the sides of the pan. Remove pan from heat and let sit 5 minutes. Then stir in each egg until incorporated. Dough will appear to break or become lumpy. Continue to stir until it forms a smooth, sticky dough.
  5. Fill a pastry bag fitted with a Wilton 1 M open star tip half full with batter (see notes below on filling pastry bags) and pipe 8″ long dough onto the sheet pan. I was able to fill two sheet pans with all the batter.
  6. Refrigerate dough at least 30 minutes and up to two days. Batter will stiffen the more it sits, so let the dough come to room temperature before frying.
  7. Fill a dutch oven or deep frying pan with vegetable oil at least 2″ up the side of the pan (I found a 1/2 gallon of avocado oil worked for me in my large dutch oven. See note below about reusing oil.). Heat oil to 340-350°f, using a candy thermometer to keep the temperature constant. You may need to adjust heat up or down during cooking.
  8. Place churros 2-3 at a time in the cooking oil for 6 minutes, turning after 3 minutes with a spatula. Wait until oil comes back to temperature before adding next batch.
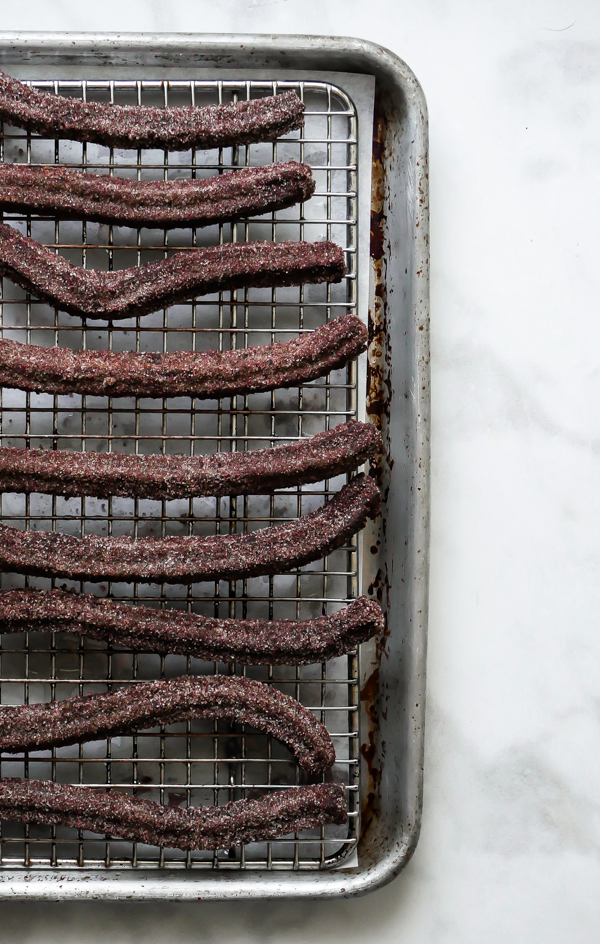
  9. Using a spider or large spatula, remove churros from oil and drain on a cooling rack over parchment or on a paper towel. Wait at least a minute and then toss the churro in the chocolate cinnamon-sugar, tapping off any excess. Then move them back to the cooling rack. Drizzle cookie butter on the churros, sprinkle the sugar crystals, and then the Mickey decorettes.
    Mickey's Celebration Churro // magicaltreatsathome.com
  10. While churros cool slightly, make the marshmallow creme dip.

Marshmallow Creme:

  1. Combine glucose or corn syrup, egg white, and salt in the bowl of a stand mixer. Beat on high for 5-10 minutes until doubled in size.
  2. Once doubled, move speed to low and pour in powdered sugar in a constant stream and mix until fully combined. You may have to stop and scrape down sides of bowl. Add in one tablespoon of milk. Add in additional milk if you’d like the creme runnier. Mix in vanilla extract.
  3. Remove 1/2 cup of mixture into a separate container and add in 3-4 drops of red food dye until desired color is reached. Top marshmallow creme with the yellow M&M “buttons”.
  4. The rest of the marshmallow creme can be sealed in an air-tight container and refrigerated up to a month.
  5. Dip churros in marshmallow creme. Enjoy!

Notes

  • Do not overfill your pastry bag! Fill in two to three batches. If there is too much dough, it will seep out the top and will be hard to pipe.
  • Slowly pipe out dough all of a consistent size, smaller spots on the churro can cause them to become more fragile while handling and can break in the oil or while coating in sugar.
  • Churro dough can be piped out onto parchment and covered in the fridge up to 48 hours.
  • If you want to make you churros immediately after making dough without the chilling time, once oil has reached temp, starting about one inch above the oil, pipe a small line of dough down into oil and either snip end with scissors, or break the dough off the pastry tip on the side of your pan. Follow directions above for frying.
  • Thicker churros will require a longer cooking time to fully cook through the center. Test one churro first to adjust your cooking time.
  • Cooking oil can be fine strained and stored again for another use. I strain back into the bottle it came from. Well strained oil can be stored in a cool, dry place and used up to several times.
  • Churros curling? That could be one of a few reasons. One is that it will naturally shrink and change shape as the dough hits the oil and puffs up. I found that the stiffer dough from sitting in the fridge resulted in straighter churros while fresher dough tending to curl more. Also, if you’re using a circular pot like a dutch oven, churros may rest against the inside edge of the pan while cooking causing them to take on the curved shape of the pan. To prevent this, nudge your churro with the spider or spatula immediately after placing in oil when it pops back up to the surface. Continue to nudge gently back and forth for about 20-40 seconds or until the dough has gotten stiff in the oil.

Did you make this recipe?

Tag @magicaltreatsathome on Instagram and hashtag it #magicaltreatsathome

Mickey's Celebration Churro // magicaltreatsathome.com

Share this:

  • Click to share on Facebook (Opens in new window) Facebook
  • Click to share on X (Opens in new window) X

Like this:

Like Loading...

Filed Under: Recipes, Treats Tagged With: chocolate, churro, cookie butter, disneyland, Get Your Ears On, marshmallow creme, Mickey Mouse, treat

Fantasia Mickey Churro

July 9, 2019 by Elana Lepkowski Leave a Comment

Fantasia Mickey Churros // magicaltreatsathome.com

Where can I find the original treat?

  • This specialty churro was part of the “Get Your Ears On” celebration found in Frontierland at the Disneyland resort.

Welcome to CHURRO MONTH! While there is nothing quite like the classic Disneyland churro (and our Facebook poll told us you LOVE the classic one), Disney has put out quite a number of fun and delicious churros this past year that are deserving of some attention here. Whether it was a sweet topping, or a sweeter dipping sauce, we’ve picked out four recipes to highlight this month that are sure to please!

Fantasia Mickey Churros // magicaltreatsathome.com

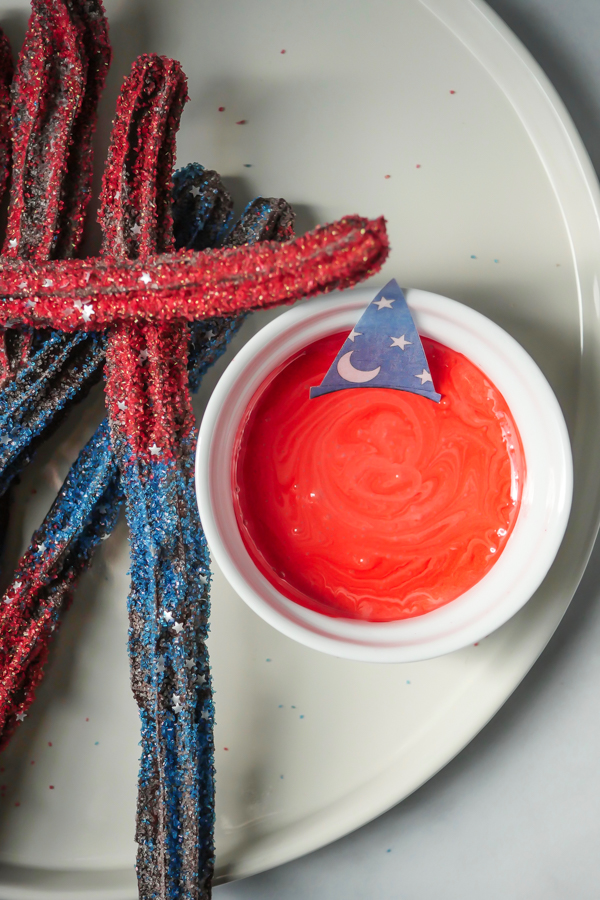
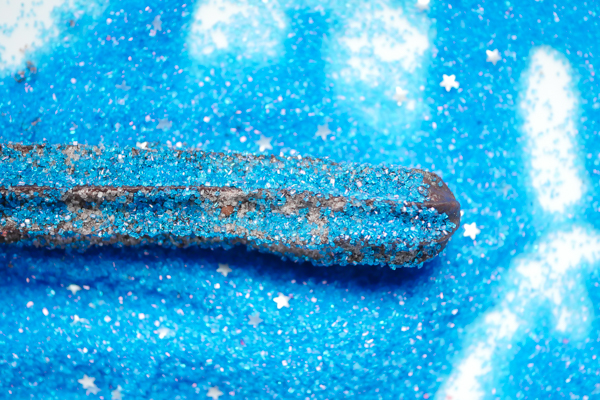
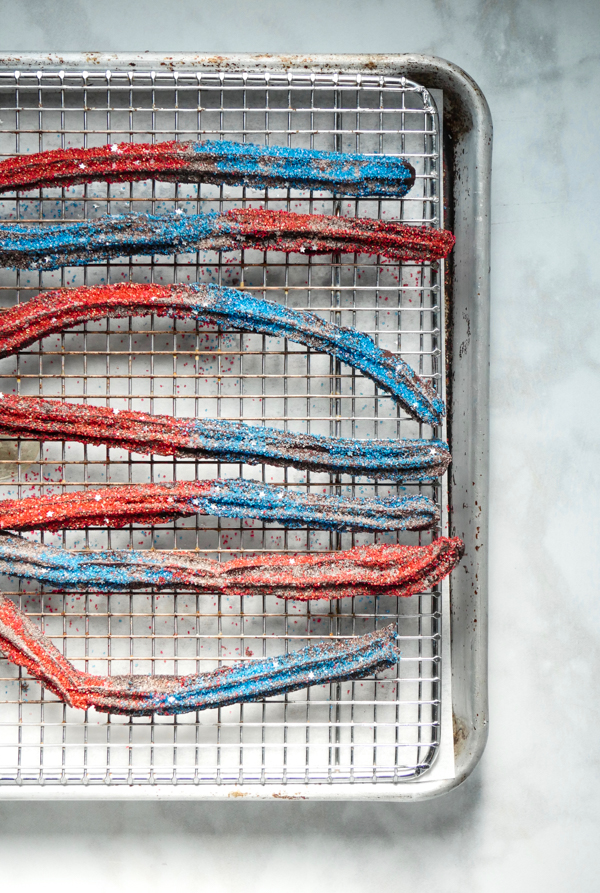
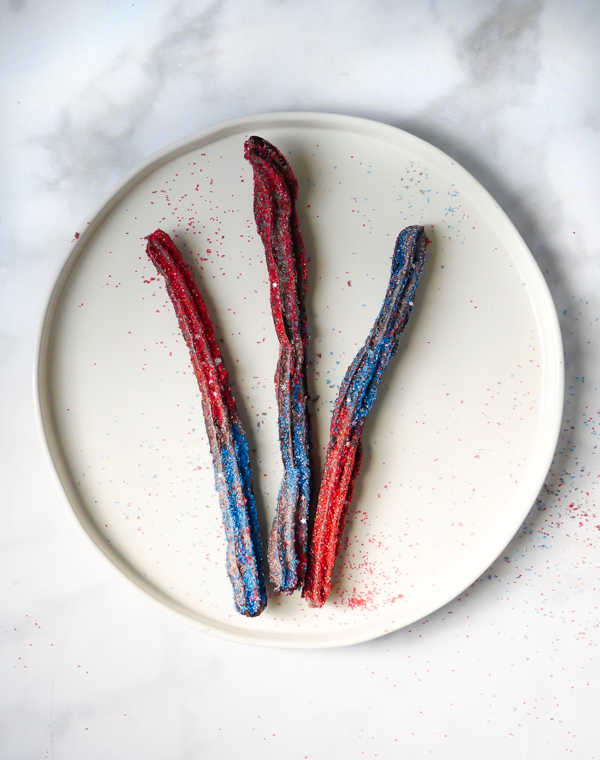
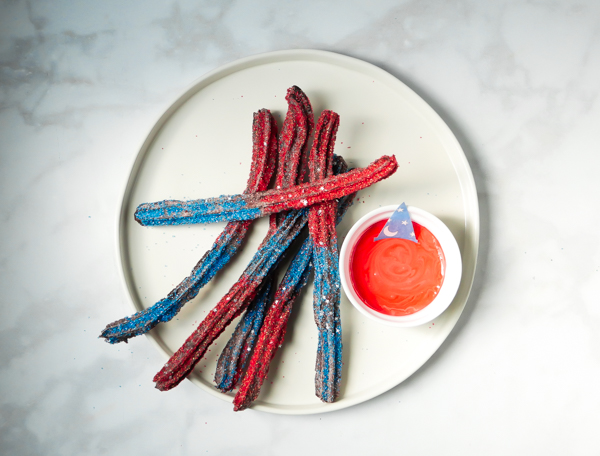
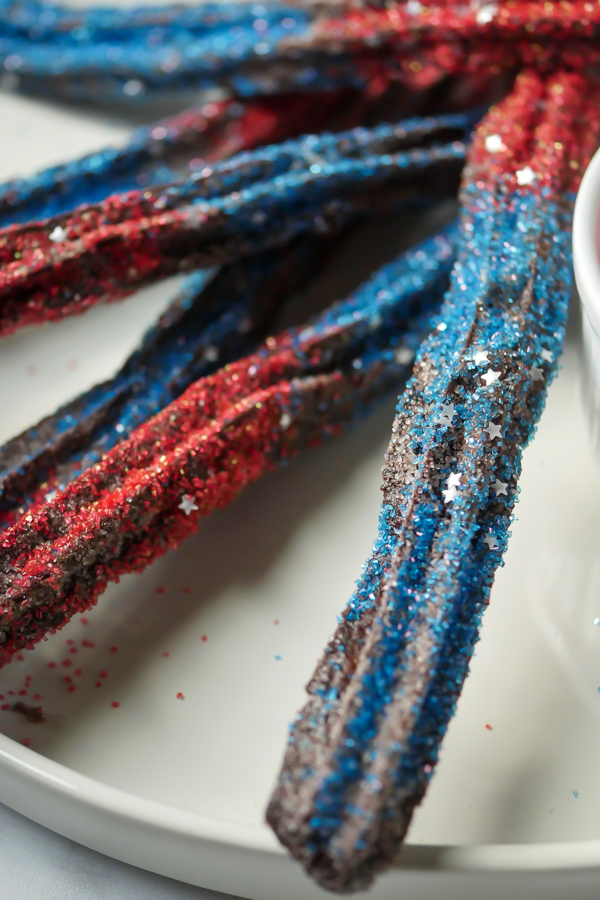
Since we’re starting this in July, our first recipe up today is the Fantasia Mickey Churro from the “Get Your Ears On” celebration (and yes, we did just conclude a month of our favorite dishes in June but we withheld the churro recipes so we could indulge in a whole MONTH) with its red, white (I’m counting the paper wrapper here), and blue color scheme. This was a sugar bomb that dyed your mouth and hands red. I thought it was super pretty to photograph and the kids liked it because… well, sugar bomb.

Fantasia Mickey Churros // magicaltreatsathome.com

The Fantasia Mickey Churro is also one of the chocolate churros that pop up and I love the flavor of these. If you’re not a fan, go ahead and make this without the cocoa powder! It will still be good!

Fantasia Mickey Churros // magicaltreatsathome.com

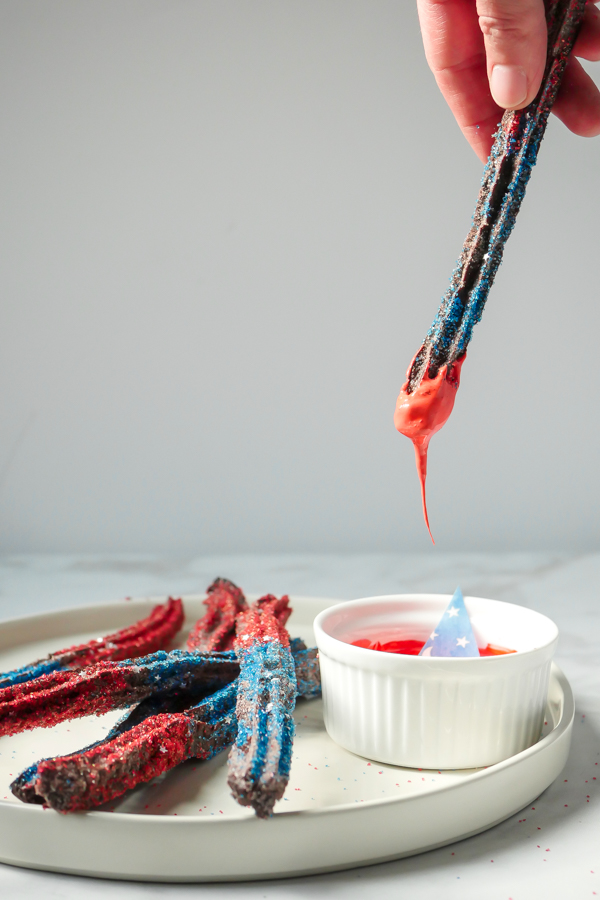
Lastly, these were paired with a bright red, marshmallow dipping sauce adorned with a teeny-tiny sorcerer hat that is worn by Mickey Mouse in Fantasia. Quite possibly I spent the whole day at the park with stained hands and a red tongue due to this dip. Also, that tiny hat fell right to the bottom of my dip before I even got to look at it so I’m going to say it’s not worth the effort when recreating this unless you really want it to be an exact replica of the dessert (it was white chocolate with a printed overlay of the hat and yes I fished it out of the dip and licked it clean so I could check out the design thus staining my hands red that day). It was a lightly flavored vanilla marshmallow creme type of dip which we’ll recreate in a minute. My recipe below is for more than you might need for this recipe, but it keeps in the fridge for a few weeks and you can always make more churros. Or maybe dip some fruit in it.

Fantasia Mickey Churros // magicaltreatsathome.com

I have lots of notes and tips on making these churros so please check out the “notes” section right below the actual recipes. These will be repeated on all the churro posts because I think it will help make the churros a breeze. If you have any questions on these, drop a comment below or shoot us an email!

Fantasia Mickey Churros // magicaltreatsathome.com
Print
clock clock iconcutlery cutlery iconflag flag iconfolder folder iconinstagram instagram iconpinterest pinterest iconfacebook facebook iconprint print iconsquares squares iconheart heart iconheart solid heart solid icon
Fantasia Mickey Churros // magicaltreatsathome.com

Fantasia Mickey Churro

5 Stars 4 Stars 3 Stars 2 Stars 1 Star No reviews
  • Author: Elana Lepkowski
  • Yield: 16 – 8” churros 1x
Print Recipe
Pin Recipe

Description

This sparkly red and blue chocolate churro with red marshmallow dipping sauce was part of the “Get Your Ears On” celebration found in Frontierland. A Disneyland-inspired treat.


Ingredients

Scale

Chocolate Churros

  • 1/2 cup granulated sugar
  • 1 teaspoon cocoa powder
  • red sanding sugar
  • blue sanding sugar
  • edible glitter stars
  • vegetable oil for frying
  • 1 cup water
  • 1/2 cup unsalted butter
  • 1 tablespoon granulated sugar
  • 1/4 teaspoon salt
  • 1 cup all purpose flour
  • 1/4 cup cocoa powder
  • 2 eggs

Marshmallow Creme

  • 3/4 cup glucose or corn syrup
  • 1 ounce egg white
  • 1/4 teaspoon salt
  • 3/4 cup powdered sugar
  • 3 tablespoons vanilla extract
  • 1–2 tablespoons milk (start with one and increase if needed)
  • red food dye

Tools:

  • spider for frying
  • Wilton 1 M piping tip
  • pastry bag
  • candy thermometer

Instructions

Chocolate Churros:

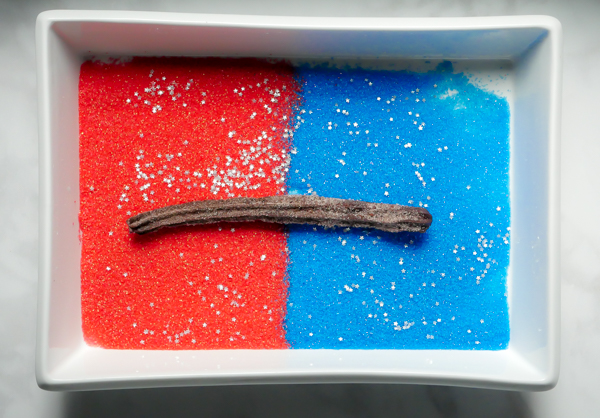
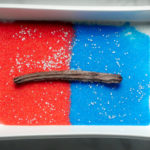
  1. Line two half sized sheet pans with parchment, set aside. Mix together 1/2 cup of granulated sugar and cocoa powder in a long shallow bowl or loaf pan, set aside. In a 9×12 baking pan, pour red sanding sugar on one side, and blue sanding sugar on other sprinkling stars over all the sugar, set aside.
    Fantasia Mickey Churros // magicaltreatsathome.com
  2. In a medium sized saucepan over medium-high heat, combine water, butter, sugar and salt. Bring to a boil, or until butter has melted.
  3. Turn burner to low and sift in all the flour and cocoa powder. Stir until there are no visible flour lumps and dough has begun to stick together in a ball and pulled away from the sides of the pan.
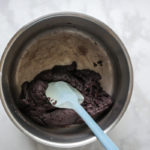
  4. Remove pan from heat and let sit 5 minutes. Then stir in each egg until incorporated. Dough will appear to break or become lumpy. Continue to stir until it forms a smooth, sticky dough.
    Fantasia Mickey Churros // magicaltreatsathome.com
  5. Fill a pastry bag fitted with a Wilton 1 M open star tip half full with batter (see notes below on filling pastry bags) and pipe 8″ long dough onto the sheet pan. I was able to fill two sheet pans with all the batter.
  6. Refrigerate dough at least 30 minutes and up to two days. Batter will stiffen the more it sits, so let the dough come to room temperature before frying.
  7. Fill a dutch oven or deep frying pan with vegetable oil at least 2″ up the side of the pan (I found a 1/2 gallon of avocado oil worked for me in my large dutch oven. See note below about reusing oil.). Heat oil to 340-350°f, using a candy thermometer to keep the temperature constant. You may need to adjust heat up or down during cooking.
  8. Place churros 2-3 at a time in the cooking oil for 6 minutes, turning after 3 minutes with a spatula. Wait until oil comes back to temperature before adding next batch.
  9. Using a spider or large spatula, remove churros from oil and drain on a cooling rack over parchment or on a paper towel. Wait at least a minute and then toss the churro in the chocolate sugar, tapping off any excess, and then moving the churro in the red and blue sugar mix, keeping the colors separate while mixing.
  10. While churros cool slightly, make the marshmallow creme dip.

Marshmallow Creme:

  1. Combine glucose or corn syrup, egg white, and salt in the bowl of a stand mixer. Beat on high for 5-10 minutes until doubled in size.
  2. Once doubled, move speed to low and pour in powdered sugar in a constant stream and mix until fully combined. You may have to stop and scrape down sides of bowl. Add in one tablespoon of milk. Add in additional milk if you’d like the creme runnier. Mix in vanilla extract.
  3. Remove 1/2 cup of mixture into a separate container and add in 3-4 drops of red food dye until desired color is reached.
  4. The rest of the marshmallow creme can be sealed in an air-tight container and refrigerated up to two weeks.
  5. Dip churros in marshmallow creme. Enjoy!

Notes

  • Do not overfill your pastry bag! Fill in two to three batches. If there is too much dough, it will seep out the top and will be hard to pipe.
  • Slowly pipe out dough all of a consistent size, smaller spots on the churro can cause them to become more fragile while handling and can break in the oil or while coating in sugar.
  • Churro dough can be piped out onto parchment and covered in the fridge up to 48 hours.
  • Thicker churros will require a longer cooking time to fully cook through the center. Test one churro first to adjust your cooking time.
  • Cooking oil can be fine strained and stored again for another use.
  • Churros curling? That could be one of a few reasons. One is that it will naturally shrink and change shape as the dough hits the oil and puffs up. I found that the stiffer dough from sitting in the fridge resulted in straighter churros while fresher dough tending to curl more. Also, if you’re using a circular pot like a dutch oven, churros may rest against the inside edge of the pan while cooking causing them to take on the curved shape of the pan. To prevent this, nudge your churro with the spider or spatula immediately after placing in oil when it pops back up to the surface. Continue to nudge back and forth for about 20 seconds or until the dough has gotten stiff in the oil.

Did you make this recipe?

Tag @magicaltreatsathome on Instagram and hashtag it #magicaltreatsathome

Fantasia Mickey Churros // magicaltreatsathome.com

Share this:

  • Click to share on Facebook (Opens in new window) Facebook
  • Click to share on X (Opens in new window) X

Like this:

Like Loading...

Filed Under: Recipes, Treats Tagged With: churro, disneyland, Fantasia, Frontierland, Get Your Ears On, Mickey Mouse, treat

“Celebrate Mickey” Chicken and Waffles

June 30, 2019 by Elana Lepkowski Leave a Comment

Celebrate Mickey Chicken and Waffles // magicaltreatsathome.com

Where can I find the original treat?

  • This specialty treat was part of the Get Your Ears on Celebration and was located at the Carnation Cafe in Disneyland.

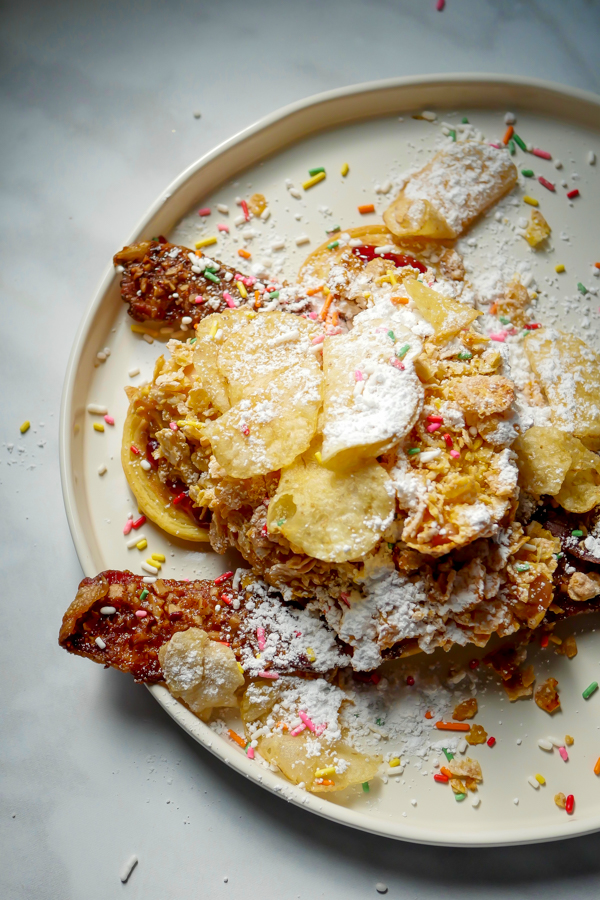
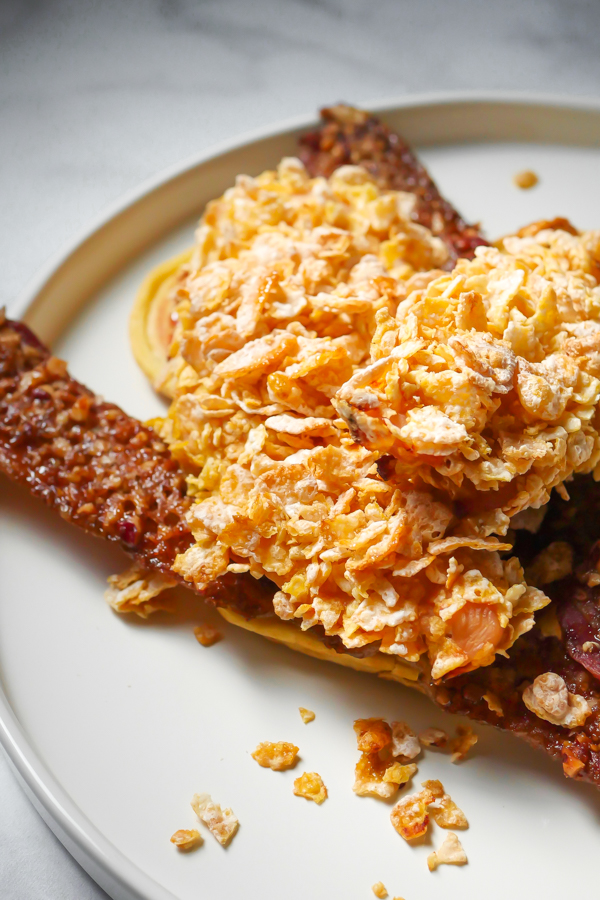
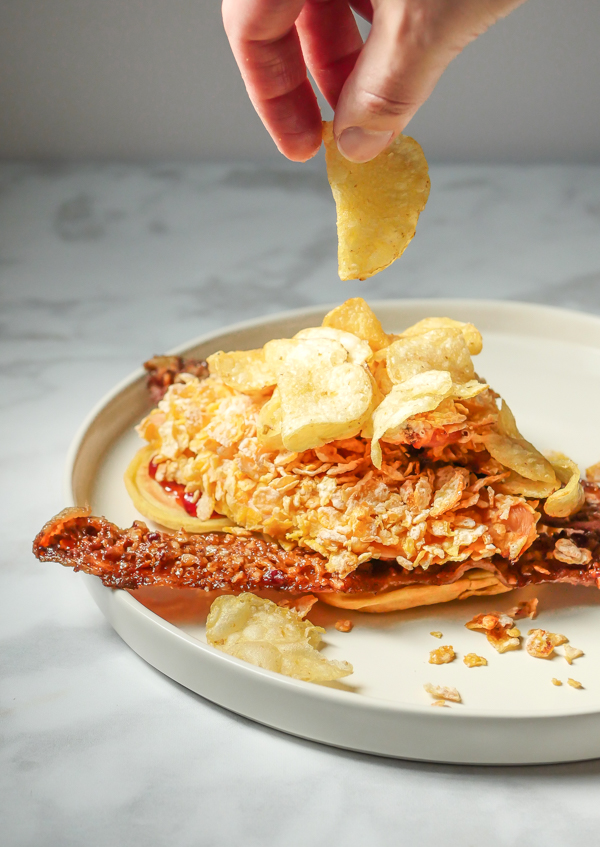
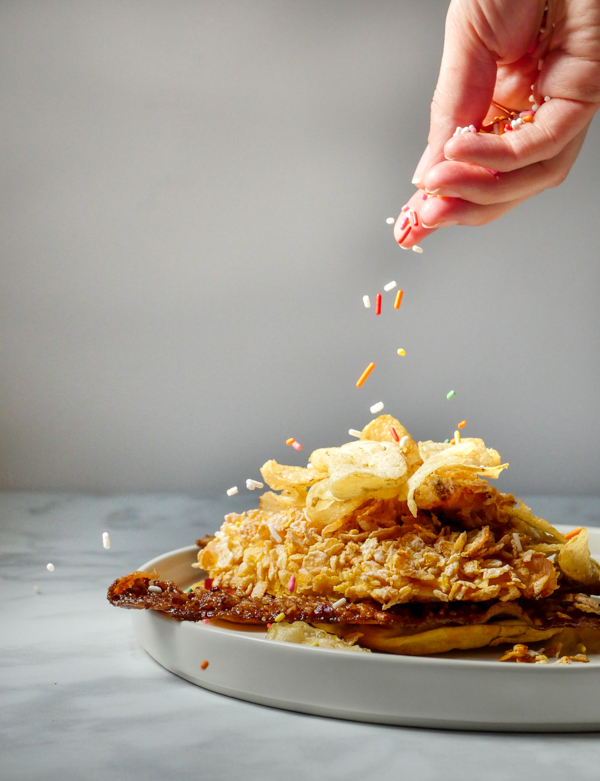
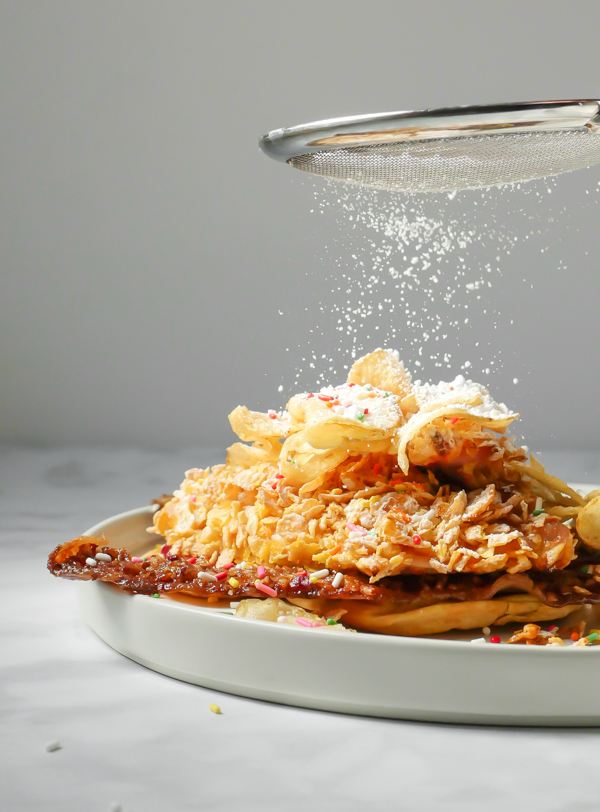
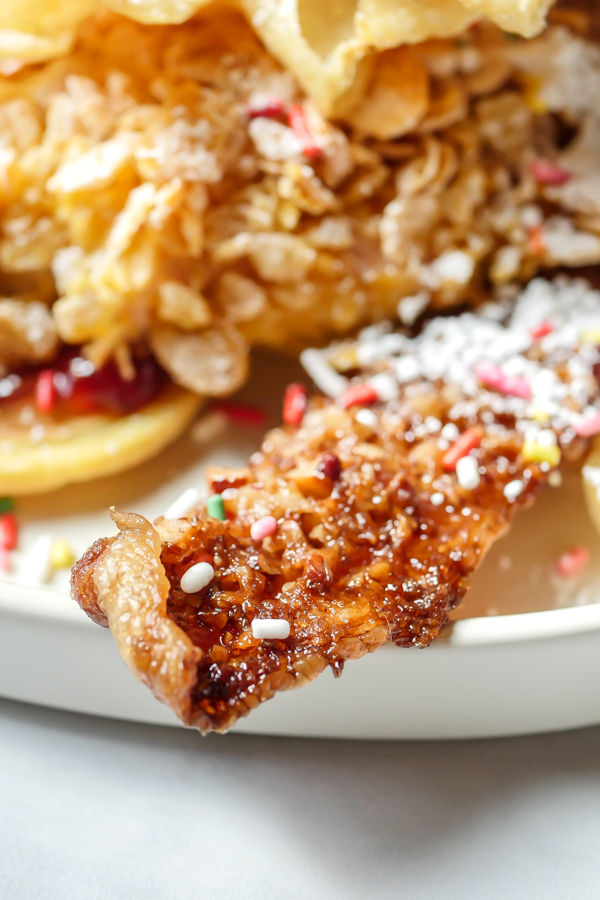
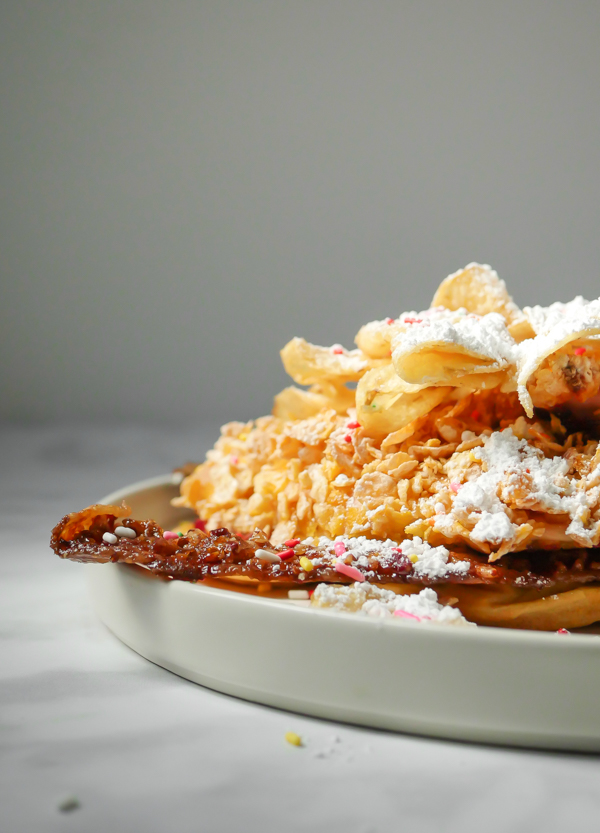
We’re squeezing in our last and final recipe from the “Get Your Ears On” celebration for this month with this festive dish, the “Celebrate Mickey” Chicken and Waffles Breakfast Special. Now, I’m a big fan of chicken and waffles any time, but cover that with candied bacon, berry compote, potato chips, powdered sugar, and sprinkles and well, now I’m even more excited.

Celebrate Mickey Chicken and Waffles // magicaltreatsathome.com

This dish has a number of components, but don’t fret, they easily can all be made ahead of time. In fact, I had to make several components well in advance while I was doing all the testing for the Piranha Lemonade Slushy.

Celebrate Mickey Chicken and Waffles // magicaltreatsathome.com

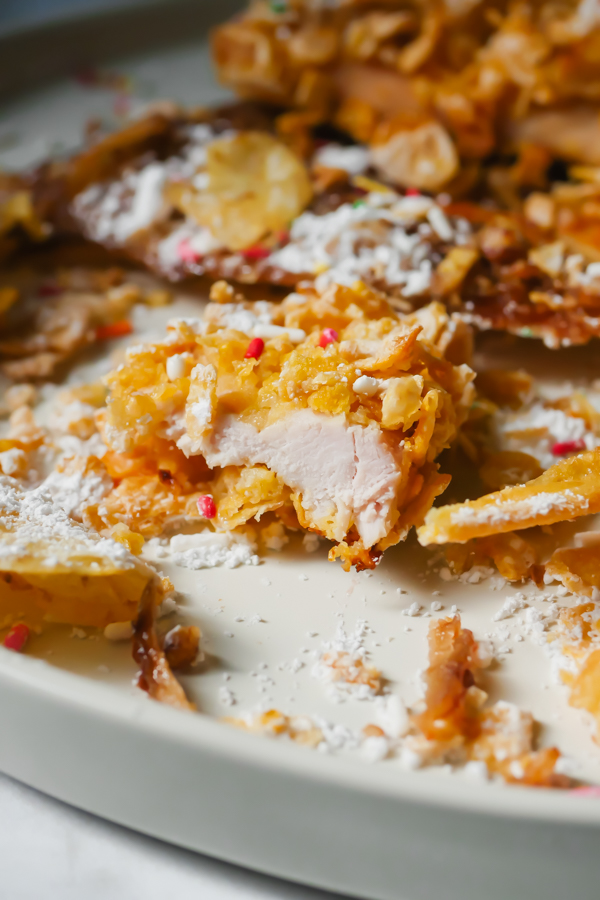
The one change I made from the original is that I did not pan fry the chicken. I wasn’t sure how the cereal coating would hold up to frying, so I decided to bake the battered chicken. And it worked out great! If you’re not up to pan frying these, the baked option keeps the topping crisp still but it does take longer to make. I like having the hands off option and less oil to deal with. It loses some of its golden color baking it, but I think it was just as tasty.

Celebrate Mickey Chicken and Waffles // magicaltreatsathome.com

If you’re looking for a special breakfast spread, or if you’re having guests over for brunch, I think this dish would be perfect. You could make stacks of each component and let your guests fill their plates as they’d like. And of course, kids LOVE making their own breakfast plate with these components, and aren’t going to say no to adding powdered sugar and SPRINKLES to their breakfast. Oh yeah, and potato chips too!

Celebrate Mickey Chicken and Waffles // magicaltreatsathome.com

Note, this dish uses the same mix that Disneyland uses in all their waffles, Golden Malt. Surprisingly this is easily available on Amazon and possibly in your local grocery store. However, if you’ve got a waffle mix you like, either store bought or homemade, go ahead and use that. Also, I opted to mix strawberry and raspberry preserves to make my own compote for the dish. If you have a mixed berry jam already at home, that would also work. The berries give a nice tang to the whole dish that I think works really well with the savory elements.

Celebrate Mickey Chicken and Waffles // magicaltreatsathome.com

And that concludes some our favorite dishes from the “Get Your Ears On’ celebration at Disneyland! Stay tuned for next month’s recipes, where we will be serving up a month of CHURROS! Until then, let’s celebrate with some chicken and waffles.

Celebrate Mickey Chicken and Waffles // magicaltreatsathome.com
Print
clock clock iconcutlery cutlery iconflag flag iconfolder folder iconinstagram instagram iconpinterest pinterest iconfacebook facebook iconprint print iconsquares squares iconheart heart iconheart solid heart solid icon
Celebrate Mickey Chicken and Waffles // magicaltreatsathome.com

“Celebrate Mickey” Chicken and Waffles

5 Stars 4 Stars 3 Stars 2 Stars 1 Star No reviews
  • Author: Elana Lepkowski
  • Yield: 2 servings 1x
Print Recipe
Pin Recipe

Description

Let’s “Celebrate Mickey” with this over-the-top Disney-inspired chicken and waffles dish topped with berry compote, candied pecan bacon, potato chips, powdered sugar, and SPRINKLES! Found at Carnation Cafe during the “Get Your Ears On” celebration at Disneyland.


Ingredients

Scale

For the waffles:

  • 1 cup Golden Malted Waffle Mix
  • 1 egg
  • 5 ounces water
  • 2 tablespoons melted butter

For the berry compote:

  • 2 tablespoons strawberry jam
  • 1 tablespoon raspberry jam

For the candied pecan bacon:

  • 5 slices bacon
  • 3 tablespoons brown sugar
  • 1/3 cup crushed pecans

For the cereal crusted chicken:

  • 4 cups crushed frosted cereal flakes
  • 1 egg
  • 1–1/3 cup milk
  • 4 chicken breasts
  • salt

Toppings:

  • potato chips (I use kettle chips for this dish)
  • powdered sugar
  • rainbow sprinkles

Special Tools

  • Mickey Mouse Waffle Maker

Instructions

For the waffles (makes 4 waffles in Mickey Waffle Maker):

  1. Beat eggs and liquid together.
  2. Add flour and mix well.
  3. Stir in melted butter and mix thoroughly.
  4. Ladle onto hot Gourmet Waffle Baker and remove when golden brown.

For the berry compote:

  1. Mix together jams in a small bowl.
  2. Set aside.

For the candied pecan bacon:

  1. Heat oven to 400.
  2. Line a baking sheet with foil and place a cooling rack on top. Place bacon on the cooling rack.
  3. Combine brown sugar and pecans in a small bowl. Spoon mixture over bacon, pushing down into bacon evenly.
  4. Bake 20-25 minutes until brown and crispy.

For the cereal crusted chicken:

  1. Preheat oven to 375°f.
  2. Grease a 9×12 baking pan.
  3. Season chicken breasts with salt on both sides (about 1/2 teaspoon each).
  4. Crush cereal into even pieces (I used my hands as I measured it out) and place into a shallow bowl large enough to lay chicken in.
  5. In another shallow bowl of equal size, pour milk in and beat the egg into it.
  6. Next, dip chicken breast into the milk, letting excess drip back into bowl, and then dip into the cereal on both sides. Place in baking dish and repeat with the rest of chicken. 
  7. Bake in the oven for about 40 minutes or until a thermometer reads 165°f.

Assembly:

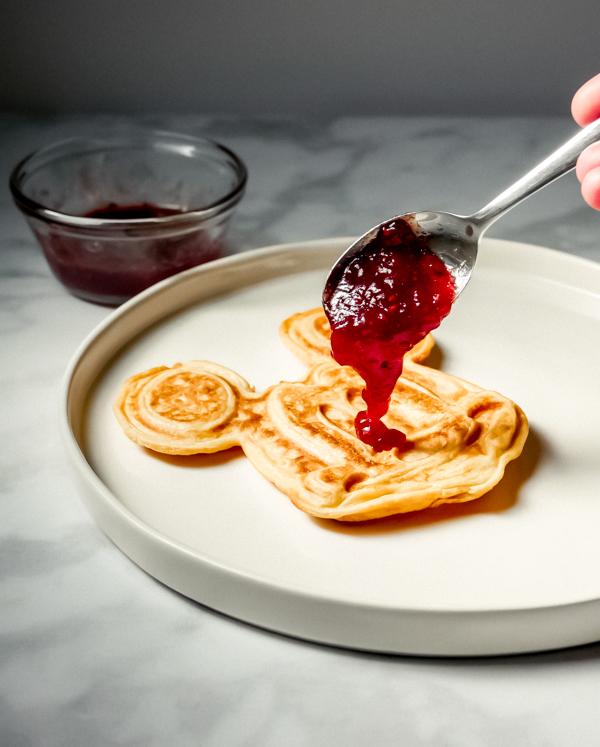
  1. Place the waffle on a plate and top with jam.
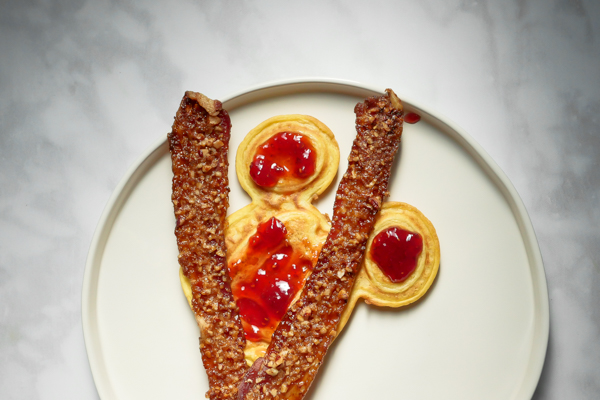
  2. Lay the bacon pieces next and then place chicken on top.
  3. Cover with potato chips, powdered sugar, and sprinkles. Enjoy!

Notes

  • Waffles can be made ahead of time and frozen individually between sheets of parchment and placed in a ziplock until ready to use. They can be toasted in a toaster oven or toaster the same as frozen waffles.
  • Bacon can be made ahead of time and placed in an airtight container in the fridge until ready to use up to 3 days. Let the bacon come to room temp, or warm in a toaster oven when ready to eat.
  • Chicken can be made ahead of time and placed in an airtight container in the fridge until ready to use up to 3 days. Warm in oven or toaster oven when ready to eat.
  • Jam can be mixed and stored in an airtight container in the refrigerator up to two weeks.
  • Waffles will deflate after cooking slightly.

Did you make this recipe?

Tag @magicaltreatsathome on Instagram and hashtag it #magicaltreatsathome

Celebrate Mickey Chicken and Waffles // magicaltreatsathome.com

Share this:

  • Click to share on Facebook (Opens in new window) Facebook
  • Click to share on X (Opens in new window) X

Like this:

Like Loading...

Filed Under: Recipes, Savory Tagged With: bacon, breakfast, Carnation Cafe, cereal, chicken, Mickey Mouse, potato chips, savory, sprinkles, waffles

Mickey Mouse Butterscotch Beignets

June 10, 2019 by Elana Lepkowski 1 Comment

Mickey Mouse Butterscotch Beignets // magicaltreatsathome.com
  • Find these butterscotch beignets at the Mint Julep Bar in New Orleans Square.

We’re continuing our series of favorites from the “Get Your Ears On” celebration from Disneyland with these fluffy, melt-in-your-mouth, butterscotch beignets. These actually *might* be our favorite flavor of beignets, even more so than the original version. And lucky us! Even though these appeared as part of the “Get Your Ears On” celebration, they are still being served at the Mint Julep bar… we just don’t know until when!

Mickey Mouse Butterscotch Beignets // magicaltreatsathome.com

Since these could go away at any moment, the recipe had to be cracked ASAP. And recipe test we did! The secret to that butterscotch flavor is in the topping, not the actual beignet. At the park, the beignet itself tasted no different than an original one, it was the flavored sugar that imparted that buttery sweet butterscotch flavor. But how to do it?

Mickey Mouse Butterscotch Beignets // magicaltreatsathome.com

We tried a few methods: first, trying to flavor the powdered sugar. But, when you add a liquid to powdered sugar, it melts. So the next step was to coat the beignets with butterscotch syrup and then coat with powdered sugar. This definitely added a little flavor to the beignets, but not as strong as what we wanted. So lastly, we made a butterscotch powder using blitzed butterscotch candies. And there we seemed to get the right flavor. Now, I doubt they are crushing hard candies at the parks to get that flavor, and after doing some additional research, I’ve found you can purchase a butterscotch flavoring powder, so if you’re so obsessed with these and you want to make them every week, maybe you should check that out.

Mickey Mouse Butterscotch Beignets // magicaltreatsathome.com

Timing of applying the butterscotch powder here is crucial. Applying too late after they’ve cooled and the butterscotch powder along with powdered sugar just slides off the beignets and doesn’t really coat. Apply it too soon and it melts the butterscotch powder and hardens it back into a crunchy state (my husband actually really liked getting some crunchy bits in his so you might too). The key here to getting an even coating is to let the beignet rest a few minutes after it comes out of the oil, coat a little with butterscotch syrup and then dust with the butterscotch powder and powdered sugar.

Mickey Mouse Butterscotch Beignets // magicaltreatsathome.com

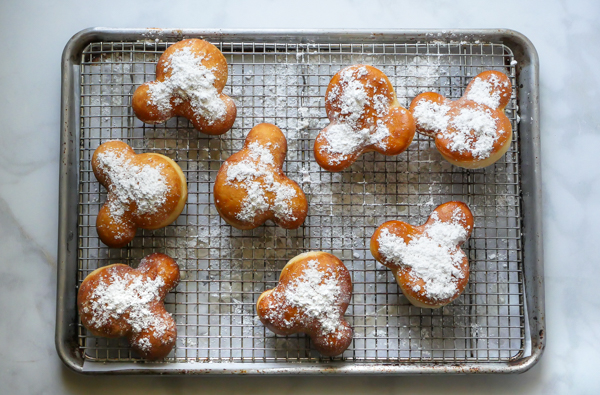
Ok, we’ve got the topping, but what about the actual beignet part? Well, this dough is a beauty to work with. It requires very little kneading (and if you’ve got a dough hook at home then all the kneading will be done in the machine for you), and it produces a shiny, smooth, easy to roll out dough. I barely needed flour to roll it out! What it does require is time. Since this is a yeasted dough, it needs to sit in total for a few hours, or overnight if you decided to make these in the evening and fry off in the morning. But if you need to have them that day, the nice thing is it is just only a few hours of waiting.

Mickey Mouse Butterscotch Beignets // magicaltreatsathome.com

Now, let’s say a few things about deep frying at home. First, it’s super easy as long as you have a few tools to help you (and I’ll list them in the recipe below). Second, none of the tools are fancy or expensive and you don’t need some sort of special frying machine. Lastly, you don’t need to be outside or in a specially ventilated area. If you don’t like the smell, open some windows, light a kitchen candle, and immediately deal with your oil as soon as it is cool enough to touch. Tip, you don’t need to toss out the oil after one doughnut frying session either. I bought a half gallon of avocado oil (it does well at high temps) and kept the container it came in. Once my oil was room temp, I strained it back into the bottle, sealed it, and used it again the next day for another batch of recipe testing. The number one rule though with working with hot oil: be safe and be aware! Wear an apron, closed toe shoes, and get a glove out if you’re afraid of oil splatters.

OK! That’s all my tips and notes for this yummy treat. If you’ve always wanted to enjoy those Mickey Mouse beignets, but were nowhere near the park that day, I highly encourage you to try this at home.

Mickey Mouse Butterscotch Beignets // magicaltreatsathome.com
Print
clock clock iconcutlery cutlery iconflag flag iconfolder folder iconinstagram instagram iconpinterest pinterest iconfacebook facebook iconprint print iconsquares squares iconheart heart iconheart solid heart solid icon
Mickey Mouse Butterscotch Beignets // magicaltreatsathome.com

Mickey Mouse Butterscotch Beignets

5 Stars 4 Stars 3 Stars 2 Stars 1 Star No reviews
  • Author: Elana Lepkowski
  • Yield: 15 Mickey Mouse shaped beignets 1x
Print Recipe
Pin Recipe

Description

Sweet, buttery, melt-in-your-mouth Mickey Mouse butterscotch beignets. Part of the “Get Your Ears On” celebration at Disneyland. Adapted from the Disney Parks Blog.


Ingredients

Scale
  • 15 hard butterscotch candies
  • 1/2 teaspoon dry yeast
  • 1/4 cup warm water (105º)
  • 1/4 cup sugar
  • 2 tablespoons vegetable shortening (I used refined coconut oil)
  • 1/2 teaspoon salt
  • 1/2 cup heavy cream
  • 1 egg
  • 4 cups all-purpose flour
  • 1/2 cup boiling water
  • Vegetable oil for frying, like avocado
  • 3/4 cup butterscotch syrup
  • Powdered sugar

Specialty Tools:

  • heavy bottomed dutch oven
  • candy thermometer
  • Mickey Mouse cutter
  • mesh strainer bag (I use these reusable straining bags for everything!)

Instructions

For the butterscotch powder:

  1. First, break up the butterscotch candies in a ziplock bag using a rolling pin or rubber mallet. You do not need to fully crush them, just break them into small pieces.
  2. Next, transfer to a food processor or spice grinder. Pulse until candies are a find powder. Set aside.

For the beignets:

  1. Sprinkle yeast over warm water in a small bowl, gently stirring to dissolve. Let stand for 5 minutes.
  2. Combine sugar, shortening, salt, heavy cream, egg, flour and boiling water in a large bowl. Mix until everything is just combined and then stir in yeast mixture. With the dough hook attachment of an electric mixer on medium speed, mix the dough just until combined and smooth. About 3-4 minutes. Let dough rest for 30 minutes in the bowl.
  3. Flour your surface and roll to 1/4-inch thickness. Using the Mickey Mouse cutter, cut dough pieces, twisting slightly, and carefully removing dough from around cutter before releasing. You may have to combine dough and roll out again to cut more shapes out. Cover with a towel and let dough rise until doubled in size in a warm, draft-free area, about 1-1/2 to 2 hours.
  4. Pour enough oil into a deep-sided, heavy bottomed pot until it reaches 2 inches up sides; heat oil over medium heat to 370°F.
    Mickey Mouse Butterscotch Beignets // magicaltreatsathome.com
  5. Add 2-3 beignets to oil; fry until golden brown on both sides, about a minute each, turning once.
  6. Remove from hot oil with a slotted spoon and place on a baking sheet lined with paper towels.
  7. Let cool about 5 minutes, coat with butterscotch syrup and then dust with butterscotch powder and then powdered sugar. Enjoy!

Notes

  • Dough may have to be recombined and rolled a second time if you have a lot of scraps
  • Wait for oil to come back to temperature before adding next batch of beignets to the pot
  • Let hot beignets rest 5 minutes, but no more than 30 minutes, before coating with syrup and powdered sugar
  • No dough hook attachment? Knead dough until smooth and shiny, about 5-8 minutes and then proceed with the recipe
  • Want to make these at night for the next morning? After cutting Mickey Mouse shapes out. Transfer to a baking sheet and let rest, covered with a towel, in the refrigerator overnight. Let come to room temperature before frying in the morning
  • Strain your oil after it reaches room temperature. It can be used again!

Did you make this recipe?

Tag @magicaltreatsathome on Instagram and hashtag it #magicaltreatsathome

Mickey Mouse Butterscotch Beignets // magicaltreatsathome.com

Share this:

  • Click to share on Facebook (Opens in new window) Facebook
  • Click to share on X (Opens in new window) X

Like this:

Like Loading...

Filed Under: Recipes, Treats Tagged With: beignet, character treat, Get Your Ears On, Mickey Mouse, Mint Julep Bar, treat

Mickey Mouse Celebration Whoopie Pies

May 27, 2019 by Elana Lepkowski Leave a Comment

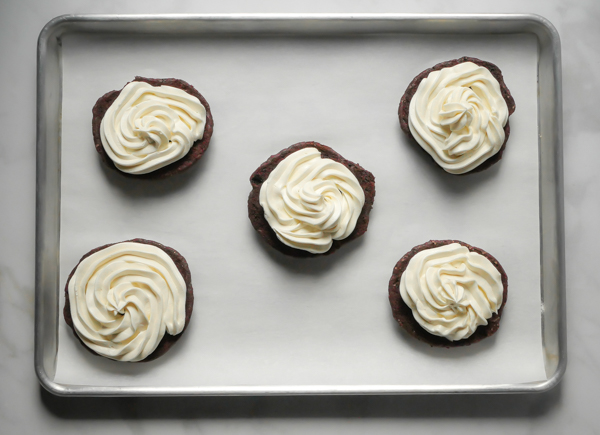
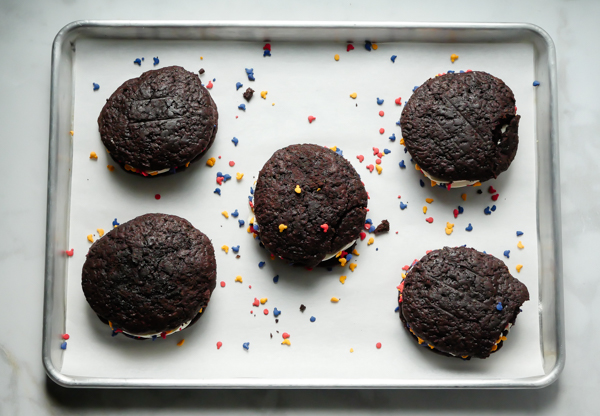
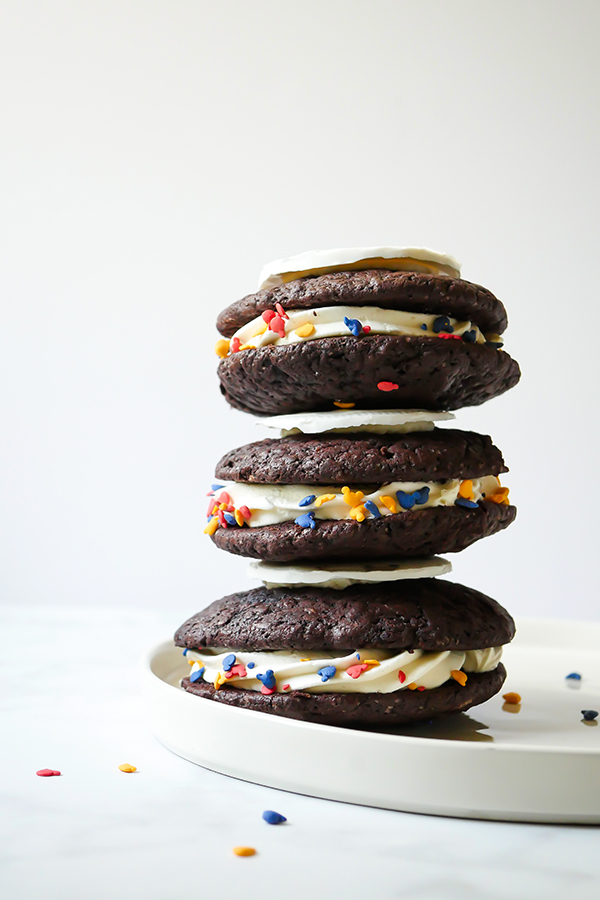
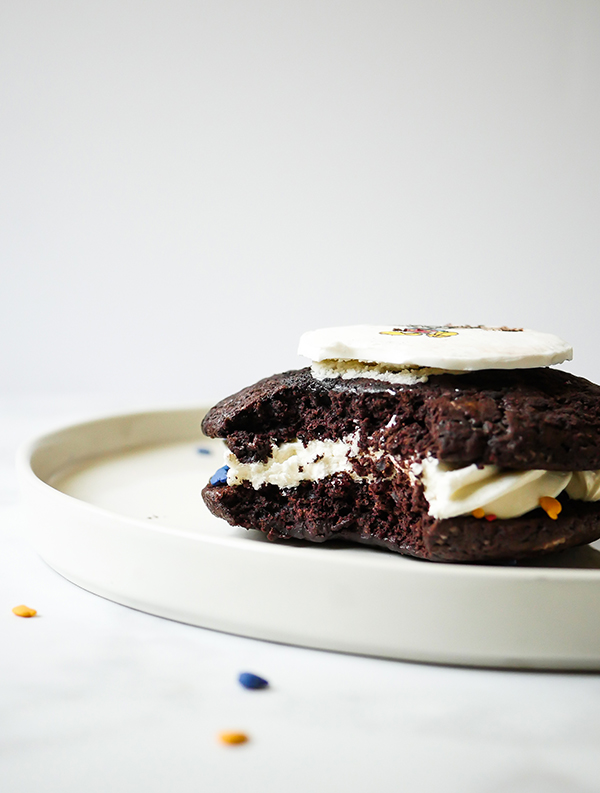
Mickey Mouse Celebration Whoopie Pies // magicaltreatsathome.com

Where can I find the original treat?

  • These specialty treats were found at the Grand Californian Hotel.

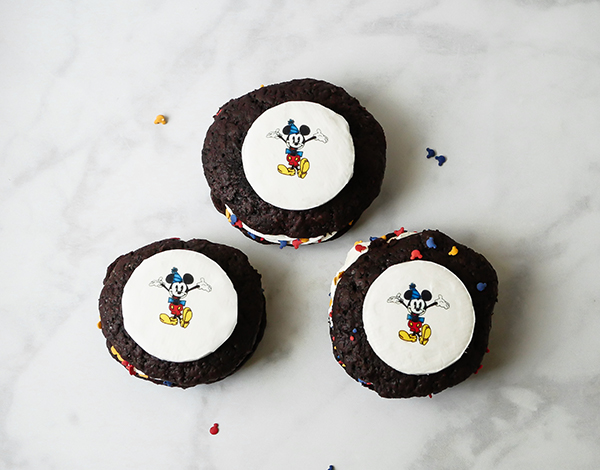
Disneyland’s “Get Your Ears On” celebration is sadly coming to a close this week at the parks, but that doesn’t mean the celebration has to stop in your kitchen! We’re popping back in to White Water Snacks at the Grand Californian Hotel to recreate their massive Mickey Mouse Celebration Whoopie Pie. Bonus: there’s sprinkles involved.

Mickey Mouse Celebration Whoopie Pies // magicaltreatsathome.com

I consider myself a bit of a whoopie pie master. A few years back I decided to make some for a friend’s party and they were such a hit I feel like I haven’t stopped making them for friends and clients ever since. (I even made an adult’s only version with Kerrygold Irish Cream that is definitely worth checking out if that’s your thing.) The cakes are not super sweet because HELLO! they’re filled with vanilla buttercream and sprinkles; it’s a great balance that prevents them from becoming too sweet.

Mickey Mouse Celebration Whoopie Pies // magicaltreatsathome.com

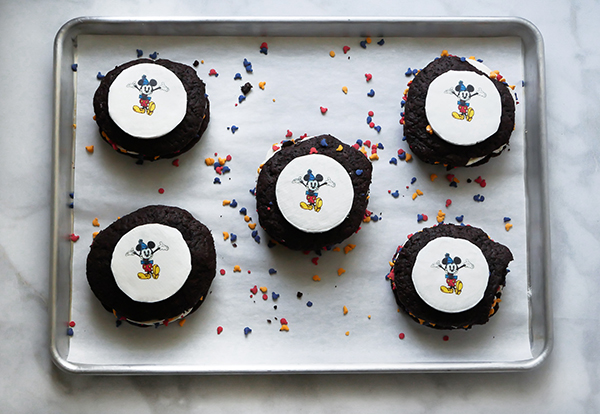
Now let’s talk about the white chocolate medallion. This was purely an optional step on my part to really recreate what you get in the parks. The Mickey Mouse design on there is done with a printer outfitted with edible inks!! I have one!! If you are considering purchasing one, they’re not really that expensive. But unless you are doing lots of decorating that requires such a thing (or, *coughcough*, starting a side project based on a certain theme park’s foods), this is definitely not something you need to get. My kids didn’t even bother eating the medallion because they found the artwork too interesting to destroy.

Mickey Mouse Celebration Whoopie Pies // magicaltreatsathome.com

One tool that I do find helpful for making the whoopie pies is a disher. Dishers are used a lot by institutions for serving food that needs to be a certain amount. They are usually color coded to help identify them in the kitchen. However, they are excellent products to have in your kitchen since they scoop perfect sized cookies, or ice cream, or meatballs, or anything else that needs to be measured. A blue handled, #16, 2 ounce disher is the perfect way to dish out the batter for each whoopie pie half (yes, there is FOUR OUNCES OF CAKE you’re getting per whoopie pie). Feel free to size this down though if you’d like more petite whoopie pies. You’ll need to reduce baking time though depending on how small you go.

Mickey Mouse Celebration Whoopie Pies // magicaltreatsathome.com

Ok, I feel like I’ve written enough here, let’s make some whoopie pies!

Mickey Mouse Celebration Whoopie Pies // magicaltreatsathome.com
Print
clock clock iconcutlery cutlery iconflag flag iconfolder folder iconinstagram instagram iconpinterest pinterest iconfacebook facebook iconprint print iconsquares squares iconheart heart iconheart solid heart solid icon
Mickey Mouse Celebration Whoopie Pies // magicaltreatsathome.com

Mickey Mouse Celebration Whoopie Pies

5 Stars 4 Stars 3 Stars 2 Stars 1 Star No reviews
  • Author: Elana Lepkowski
  • Yield: 5 cakes
Print Recipe
Pin Recipe

Description

Rich chocolate whoopie pies are filled with sweet vanilla buttercream, sprinkled with Mickey Mouse decorettes, and topped with a white chocolate Celebration Mickey Mouse. A Disneyland-inspired treat from the “Get Your Ears On” celebration.


Ingredients

Cakes:

1/2 lb. butter

1 cup light brown sugar, packed

1 egg

1 teaspoon baking powder

1/2 teaspoon baking soda

3/4 teaspoon salt

1 teaspoon vanilla extract

1/2 cup cocoa, dutch-processed

10 ounces all purpose flour

1 cup milk (or milk substitute like almond)

Filling (this filling can be doubled if you want extra filling):

1/2 stick (2 ounces) unsalted butter, room temperature

1/2 pound powdered sugar

2-1/2 tablespoons heavy cream

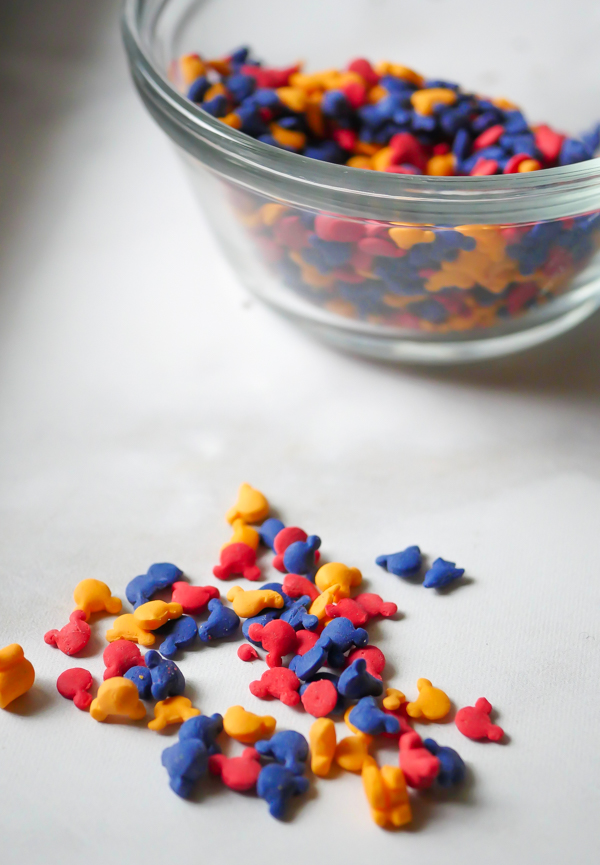
Mickey Mouse celebration decorettes
2-1/2 ounces white candy melts, optional (for medallions)

Tools:
#16, 2 ounce disher


Instructions

Filling:

  1. Prepare the frosting by creaming together the butter and powdered sugar until smooth.
  2. Pour in the heavy cream until incorporated. Filling can be kept refrigerated in a sealed container up to three days.

Cakes:

  1. Preheat oven to 350 degrees.
  2. Make the cakes by creaming the sugar and butter together until smooth. Add in the egg and mix until incorporated.
  3. Next add in baking powder, baking soda, salt and vanilla extract. Mix until well combined.
  4. Sift in cocoa powder and mix until combined.
  5. Mix in 1/2 of flour and 1/2 the milk, and then mix in second half of flour and then the rest of the milk. Stir until just combined.
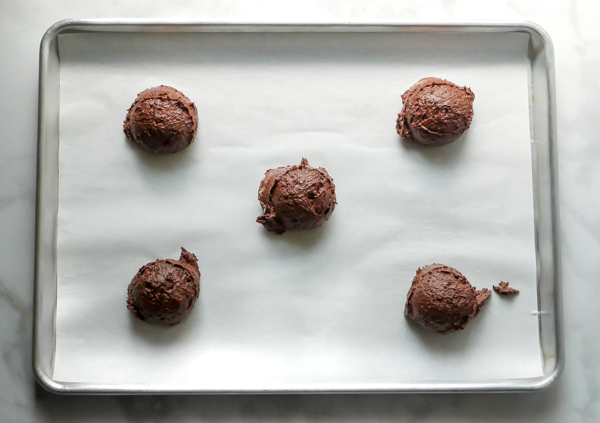
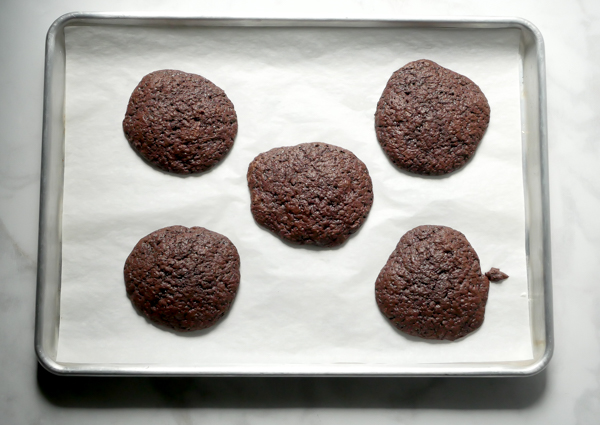
  6. Scoop out a 1/4 cup of mixture (or use the #16 disher) onto a sheet pan covered in parchment. You can fit 5 scoops on each sheet pan. Bake 18-22 minutes until a toothpick comes out clean from the center.
    Mickey Mouse Celebration Whoopie Pies // magicaltreatsathome.com
  7. Cool on sheet pan and then transfer to a wire rack to finish cooling completely. Store in an air tight container until ready to use.
  8. To assemble, spread filling on flat side of one half of the cakes. Top with second half of cake.
  9. Sprinkle Mickey Mouse decorettes to sides of whoopie pies.
  10. Set any extra frosting aside to attach medallions if making.

Medallions (optional)

  1. Melt the white candy melts in a microwave safe container like glass for 30 seconds, stir, and then continue to microwave in short bursts of 15-20 seconds, stirring between times, until fully melted and smooth. Optionally, melt using a double boiler.
  2. Next, line 5 standard muffin tins, covering bottoms and all the way up the sides, with cling wrap.
  3. Pour in candy melts among the 5 tins, making sure it is evenly distributed.
  4. Let set about 30 minutes and then, using the cling wrap, gently remove the discs and set aside.
  5. If using a chocolate transfer design, follow the directions on the package and adhere to medallion.
  6. Use remaining frosting to add a dot to the top of each assembled whoopie pie and adhere the medallion to the top.

Notes

  • A disher will help get even, rounded whoopie pies that are also consistent in size.
  • Frosting can be made ahead of time and kept refrigerated up to 3 days.

Did you make this recipe?

Tag @magicaltreatsathome on Instagram and hashtag it #magicaltreatsathome

Mickey Mouse Celebration Whoopie Pies // magicaltreatsathome.com

Share this:

  • Click to share on Facebook (Opens in new window) Facebook
  • Click to share on X (Opens in new window) X

Like this:

Like Loading...

Filed Under: Recipes, Treats Tagged With: buttercream frosting, chocolate, Get Your Ears On, Grand Californian Hotel, Mickey Mouse, treat, White Water Snacks

Mickey Mouse Shorts Doughnuts

May 13, 2019 by Elana Lepkowski 1 Comment

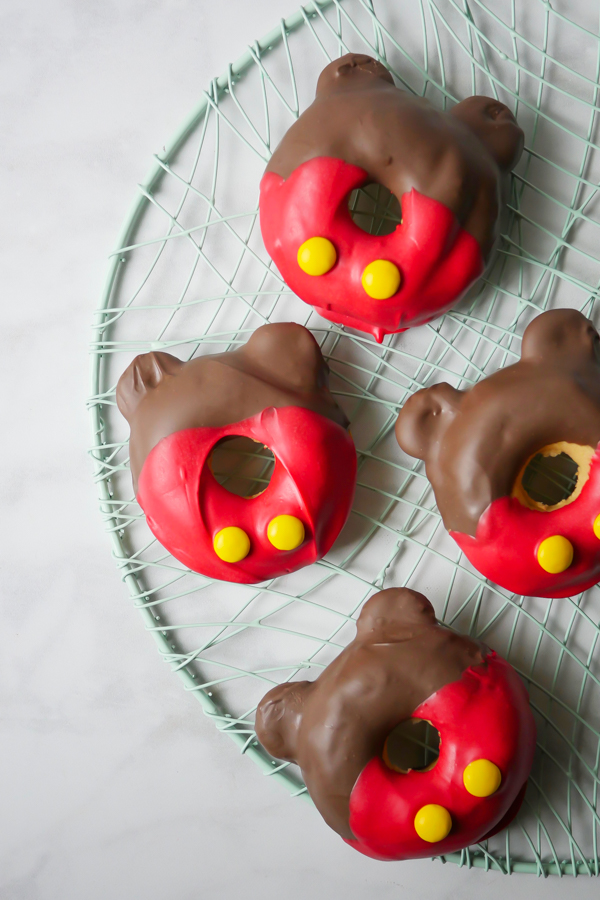
Mickey Mouse Shorts Doughnuts // magicaltreatsathome.com

Where can I find the original treat?

  • These vanilla cake doughnuts can only be found at Craftsman Bar and Grill (formerly White Water Snacks) inside the Grand Californian Hotel in Downtown Disney.

I found myself googling “does Mickey Mouse wear pants or shorts?” this morning to make sure I was getting the title correct for this treat. Answer: most definitely shorts.

Mickey Mouse Shorts Doughnuts // magicaltreatsathome.com

And these are most definitely delicious and easy to make. My #1 easy tip for this is that you most certainly can use store bought doughnuts to make these. The actual treat from White Water snacks reminds me of grocery store doughnuts (like Donettes!), but today I’m also providing a super quick (and I mean quick!) recipe to make baked doughnuts. So put that vat of hot oil away for another day (like churro making day… we have a lot of those recipes coming up!).

Mickey Mouse Shorts Doughnuts // magicaltreatsathome.com

One surprise after dissecting my doughnut to find out all the components… Disneyland uses M&Ms to make all their buttons for treats! Who knew? Well, maybe you if you’re like me and need to know how they make everything.

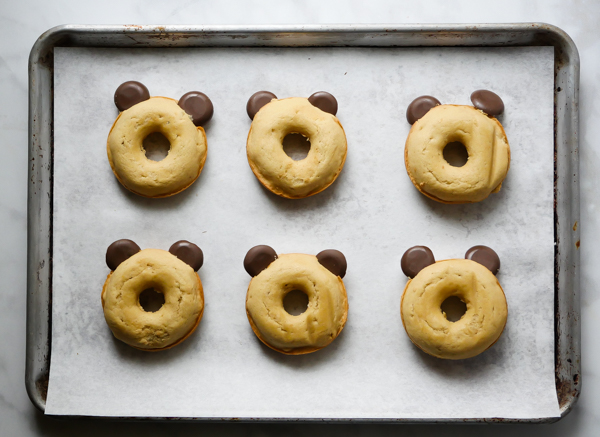
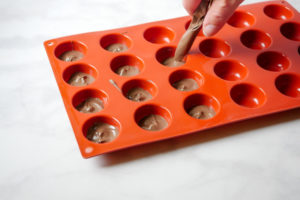
If you can find chocolate wafers, go ahead and use those for the ears, however since my chocolate wafers were on the small side, I used the same candy melts chocolate to make rounds in a mold, and then that chocolate was used again to coat the ears and doughnut.

Print
clock clock iconcutlery cutlery iconflag flag iconfolder folder iconinstagram instagram iconpinterest pinterest iconfacebook facebook iconprint print iconsquares squares iconheart heart iconheart solid heart solid icon
Mickey Mouse Shorts Doughnuts // magicaltreatsathome.com

Mickey Mouse Shorts Doughnuts

5 Stars 4 Stars 3 Stars 2 Stars 1 Star No reviews
  • Author: Elana Lepkowski
  • Yield: 6 doughnuts 1x
Print Recipe
Pin Recipe

Description

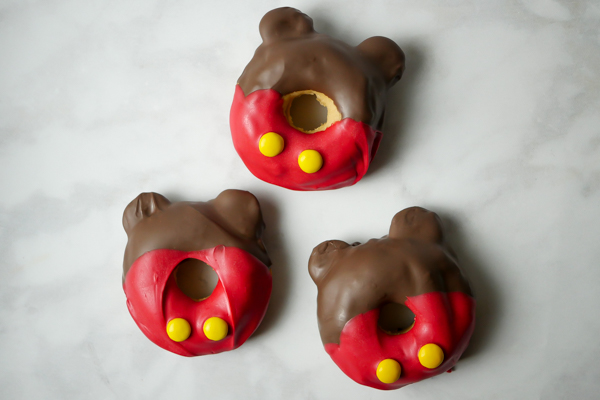
Vanilla cake doughnuts dipped in chocolate look a lot like Mickey Mouse’s shorts. A Disneyland-inspired treat!


Ingredients

Scale

Vanilla Cake Doughnuts
Adapted from King Arthur Flour

2 tablespoons butter
25g (1/8 cup) vegetable oil (or refined coconut oil)
49g (1/3 cup) granulated sugar
35g (1/4 cup) brown sugar
1 large eggs
3/4 teaspoons baking powder
1/4 teaspoon baking soda
1/4 teaspoon salt
1/2 teaspoon vanilla extract
159g (1-1/3 cups) Unbleached All-Purpose Flour
113g (1/2 cup) milk (or milk substitute like almond milk)

Chocolate Discs

1–1/2 ounces light cocoa candy melts

Decorating

5–1/2 ounces light cocoa candy melts
3-1/2 ounces red candy melts
12 yellow M&Ms


Instructions

For the doughnuts:

  1. Preheat the oven to 425°F. Lightly grease one standard doughnut pan.
  2. In a medium-sized mixing bowl, beat together the butter, vegetable oil, and sugars until smooth.
  3. Add the eggs, beating to combine.
  4. Stir in the baking powder, baking soda, salt, and vanilla.
  5. Stir the flour into the butter mixture alternately with the milk, beginning and ending with the flour and making sure everything is thoroughly combined. 
  6. Spoon the batter into the lightly greased doughnut pans, filling the wells to about 1/4″ shy of the rim.
  7. Bake the doughnuts for 10 minutes. Remove them from the oven, and wait 5 to 7 minutes before turning them out of the pans onto a rack.

For the Chocolate Discs:

  1. Melt candy melts in a microwave safe bowl (preferably glass) or piping bag for 30 seconds. Stir, and continue to microwave in short bursts until fully melted and smooth. (I found once more at 30 seconds and then again at 20 seconds worked for me, but your microwave may be different)
  2. Pour melted chocolate into round molds about 1/8″ high or alternatively, pipe out into rounds on parchment.
  3. Wait 10 minutes and then remove from molds. The discs are ready to use.
    Mickey Mouse Shorts Doughnuts // magicaltreatsathome.com

For assembly and decorating:

  1. Start by cutting two slits for the chocolate discs in each doughnut for the ears along the seam line of the doughnut. Insert the discs halfway into the doughnut. Set aside.
  2. Melt the light cocoa candy melts following the method above. Alternatively you can do this over a double boiler as well.
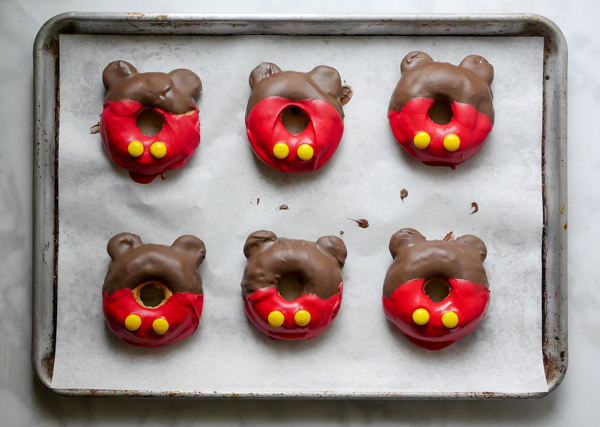
  3. Dip the doughnut half including the “ears” into the melted light cocoa candy melts. See note below if you have trouble keeping the discs in place.
  4. Set the dipped doughnuts down on parchment and melt the red candy melts using the same method above or in a double boiler. Dip the bottom half of the doughnut in the red candy melts, overlapping with the light cocoa candy melts. Immediately press two yellow M&Ms into the red to make Mickey’s buttons. Set aside.
  5. These take about 30 minutes to fully set and can be eaten then, or stored in an air tight container for up to 3 days.

Notes

  • Several components can be purchased instead of made. The doughnuts and chocolate discs can be store-bought and assembled.
  • If the discs pop out while dipping the doughnut into the melted chocolate, remove them and dip the doughnut separately, and then they can be dipped separately in the melted chocolate and inserted into the doughnuts.
  • Never rest items that have been dipped into candy melts on a wire rack. Always use parchment paper or you risk the melted chocolate fusing onto the wires and ripping off once cool.

Did you make this recipe?

Tag @magicaltreatsathome on Instagram and hashtag it #magicaltreatsathome

Share this:

  • Click to share on Facebook (Opens in new window) Facebook
  • Click to share on X (Opens in new window) X

Like this:

Like Loading...

Filed Under: Recipes, Treats Tagged With: candy melts, character treat, chocolate, doughnut, Mickey Mouse, treat

  • « Go to Previous Page
  • Go to page 1
  • Go to page 2
  • Go to page 3

Primary Sidebar

Follow Us

  • Instagram
  • Facebook
  • X
  • Pinterest
  • Email
  • YouTube

Hi! My name is Elana, and that’s me shoving a Mickey Mouse shaped treat in my face. I love the treats at Disneyland. A lot. So much so I’ve dedicated an entire website to making all my favorites, and hopefully yours too, out of my home kitchen. My aim is to create Disneyland-inspired treats, with easy to follow directions, and many recipes geared towards getting the kids in the kitchen to help too! Because putting sprinkles on things is F-U-N.

Top With Sprinkles

Get Recipes in Your Inbox!

* indicates required

Look for this icon in posts to find Kid Friendly recipes!

Recent Posts

  • Matterhorn Macaroon
  • Caramel Gingerbread Cookie Sandwiches
  • Colorful Fruit Hand Pies
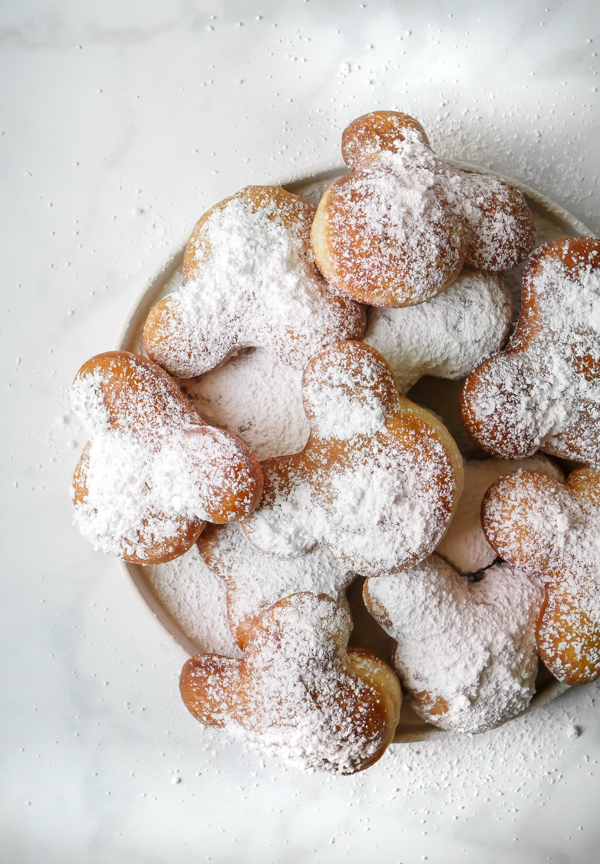
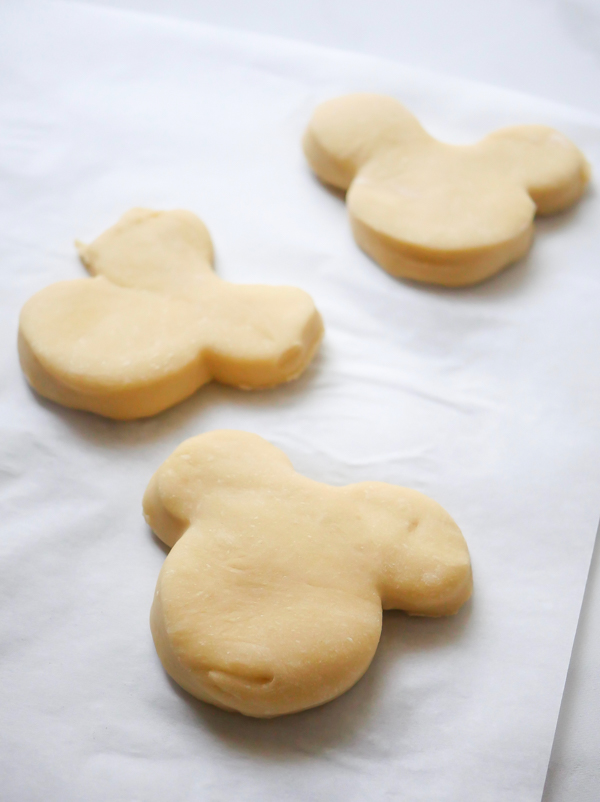
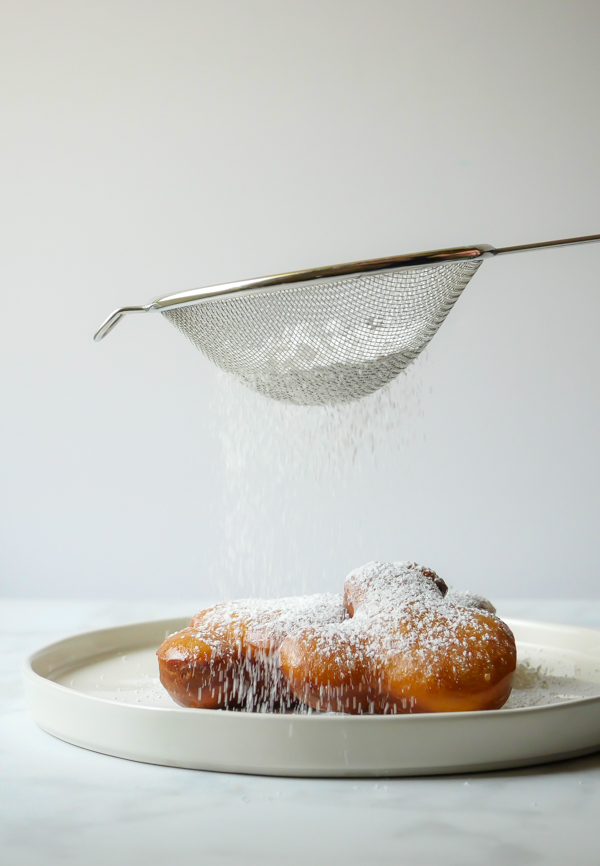
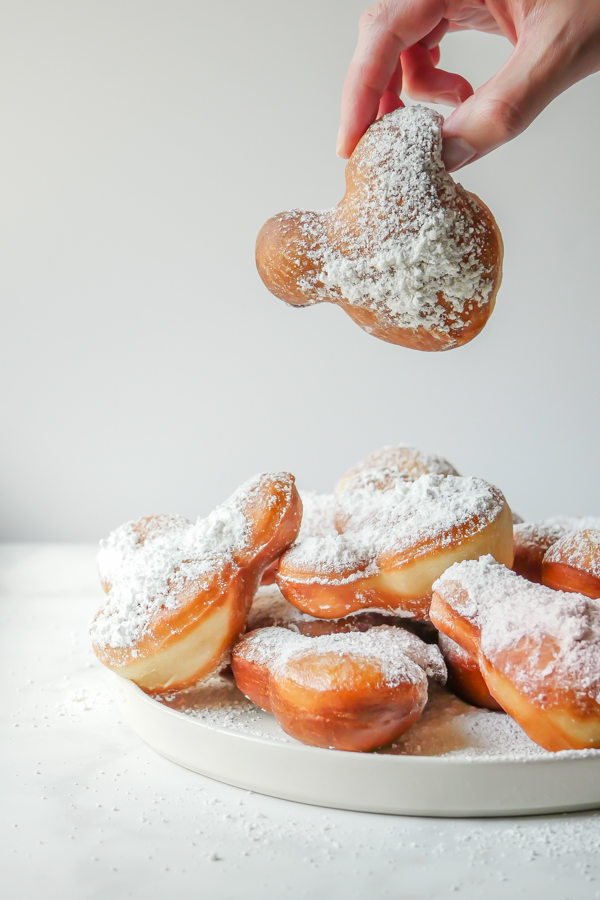
  • Classic Mickey Shaped Beignets
  • Carrot Cake Cookies

Archives

  • February 2023
  • December 2022
  • August 2022
  • January 2022
  • December 2021
  • November 2021
  • December 2020
  • November 2020
  • October 2020
  • September 2020
  • August 2020
  • July 2020
  • June 2020
  • May 2020
  • April 2020
  • March 2020
  • February 2020
  • January 2020
  • December 2019
  • November 2019
  • October 2019
  • September 2019
  • August 2019
  • July 2019
  • June 2019
  • May 2019

Copyright © 2025 Magical Treats at Home on the Foodie Pro Theme

%d