• Skip to primary navigation
  • Skip to main content
  • Skip to primary sidebar

Magical Treats at Home

  • About
  • Treats
  • Drinks
  • Savory
  • Favorite Tools
  • Etsy Shop

donut

Baked Fruity Pebbles Doughnuts

August 27, 2020 by Elana Lepkowski Leave a Comment

Fruity Pebbles Doughnuts // magicaltreatsathome.com

Where can I find the original treat?

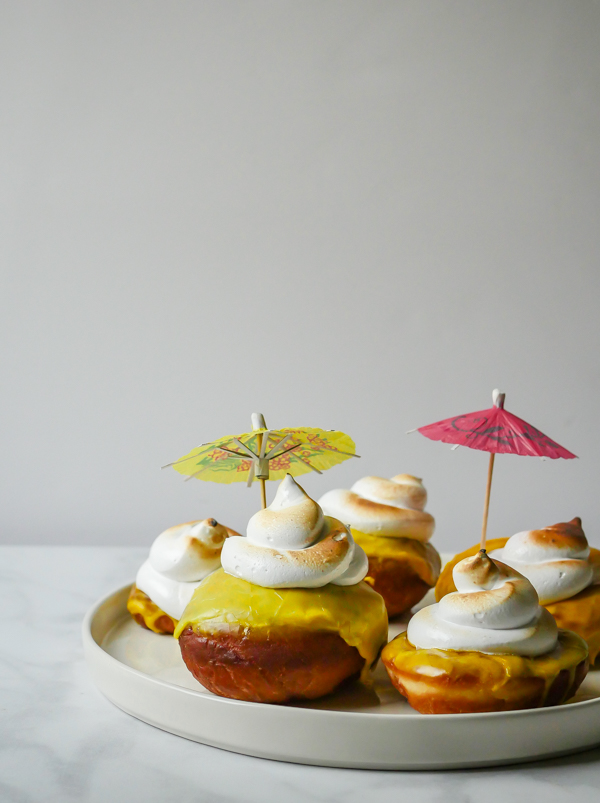
  • This treat was found at the Jolly Holiday Bakery Cafe inside Disneyland.

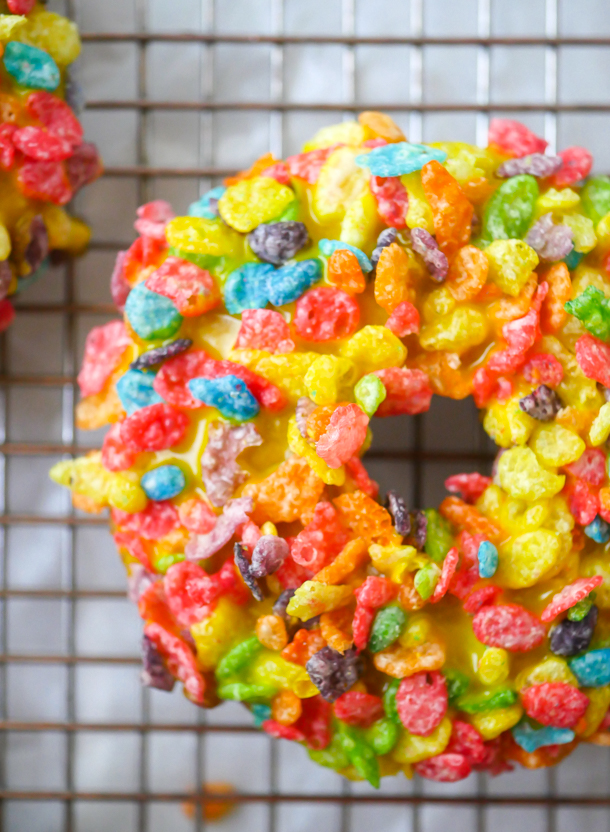
Somehow summer is already over and everyone is starting to head back to school, in whatever form that looks like. Over here at Magical Treats Headquarters, we will be doing the entirety of the next school year (kinder and pre-k) virtually. There will be many bowls of cereal for future breakfasts. Or maybe it will be doughnuts covered in cereal, like today’s recipe The Fruity Pebbles Doughnut. Hey, we all need to do what we got to do to make it through the day. 

Fruity Pebbles Doughnuts // magicaltreatsathome.com

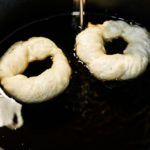
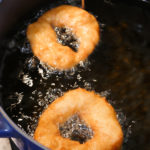
I’ve seen two versions of this at Disneyland, the classic circle and the rectangular Long John type, so basically you can make these whatever shape you’d like at home. The doughnut is also yeasted at the parks, and here today we will tweak that as well. 

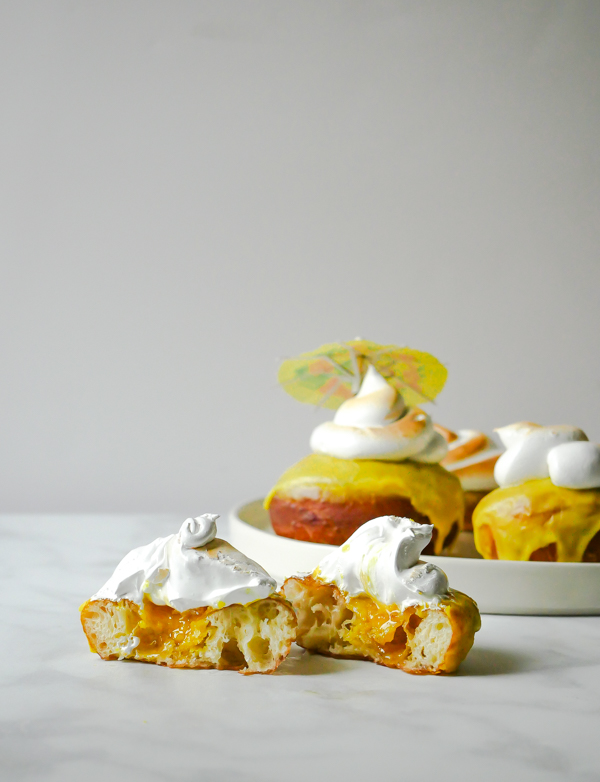
A yeasted doughnut is really the perfect base for the sweet and crunchy topping because it’s light and airy and pushes your focus more to the Fruity Pebbles cereal and the lightly flavored lemon glaze than to the actual doughnut. Now, that said, it’s been quite hot here in SoCal, and deep frying anything inside, with all the windows shut and the air conditioning going, is not how I’m spending my day. Because of this hiccup in my baking schedule, I decided that I’d try these on baked doughnuts instead.

Fruity Pebbles Doughnuts // magicaltreatsathome.com

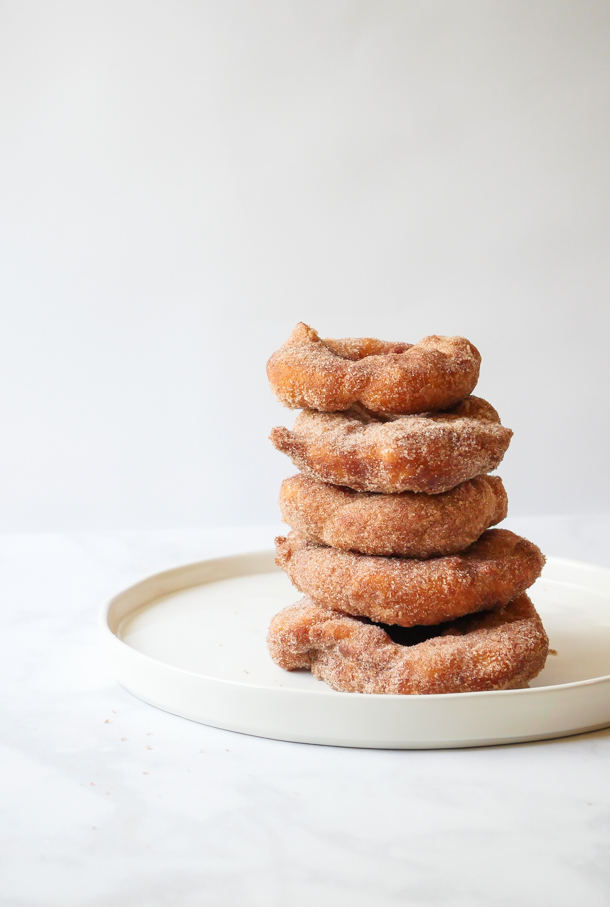
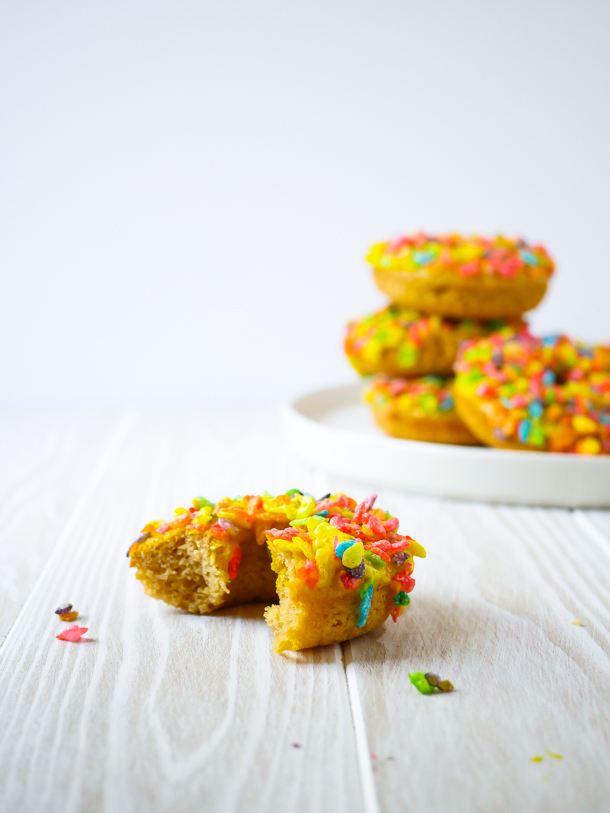
The verdict? Well, it’s definitely quicker to make everything and get to eating them, but using baked doughnuts is a lot more… well, doughnut! Baked doughnuts are like little round cakes and as such, are heavier and can have a more pronounced flavor. Did it taste bad? No! Not at all. But just a warning that using a baked doughnut, or a cake doughnut too, just means you end up with more dessert to contend with. And maybe that’s not all bad.

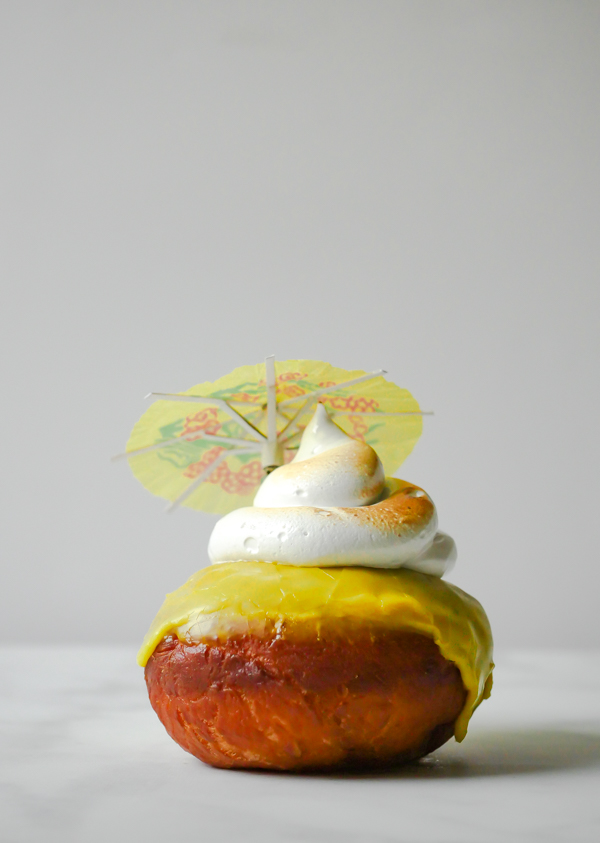
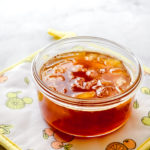
A note on the glaze. Consistency changes at the parks and again, I’ve had this lemon flavored, and not lemon flavored. Personally the lemon balances out the “fruity pebbles” flavor (which I find now as an adult to taste strongly of bergamot which you find in Earl Gray tea), however if you don’t want to add it in, or are having trouble locating a decent lemon flavoring (check out our rec below!), then go ahead and leave it out.
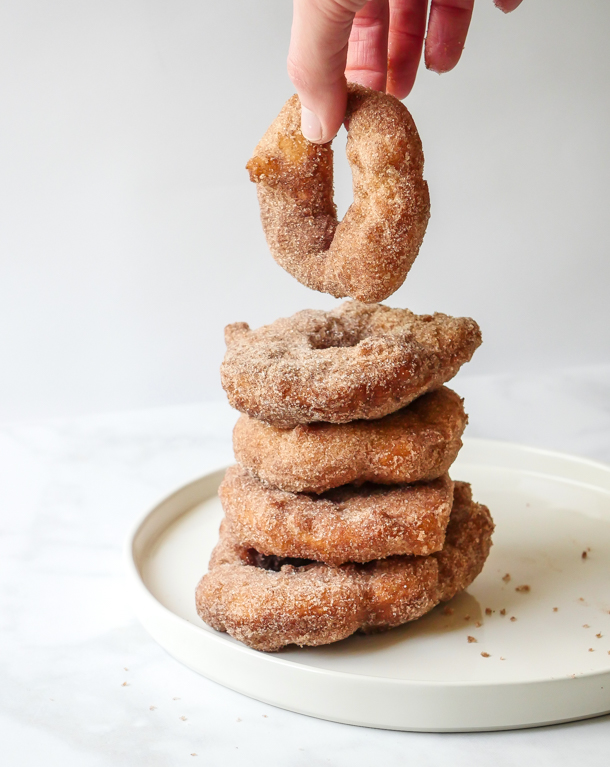
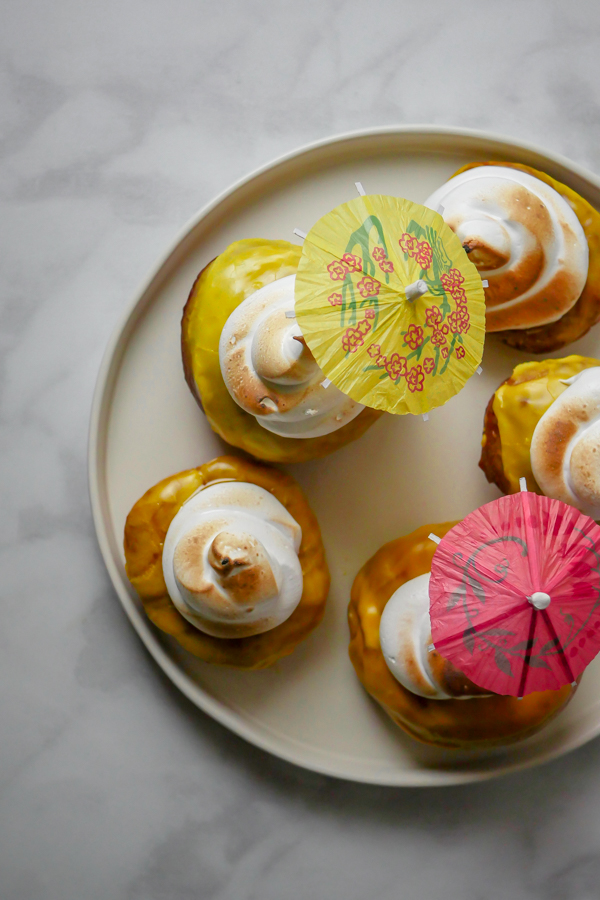
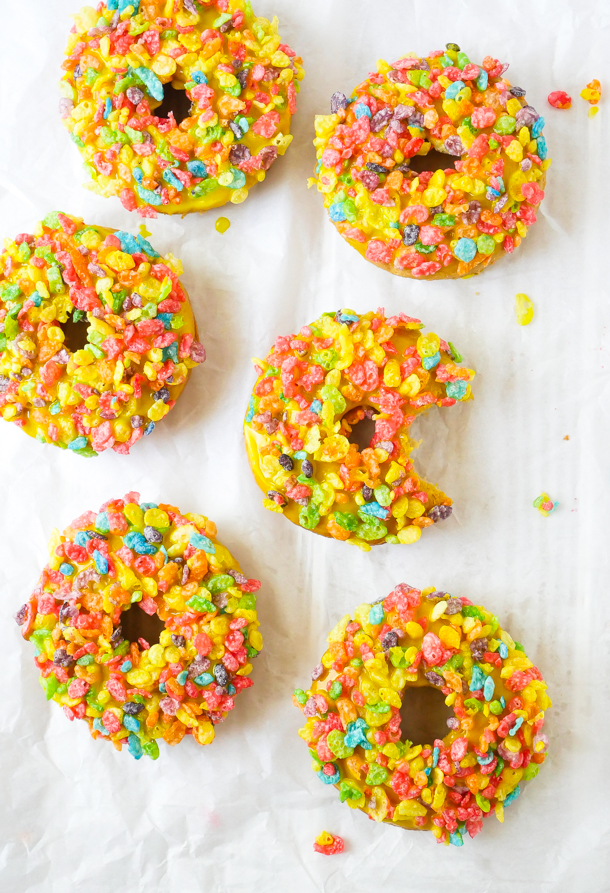
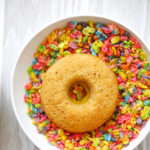
My kids were SUPER into these at the parks and at home. Once the doughnuts are cooled, kids can help dip the doughnut into the glaze and decorate with cereal topping. 

Fruity Pebbles Doughnuts // magicaltreatsathome.com

Ok, who needs a doughnut? If that’s you, remember to check out our helpful tips and tricks at the bottom of the recipe! Let’s bake (or fry)!

Print
clock clock iconcutlery cutlery iconflag flag iconfolder folder iconinstagram instagram iconpinterest pinterest iconfacebook facebook iconprint print iconsquares squares iconheart heart iconheart solid heart solid icon
Fruity Pebbles Doughnuts // magicaltreatsathome.com

Fruity Pebbles Doughnuts

5 Stars 4 Stars 3 Stars 2 Stars 1 Star No reviews
  • Author: Elana Lepkowski
  • Yield: 6 doughnuts 1x
Print Recipe
Pin Recipe

Description

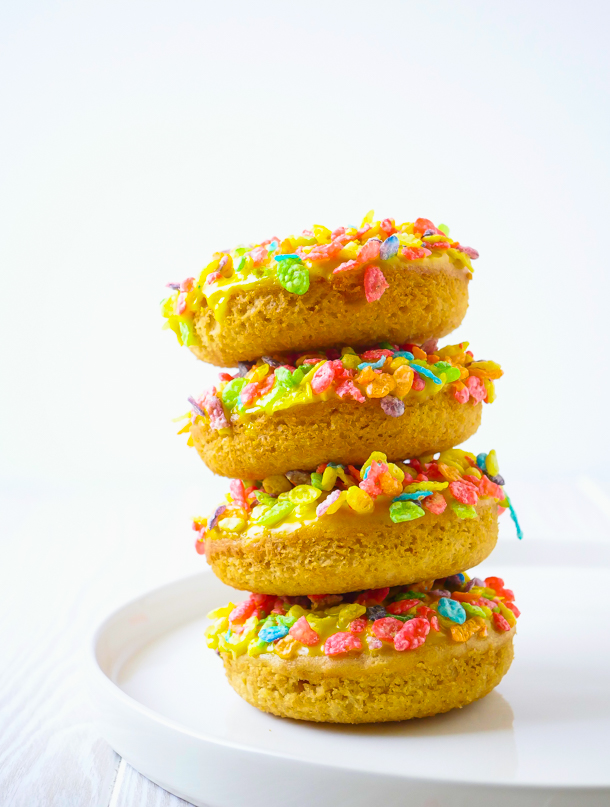
Lemony Fruity Pebbles topped doughnuts are a sweet and crunchy dessert for snack time or breakfast time. A Disneyland-inspired treat.


Ingredients

Scale

For yeasted doughnuts, please check out the recipe here!

For the baked doughnuts:

  • 2 tablespoons butter
  • 25g (1/8 cup) vegetable oil (or refined coconut oil)
  • 49g (1/3 cup) granulated sugar
  • 35g (1/4 cup) brown sugar
  • 1 large egg
  • 3/4 teaspoons baking powder
  • 1/4 teaspoon baking soda
  • 1/4 teaspoon salt
  • 1/2 teaspoon vanilla extract
  • 159g (1–1/3 cups) Unbleached All-Purpose Flour
  • 113g (1/2 cup) milk (or milk substitute like almond milk)

For the glaze and topping:

  • 1/2 cup powdered sugar
  • 1/4 – 1/2 teaspoon pure lemon extract, optional (I used Nielsen-Massey lemon extract, see notes below about extracts)
  • 1 tablespoon milk (or milk alternative)
  • 2 to 3 drops of yellow food coloring (I used Lemon Yellow from Americolor)
  • 1 cup Fruity Pebbles cereal
    Fruity Pebbles Doughnuts // magicaltreatsathome.com

Instructions

For the doughnuts:

  1. Preheat the oven to 425°F. Lightly grease one standard doughnut pan.
  2. In a medium-sized mixing bowl, beat together the butter, vegetable oil, and sugars until smooth.
  3. Add the eggs, beating to combine.
  4. Stir in the baking powder, baking soda, salt, and vanilla.
  5. Stir the flour into the butter mixture alternately with the milk, beginning and ending with the flour and making sure everything is thoroughly combined. 
  6. Spoon the batter into the lightly greased doughnut pans, filling the wells to about 1/4″ shy of the rim.
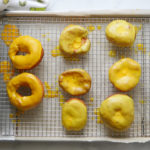
  7. Bake the doughnuts for 10 minutes. Remove them from the oven, and wait 5 to 7 minutes before turning them out of the pans onto a rack.
    Fruity Pebbles Doughnuts // magicaltreatsathome.com

For the glaze and topping:

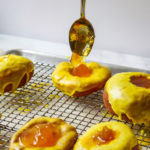
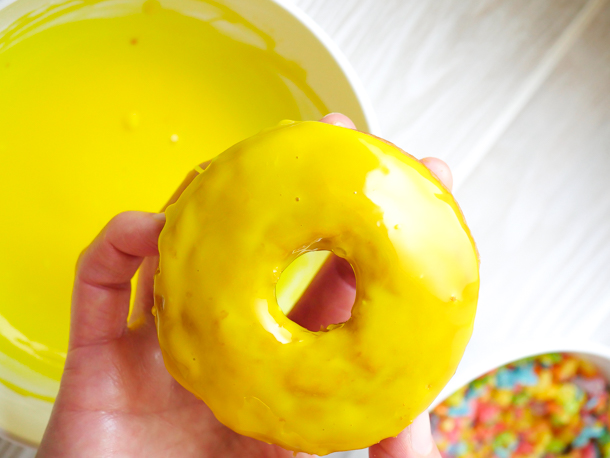
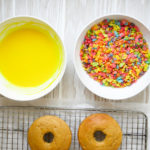
  1. Once the doughnuts are cool, in a bowl wide enough to fit a doughnut, whisk together the powdered sugar, lemon extract (if using), milk, and food coloring until smooth. Pour the Fruity Pebbles into a shallow, wide bowl that can accommodate a doughnut.
    Fruity Pebbles Doughnuts // magicaltreatsathome.com
  2. Dip the top half of each doughnut into the glaze, letting any excess glaze drip back into the bowl.
  3. Immediately press the doughnut glaze side down into the Fruity Pebbles. Gently press the doughnut down into the cereal and then gently lift and place on a drying rack to set. Repeat with the remaining doughnuts.
    Fruity Pebbles Doughnuts // magicaltreatsathome.com
  4. The glaze will take about 30-45 minutes to harden, however, don’t let that stop you from eating right away.

Notes

  • Don’t want to make doughnuts at all? Plain store bought doughnuts can be decorated instead!
  • Check the strength of your lemon extract  before adding more than a 1/4 teaspoon to your glaze. I had plenty of lemon flavor with a quarter teaspoon of my brand, but your brand might be different, so taste and adjust as necessary.
  • These are best eaten the day they are made as the Fruity Pebbles tend to go soft the longer they sit.

Did you make this recipe?

Tag @magicaltreatsathome on Instagram and hashtag it #magicaltreatsathome

Fruity Pebbles Doughnuts // magicaltreatsathome.com

Share this:

  • Click to share on Facebook (Opens in new window) Facebook
  • Click to share on X (Opens in new window) X

Like this:

Like Loading...

Filed Under: Recipes, Treats Tagged With: breakfast, cereal, disneyland, donut, donuts, doughnuts, Fruity Pebbles, glaze, lemon, treat

Jolly Holiday Maple Bacon Doughnuts

July 3, 2020 by Elana Lepkowski Leave a Comment

Maple Bacon Doughnut // magicaltreatsathome.com

Where can I find the original treat?

  • This treat was found at the Jolly Holiday Bakery Cafe in Disneyland.

The Donut Cart at Disneyland was always my favorite place to visit for a treat and to say I was bummed when they decided to get rid of it to widen the walkways around Sleeping Beauty Castle is an understatement. However, some of those fabulous doughnuts can be found over at the Jolly Holiday Bakery Cafe on occasion. (Although they will sell out quickly if it’s a good one!)

One of the last doughnuts I had while visiting the park this year was the Maple Bacon Doughnut, and let me tell you, the combination of sweet maple and salty bacon was *chef’s kiss*. I love sweet and salty treat combos, but I get it’s not for everyone (my husband picked all the bacon off and ate it separately). But I urge you to try the combo once, because it’s not just crispy bacon on top, it’s lacquered bacon and it gives another maple dimension to the doughnut.

Maple Bacon Doughnut // magicaltreatsathome.com

These are yeasted doughnuts so they require two rises, but they also make the most fluffiest, softest doughnuts and it’s worth the time you put in. However, if yeast is not available to you right now, or the time is not there, you could also bake a batch (like these doughnuts!) or even just buy some plain doughnuts and decorate. We’ve got all the recipes below for every component, so choose whatever option works for you.

I would not recommend that kids get involved for the actual frying part of the doughnut making, but mixing, shaping and decorating are all ways they can get involved. Although my kids just wanted to dip the bacon in the glaze.

Maple Bacon Doughnut // magicaltreatsathome.com

TIP: Now, if making homemade doughnuts seems like a chore, please let me assure you it’s not! Hope on over to our Instagram account and head to our doughnut making highlight bubble for lots of tips. And remember to read all our tips below in the notes section of the recipe card. Also, if you want doughnuts in the morning, make the dough up the night before! Here’s the run down from our Churro Gears post…

Don’t wake up at 4am for breakfast doughnuts! Start them the night before!

  • The night before, mix up the dough and instead of having it sit out to double in size for an hour and a half, cover and refrigerate it at least 8 hours and up to 12.
  • The next day, take them out of the fridge, let the dough sit for 5 minutes uncovered, and then roll out and proceed with making the doughnuts.
  • Once shaped, doughnuts need to rise for 45 minutes before frying off. So, during this time you can brew some coffee, scroll Instagram, make lunches, heat the oil, and whatever else eats up all that precious morning time every day.
  • You should definitely though start heating the oil around 15-20 minutes before your timer goes off. I start on high to get it warmed up quickly in my dutch oven, and then ease on down to medium-high or medium at around 320°f or so. Otherwise it can reach temp and then get too hot and you don’t want that to happen.
  • And from there you’ll start frying off doughnuts and have them ready to eat within 10 minutes!
Maple Bacon Doughnut // magicaltreatsathome.com

Have a magical weekend everyone! And if you try these in an air fryer, let me know how they turn out (I still haven’t bought one yet…).

Print
clock clock iconcutlery cutlery iconflag flag iconfolder folder iconinstagram instagram iconpinterest pinterest iconfacebook facebook iconprint print iconsquares squares iconheart heart iconheart solid heart solid icon
Maple Bacon Doughnut // magicaltreatsathome.com

Jolly Holiday Maple Bacon Doughnuts

5 Stars 4 Stars 3 Stars 2 Stars 1 Star No reviews
  • Author: Elana Lepkowski
  • Yield: 4 Maple Bacon Doughnuts 1x
Print Recipe
Pin Recipe

Description

This sweet and salty breakfast treat combines rich maple glaze and lacquered bacon on the softest yeast dougnut. A Disneyland-inspired treat.


Ingredients

Scale

For the doughnuts:

  • 3/4 teaspoon active dry yeast (not rapid rise)
  • 1 tablespoon warm water (around 110°f)
  • 1 cup (120 grams) all-purpose flour
  • 1/4 cup warmed whole milk, or milk alternative of your choice (see notes below)
  • 1 tablespoon unsalted butter, softened
  • 1 large egg yolk
  • 2 teaspoons granulated sugar
  • 1/2 teaspoon kosher salt
  • 4 cups neutral oil like avocado or canola

For the lacquered bacon:

  • 4 strips bacon
  • 1/4 cup maple syrup

For the maple glaze:

  • 1/3 cup maple syrup (I used a robust grade B for a richer flavor)
  • 1 tablespoon butter, unsalted
  • 1 cup powdered sugar
  • splash of cream or milk

Specialty Tools:

  • 1-1/4″ circle cutter
  • candy/frying thermometer
  • spider strainer

Instructions

For the doughnuts:

  1. Mix together yeast and warm water in a small bowl. Let sit for five minutes until bubbles form on top (if bubbles do not form, throw away and try again. Your yeast might be too old, or your water too hot/cold to activate yeast).
  2. While yeast sits, in the bowl of a stand mixer or a freestanding large bowl with a hand mixer, combine the flour, milk, butter, egg yolk, sugar and salt. Add in yeast mixture.
  3. Stir until just combined and then attach a dough hook and mix in the stand mixer on low until dough comes together. Then increase speed to high and mix for 3 more minutes. Alternatively, you can knead dough by hand for 5-7 minutes.
  4. Remove dough from the dough hook and let sit in the bowl, covered, at room temperature, for one hour until dough has doubled in size. (It will be done rising once you can leave an indentation in the dough with your finger and it doesn’t spring back)
  5. Next, sprinkle flour onto your counter and divide your dough into four equal pieces.
  6. Roll each segment into balls, and then shape them by either making a hole through them with your finger, or flattening into a circle and using a 1-1/4″ circle cutter to make a center hole, and let rise again for 30 minutes covered with a tea towel.
  7. About 20 minutes before the second rise is complete, heat oil in a dutch oven with a candy thermometer attached.
  8. When the oil reaches 350°f, carefully lower the dough into the hot oil. You can fry two to three doughnuts at a time in a wide dutch oven.
  9. Fry on each side about one minute. Then remove with a spider or slotted spoon onto a cooling rack with paper towels underneath. Let temperature in the pot come back to 350°f before frying next batch.
  10. Let doughnuts come to room temperature before glazing and filling.

For the lacquered bacon:

  1. Heat oven to 350°f.
  2. Cover the bottom of a sheet pan with foil and place a grate over the top. Set aside.
  3. In a bowl wide enough to accommodate the bacon, place bacon inside and then pour the maple syrup over them.
  4. Use your hands to massage the maple syrup into the bacon and to ensure all of the bacon is covered in the syrup.
  5. Lay the pieces of bacon flat on the grate and move into the oven.
  6. Bake for 20 minutes (starting to check at 18 to make sure it is not burning) until crisp and shiny.
  7. Remove from the oven and let cool. Then chop into 1-1/2″ sections. Set aside.

For the maple glaze:

  1. In a small sauce pan, melt the maple syrup and butter together.
  2. Remove from the heat and add in the powdered sugar. Mix until smooth. If too thick, add a splash of milk or cream.
  3. Move back to the stove on the lowest setting to keep warm.

To assemble the doughnuts:

  1. Dip a doughnut top into the maple glaze.
  2. Add pieces of bacon to the center.
  3. Set aside and repeat on remaining doughnuts.

Notes

  • This recipe can be doubled as is with no adjustments.
  • Frying reaches temperatures of over 350°F so please use caution in the kitchen! Wear gloves, an apron, closed toe shoes, and use a candy thermometer. Keep children away when handling hot dishes.
  • I made my batch of doughnuts with almond milk and they came out exactly the same as with cow milk, so feel free to use a milk alternative.
  • If you choose to cut out your doughnuts instead of hand shaping, save the doughnut holes and fry those off as well! 40 seconds on side one, and then 30 seconds on the other side.
  • Remember, bacon is a raw pork product, so clean your hands and any surfaces before handling cooked doughnuts.
  • Doughnuts are best the day they are made, but can be placed in an air-tight container and eaten the next day (but no longer than that!).
  • Extra glaze can be kept in an air-tight container in the refrigerator for up to 5 days and reheated on the stove with a splash of cream or milk.

Did you make this recipe?

Tag @magicaltreatsathome on Instagram and hashtag it #magicaltreatsathome

Maple Bacon Doughnut // magicaltreatsathome.com

Share this:

  • Click to share on Facebook (Opens in new window) Facebook
  • Click to share on X (Opens in new window) X

Like this:

Like Loading...

Filed Under: Recipes, Treats Tagged With: bacon, disneyland, donut, doughnut, maple, maple bacon, Sleeping Beauty

Churro Gears (aka Churro Doughnuts)

January 29, 2020 by Elana Lepkowski 1 Comment

Churro Gears (Doughnuts) // magicaltreatsathome.com

Where can I find the original treat?

  • This treat can be found at Maurice’s Treats at the Disneyland resort.

There are now multiple ways to get your churro fix at Disneyland beyond an actual churro (like churro toffee or a churro marshmallow wand), and today we’re over in Fantasyland for their latest one: Churro Gears, AKA Churro Doughnuts. Yes, you’re going to make doughnuts (or donuts if you prefer) at home today. And it’s going to be so easy.

Churro Gears (Doughnuts) // magicaltreatsathome.com

First, let’s talk about the doughnuts. At the park you get them served to you WARM, which, honestly is the only way to eat these. Although, coming in a strong second is cold and hours old. That is also a delicious option. These are yeasted doughnuts which means, unfortunately, there is some waiting. However, I’ve outlined below the best option for making these and having them for breakfast that does not include waking up at 4am.

Yeasted doughnuts though provide for a chewy, soft interior with a slightly crisp outside. Similar to the style of a churro, and these too are covered in cinnamon-sugar and hence the name Churro Doughnuts. The dough itself is twisted to look like a “gear”, and while that might not be necessary with your homemade batch, what that does do for your doughnut is provide lots of pockets for that sprinkling of cinnamon-sugar to fall into. YUM.

Churro Gears (Doughnuts) // magicaltreatsathome.com

Can kids help with this recipe? Absolutely, but know your kids first. Older kids with some experience in the kitchen might find it a fun challenge to roll out and shape the dough. And younger kids can flip the cooled doughnuts around in the cinnamon-sugar. Just beware of the very hot oil on the stove, and also the doughnuts stay warm for awhile, so test them out before handing them off for sugaring.

BONUS: This recipe only calls for a handful of ingredients and with just one change, swapping out the milk for a non-dairy alternative, means you can also have VEGAN doughnuts too. I tried this recipe with almond milk and got excellent results. Also, extra bonus, any small chunks of dough leftover can be rolled into balls and made into doughnut holes! See notes below for instruction.

Churro Gears (Doughnuts) // magicaltreatsathome.com

Don’t wake up at 4am for breakfast doughnuts! Start them the night before!

  • The night before, mix up the dough and instead of having it sit out to double in size for an hour and a half, cover and refrigerate it at least 8 hours and up to 12.
  • The next day, take them out of the fridge, let the dough sit for 5 minutes uncovered, and then roll out and proceed with making the doughnuts.
  • Once shaped, doughnuts need to rise for 45 minutes before frying off. So, during this time you can brew some coffee, scroll Instagram, make lunches, heat the oil, and whatever else eats up all that precious morning time every day.
  • You should definitely though start heating the oil around 15-20 minutes before your timer goes off. I start on high to get it warmed up quickly in my dutch oven, and then ease on down to medium-high or medium at around 320°f or so. Otherwise it can reach temp and then get too hot and you don’t want that to happen.
  • And from there you’ll start frying off doughnuts and have them ready to eat within 10 minutes!
Churro Gears (Doughnuts) // magicaltreatsathome.com

I believe that making a batch of these Churro Doughnuts at home is easy for a few reasons. First, it’s a small, doable amount of ingredients and I bet you have most, if not all of them, at home (and if instant yeast is not in your pantry I’ve linked to that below in the ingredient list). Second, the steps to making them are pretty straightforward. There isn’t a technique here that is only going to be taught in pastry school. YOU GOT THIS. If the dough is sticking to everything (that can happen), and you’re not getting perfect circles, don’t worry they’ll still taste amazing. And third, it’s mainly hands off time. Yes, from complete start to finish it’s a few hours. But if you break it up and start the night before, and fill the wait time with something else, making the actual doughnut is fairly quick! And you’ve got doughnuts! At home! And they’re fresh and warm!

Ok let’s make doughnuts! Churro doughnuts!

Print
clock clock iconcutlery cutlery iconflag flag iconfolder folder iconinstagram instagram iconpinterest pinterest iconfacebook facebook iconprint print iconsquares squares iconheart heart iconheart solid heart solid icon
Churro Gears (Doughnuts) // magicaltreatsathome.com

Churro Gears (aka Churro Doughnuts)

5 Stars 4 Stars 3 Stars 2 Stars 1 Star No reviews
  • Author: Elana Lepkowski
  • Yield: 5–6 Churro Gears 1x
Print Recipe
Pin Recipe

Description

Chewy, crispy, cinnamon-sugar laden Churro Gears (AKA Churro Doughnuts), are an easy treat to try day or night! A Disneyland-inspired treat.

Adapted from Food52


Ingredients

Scale

For the doughnuts:

  • 1/2 cup whole milk, buttermilk, or almond milk (for vegan version)

  • 1 tablespoons refined coconut oil

  • 1 cup (120 grams) all-purpose flour

  • 1 tablespoons sugar

  • 1 teaspoon (6 grams) instant yeast
  • 
1/2 teaspoon kosher salt
  • 6 cups to 1/2 gallon (8 cups) avocado oil (or other high heat oil)

For the topping:

  • 1 cup granulated sugar
  • 1 teaspoon ground cinnamon

Specialty Tools:

  • instant read thermometer
  • candy thermometer
  • dough cutter/scraper

Instructions

  1. In a glass measuring cup, pour in milk or milk alternative. Add coconut oil. Microwave at full power 15-20 seconds. Using at instant read thermometer, bring the milk down (or up, microwaving in short bursts of 5 seconds) to 110°f.
  2. In a medium sized bowl, whisk together flour, sugar, instant yeast, and salt.
  3. Pour the milk mixture into the dry ingredients and stir to combine using a rubber spatula. You only need to just incorporate the ingredients. Do not over mix (some lumps in the batter are fine!).
  4. Cover the bowl with plastic wrap or a tea towel and leave on a counter away from drafts for one and a half hours, or until doubled in size. (If prepping overnight, follow timeline above in post or in notes below)
  5. After dough has doubled in size, flour your counter and turn the dough out. The dough will be very, very sticky. Make sure to flour your surfaces, your hands, and your rolling pin.
  6. Roll out about 1/2″ thick into approximately a 8″x8″ square.
  7. Using a dough cutter or bench scraper or sharp knife, cut dough into about 1-1/2″ thick strips. You should get about 5 strips with a small section left over. The small section can be cut into small squares and rolled into balls for doughnut holes.
  8. Flour your hands again and carefully lift the first section. Fold the dough in half and then twist the dough. Take the ends and pinch together. Set aside on floured counter. Repeat with other strips.
    Churro Gears (Doughnuts) // magicaltreatsathome.com
  9. When all the doughnut shapes are ready, cover lightly with plastic wrap or a tea towel. Let sit 45 minutes until puffy.
  10. In a shallow bowl, combine sugar and cinnamon together. Set aside.
  11. About 15-20 minutes before the dough has finished its final rest, pour the avocado oil into a dutch oven until the oil reaches 345°f on a candy thermometer.
    Churro Gears (Doughnuts) // magicaltreatsathome.com
  12. Working in batches, carefully lower the dough down into the oil. Do not plop it in or it will splash and burn you. You can also use tongs to lower, see notes below. Cook for 1-1/2 to 2 minutes on one side, and cook for an additional 1-1/2 minutes on the second side. Use a spider or strainer to remove the cooked doughnuts and place on a paper towel lined sheet pan. Repeat with remaining doughnuts. If making doughnut holes, cook for a few seconds less.
    Churro Gears (Doughnuts) // magicaltreatsathome.com
  13. Let doughnuts cool at least 5 minutes, and then toss in the cinnamon-sugar mix, spooning on extra sugar to fully coat. Place on a cooling rack and repeat with the remaining doughnuts. Enjoy warm!

Notes

  • To start doughnuts the previous day: the night before, mix up the dough and instead of having it sit out to double in size for an hour and a half, cover and refrigerate it at least 8 hours and up to 12. The next day, take them out of the fridge, let the dough sit for 5 minutes uncovered, and then roll out and proceed with making the doughnuts. Start the second rise and proceed with the rest of the instructions above.
  • Oil temperatures are extremely hot. Please use caution in the kitchen! Wear gloves, an apron, closed toe shoes, and use a candy thermometer. Keep children away when handling hot dishes.
  • If you are absolutely terrified of dropping anything into the oil with your fingers, or think you might get burned, definitely go ahead and flour a pair of high heat proof tongs to put the doughnut down into the hot oil.
  • Wait for oil to come back to temperature before adding next batch of doughnuts to the pot.
  • Cooking oil can be fine strained and stored again for another use. I strain back into the bottle it came from. Well strained oil can be stored in a cool, dry place and used up to several times.

Did you make this recipe?

Tag @magicaltreatsathome on Instagram and hashtag it #magicaltreatsathome

Churro Gears (Doughnuts) // magicaltreatsathome.com

Share this:

  • Click to share on Facebook (Opens in new window) Facebook
  • Click to share on X (Opens in new window) X

Like this:

Like Loading...

Filed Under: Recipes, Treats Tagged With: churro doughnut, cinnamon, disneyland, donut, doughnut, Fantasyland, treat, vegan

Pineapple Donut (aka Dole Whip Donut)

September 16, 2019 by Elana Lepkowski Leave a Comment

Pineapple Donut a.k.a. The Dole Whip Donut // magicaltreatsathome.com

Where can I find the original treat?

  • This treat can be found at the Jolly Holiday Bakery Cafe at Disneyland.

I just had to squeeze one last summertime dessert in before I flood your feeds with pumpkin spice, orange sanding sugar, and whatever spooky snacks Disneyland has planned for the next month and a half. And what dessert at Disneyland has the most summer fun packed into every bite? The Pineapple Donut, or as its cult following calls it: The Dole Whip Donut.

Pineapple Donut a.k.a. The Dole Whip Donut // magicaltreatsathome.com

First of all, let me make one quick aside here, and that is that Disneyland spells it “donut”, and I almost always spell mine D-O-U-G-H-N-U-T. And it’s driving me crazy to spell it their way. Ok. Moving on…

Pineapple Donut a.k.a. The Dole Whip Donut // magicaltreatsathome.com

This tropical doughnut (now I’m referring to the type of dessert so I can spell it this way again) is SO hot it needs its own umbrella. Packed with sweet-tart pineapple jam, this yeast style doughnut is topped with a bright yellow glaze and crowned with meringue reminiscent of that iconic Dole Whip swirl. While this might look like a sugar bomb, the pineapple jam has a nice acidity, that when eaten with the meringue and the not-too-sweet doughnut, it balances really well.

Pineapple Donut a.k.a. The Dole Whip Donut // magicaltreatsathome.com

The doughnut has three main parts: the doughnut, the pineapple filling, and the meringue topping (technically four if you count the glaze). And today, for the recipe, I’m going to let you decide how easy or involved you’d like to make this. So here it goes. You can:

  • buy the doughnuts, pineapple jam, marshmallow cream, and make the glaze
  • you can make everything from scratch (see recipes below)
  • you can do a combination of make/buy all the components except the glaze (you need to make the glaze)
Pineapple Donut a.k.a. The Dole Whip Donut // magicaltreatsathome.com

As per usual, notes are included below the recipe so please read through. If making the doughnuts, jam, and/or meringue, please keep children out of the kitchen as these all require HOT temperatures.

Pineapple Donut a.k.a. The Dole Whip Donut // magicaltreatsathome.com

However, once it is assembly time, kids can definitely help dip, fill, and decorate! Just leave the toasting to the adults.

Pineapple Donut a.k.a. The Dole Whip Donut // magicaltreatsathome.com

Now you’ve got an excuse to pick up some drink umbrellas! Let’s bake this!

Print
clock clock iconcutlery cutlery iconflag flag iconfolder folder iconinstagram instagram iconpinterest pinterest iconfacebook facebook iconprint print iconsquares squares iconheart heart iconheart solid heart solid icon
Pineapple Donut a.k.a. The Dole Whip Donut // magicaltreatsathome.com

Pineapple Donut (aka Dole Whip Donut)

5 Stars 4 Stars 3 Stars 2 Stars 1 Star No reviews
  • Author: Elana Lepkowski
  • Yield: 4 doughnuts 1x
Print Recipe
Pin Recipe

Description

Take a trip to the tropics with this pineapple jam filled yeast-style doughnut with creamy meringue topping reminiscent of the classic Dole Whip. A Disneyland-inspired treat!


Ingredients

Scale

For the doughnuts (adapted from Joy the Baker):

  • 3/4 teaspoon active dry yeast
  • 1 tablespoon warm water (110°f)
  • 1 cup (120 grams) all-purpose flour
  • 1/4 cup warmed whole milk, or milk alternative of your choice (see notes below)
  • 1 tablespoon unsalted butter, softened
  • 1 large egg yolk
  • 2 teaspoons granulated sugar
  • 1/2 teaspoon sea salt
  • 4 cups neutral oil like avocado or canola

For the pineapple jam:

  • 1 cup pineapple crushed with juice (or 1 cup frozen chunks plus 3/4 cup water)
  • 1 cup sugar
  • 1 ounce (2 tablespoons) freshly squeezed lime juice

For the meringue:

  • 5 tablespoons water
  • 1/4 cup plus 2 tablespoons sugar
  • 1/4 cup plus 2 tablespoons light corn syrup
  • 2 egg whites
  • 1/4 tsp cream of tartar
  • pinch of salt
  • 1/2 teaspoon vanilla

For the glaze:

  • 1 cup powdered sugar
  • 2–3 tablespoons water
  • yellow food coloring
  • pineapple extract, optional

Instructions

For the doughnuts:

  1. Mix together yeast and warm water in a small bowl. Let sit for five minutes until bubbles form on top.
  2. While yeast sits, in the bowl of a stand mixer, combine the flour, milk, butter, egg yolk, sugar and salt. Add in yeast mixture.
  3. Stir until just combined and then attach a dough hook and mix in the stand mixer on low until dough comes together. Then increase speed to high and mix for 3 more minutes.
  4. Remove dough from the dough hook and let sit in the bowl, covered, at room temperature, for one hour until dough has doubled in size.
  5. Next, sprinkle flour onto your counter and divide your dough into four equal pieces.
  6. Roll each segment into balls and let rise again for 30 minutes.
  7. About 20 minutes before the second rise is complete, heat oil in a dutch oven with a candy thermometer attached.
  8. When the oil reaches 350°f, take a dough ball, make an indentation in the middle with your thumb but do not go all the way through (you’ll need a ‘pocket’ to fill with jam), and lower carefully into the hot oil. You can fry two doughnuts at a time if in a wide dutch oven.
  9. Fry on each side about one minute. Then remove with a spider or slotted spoon onto a cooling rack with paper towels underneath. Let temperature in the pot come back to 350°f before frying next batch.
  10. Let doughnuts come to room temperature before glazing and filling.

For the pineapple jam:

  1. Combine pineapple and water/juice in a medium, heavy bottomed saucepan over medium heat. Cook, stirring occasionally, until pineapple becomes soft, about half an hour.
  2. Stir in sugar and lime juice to the pineapple and raise temperature to medium-high.
  3. Let the mixture reach a simmer, stirring to dissolve all the sugar.
  4. Then, lower heat to low and let cook about one hour, stirring occasionally, until thickened.
  5. Let cool to room temperature. If not using right away, store in an airtight container in the refrigerator up to one month.
    Pineapple Donut a.k.a. The Dole Whip Donut // magicaltreatsathome.com

For the meringue:

  1. Place the water, sugar, and corn syrup in a medium saucepan over medium-high heat until the mixture reaches 240°F on a candy thermometer.
  2. At the same time (you’ll want sugar syrup and egg whites to be done at the same time), whisk egg whites in a stand mixer until foamy, and then add in cream of tartar and salt. Increase speed to high until soft peaks form.
  3. Once the syrup reaches 240°f, slowly pour it into the egg whites while the stand mixer is on medium speed. Mix until the bowl is no longer hot but room temp, about 8-10 minutes. Then, mix in vanilla until incorporated.
  4. Place all the meringue into a large pastry bag or ziplock. Set aside.

For the glaze:

  1. In a small bowl, combine water and sugar. Stir until smooth and then add in desired amount of food coloring.
  2. Optionally, you can add in 1-2 drops of pineapple extract if you’d like more pineapple flavor.

Assembly:

  1. Start by dipping room temperature doughnuts in the glaze. Dip a second time for a more opaque glaze.
  2. Spoon pineapple jam into the center of the doughnuts, using the spoon to push the jam down into the center.
    Pineapple Donut a.k.a. The Dole Whip Donut // magicaltreatsathome.com
  3. Next, cut the tip off the pastry bag (if it’s disposable) or ziplock and pipe a swirl of meringue on top.
  4. Using a kitchen torch, lightly toast the outside of the meringue until golden. Enjoy!

Notes

  • Doughnuts, jam, and meringue can reach temperatures of over 300°F so please use caution in the kitchen! Wear gloves, an apron, closed toe shoes, and use a candy thermometer. Keep children away when handling hot dishes.
  • I made my batch of doughnuts with almond milk and they came out exactly the same as with cow milk, so feel free to use a milk alternative.
  • If you powdered sugar is clumpy, sift before adding water.
  • If glaze is too thin add more sugar. If too thick add more water a half a teaspoon at a time.
  • If you want your doughnuts extra pineapple-y, you can add a drop or two of pineapple extract to the glaze. But use sparingly!
  • Leftover meringue can be stored in the fridge for up to two weeks in an airtight container.
  • For this recipe I tested hand rolling doughnuts, cutting circles with a cutter, and rolling balls. To get a great puffy doughnut I found it best to roll into balls. However, if you’d like smaller doughnuts that still puff up, using a 2-3″ round cutter on flattened dough will produce smaller ones. Hand rolling will give you the classic shape, but you’d need to sandwich the pineapple jam between meringue in the hole.
    Pineapple Donut a.k.a. The Dole Whip Donut // magicaltreatsathome.com

Did you make this recipe?

Tag @magicaltreatsathome on Instagram and hashtag it #magicaltreatsathome

Pineapple Donut a.k.a. The Dole Whip Donut // magicaltreatsathome.com

Share this:

  • Click to share on Facebook (Opens in new window) Facebook
  • Click to share on X (Opens in new window) X

Like this:

Like Loading...

Filed Under: Recipes, Treats Tagged With: disneyland, dole whip, donut, doughnut, jolly holiday bakery cafe, pineapple

Primary Sidebar

Follow Us

  • Instagram
  • Facebook
  • X
  • Pinterest
  • Email
  • YouTube

Hi! My name is Elana, and that’s me shoving a Mickey Mouse shaped treat in my face. I love the treats at Disneyland. A lot. So much so I’ve dedicated an entire website to making all my favorites, and hopefully yours too, out of my home kitchen. My aim is to create Disneyland-inspired treats, with easy to follow directions, and many recipes geared towards getting the kids in the kitchen to help too! Because putting sprinkles on things is F-U-N.

Top With Sprinkles

Get Recipes in Your Inbox!

* indicates required

Look for this icon in posts to find Kid Friendly recipes!

Recent Posts

  • Matterhorn Macaroon
  • Caramel Gingerbread Cookie Sandwiches
  • Colorful Fruit Hand Pies
  • Classic Mickey Shaped Beignets
  • Carrot Cake Cookies

Archives

  • February 2023
  • December 2022
  • August 2022
  • January 2022
  • December 2021
  • November 2021
  • December 2020
  • November 2020
  • October 2020
  • September 2020
  • August 2020
  • July 2020
  • June 2020
  • May 2020
  • April 2020
  • March 2020
  • February 2020
  • January 2020
  • December 2019
  • November 2019
  • October 2019
  • September 2019
  • August 2019
  • July 2019
  • June 2019
  • May 2019

Copyright © 2025 Magical Treats at Home on the Foodie Pro Theme

%d