• Skip to primary navigation
  • Skip to main content
  • Skip to primary sidebar

Magical Treats at Home

  • About
  • Treats
  • Drinks
  • Savory
  • Favorite Tools
  • Etsy Shop

bacon

Jolly Holiday Maple Bacon Doughnuts

July 3, 2020 by Elana Lepkowski Leave a Comment

Maple Bacon Doughnut // magicaltreatsathome.com

Where can I find the original treat?

  • This treat was found at the Jolly Holiday Bakery Cafe in Disneyland.

The Donut Cart at Disneyland was always my favorite place to visit for a treat and to say I was bummed when they decided to get rid of it to widen the walkways around Sleeping Beauty Castle is an understatement. However, some of those fabulous doughnuts can be found over at the Jolly Holiday Bakery Cafe on occasion. (Although they will sell out quickly if it’s a good one!)

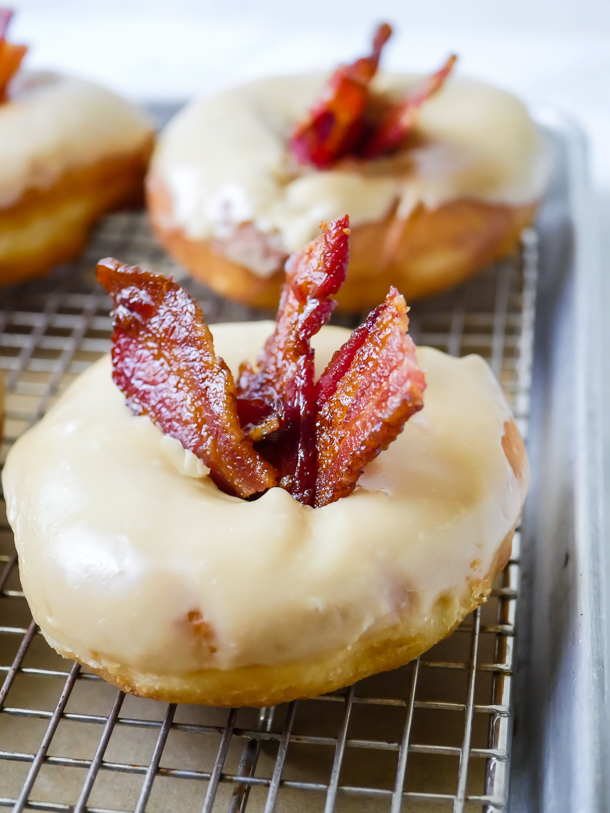
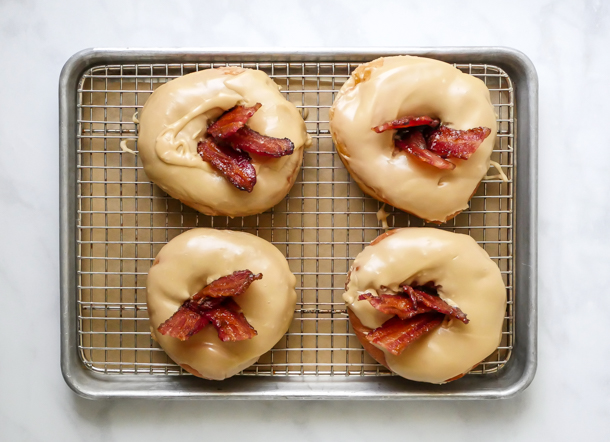
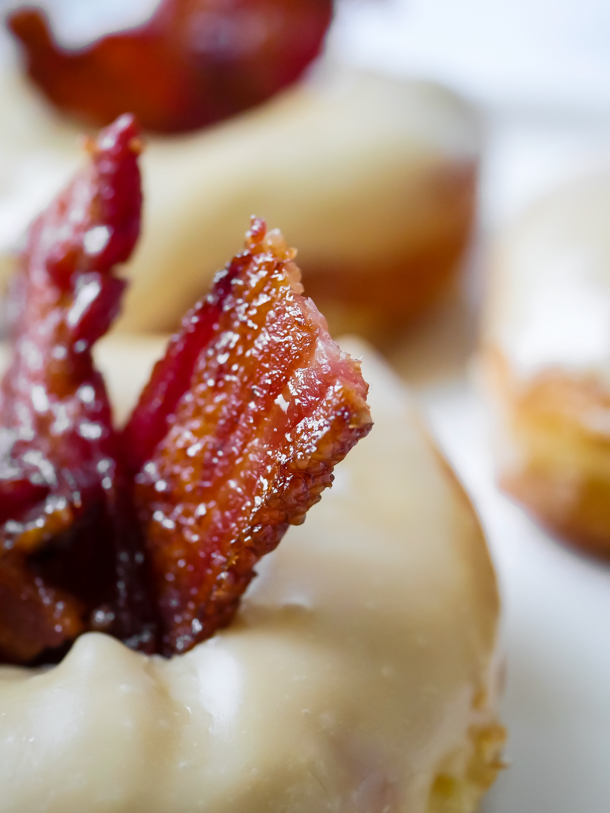
One of the last doughnuts I had while visiting the park this year was the Maple Bacon Doughnut, and let me tell you, the combination of sweet maple and salty bacon was *chef’s kiss*. I love sweet and salty treat combos, but I get it’s not for everyone (my husband picked all the bacon off and ate it separately). But I urge you to try the combo once, because it’s not just crispy bacon on top, it’s lacquered bacon and it gives another maple dimension to the doughnut.
Maple Bacon Doughnut // magicaltreatsathome.com

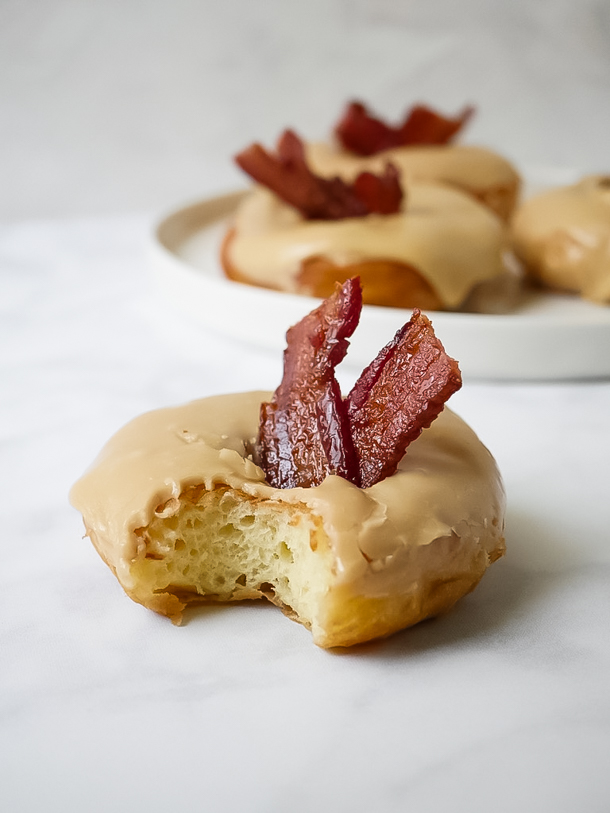
These are yeasted doughnuts so they require two rises, but they also make the most fluffiest, softest doughnuts and it’s worth the time you put in. However, if yeast is not available to you right now, or the time is not there, you could also bake a batch (like these doughnuts!) or even just buy some plain doughnuts and decorate. We’ve got all the recipes below for every component, so choose whatever option works for you.

I would not recommend that kids get involved for the actual frying part of the doughnut making, but mixing, shaping and decorating are all ways they can get involved. Although my kids just wanted to dip the bacon in the glaze.
Maple Bacon Doughnut // magicaltreatsathome.com

TIP: Now, if making homemade doughnuts seems like a chore, please let me assure you it’s not! Hope on over to our Instagram account and head to our doughnut making highlight bubble for lots of tips. And remember to read all our tips below in the notes section of the recipe card. Also, if you want doughnuts in the morning, make the dough up the night before! Here’s the run down from our Churro Gears post…

Don’t wake up at 4am for breakfast doughnuts! Start them the night before!

  • The night before, mix up the dough and instead of having it sit out to double in size for an hour and a half, cover and refrigerate it at least 8 hours and up to 12.
  • The next day, take them out of the fridge, let the dough sit for 5 minutes uncovered, and then roll out and proceed with making the doughnuts.
  • Once shaped, doughnuts need to rise for 45 minutes before frying off. So, during this time you can brew some coffee, scroll Instagram, make lunches, heat the oil, and whatever else eats up all that precious morning time every day.
  • You should definitely though start heating the oil around 15-20 minutes before your timer goes off. I start on high to get it warmed up quickly in my dutch oven, and then ease on down to medium-high or medium at around 320°f or so. Otherwise it can reach temp and then get too hot and you don’t want that to happen.
  • And from there you’ll start frying off doughnuts and have them ready to eat within 10 minutes!
Maple Bacon Doughnut // magicaltreatsathome.com

Have a magical weekend everyone! And if you try these in an air fryer, let me know how they turn out (I still haven’t bought one yet…).

Print

clock clock iconcutlery cutlery iconflag flag iconfolder folder iconinstagram instagram iconpinterest pinterest iconfacebook facebook iconprint print iconsquares squares iconheart heart iconheart solid heart solid icon
Maple Bacon Doughnut // magicaltreatsathome.com

Jolly Holiday Maple Bacon Doughnuts

5 Stars 4 Stars 3 Stars 2 Stars 1 Star No reviews
  • Author: Elana Lepkowski
  • Yield: 4 Maple Bacon Doughnuts 1x
Print Recipe
Pin Recipe

Description

This sweet and salty breakfast treat combines rich maple glaze and lacquered bacon on the softest yeast dougnut. A Disneyland-inspired treat.


Ingredients

Scale

For the doughnuts:

  • 3/4 teaspoon active dry yeast (not rapid rise)
  • 1 tablespoon warm water (around 110°f)
  • 1 cup (120 grams) all-purpose flour
  • 1/4 cup warmed whole milk, or milk alternative of your choice (see notes below)
  • 1 tablespoon unsalted butter, softened
  • 1 large egg yolk
  • 2 teaspoons granulated sugar
  • 1/2 teaspoon kosher salt
  • 4 cups neutral oil like avocado or canola

For the lacquered bacon:

  • 4 strips bacon
  • 1/4 cup maple syrup

For the maple glaze:

  • 1/3 cup maple syrup (I used a robust grade B for a richer flavor)
  • 1 tablespoon butter, unsalted
  • 1 cup powdered sugar
  • splash of cream or milk

Specialty Tools:

  • 1-1/4″ circle cutter
  • candy/frying thermometer
  • spider strainer

Instructions

For the doughnuts:

  1. Mix together yeast and warm water in a small bowl. Let sit for five minutes until bubbles form on top (if bubbles do not form, throw away and try again. Your yeast might be too old, or your water too hot/cold to activate yeast).
  2. While yeast sits, in the bowl of a stand mixer or a freestanding large bowl with a hand mixer, combine the flour, milk, butter, egg yolk, sugar and salt. Add in yeast mixture.
  3. Stir until just combined and then attach a dough hook and mix in the stand mixer on low until dough comes together. Then increase speed to high and mix for 3 more minutes. Alternatively, you can knead dough by hand for 5-7 minutes.
  4. Remove dough from the dough hook and let sit in the bowl, covered, at room temperature, for one hour until dough has doubled in size. (It will be done rising once you can leave an indentation in the dough with your finger and it doesn’t spring back)
  5. Next, sprinkle flour onto your counter and divide your dough into four equal pieces.
  6. Roll each segment into balls, and then shape them by either making a hole through them with your finger, or flattening into a circle and using a 1-1/4″ circle cutter to make a center hole, and let rise again for 30 minutes covered with a tea towel.
  7. About 20 minutes before the second rise is complete, heat oil in a dutch oven with a candy thermometer attached.
  8. When the oil reaches 350°f, carefully lower the dough into the hot oil. You can fry two to three doughnuts at a time in a wide dutch oven.
  9. Fry on each side about one minute. Then remove with a spider or slotted spoon onto a cooling rack with paper towels underneath. Let temperature in the pot come back to 350°f before frying next batch.
  10. Let doughnuts come to room temperature before glazing and filling.

For the lacquered bacon:

  1. Heat oven to 350°f.
  2. Cover the bottom of a sheet pan with foil and place a grate over the top. Set aside.
  3. In a bowl wide enough to accommodate the bacon, place bacon inside and then pour the maple syrup over them.
  4. Use your hands to massage the maple syrup into the bacon and to ensure all of the bacon is covered in the syrup.
  5. Lay the pieces of bacon flat on the grate and move into the oven.
  6. Bake for 20 minutes (starting to check at 18 to make sure it is not burning) until crisp and shiny.
  7. Remove from the oven and let cool. Then chop into 1-1/2″ sections. Set aside.

For the maple glaze:

  1. In a small sauce pan, melt the maple syrup and butter together.
  2. Remove from the heat and add in the powdered sugar. Mix until smooth. If too thick, add a splash of milk or cream.
  3. Move back to the stove on the lowest setting to keep warm.

To assemble the doughnuts:

  1. Dip a doughnut top into the maple glaze.
  2. Add pieces of bacon to the center.
  3. Set aside and repeat on remaining doughnuts.

Notes

  • This recipe can be doubled as is with no adjustments.
  • Frying reaches temperatures of over 350°F so please use caution in the kitchen! Wear gloves, an apron, closed toe shoes, and use a candy thermometer. Keep children away when handling hot dishes.
  • I made my batch of doughnuts with almond milk and they came out exactly the same as with cow milk, so feel free to use a milk alternative.
  • If you choose to cut out your doughnuts instead of hand shaping, save the doughnut holes and fry those off as well! 40 seconds on side one, and then 30 seconds on the other side.
  • Remember, bacon is a raw pork product, so clean your hands and any surfaces before handling cooked doughnuts.
  • Doughnuts are best the day they are made, but can be placed in an air-tight container and eaten the next day (but no longer than that!).
  • Extra glaze can be kept in an air-tight container in the refrigerator for up to 5 days and reheated on the stove with a splash of cream or milk.
Did you make this recipe?

Tag @magicaltreatsathome on Instagram and hashtag it #magicaltreatsathome

Maple Bacon Doughnut // magicaltreatsathome.com

Share this:

  • Click to share on Facebook (Opens in new window) Facebook
  • Click to share on X (Opens in new window) X

Like this:

Like Loading...

Filed Under: Recipes, Treats Tagged With: bacon, disneyland, donut, doughnut, maple, maple bacon, Sleeping Beauty

Maple-Bacon Churro

July 15, 2019 by Elana Lepkowski Leave a Comment

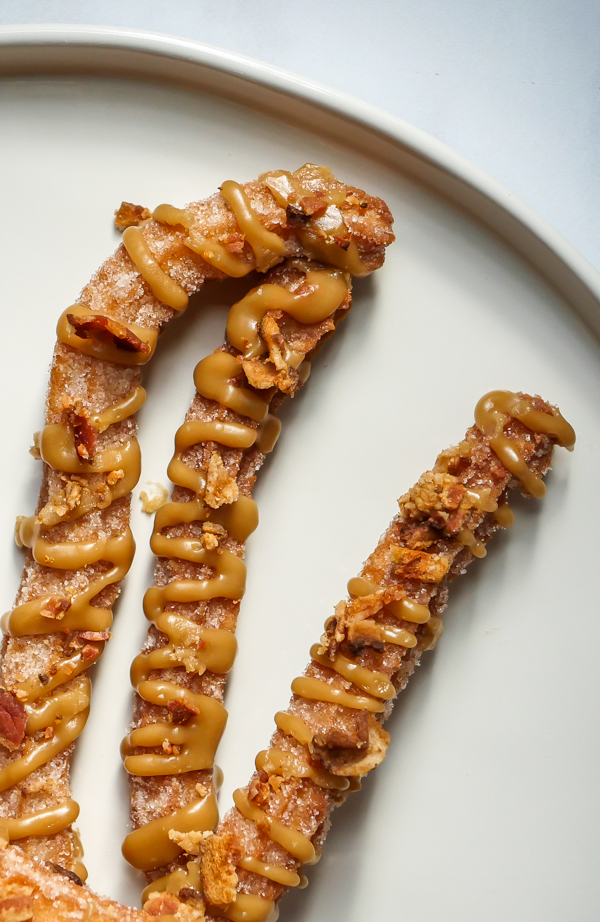
Maple-Bacon Churros // magicaltreatsathome.com

Where can I find the original treat?

  • This specialty churro was part of the “Get Your Ears On” celebration found in Grizzly Peak in California Adventure at the Disneyland resort.

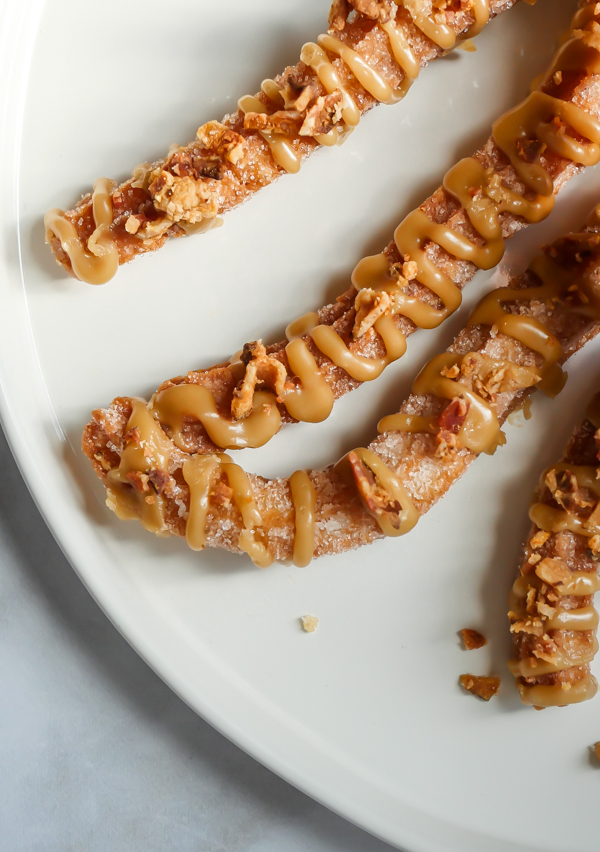
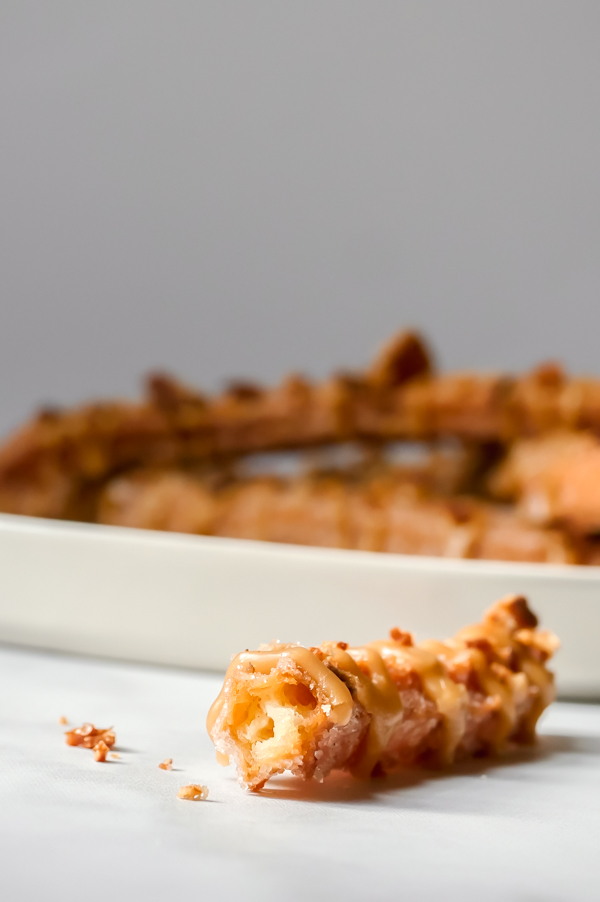
We’re back today with another of our favorite churro recipes for #ChurroMonth here on the site. We just love anything with maple but when you add some salty bits of bacon… WOW! And we weren’t the only ones who were big fans of this treat. Many followers let us know that this churro was also a hit for them. So maybe we should start a #bringbackthemaplebaconchurro hashtag??

Maple-Bacon Churros // magicaltreatsathome.com

Anyway, this churro takes the classic cinnamon sugar recipe and dresses it up with a maple glaze and salty bacon bits. If you’re a fan of sweet and savory treats, this is definitely for you.

Maple-Bacon Churros // magicaltreatsathome.com

If you’re new to making churros, or any fried foods, please read through the notes below. I’ve tried to cover many issues that might arise while making these, but if you don’t see your question answered, leave us a comment below and we’ll get back to you (and you might even help another reader out!).

Maple-Bacon Churros // magicaltreatsathome.com

Ok, enough chatting for now… let’s make some churros!

Maple-Bacon Churros // magicaltreatsathome.com
Print
clock clock iconcutlery cutlery iconflag flag iconfolder folder iconinstagram instagram iconpinterest pinterest iconfacebook facebook iconprint print iconsquares squares iconheart heart iconheart solid heart solid icon
Maple-Bacon Churros // magicaltreatsathome.com

Maple-Bacon Churro

5 Stars 4 Stars 3 Stars 2 Stars 1 Star No reviews
  • Author: Elana Lepkowski
  • Yield: 14–16 churros 1x
  • Category: Treats
Print Recipe
Pin Recipe

Description

A sweet maple glaze and salty bacon bits top this classic cinnamon sugar churro found at Grizzly Peak in Disney’s California Adventure Park from the “Get Your Ears On” celebration. A Disneyland-inspired treat.


Ingredients

Scale

Toppings

  • 1/2 cup granulated sugar
  • 1 teaspoon cinnamon
  • 3–4 pieces of bacon
  • 1/2 cup maple syrup
  • 2 tablespoons butter
  • 1 tablespoon milk
  • 1 cup powdered sugar

Churro:

  • 1 cup water
  • 1/2 cup butter
  • 1 tablespoon granulated sugar
  • big pinch of salt
  • 1 cup all purpose flour
  • 2 eggs
  • vegetable oil for frying

Tools:

  • spider for frying
  • Wilton 1 M piping tip
  • pastry bag
  • candy thermometer

Instructions

For the toppings:

  1. Line two half sized sheet pans with parchment, set aside. Mix together 1/2 cup of granulated sugar and cinnamon in a long shallow bowl or loaf pan, set aside.
  2. Cook the bacon until crispy. Depending on the type of bacon you have, this can take about 8-10 minutes on medium high, flipping halfway through cooking. Drain on paper towels, cool, chop into small pieces and set aside.
  3. Make the maple glaze by combining maple syrup, butter, and milk in a medium sized saucepan. Bring to a boil and whisk for two minutes. Remove from heat. Slowly pour in powdered sugar, whisking continuously until combined and smooth. Set aside until ready to use or funnel into a squeeze bottle. (This will make more maple glaze than you need for just drizzling on your churros! This will keep refrigerated up to two weeks. Warm before using.)

For the churros:

  1. In a medium sized saucepan over medium-high heat, combine water, butter, sugar and salt. Bring to a boil, or until butter has melted.
  2. Turn burner to low and pour in all the flour at once. Stir until there are no visible flour lumps and dough has begun to stick together in a ball and pulled away from the sides of the pan.
  3. Remove pan from heat and let sit 5 minutes. Then stir in each egg until incorporated. Dough will appear to break or become lumpy. Continue to stir until it forms a smooth, sticky dough.
  4. Fill a pastry bag fitted with a Wilton 1 M open star tip half full with batter (see notes below on filling pastry bags) and pipe 8″ long dough onto the sheet pan. I was able to fill two sheet pans with all the batter.
  5. Refrigerate dough at least 30 minutes and up to two days. Batter will stiffen the more it sits, so let the dough come to room temperature before frying. (Note below for frying immediately after making dough)
  6. Fill a dutch oven or deep frying pan with vegetable oil at least 2″ up the side of the pan (I found a 1/2 gallon of avocado oil worked for me in my large dutch oven. See note below about reusing oil.). Heat oil to 340-350°f, using a candy thermometer to keep the temperature constant. You may need to adjust heat up or down during cooking.
  7. Place churros 2-3 at a time in the cooking oil for 6 minutes, turning after 3 minutes with a spatula or spider. Wait until oil comes back to temperature before adding next batch.
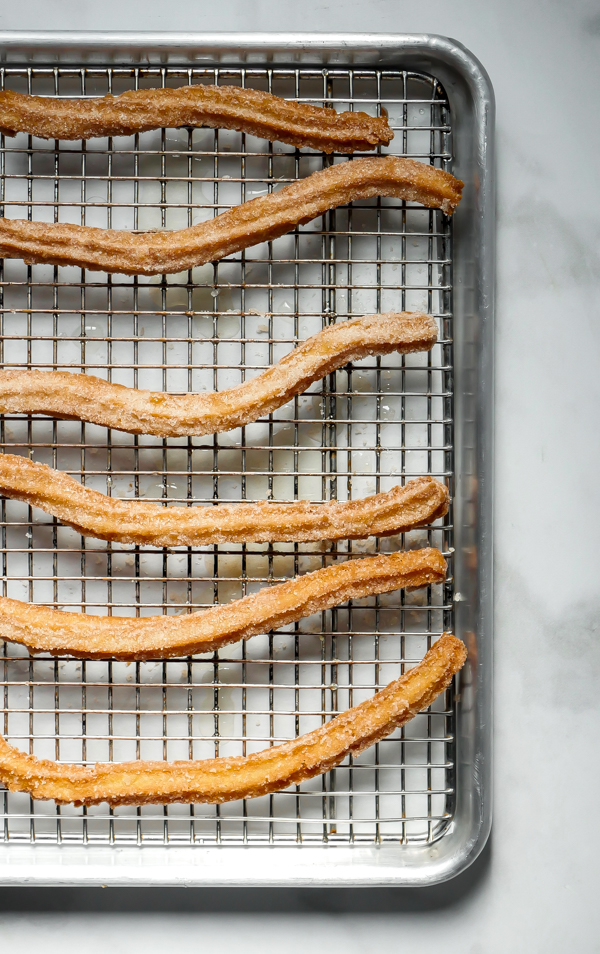
  8. Using a spider or large spatula, remove churros from oil and drain on a cooling rack over parchment or on a paper towel. Wait at least a minute and then toss the churro in the cinnamon sugar, tapping off any excess.
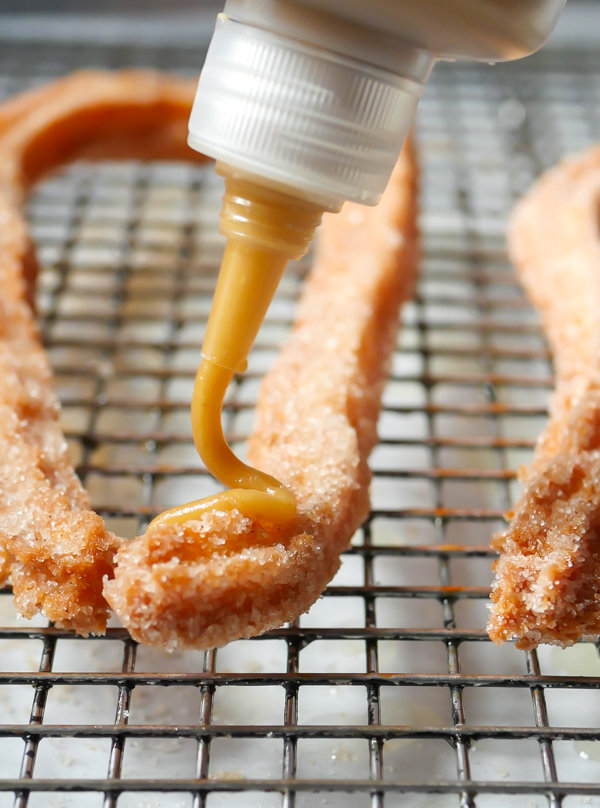
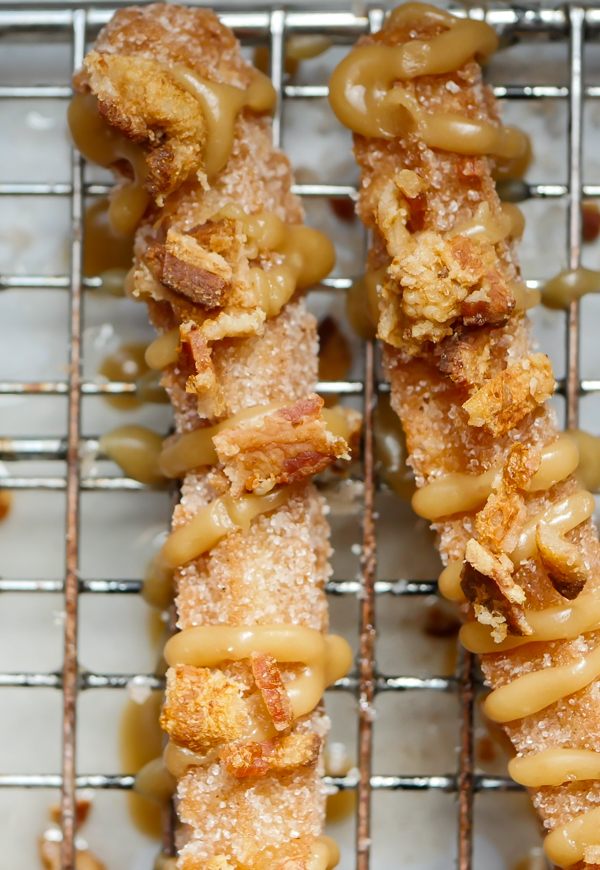
  9. Place sugared churros on a cooling rack with parchment or a sheet pan underneath to catch drips and then drizzle maple glaze onto each churro. Immediately sprinkle with bacon bits so they adhere to glaze.
  10. Allow to cool slightly and enjoy!

Notes

  • Do not overfill your pastry bag! Fill in two to three batches. If there is too much dough, it will seep out the top and will be hard to pipe.
  • Slowly pipe out dough all of a consistent size, smaller spots on the churro can cause them to become more fragile while handling and can break in the oil or while coating in sugar.
  • Churro dough can be piped out onto parchment and covered in the fridge up to 48 hours.
  • If you want to make you churros immediately after making dough without the chilling time, once oil has reached temp, starting about one inch above the oil, pipe a small line of dough down into oil and either snip end with scissors, or break the dough off the pastry tip on the side of your pan. Follow directions above for frying.
  • Thicker churros will require a longer cooking time to fully cook through the center. Test one churro first to adjust your cooking time.
  • Cooking oil can be fine strained and stored again for another use. I strain back into the bottle it came from. Well strained oil can be stored in a cool, dry place and used up to several times.
  • Churros curling? That could be one of a few reasons. One is that it will naturally shrink and change shape as the dough hits the oil and puffs up. I found that the stiffer dough from sitting in the fridge resulted in straighter churros while fresher dough tending to curl more. Also, if you’re using a circular pot like a dutch oven, churros may rest against the inside edge of the pan while cooking causing them to take on the curved shape of the pan. To prevent this, nudge your churro with the spider or spatula immediately after placing in oil when it pops back up to the surface. Continue to nudge gently back and forth for about 20-40 seconds or until the dough has gotten stiff in the oil.

Did you make this recipe?

Tag @magicaltreatsathome on Instagram and hashtag it #magicaltreatsathome

Maple-Bacon Churros // magicaltreatsathome.com

Share this:

  • Click to share on Facebook (Opens in new window) Facebook
  • Click to share on X (Opens in new window) X

Like this:

Like Loading...

Filed Under: Recipes, Treats Tagged With: bacon, churro, DCA, Disney's California Adventure, Get Your Ears On, maple, treat

“Celebrate Mickey” Chicken and Waffles

June 30, 2019 by Elana Lepkowski Leave a Comment

Celebrate Mickey Chicken and Waffles // magicaltreatsathome.com

Where can I find the original treat?

  • This specialty treat was part of the Get Your Ears on Celebration and was located at the Carnation Cafe in Disneyland.

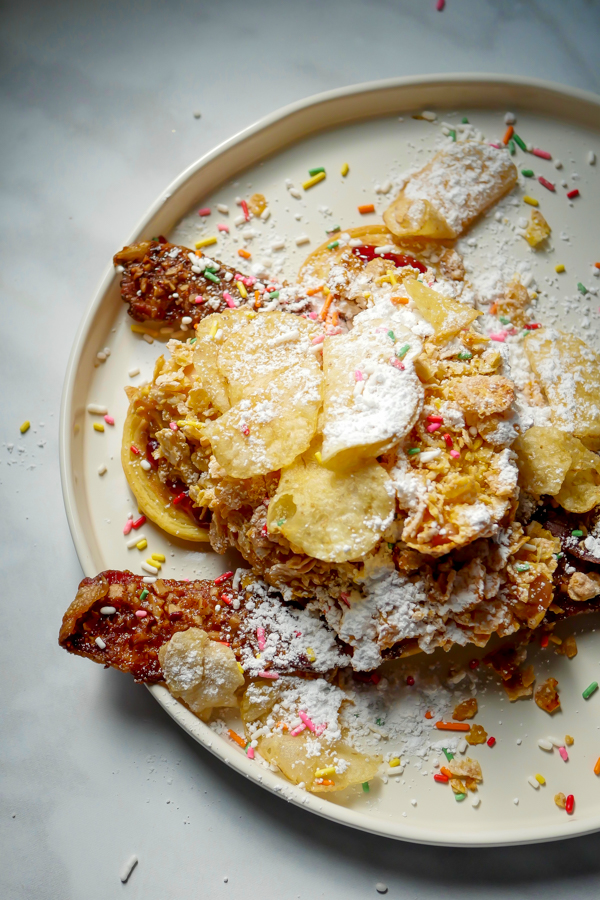
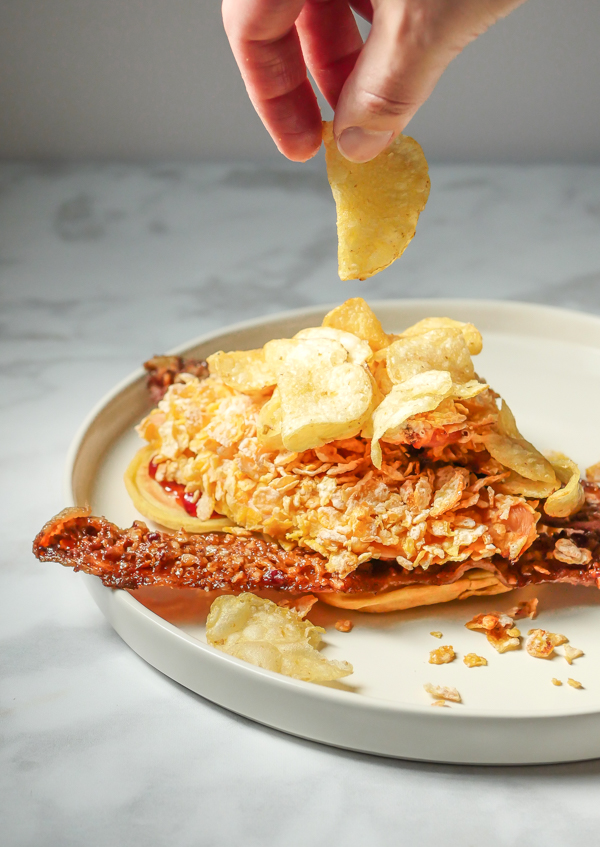
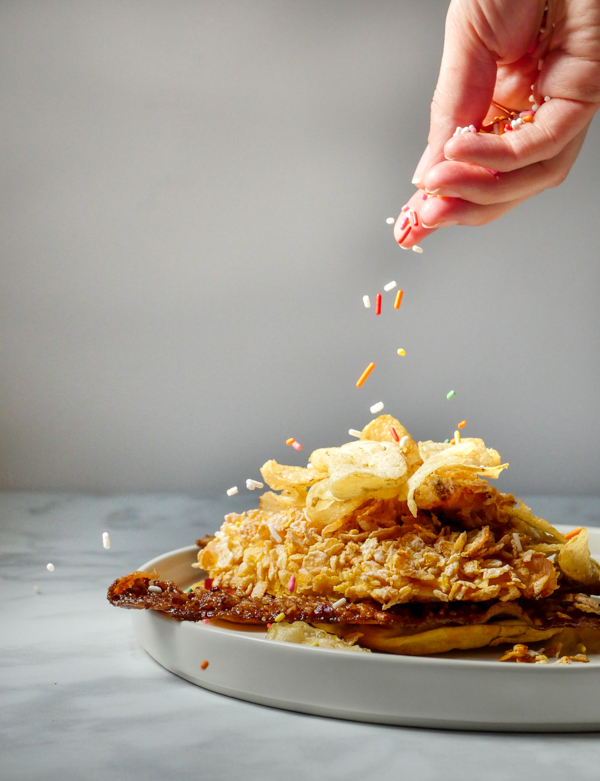
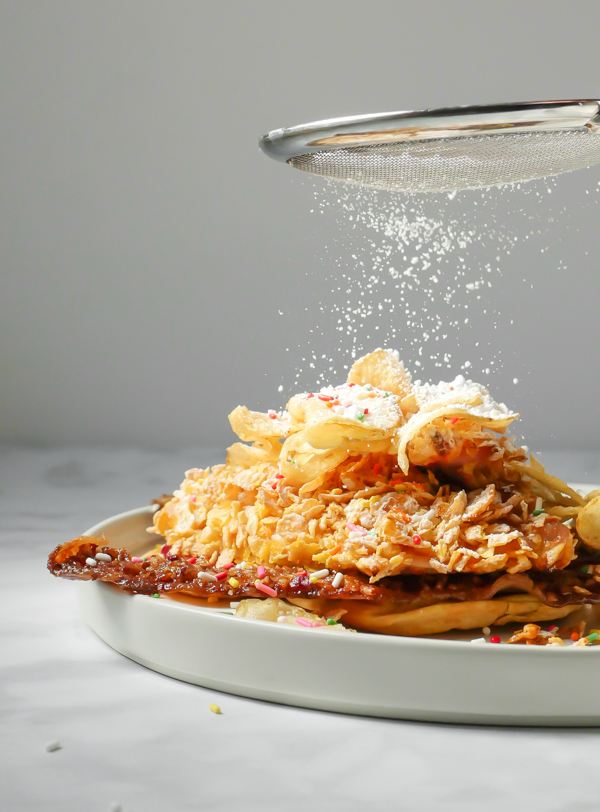
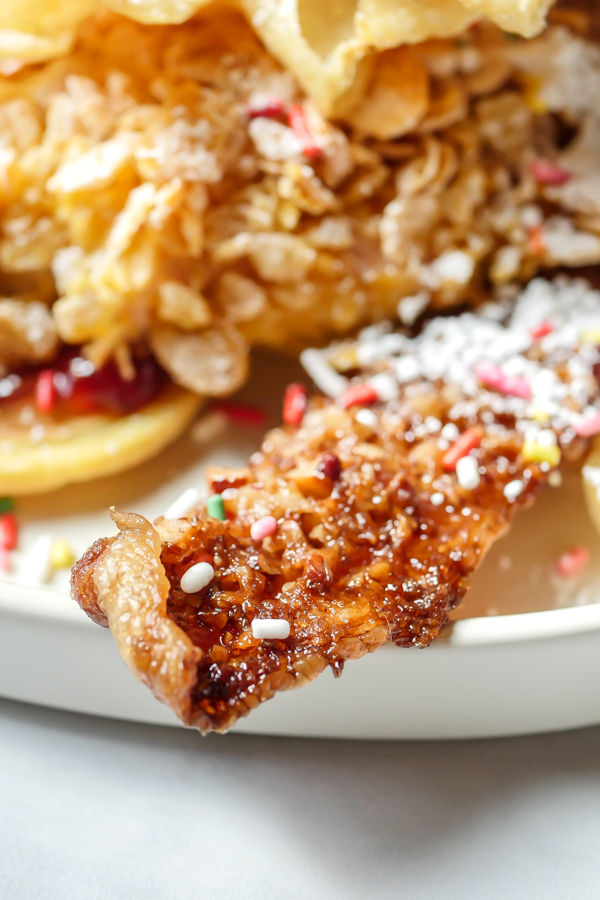
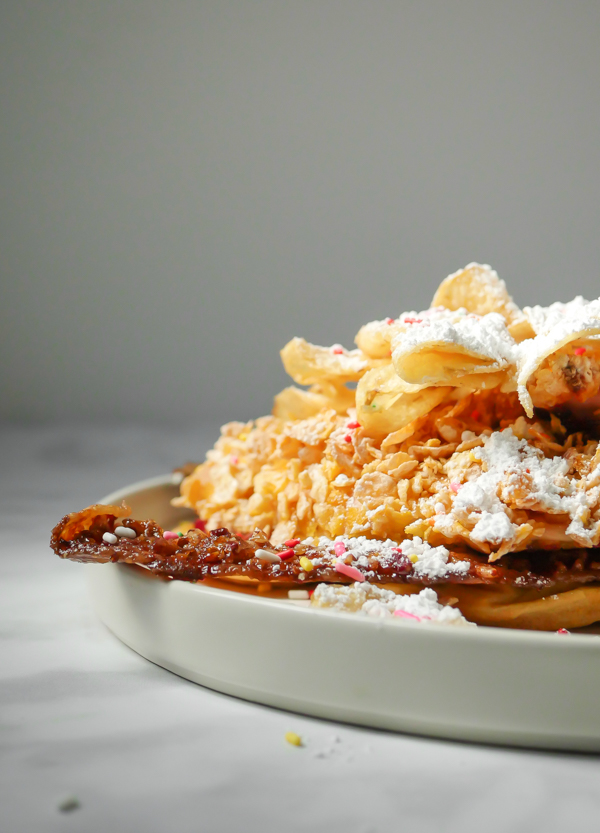
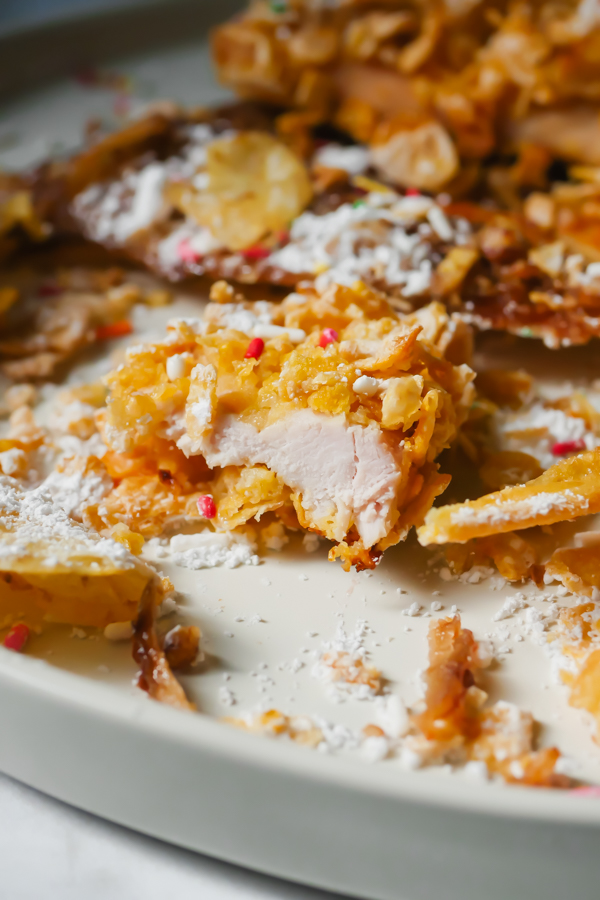
We’re squeezing in our last and final recipe from the “Get Your Ears On” celebration for this month with this festive dish, the “Celebrate Mickey” Chicken and Waffles Breakfast Special. Now, I’m a big fan of chicken and waffles any time, but cover that with candied bacon, berry compote, potato chips, powdered sugar, and sprinkles and well, now I’m even more excited.

Celebrate Mickey Chicken and Waffles // magicaltreatsathome.com

This dish has a number of components, but don’t fret, they easily can all be made ahead of time. In fact, I had to make several components well in advance while I was doing all the testing for the Piranha Lemonade Slushy.

Celebrate Mickey Chicken and Waffles // magicaltreatsathome.com

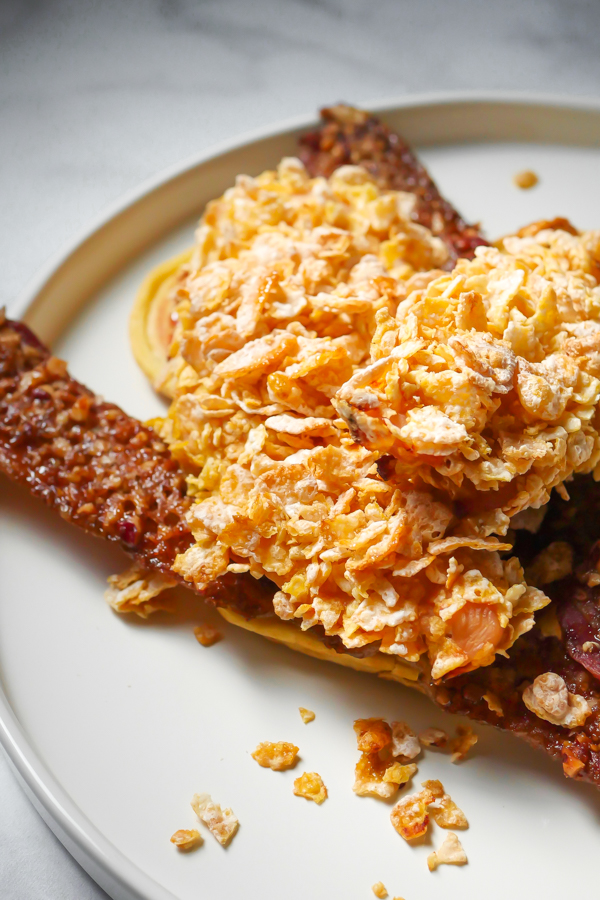
The one change I made from the original is that I did not pan fry the chicken. I wasn’t sure how the cereal coating would hold up to frying, so I decided to bake the battered chicken. And it worked out great! If you’re not up to pan frying these, the baked option keeps the topping crisp still but it does take longer to make. I like having the hands off option and less oil to deal with. It loses some of its golden color baking it, but I think it was just as tasty.

Celebrate Mickey Chicken and Waffles // magicaltreatsathome.com

If you’re looking for a special breakfast spread, or if you’re having guests over for brunch, I think this dish would be perfect. You could make stacks of each component and let your guests fill their plates as they’d like. And of course, kids LOVE making their own breakfast plate with these components, and aren’t going to say no to adding powdered sugar and SPRINKLES to their breakfast. Oh yeah, and potato chips too!

Celebrate Mickey Chicken and Waffles // magicaltreatsathome.com

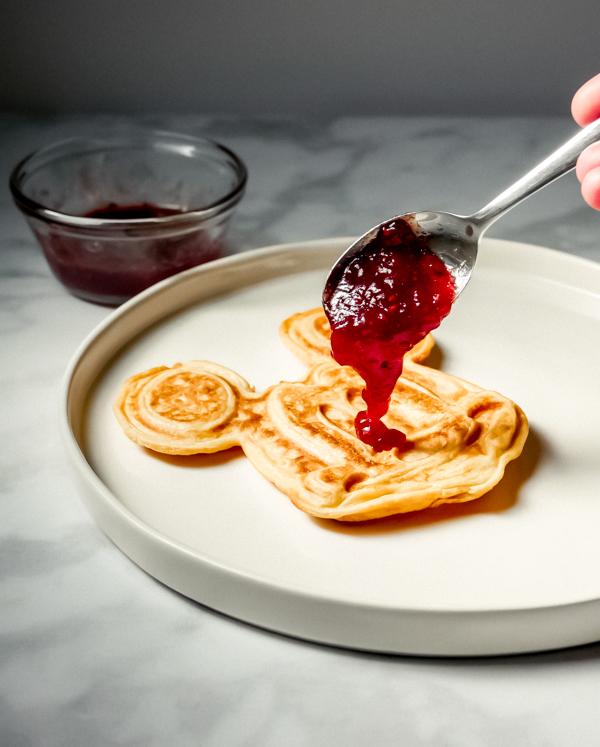
Note, this dish uses the same mix that Disneyland uses in all their waffles, Golden Malt. Surprisingly this is easily available on Amazon and possibly in your local grocery store. However, if you’ve got a waffle mix you like, either store bought or homemade, go ahead and use that. Also, I opted to mix strawberry and raspberry preserves to make my own compote for the dish. If you have a mixed berry jam already at home, that would also work. The berries give a nice tang to the whole dish that I think works really well with the savory elements.

Celebrate Mickey Chicken and Waffles // magicaltreatsathome.com

And that concludes some our favorite dishes from the “Get Your Ears On’ celebration at Disneyland! Stay tuned for next month’s recipes, where we will be serving up a month of CHURROS! Until then, let’s celebrate with some chicken and waffles.

Celebrate Mickey Chicken and Waffles // magicaltreatsathome.com
Print
clock clock iconcutlery cutlery iconflag flag iconfolder folder iconinstagram instagram iconpinterest pinterest iconfacebook facebook iconprint print iconsquares squares iconheart heart iconheart solid heart solid icon
Celebrate Mickey Chicken and Waffles // magicaltreatsathome.com

“Celebrate Mickey” Chicken and Waffles

5 Stars 4 Stars 3 Stars 2 Stars 1 Star No reviews
  • Author: Elana Lepkowski
  • Yield: 2 servings 1x
Print Recipe
Pin Recipe

Description

Let’s “Celebrate Mickey” with this over-the-top Disney-inspired chicken and waffles dish topped with berry compote, candied pecan bacon, potato chips, powdered sugar, and SPRINKLES! Found at Carnation Cafe during the “Get Your Ears On” celebration at Disneyland.


Ingredients

Scale

For the waffles:

  • 1 cup Golden Malted Waffle Mix
  • 1 egg
  • 5 ounces water
  • 2 tablespoons melted butter

For the berry compote:

  • 2 tablespoons strawberry jam
  • 1 tablespoon raspberry jam

For the candied pecan bacon:

  • 5 slices bacon
  • 3 tablespoons brown sugar
  • 1/3 cup crushed pecans

For the cereal crusted chicken:

  • 4 cups crushed frosted cereal flakes
  • 1 egg
  • 1–1/3 cup milk
  • 4 chicken breasts
  • salt

Toppings:

  • potato chips (I use kettle chips for this dish)
  • powdered sugar
  • rainbow sprinkles

Special Tools

  • Mickey Mouse Waffle Maker

Instructions

For the waffles (makes 4 waffles in Mickey Waffle Maker):

  1. Beat eggs and liquid together.
  2. Add flour and mix well.
  3. Stir in melted butter and mix thoroughly.
  4. Ladle onto hot Gourmet Waffle Baker and remove when golden brown.

For the berry compote:

  1. Mix together jams in a small bowl.
  2. Set aside.

For the candied pecan bacon:

  1. Heat oven to 400.
  2. Line a baking sheet with foil and place a cooling rack on top. Place bacon on the cooling rack.
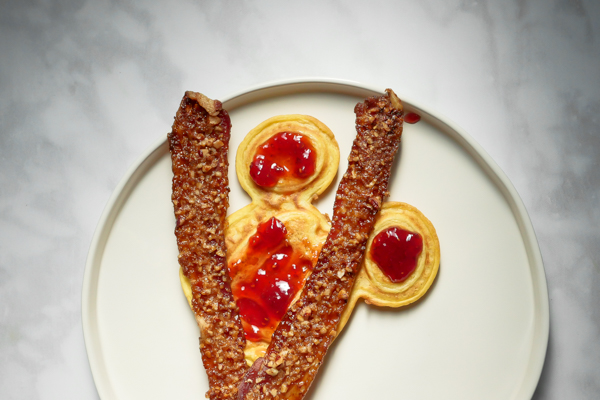
  3. Combine brown sugar and pecans in a small bowl. Spoon mixture over bacon, pushing down into bacon evenly.
  4. Bake 20-25 minutes until brown and crispy.

For the cereal crusted chicken:

  1. Preheat oven to 375°f.
  2. Grease a 9×12 baking pan.
  3. Season chicken breasts with salt on both sides (about 1/2 teaspoon each).
  4. Crush cereal into even pieces (I used my hands as I measured it out) and place into a shallow bowl large enough to lay chicken in.
  5. In another shallow bowl of equal size, pour milk in and beat the egg into it.
  6. Next, dip chicken breast into the milk, letting excess drip back into bowl, and then dip into the cereal on both sides. Place in baking dish and repeat with the rest of chicken. 
  7. Bake in the oven for about 40 minutes or until a thermometer reads 165°f.

Assembly:

  1. Place the waffle on a plate and top with jam.
  2. Lay the bacon pieces next and then place chicken on top.
  3. Cover with potato chips, powdered sugar, and sprinkles. Enjoy!

Notes

  • Waffles can be made ahead of time and frozen individually between sheets of parchment and placed in a ziplock until ready to use. They can be toasted in a toaster oven or toaster the same as frozen waffles.
  • Bacon can be made ahead of time and placed in an airtight container in the fridge until ready to use up to 3 days. Let the bacon come to room temp, or warm in a toaster oven when ready to eat.
  • Chicken can be made ahead of time and placed in an airtight container in the fridge until ready to use up to 3 days. Warm in oven or toaster oven when ready to eat.
  • Jam can be mixed and stored in an airtight container in the refrigerator up to two weeks.
  • Waffles will deflate after cooking slightly.

Did you make this recipe?

Tag @magicaltreatsathome on Instagram and hashtag it #magicaltreatsathome

Celebrate Mickey Chicken and Waffles // magicaltreatsathome.com

Share this:

  • Click to share on Facebook (Opens in new window) Facebook
  • Click to share on X (Opens in new window) X

Like this:

Like Loading...

Filed Under: Recipes, Savory Tagged With: bacon, breakfast, Carnation Cafe, cereal, chicken, Mickey Mouse, potato chips, savory, sprinkles, waffles

Bacon Mac & Cheese Footlong Hotdog

June 3, 2019 by Elana Lepkowski Leave a Comment

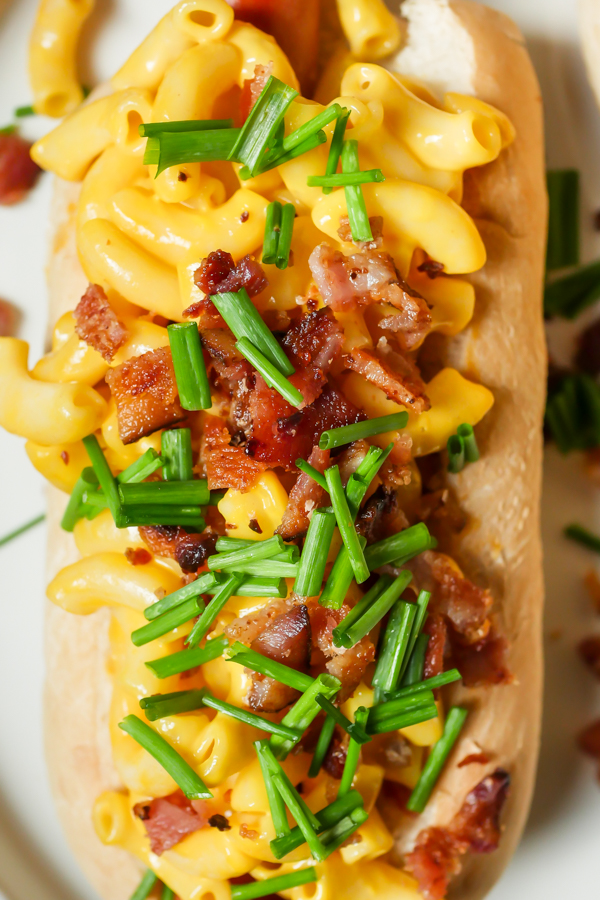
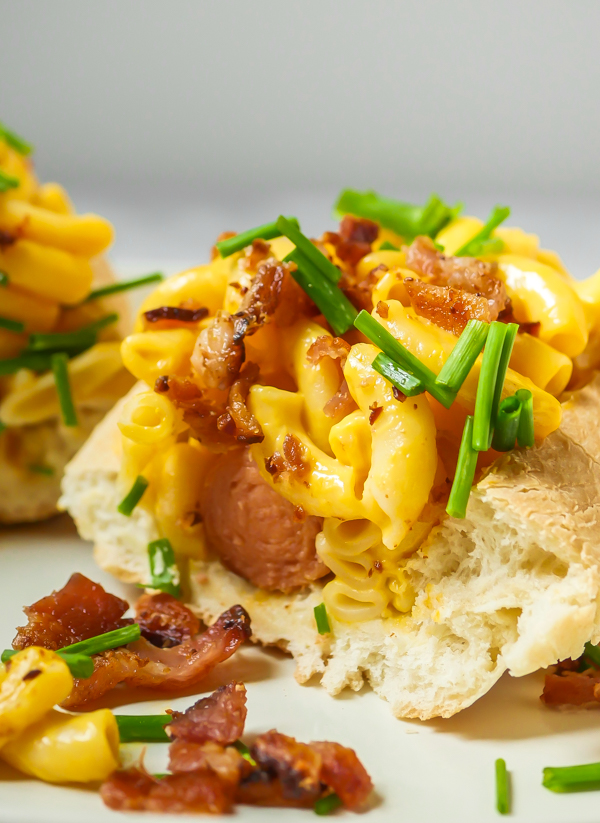
Bacon Mac & Cheese Footlong Hotdog // magicaltreatsathome.com
  • I’m kicking off a month of favorites from the “Get Your Ears On” celebration for June!

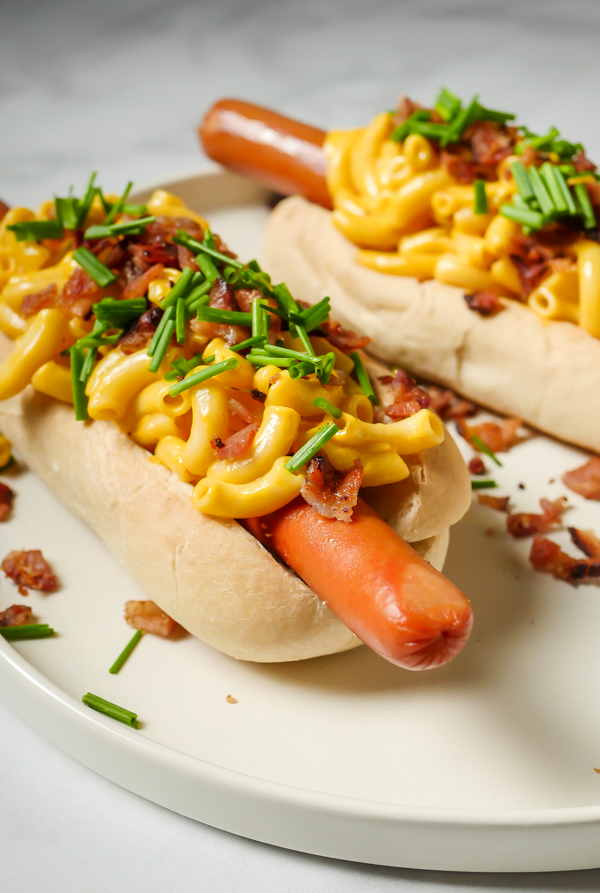
I thought it was time we tried a savory item on here. Treats do not necessarily have to be sweet, and the Bacon Mac & Cheese Footlong Hotdog was definitely one of my favorite savory items at the park during this festival.

Bacon Mac & Cheese Footlong Hotdog // magicaltreatsathome.com

Now, this recipe is an example of why I say “inspired” and not “copy cat” recipe… and that’s because if I could change one thing about this, it would be the mac & cheese; it just wasn’t 100% for me. Overall I loved this dish. I mean, it fed four of us as a snack and that’s a great bang for your buck! The mac & cheese worked just fine as part of the whole meal, but on its own I thought it could be better. So, today I’ll just sub in my favorite creamy mac & cheese and then it will be perfect!

Bacon Mac & Cheese Footlong Hotdog // magicaltreatsathome.com

This dish does not use standard hotdog buns. The whole meal rests inside a soft, french roll, and really, you need that sturdier bread to hold it all. If you decided to not go the footlong route and just make standard size hotdogs, I’d still suggest you use a sturdy bun, or you’ll need to eat it out of a bowl!

Bacon Mac & Cheese Footlong Hotdog // magicaltreatsathome.com
Print
clock clock iconcutlery cutlery iconflag flag iconfolder folder iconinstagram instagram iconpinterest pinterest iconfacebook facebook iconprint print iconsquares squares iconheart heart iconheart solid heart solid icon
Bacon Mac & Cheese Footlong Hotdog // magicaltreatsathome.com

Bacon Mac & Cheese Footlong Hotdog

5 Stars 4 Stars 3 Stars 2 Stars 1 Star No reviews
  • Author: Elana Lepkowski
  • Yield: 2 hotdogs 1x
Print Recipe
Pin Recipe

Description

Creamy mac & cheese with bacon bits and chives makes a delicious topping for a footlong hotdog! A Disneyland-inspired treat from the “Get Your Ears On” celebration.


Ingredients

Scale
  • 2 cups creamy mac & cheese, prepared
  • 3–4 slices of bacon
  • 2 footlong hotdogs (I used Farmer John’s Dodger Dogs)
  • 2 tablespoons chopped chives, divided
  • 2 french rolls

Instructions

  1. Start by preparing the mac & cheese per the box’s instructions.
  2. Next, cook bacon over medium-high heat until crispy. Watch that it does not go from crispy to burned! Set aside until warm and then chop bacon to small bite-sized pieces.
  3. Cook hotdogs over medium heat about 8 minutes, turning occasionally to crisp skin on all sides. While hotdogs are cooking, warm french rolls if desired. 
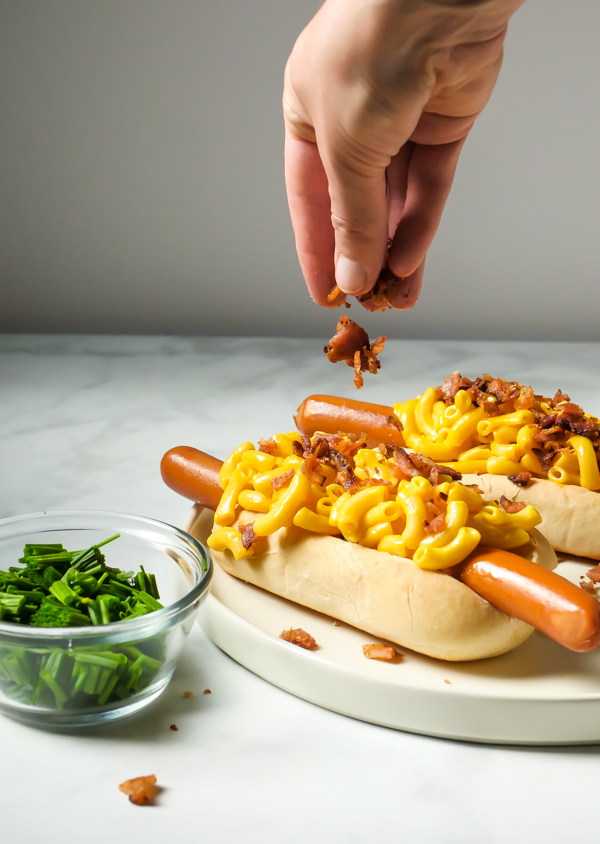
  4. To assemble: carve out a small section from french rolls and place hotdog inside. Scoop mac & cheese on top. Sprinkle with bacon bits and chopped chives. Enjoy!

Notes

  • Use a french roll instead of a standard hotdog bun for a sturdier base
  • All components can be prepared up to a day in advance and reheated to assemble

Did you make this recipe?

Tag @magicaltreatsathome on Instagram and hashtag it #magicaltreatsathome

Bacon Mac & Cheese Footlong Hotdog // magicaltreatsathome.com

Share this:

  • Click to share on Facebook (Opens in new window) Facebook
  • Click to share on X (Opens in new window) X

Like this:

Like Loading...

Filed Under: Recipes, Savory Tagged With: bacon, Get Your Ears On, hotdog, mac and cheese, savory

Primary Sidebar

Follow Us

  • Instagram
  • Facebook
  • X
  • Pinterest
  • Email
  • YouTube

Hi! My name is Elana, and that’s me shoving a Mickey Mouse shaped treat in my face. I love the treats at Disneyland. A lot. So much so I’ve dedicated an entire website to making all my favorites, and hopefully yours too, out of my home kitchen. My aim is to create Disneyland-inspired treats, with easy to follow directions, and many recipes geared towards getting the kids in the kitchen to help too! Because putting sprinkles on things is F-U-N.

Top With Sprinkles

Get Recipes in Your Inbox!

* indicates required

Look for this icon in posts to find Kid Friendly recipes!

Recent Posts

  • Matterhorn Macaroon
  • Caramel Gingerbread Cookie Sandwiches
  • Colorful Fruit Hand Pies
  • Classic Mickey Shaped Beignets
  • Carrot Cake Cookies

Archives

  • February 2023
  • December 2022
  • August 2022
  • January 2022
  • December 2021
  • November 2021
  • December 2020
  • November 2020
  • October 2020
  • September 2020
  • August 2020
  • July 2020
  • June 2020
  • May 2020
  • April 2020
  • March 2020
  • February 2020
  • January 2020
  • December 2019
  • November 2019
  • October 2019
  • September 2019
  • August 2019
  • July 2019
  • June 2019
  • May 2019

Copyright © 2025 Magical Treats at Home on the Foodie Pro Theme

%d